

Wire Wrapping Techniques: A Beginner’s Guide
Discover how these wire wrapping techniques can turn a simple piece of wire and a couple of gemstones into stunning jewelry you can wear anywhere.


If you’re interested in jewelry making, the wire wrapping technique is a beginner-friendly way to get started. It allows for a high degree of creativity and personalization, as you can create your own twists and patterns and incorporate stones and gems without the need for complex tasks like drilling holes or worrying about gluing bits together.
As your expertise develops, you’ll be able to adopt more advanced wire wrapping techniques to produce even more intricate pieces of jewelry.
Embark on your journey to becoming a wire-wrapped jewelry pro with our comprehensive tutorials that will take you from beginner to expert in no time.
Beginner Wire Wrapping Techniques
1. Simple Loop
The first wire wrapping jewelry class you’ll tackle will teach you how to make a simple loop.
It’s effortless to learn—and it’s found in many different jewelry types.
In fact, there are just four elements to the step-by-step tutorial:
- Measure and cut your piece of gold or silver wire.
- Take your round-nose pliers and draw a line where you want to make the loop. The closer to the handle you mark, the larger the loop will be.
- Put the wire between the pliers' jaws and line it up with your mark. Twist the pliers away from you and rotate your wrist as far as possible. To complete the loop, you should do this more than once.
- To close the loop, place your thumbnail where the wire meets the start of the simple loop and twist it slightly in the opposite direction.
Once you know how to use this simple wire wrapping skill, you can make your own earrings, necklaces, and more.
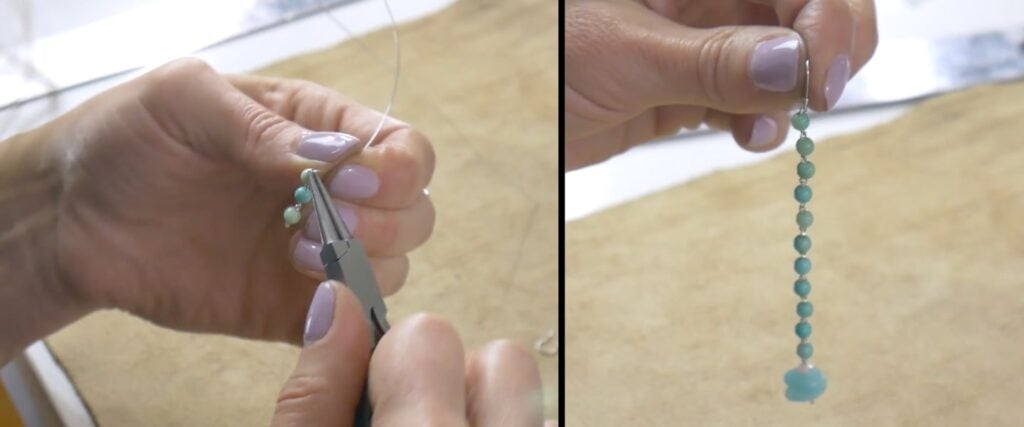
2. Securing a Bead
Another beginner wire wrapping technique you should learn is how to use beads with wire, which will enable you to secure gemstone beads on your DIY jewelry.
There are just three steps to securing a bead when you’re wire wrapping:
- Make a simple loop in one end of the wire.
- Place your bead onto the wire.
- Make another simple loop at the end of the bead. The tighter the loop is to the bead, the less movement it will have.
- Close any gaps in the loops with a pair of flat-nose pliers.
You can use this wire jewelry technique to make a simple pair of beaded earrings, or if you’re feeling ambitious, you can connect multiple links to build longer handcrafted jewelry.
Intermediate Techniques
3. Wire Wrapped Pendant
Learning to secure a pendant is an excellent next step if you’re ready to progress to intermediate wire wrapping techniques.
It’s one of the oldest jewelry-making techniques and involves wrapping wire around a smooth gemstone to keep it in place. You can start with simple, elegant styles, and as your skills develop, you can progress to more complex, labyrinthine jewelry designs.
A typical wire wrapping tutorial for pendants follows four stages:
- Choose a gemstone that’s been shaped and polished, also known as a cabochon.
- If the cabochon has a hole, you can thread the wire through it. If it doesn’t, you’ll need to ensure there’s at least one strand of wire along the back of the gemstone to keep it in place.
- Using your hands, wrap the wire around the cabochon as often as needed to be confident it’s tightly secured. The bigger the gemstone, the more wrapping you may need to do.
- Fix everything in place by taking the final bit of wire back to the top and twisting it around. This must be a tight twist, so you should use your pliers for this.
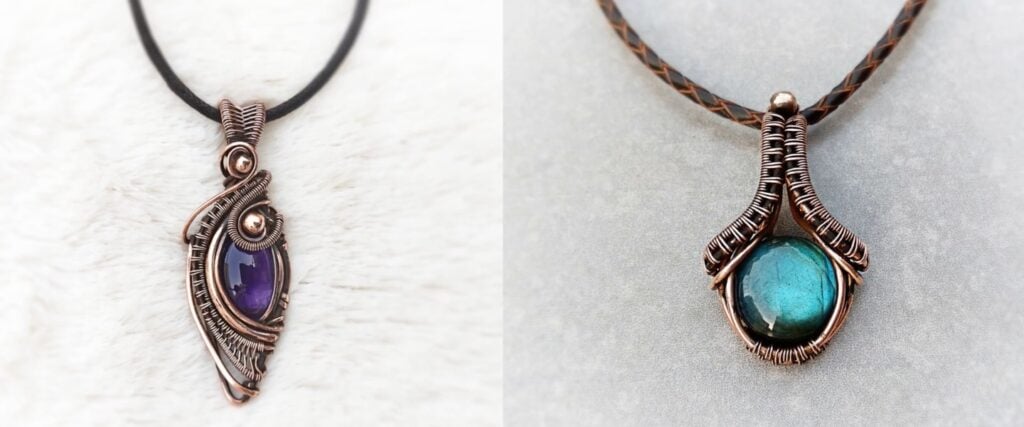
4. Herringbone Weave
Another intermediate wire wrapping technique is the herringbone weave, which is another way to wrap beads for earrings or pendants.
This is a four-step-process that builds upon the skills you learn with the simple loop and wire wrapped pendant techniques:
- Make a simple loop and twist one of the bits of wire around the other to create a spiral leading below the loop.
- Thread your gemstone onto the main piece of wire and then make another loop below it, leaving enough room to add twists between the two.
- When the twists have reached the bottom of the bead, you can start your herringbone wire weaving. Press the wire around the edge of the bead, loop it across the spirals, and press it around and down the other side.
- Keep repeating this technique to create your herringbone patter. Ensure that every twist goes up and around the row of spirals. When you reach the main loops, trim the wire and secure the final twist with your pliers.
Advanced Techniques
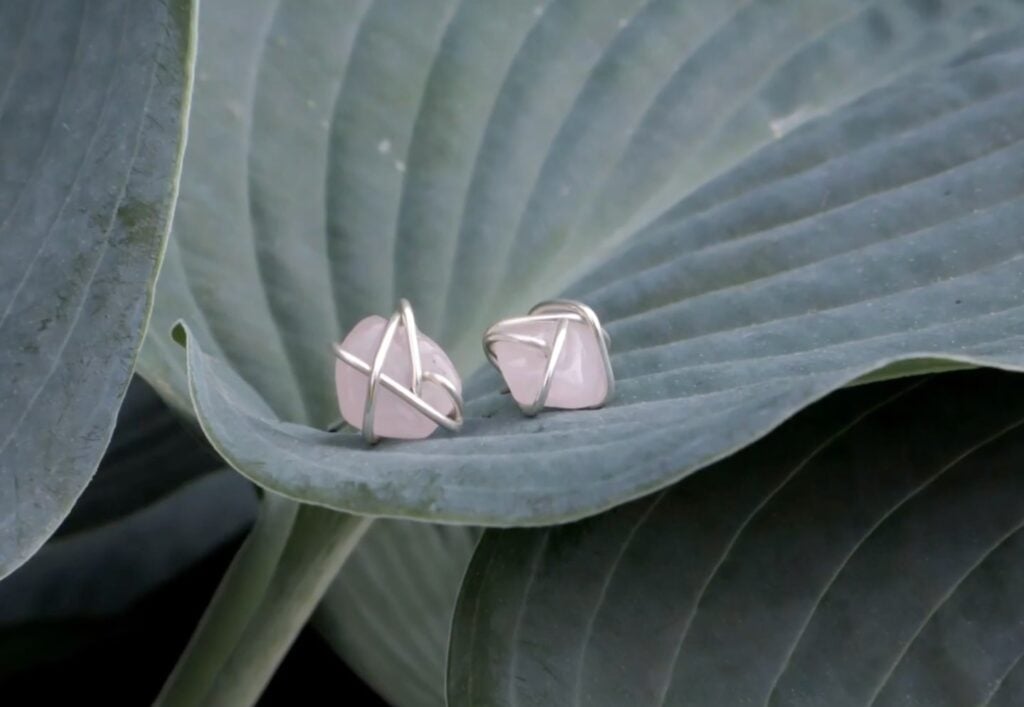
5. Wire Wrapped Cabochon Bezel
As your skill develops, you might want to learn how to hold a gemstone in place without any visible wire wrapping.
You can do this with a bezel mount. It’s the most common way to set a cabochon; at its simplest, it’s just a metal band that wraps around the stone.
But for advanced wire wrapping jewelry making, it’s an opportunity to make a mount as stunning as the gemstone itself. By twisting and weaving bits of wire together, you can craft an exquisite base on which to set your gemstone.
Even though this is a more complex technique, the step-by-step tutorial only involves three parts:
- Craft your frame in wire. Start by wrapping the wire around the edge of the cabochon to create a clean bezel. If you’re more advanced, you can use any wire wrapping technique to construct the frame.
- If the gemstone has a hole, you can thread a thinner wire through and secure it onto the bezel by wrapping it around either side. If it doesn’t have a hole, you’ll need to weave more wire across the back and slightly in front of the cabochon to stop it from falling out.
- Trim off any excess wire and tighten all your twists with pliers to ensure the wire-wrapped cabochon bezel is fixed in place.
Wrapping up your wire jewelry journey
The wire wrapping techniques outlined here are all you need to make your own earrings, necklaces, bracelets, wire wrapped rings, and beyond.
If you’re just starting, the beginner techniques will give you an excellent fundamental skillset that you can build upon. With a little more time, you can weave and twist your way to designs so complex that no one will believe you’re wearing DIY jewelry!
Related Reading:
Explore Your Creative Side with Skillshare – Start your 7-Day Trial
Start Your Free Trial Today!- Creative pursuits for all levels
- Unlimited access to all classes
- Learn from experts, at your own pace


