

Vyshyvanka: Learn About (and Make!) the Intricately Embroidered Ukrainian Traditional Shirt
A symbol of the rich culture of Ukraine, the vyshyvanka holds much significance for Ukrainian people around the world.


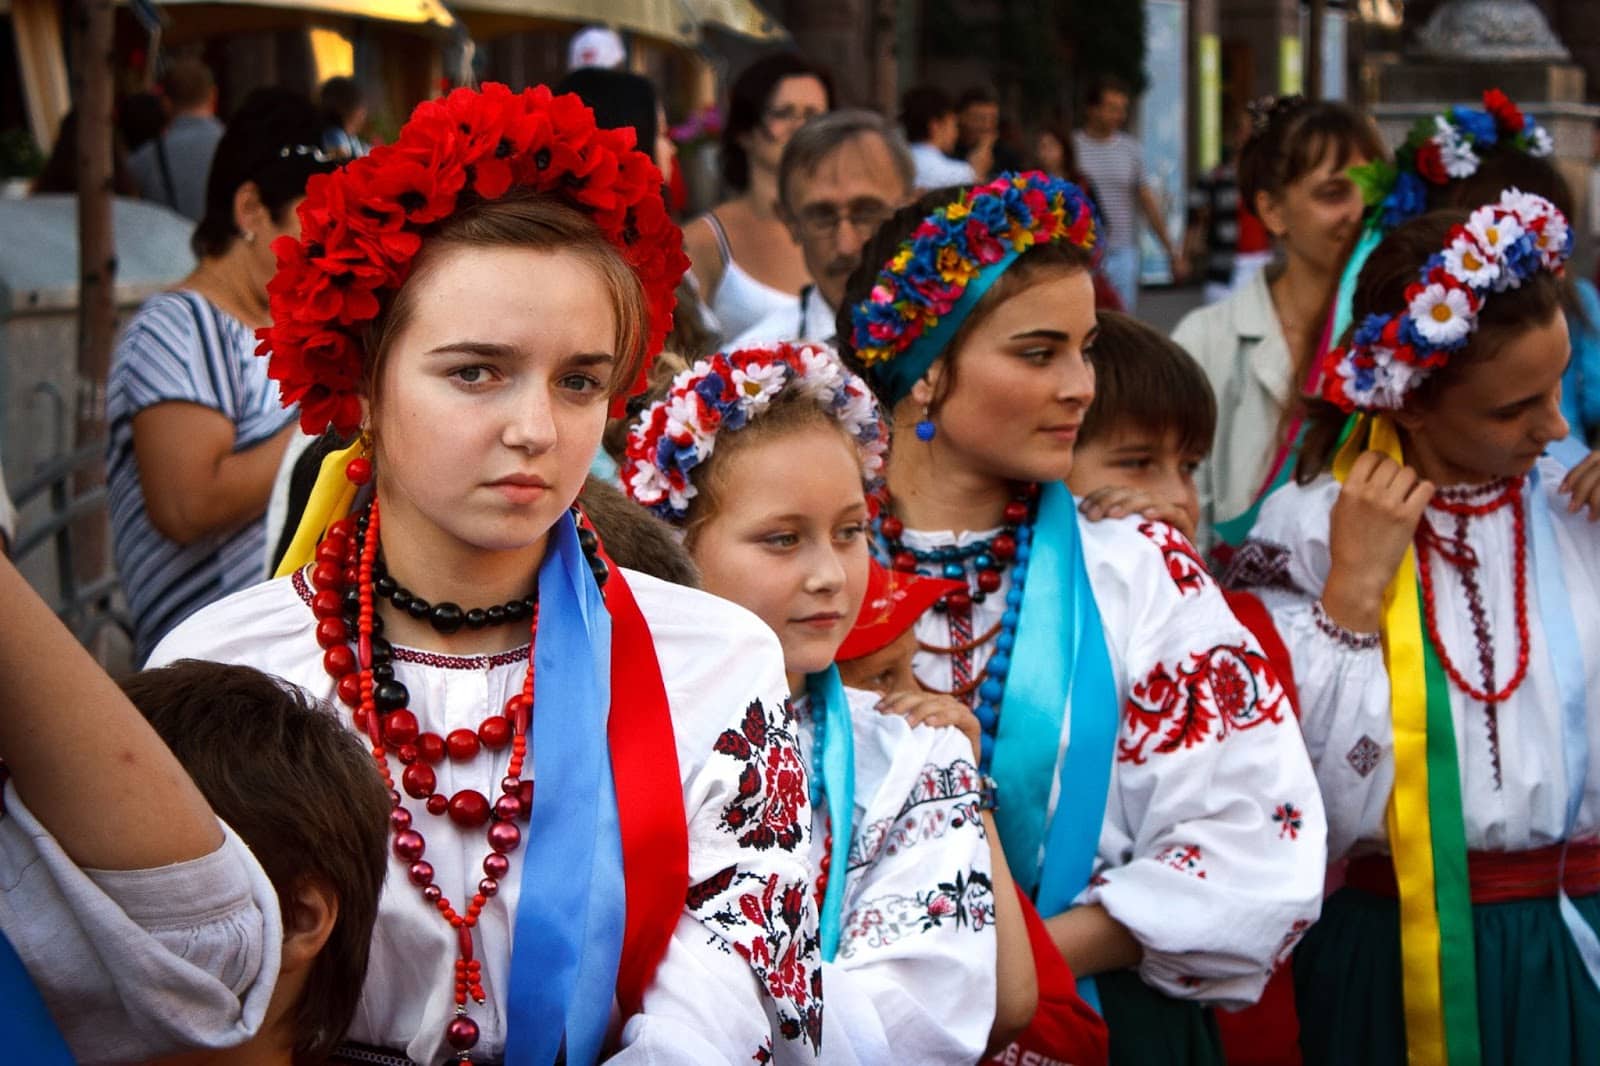
Along with flower crowns (vinok) and painted eggs (pysanky), the vyshyvanka is one of the best-known symbols of Ukrainian culture, both at home and around the world. But have you ever wondered where these garments came from, how to make them, or why they have their own national holiday? Read on to learn more about these beautiful items of traditional Ukrainian clothing.
Quick Links
- What Are Vyshyvanky?
- Vyshyvanka Day
- Ukrainian Embroidery
- How to Make a Vyshyvanka
- Other Ways to Celebrate Ukrainian Culture
What Are Vyshyvanky?

Meaning of Vyshyvanka in English
Vyshyvanka means a traditional embroidered shirt in the Ukrainian and Belarussian languages. Vyshyvanka is singular, while vyshyvanky is plural—we might say vyshyvankas in English, but that wouldn’t technically be correct.
Vyshyvanky are usually white with black and colored embroidery. One of the more common color combinations is red and black embroidery on a white shirt. The embroidery might be small and subtle around the neck and at the wrists, or it might be detailed and elaborate, covering the sleeves and parts of the front of the shirt. Both men and women wear vyshyvanky, though women are more likely to wear a floral vyshyvanka and men one with more geometric patterns.
Vyshyvanky have been made and worn for hundreds of years, and while most Ukrainians today wear other everyday clothing, vyshyvanky are still an important part of Ukrainian culture. Ukrainians in the countryside and smaller towns may wear them more often, while big-city dwellers have them for special occasions.
Origin and History of Vyshyvanky
The fabric used to make vyshyvanky was once woven with elaborate black and red patterns, but over time those patterns were created using embroidery. Vyshyvanka embroidered shirts and dresses have changed somewhat with the times while keeping important parts of tradition. From the 17th century in particular, the bright colors of southern Russian traditional dress influenced vyshyvanky.
These days, contemporary Ukrainian fashion designers have modernized vyshyvanky and made them appealing to more contemporary tastes while maintaining links to traditional culture. Modern embroiderers aim to keep the embroidery of vyshyvanky in-line with traditions (some designers think that to change the embroidery is to water down the culture) while perhaps altering the shape of the garment to fit modern tastes. Nowadays, wearing a vyshyvanka paired with a gorgeous flower crown is a fashion statement as well as a statement of Ukrainian pride.
Significance of Vyshyvanka

Ukrainians typically wear vyshyvanky with the local embroidery motifs of their area. Those in the know are able to tell where the wearer comes from (or, at least, where the vyshyvanka comes from!) just by seeing the embroidery designs. Each region has its own symbols, colors, patterns, and embroidery techniques.
As well as being a symbol of regional identity, vyshyvanky are worn as good-luck talismans. Some people believe that wearing a vyshyvanka protects the wearer from harm.
Vyshyvanka Day
A sign of just how beloved vyshyvanky are is that they get their own holiday in Ukraine: Vyshyvanka Day is celebrated on the third Thursday in May (that’s May 19, 2022). And Vyshyvanka Day isn’t just celebrated in Ukraine itself, but anywhere where Ukrainians live and have settled. You might find your Ukrainian neighbors or friends celebrating Vyshyvanka Day proudly this year.
How Vyshyvanka Day is Celebrated

Although vyshyvanky themselves have a long history, the holiday itself is quite new, as it was established in 2006 as a way of celebrating Ukrainian culture. It’s grown in popularity since, both in Ukraine and around the world. In 2011, Vyshyvanka Day participants set a Guinness World Record with the largest number of people wearing embroidered shirts gathered in one place: more than 4,000 people gathered in Chernivtsi Central Square in western Ukraine.
Vyshyvanka Day celebrations aren’t always so grand or large-scale, though. The idea behind the holiday—and holding it on a Thursday rather than over a weekend—was to show what an ordinary part of everyday Ukrainian life this item of traditional dress is. Ukrainians around the world brush off their best vyshyvanka and wear it with pride.
Ukrainian Embroidery

The art of embroidery in Ukraine can be traced back to the 5th century BCE—that’s 2,500 years ago! It should be no surprise, then, that Ukrainian embroidery these days is highly respected as highly artistic and meaningful. In addition to adorning traditional clothes, Ukrainian embroidery decorates homewares and religious items. It’s typically a women’s craft in Ukraine, and traditionally, most women would have done their own embroidery. This is less common now, but embroidery clubs and academic research into Ukrainian embroidery has kept this ancient craft alive both at home and in the diaspora.
How to Make a Vyshyvanka

If you want to celebrate Ukrainian heritage (whether your own or a friend’s) and wear something beautiful and meaningful, you can make your own vyshyvanka-inspired clothing. Vyshyvanka are meaningful garments for the makers and the wearers, so it’s important to do some research into the designs before you get sewing.
You can vary the level of difficulty when making your own vyshyvanka. If you don’t have the time or skills to make a full shirt from scratch, find a ready-made loose cotton shirt or dress with full sleeves. You can embroider directly onto this or stitch onto separate panels that you then stitch onto the shirt. This is one traditional way of making a vyshyvanka.
If you’re comfortable with a sewing machine and would prefer to make the whole garment yourself, look for a pattern to base your shirt around. Shirt patterns labeled “peasant style” or “folk style” are most appropriate as a base for vyshyvanka embroidery. Traditionally, a common way of making vyshyvanky is to embroider the unstitched cloth first and then make it into a shirt. This is the most difficult and time-consuming way of making the garment, though.
Supplies

You’ll need the following before you get started:
- A plain white shirt, tunic, or dress
- Panels of fabric in the same color as the shirt (optional)
- Vyshyvanka pattern (PDFs are convenient)
- Embroidery needles
- Sewing thread in a contrasting color
- Embroidery floss
- Embroidery hoop
- Scissors
- Air-erasing marker
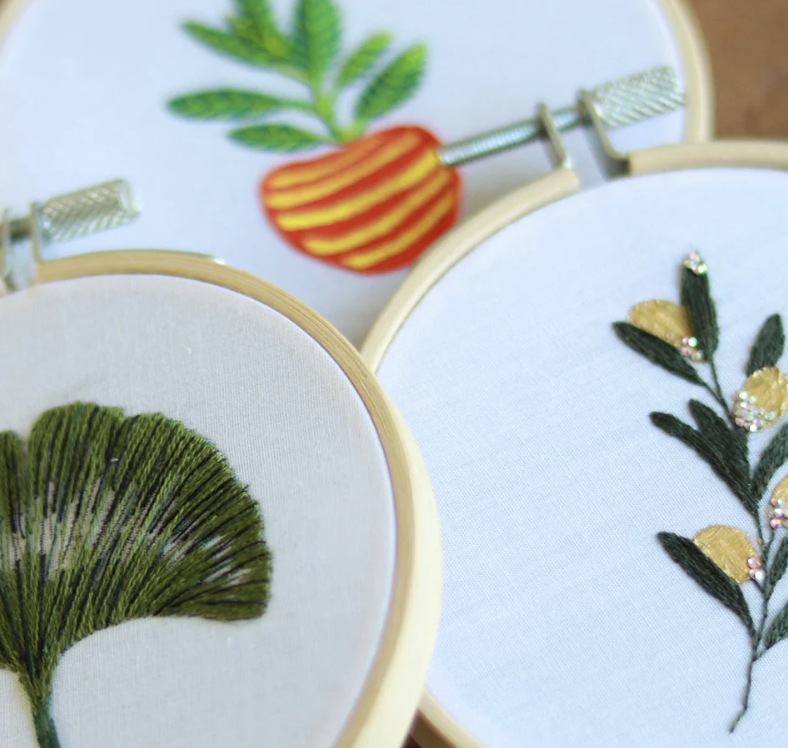
Vyshyvanka embroidery patterns can be found online, on sites such as Etsy and Pinterest, as well as in books on traditional Ukrainian embroidery. It’s better to work from an embroidery pattern rather than just an image of a vyshyvanka you like so that you can see each stitch clearly.
Although choosing a visually appealing pattern is important, it’s also a good idea to learn about the significance of different types of patterns. For example, if you have a Ukrainian cultural background, find out where your ancestors came from and try to find a vyshyvanka pattern that originates from the same area. This way, your vyshyvanka will be more personalized and meaningful—more than just a fashion statement.
Vyshyvanky sometimes use a cross-stitch style of embroidery that follows a grid and sometimes a more freehand needlepoint technique. If you’d like to try the cross-stitch style, look for a piece of woven fabric with clear lines in the weave. Alternatively, embroider onto cross-stitch panels and then stitch these onto your shirt after.
Step 1: Sketch the Main Shapes with Air-Erasing Pen
After gathering your materials, study your embroidery pattern and mark out the largest shapes onto your shirt (or panel to be sewn on later) using an air-erasable pen. These pens are designed for sewing and embroidery; while they go on looking blue/purple, the marks completely disappear when they air dry. Some pens dry faster than others, so you may need to complete this step and step 2 in stages, depending on how big or complicated your embroidery pattern is.
Step 2: Roughly Sew Outlines Over the Pen Marks
Thread your needle with a piece of thread that contrasts with your embroidery floss and with your fabric. Stitch over the pen marks that you’ve just completed in step 1. If your air-erasing pen disappears quickly, you may need to go back and forth between steps 1 and 2 until the whole embroidery design is roughly sketched and stitched out.
Step 3: Secure the Embroidery Hoop
If you’re working directly onto the shirt or onto a larger panel of fabric to be attached later, using an embroidery hoop with stitching can really help. These two-layered circles of wood, plastic, or metal keep your fabric taut as you stitch. These only work on larger pieces of fabric, not smaller areas like cuffs or collars.
Step 4: Embroider the Shirt
Checking against the pattern and possibly adding some more sketches with air-erasing marker pen, begin stitching your vyshyvanka. Keep your knots minimal and at the back of the garment so they don’t show. Try to work methodically around the shirt, finishing off one section–such as a flower or geometric design–before moving on to another. This will make the back of the shirt look neater, which is especially important if you’re stitching with a dark thread onto a light background. Move your embroidery hoop around the shirt as you need to, and remove the outline stitching in a contrasting color when you don’t need it any longer for guidance.
Step 5: Stitch the Panel onto the Vyshyvanka (Optional)
If you’ve been stitching onto a separate panel rather than directly onto the shirt, the next step after finishing the embroidery is to stitch the panel onto the shirt. Make small stitches in a thread color that matches the shirt and the panel so your stitching won’t be visible. You might want to iron the shirt and the panel first, so neither is crumpled before you stitch them together.
Step 6: Gently Hand-Wash the Vyshyvanka
Before wearing your vyshyvanka, hand-wash it gently. This will get rid of any loose fibers and fluff from the embroidery process and may also soften the shirt and the panel if you’re working with new, unworn fabric that’s a bit stiff.
Step 7: Wear Your Vyshyvanka with Pride

Whether you want to display your pride in your Ukrainian heritage or simply your pride in completing a beautiful craft, wear your vyshyvanka at every opportunity. Something so beautiful shouldn’t just be stored away for special occasions but should see the light of day on the regular.
Other Ways to Celebrate Ukrainian Culture
There are many other ways to get crafty with a Ukrainian flavor. To learn more about Ukrainian folk art designs, check out Inga Yoon’s Skillshare class, Petrykivka—Ukrainian Folk Art: Digital Floral Illustration—Combination of Gouache and Watercolor. Bonus: You may pick up some more inspiration for vyshyvanka designs.
Another popular traditional folk art of the spring is painting pysanky. You can learn about the designs and how to paint real or wooden eggs in Anna Bucciarelli’s class Explore Ukrainian Folk Art: Paint Easy Beautiful Easter Eggs in Gouache or Katia Bulbenko’s class Making Pysanky.
Inspiration for Vyshyvanka Embroidery
Mixed Media Embroidery For Beginners: 7 Days of Botanical Prompts
Try Skillshare for free! Sign up for a 7 day free trial today!
Get Started- Unlimited access to every class
- Supportive online creative community
- Learn offline with Skillshare's app


