

Underwater Photography: Expose a Whole New World
We haven’t yet encountered every species that lives in the ocean. Your underwater photography may not reveal new species, but it can certainly make for beautiful images.


The most compelling photographs reveal something we don’t ordinarily get to see in our day-to-day lives. And what’s more extraordinary than a view captured underwater? Underwater photography requires special equipment and techniques, but the results can be breathtaking.
If you’re a diver, you’re likely looking for a way to preserve your memories of the underwater world and share them with those around you. Or maybe you’re an experienced “land” photographer looking to broaden your skill set and bring your camera below the surface. In any case, with the right tools and knowledge you can start taking stunning underwater photos of coral reefs and marine life in no time.
What Is Underwater Photography
Anything that involves taking photos underwater is considered underwater photography.
Like regular photography, it has a number of different applications. As a type of nature photography, it may involve capturing images of underwater landscapes, aquatic plants or wildlife, which can be for scientific or commercial purposes. People are also common subjects of underwater photography, usually as part of creative and editorial shoots.
Underwater photography is usually done while scuba diving, freediving, snorkeling or swimming. If you don’t already have experience with these, your first step should be to get professional training and lots of practice. You need to be comfortable spending time underwater and, of course, doing it safely.
Underwater Photography Equipment
If you’re just looking for something to bring along on vacation, you can take decent underwater photos with a GoPro or even an iPhone (as long as it’s in a waterproof case). But if you’re serious about underwater photography and want to take professional-looking photos, you’ll need to invest in special equipment beyond dive gear.
Cameras for Underwater Photography
If you already have a camera you like to use for regular photography, it will likely do well underwater, as long as you can find a custom underwater housing system for it.
If you don’t already own a camera, you have three options when purchasing a camera system:
- Compact or Point-and-Shoot
A compact camera is a great choice for beginner underwater photographers. It’s small in size and has a built-in lens. Not to mention, it’s several times more affordable than a full DSLR or mirrorless setup.
- DSLR
DSLR cameras have been the industry standard for professional underwater photographers because they offer the best image quality. However, they can be very expensive, especially considering the cost of lenses and underwater housing. Because of their size, they’re also quite difficult to swim with—you definitely need to be an experienced diver to safely operate a DSLR setup.
- Mirrorless
Mirrorless cameras offer the best of both worlds, and more and more photographers have been switching to them in recent years. Mirrorless cameras are smaller and a bit more manageable than DSLRs, but they still allow you to change lenses and have lots of creative control.
Camera Lenses
Light doesn’t travel through water as well as it does through air, so things further away from the camera will appear darker and more blue. This is why it’s best to use a lens with a short focal length, such as a wide-angle lens. It will allow you to get as close to your subject as possible and capture them in sufficient detail. For extreme close-ups—of small creatures or plants, for example— you can use a macro lens.
If you’ve settled on a compact camera, you won’t have the option to switch lenses. That being said, you can purchase adaptors that attach to the front of your camera housing. These are called wet lenses because they can be switched underwater. This makes compact cameras much more versatile than DSLRs or mirrorless cameras—you can quickly switch from shooting macro photos to wide-angle landscapes without resurfacing. With DSLRs and mirrorless cameras, you’ll need to decide which lens to use before you dive and won’t be able to switch it until you’re out of the water.
Underwater Camera Housing
Underwater housing is what’s going to keep your camera dry in the water. It’s essentially a waterproof case, made of plastic, polycarbonate or aluminum. Housings are tailor-made for each camera model to ensure a proper fit and give you access to essential camera controls (using triggers on the outside of the housing that directly interact with the triggers on the camera).
For DSLRs and mirrorless cameras, you’ll need a housing for the body of the camera, as well as a lens port to keep the lens dry. Lens ports come in two varieties:
- Flat lens ports are best for macro photography and over-under photos (when half of the shot is above the surface and the other half is under)
- Dome lens ports are curved, so they can correct for the refractive properties of water. These need to be used with wide-angle lenses.
It’s essential that your camera, lenses, housing and lens ports are all compatible with each other, so be sure to do your research and ask the manufacturers for guidance.
Underwater Lighting
Because ambient light doesn’t travel well through water, you’ll likely need to bring in additional lighting. You may be able to use natural light if you stay close to the surface, but as you go deeper, you’ll start to lose both light and color in your images.
You can combat this in one of three ways:
- Your camera’s built-in flash
This will work fine for close-up shots, but if you’re more than two feet away from your subject, the water particles will reflect light back into your camera and introduce noise into your images, known as backscatter.
- Strobe lights
Strobe lights provide brief, but powerful bursts of light, in sync with the camera’s shutter release. They’re secured outside the camera housing at a slight angle, so that light doesn’t reflect right back into the camera. This makes them a much better option than the built-in flash. You can use one underwater strobe, but two will yield even better results.
- Continuous lights
The only downside to using strobe lights is that you can’t see what your photos will look like before you take them. For this reason, some photographers prefer to use continuous lights, which can be turned on and off manually and used to compose the shot before pressing the shutter release button. The drawback is that continuous lights aren’t as powerful as strobe lights.
Underwater Photography Ideas
Not sure what to photograph? Find inspiration with these beautiful examples of underwater photography.
Underwater Ocean Photography
Take a dive into ocean photography and help the world appreciate all the wonders hidden under the surface.
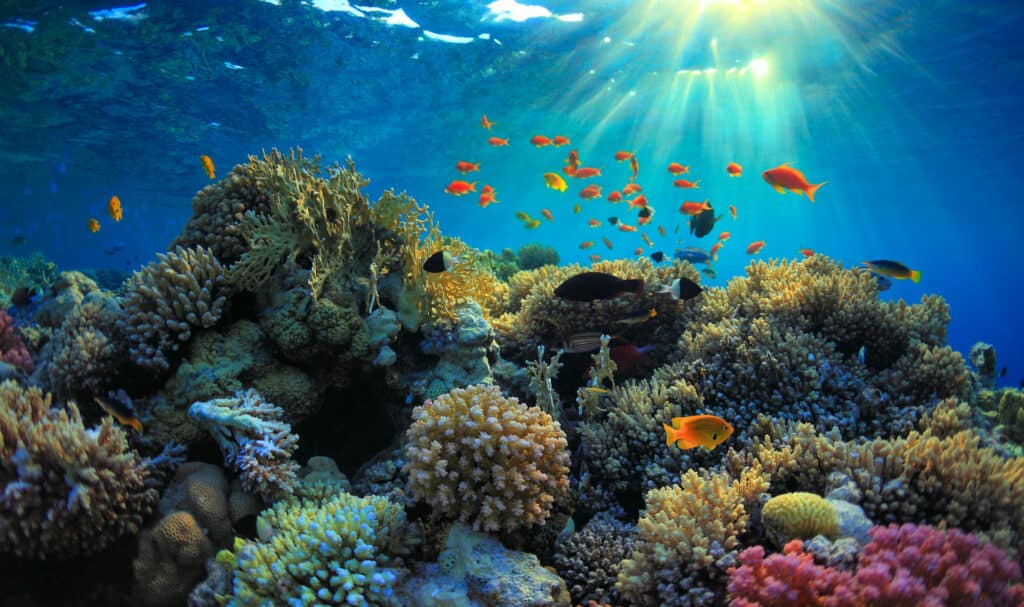
Underwater Wildlife Photography
Countless species of aquatic plants and animals live underwater. See if you can get close (without disturbing them, of course) and capture their beauty.

Underwater Macro Photography
With the help of a dedicated macro lens, you can showcase subjects at a 1:1 ratio to how they appear in real life and capture incredible amounts of detail.

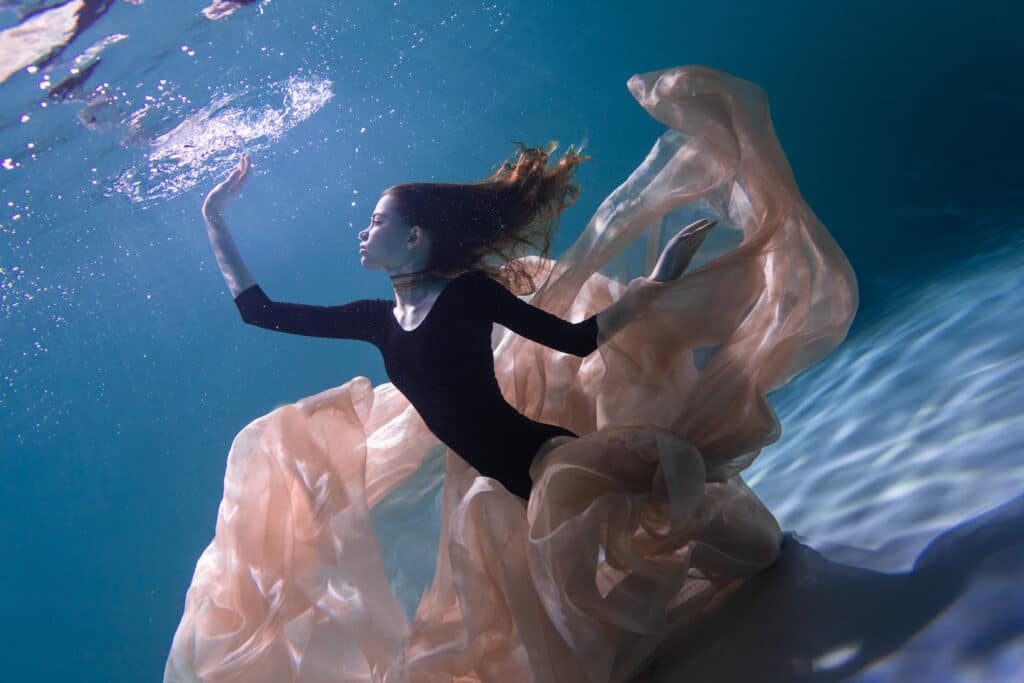
Underwater Fashion Photography
Underwater photography isn’t always focused on nature. Introducing people as subjects can make for some very creative shots, especially in the fashion industry.
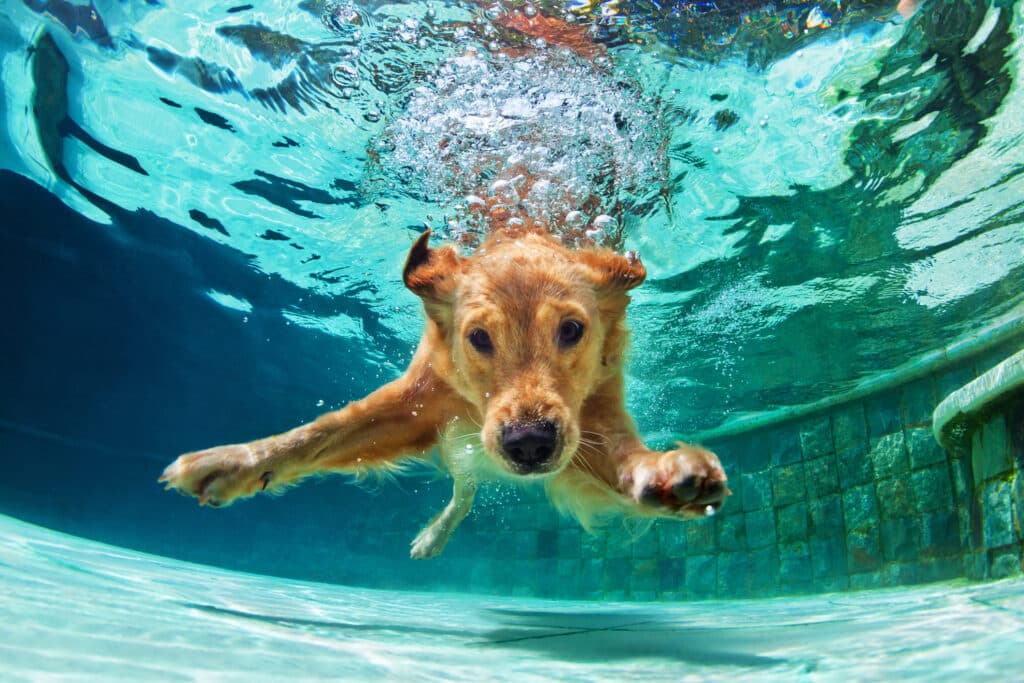
Underwater Dog Photography
Many dog breeds enjoy swimming and diving underwater. Capture their fun by throwing something that sinks into the water and asking them to retrieve it.
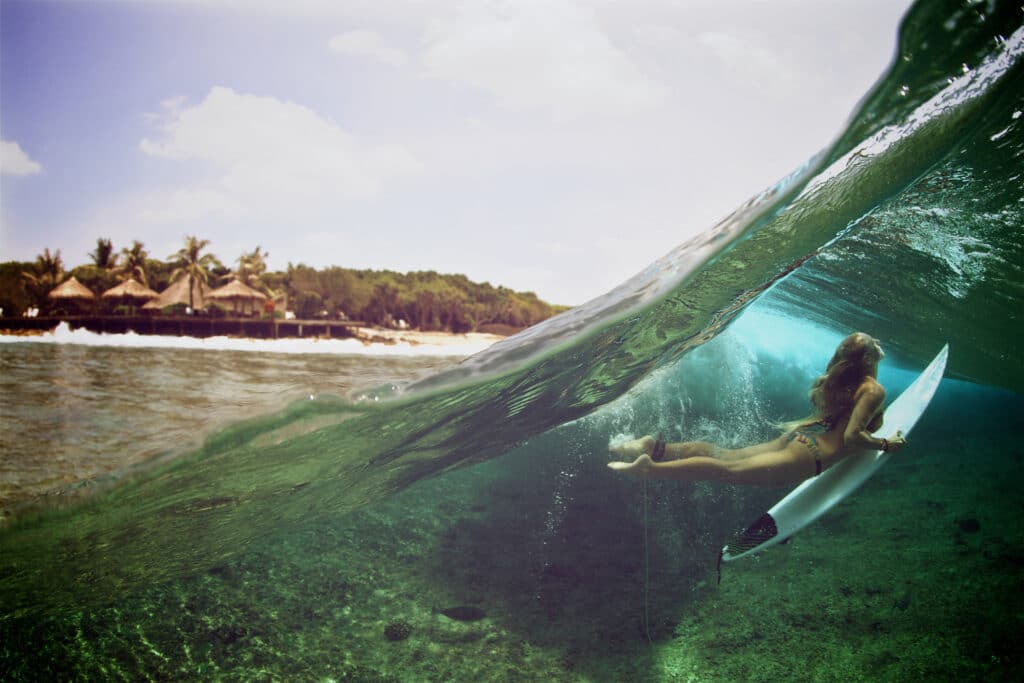
Over-under Photography
Over-under photos show scenes both above and below the surface. Simply hold the camera halfway into the water and capture the best of both worlds.
Underwater Photography Tips
Keep the following tips in mind as you start your underwater photography journey.
- Practice Swimming With Your Gear
Underwater photography equipment can be bulky and difficult to swim with. Most setups require both hands to hold them, so you need to be comfortable swimming using just your legs. Even experienced divers can benefit from practicing swimming with their gear in a safe environment, such as a shallow body of water or pool.
- Prioritize Safety
It’s easy to get lost in the art and focus on getting the perfect shot, but don’t forget that diving underwater can be dangerous. Make sure you check weather conditions before you go and follow all safety precautions. It’s also important to bring along a “dive buddy” so you’re not stranded by yourself should anything go wrong.
- Take Care of Your Gear
Regular maintenance of your gear before and after each dive will help reduce the chances of leaks. Before you dive, lubricate the o-rings (they help create a waterproof seal) and, if you can, check the housing for leaks using a vacuum system. After each dive, rinse the housing with fresh water and let it thoroughly dry.
- Get as Close as Possible
To capture a well-lit subject and retain its natural colors, you need to get as close to them as possible. Water hinders light, so the more water you allow between the camera and the subject, the darker and muddier your image will be. For best results, get as close as you can without disturbing the subject or putting yourself in danger.
- Shoot Upwards
One of the best things about underwater photography is that, because you’re floating in water, you can shoot your subject from just about any angle. You can get creative with this, but a tried-and-true technique is to position yourself slightly below your subject and point your camera up toward the surface. There is more light near the surface, so it will provide a nice contrast and make your subject stand out against the background.
- Focus on the Eyes
If you’re shooting fish or other sea creatures, follow the number one rule of wildlife photography and make sure your subject’s eyes are in focus. Other parts of them can be slightly blurry, but the eyes need to be front and center, sharp and well-lit.
- Edit Your Photos
Just like with regular photography, a lot of the magic happens in post-processing. This is especially true with underwater photography, because no matter how well you light your subjects and how close to them you get, you’ll still need to color-correct your photos. The unavoidable fact is that water makes everything more blue, so you’ll need to use apps like Adobe Lightroom or Photoshop remove the blues and greens and add more reds and oranges to your underwater images.
Take the Dive into Underwater Photography
Bringing the camera underwater is one of the more challenging forms of photography, but it’s, without a doubt, incredibly rewarding. Even if you have no experience as a scuba diver or photographer, it’s possible to learn both and combine them into a fulfilling hobby or career.
Take the required courses, dive into photography tutorials, and start exploring shallow water with the gear you already have. As you gain experience and confidence, you can upgrade your Nikon, Sony, or Canon and explore new dive sites. After all, there is so much of the underwater world we have yet to discover!
Related Reading
Sayana Lam
Sayana is a musician, writer and graphic designer based in Toronto, Canada.
Try Skillshare for free! Sign up for a 7 day free trial today!
Get Started- Unlimited access to every class
- Supportive online creative community
- Learn offline with Skillshare's app


