

Origami Crane: The Art’s Most Meaningful Form
Have you ever made an origami crane? How about a thousand of them? You may want to once you learn the symbolism of this simple, beautiful form.


Origami, the traditional Japanese art of paper folding, is used to create all kinds of things, from cute animals to useful trinket boxes to kids’ toys.
But one type of origami creation has special significance in Japanese culture: origami cranes. Learn why these folded paper birds are considered so special, then follow the steps for how to make an origami crane of your own.
Origami Crane Meaning
Along with dragons and tortoises, cranes have traditionally been considered a holy animal in Japan. Legend has it that the Japanese crane lives for 1,000 years and brings good luck.
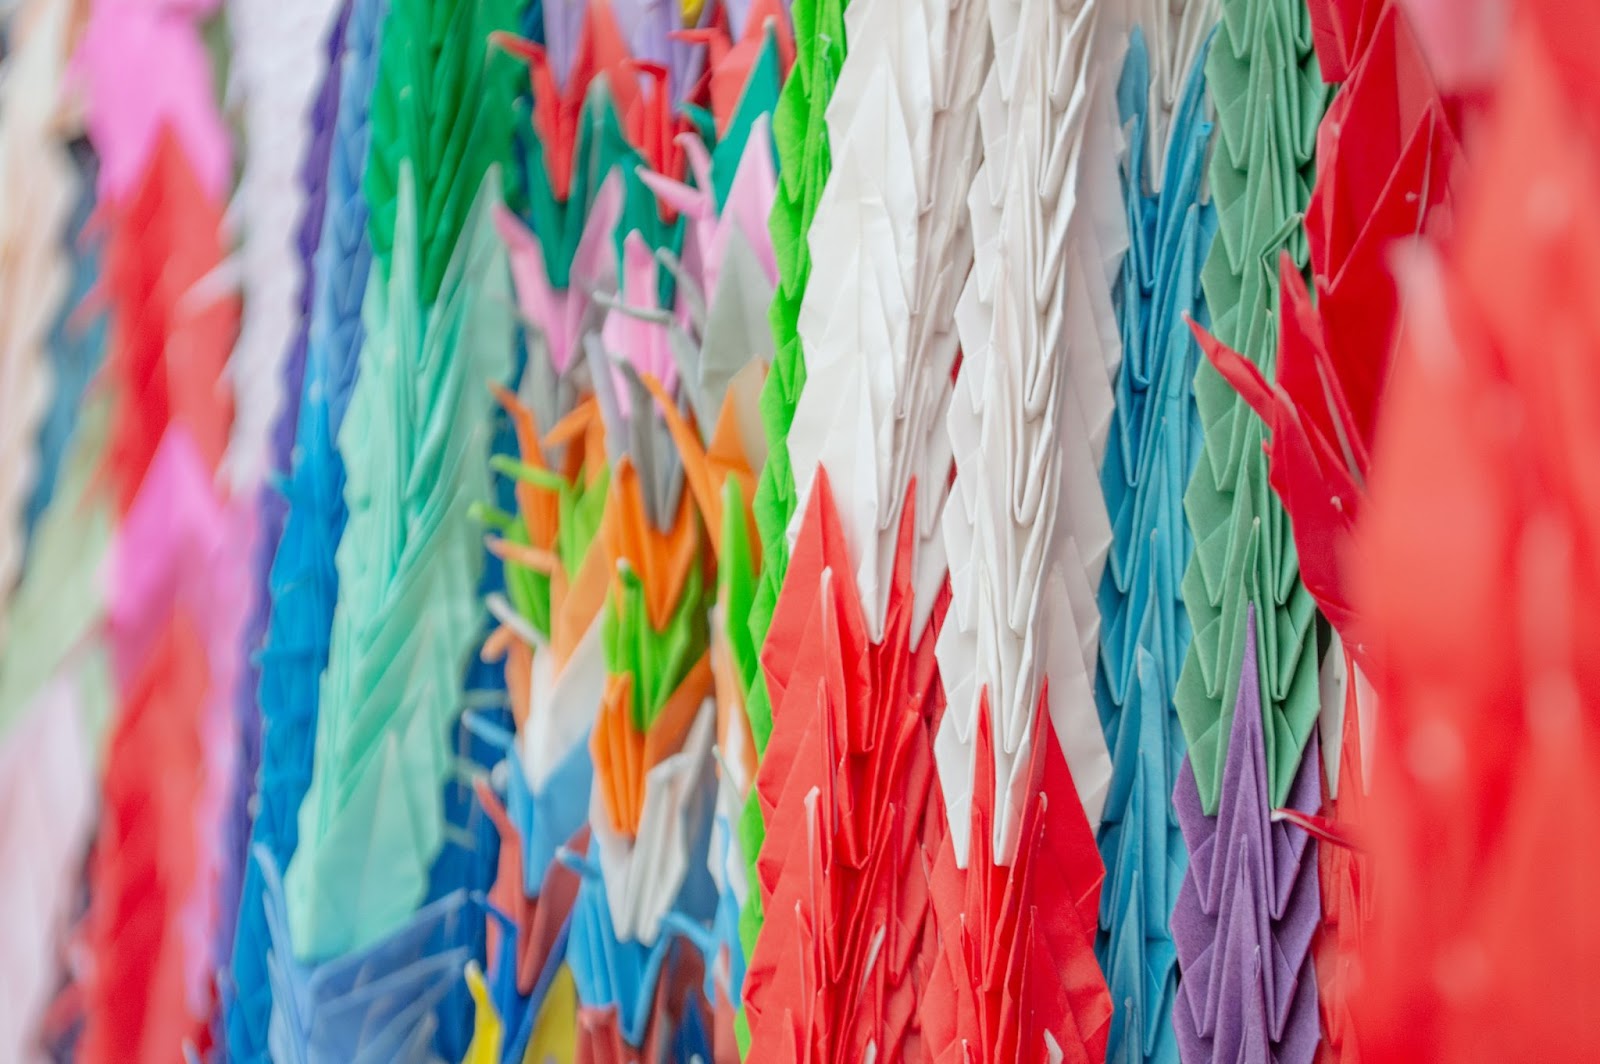
Origami cranes have also long been significant in Japanese culture. There’s a traditional belief that anyone who can fold and string together 1,000 origami cranes will have eternal good luck, and all of their wishes will be granted by the gods. Strings of 1,000 origami cranes (one for each year of the Japanese crane’s life) are often given to people suffering from illness or injury as a way of bringing them back to health.
They grew in importance after the nuclear bombing of Japan in World War II. In August 1945, the Japanese cities of Hiroshima and Nagasaki were attacked, killing up to 226,000 people and leaving many thousands of others with debilitating injuries and lifelong illnesses. Two-year-old Hiroshima resident Sadako Sasaki was one such child who was exposed to dangerous amounts of atomic radiation. In the years after, she was diagnosed with leukemia and spent a lot of time in the hospital.
When she was 12, she made it her mission to fold 1,000 origami paper cranes, following the traditional belief that doing so would help her get better. Different versions of her story say that she either completed her mission before dying in October 1955 or that she only completed around 600 before her classmates continued to fold the remaining origami cranes in her memory.
The Peace Memorial Park in Hiroshima commemorates Sadako with a statue of her holding a crane. Many strings of 1,000 origami cranes are strung up around the park and at other significant sites in Japan as a gesture of peace, good fortune, and healing.
Feeling inspired to fold your own? Now, let’s walk through how to make an origami crane step by step.
Make and Give a Handmade Gift
Beautiful Origami Boxes
How to Make Origami Cranes
As far as origami projects go, origami cranes sit in the middle in terms of difficulty. They’re not the easiest beginner project, but you can definitely learn how to fold origami cranes without any prior experience. Remember that practice makes perfect, and the more you fold, the easier the process will become.
Follow the instructions for how to make an origami crane step by step:
Step 1: Pick Your Origami Paper
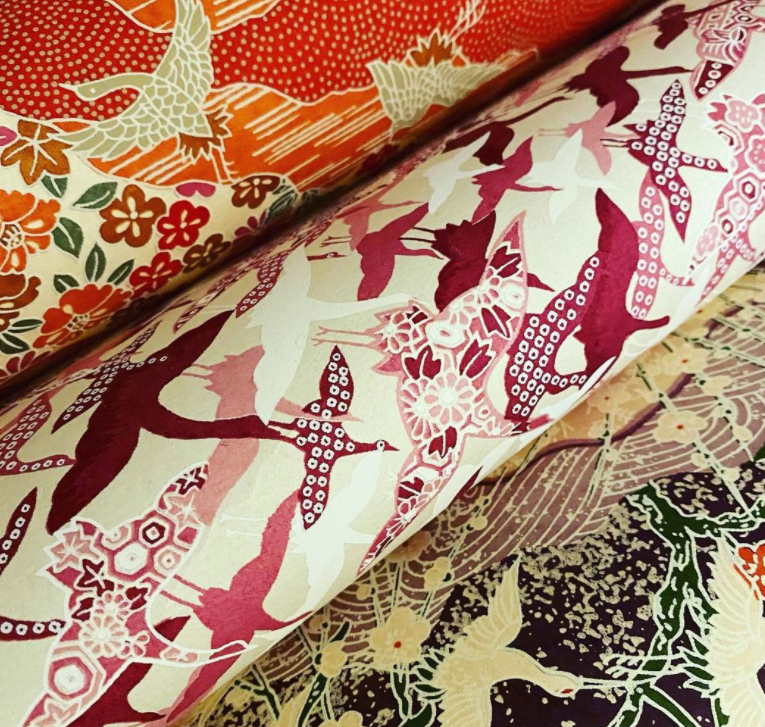
Japanese origami paper (washi) is traditionally made out of wood pulp, making it soft, thick, and easy to fold. It also comes in beautifully colored patterns. These days, more modern Japanese origami papers are less decorative, but they still come in bright colors. You can also use regular paper as long as it can be folded and creased easily.
Origami paper for most traditional projects should be square. If you’re a beginner, you might want to start with cheap, plain paper, then move on to the more expensive decorative paper once you’ve got the hang of it.
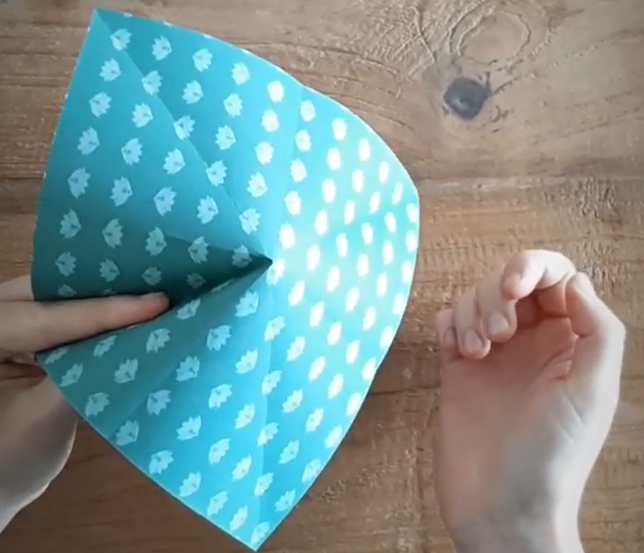
Step 2: Horizontally Fold the Paper

The first step in how to fold an origami crane is to fold the paper in half and make a tight crease in the fold. Make sure that the corners all match up. Open up the paper and fold it in half the same way along the unfolded side. Open it up again, and you’ll now have a square piece of paper with folds criss-crossing the middle of the paper and forming four equally sized square boxes.
Step 3: Diagonally Fold the Paper

Do the same thing again, but this time on the diagonal. Fold the paper in half, open it back up, and fold it along the other diagonal. Open it back up, and you should see eight triangles.
Step 4: Fold Two Sections Inwards
Hold one corner section of the paper and fold inwards along the creaseline that you made in step 3. Repeat with the opposite corner section, ending up with a square with two folded pouches inside. It should look like this from the underside:

Step 5: Create Diagonal Folds

With the open part of the bird base facing toward you, fold each side up from the bottom so the flat outside edge meets with the center crease. Turn the paper over and repeat the step on the other side. You should end up with this:

Step 6: Fold the Top Down, Open Up the Sides, and Fold Them Down

Fold over the top section of the kite-shaped piece of paper. Then, open out the folded paper and fold down the sides so it looks like this:

Here’s how it looks in action:
Turn the paper over and repeat this step on the other side.
Step 7: Fold the Outside Corners Inward
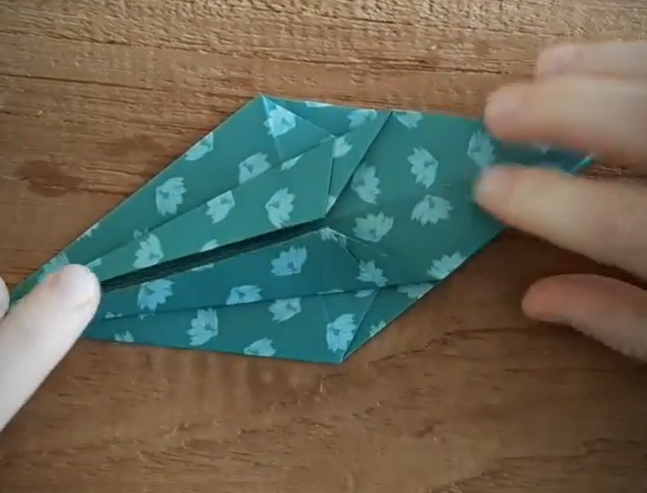
Fold the outer corners in so they meet at the middle crease. Repeat this on both sides. You should end up with this:

Step 8: Fold the Legs and Head/Neck

The two thinner parts comprise the legs and head/neck of the crane. Take one of the legs and fold it upward, diagonally, as in the picture above. Repeat on the other side. Unfold where you have just folded and crease each side back up and in on itself, so you end up with this:

Leave one end (the tail) as it is, and fold the other end down a little bit so it resembles a bird’s head.
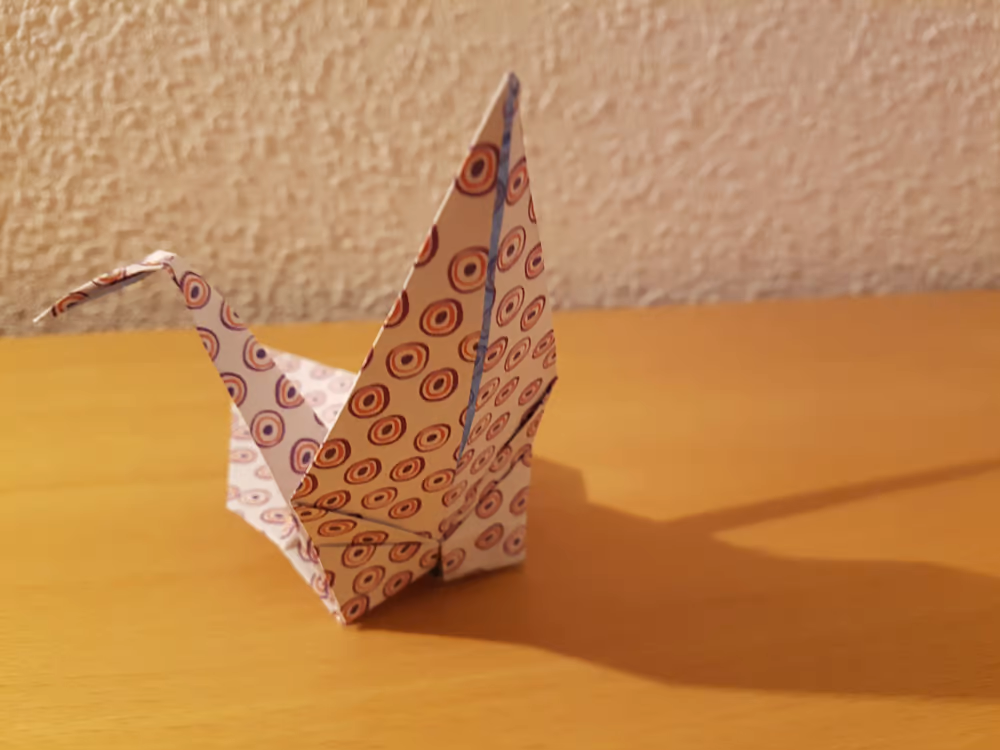
Step 9: Pull Out the Wings and Finish the Crane

Gently pull out the larger flaps at either side to form the crane’s wings. Don’t pull too hard here.

Start Your One Thousand Origami Cranes Today
Origami can be meditative, relaxing, and a source of creative expression, but it’s also an art form with deep symbolism and cultural meaning. Whether or not you have Japanese cultural heritage, learning how to fold origami cranes can be a way to inspire peace and good fortune for yourself and others. Origami cranes also make great gifts, especially to sick friends or family members, and you can tell the recipient about their significance.
Once you’ve folded your first few, you might even be inspired to fold 1,000 origami paper cranes and string them together for display. Just remember that tradition has it that the folder must complete the project within a year. Better get folding!

Deck the Halls with Boughs of Origami
Origami Wreaths for All Occasions
Try Skillshare for free! Sign up for a 7 day free trial today!
Get Started- Unlimited access to every class
- Supportive online creative community
- Learn offline with Skillshare's app


