

How to Remove Background In Canva: A Complete Guide
Love the photo but not the background? No problem! Find out how to remove backgrounds in Canva in seconds, and open up a world of creative opportunities.


Isolating an object in a photo by removing the background is an easy way to make your designs more eye-catching and memorable. A few years ago, this would have involved spending hours in Photoshop, painstakingly erasing pixel by pixel. Today, thanks to tools like Canva, you can erase the background of any photo with a single click of your mouse.
If you’re not already familiar with Canva, it’s an online graphic design tool that simplifies the user experience and prioritizes creativity, letting you create high-quality designs even if you have no prior experience. Beginners can get started with Canva basics in just a few simple steps.
Though Canva is free to use, their background remover tool comes as part of the paid plan. That being said, it’s still much more accessible than Photoshop and similar photo editing software. The low subscription cost, plus the incredibly user-friendly interface, make Canva one of the best options for removing backgrounds.
The Ideal Moment to Use a Background Remover
Without a background eraser tool, you’re limited to using only photos that fit your design contextually and aesthetically. For example, if you’re working on a design with a predominantly beige color palette, adding a product photo with a bright blue background is out of the question. But if you can erase the background around the product, then the blue is no longer an issue. When you don’t have to consider the background in your design, it opens up so many more options and creative opportunities.
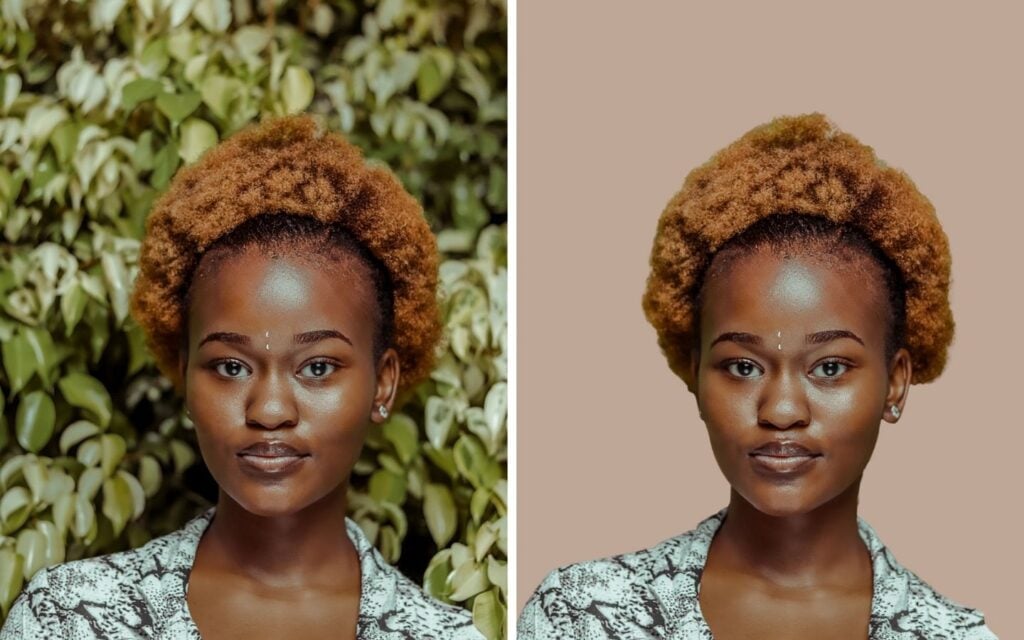
Having access to a background remover tool can also save you time and money. Say you’re working on a portfolio for your business and you need a professional portrait of yourself. You have a great photo already, but it was taken in a park, with trees and people in the background—a nice setting, but it doesn’t scream “I’m a business professional”. Instead of spending time and money on a brand-new portrait session, simply remove the background in your park photo and replace it with something neutral. It will take less than a minute and cost next to nothing!
Why Mastering Background Remover is Important
Using a background remover doesn’t just allow you to consider countless more photo options, it can also help you create more effective designs. By erasing the background around an image, you can:
- Make the image stand out and draw the viewer’s attention to it
- Remove anything that might be distracting
- Simplify your design and reduce eye strain for the viewer
- Use an image in a new context that better fits the design
- Make the design more visually appealing and memorable
- Tell the story more effectively by erasing anything that might make the message confusing or contradicting
- Make space for a new background that better supports the message or story
- Overlap the image with other images or design elements
5 Steps to Use The Background Remover in Canva
Removing backgrounds in Canva is incredibly easy in either the desktop browser or the mobile app. Just make sure you have signed up for Canva Pro or the free trial. Then, follow the steps below:
Desktop Browser
Step 1: Choose an Image
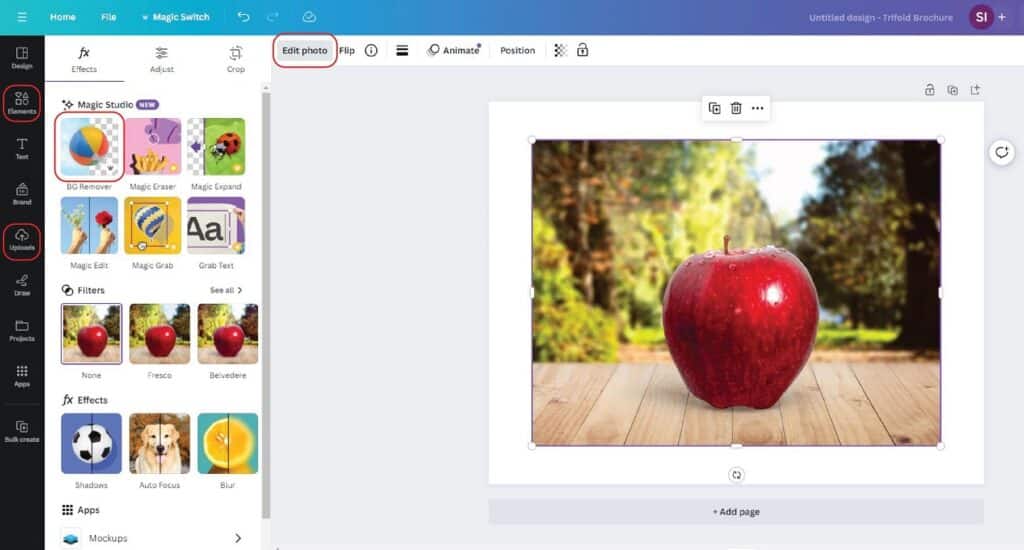
Upload your own photo using the Uploads tab or search the free database using the Elements tab. Drag your desired photo onto the canvas.
Step 2: Access Image Editing
Click on the photo and click Edit photo in the top panel. A new editing panel will appear on the left.
Step 3: Use Background Remover
Under the Magic Studio category, select BG Remover and watch the background magically disappear!
Step 4: Fine Tune (Optional)
In most cases, the previous step will remove the background perfectly, but depending on the quality of the photo you’re using, you may need to touch up a few areas manually.
To do this, head back to the BG Remover tile—it should now have an icon with three sliders overlaid on top, letting you know you can make adjustments. Click on the icon to bring up the manual adjustment window.
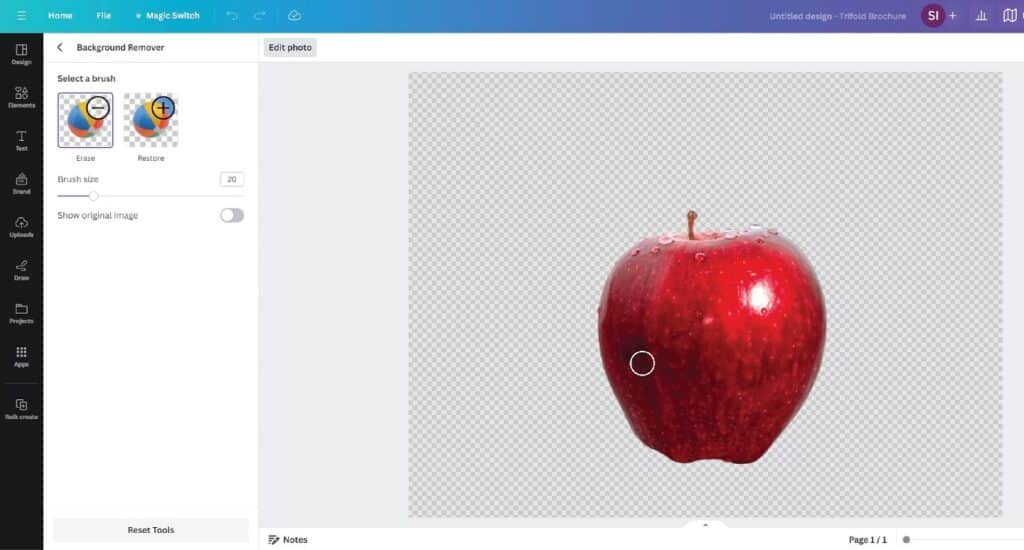
Here, you can use a brush to manually erase unwanted areas or restore areas you’d like to keep. You can also change the brush size and zoom in on the image to make your adjustments more precise.
Once you’re done fine-tuning your image, click the back arrow in the top left corner of the screen to return to your main canvas.
Step 5: Make Final Adjustments
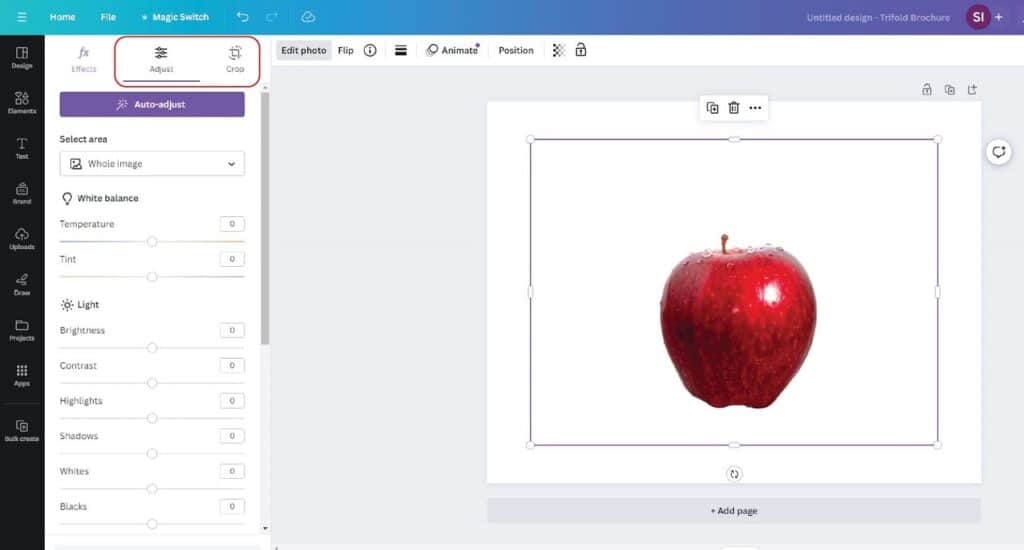
With the background removed, you can now adjust the crop, size and position of your image to make sure it fits nicely into your design. You can also play around with light and color settings like brightness, contrast and saturation, just like you normally would when editing photos.
Mobile App
Step 1: Choose an Image
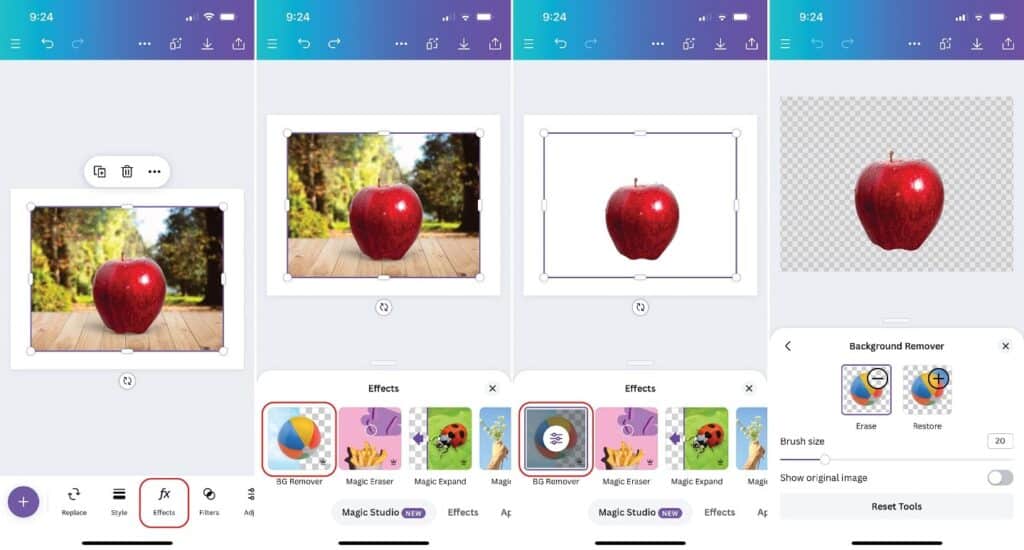
Tap the plus icon in the bottom left corner of the screen and add a new photo using the Elements tab or the Uploads tab.
Step 2: Access Image Effects
Tap the photo—this will bring up a new toolbar on the bottom of the screen—and select Effects.
Step 3: Use Background Remover
Select BG Remover to remove the background.
Step 4: Fine Tune (Optional)
If you need to make manual adjustments, tap the slider icon and use the brush to erase or restore areas of the photo you want to remove or keep.
Step 5: Make Final Adjustments
Edit, crop, resize and position your new image to fit your design.
Start Editing Your Photos with Canva
Whether you’re on a computer or the mobile app, Canva makes removing backgrounds an absolute breeze. In a matter of seconds, you can erase a background that doesn’t quite fit your vision and replace it with something that will help you grab the viewer’s attention and tell your story in a memorable and impactful way.
Plus, background remover is just one powerful tool out of dozens that Canva has to offer. You can also replace specific elements in a photo with AI-generated options or even generate entirely new images using text prompts.
Get your creative juices flowing by browsing the hundreds of other Canva classes that Skillshare offers for both beginners and advanced Canva users.
Sayana Lam
Sayana is a musician, writer and graphic designer based in Toronto, Canada.
Try Skillshare for free! Sign up for a 7 day free trial today!
Get Started- Unlimited access to every class
- Supportive online creative community
- Learn offline with Skillshare's app


