

How to Make Resin Coasters
What do you get when you combine pragmatism with pulchritude? Resin coasters, of course! Learn how to make them yourself.


Sure, coasters are useful household objects to protect your tables and counters—but they can also be tiny works of art. With epoxy resin and a few other craft supplies, like paint or dried flowers, you can create beautiful coasters for your coffee table.
Want to try this fun, beginner-friendly project? Learn how to make DIY resin coasters step by step in this guide—and get inspired with a few examples of different designs you can embed in them.
Quick Links
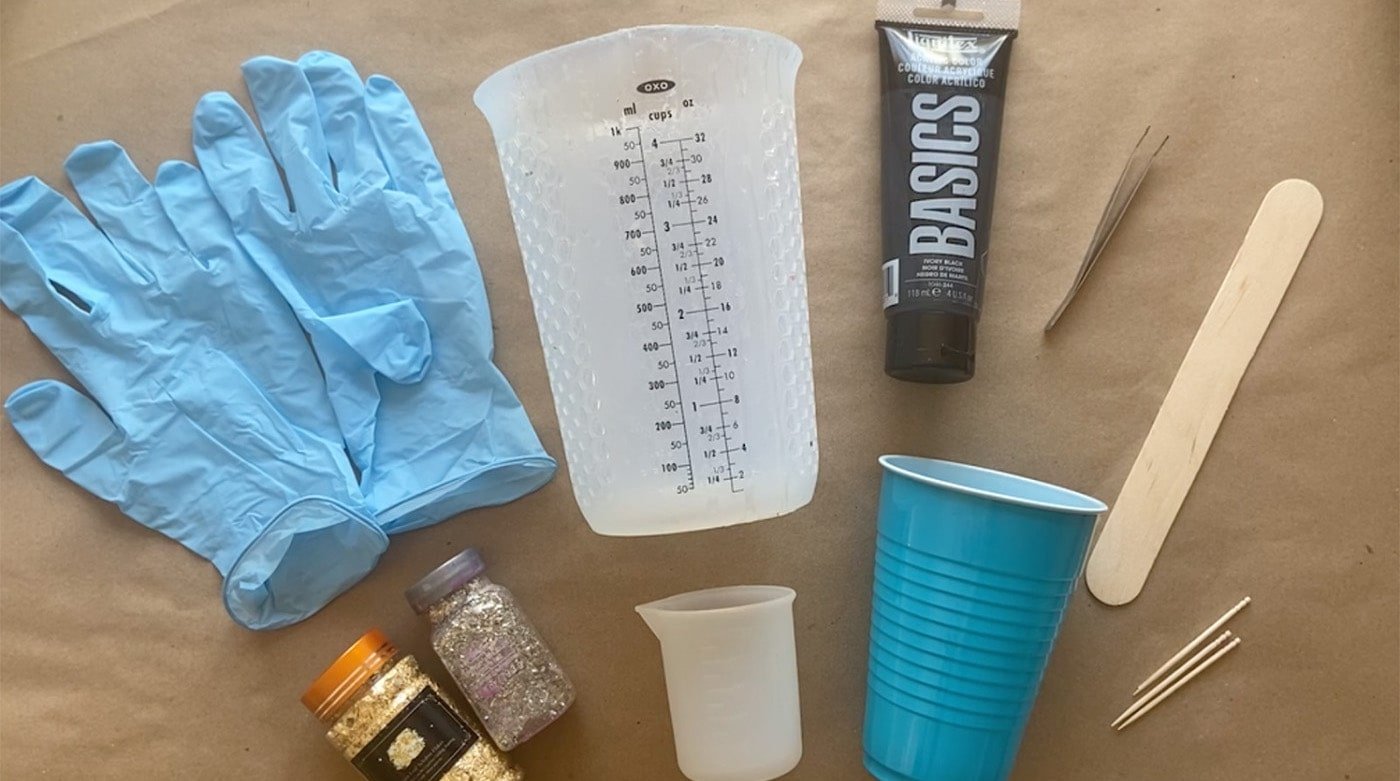
Supplies You’ll Need for Resin Coasters
Creating a set of resin coasters boils down to a few key supplies: resin, molds, and anything you want to cast within that resin.
Resin
The best resin for coasters is epoxy resin, which is created by mixing two components: resin and hardener. Mixing the two elements produces a chemical reaction that causes the resin to begin gradually hardening.
When shopping for resin, make sure to look for a brand that is heat-resistant, since coasters may be used for hot drinks, like coffee or tea. Also look for a resin that’s crystal clear and UV stable, which will keep your coasters from yellowing over time.
Silicone Molds
You can find silicone coaster molds in a variety of sizes and shapes, including round, square, and other geometric shapes. Some molds even feature irregular edges, a great option for making geode resin coasters. Standard coasters are generally between 3.5 and 4 inches in diameter, although a larger size—like 5 inches—will provide even more surface area to display your designs.
Paint, Ink, or Flowers
A big part of the fun of making resin coasters is adding color and designs. Because resin is clear, you have a range of options when it comes to putting a unique spin on your coasters. Try adding dried flowers, glitter or gold flecks, or swirls of color created with acrylic paint or alcohol inks.
Mixing Supplies
To ensure you create perfectly hardened and cured coasters, you’ll need to correctly measure and mix the resin. Make sure you have a large measuring cup, small plastic cups for pouring, and wooden mix sticks on hand. Most artists also recommend wearing gloves, as resin can be incredibly sticky.
Types of Resin Coasters to Make
Plain, clear coasters wouldn’t be much fun to look at or make—so to spark your creativity, here are a few ideas for different types of resin coasters to make.
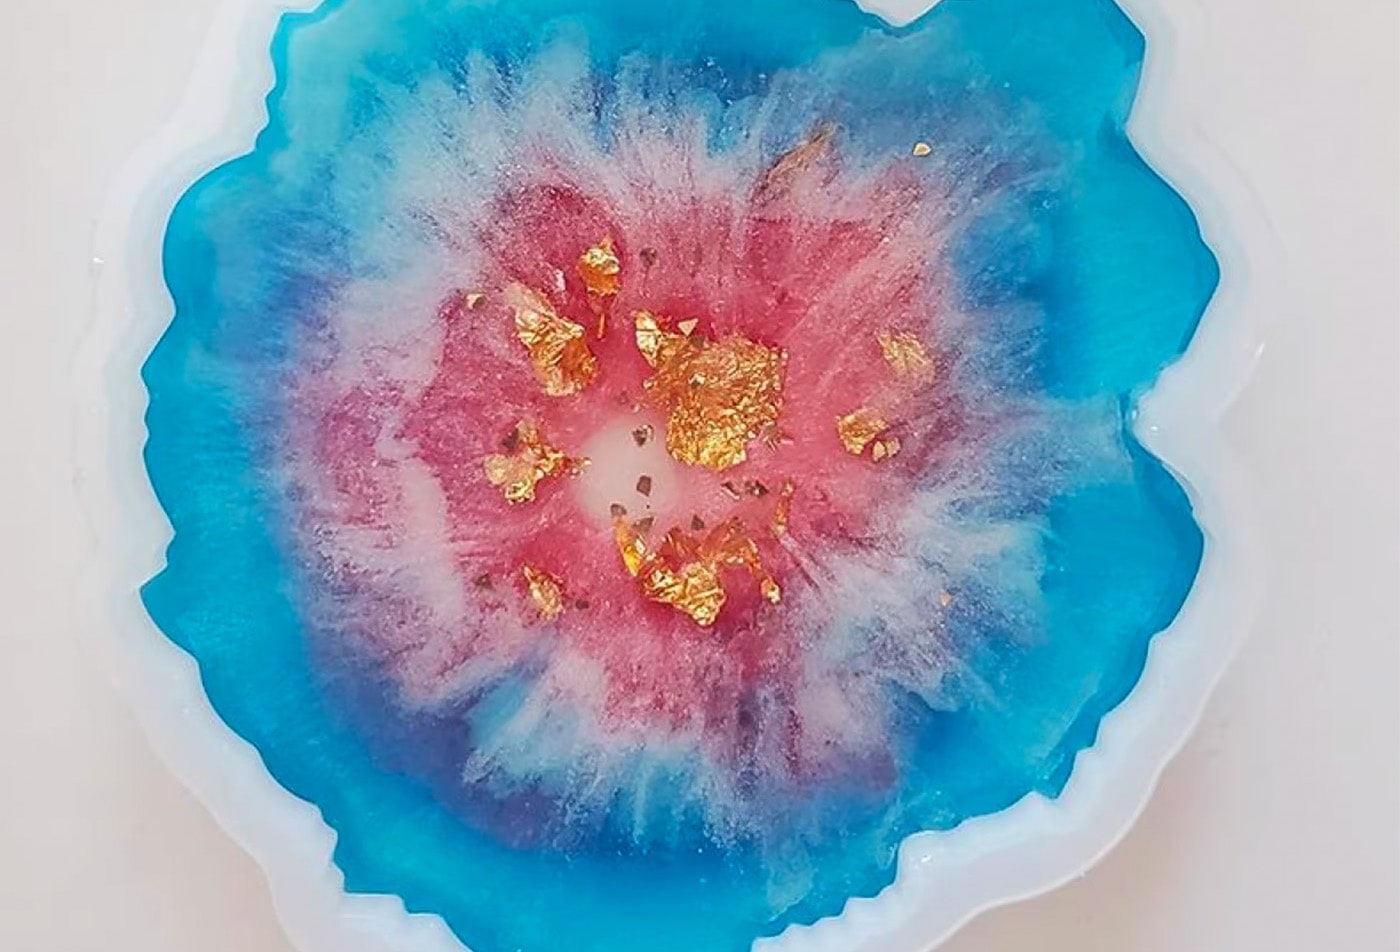
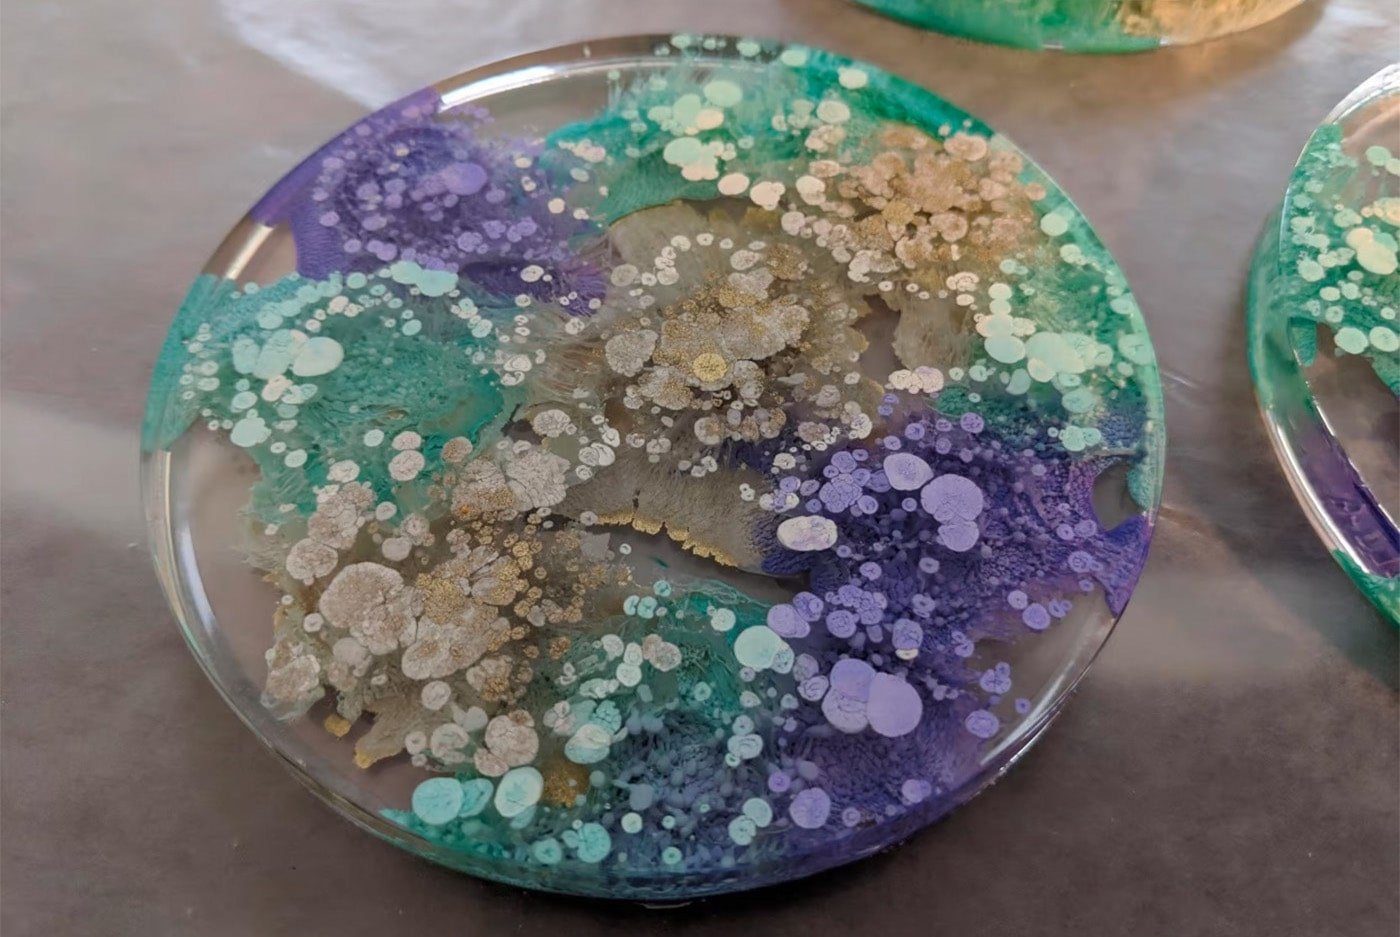
Geode Resin Coasters
Geodes are hollow rocks lined with crystals—and you can recreate that look within your coasters using acrylic paint, gold foil, and a silicone mold with irregular edges to mimic the abstract rock formation.
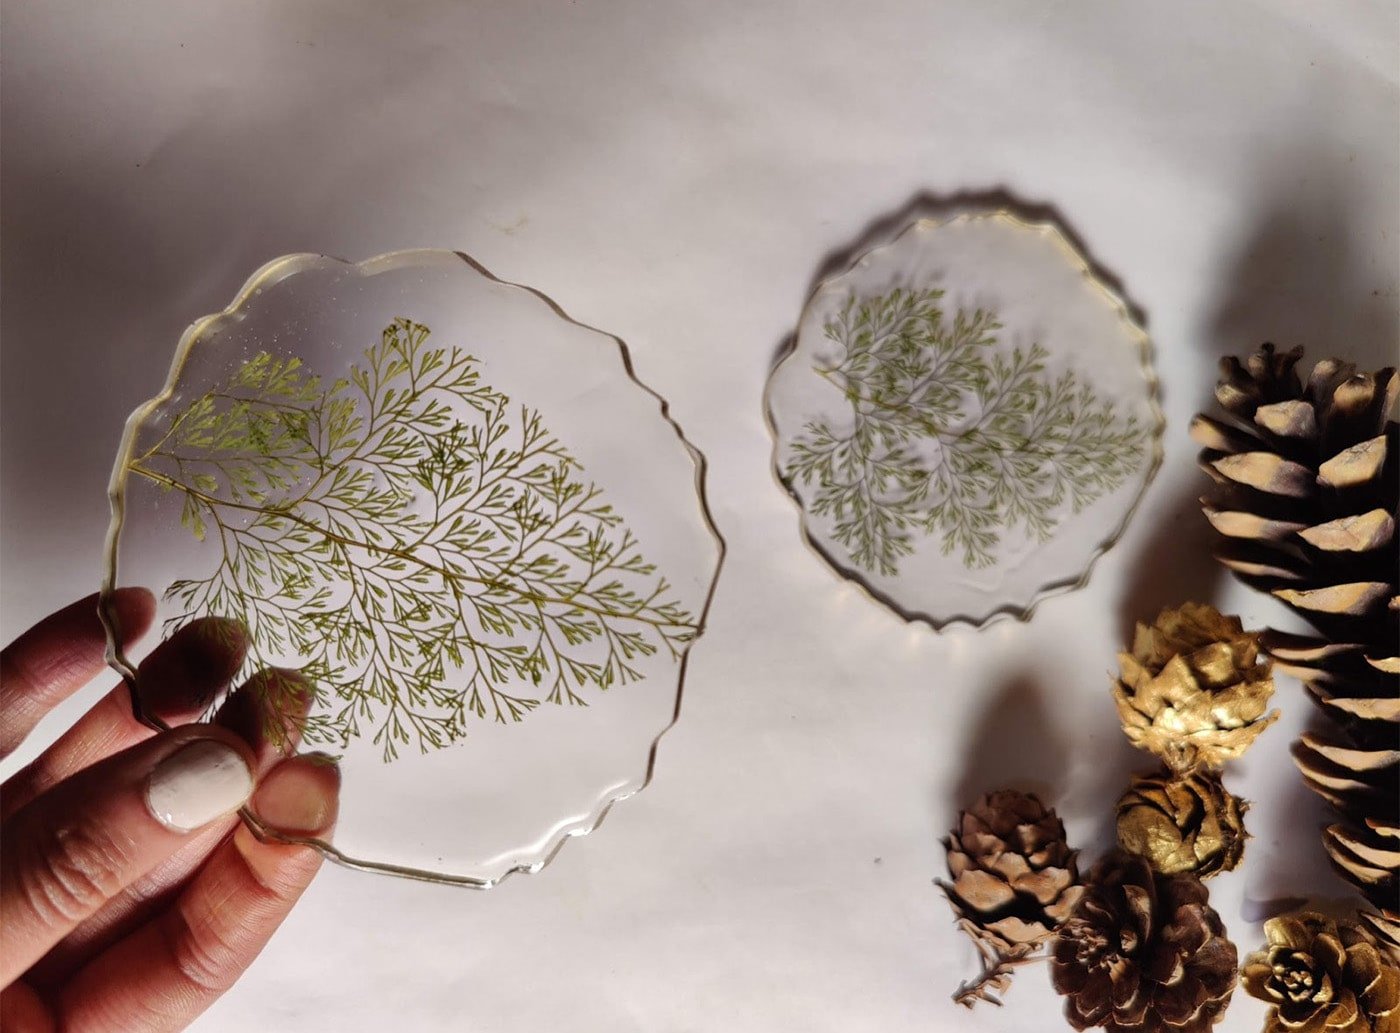
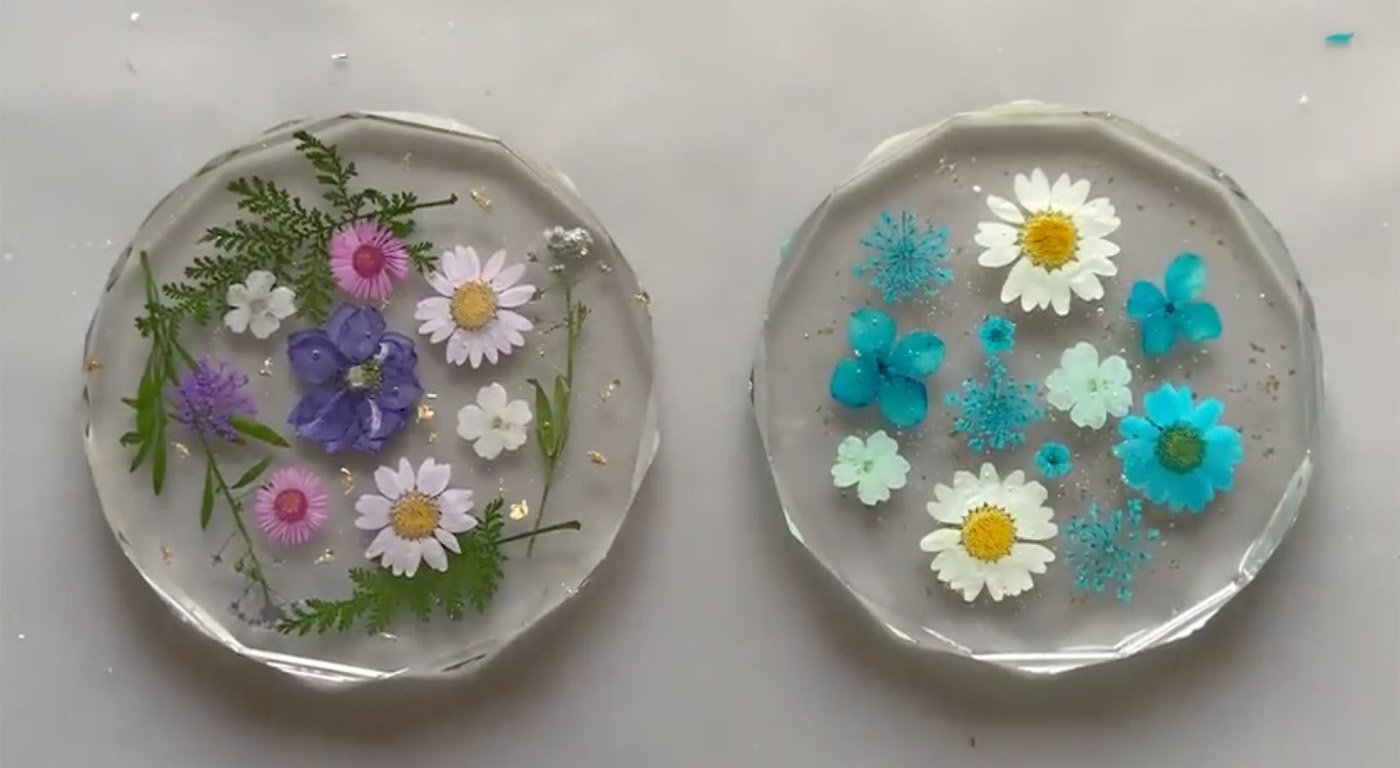
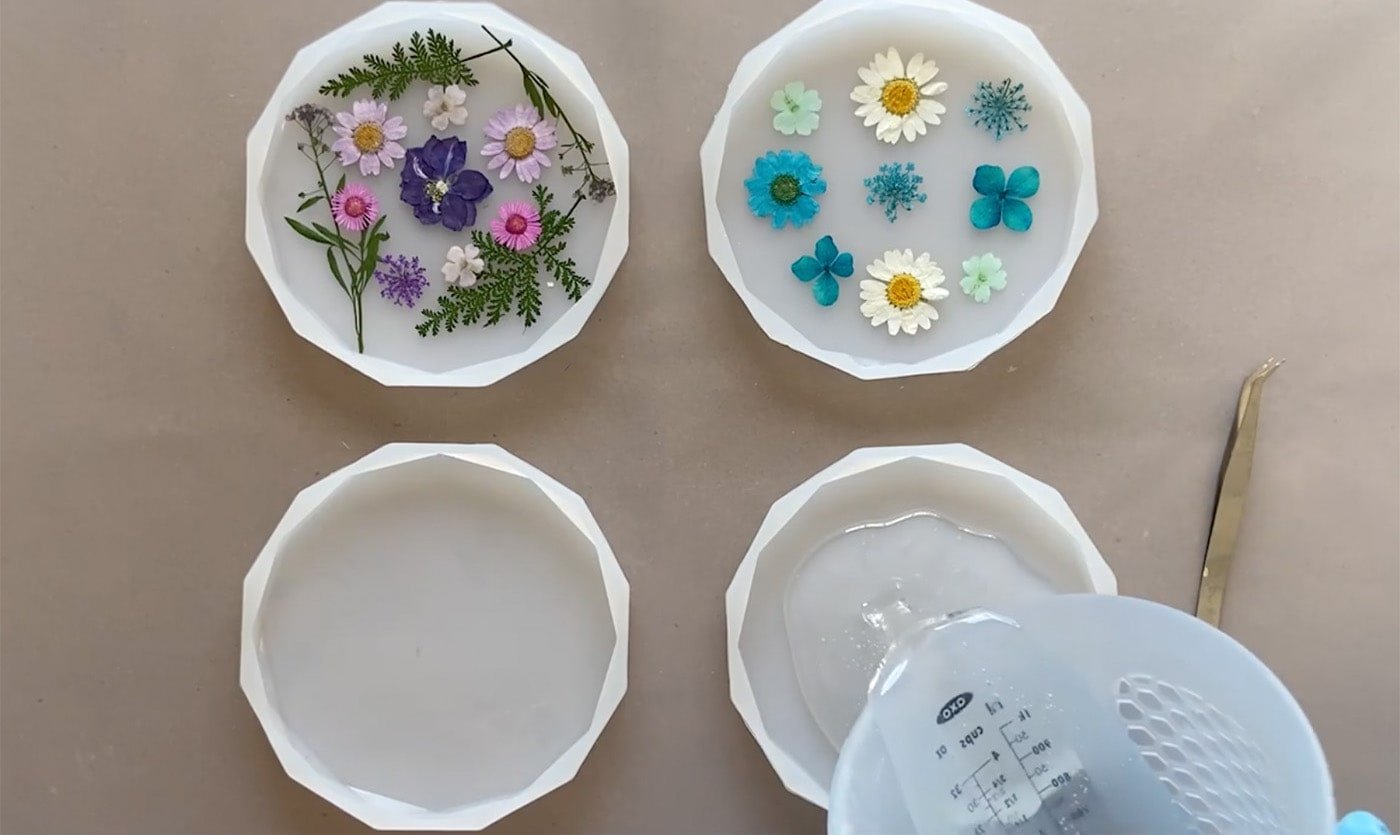
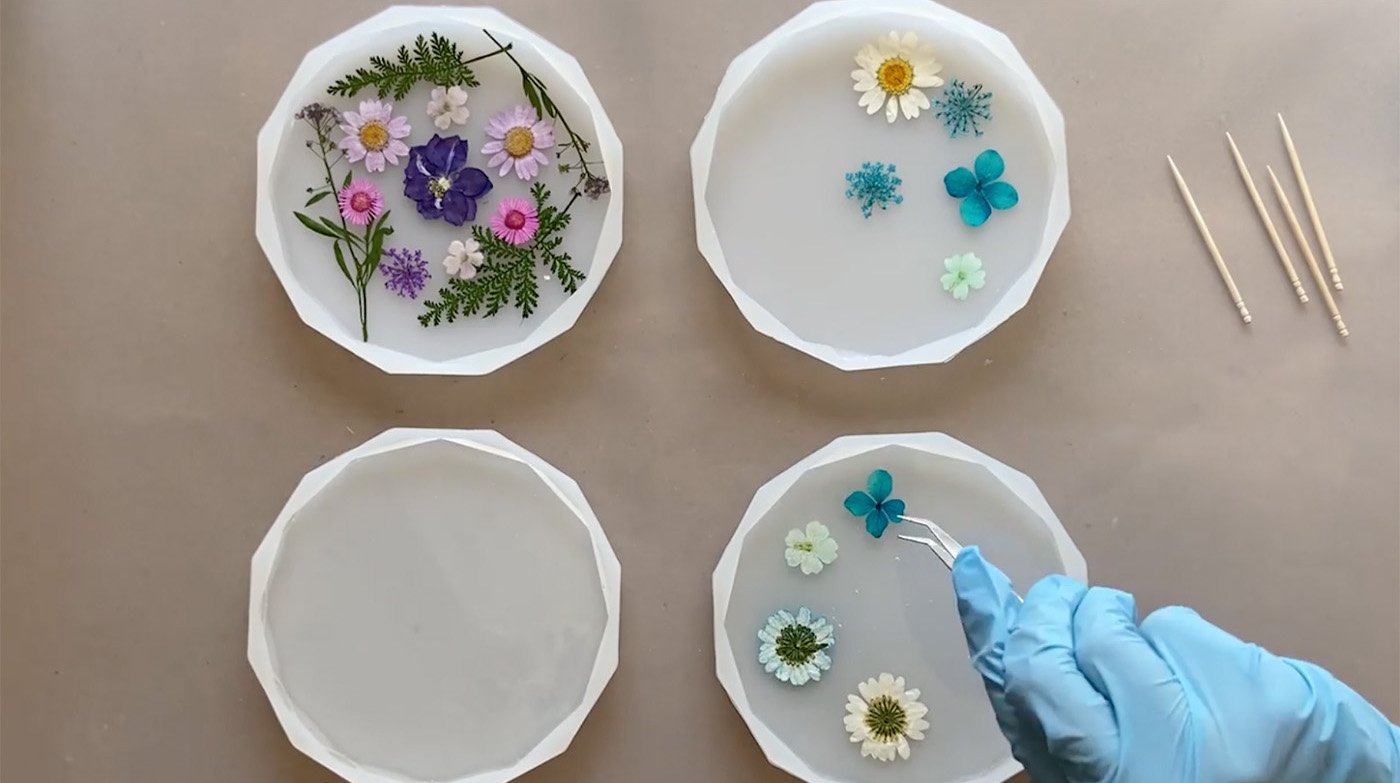
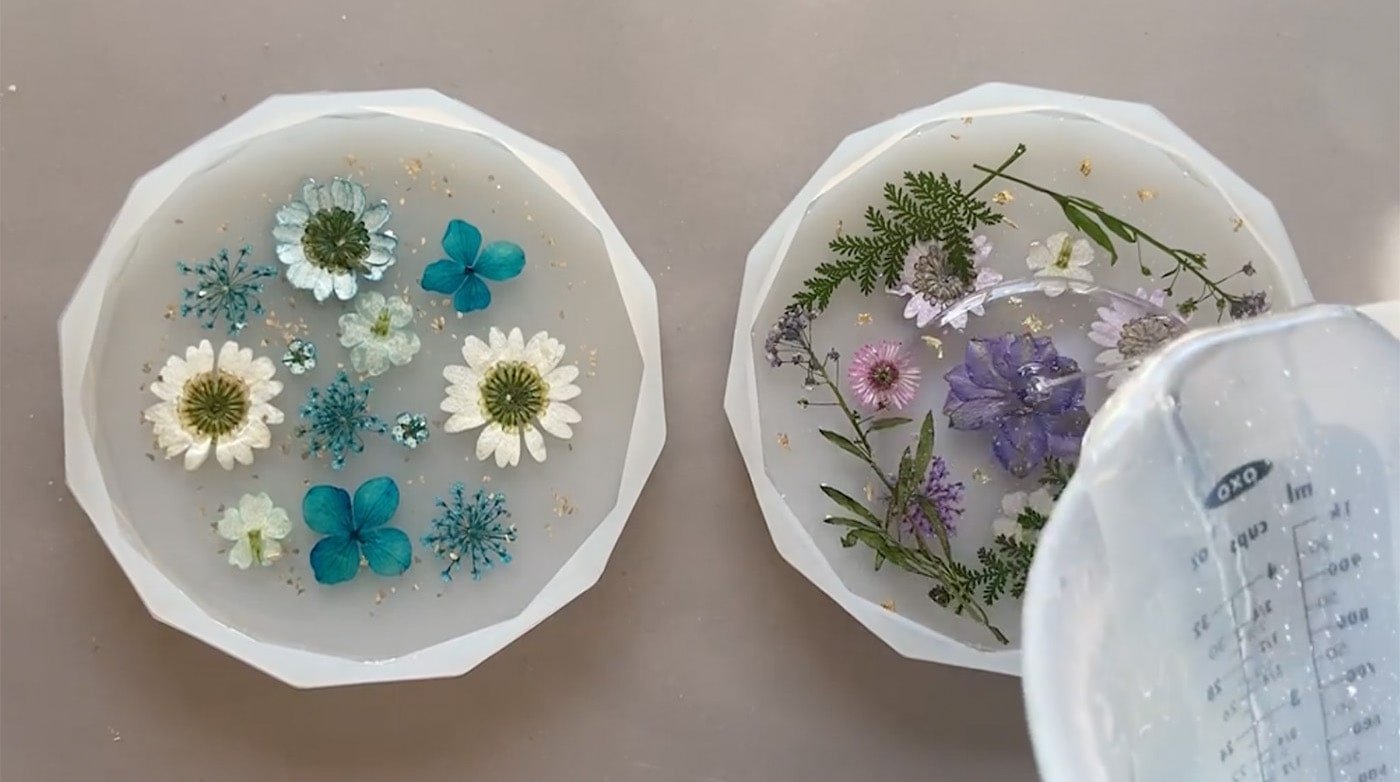
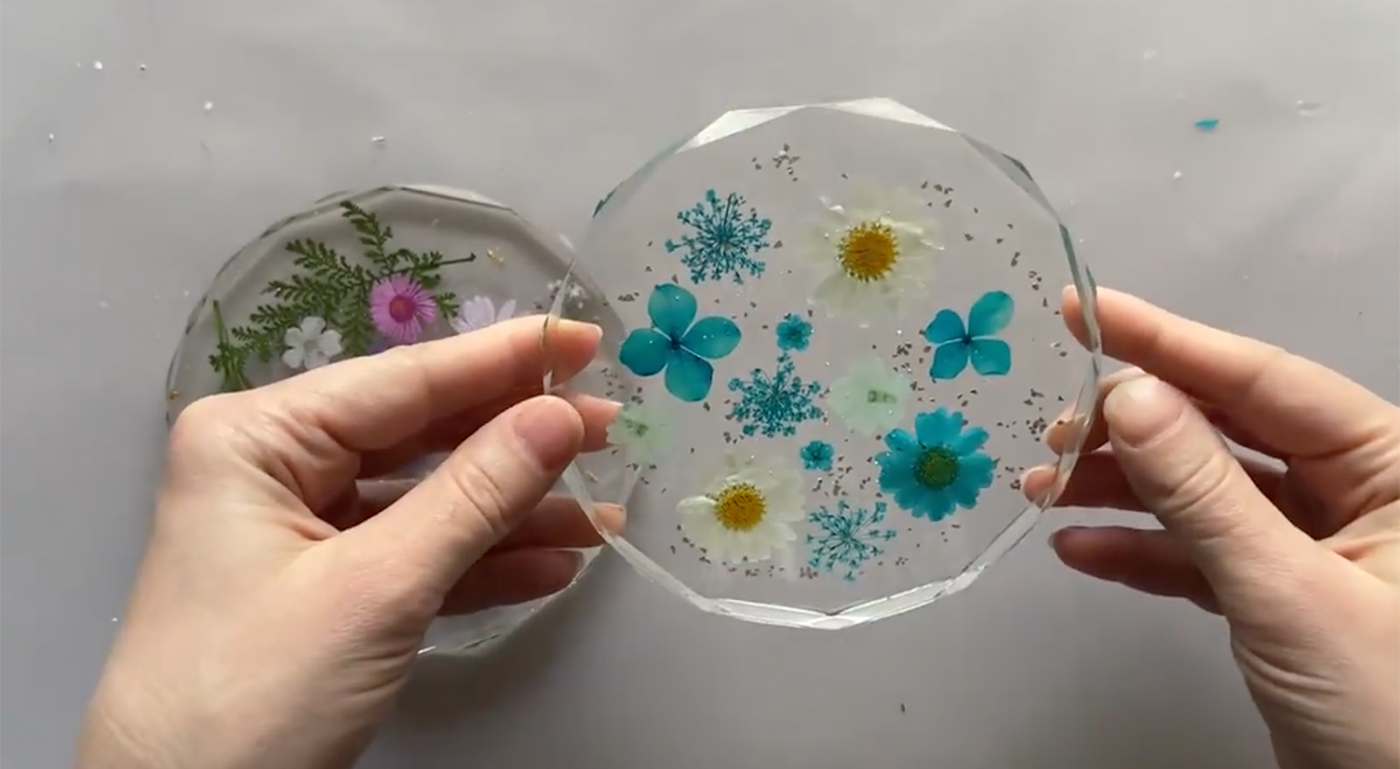
Resin Flower Coasters
Because it’s crystal clear, resin is the perfect way to display dried flowers. Whether you buy dried flowers online or preserve them yourself, it’s easy to add and arrange them in uncured resin.

Get Started With Resin Art Today
Beginners Guide to Resin: Intricate Pieces with Simple Techniques
Alcohol Ink Resin Coasters
Alcohol ink is a fluid medium that creates abstract, celestial blooms of color, typically on a nonporous surface like metal or glass. However, it’s also possible to capture those abstract shapes in resin, which creates a tie-dye effect.
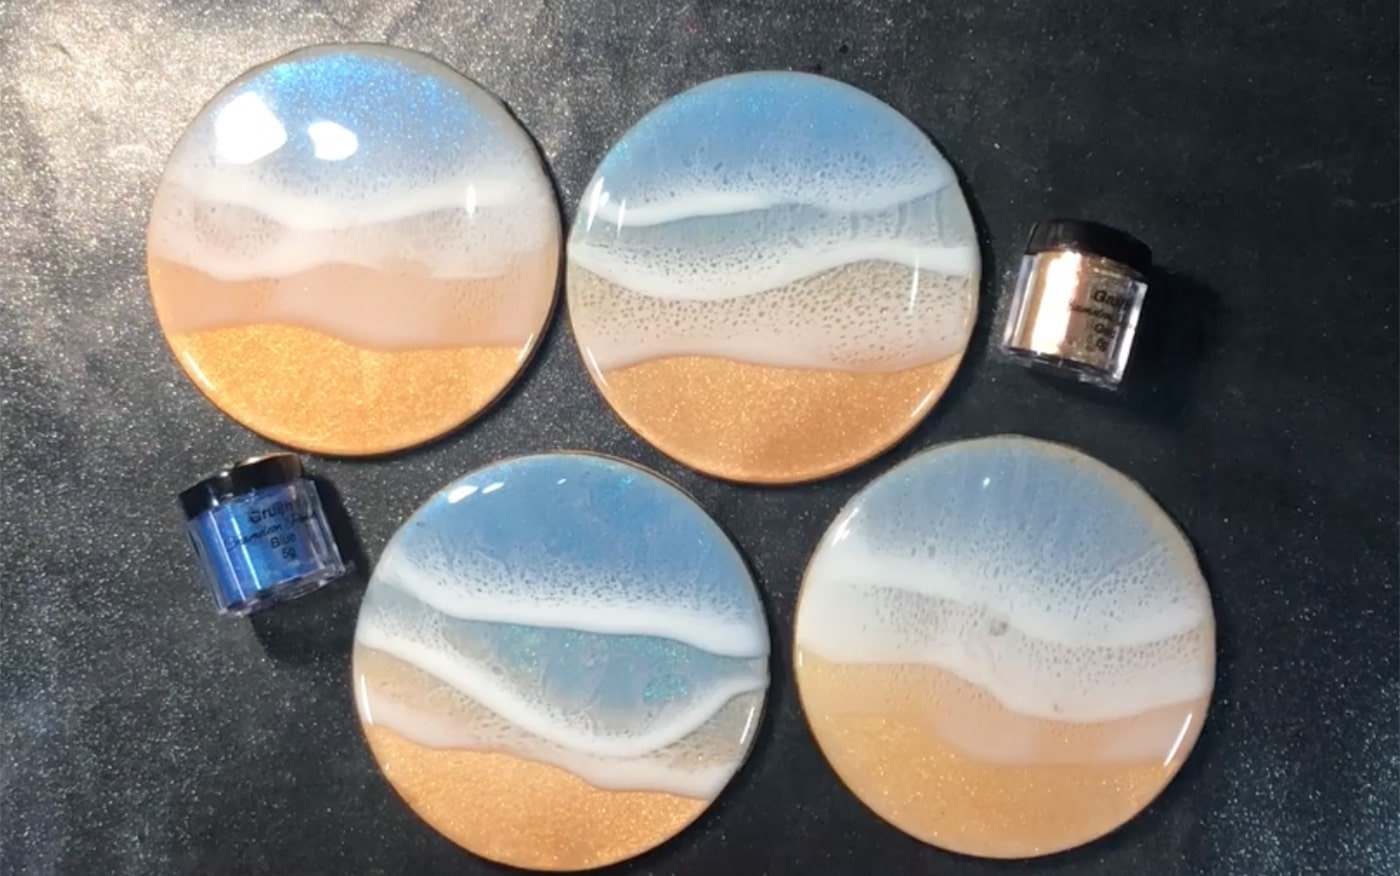
Beach Resin Coasters
Using a few different colors of resin and a heat gun, you can create the look of ocean waves on your coasters. This technique is a bit more involved, requiring several layers of resin, but it is fun and produces a slightly different effect every time.
How to Make Resin Coasters
While some aspects of making resin coasters depend on the exact look you’re after, most designs follow the same general process.
Step 1: Mix the Resin
Determine how much resin you will need for the project, and then cut that amount in half, since you will use two equal layers of resin to create the final coaster. Based on that measurement, mix resin with hardener. Double check the label on your resin for instructions, but most require combining the two components in a 1:1 ratio.
Stir for about three minutes, or until the mixture is clear with no cloudy swirls. Stirring slowly will help reduce the number of bubbles in the mixture, so take your time.

Step 2: Add the First Layer
Add enough resin to fill the mold about halfway. The resin should completely fill the bottom of the mold from edge to edge. This will provide the foundation for the colors, flowers, or other decorations you want to add to your coasters.
Step 3: Incorporate Color and Decorations
In this step, let your creativity shine as you incorporate color and additions like dried flowers, glitter, or gold leaf. For example, if you want to add alcohol ink, simply add a few drops while the resin is still tacky. Let the colors move and blend on their own, or use a toothpick to swirl the hues. If you’re adding dried flowers, use a pair of tweezers to carefully place each bloom in the resin.
Step 4: Add a Second Layer of Resin
Cover the coasters and allow the first layer of resin to cure for about 24 hours. Then, add a second layer by mixing resin and hardener—just like you did in the first step—and filling the rest of the mold, being careful not to overfill.
Step 5: Allow to Cure and Demold
Resin coasters take about 24 hours to dry, so make sure to let them cure for a full day. Once the coasters are dry, carefully remove them from the silicone mold. Simply pull gently on the edges of the mold, and then pop the coaster out.
Never Set Your Drinks on a Boring Coaster Again
DIY resin coasters are easy to make and endlessly customizable—and a set of coasters makes a great gift. So say goodbye to boring coasters and start setting your drinks of tiny works of art.

Discover Online Classes in Resin Art
Jewelry, geodes, coasters, and more.
Try Skillshare for free! Sign up for a 7 day free trial today!
Get Started- Unlimited access to every class
- Supportive online creative community
- Learn offline with Skillshare's app


