

How to Make a GIF in Photoshop in 9 Steps
Add movement to your business’ logo, make your own meme, or create a memorable email signature by learning how to make a GIF with Photoshop.


GIFs might have hit their peak popularity in the 2010s, but they can still be used to add spark to your email signature, dynamic energy to your website or a little humor to a holiday card that your friends and family will talk about for years to come. If you’re here because you already have a few images you want to turn into a GIF, you’ll be on your way to making your own eye-catching GIF in less than ten simple steps.
If you’re just looking for an introduction to Adobe for creatives, making a GIF can be a rewarding place to start. In just an afternoon’s time, you’ll be able to make a few different GIFs and explore how versatile your new skill can be. You’ll even learn a little frame-by-frame animation in Photoshop so learning how to make a GIF can also be a segue into animation work.
What Is a GIF? A Definition
Standing for Graphics Interchange Format, a GIF is an image format that supports looping animation. They are often used for really simple animations like animated logos, short video clips or animated text. Today, the GIF is a big part of modern-day memes and the Internet, but it was invented in 1987 by developer Steve Wilhite.
If you’re wondering how to pronounce GIF, the inventor himself pronounces it with a soft “G” like the peanut butter brand Jif. The internet is torn on its pronunciation as most people pronounce it with a hard “G” like “gift” without the “T.”
Visually, GIFs are known for their looping animation and limited color palette since the GIF format can only store up to 256 colors. While you might think of retouching portraits or making a mockup when using Photoshop, it can also be used for making GIFs.
9 Steps for Creating a GIF in Photoshop
With the history of the GIF in your back pocket and your unique GIF idea in the front of your mind, it’s time to get to work. Once you open up your Photoshop app, collect any GIF inspiration you have and locate your image files, you’ll be ready to get started.
1. Import Your Images Into Photoshop
Start by importing your images into Photoshop. If you don’t have any images ready, you might try to make a color-changing text GIF. For this, you’d add text to a layer and then duplicate that layer until you have five or six layers. Then, you can change the color of each new layer you create.
2. Access the Timeline Window
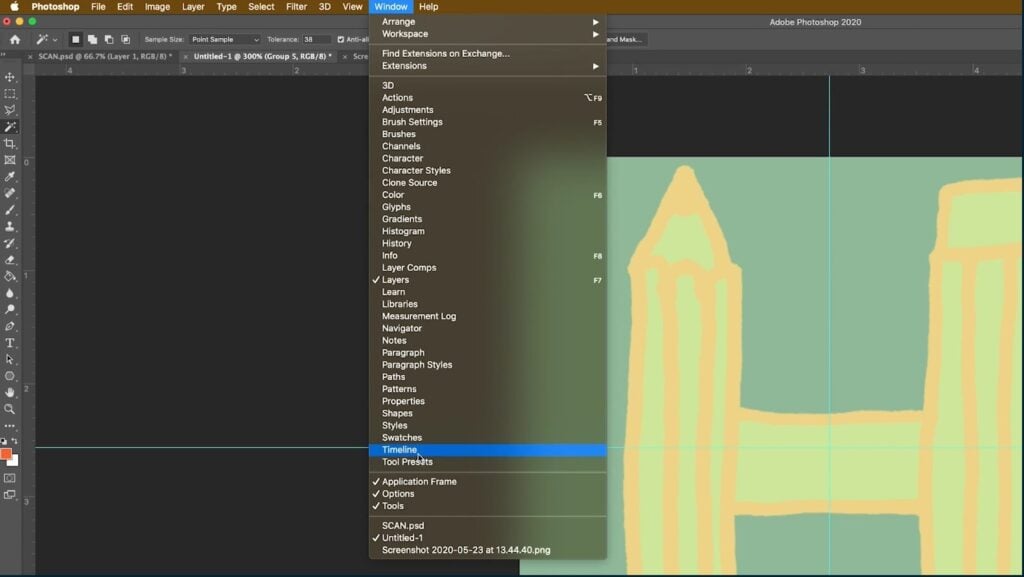
Navigate to the drop-down menu “Window” within the toolbar at the top of the screen. Closer to the bottom of the menu you’ll see an option called “Timeline.” Select “Timeline.”
3. Click “Create Frame Animation” in the Timeline Window

Once you click “Timeline,” a bar will appear at the bottom of your Photoshop app underneath your canvas. This is your Timeline. Here, you’ll find a button titled “Create Frame Animation.” Click on the button to begin your GIF creation process.
4. Make a New Layer for Each Frame
Before you start animating, it is very important that each of your images is on its own separate layer. You can find your layers to the right of your canvas. If your images are all on the same layer, create as many new layers as you need and move your images accordingly.
5. Convert Layers Into Frames Using the Menu Icon
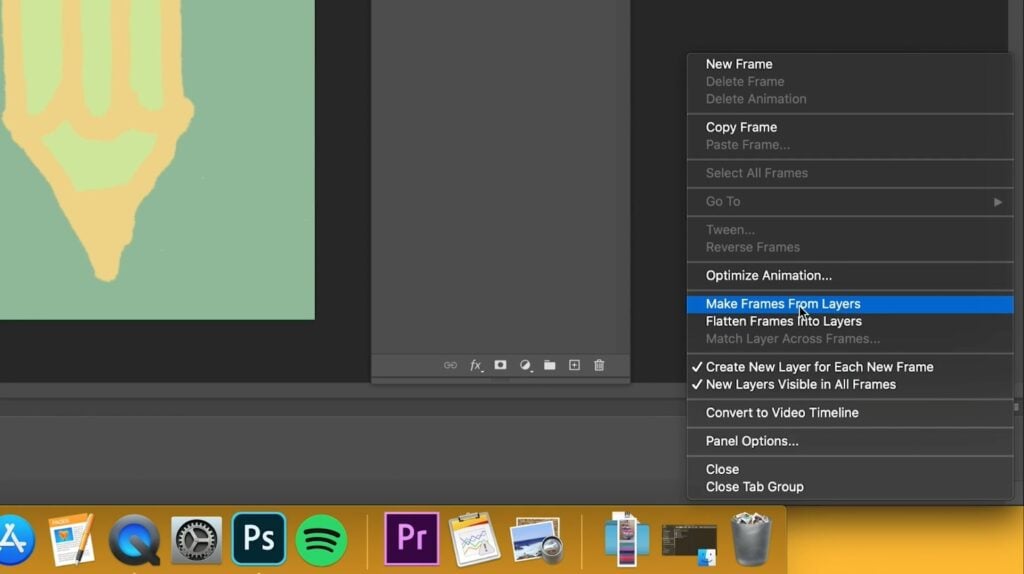
With your layers created, you can now navigate to the small button on the right area of your Timeline. When you click on that button, a menu will pop up that reads “Make Frames From Layers.” When you click “Make Frames from Layers,” Photoshop will convert each of your layers into frames. These frames will be the building block of your animation, which in this case will turn into a GIF. Each frame is made up of a single image that plays in rapid succession to create that illusion of movement.
6. Specify the Display Duration for Each Frame
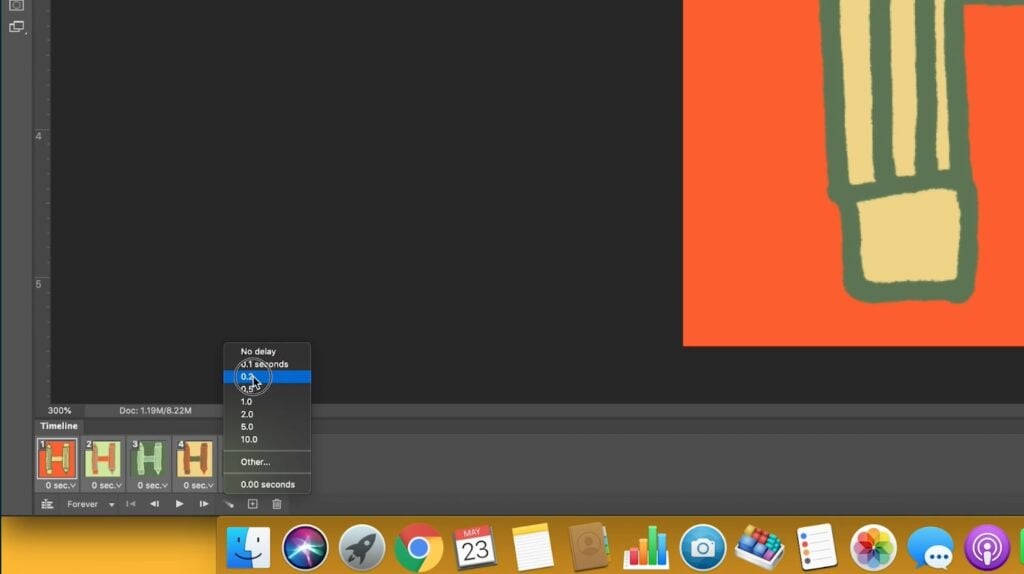
You should see each of your layers as frames in the bottom left corner of your timeline. Here, you’ll be able to make multiple adjustments to your frames including their duration. If you choose to have frames with really long durations, your GIF will feel more like a slideshow than a seamless video. If you choose to have frames with really short durations, your GIF might move too quickly for your viewer to take in.
Spend some time trying out a few different durations for your frames. Usually, somewhere between .2 and .5 seconds will work for most projects.
7. Set the Loop Count at the Bottom of the Toolbar
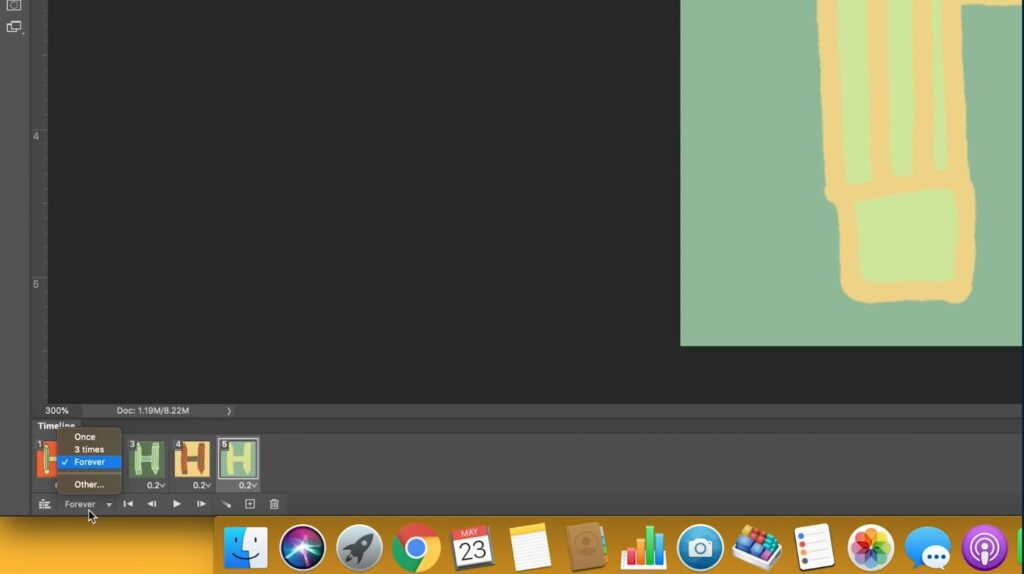
A GIF is defined by its infinite looping animation, which is why it’s important to select “Forever” as the loop count for your GIF. By selecting “Forever,” your GIF will continue playing from start to finish over and over.
8. Preview Your GIF With the Play Icon
At the very bottom of your Timeline, you’ll see your Loop Count menu as well as the options to add new frames, delete frames, and fast forward through your animation. You’ll also see a play icon, which you can use to preview your GIF once you’ve finished creating it.
9. Save and Export Your GIF
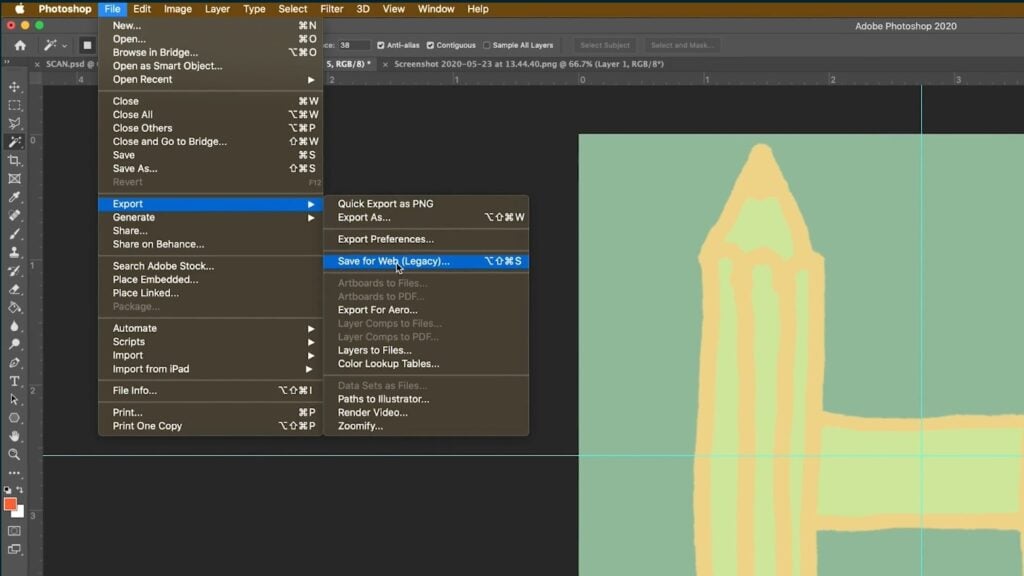
Once you’re happy with the speed and look of your GIF, you can export your final creation by going to File>Export>Save for Web.
Differences Between a GIF and Other Image Types
Image types can be defined by four main categories: compression, color depth, transparency, and animation. GIF uses lossless compression, which means that it preserves image quality but has a larger file size. JPEG uses lossy compression, which has reduced image quality in order to have a smaller file size. PNG uses lossless compression like GIF and TIFF can use both lossless and lossy compression.
PNG-24, JPEG and TIFF can support around 16 million colors, making them easy choices for high-quality images. GIF and PNG-8 only support 256 colors, which makes them better for simple images with less complex color schemes.
GIF, PNG and TIFF all support transparency while JPG does not. Finally, only GIFs support animation while PNG, JPEG and TIFF files do not.
Create and Share Your GIFs to the World
Take these next few weeks to really have fun making GIFs. Try adding them to your emails, website, or even creating your own memes to send in your family group chat. Learning a new skill can take time but the more GIFs you make the better you’ll understand the process. If you need further help, Skillshare has the best class selection for learning how to use Photoshop for creating GIFs.
Calli Zarpas
Producer & Writer by occupation. Ceramicist & Newsletter Editor by avocation.
Try Skillshare for free! Sign up for a 7 day free trial today!
Get Started- Unlimited access to every class
- Supportive online creative community
- Learn offline with Skillshare's app


