

How to Draw a Dress: A Step-by-Step Guide
Learn to sketch beautiful dresses with our step-by-step drawing guide, perfect for all abilities!


Dreaming of designing your own dresses? It all starts with putting your ideas to paper.
Whether you want to learn how to draw a simple dress, wedding dress or prom dress, this easy drawing tutorial will help you draw your dream dress step by step.
Unleash your inner fashion designer and let’s get started!
Step 1: Gather Your Supplies
Fashion illustrations can be drawn on paper or digitally.
To draw yours on paper, you’ll need good quality paper or a sketchbook, a pencil and an eraser. You’ll also need a set of fine-tip black pens for outlining, preferably with a few different thicknesses. When it comes to coloring your illustrations, colored pencils or Copic markers are great beginner-friendly choices, as they’re easy to control and layer. If you’re already comfortable working with watercolors or acrylic paints, you can try those, as well.
For those who prefer the digital route, all you need is your tablet, stylus and a program like Procreate. This dress tutorial focuses on paper drawing, but if you know your way around your digital illustration program, you should have no trouble following along.
Step 2: Draw or Find a Croquis
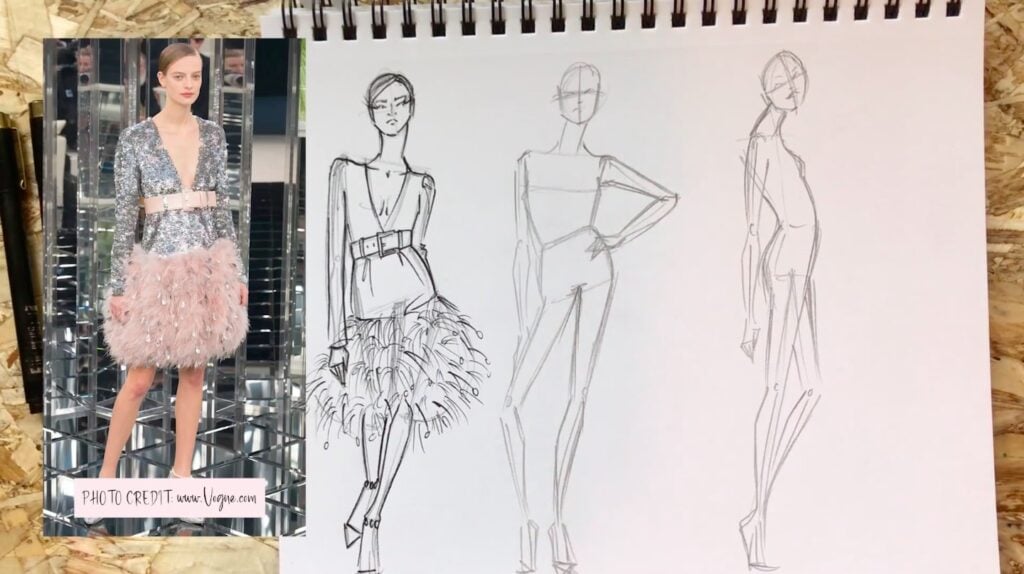
You can, of course, draw a dress pictured on its own, but the best way to showcase your dress design is to present it the same way it’s meant to be worn—on a person. This sketch of a person is called a croquis. Most fashion illustrators start by drawing a quick croquis and then overlay clothing on top.
A croquis is not a technical drawing of a standard human figure. For one, croquis tend to be much taller. This is measured in the number of times the height of the head fits into the height of the entire body. The average person is about 7.5 heads tall, while croquis can be anywhere from 8 to 11 heads tall, with 9 being the most common option.
Croquis also tend to be drawn in dynamic, exaggerated poses. This, along with the added height, creates an ideal canvas to showcase how the clothes would fit and move with the person.
With a bit of practice, you can learn how to draw fashion croquis. Alternatively, if you just want to focus on illustrating your design ideas, you can trace over a croquis template. A quick Google search will help you find countless options in different styles, heights and poses.
Step 3: Create a Rough Dress Sketch
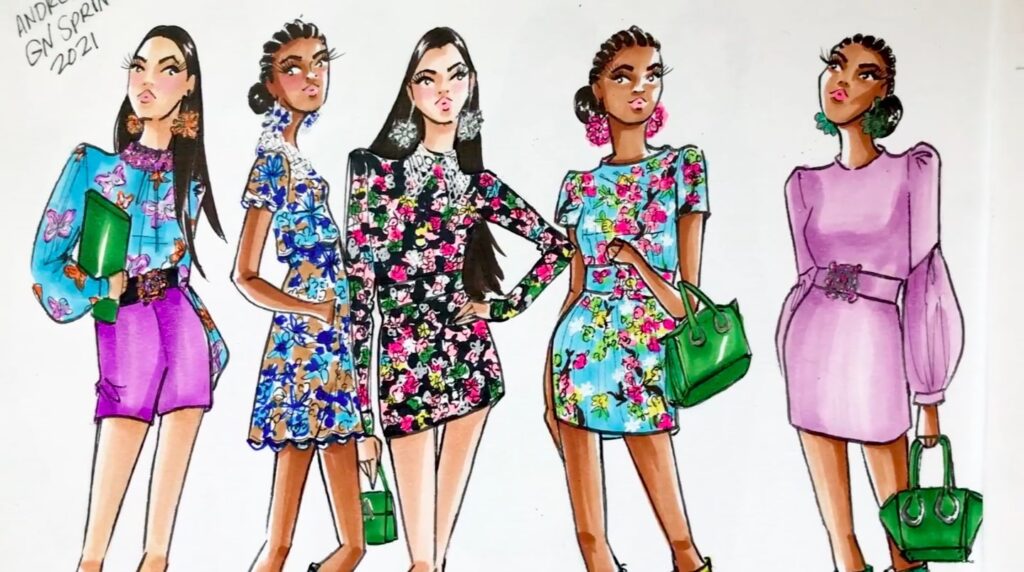
Now comes the fun part—designing the dress. Using a pencil, sketch the rough outline of your dress, starting at the top of the croquis and working your way down. With each part of the dress—neckline, bodice, sleeves, waistline and skirt—you have lots of styles to choose from. Try out some of the options below or dream up something entirely new!
- Neckline: scoop, square, V-neck, sweetheart, halter, high neck, boat neck, cowl, collar or asymmetrical
- Bodice: straight, adjusted, gathered, wrap-over, draped or corset
- Sleeves: sleeveless, spaghetti straps, strapless, off the shoulder, cap, short, long, bell, kimono or puff
- Waistline: shift, empire, high, natural, drop, blouson, peplum or basque
- Skirt: A-line, princess dress, sheath, trumpet, mermaid, asymmetrical, high-low or bubble
- Dress length: mini, knee length, midi, tea, maxi or full
Take your time with this part and play around with different styles and combinations. The great thing about using a pencil and eraser is that you don’t have to commit to anything until you’re absolutely happy with how your dress is looking.
Step 4: Add Movement
The purpose of your drawing isn’t just to show the style and structure of the dress—it’s also crucial that your illustration demonstrates the weight of the fabric, how it sits on the model and how it would realistically behave in response to the model’s movement. For example, lighter fabrics tend to move more easily than heavier ones, so they naturally show more creases.
Still using a pencil, add details such as folds, wrinkles, ruffles and pleats. Focus on the most obvious places where the fabric is draped or bunched together, such as when:
- The skirt of the dress hangs loosely, creating pipe folds
- The dress is cinched at the waist (with or without a belt)
- Loose fabric sags between two points of tension (ex: cowl necklines)
- A skin-tight dress made from non-stretchy fabric folds where the body curves
- The model’s arm is bent at the elbow while wearing a long-sleeve
- The model’s hand rests on the hip, pinching the fabric there
Step 5: Outline with a Pen
Once you’re happy with your pencil sketch, go ahead and outline the strokes you’d like to keep with a black pen. If you can, use a thicker pen for more prominent lines like the model’s body, the main parts of the dress and some of the major folds. Use a thinner pen for smaller details, minor creases and decorations.
Give the pen a few minutes to dry and then take an eraser to the entire drawing to remove any remaining pencil lines.
Step 6: Add Color
Of course, you want your illustration to show the colors you envision for your dress. But adding color to your drawing is about much more than that—you can use it to show the texture and weight of the fabric, accentuate the fit of the dress and add depth and dimension to the illustration.
Rather than treating your illustration like a coloring page and filling in each part of the dress with solid colors, imagine a light source coming from somewhere off the page and think about the shadows and highlights it would create. For example, when the fabric has lots of folds and creases, the light wouldn’t reach certain areas very well, so they would appear darker. On the other hand, very smooth, tightly woven fabric—like silk or satin, for example—tends to reflect light at certain angles. To give the illusion of shiny, glossy fabric, use very light colors for areas that are in the direct path of the light source or maybe even leave them completely white.
Lastly, don’t hesitate to play around with adding thin strokes of color to create patterns or illustrate textures like sequins, lace and embroidery.
Develop Your Fashion Illustration Skills
Don’t worry if your dress drawings don’t yet look quite like you imagined them. You could have groundbreaking design ideas, but accurately communicating them on paper takes an immense amount of practice.
To help you get there, consider taking a few fashion illustration classes and watching drawing tutorials. And if you want to focus solely on your drawing skills, without the pressure of coming up with original design ideas, spend some time copying existing illustrations or your favorite runway looks. With time and dedication, you’ll be able to bring your own ideas to life and share them with the world.
Sayana Lam
Sayana is a musician, writer and graphic designer based in Toronto, Canada.
Level-Up Your Drawings and Illustrations with Skillshare
Start Your Free Trial Today!- Drawing classes for all levels
- Digital and traditional drawing styles
- Unlimited access to all classes


