

How to Crop In Photoshop: Best Tricks and Techniques
There’s more to cropping photos than you might think. Learn the ins and outs of how to use the Crop Tool in Photoshop and effortlessly enhance your photos.


Cropping is one of the most impactful things you can do when editing a photo. It helps get rid of unwanted elements, bring the subject closer and improve framing and composition.
If you’re already using Photoshop to edit photos, take some time to get to know its Crop Tool. With it, you can crop an image to any aspect ratio or size within seconds. Beyond that, it can even straighten your images and fill in any blank areas with generative AI.
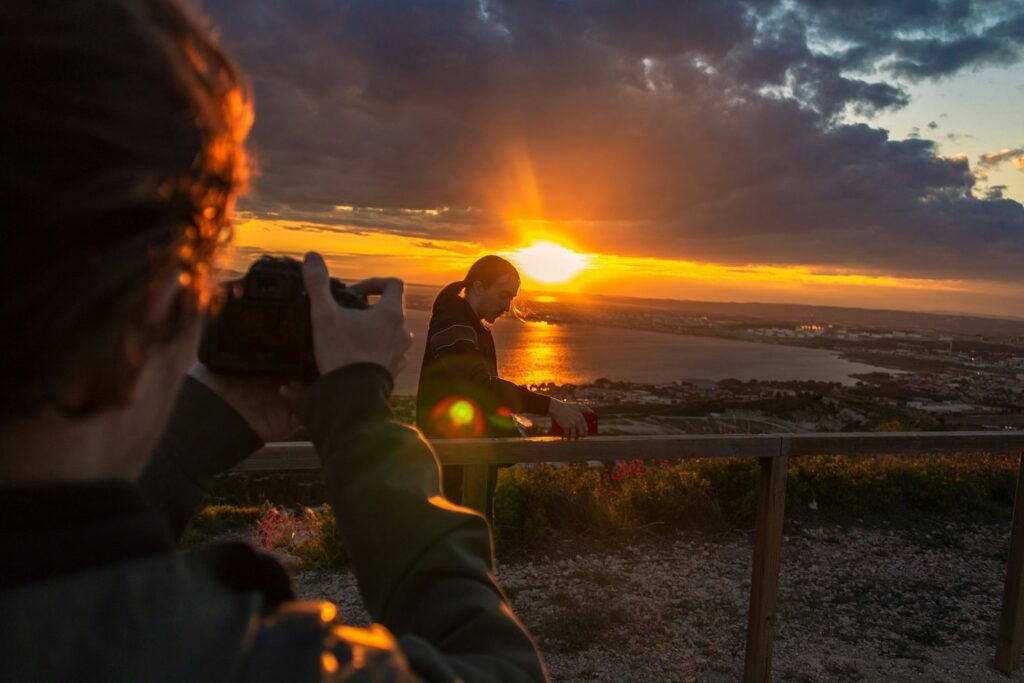
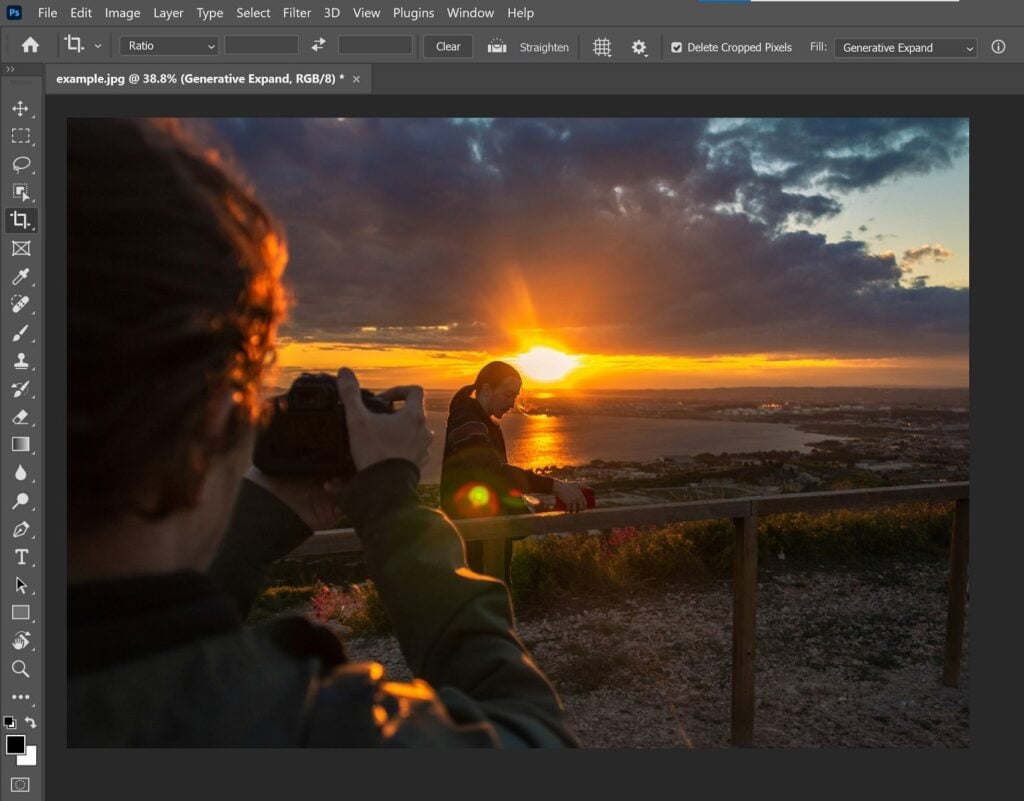
Let’s use the image below as an example and take a closer look at how to take full advantage of the Crop Tool in Adobe Photoshop.
How to Crop a Photo Using the Crop Tool
To freely crop a photo without maintaining a set aspect ratio, follow the steps below:
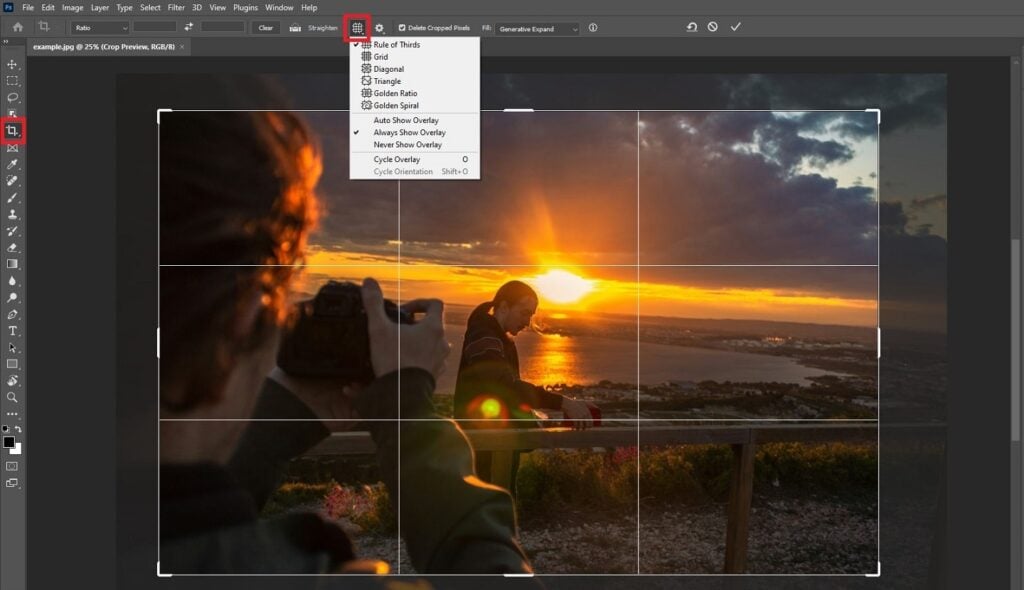
1. Select the Crop Tool
Find it in the toolbar on the left side of the screen—it’s the fifth one from the top. You can also press C on your keyboard.
Once selected, you’ll see a crop border appear around the image, along with crop handles on each side and in each corner.
2. Find Your Perfect Framing
Everything inside the crop border will be kept, and everything outside it will be cropped out. You can resize the crop border in one of two ways:
- Drag any of the crop handles toward the center of the image until you reach our desired size and aspect ratio. The side handles affect only one side at a time, while the corner handles affect the two sides that the corner joins.
- Alternatively, you can click and drag anywhere on the image to create a new crop border. From here, you can still use the crop handles to make further adjustments.
Don’t worry if your crop border doesn’t quite frame the image in the way you hoped. At this point, you can also click and drag the image to reposition it inside the crop border.
Note that once you start adjusting the crop border, four grid lines appear over the image, vertically and horizontally dividing it into thirds. This can help you crop your image according to the rule of thirds. If you’d like to use a different grid, click the Overlay Options button at the top of the screen and select your desired overlay.
Keep adjusting the border and how the image fits inside it until you find your desired framing.
3. Commit the Crop
If you’d like to start over, click the Cancel button at the top of the screen. Otherwise, commit the crop by clicking the checkmark beside it or pressing Enter on your keyboard.
If you think you might go back and change the crop again in the future, make sure Delete Cropped Pixels is unchecked. This will save the original image and let you recover the areas you cropped out.
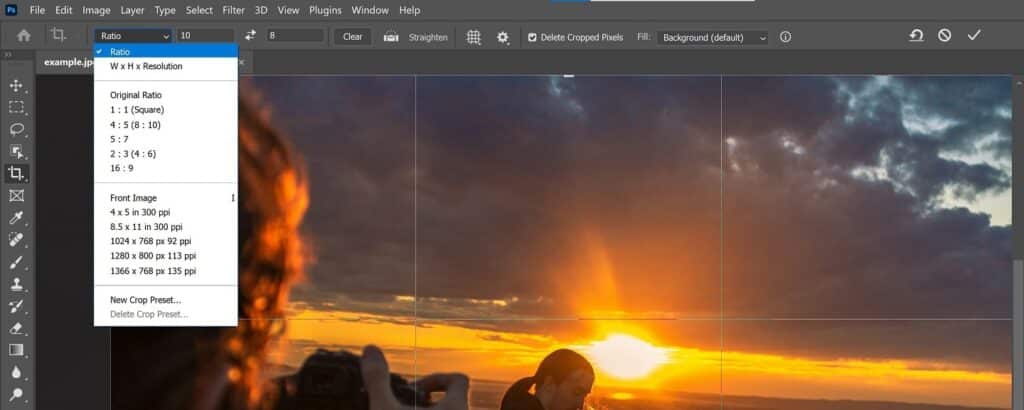
How to Crop Images to a Specific Aspect Ratio
To maintain the original aspect ratio of your image, hold down SHIFT while you drag any of the crop handles.
To crop to a specific aspect ratio, find the Ratio drop-down menu in the top left corner of the screen and select from a list of presets. If you can’t find the preset you need, you can input your own values to the right of the drop-down menu. The first box sets the width of your image, while the second box sets the height.
Notice the two arrows between the two boxes. This is the Swap button, and you can click it to quickly swap the width and height values and change the orientation of your image from landscape to portrait or vice versa.
How to Crop Images to a Specific Size
To crop your image to a specific size and resolution, open up the Ratio drop-down menu and select W x H x Resolution. In the width and height boxes, you can input specific values, followed by in for inches, cm for centimeters or px for pixels. You’ll also notice a third empty box—this is where you can input your desired resolution. For example, 300 ppi (pixels per inch) is usually the minimum for anything that will be printed.
Alternatively, you can go back to the Ratio drop-down menu and select one of the preset size/resolution combinations from the bottom half of the menu.
How to Crop Two Images to the Same Size
If you just finished cropping one image and you have another image open in Photoshop that you’d like to crop to the same size, there’s nothing more you need to do. Photoshop will save your crop settings from the first image and use them as a starting point when you open the Crop Tool in the second image.
You can also save your preferred crop settings as a new preset, so you can use them on other images down the line. Simply open up the Ratio drop-down menu and choose New Crop Preset.
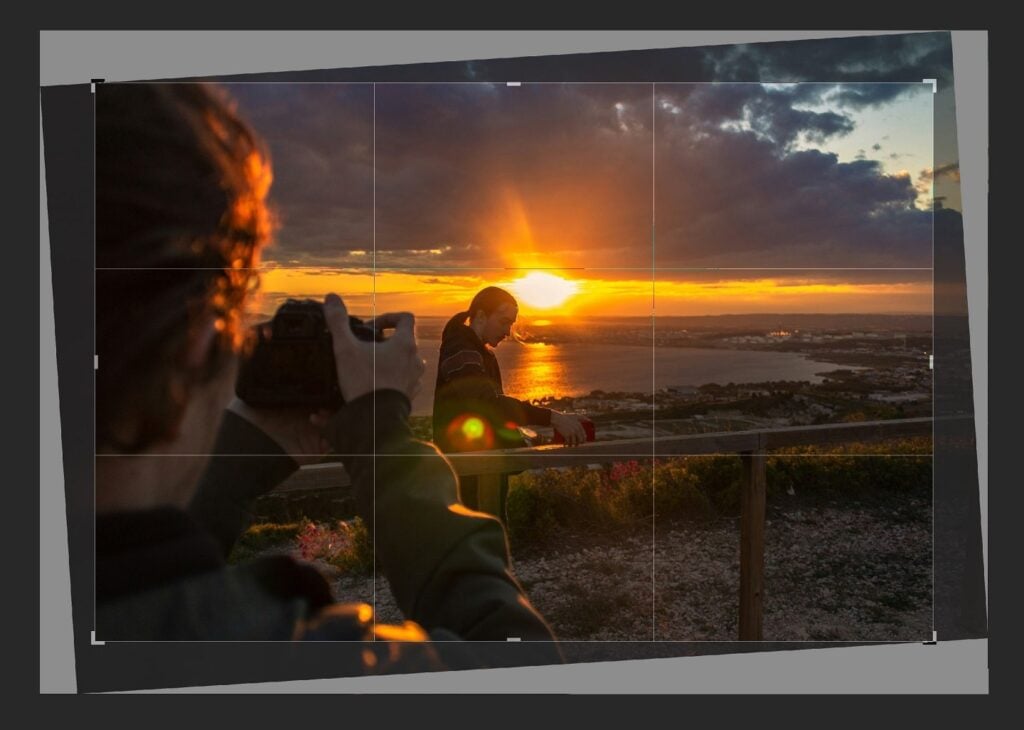
How to Straighten an Image With the Crop Tool
When editing images, cropping and straightening are two functions that are usually done together because one affects the other. That’s why Photoshop offers a straightening feature within the Crop Tool, and it’s very easy to use.
With the Crop Tool open, click on the Straighten button near the top of the screen. Next, click and drag your mouse to draw a line along the horizon or the part of the image you want to see perfectly leveled. When you let go, your image will automatically straighten.
By default, your crop border will shrink to make sure it doesn’t include any blank corners that appear as a result of the straightening. In the past, this was your only option—straightening always resulted in a tighter crop.
However, Photoshop now offers powerful tools that allow you to fill in those blank areas and keep your image at its original size. To do this, find the Fill drop-down menu at the top of the screen. The default option is Background, and this is the one that results in blank corners. To fill in these corners, choose Content-Aware Fill or Generative Expand.
Content-Aware Fill uses small bits of visual information that already exist in the image and samples them to fill in the blanks.
Generative Expand is a newer, AI-powered feature that generates brand-new visual information based on what’s already in the image. It even gives you three different options to choose from, and you can keep running it to generate more.
Both options work great for filling in blank edges after straightening an image.
Edit Your Images Like a Pro with Photoshop
Photoshop’s Crop Tool is powerful, yet quick and intuitive. Use it to instantly transform any kind of photo or image and achieve a perfect aspect ratio or size.
And if you’re not yet familiar with Photoshop’s other features, it offers a whole world of tools that can help you take your craft to the next level. Whether you’re a photographer, graphic designer, illustrator or digital artist, you’ll find everything you need to achieve professional results.
Start by learning the fundamentals of Adobe Photoshop and see where the journey takes you!
Sayana Lam
Sayana is a musician, writer and graphic designer based in Toronto, Canada.
Try Skillshare for free! Sign up for a 7 day free trial today!
Get Started- Unlimited access to every class
- Supportive online creative community
- Learn offline with Skillshare's app


