

Guide: Coptic Stitches and Book Binding
Learn the Coptic stitch technique, often used for bookbinding and other crafts in this step-by-step how to tutorial.
Table of Contents


Coptic stitch bookbinding (also called Coptic binding) is a way of binding pages of a book together without glue or staples. Like other types of hand binding, it’s an ancient art form. And even though it’s not the most common way of binding books these days, it’s a beautiful craft that adds style to handmade notebooks and sketchbooks.
Coptic stitching is an intricate technique, and it takes a while to stitch a book together, but the results are well worth the effort. Read on to learn how to do Coptic stitch bookbinding with a step-by-step Coptic binding tutorial.
What Is a Coptic Stitch?
A Coptic stitch is a type of stitch used in handmade bookmaking to attach the pages and covers together. It’s similar to a chain stitch used in embroidery in that a chain of knots is formed.
These days, many books are made by gluing one side of the pages to a hard strip of card, called the spine. (This is the part that faces outward when books are lined up on a shelf). Books and notebooks held together by Coptic stitches don’t have, or need, a spine, as the stitches keep the pages together.
Coptic stitches are named as such because the technique is thought to have been developed by early Christians in Egypt—otherwise known as Copts—in the 2nd century CE.
Other Types of Stitches
Coptic stitches aren’t the only type of handmade bookbinding technique. Here are some examples of other stitches so you can see the difference.
Saddle Stitch
Saddle stitch is a simpler technique than Coptic stitch.
Japanese Stitch

Japanese stitch is fast and simple, but unlike with the Coptic stitch, the book won’t lie flat.
Hitch Stitch
The hitch stitch is good for smaller notebooks.
French Link Stitch

The French link stitch is another intricate and striking traditional bookbinding technique.
Kettle Stitch

The kettle stitch looks similar to Coptic binding but is formed differently.
What Are Coptic Stitches Used For?

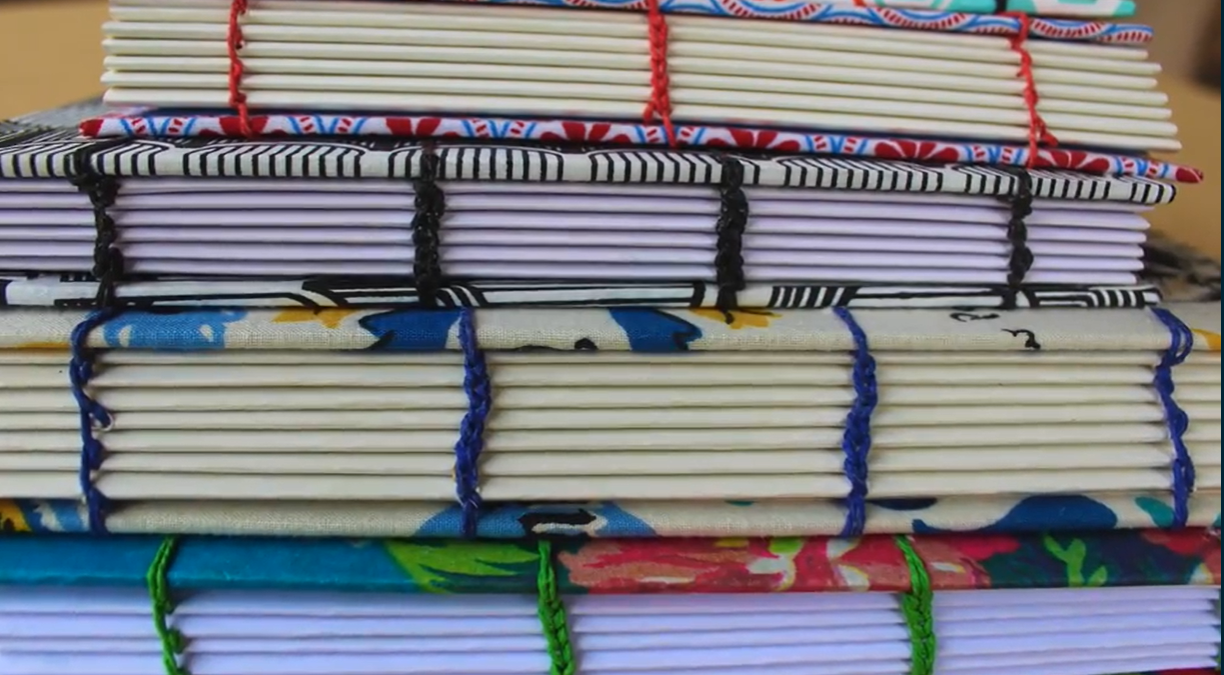
Unlike many other types of books, Coptic stitched books lie completely flat when open. This makes them especially good for binding artist sketchbooks or presentation books because nothing on the page will be hidden in the crease where pages meet. Coptic stitch journals, sketchbooks, and art portfolios look particularly striking.
These days, books made with Coptic stitches are prized handicrafts rather than a practical way of making books, and learning how to Coptic stitch is a great idea for any artist or creative person.

How to Do a Coptic Stitch
Ready to make your own handmade notebook? Here, we’ll walk step-by-step through the process of how to do Coptic stitch bookbinding.
Note that these instructions assume that you already have a collection of papers folded and a front and back cover. If you want to make a handmade notebook from scratch, a Coptic stitch tutorial such as Maribel Reyes’ How to Make a Coptic Stitch Sketchbook covers the whole process, including making the front and back covers and folding the pages.
Otherwise, let’s get started!

Step 1: Gather Your Materials

You’ll need these materials to bind a Coptic stitch notebook.
- Waxed linen thread
- Thick needle
- Scissors or craft knife
- Cutting mat
- Awl (a tool with a sharp end for punching holes)
- Ruler
- Pencil
- Hand drill and bits
- Paper for notebook and board for covers
Note that waxed thread is preferable to other types because it is smoother to work with and the knots can be pulled tighter, leading to a neater and stronger finish.
Step 2: Measure Your Thread

In bookbinding, a signature is a small group of papers folded together. They can comprise 2-4 pages, depending on how thick you want your book to be. A signature is not all of the pages you’ll include, but one of several bundles of papers that, when attached together, will form the book.
Take the waxed string and measure it against the folded edge of the signature papers. Measure as many lengths as you have signatures, plus one more for the front cover and one more for the back cover. So, if you have seven signatures, you’ll need to measure out nine lengths of string against the spines of the signature. Don’t cut each of the nine lengths—you’ll need to sew them in a continuous process, rather than start with a new length for each signature.
When you’ve finished measuring out the string, thread it onto your needle and tie it with a knot.
Step 3: Measure Out and Punch Holes in the Signatures
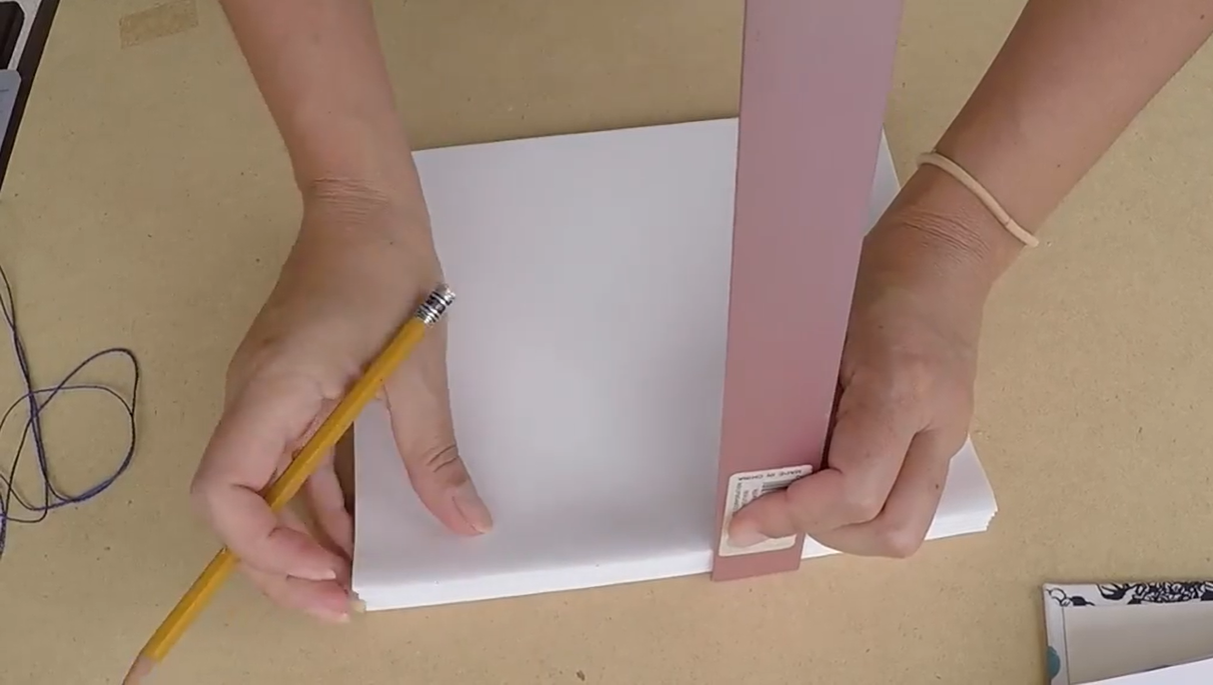
Decide how many holes you want along the spine of your notebook. The larger the book, the more holes you will need to keep the pages securely bound together. Using the ruler, measure out evenly spaced intervals for these holes along the spine of each signature, and mark with a pencil. Make sure the measurements are exactly the same on all your signatures.
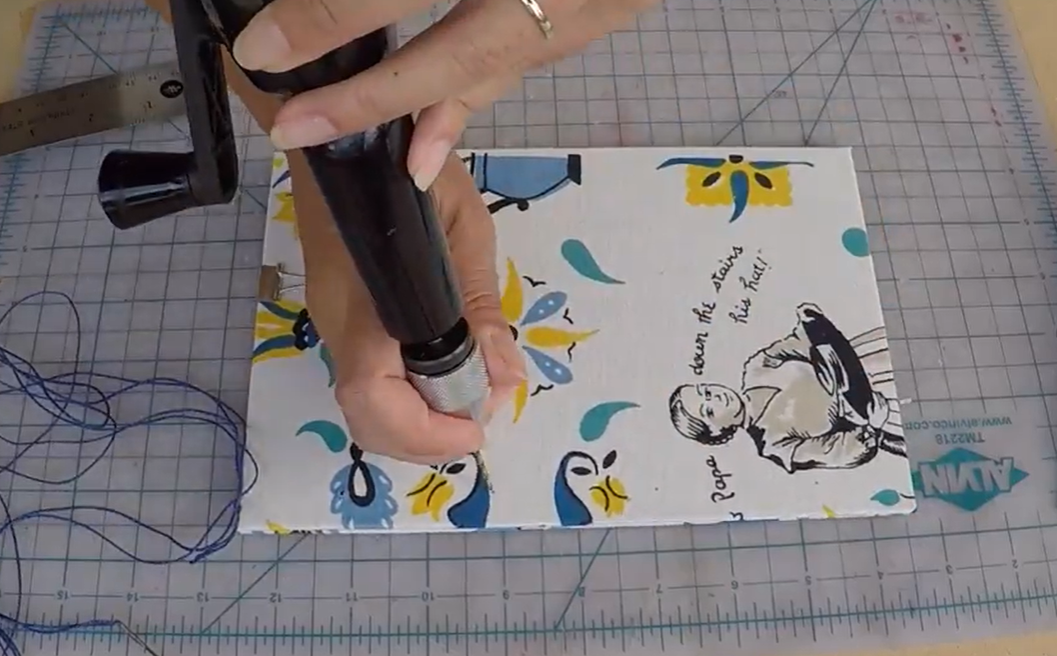
When you’ve done measuring, take each signature one at a time and lay it flat. Use an awl to pierce the paper and make holes in the places you’ve marked. Do this on top of your cutting pad so you don’t damage your table.

Step 4: Measure Out and Drill Holes in the Covers

Lie one of the signatures on top of the back or front cover of the book. Use the holes in the signature as a guideline for marking where the holes should be on the cover. Mark with pencil. Repeat the process for both covers.
Take out your hand drill and select a drill bit that is a little bit thicker than the needle you’ll be using for the Coptic stitching. Don’t drill a hole that’s too big or the stitches will move around and you won’t get a tight binding.
Step 5: Begin Stitching

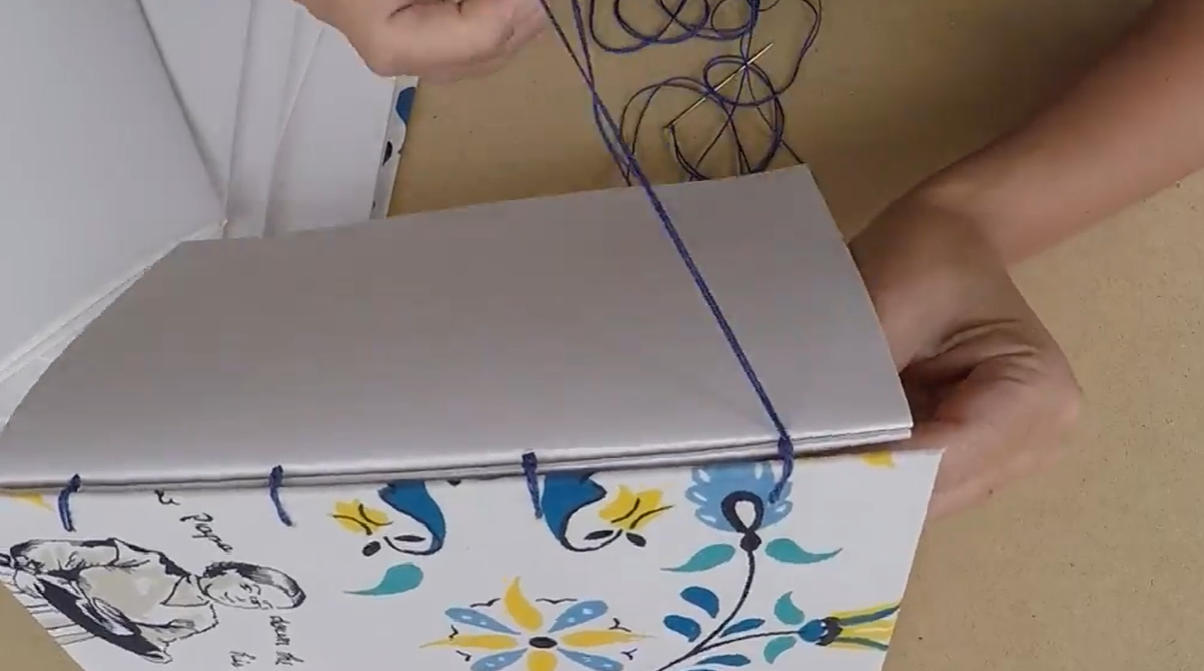
Now, take one signature and one cover. Thread the needle and string through the top hole of the signature, from the inside going out. When you’ve pulled the string through the first hole, take the front cover and insert the needle into the top hole, from the inside out. Then, sew back into the same hole in the signature, from the outside in. Pull the stitches firmly but not too tight. Repeat this process with the second and subsequent holes.
Once you’ve completed this process with the first signature, end with the needle and string inside the folded signature. Make a knot beside one of the holes, but don’t cut the string like you might with embroidery. Thread the needle back through the same hole, from the inside out.
Take the second signature and repeat the first step in the above process so that the second signature becomes attached to the first. When you get to the second hole, instead of taking the needle through the hole in the board, loop it between the string attaching the board and the first signature. This will create a knot. Then thread the needle through the outside hole of the second signature, threading the string inwards. Repeat this process.
When you get to the final hole in the second signature, instead of threading the needle back inside, take a third signature and repeat this whole process. However, instead of knotting the thread between the board cover and the first signature, knot it between the second signature and the third. Repeat this process with all of your remaining signatures and the back cover.

When you get to the end, secure the thread by knotting it onto the stitches inside the last signature and cutting it.
If this all seems a bit difficult to imagine, watching a Coptic binding tutorial (like Reyes’) can help. As with other crafts requiring intricate knots, like crocheting or knitting, the process of Coptic stitching is best learned visually. Seeing how the knots are formed will help bring these instructions to life!

Want to Learn More Stitches?
Bookbinding: Makea Japanese Stitch Album!
Try Skillshare for free! Sign up for a 7 day free trial today!
Get Started- Unlimited access to every class
- Supportive online creative community
- Learn offline with Skillshare's app


