

A Beginner’s Guide to Surface and Pattern Design
Learn surface pattern design—from creating repeating patterns to launching your creative career.


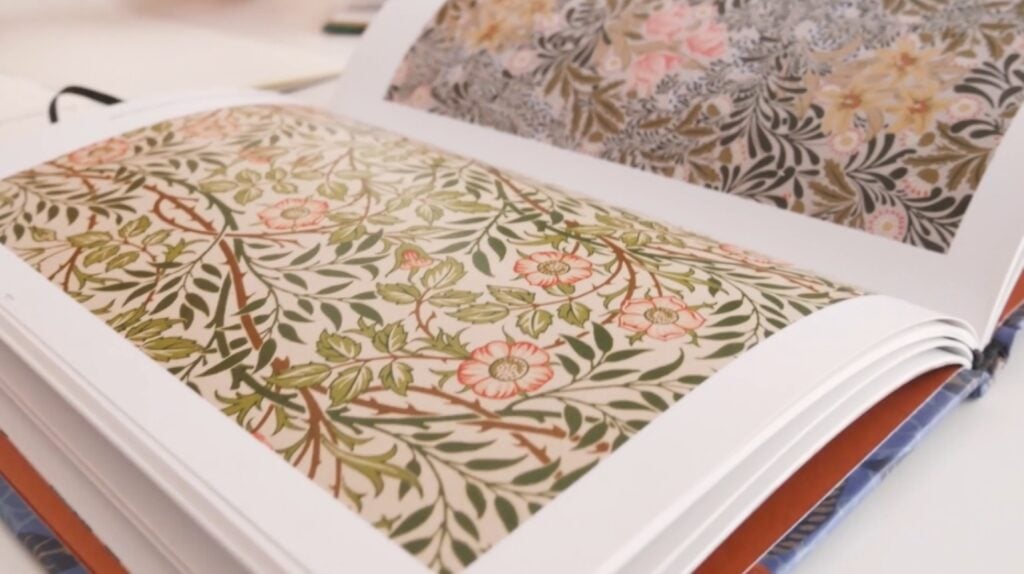
Surface design is the art of giving everyday objects their own visual personality. Think of a repeating floral motif on a coffee mug, a plaid pattern on a cozy flannel shirt or a geometric design decorating an office’s wallpaper. None of those designs sprang into existence on their own—instead, they began with a designer, an idea, and a set of tools to create a pattern or illustration meant to cover a flat surface. If you use the right tools and learn how to create your own patterns, that designer could be you.
Want to know how? Here’s a hint: It doesn’t necessarily start with a fine arts degree. Instead, you just need to understand what surface and pattern design is, discover the tools you have to choose from, and follow a step-by-step tutorial to turn rough sketches into a polished design. And if you’re interested in using your designs to build a career, we’ll cover that too, from licensing your work to launching your own print-on-demand shop.
What Is Surface and Pattern Design, Anyway?
Put simply, surface design is the art of creating visuals applied to a wide range of surfaces, transforming blank, utilitarian objects into decorated, visually engaging products.
You may have also heard of pattern design. Rather than being an entirely separate design discipline, pattern design is a subset of surface design that focuses on creating repeating motifs or arrangements that cover a surface.
As a result, all pattern design is surface design, but not all surface design is pattern design. For instance, a single, non-repeating illustration created for a T-shirt is surface design, but it isn't a pattern design. On the other hand, a repeating floral print created for fabric is both surface design and pattern design.
What Are Surface and Pattern Design Used For?
Surface and pattern design can be found almost anywhere and can be applied to virtually anything that can be printed on, woven, or otherwise decorated. They bridge the gap between two-dimensional art and three-dimensional products, and have a profound impact on the aesthetics of consumer goods.
Typical applications include:
- Home goods: Wallpapers, curtains, bedding, rugs, ceramic tiles and dinnerware.
- Fashion and accessories: Apparel, scarves, handbags and shoes.
- Textile design: Fabric that can be used for clothing, blankets, crafts and more.
- Stationery and paper goods: Greeting cards, wrapping paper, notebooks and stickers.
- Packaging: Product boxes, labels and bags.
- Digital: Website backgrounds, social media graphics and app icons.
Learning Design Without an Art Degree
In a word, yes. In a few more words, it’s absolutely possible for someone to learn surface or pattern design without being a professional artist.
While a background in fine art can be beneficial, the core skills for surface design are often more focused on digital tools (like Adobe Illustrator or Procreate), understanding repeat mechanics, using color theory and staying in touch with market trends—all of which are skills that can be learned through online courses, books and practice.
In fact, many successful surface designers come from backgrounds like graphic design, illustration or even completely unrelated fields.
Teacher Tip:
“I want you to know that you shouldn't be intimidated if you don't consider yourself a really established artist,” says Skillshare teacher Bonnie Christine. “In fact, a lot of surface pattern designers can't sketch at all.”
Tools of the Trade
A surface designer's toolkit is often a mix of traditional media (for initial sketching) and specialized digital software (for finalizing and repeating artwork).
Here are some of the most commonly used options:
Traditional Drawing Implements & Paper
Analog tools are typically used for the foundational stages of ideation, sketching and developing motifs. While digital tools can be used instead, you may find that the tactile nature of traditional tools jumpstarts your creativity.
And for complete beginners, sketching an idea with pencil and paper can be more familiar than with a stylus and tablet.
Some of the traditional drawing implements you could use include pencils, pens, watercolor paints, gouache, acrylics, pastels, charcoal and markers.
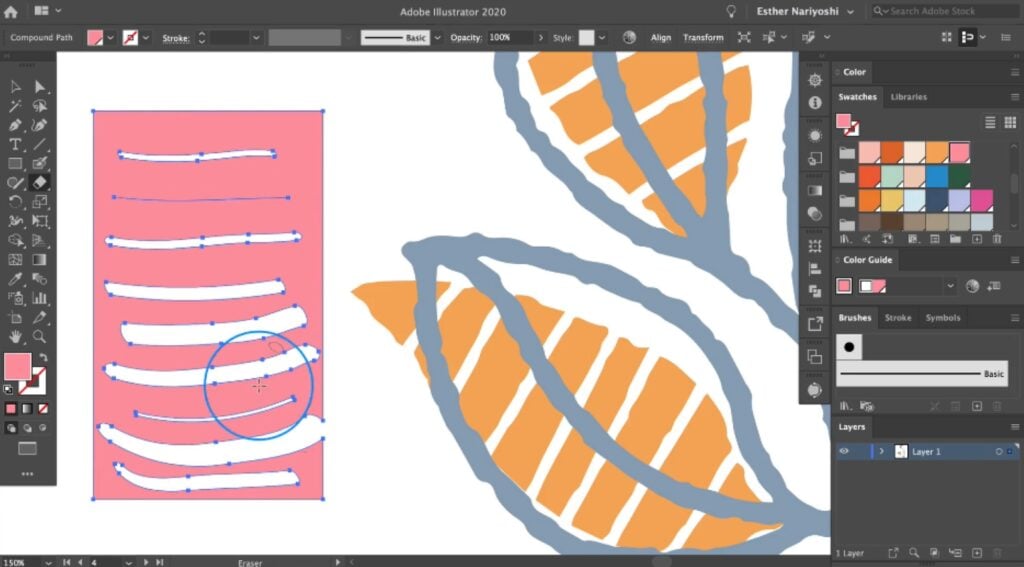
Adobe Illustrator
As the industry-standard vector graphics editor, Adobe Illustrator is a staple for countless surface designers.
Because it’s vector-based rather than raster-based, designs created in Illustrator can be resized infinitely without loss of quality, making it ideal for final production files, such as those intended for fabric printing or vinyl cutting. It also features a dedicated Pattern Tool that simplifies the process of creating repeating patterns.
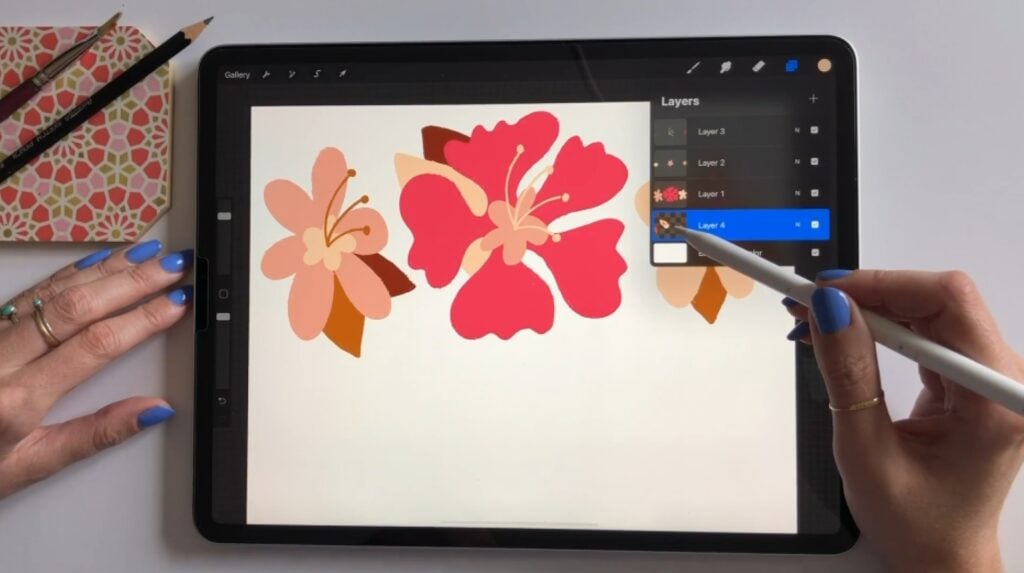
Procreate
A raster-based digital painting and illustration app for iPad, Procreate is wildly popular for its natural-feeling brushes and portability. Designers often use it to create textured artwork that retains an organic, artistic feel.
Since it uses pixel-based raster graphics rather than vector graphics, Procreate is ideal for giving elements a hand-drawn or hand-painted look.
Affinity Designer
Often used as a cost-effective, subscription-free alternative to Adobe software, Affinity Designer is a professional-grade vector and raster graphic design program.
One of Affinity Designer’s most unique features is its ability to combine both vector images and their raster counterparts in a single file. Overall, it’s excellent for creating precise vector artwork and offers robust tools for surface designers.
Adobe Photoshop
Another industry-standard program from Adobe, Photoshop is a raster-based image editor.
Despite its name, it can be used to edit and manipulate images of any kind, not just photos. For surface designers, that makes it ideal for creating organic-looking textures and elements with a hand-drawn feel.
While Illustrator is perfect for creating ultra-crisp designs, Photoshop is fantastic for designers whose style relies on detailed textures, shading and photographic elements.
Adobe Fresco
Like Procreate, Adobe Fresco is a drawing and painting application that’s designed specifically for the iPad (you can even use it on your iPhone, if you’re so inclined).
One of Fresco’s most well-known features is its "live brushes," which realistically simulate the effects of watercolor and oil paints. In surface design, it's perfect for creating initial digital artwork with a rich, traditional media feel before exporting elements to Illustrator or Photoshop, where they can be easily incorporated into a pattern.
Notion
While not a design tool itself, Notion is a popular productivity and organizational app that can be invaluable for the business and planning side of surface design.
Many different types of designers use Notion to organize their collections, track licensing agreements, manage production deadlines, maintain a calendar of market trends and catalog finished design files.
How to Learn Surface and Pattern Design
Feeling intimidated by all the professional software and technical terms? Don't be—every successful surface designer started exactly where you are now.
Even more reassuringly, the steps to transform a blank page into a finished design are surprisingly simple, and the first ones focus on creative exploration rather than technical mastery. Remember, you don't need to master every tool right off the bat; you just need to know the basic process.
All you need to do is pick the design software that sounds best to you (or use whichever one you already have) and get started.
Here are the practical steps you can take to create your first surface or pattern design:
1. Brainstorming: Sketch Your Initial Ideas
This is the most crucial step, but it’s also the lowest-pressure. Here, you don't worry about perfection, color or repeats. Your only goal is to let your ideas flow.
- On paper: Using a simple pencil and sketchbook, draw plants, animals, buildings, people, geometric shapes or even blobs—anything that inspires you and gets your pencil moving. Focus on the raw form and outline of the motifs (i.e., individual design elements) you want to use.
- On a screen: If you prefer, you can use an app like Procreate or Adobe Fresco instead of traditional drawing tools. Select basic brushes to quickly doodle and experiment with shapes, textures and themes.
2. Selection: Choose and Prep Your Favorite Elements
Review your sketches and choose the elements you like the best. These will become the building blocks of your design.
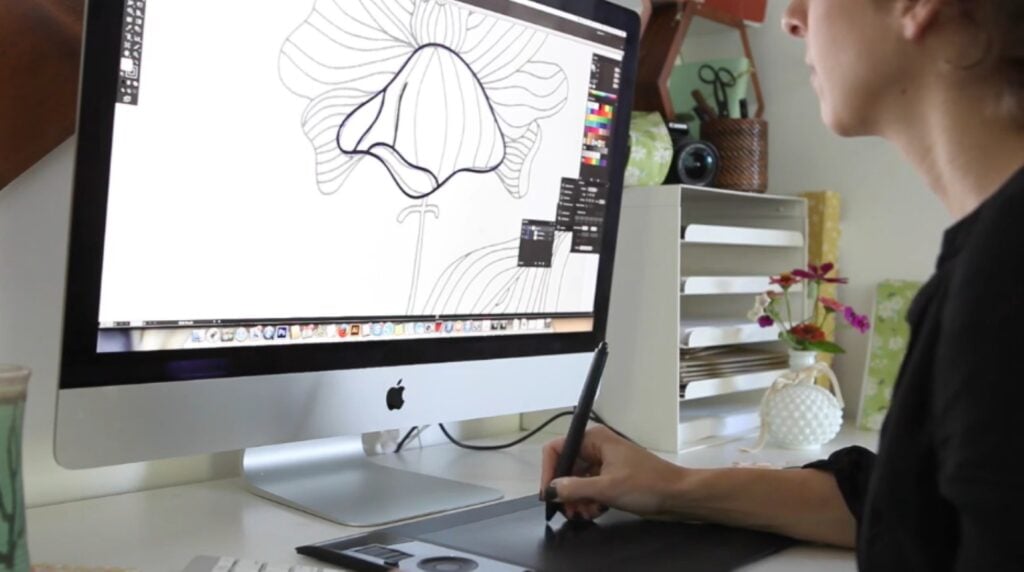
- Refine: If you started on paper, you will need to digitize your chosen motifs. You can do this by scanning them or simply taking a high-quality photo of your work and importing that photo into your chosen software.
- Clean-up: Import the elements into your design software, such as Illustrator or Procreate. If it’s vector-based, you may want to trace or redraw your scanned sketches to create clean, scalable vector shapes. If it’s raster-based, ensure the resolution is high enough for your liking and clean up any stray marks.
3. Placement: Arrange Your Elements Into a Rough Layout
Now, you can begin organizing your elements into a cohesive composition (or at least, the start of one).
- Consider layout: Think about the flow you want your design to have. Will it be a dense, packed arrangement? Or will it be sparse and airy instead? To find out, simply drag and drop your motifs onto the canvas and start playing with their placement.
- For repeating patterns: If you are designing a seamless pattern, this is where you’ll ensure that your elements are placed correctly on all four edges of the design tile. You’ll need to arrange them so that any motif that leaves the left side of the tile appears again on the right side, and likewise for the top and bottom.
4. Refinement: Add Detail and Polish to Each Element
Once the basic placement feels right, zoom in on the individual motifs and give each one a little TLC.
- Add color: Apply your chosen color palette to each element. Experiment with different combinations and find the ones that speak to you.
- Add texture and shading: Use brushes, effects or raster techniques (if applicable) to give your motifs depth, texture or a signature hand-drawn look.
- Consistency: Ensure that the style and level of detail are consistent across all the elements in your design.
5. Review: Tweak the Elements’ Arrangement as Needed
Step back and look at the design as a whole. Don’t worry if you’re not totally satisfied—even experienced designers will rarely get a perfect layout on the first try.
- Fill the gaps: Look for any awkward "holes" or empty spaces that disrupt the flow. Adjust the scale, rotate and slightly move elements to fill these voids, ensuring a balanced look.
- Check the repeat: If you are creating a repeating pattern, now is the time to generate the full repeat (often using Illustrator's Pattern Tool) and ensure the seams are invisible and the overall rhythm is pleasing to the eye.
6. Finalization: Export Your Design
Once you’re happy with your design (remember, you don’t need to strive for perfection with your first try), it’s time to export it. This will let you save your design as a shareable file.
- Choose a file format: Save your final file in a format suitable for its intended use. This is typically a high-resolution JPEG, PNG (if transparency is needed) or a TIFF for print manufacturers. In most cases, a Dots per Inch (DPI) setting of 300 will be ideal.
- Save the repeat: If your pattern is a repeating one, make sure to only save only the single, perfectly repeating tile. This tile is the only file you (or the manufacturer) will need for printing.
Create a Better Workflow
Once you’re comfortable with the basic design process, you can start thinking about efficiency. By using smart techniques for color, digitization and repeat pattern mechanics, you can spend less time fiddling with software and more time drawing.
Here’s how.
Choose Cohesive Color Palettes
The right color palette creates visual harmony and cohesion. Use these tips to build palettes that are appealing and commercially viable:
- Follow the 60-30-10 rule: In both digital and interior design, this rule recommends allocating 60 percent of the visual space to a dominant or main color, 30 percent to a secondary color and 10 percent to a high-contrast accent color. You don’t have to follow the rule precisely, but by keeping it in mind, you can prevent your designs and color schemes from looking too chaotic.
- Take inspiration from the real world: Use your phone to photograph color combinations you love in nature, architecture or fashion—whatever gets your creative juices flowing. Then, use your chosen software’s eyedropper tool to pull the exact Hex codes from those photos to create your palette.
- Use color psychology: Consider the vibe you want to convey when choosing your color palette. In color psychology, for example, cool colors like blues and greens tend to evoke calmness, while warm colors like reds, yellows and oranges typically convey energy and passion.
- Pre-load your swatch libraries: Before you start coloring your motifs, add your final handful of colors to your software's swatch panel. By limiting yourself to a predetermined set, you can save time and maintain cohesion more easily. And if you change your mind mid-way through the project, you can always swap out a color for another option.
Teacher Tip:
“As a general rule, limited color palettes do much better,” according to Skillshare teacher and successful commercial surface designer Cat Coquillette. “So when in doubt, pare down those colors.”
Digitize Your Artwork in a Snap
If you start your design with traditional drawing or painting tools, digitizing your art can be time-consuming. Whether you’re scanning or photographing, streamline it with these techniques:
- Prioritize even lighting: If you’re photographing your work rather than scanning it, try to take photos in bright, indirect daylight. Lay your artwork flat on a smooth surface and shoot directly from above to reduce shadows, lens distortion, and color casts.
- Adjust brightness and contrast: After uploading a photo or scan of your work, tweak the brightness and contrast in your preferred software to make your blacks darker and your whites brighter. This will help to clarify your lines and eliminate confusion.
- Work in black and white first: If you’re a beginner, try drawing your motifs in high-contrast black ink before scanning or photographing them. This will make it much easier to scan, clean up and remove the background from your design.
Create Seamless Repeats Like a Pro
Making a perfectly repeating pattern is often considered the most technical part of pattern design. But with the right tricks, it doesn’t have to be difficult.
- Leverage native pattern tools: Apps like Adobe Illustrator include dedicated pattern tools that automatically generate a repeating preview and simplify aligning elements across tile boundaries.
- Use small tiles: If you’re feeling overwhelmed, try using a smaller tile size. It’s easier to focus on creating a repeat in a small area than it is in a massive one.
- Check the corners: Since they need to repeat perfectly on four adjoining sides, elements placed near the corners of your tile require special attention.
Use Your Designs to Build a Career
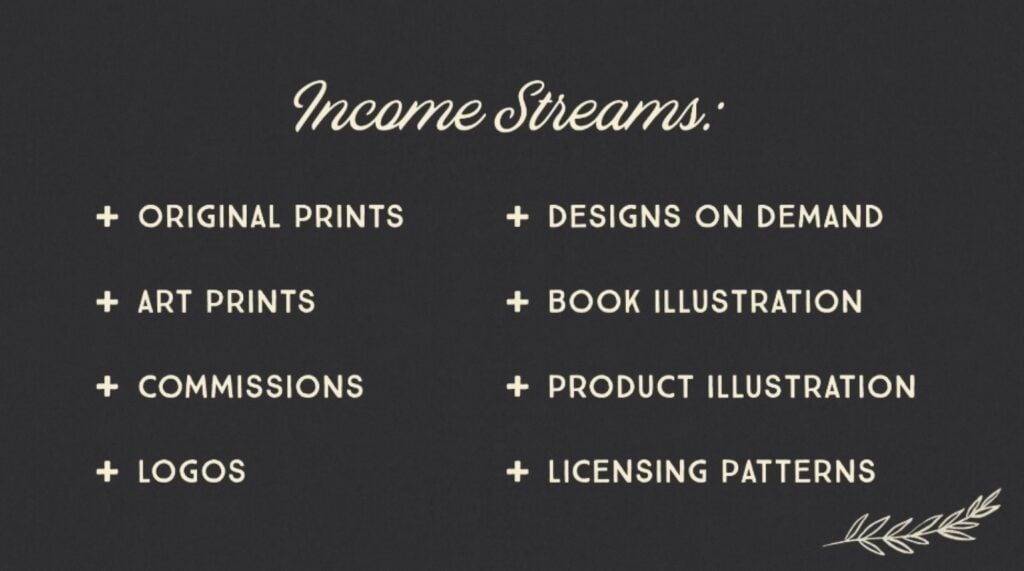
Surface and pattern design can be a wonderful creative hobby, but it also has the potential to be a versatile and scalable career path. Your unique designs can become a source of income ranging from a manageable side hustle to a lucrative full-time career as a surface designer.
The key to success is understanding all the different business models you can choose from, and being aware of the unique traits of each one.
| Business model | How it works | Ownership and payment | Stability |
| Licensing | You "rent" your existing designs to a company (e.g., a stationery brand) for a specific product, time period and geographic region. | You retain the copyright. You are paid either a flat fee or a percentage of sales (i.e., royalties). | Varies based on luck (will the right company find your designs?) and appeal (do your designs stand out from the crowd?). Can become a source of passive income. |
| Freelancing | You’re hired to create custom artwork based on a client's project brief or mood board (in other words, a commission). | Ownership is often transferred to the client. Or, depending on the contract, exclusive usage rights may be negotiated. You’ll be paid an hourly or flat rate. | If you can land clients, freelancing can provide stable short-term income. However, you’ll need to constantly be pitching ideas and seeking out new clients. |
| Print-on-demand (POD) | You upload your designs to platforms like Society6 or Spoonflower, and customers can buy products with your designs on them. The platform you chose will handle the manufacturing, printing, shipping and customer service. | You retain the copyright. You earn a small percentage of each product sale. | Low barrier to entry, low overhead and the potential for passive income. While earning supplemental income is very feasible, only a small number of designers are able to earn a full-time income through POD. |
| In-house design | You’re a salaried employee working directly for one company (for instance, a home goods retailer, a fashion label or a wallpaper manufacturer). | The company owns all the work you create during your employment. You are paid a consistent salary with benefits. | Very stable and reliable, but you’ll need to adhere to a corporate schedule and style guide. |
So how can you actually start getting paid for your designs? Let’s break it down into six straightforward steps.
- Develop your signature style: Before pitching, create a cohesive body of work that demonstrates a unique, recognizable aesthetic. After all, clients will likely be convinced by your overall style, not just a single pattern. Experiment with themes, color palettes and mark-making until your work feels true to you.
- Master the mockup: Learn to present your digital designs on professional mockups, such as by showing how they’d look on a throw pillow or a phone case. This will help buyers visualize the final product.
- Build a professional portfolio: Organize your best designs into a clean and polished portfolio. Group designs into small collections of coordinating prints to demonstrate your ability to design for a line of products.
- Create a list of target clients: Identify companies whose brand aesthetic perfectly aligns with your style. Then, research their product lines and the type of art they currently use. This research will pave the way for successful licensing pitches later on.
- Start with print-on-demand: Use POD platforms like Spoonflower as your low-risk test market. There, you can get a feel for which of your designs are the most well-received, and even start earning your first bits of passive income.
- Network and pitch: If you’re aiming to secure licensing deals, start reaching out to your target companies directly by sending them your portfolio. If you’re looking to freelance or become an in-house designer, begin applying to job listings on reputable platforms. Don’t be discouraged by a few rejections—it’s normal to apply for plenty of surface design projects and positions before finding one that’s a good fit.
Bring Your Style to the Surface
If there was ever an art form that we interact with on a daily basis, it’s surface design. From shower curtains and coffee mugs to fashion and accessories, examples of surface design are everywhere. And even if you were a complete beginner up to this point, you have a foundational understanding of how it works from start to finish.
Whether you want to pursue surface design as a hobby or a career, by tackling the technical steps of aligning seamless repeats and preparing files for print, you can focus on the most enjoyable part: developing your unique artistic voice. In the words of Skillshare teacher and surface design superstar Bonnie Christine, “the world needs your artwork,” and “there’s room for you.”
Related Reading
Carrie Buchholz
Carrie Buchholz is a freelance writer who lives in Northern Colorado with her husband and dog.
Try Skillshare for free! Sign up for a 7 day free trial today!
Get Started- Unlimited access to every class
- Supportive online creative community
- Learn offline with Skillshare's app


