

10 Sketching Tips for Character Design
Take your character designs to the next level, with tips from applying s-curves and c-curves to developing the anatomy of your character.
Table of Contents
- 1. Use references.
- 2. Start loose.
- 3. Use simple shapes.
- 4. Apply S-curves and C-curves.
- 5. Use as few lines as possible.
- 6. Don’t be afraid to exaggerate.
- 7. Check anatomy with a skeleton sketch.
- 8. Pay attention to the eyes.
- 9. Remember: Your character is only as good as its silhouette.
- 10. Get a grip…on your pencil.
- Bonus pro tip: Flip your sketch.
- Start sketching!


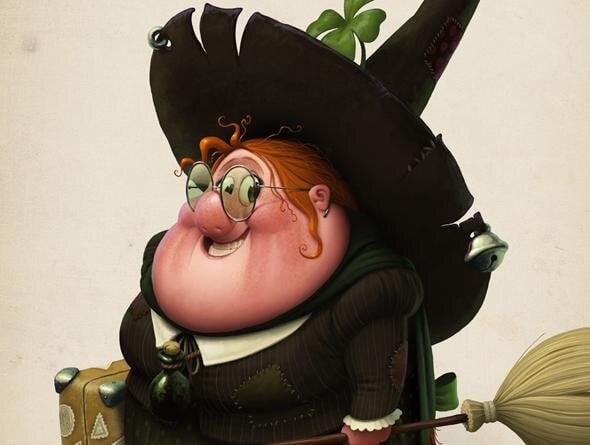
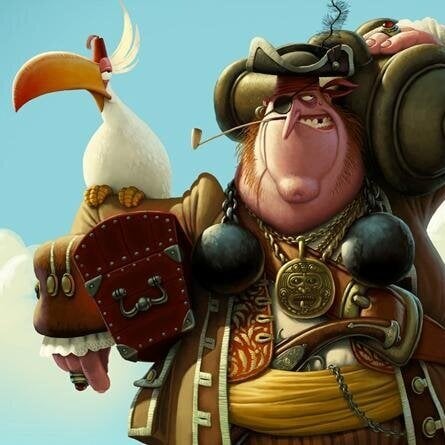
Designing a character is a process of experimentation. Your illustrations will come to life through messy pencil strokes, trial and error, and many practice drawings. Sketching is the exercise by which characters grow from ideas into beings with personality and the promise of action. As you learn how to draw a polished character, consider the following tips, exercises, and techniques.
It starts with thumbnailing and rough sketching. Learn how Skillshare Originals teacher Jazza gets started with his iconic character designs.
1. Use references.
Even the most experienced designers look at reference images before they begin to sketch. This can include anything from the results of a Google image search to a picture of a character from your favorite animated film. Whatever you choose as a starting point, reference images can both inspire you and keep you on track.
Imagine you’re tasked with designing a fictional creature that’s furry and large. You might want to start by searching online for a real animal that fits that description—in this case, a bear. Though you’re not setting out to draw a bear, the images you find will show you how to emulate its large, furry appearance to create something entirely fictional.
Other times, you may admire the work of a specific illustrator and want to emulate their style in a new character sketch. If that’s the case, you can use that artist’s work as a reference point—just make sure you’re using it for inspiration, not a duplication.
2. Start loose.
After you’ve looked at your reference images, it’s time to wade in slowly. Instead of getting right to a painstakingly detailed sketch of your character, loosen up. Concept artist and illustrator Sarita Kolhatkar recommends drawing circles to warm up. That way, she says, you’ll get all of your “bad circles” out of the way before you set out to create your final sketch.
Never aim for perfection too early in the character design process. Let your pencil lead the way and allow the results to surprise you. To make sure you’re sticking to your original concept, try writing notes that describe your character at the top of the page. Guidelines like “smart boy, age 10,” or “playful mouse, smiling” will keep you on track as you follow your pencil’s movements.
3. Use simple shapes.
Circles and ovals often serve as the foundation of character sketches. You may want to avoid drawing details this early on in the sketching process, so starting with simple shapes will force you to keep your design basic. A big oval can make up a torso, while elongated ovals can come together to form limbs. Use a square to delineate a hat, or draw a triangle to depict a certain haircut.

Try working off of three or four circles simultaneously. Leave some space between them so you can tack on additional shapes to form appendages, and build up a few different characters next to one another. Having direct comparisons at your disposal, as well as the ability to move quickly back and forth between sketches, will make for a more fluid design process. You can quickly realize and build on your favorite designs, seeing what works and what doesn’t before you get too invested in a particular design.
How to Design Cartoon Characters
Review the fundamentals of character design—or learn them for the first time.
4. Apply S-curves and C-curves.
Your character can’t remain a collection of shapes forever. Eventually, you’ll want to join those shapes to form a single, cohesive being. That’s where S-curves and C-curves come in.
S- and C-curves are two basic strokes most character designers use throughout their work, and they can make up any body part. The two sides of a face can be described as two opposite-facing, adjoining C’s. Each foot is a mildly curved C, and wavy hair is just a bunch of S-curves tumbling down beside the C-curves of a face.
Picture your sketch in the form of shapes. To bring those shapes together, you’ll need to draw connecting lines. Drawing only straight lines will make your character appear rigid like a robot. If your character is a robot, that works. But if your character is meant to resemble a breathing product of nature, then it should be made up of curves.
Translating your design from shapes into simple, curved lines will continue to keep you from rushing into details. It’s not quite time to embellish your character, and focusing on S- and C-curves will make you stick to designing its form—your primary concern during the early sketching phase.
But that doesn’t mean that S- and C-curves don’t play into the detailing stage. Once you learn how to break down shapes into these basic curves, you’ll be able to apply them to complicated structures, from irregular strands of hair to the flourishes on your character’s sneakers.
5. Use as few lines as possible.
A little bit goes a long way when it comes to showing characters’ emotions. One of the most important drawing lessons for beginning designers to learn is never to use two lines where you can just as easily use one.
Consider a mouth. With just a single line, you can make that mouth easily display anger, joy, fear, or disgust. And upward C-curve says joy, a series of connected S-curves can be read as anxiety, and, of course, a downward-facing C makes a frown. You don’t need flourishes to depict emotion. Excessive detail is more likely to distract from your character’s essence than it is to enhance it.
Certain styles call for more intricate details, but as you learned in the S- and C-curves section, all details can be broken down into simple curves. You can construct even the most detailed mouth using just an S-curve and a few C-curves and letting shading do the rest.
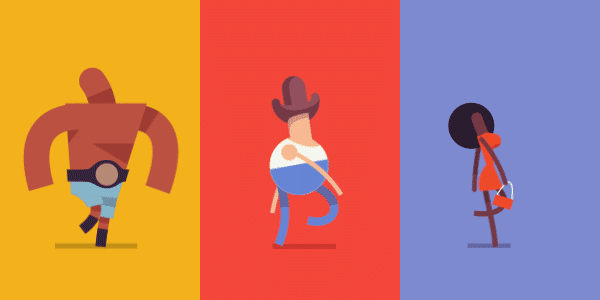
6. Don’t be afraid to exaggerate.
Exaggerating isn’t the same as decorating. Over-decorating a character bogs it down with unnecessary detail and takes away from its personality. Exaggerating can help bring out that personality.

A simple way to make your character more expressive is to make its large features larger and its smaller features smaller. Make a small ear a little tinier, and expand a broad smile to make it even wider. Spread fingers out for a more expressive silhouette—a concept we’ll expand upon later—and make accessories gaudier.
Think of the characters that you’re creating as part of a show. Actors in stage productions exaggerate their behaviors, speak louder, and wear over-the-top costumes because they’re creating a spectacle. They also have to play to audience members that are sitting rows away or even balconies above them: Those viewers have to be able to hear lines and see stage directions from afar, so there’s no room for subtlety. A show forces us to examine our everyday behaviors by exaggerating them. Apply this principle to your character, and you’ll have a design that captivates viewers the way skilled actors captivate their audiences.

The Fundamentals of Manga
Learn to draw manga characters and optimize them for print or digital distribution with illustrator Camilla D'Errico.
7. Check anatomy with a skeleton sketch.
Your character may be an imaginary creature, but to feel lifelike, it still needs to adhere to its world’s set of physical rules. Fostering believability in your character’s universe draws people into its story. If everyone else in the character’s world has long legs and a proportional torso, people will scratch their heads if your top-heavy, stubby-legged character moves at the same speed as their long-legged counterparts. This takes them out of the story and into a separate plane from which they’ll critique its design.
A character’s proportions don’t have to look like yours or mine, but they should be able to form a skeleton that fits together. You can test this by simply drawing a skeleton over your sketch, using tracing paper, or, if you’re using a design program like Adobe Illustrator, drawing it in a separate layer.
“I do this quite a lot frankly, especially when my character is placed within some complex pose with a lot of intersecting objects and shapes,” says cartoonist Denis Zilber, the instructor behind Skillshare Original Introduction To Cartoon Character Design. It doesn’t have to be complicated—just draw a general outline of what a human skeleton should look like. “I just want to make sure that all the limbs and joints are placed correctly within three-dimensional space.” In doing so, you may find that the way you crossed your characters legs actually made one a lot shorter than the other, and you can remedy this by extending the short leg to match the skeleton’s proportions.
Drawing anatomy takes a lot of skill, so let's learn from the pros. Skillshare Originals teacher Jazza gives his finger drawing tips in this helpful tutorial.
8. Pay attention to the eyes.
Our eyes can reveal our moods, our innermost desires, and our oddest personality quirks. Artfully positioning your characters’ eyes and eyebrows is a minimalist way to create maximum emotion. Upward-tilting eyebrows show inquisitiveness, while downward-facing eyebrows show anger. Wide eyes can easily communicate surprise or fear, and narrowed eyes show suspicion. Some designers, like monster-loving artist Motomichi Nakamura, even start their sketches with the eyes, letting them set the tone for the entire character.
Even just two dots for eyes can create a wide array of expressions. You don’t have to use a lot of detail to make communicative eyes—you just need to think carefully about this part of the face, because your characters’ eyes will do as much talking as their mouths.

Add Personality to Your Facial Expressions
Create expressive, lifelike characters with tips from comic artist Gabriel Picolo.
9. Remember: Your character is only as good as its silhouette.
If you shade your character completely in black, it should still read as your character. Its default pose to be dynamic enough that the position of its limbs, the contours of its face, and its various accessories stick out, even when they’re shrouded in shadows.
You can check that your character has an effective silhouette by outlining it on tracing paper and then completely shading it in. If it looks like a blob, you need to make a more dynamic silhouette. This can mean positioning limbs that are spread apart, adding accessories that sit at an angle from the body, and defining facial features.
10. Get a grip…on your pencil.
There are plenty of drawing techniques that can improve the way you create characters. But we’ll start with the most basic: how to hold your pencil.
Holding your pencil closer to the tip with a tight grip will make for controlled, darker lines. This is good for adding shading and details further on in the sketching process. For looser lines and practice sketches, hold your pencil closer to the eraser and let your hand relax. Changing your grip as you draw will help you vary your lines between light and dark, thin and thick, straight and wavy. No creature has a perfectly uniform appearance, so even the smallest variations in your lines and drawings will help bring your character to life.
Bonus pro tip: Flip your sketch.
As you’re drawing, remember to periodically look at the mirror image of your character sketch. In programs like Illustrator, you can flip your image with a single command. By hand, you can sketch on tracing paper to easily turn your sketch over and see its mirror image. This exercise will allow you to see your character from a fresh perspective, which can be especially helpful if you’ve been staring at the same drawing for hours on end. An awkward stance may start to look natural when you’ve been working on it for a long time—until you see it from a whole new perspective. If you don’t have tracing paper on hand, you can also hold your character up to a mirror for the same effect.

The Basics of Character Animation
Learn how to design a character in Adobe Illustrator and add motion using After Effects.
Start sketching!
From finding a reference image to designing a dynamic silhouette, the tools and tips you need to get sketching are all at your fingertips. For more assistance in your character design journey, consider enrolling in a course, whether it’s an introduction to cartooning or a crash course in simple animation. Whatever you choose, remember that effective character design boils down to the ability to relax and have fun. Loosen up, keep it simple, and let your pencil be your guide. The more you practice, the more efficiently you’ll be able to put your ideas on paper.
Try Skillshare for free! Sign up for a 7 day free trial today!
Get Started- Unlimited access to every class
- Supportive online creative community
- Learn offline with Skillshare's app


