

10 Blender Projects for Beginners
Explore beginner-friendly Blender project ideas to build your 3D design skills and portfolio with simple creative projects and step-by-step guides.
Table of Contents


Thinking about trying your hand at 3D modeling? Blender should absolutely be your first stop. It’s a powerful software used by both hobbyists and professionals for 3D modeling, sculpting, animation and much more. Best of all, it’s open-source and completely free, so there’s no excuse not to download it and give it a go.
Once you’re inside Blender, one of the best ways to learn the software and develop practical skills is to dive straight into beginner-friendly projects. By following tutorials from trusted experts and completing fun 3D projects step-by-step, you’ll not only learn to use Blender but also gain valuable experience and start building your creative portfolio.
To help you get started, we’re sharing 10 Blender projects that are perfect for beginners. Even if you’re just opening up Blender for the very first time, you should be able to follow along and start learning. By completing some (or all!) of these tutorials, you’ll gain valuable skills, such as:
- Basic 3D modeling using primitive shapes and modifiers
- Texturing and material application to make your models look more realistic
- Lighting and rendering techniques to bring your scenes to life
- Blender animation basics like keyframing and timeline editing
Ready to become a Blender pro? Let’s dive in!
1. Toy Train
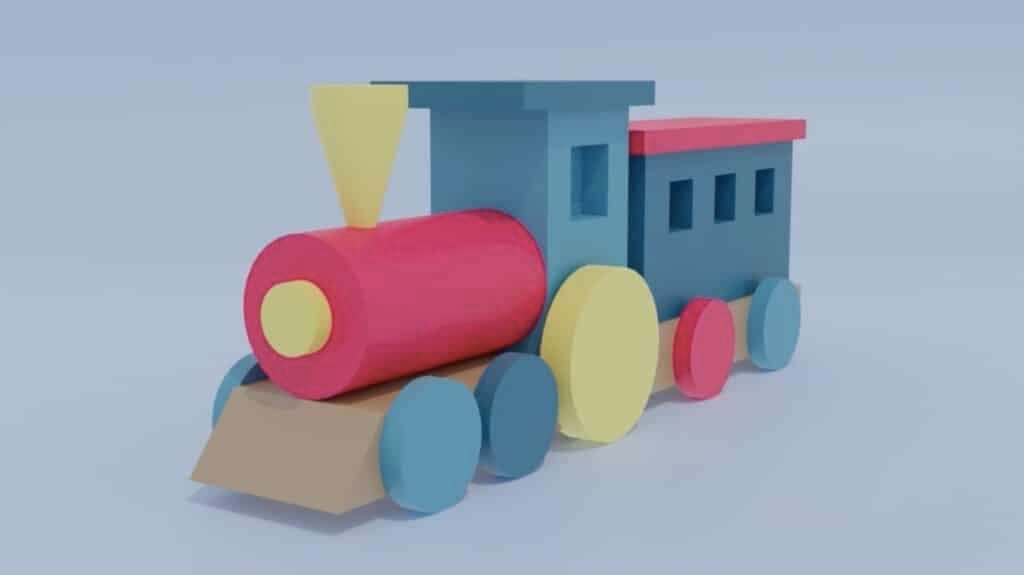
In this tutorial, you’ll use simple shapes and basic techniques to create a 3D model of a toy train. You’ll primarily work with primitive shapes like cubes and cylinders, making this the perfect first project to try in Blender.
You’ll start by using a cube for the train’s base and scaling it on the y-axis and z-axis. You’ll also need to modify the front edges to give the base a more diagonal front. Next, you’ll add a cylinder for the train’s body, rotating it on the x-axis to position it on top of the base.
You’ll continue to use cubes to create the train’s main cabin, wagon, and roof, adjusting their dimensions to create the desired shapes. To craft the smokestack, you’ll start with a cone, flatten the top, narrow down the bottom and invert it. Lastly, you’ll extrude the top faces outward to refine its shape.
For the wheels, you’ll create cylinders, then rotate and flatten them. Once you position the wheels close to the base, you can then duplicate them for the opposite side. To add windows to either side of the main cabin, you’ll use the Inset tool to create new faces, then extrude them inward. For the wagon’s windows, however, you’ll be adding more than one window to each side, so the Inset tool won’t work, and you’ll use Loop cuts instead.
Once the model is complete, you’ll apply materials to add color. Next, you’ll set up lighting, create a surface for the train to rest on and add a light blue background. Lastly, you’ll learn how to add a camera and render your scene.
Take the class: Introduction to Blender 3D: Complete beginner’s guide to 3D modeling
2. Simple Bird on an Inscribed Base
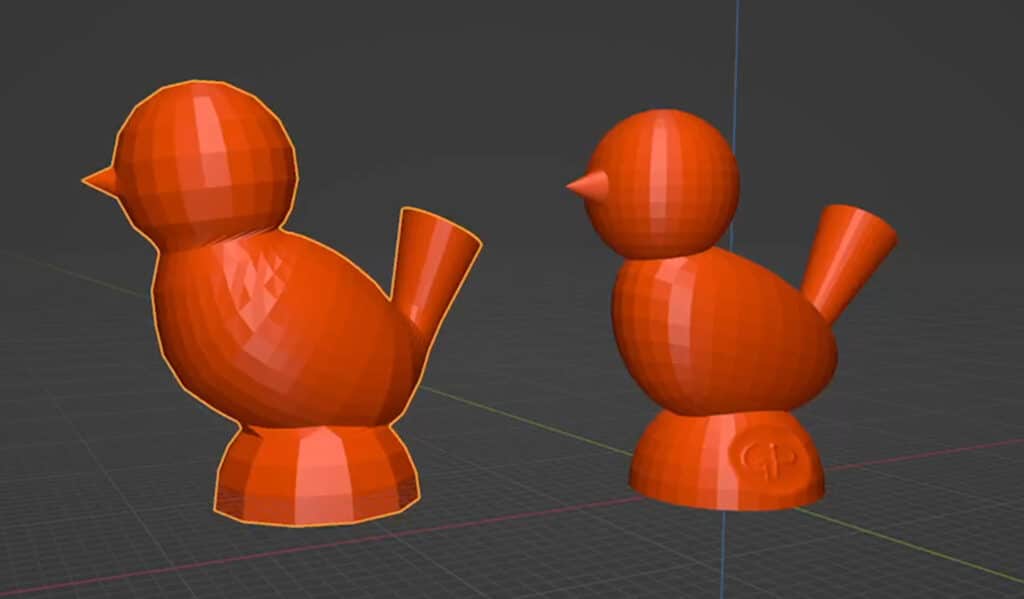
In this tutorial, you’ll work on creating a simple, low-poly bird model. This project is designed to get you used to the idea of breaking down complex forms into basic geometric shapes like spheres, cubes and cones.
You’ll start by using a UV sphere to form the base on which the bird will perch. You’ll remove the lower half of the sphere and extrude the edges to close the shape. For the bird’s body, you’ll start with a cube and then shape it into a more rounded form using the Subdivision surface modifier. You’ll adjust the body by scaling and moving edges to refine it.
The head of the bird will be another simple UV sphere. Cones can be used to create both the beak and the tail, and you’ll learn how to precisely position them using snapping tools.
Later, you’ll use sculpting tools to add custom details, like inscribing your name on the base. The tutorial also introduces Dyntopo (Dynamic Topology) and multi-resolution modifiers, allowing you to add finer details while keeping the low-poly look.
The final step will be to combine all parts into a single mesh using Boolean modifiers. If you’re interested in 3D printing, this tutorial will also show you how to prepare and export the model for printing.
Take the class: Learn Blender - 3D Design for Absolute Beginners
3. Shelf with Two Pots

In this Blender tutorial, you’ll create a simple shelf with two pots. This project is perfect for anyone interested in creating 3D renderings of their interior design or architecture ideas. The skills covered here, like modeling, lighting and rendering, lay the groundwork for designing realistic spaces and decor items.
You’ll begin by turning Blender’s default cube into a wall. Then, you'll duplicate and transform objects to create shelves.
Next, you’ll add cylinder objects to create pots. Entering edit mode, you’ll refine their shapes by manipulating vertices and faces. To make them look realistic, you’ll use modifiers like Solidify to adjust thickness and Bevel to create smooth edges. The Subdivision surface modifier will help you smooth surfaces to give your pots a clean, polished look.
Lighting plays a key role in making spaces feel realistic, and Blender’s Sky texture is a great tool for depicting natural sunlight. You’ll learn how to adjust shadow intensity and light direction—key skills for anyone working with interior renders. For materials, you’ll explore options like changing color and roughness to create different textures, adding depth and realism to your scene.
Take the class: 3D Modeling In Blender: Design Your First 3D Object
4. Realistic Wooden Chair
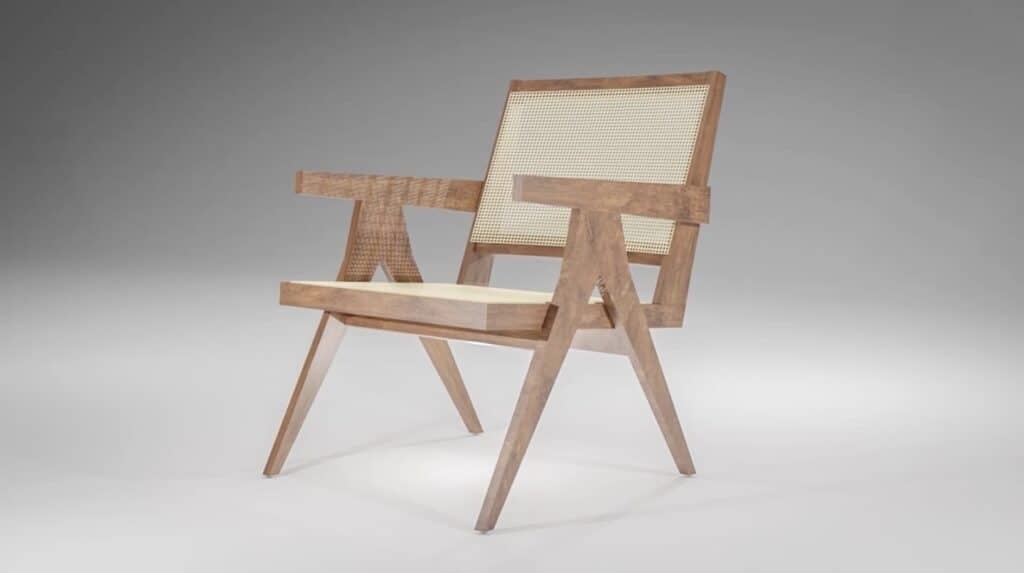
This is another beginner tutorial perfect for those interested in using Blender for rendering interiors and home decor. And even if that’s not you, this project is still worth trying. By building this stunning wooden chair, you’ll get lots of practice transforming simple geometric shapes and combining them into a realistic 3D model.
You’ll begin by setting up reference images of a wooden chair from multiple angles. This will help guide your modeling.
You’ll use simple cubes and shape them into the chair’s seat, backrest, legs and armrests. Once you’ve created a pair of legs and an armrest on one side, you can use the Mirror modifier to duplicate them to the other side. Using Loop cuts and Proportional editing, you’ll add a slight curve to the backrest.
To create the mesh that stretches across the chair’s backrest, you’ll start by adding a new plane, then scaling it and positioning it onto the backrest. Don’t forget to curve it like you did with the backrest frame. Using Loop cuts, you’ll subdivide the plane into a grid of squares, then apply the Wireframe modifier to turn it into a mesh. You’ll repeat these same steps to create the mesh for the chair’s seat.
To simulate the look of Japanese joinery (without any screws or nails), you’ll use the Boolean modifier to create joint cuts in places where wooden planks are joined together.
Next, you’ll import a pre-downloaded wood grain texture and apply it to your model, utilizing UV unwrapping to ensure a perfect fit. You’ll also add a light beige color to the seat and backrest meshes.
Finally, you’ll set up lighting to highlight your chair’s design, adjust your camera position and render your image using the Cycles engine for a polished finish.
Take the class: Blender Modeling for Beginners - Model a Realistic 3D Wooden Chair in Blender Step-by-Step
5. Low-Poly Sword

In this tutorial, you’ll create a low-poly fantasy sword, along with a simple scene that includes a large rock, bits of grass and a campfire.
To model the blade of the sword, you’ll add a new cube with specific dimensions. You’ll shape this cube into a blade by moving vertices, adjusting the width and beveling to create more detail. From there, you’ll model the hilt by adding another cube for the guard and a cylinder for the grip.
Next, you’ll create a small scene to surround the sword. First, you’ll add an icosphere and edit it slightly to give it a rugged rock shape. This will be the rock that the sword will lean on. You can then duplicate this rock and scale it down, creating a number of smaller rocks to form a campfire. You’ll also model a blade of grass, duplicate it to form a clump and then scatter a few of these grass clumps around your scene. For a realistic touch, you’ll add a ground plane.
Once your scene is complete, you’ll move on to texturing, assigning materials to the sword, rocks and grass. Next, you’ll set up a camera and adjust its depth of field, so you can control which elements appear in and out of focus. Finally, you’ll set up lighting, adding a warm light that comes from the campfire, as well as a spotlight that simulates moonlight, before rendering the final image.
Take the class: Blender 3D for Beginners: Model a Low-poly Sword and Environment
6. Bunny In the Rain

In this Blender tutorial, you'll build a fun 3D scene featuring a stylish bunny, walking under a rain cloud and holding an umbrella. This step-by-step project is ideal for beginners and walks you through essential skills such as adding objects, using modifiers and applying materials.
The head, eyes and pupils of the bunny are made from UV spheres. The ears, teeth, nose and whiskers start out as cubes, which are then scaled and shaped. The mouth is created by extruding a face of the head inward. The tongue and the shoes start out as cubes, and their faces are repeatedly extruded outward to form their unique shapes. The glasses and the umbrella handle are both made from tori (donut-shaped objects). The fabric part of the umbrella is another UV sphere with some of the faces removed.
One standout feature of this project is its clever use of metaballs to create a fluffy cloud. These metaballs automatically merge when placed near each other, allowing you to shape a cloud quickly and easily. For the raindrops, you’ll create simple cylinders. By adding Loop cuts to some of them and using Proportional editing, you can make them look like they’re splashing against the umbrella.
After modeling, you'll move on to adding materials and colors. By decreasing the roughness of things like teeth, eyes and raindrops, you can make them look like they’re reflecting light.
The tutorial ends with three-point lighting, a classic technique that adds depth and shadows, making the scene visually dynamic. Finally, you’ll render the scene using Cycles to achieve a photorealistic finish.
Take the class: Blender 3D: Design 3D Characters in Blender from Scratch
7. Gummy Bear
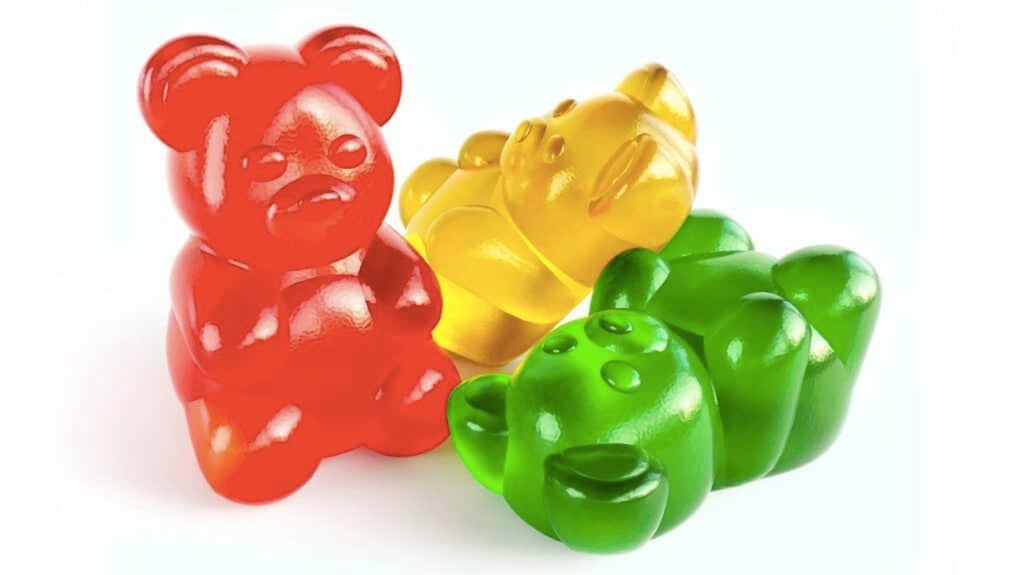
In this tutorial, you’ll create a realistic gummy bear. You’ll learn a new way to shape your 3D model, as well as a few advanced techniques that will help give your gummy bear that glossy, candy-like texture.
To create the gummy bear’s body and head, you’ll start with two round cubes and use Proportional editing to form them into more organic shapes. You’ll use a similar process for the bear’s limbs, belly, ears, eyes and nose. The Mirror modifier will help you keep everything symmetrical, while the Boolean modifier will allow you to merge all the body parts into a single mesh.
Once you’re happy with your gummy bear model, you’ll create a soft backdrop and set up a light source. To take it up a notch, you’ll use HDRI lighting for realistic reflections and shadows.
Next, you’ll create a material for your model, adding a base color and playing around with textures. Adjusting attributes like Transmission, Roughness and Specular will help you achieve that classic gummy bear look. You can also add a Musgrave texture to simulate surface imperfections and make your bear look more realistic.
At this point, you can duplicate your gummy bear in a few different colors and vary their positions to create a scene. Finally, you’ll set up a camera and render your scene.
Take the class: Blender 3D for Beginners: Learn to Model a Gummy Bear
8. Bearded Gnome
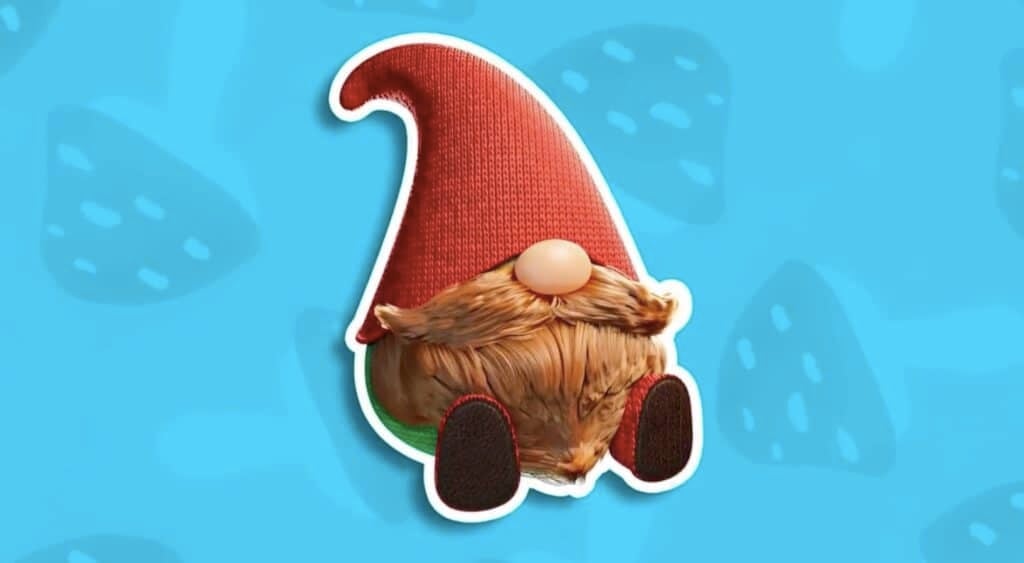
In this tutorial, you’ll create an adorable 3D gnome, complete with a fluffy beard and a funky hat. Here, you’ll be taking things up a notch and learning how to create detailed textures like hair and knitted fabric.
You’ll start by adding a round cube and using Proportional editing to form it into a teardrop shape—this will be the gnome’s body. Next, you’ll start with a cube and shape it into a boot by adjusting vertices and extruding faces. You can then duplicate this boot and mirror it along the Y-axis for symmetry.
For the gnome’s hat, you’ll add a cone with specific dimensions and move it above the gnome’s head, adjusting the top vertices to give it a charming curl. Adding a Subdivision surface modifier will smooth the hat. The nose will be a simple round cube that’s been shaped into a sphere and flattened a bit.
Before you can add the gnome’s beard and mustache, you’ll need to switch to Weight Paint mode and paint the areas where you want the hair to grow. Blender has a built-in particle system for hair, so all you need to do is enable it for the areas you painted and then shape the hair into a beard and mustache using the Comb tool.
To add color and textures to your gnome, you’ll use the Node Wrangler add-on, along with some pre-downloaded fabric files you’ll import into your project. That’s how you’ll apply a knitted texture to the gnome’s body and hat, and a leather texture to the soles of the boots.
You’ll finish off by adding a light and rendering your final scene.
Take the class: Blender 3D for Beginners: Learn to Model a Cute Gnome With Real Hair
9. Robot Animation
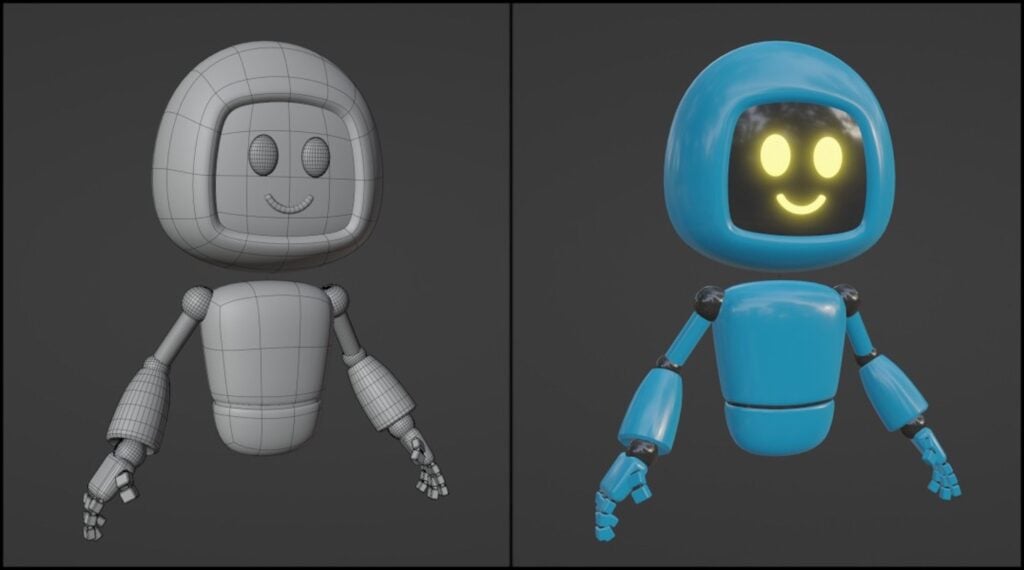
If you’d like to try animating in Blender, give this robot tutorial a go. And if you’re not quite ready, you can always complete the modeling portion of this class, then come back and animate the robot later.
You’ll start by modeling the robot’s head using a cube, then applying the Subdivision surface modifier to smooth it out. You’ll extrude a portion of the robot’s head inward to create its screen. Next, you’ll model the eyes and mouth using simple shapes like spheres and cylinders. For the body, you’ll refine a cube by scaling, adding Loop cuts and tapering its bottom to create a more stylized shape. You can also add a detail strip on the body using the Bevel tool and extruding inward.
Since you’ll be animating the robot’s arms later, you’ll need to create some joints. Spheres make the perfect joints for the shoulder, elbow and wrist, while cylinders can be used as finger joints. You only need to create one arm—the other can be duplicated using the Mirror modifier.
Once modeling is complete, you’ll move on to material setup. The robot’s body will be colored in black and blue, but you’ll also adjust the Roughness value of the robot’s screen to make it reflective, and the Emission value of the eyes and mouth to give them a glowing effect.
At this point, if you’re interested in animating the robot, you’ll need to check the joints and refine pivot points. You’ll also assign Object parenting relationships. For example, the head is a child of the body, so it needs to follow the body’s movements but still rotate independently.
Next, you’ll follow the tutorial to create a simple animation sequence that shows the robot rising into the frame, raising its arm to wave and then returning to rest. Using timeline keyframes, you’ll set up six main poses and interpolate smooth movement between them.
Finally, you’ll complete the project by configuring a three-point lighting setup and enabling render effects like Bloom and Motion blur. The project will be rendered as a video, producing a fully animated, lit and textured clip.
Take the class: Blender Start! An Immersive Blender Crash Course!
10. Sculpted Seahorse

If you try any of the tutorials we’ve shared so far, you’ll get a good sense of how to create 3D models using polygonal modeling—using geometric shapes like cubes and spheres and manipulating vertices, edges and faces to build your model. It’s a great place to start, but it’s not the only route you can take. Another Blender technique you should learn is sculpting. Ideal for more organic shapes, sculpting is a bit like working with digital clay and allows you to refine your model with tools and brushes. This seahorse project offers the perfect introduction to sculpting and gives you hands-on experience with both methods.
You’ll start by importing reference images of a seahorse and aligning them with Blender’s front and side views. Next, you’ll use polygonal modeling to roughly model the general shape of the seahorse’s head and body. You’ll start with cubes and then, using the reference images as your guide, extrude faces and adjust vertices to create the desired shapes.
Once you have the base shape, you’ll switch to the Sculpting tab and use a brush to further smooth out and refine the seahorse’s head and body. Thanks to Symmetry mode, you can work on both sides of the model simultaneously and keep them symmetrical.
For the eyes, you’ll carve out sockets with the Clay Strips Brush and add UV spheres for the eyeballs. The Crease Brush can be used to define the mouth. To model the dorsal fin, you’ll start with a cube and use proportional editing to shape it. Then, you can simply duplicate it and scale it down to create a pair of pectoral fins.
In the Shading tab, you’ll apply a base color to the body and adjust the Alpha settings on the fins to make them translucent. Deactivating shadow casting on the fins will prevent harsh shadows.
Finally, you’ll set up lighting, position the camera and render your scene.
Take the class: Into the Ocean: Character Sculpting Essentials in Blender 3D
Become a Blender Pro with Skillshare
Exploring Blender through these beginner-friendly projects is an excellent way to build practical 3D modeling skills and create portfolio-worthy designs.
While many of these projects follow a similar workflow—modifying and combining basic shapes, applying textures and ending with lighting and rendering—each one introduces new techniques and challenges, allowing you to grow your skills and discover your favorite ways to approach 3D modeling. By trying these projects and experimenting with Blender’s extensive toolset, you'll not only grow as a 3D artist but also develop your own creative style. Ready to continue your Blender journey? Explore more Blender classes and design ideas to keep learning and stay inspired.
Related Reading
Sayana Lam
Sayana is a musician, writer and graphic designer based in Toronto, Canada.
Learn Animation with Skillshare – Start your 7-Day Trial Today!
Get Started- Hands-on classes with animation pros
- Unlimited access to all classes
- Browse a variety of animation platforms


