Transcripts
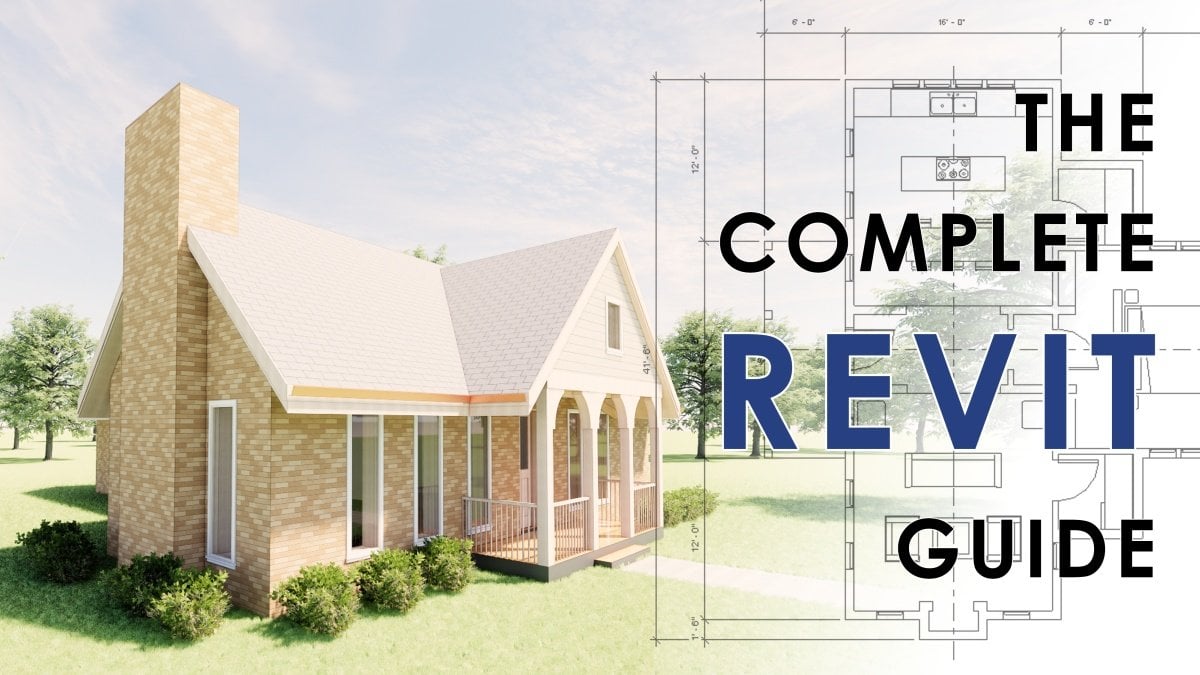
1. Introduction to the Complete Revit Guide: Rabbit is super complex. Even if you know a little bit, it's hard to get the leap to different projects because they only have a basic understanding of different parts. And that's why I made this complete Revit guide for intermediate. Hi, I'm Brandon and made this course by putting gather knowledge about Revit and also by putting together concepts that you can apply in the course in a project in real life. So we start in this course by going through the actual project or working on a modern house using some advanced concepts that can be used in a house or a building by working with walls, by working with curtain walls. I working with different ways. I'll put it together and then we go into how to detail that by making section and tags that you can actually start to understand what's happening. Revit has a lot of complex tools that walls and we also go into how to make that. And at the end of our project, we're going to of course, go through and make a PDF so you can export that and share that with your project team. This course is for those who have a basic understanding of rabbit and are looking to get to the next level with it. So you'll be ready to, at the end of this course be able to understand how to take that basic Revit, understanding into most advanced projects. I'm Brandon, a architect and in the industry of architecture for over 20 years. Hi, I've used forever for over a decade and I've seen the ups and downs of all sorts of software changes. So I'm bringing the best to you for workflows that we use in a firm that you can use in your own projects. Or if you're working with a firm that you can take those with you. This class project goes through designing this modern homes similar to the one in the project. But you can go through and innovate in ways that you think are valuable. But you can also learn and derived from the project-based off figuring out these things in rabbit. So if you're ready to get started mastering more rabid, and let's go.
2. Complete Revit Guide Course Concepts: Here are eight ways to get the most out of this course. So concepts that help you as you are maximizing your Revit career and figuring out what Revit can do for you as you're working projects. The first one is you definitely wanna maximize this tutorial. Spend some time. It can be a part of time every day. It could be every other day. It could also be going back and exercising all the things that you're learning in the class. Playing around with models. You need to have some time in Revit and making the most of the tutorials is going to help you do that. Number two, you need to practice remodeling. In architecture school, I got my hands in the work of making models very early on. And so with 3D, you have the ability to be marbling different things, different components. You can make a file just testing with these ideas. And that's so simple. And as you get skills, just be practicing my link. Download models that can other people's models. It's all possible and rabbit. So make your time to do that and it's gonna really help you a lot because revit is a modeling based program. Number three, you definitely want to focus on communication early. Communication early means that you are already thinking about the fact that your drawing is going to be communicated. So you're thinking about how this view is going to be, how this is going to appear. You're not just modeling and waiting to the end, but rather because of its great communication abilities, you're putting that all along the way. Number 4, you definitely to plan for collaboration. Collaboration. You're bringing other people in, the two people or three people or big team working on the project. So different people who work in the different parts. So that definitely needs planning. Or if you're going to use someone else's model, if there was a consultant or you're exploiting a model, you have to think about that when you're starting. It just helps from the beginning. So there's a great torques that are rabbit collaboration. So it's something that you should put some time into is going to make it much better in this course helps you at figuring out how to do some of those things. Number five is you want to definitely maximise your automation. Automation. And rabbit could be from a family changing it in one area in and change your whole. Some parametric ideas are also in the place for whether you're working on views or whether things are coordinating between models. Just think about automation. And if you haven't used a program like this before, then just spent the time to see how it's being done by other people. Look I'm using in the course and make the most out of it, and it's gonna make you much better at Rabbit. Okay, number six is definitely, you need to be simplifying with analysis. So rabid gives you so much information where they make an rooms or a material system. You can make an estimate. You can find how many doors and windows are in your model. It's all built in information that you get the accessors, rabbits. So if you're not using an hour, maybe you'll be using in the future. So in the chapter that I go over, these sort of tools, just make sure to take notes because that's a key feature of rabbit. And number 7, you definitely want to be researching, researching, and researching those little details before you come into rather. So if you're trying to do a certain wall assembly, make sure that if it's not doing an entire research at a library with a few books or, you know, with the manufacturer directly, you can always just do a Google search and find a how a system works together. And that will help you, in the end, get started in the right place. So you're not changing so many things later on and I go through some of that and of course, you're going to research and find out what's being done before jumping in. And finally, I think we all know that you need to have fun. If you're going to learn, if you're going to understand something you have to enjoy it. Remedies is really cool. There's a lot of things going on. So I think to figure out your best path and rabbit, you want to do bit by bit. So just focus on one particular aspect, then come back and see everything. And it's going to be so much more valuable to you. So remember these concepts and come back to it as you go through the course so you can get the most out of the concepts and the techniques and skills and revenue.
3. Chapter 1: Installing Revit: Welcome to the complete Revit guy. If you've already gotten to this course, you're probably really ready to get started with learning about Reddit. And the first thing to learn is for sure where to get rid of it. And I'll go over some of the principles about Revit as we looked at their product page. Revit is a multidisciplinary software that gives you all sorts of great abilities. There is a high price tag per year. There are other options as well. You can also download a free trial. So if you're working on it by yourself or with a firm, I think it's a good investment and you will learn that throughout this course. Revit is a building information modeling. That's what BIM is, software that helps you have higher-quality coordinate designs. That means that several different trades, including engineers, contractors, they can all use Revit as you are putting a building together and building project together. You can go through there this website, and you can see several different types of things that they offer that you can be using as you are advancing.
4. Introduction to the Revit Interface: Let's look at the rabbit interface. It's a lot of things that go into Revit. So we're going to go step-by-step and we'll come back to it and we'll explain a little bit more as we go throughout this course. One of the ways this course is going to be taught is going from inside to outside features like printing out and exporting, and also thinking about the different things that go into building after your model. So this inside, outside way of thinking is really connected to what building information modeling is. Because if in a day at tool, so be thinking about those things as we go in the back of your mind.
5. Revit Interface Basics: So here we are looking at the rabid main interface, the place where you can put your models as well as your family. So this is where you are opening the models, all your buildings for your engineering models. And here is where you're going to be opening different components that go into Revit models. And as you see, this is actually quite simple and that's really useful. You can see the recent files at the top and then you see at the bottom some families that may have been customized or use in this project. Above that, of course, you see the ribbon. You see pretty much wherever it can get started from scratch. And when we click on this button here, we can actually go to the home screen, which shows an empty model. But you see some of the commands in the menu and this Icon Bar. And you also see the project name as well as some icons that will activate when we're working on a project. So it's very useful to see all these things. I'll go over them little by little as we get through the project in general. You will also notice things about your ID where you can get help if you need to buy some other things like apps, which I have some that are really great. We'll talk about a little bit of that. And you pretty much are going to be going through this page a lot as you go into your models. But we'll start by looking at a model and we'll be looking at one that I've model for this class. And we just double-click that. As I talk about the interface, you have this understanding basic of what's going on.
6. Revit Selection Tools: Selection is a major part of rabbit. So here are some things that are going to help you as you look at the interface for selection. Right down here we see that you have the ability to select the links that you are going to be working with. So that's, that's useful. Because sometimes you want to select one object and sometimes you want to select a lot of objects. So having that selected is, is useful. Though I don't typically use it. So underlay elements, because there's a lot of different things inside of Revit. You can choose things that are under other things. We're not going to choose that one. You could also select pinned elements. So if you bring an object and then there's also select elements by face, which it makes it very useful to operate in that method. And then you could also do some, several different selections, including if you select multiple objects, you can click here and make sure that you only collecting and selecting the object that you're focusing on.
7. Revit Menu Ribbons: This is our Architecture tab. If we were working in structure, that would be of course, one of the critical parts of work with structure including the steel. And we see for MEP they'd be concerned with the systems ribbon. So it's the icon ribbon that, that's related to what you're going to be doing. And sometimes architect will use structure and impossibly steel. But we're going to focus on architecture for this section. So we have some basic things that we can build. Starts from a wall, goes to different elements in a wall. Also components which can be like a wall that different elements as you can see in their example. And you can also do elements like roof, ceiling, and floor. And finally, it talks about curtain walls, which are interesting ways of using class and material, or just a different framing system. And then at the end it goes to ramps, stairs, and railing. So different circulation components. And the last three sections are the model where you can add lines, add letters, make a group, and you can also work on rooms. And this is more of the outside of rabbit sort of thing because you're going to be communicating about rooms. Whereas the left side is where you're going to be making a model. Now, the openings is something where you are going to be working to make a model, editing and working on that. So that's actually sort of internal though what's on the right. But the grid is definitely something that's something that's helping you organize your model. So there's an on the inside part of rabbit with this. And the work plane is going to be valuable as we start to make things later on.
8. Common Shortcuts: To set you up for success and no. And beyond path with what I'm doing in this tutorial for rabbit, I want you to know some key shortcuts that I'm using continuously. So it's of course very useful, as you see on the rabbit tab to know the keys that you're gonna be using most frequently. And so the ones that I use all the time, typically in the modify command R match properties in a. And as well filet, which I call for label, they call it trim to corner, and also extend. These are incredible. And of course move is something that is always been used as well as a line. So the idea is if I make a wall, I press, press W. And I start by making a type of wall. And the thing is, sometimes I will want to make a new different type of wall. You know, I'm always going to be pressing in a just really quickly. It's almost like a reflex now. So knowing how to do that, knowing that in the course is going to be critical. Also, I always use fillet so that just like I did before, if I undo that, just match an item. Also, I'll always do fillet and Philae. What I do is F, but you can of course make your own. Just click trim the corner. And it's just so useful when you're working with items also if you're making something like a floor. And the thing is if you know the idea is you don't have one a year sides connecting, you know, being able to press F or what have you ever trimeric corner will make it so much more quickly available. And if we go back to modify, again, another useful one is definitely mirror. Because you have these geometry and you just want to get something going on the other side. So often I will just click on the items I want to mirror, press N M, and I'm just mirroring. And it, it's, it's, it's so useful to get that done very quickly. And sometimes also of course, use rotate. So you have rotate here. Rotate, it will rotate around a cinema. She pressed Space bar. Then you can choose the center to rotate on. And I do that all time. And also when you rotate, you actually can of course make, make a copy. So that's the beautiful thing about you can just pretty make a new one. And so those are things that you would like to know. And also in terms of offsetting, offsetting so valuable. Here's the command here. If you're trying to do like six feet. But also just pressing O, you just make it a second habit to make sure that's all going in at the same time. And extend is also a credibly valuable because you're going to want these walls to be connecting. You just want to select that wall and get this one going. But I've made aware it's EX is. So that's just going to make sure that happens at the same time. So that's something I use all the time. And another command that I use all the time I think would be Vab view is a line. So a line is sort of like extend only. It's moved something to be connected with something else. So for instance, right now, none of these walls is sort of in the same plane, so it doesn't exactly a line. But if I make a detail line or press the L and I'm making two boxes. Clicking that align or pressing ALL is going to help me. Tremendously. I just press that button and it's already working. And of course it's obvious if you're copying things, that's going to be of course, very useful just to be able to select an object and press CEO. It's going to be one of the most valuable tools you have in revenue. So as you're going through this class, look at the points that you can make it, the customized shortcuts and make sure to go through those. To make your shortcuts. Just make sure to always go to File and Options. And as you are going to do the options, click User Interface and you keyboard shortcuts. And if you were trying to make a, something for copy, you CCO, mind that it might be for another item as well, so be mindful of that. So your shortcut is only going to be for that one. A thing you're trying to do. For instance, if there's something that's already in there for plumbing and you don't do plumbing, there's no reason for you to be worried about that. So that's something to mind as you are working in Revit so that you can have the workspace setup so you can be effective and productive. Make sure you have your key setups for your shortcuts and that you know those as you're working.
9. Annotate Ribbon: So let's start our project with making our new architecture template. And before starting, we're not just going to start with walls where we're actually going to make a diagram, which will be a great way for you to look at some of the analytical tools and annotation and dimension tools and rabbit. So we're going to currently work and what's called a working view. And we're going to duplicate the current view with the detailing. And we're going to label it. And you can label that in the properties dialog here. We'll just call this a working level one. So we know some of the basic sizes that we want for our houses by going to the Annotate ribbon. And here we have various different effects. We can use region. Some of the details where we can make a detail component or region where we can make something like a, a box. And the thing is, you will see that these are general lines. We have a typical draw. And if we press Start, are okay with the green arrow, will see there's a region that we can move around. And this is going to be the hallmark of what we're working on as we're analyzing and drawing. And so we're going to use the annotate and we're also going to be using some detail lines. There's a difference between a model line. This is a model line. And you can tell by clicking here. And in here, in the Properties you'll see it just talks about line and detail. Line is NOT clicked. Though you can change it very simply. You're using the same command. You can. If you want to know the difference, the 3D view will show your model lines. But if you make a detail line and your detail line, I tried it on your annotate as we draw it right next to this model line. And they can have the same sort of features. You won't see it. So it's for working on figuring things out in your model and understanding. We're going to break down this line to see a little more of what you can do in terms of working with the model. I currently have just a few lines. We're going to actually stick with the model on for right now. We can have different styles and we'll learn how to customize those a little bit later. But you can see they can have different line weights and to hide the long way to turn them on, you'll be clicking this button right here. Here are the types of line you're beyond. Line will look like this. And then you have a center line which looks like this. And then you have your demolished line and vice versa. And so right now we showing line weights, so that's useful for us. Let's go a little deeper into the annotate tab. So here from the start we see different ways that we can make dimensions. So right now, we'll learn a little bit about the constraining for before we just made a wall and then we made some lines. But now, let's see what sort of things we can do with these constraints. You see I just change the dimension and this whole form changed. That's because there are constrained. And so when I click on a value, it'll just change it for me. And so that's a really cool way. You can also, if you go into or double-click on this region, every time you click on a line, it will have a relationship to other lines. So if I know that I'm wanna make a 16 by 16 space, I just click that. And all of these are automatically change because there are constrained. And so here are some other items that you can find here. Revision cloud, pretty much use if you're doing a drawing Edit. And you can also work on tagging different items in your model. And every tag has a particular family. And so I will go into the rest of this and then we'll talk about families for a little bit. So these are different tags for different elements all here. And then there's some keynotes and ways to make legends. Color legends, all sorts of legends that are also useful when figuring out things about your space. And then you also can put in symbols and different information. But your model in your annotate tab and including text.
10. Manage Ribbon: And if you want to customize the type of line, you can have a really wide line. You can go to your Manage tab. And so your Manage tab is where you can start to work on your material settings, these various settings in the model, your snaps, your objects styles. You can work on different parameters. I typically don't work on these on us. I'm working with a family, which we'll go into a little bit later. And there's some different systematic things that you can set up as well. And you can also change some various things about your model. Create your own settings for lines and different materials, and also different way you set up your model here. And then finally, you can manage your project and start dynamo from this Manage tab.
11. Other Ribbons: And the insert ribbon would be where you load in your plan. You can import CAD. You can also import an image, PDF, et cetera, and loading a family simply we'll talk about later when we start to put ideas the pot later model can do a lot in terms of, well, if you're doing structural, you can find I've mentioned what your motto. You could also do information about your plans and you can also start creating schedules for different systems. So this is some of the MEP and also planning parts to read it. We won't be using that collaboration is for working with other people. So if you're synchronizing, you can make work sets when working with other people. So we'll look at that later in the course. And view again is where you're choosing how your model looks. In terms of lines you show, You don't show you more control your renders, you can control your views. And as we develop this model, we will make some of our own views. So you can look at it and you can also work on sheets which will make at the end of this exercise, look at add-ins. Now we use C where you can batch prints some of your drawings. You can also use some different plugins that you put in here. Enscape is a renderer that you can use in your model. We won't be using that for myself. But that's something that if you're interested in, you could be looking into I think the Revit model or is really great. And you also can use things like VRA. There's all sorts of options for rendering.
12. Whats New In Revit 2025: I just want to go over some of the new things that
are part of Rev 2025. The complete Revt guide
was generated and pretty much finished
over a couple of years, a lot of things were
really consistent, but I do want to go through
some things that might have changed in the time since, you know, the latest
version has come out. And so we'll just
quickly go over those. Essentially, Rev 2025. I obviously look a little
bit diferent I have a little bit of
the night mode on. But the changes are, you know, sort of sort of here and there when you're actually
thinking about it. There's significant
changes in how sites are made there as well as extensive changes in how you operate and work
with things like sheets. We also have a lot of upgrade and how your
interoperability works, including how you export. You know, if you want to
export an older version, you can't export vet, but
you can export a IFC. So that's going to be a
great opportunity there. So I just want to
go through some of the maybe more workflow changes in case you're learning
and needing to know. Again, like, a lot of the
same things that work for the lessons from the
complete Rev guy I do work in all the
versions of RVT. But let's first look at
what changes with views. This is one great thing
for the project browser, where instead of just
having everything together, you can also just
have a breakdown of just look at views or
just look at legends. You know, the idea
is, you know, when you don't want to
have to be scrolling through everything to find the thing that
you're working with. So I found that pretty valuable. Also, something
that's happened in Rivet 2023 through 2025. Now, sheets that are
pretty much views or schedules that are on pages
are going to be blue. So that's going to be
a nice little way of knowing if something's going
to be in your final project. You also can always, again, break down and look at what's going on in your
groups really separately. And I found that
as a very good ad. Concerning site operations, one really valuable thing that, you know, Revett
has done is pretty much take away some
of the, you know, issues that happens
with working with sites by making now a
topo solid where now, you know, if you have, like,
a topo solid in your model, instead of, you know,
having one place for if you're using a mass
and it might intersect, you actually can now
cut your geometry of your site with
walls with floors, you know, so you don't
really have to make a separate pad to ate things, but you can also just cut it. And that's going to be in the
massing tab where you have a new set of tools
with your topo solid. There's also going to be some
advanced dynamo support, and that's more of your
add in and you know, a little advance, you
know, with your manage. So, you know, you can
always check out my dynamo course to learn out more
about updates with that. And pretty much, you know, the idea is it is
improved workflow. I do recommend giving it a look. If you have RVD, of
course, your license typically is going to
be for the latest. So go ahead and look into how you can use
that for your team. Again, some of the same
things that are going to be used in complete RVI
guide are going to be valuable in 2025. And if there's anything that
changes, I'll let you know. So yeah, let me know if you
have any questions about 20:25 and any ideas
for new lessons.
13. Chapter 2: Introduction to Geometry in Revit: Revit has a lot of cool features and cool ways of working with geometry, but it might be very hard to get started for how rabbit works with geometry. So we're gonna go through some of the key things for just making geometry. Just lines as 2D geometry and rabbit, this works with detail lines also with model lines. So right now we are in a view that's just a typical view. And I want you to know something about the difference between a regular view and a legend view. You actually can't copy items from either sheets, sometimes legends into your model. So it's a funny sort of way things work. So like you're you can't use model lines in a legend. And why you can copy from your legend to level when you make a sheet, will make a sheet very quickly because the basic sheet, you can't copy that into a sheet. So be mindful that when you're working with Revit, where things can be located. So as you won't make something and wonder why can I connect it there? But we'll go back and press D L for detail lines and we'll look at how to make different types of wines. So this straight line, the course, the basic type. We can also go in here. And this is a legend. So lonely uses detail lines. We can make rectangle AC. We can actually offset it from our location where we started. So they actually can have it where it's offset from a location. So that's also really cool. And we also can actually put it with a radius. So that's pretty cool as well. You can just make rounded shapes.
14. 2D Geometry in Revit - Polygons: If we go back to basic geometry, we also can make polygons. And we choose how many size they have. Like if we wanted to 12 sides, we don't want any offset or radius. Now you see this complicated form. One thing about it is after you have created it, you can't go back and change how many sides it has. So just something that the mind, but you can always make sure that you just keep the same center point. So if you want to make it again, Let's look at some other geometry we can use. We can actually circumscribed geometry or we can just have it inscribed. So the one being where you can do one inside of a shape, other side, other one where we can do it. And there's literature about making inscribed geometry.
15. 2D Geometry in Revit - Curves & Circles: You can also just make a basic circle with options for circle, of course, are your, your offset. So that's a very simple geometry form. Now we have for our curve sections, of course, the easiest is a making a simple curve and the ideas you can make it anywhere. However, you are not going to control when you're moving the point, you can't just stretch it and pull it. So that's one of the caveats of rabbit. And it's controlled geometry. It will maintain its diameter. Unless you move the center. You can't just move the point at stretch it. And so you can also make Center ends arc where you start at the center and you can go to a point. Now this also behaves the same way where you can't really change its diameter unless you really just go in and out. And then you can actually change where it's centered at, so it's not super free. Also. Now this requires the tangent and arc requires actually starting with two points that are already at work. So, and it starts from the arg point, or it can do a straight point as well. But it doesn't, it's not based on starting with a line. You can start with a point. So when you're using fillet, flay works with lines and points. So you can see this fillet was a little bit screwed up. We go back and do that again. At the detail line. We click this point and this point. And we make sure to click it on the right side. So you can of course, click too far off, but also you're clicking and you have these lines. And then we also can make splines. But be mindful when you're making a spline, it seems very free. But your spline actually isn't as free as you might think. You actually can't cut slot splines as easy. So I'd have this extend tool right here. You also, you can't fillet splines. So be mindful of working with splines because of that. Even in terms of spines working with each other, splines, this work radically different. So be mindful when you're working with splines, they don't work like lines. And then of course, if we use ellipse, ellipses are a lot more free in terms of you can stretch them and make sure to escape when you've added your geometry. So you can just move things out as, as desired. And you can stretch them, whereas you can't do that with a curve. And also when you're making a basic line, you can actually, this will have all the functionality of this moving something up in a way. But we still will have that limitation of like with circles where you cannot really move these points closer together.
16. 2D Geometry in Revit - Pick Line Tool: Another thing to see is, of course the PICC line tool, which is very effective if you're making a region, for instance, and you want to follow the line, that is a thing. You can just pick that mind. You can even constrain it if you want to say move that element in the future. So the idea is now it's connected. If I move that the, the, the filler will follow with it. However, this is where the trains get crazy. You can see that the constraint is not perfect. So be mindful of when you can train items that if something is flipped, it might not act the way you want it to do. So the to use a line tool is also a great added feature for you.
17. 2D Geometry in Revit - Grouped Geometry : As opposed to making solid geometry, everything can actually interact with each other, which is great. But if you want to make a closed besides this pressing tab and select the whole item, you can always just make it a group. So when you move it, it will all move together. And actually if you make a group and you copy it, if you change that first group. And mindful this as well. You can actually add new geometry to a group, but it's not as easy as doing that outside. So you can split something. I use these fillet and split all the time. Since it's a group, it's actually a component. And you can see it's, it'll change in 10, changing the other. You actually can mirror groups as well. You can even exclude items in a group. For instance, if you start saying for this group that you want to have this line in here, you actually can select this element and right-click, and you can click Exclude. So you actually see it in one and you don't sit and other. That's an interesting thing about groups.
18. 2D Geometry in Revit - Conclusion: So those are how you work with geometry in rabbit. You of course, can be working with groups and one way with your geometry, it's good to be very simple about making groups. But these are some ways that you can work to make geometry do what you needed to do. Either. If you're trying to sketch out a form that you want to make into models. Or if you're making a profile, this will give me your freedom. And of course, you can always use model lines using the PICC line tool. And pick Line tool is something that again, you want to make sure you're controlling when you're working with that. But making jump chain and Revit is constrained, but that also helps it to be better with building information modelling. So mine that as you're creating your geometry to always be false whole of how you can do it in a Reddit way.
19. In Place Masses: Making generic models and revenue is a great way to play with form and also sketch different ideas. There is of course, to sort of ways of making these generic models. The first one is going through and modeling and place, and a second one is making masses and sites. And great thing about science is that you can actually make a building elements from your mass. So if you say you want to play some mass, Revit will be in show mass mode. And it talks about your mass family. So I think that's something that you probably want to in place mass. You can also add families or make templates. And so this way is, it's very basic where you start with a pretty much a profile. And what you would probably want to see is a 3D view should make in this. You can choose what you're looking at. So right now we have this and you can choose what type of form it's going to start with. We want to make a solid form. So now we have this solid form. And what if we want to have some interesting part to it? So if you want to add an edge, it tells you sort of some of the things that we'll deal with it or we want to put a profile upon one of the faces. So it's not entirely easy. So you can click Edit Profile. We can just from this side maybe add a bit of a chamfer. And you see that that bad change one side. So now we can say maybe we will have the bottom face, will have a different sort of set of parameters. And so this, this does give you a lot of freedom in Revit because you can be playing around with this, this form. And you also of course, could, could have it where you're creating a form by itself. To make 3D forms a year the quit lines and work with them, that's fine. Let's go ahead and work with adding a bit of a bit of a fillet to our profile. What does actually come in here? And this is not the easiest thing to work with. With Revit. So it's something that you want to spend some time to get to know. A lot of people will say I'm working on a plan, let's work on that plan. This edit the profile here. And if you've seen my geometry course, that's something that helped you figure this one out. Because ideas you'll be working with geometry to figure out what's going on. Okay, we're going to edit our bottom profile. We're actually going to use our top profile for a reference point or just copy this chalet and we see this is actually 10 foot six. So we can actually come back down here. And it is base profile. And we'll do that same 10 foot six. And it's really not going to scar to accidentally press. Okay, so now we have this interesting form that we've made is very simple. So it's, there's a lot of freedom with making generic Masses and rabbit. And then you could even just say where you go into your mass menu. Where if it's a certain size, you can go ahead and add floors to it. Level 2 and Level 1. That's useful to just have a generic floor here. And this is the mass for, so you just for demonstration. And then you could go into your massing aside and you start saying, let's make a curtain system. Like if I want this to be a current system right here, I just can press press that curtain system. And we'll just try that one more time. So we want to make a curtain wall for this current law on this side as well. Five by ten system creates system. So now we see that it's not as curvy as we want on this side, that one's fine. So what we could do is come back over here. So you can go ahead and actually do want it to be constrained. But if we want to work on it to be a little more room, I just actually start from scratch so we can actually get a better curve, actually. Select on it. See we can do a little better versus a five by 10 will just come in and duplicate it and make it a maybe a five by one by one. So that helps us immediately have a lot more freedom. So take that freedom from your generic mass into your modeling and it will regenerative figure it out. So. So now we have a curvilinear to curvilinear walls are remaining walls. We could just say that would be something like baby brick. So we want to make a wall over here. And we'll just make a generic eight inch wall here. And we could of course also come into massing aside, make a roof. And we'll do a generic tool bench roof. And immediately we have a building that's made from some of the generic components in Revit. So this is the first method of making some 3D items in your model. Of course, this is obviously for building, modeling and figuring out. And there's so many components like I'd have to make an entire course about making 3D geometry with rabbit masses. But you've got a little bit of a primer. It's very useful to get some basic forms out and figure out how to put them on the floor as you can generate at something like a tower really quickly or an outside form. Getting more intricate would take a little more time since we can make things very quickly. And rabbit anyway, that's the question about using masses. It is something that takes time to get into how to use. Obviously some people are freer and some other software, but Revit is cool for its ability to make a lot of information in your model. And this is something you have to practice a little bit. Width.
20. Introduction to Model in place : The second type of method for massing and Revit and 3D generation besides making the components is making generic models. So this is very useful if your mass and a part of a building or some cabinet tree, It's good to work on generic masses. So let's go into our component model place. And you could of course also save this as a family and help other people working on making that for any project they're using it. Or they could just copy the generic model n. And you can see there's all sorts of types of models. And the great thing about this is this would be included in the building information model if you have like it as a stair or a type of wall, et cetera. So that's a useful thing. Typically generic models, what I do to get started. So in generic models we have different types of forms that we can be working with will make each type of those. We'll start with the extrusions. Shoes is just for you. Just like it says, go straight up. Blend is where using two profiles, one at the bottom, one at the top. Revolve is where you can center around a form and sweep follows the path and sweep blend. You can have two different types of profiles. And then you can have these sort of information component within a component. So that's a useful way to have that in your component. Besides your form, you can actually use something that's repeatable. And then you can also take out with a void form. And there's some other 3D tools that are usable would just make the forms right now.
21. Model in Place - Extrusions and Voids: Well, we're going to start with a 3D form. So the fusion is going to be something that starts on a plane. You use the same 2D geometry from rabid. You can actually have a any sort of extrusion. You can have multiple parts, but they do have to be closed. That's the one thing. And it gives you a start and end point. So I said ten feet, that would be there. And so now if we go into our 3D view, you'll see that the extrusion is 10 feet long and it's this size. So one thing we can do to make this more interesting, of course, is we could actually start saying, if we want to have particular profile on this, that we can create that using a void. And void could also be an extrusion. So now we can to avoid form of extrusion. And the thing about it is we've been working on the ground plane, but we can actually choose the plan we work with, where you make that profile. So it's going to be a two-dimensional. We can choose any plan that in the model. So we want to pick a plane. So now we've made up plane. And what we can do is now saying, if we want this to be the profile that's subtracted. And we'll do the same thing over here. And we actually want to let it make it, and then we'll align it. Then align our edge over here to this. And so now we actually have two forms, but you only see one because the other one wasn't. Avoid form. And we can do that same process on this side. Well, we could say let's make a avoid form of an extrusion. And we could say, we actually want to set it as a plane. And the model would pick a plane. Since our previous one wasn't there. We actually cannot just come in and make this separately. And think about it is that's when you're making something, you can always actually go back. And right now I wanted to actually make that on the same form. We actually can just say right now to uncolored. So the void will cut the file. If you don't press anything. But you can always uncut it and added a second time. So now we want to create two Void Forms. And we're going to set it on this face. And it's going to be doing something in this way. And now we'll see how that plays out. And now we want to probably have it going from here to here. And so now all we need to do is say cut. Now that automatically cut this form. Now we can say cut again and we say cut. And now we have two voids cutting into our object here.
22. Model in Place - Sweeps: What if we wanted to make some sweeps? Or this idea of if we want to have a profile and we want to have it on a path. For instance, if we came and made a curvilinear path and we want to probably set our plane, make sure it's going to be a plane one. So we do level one. And we'll make our path where it's curving out a little bit. And now we want to choose our profile. And we asked you can choose a profile that we make, what we can find one in the project. For instance, if I choose the fascia, that will. Let me press. Go Finish edit mode. We'll see it's, it's a tiny fascia that's rotated along here. But we also got a comment to this sweep and press edit suite when it's created. And we could edit the profile. And we just can select it like that. And we can just load profile. Or we could just click, click on that and say sketch. And we can just edit the profile right here. And the thing about it being curved is you don't see the face of it. So that's the one challenge for making profiles. You wanna make sure that you can see what, what is it doing. So because ideas, if you are not perpendicular to the face, you'll have an issue seeing what's actually happening. One great, great figure that out is actually you can, you can find out the plane of the lines, like we can say, orient to a plane. And we'll pick a line. And we just click that. And now we have a proper plane. So now we can see exactly the size and how that will look. So now we'll just try it out. So it's these be closed. We're just Philae this through That's flight on this side as well. And now we'll look in 3D and we'll finish this sweep. And now we see our sweep is this cool little form.
23. Model in Place - Blends: So let's try a sweep blend. And we'll just sketch another path, would just try another curvy path. And we're gonna make our profile first profile. And we'll just edit that. And that's going to be, which can keep it simple for now. Just do that in that plane. And we want to do this select profile to edit that. And that's going to be more of this sort of form. And we'll move that point over. And so we'll have it crawling up here to make that form. So that's a cool way of having that sweep blend from two forms. But that's not all. That's sweep. Sweep is a little bit different from just the basic blend because the land is just giving a top and a bottom, which is used to grabbing like a, a column form that is going to be changing at the top or something. Now we're gonna add the top. And the top is going to be smaller than that. And we see that it's saying now going up 1 foot, now we say 10 feet. And we also can change the vertices. So right now you see how it's gonna go up. You can choose if the vertice is not going to be the way you like, you can change that. So we can also twist it. So you see this line will connect to that line. So it's, it's very useful and how you figure that out. Okay, So now we have this and that's how you do your, your blend as the basic extruded blend. Basically one group to another.
24. Model in Place - Revolves: And now we'll work on a Revolve. Revolve is where we will choose our boundary line. Right now we're just going to, we want to know which plane we're working in. That's the one, the one challenge. So we're actually going to set the plane of this plane. And we're going to make our axis line right here. And then we're going to work on our boundary line. And we'll just do an interesting form. So we're going to make sure of course that our, our boundary line is closed. So it happens to overlap the axis line down, get deceived. Okay, so yeah, so we see that it rotated around that line. And so we of course also could have come in here with our property browser and set that to 180. And we could have started somewhere else. And the great thing about it is always when it started it's constrained to a plane, but you just can click on that plane constrained button. And when it's gone, you can actually move it freely around your model. For the most part. C Part of it is still constrained. That's why you call it to make a construction line. Now. It can go wherever you like for it to go. All right. So if you want to rotate it, you can choose a plan, what you're going to rotate it. That's the funny thing about that. Because right now you see the plane we're, we're, we're in. We could always just get out of that plane. We can go back to our Create and we've set the plane as the level 1. Now when we rotate it, you can just rotate it like that.
25. Model in Place - Hosted components: And one thing we can also do, which is really cool is we can also make openings. And so I'm going to finish this model. And we're going to make some geometry and rabbits so we can work on openings. So walls are forms that can have openings. Pretty much different surfaces can add openings. So when you're making a generic model, you might want to think of a window that you want to place in your building. So if you click window here and you want to make a opening for the window and you want to make the window, what you're going to do is you're going to sit the plane where you want the window to go. And then you're going to make opening. And we're going to select the host. It's going to be this wall. We could choose any form that we want. And you see the opening is made. And so now we could go back and say that we want our extrusion, that's going to be our frame. As you can see here. You can make a material here and you also can select the category for this. So we want to make a frame. So as this is not just the generic component, it has like some specialized functions. And saw all we could say is maybe we have this and we have this coming in, maybe three inches. And that's as much as we want to have for that going. And this is shrewd, is going to be about four inches. And we just want to make sure it's on the right side. So it's coming out four inches. Probably want to have it going through the wall. And the wall is about eight inches. So we'll go to negative ten. So it will be on both sides of the wall. So that's R12 opening and also for making a window, want to make that exclusion. We can select the lines inside of our frame. And we can just say going from 0 to probably two. And make sure in our sub category category to make that a class. And be mindful if you don't make it the need to probably make it the glass material could just clicked by category. And from your materials, make sure to select class. And you press Okay. And there you have it. You've made a window and opening. So that's another type of generic models and there's all sorts of types. So Autodesk does ask them good revenue instruction on making unique masses. But that's one of the key basic ideas of masses. Just play around with that.
26. Model in Place - Component Annotation: Finally, looking into what we can do with R. We can look into with making our model in place. Mass will again go with our generic models. Is we can work on making some information about our model that will be useful when we're coming back to it. And the great thing about it is the model lines will be visible. So you can use those as reference points. However, your reference lines are not visible and they can be used for construction purposes. For instance, if you're since this is a window type, you might want to say, I'm going to set this view. For instance, if you want to set some lines to help us orient a frame or something, you could use this. But the model line could be useful if we're gonna make a projection line. So we also choose how the window is going to be cut. So we want to put this view AN compress finished a model. If we're going to make a, we go to our level one. And if we make an elevation that we'll look at this is we finished a model. Look on elevation and we see our little projection lines. So.
27. Model in Place - Conclusion: Those are some ways to figure out working with generic models. Generic models can be helpful for a lot of things. But you want to spend time to figure out how you're going to model something that's going to exclusion. Or if it's going to be a blend, you'll figure it out by using some critical ideas based on those methods.
28. Chapter 3: Introduction To Views : Revit has some incredible ways to view your project and understand it in 3D as well as in elevation. That's where you're looking straight onto a model. In addition to looking at it in perspective, which Revit also offers. So I just want to give a primer before any projects about views and rabbit. And we're going to look at some projects. Views in a project so you can get the feel and what's really going on.
29. View Tags: This is a house project that we'll be working on in this class. And these are some elevation tags. So the elevation tags we look close, comes both to the sheet name and also a number. So that's when it goes on a sheet. To break it down. When you start a Revit project, it will have four of these, north, south, east, and west. And when you click on your tag, it will tell you the type of elevation that it is. And this is just the tag. When you click on the unique view, it will give you information about that view, including the scale. And as we look into our project browser, we will see more information. We'll have a sale and different options for that view, including how we will crop the extents and also things like the template and the name. And it finally, you'll see what filter is set up for the phase phasing deals with reducing with a new or existing model. So let's click into here. As you can see, when you click on that particular tag, the letter or number and the carrot shape, the triangle escape. It will go to a view. And this view will have a crop window. And you can find that crop window right here. We can show the crop region. And we also can show beyond the region or we can crop it. But you also can find that crop region. If we go back to a level one right here. Because you'll see the extents of this little point are going to be the crop region width. And then you also can move it somewhere inside. You'll actually be making a section because the view is inside. However, if you want to make a internal elevation, you have to make a new one because this is still setup for external. So what we need to do is we actually can just click on this tag. And we can convert it right here into an interior elevation. So interior elevation works just like a elevation for exterior, except for if you click on it, it typically has a little less information. And you can see on this tag and we click on it, it has other information has where you can add a another view. And each one comes with four directions. So you can only have four views associated to this tag. And each tag has an individual tag for a view. So each tag for the elevation set comes with Ford unique directional tags. Now, the type of thing that you're seeing here is a interior elevation that includes multiple information. It includes the name and the number. So here's how to customize that tag. If you double-click on the the tag and go to Edit type, you see from the family's property that there is graphical information about this. There's information about the callout tag, and there's also what it would be called if it's a reference view. So I'll reference through is not an attribute, but it's named for another reference or another view that in the model. And you don't have to make a view for each reference. You can make a reference view. And these are made sides, one in the model that you can convert by going to the View tab and the view ribbon and clicking elevation. And the elevation tag will typically orient to the closest wall. And you just press escape to get out of that. And so this doesn't have any names or sheets. So it's bare right now. So when you're making a view is when you decide, you click again whether it will be a view that's just based on something it sees or if it will be a reference view. Now if we make a reference view, we can choose that same detail for North. And we could put it here. And it gives a tag identifier of SEM for being a similar tag.
30. Customizing View Tags: So if we go back into the family of this interior elevation, we actually can change the type of callout tag that's used by clicking on it. And it will go to this page. So you cancel, you'll go back. If you click on this, it will show you what type of color tag is used. So one thing you could do for this callout tag for interior elevations is that you could change it to a another type. For instance, if you wanted to add that, you'd have to add that in the families. So be mindful that that's something you'd have to load or edit. And you could find this callout head within the Project Browser. You also can change if it's a circle, half circle. Other options are half square. Click Okay. And you see your elevation tag will become a square. And if we go back to Edit type, we can change this here to make this to be half circle. And now actually now we see in this elevation tag family, we also have some different information we could actually put here. So we can have where it just puts the field arrow and the view name, or we could say field arrow. And leave that by itself. Press Okay. And the great thing about this is now you don't have that name was still an interior elevation. And if we go back into here, we can actually see that the square had the field arrow, but we can also choose the circle filled arrow and press. Okay. Now we have an interior elevation tag that doesn't include extra information. So that's a very useful way of making these views.
31. Editing Elevations: Now let's click into this interior elevation and add a new one for this wall by clicking this point here. So this is not a reference tag. We click in here. What we can see from the interior elevation that's different is it actually makes a crop right at the wall. And so if you make it on the inside, it will conform to the level and the wall. And you can set a template where you choose what type of things you see and you can make that unique for your own type of elevations. And elevation is a detail view. Which means though you can draw though you can draw detail lines. So by going to annotate and you can make a detail line here or you can press DL. You actually cannot make model lines. In this view. Unless you pick, pick a plane and pretty much go from the plane that you're working with. So you can, in some sense work on that model line, but pretty much you are a little bit limited here. So this is a model line. But the thing is it's in 3D space. So whereas in, if you actually go to the 3D and if we take off the roof for this, we'll hide this element. You will see that this model line was drawn in elevation. However, the thing about it is it will always asks you to pick a plane when drawing, as elevations are not meant for drawing a model lines. So and we'll stop that. All right, so your detail line also means that this Detail View mean you of course, can make text. You can use dimensions. And you could also of course, click on items and families of revenue and work on them in the elevation view. So that's all accessible with an elevation.
32. Placing Views on Sheets: So elevations can be made in multiple ways. You can make many as you want for a project. You can coordinate and make reference ones. And when you place them on a page, they'll conform. For instance, if we made a new sheet by right-clicking on sheet. And we add, we does dragon and elevation. We see elevations in our project browser. It will come in just like we made it. So if it's not cropped, it will not come in crop, for instance, here, this is cropped. As we said from here. You bring that in. It's called an elevation. One beats interior elevation. So you see the under interior elevations. If it's cropped, it will come in like this. But if we don't crop the view and we just click, do not crop. When we bring that in. It'll show everything in the model that was visible. So that's a mindful thing to think about for elevation and views, for orthagonal views. But we also can make 3D views in rabbit.
33. Walkthroughs: Making a walk-through in Revit is very simple. You just go to your top tab where you have 3D and you start clicking points in your model where you want to walk to start, you press escape to stop. And you will actually find this in your walkthroughs. And you double-click on a walk-through, you'll see what the camera sees. And if you're not seeing what you need to see, unfortunately, walkthroughs and I edit it like other views, you will to change your walk through, you have to click it in the level and you'll have to click edit walk-through. But from there, you have to make sure that your click No, if you click off of it, it will ask you this, stop. I'll quit editing and that's not what you wanna do if you're trying to edit it. Which you can use is this top bar which says previous or next frame. And then for each one, you can change the view right there and make sure to hit it on the right side. And you also can change where the path is by clicking on path and moving that location. And so now when we go to the walk-through view, we're not going to quit editing. We want to make sure to go back to a level where we edited the path and go to active camera. And now we'll see from our edit walk-through menu what you're going to see in the model. And we can click Play, and it will play through. And we'll stop this.
34. 3D Views: So here are some ways to make 3D views within Revit. The first type of 3D view and revenue, of course, is the standard 3D from pressing the default 3D view. So in this view, you can create things, choose particular view effects, and also choose different ways to see the model. You can see it in perspective. And you navigate with your middle mouse button or by using your scroller and the middle mouse button. And you also can navigate by clicking on the part of your model. And right-clicking here and orient to a plane, clicking that button. And you can actually choose a particular plane to look at in Revit. So this is useful when modelling, as you can imagine. So this is oriented, this Blaine. And so this is a working view. And typically it actually has a crop that typically people will use it on cropped. Just like elevation views. You actually can crop this and you also can put this on a sheet. And so that's a beautiful thing about these sort of elevations. And we, as you can see when you rotate, it doesn't affect the crop region. And so the 3D working view is something to get familiar with finding out what do you want to show, moving around in the model. And when you're finished and you want to save a view, you can click down here for locking your view, where you can choose the option of saving orientation and locking your view. And you actually can't save it as this name because Revit only allows letters. So you would just type a name in and you can see your 3D views under your 3D view area of your views. Next we'll look at a type of view that is made from a perspective. And you can use that by making a camera. And you just place it down. And we're using that same crop window to choose what we see. At perspective is a little different from your 3D view. As a lot of times you will navigate it using this navigation will. And we click on the navigation, we'll just click on that. We get options to zoom, depend the orbit, rewind, and all you have to do is click on it and move. If you use it, pretty much follows you around and you get to do whatever you want to do with the model. You can orbit. You can send a one-point and look around and go up and down. You can pan. You can also rewind to your last view. So that's very useful. And you also have that same ability from your view categories to make it shaded, to show the shadows. You can render this by going to the View tab and clicking render. Well, you've got options for saving your image. And you can do different things with lighting or rendering. And that will go into that later. And finally, from this view, you also have of course, the ability to walk around. But if you want to save your walk around, that's when we get to our next type of view, which is our walk-through.
35. View Concepts in Revit : Those are some ways of making and looking at views and Revit, will of course go through that as we were working on the project, how you can specify that and understand that and contexts to a project. But making views is a powerful part of rabbit because views will update to what's in the 3D model. And you don't have to change the view to see the model again, if you put that view there, it'll always capture that element. So the thing is getting familiar with the fact that the views are constrained and making sure that if something is moved, that you can understand, let it to go back and review and just get free with it as it is a free-flowing process of keeping your model with information that's going outside from that information that's been modeled inside.
36. Revit Wall Exercise: Now let's go into a simple exercise that you will learn a little bit about the icons and some of the basic families in revenue. This will be a lot more helpful than just going over the menu and all the things. Because I know you definitely wanna start getting in creating things and seeing some professional methods. As we go from that, we're going to go to New. And it gives you three options when you're starting a file. And there are templates that you can add as well. There's actually for this besides architectural. So if you're using it for structures and mechanical, you can also use those templates. We're just going to use architectural template, but the other ones work pretty much the same. I'm just looking at the different traits that will be involved. And you can also open it started a project where you can start a project template. So it's useful to get that workflow because if you're going to do something again and again, work on a template that you can bring into several projects. And that's something that I regularly to do is make sure I'm working from a template that's really properly made. So we're going to open the Revit template for this project and we press Okay, so now you're going to see what happens from a real Revit project as you're loading and seeing all the ugliness and the beauty at the same time. Let's just start by simply making a simple house. And we can choose anywhere in the Canvas, though there is a project's 0. We're just going to start it here. And in this exercise we're just going to run through the systems and you can replay it. And we're going to talk about the things that you learn. Because I know a lot of people are really fascinated and some people are slower, but great thing about the classes. You can just repeat anything that you're trying to learn. All right, so we have, what we're gonna do is a 40 foot by four foot by 40 foot footprint. And what we'll do is we'll go to that 3D button like we had before. And we see immediately that we made 3D walls. And so we click on a wall. We're going to expand out this information about the wall. You can see various information and I will just close these so we can go section by section. The top section is about the constraints on the wall. And this talks about what is your wall start and where does it end? And if there's something that is a feature like room bounding is applicable to your wall, then we have structural elements. So the idea is if this wall is structural, you can elicit here. Then you can work on the dimensions. When you select an object, it will tell you one object, it'll tell you the area, the volume, also the link. And click on that again, will also be able to see identity. Or you can make a comment about the object and you can make a particular type, and they'll be useful later. And then you can also work with faces. So rabbit is used for a lot of renovations because you can go inside and say, Okay, we're doing this thing then, and then this thing here. And you can actually put multiple phases inside of Revit model, which is a really cool feature. Okay, well, since we have these walls, Let's be working back and forth between Level 1 and start to make a building. We're going to be looking at a Revit project that I have made already. And we'll get the PDF to see the type of things that we're trying to do in this project. And I'll go through different elements as we go through in the project.
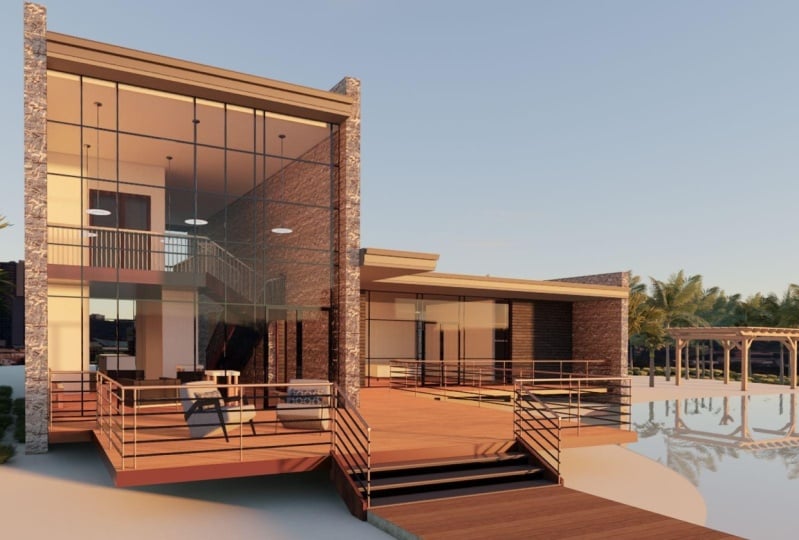
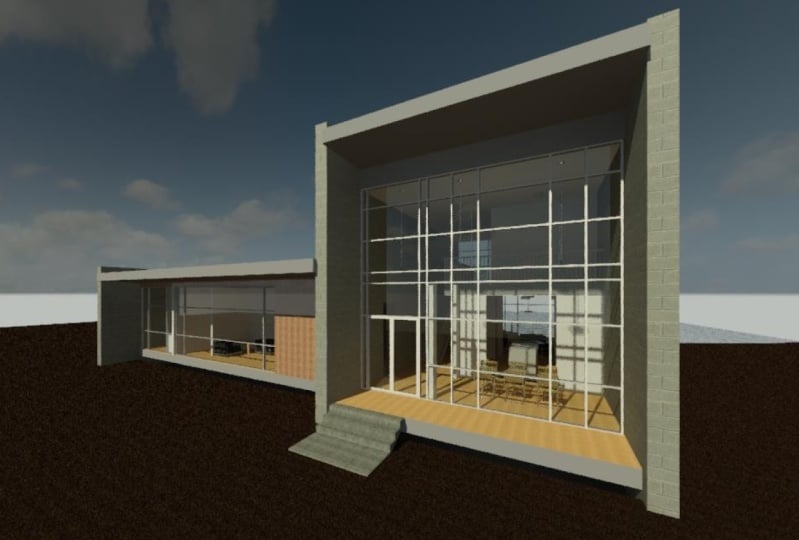
37. Chapter 4: Intro to Modern Architecture in Revit: Revit has such great abilities to make modern architecture because you can work with different materials and different connections. So what we're gonna do for this second exercise, we're going to make a modern house. And then this modern house, we're going to be playing with whatever wall we use, how components work together, and also playing with a second story.
38. Setting Up Grids : So our starting point for this exercise is really a 10-point grid. And I've drawn a 20 by 20 bucks, but here's how you draw your grids. Structure tab. We have the ability to do make grids and we're just going to come down. And that 2020 is our starting point. We'll actually just move that here. And everything, we really go around this grid. So we just copy this ten feet. And we'll just do the same thing and we'll click multiple. So we just copy, copy, copy, copy, copy. And we'll do the same thing in this vertical direction, horizontally this way. So this is our horizontal and vertical. And the idea is you can actually change the nomenclature. So now as we copy, they'll start doing be letters. So that's a great thing about rabid. It, it can tell what you're thinking a little bit. Okay, we're going to copy this. Having this as our little direction has really helped us a lot. So a 20 by 20 is sort of fine.
39. Intro to The Modern House Project: For this class project for the modern house, you're going to be working on figuring out how to use the same things that are going to be going through in the course for your own working with different wall times, making a sex from information also starting to get inside of it for an interior perspective. So let's get started. Your demo project will have the basic plan here. And you can see there's a grid and you can see a perspective and a section I'll be made at the end of this project. So you can already have an idea for what sort of things you know it following as I go through the sections. So mind all the little elements. And as you get this sheet, I'll also give the instructions for how to successfully complete this entire module. Don't worry, you can always come back and fix things, but let me know if you have any questions.
40. Developing the Program : From our grid, we can already start to put our drawing in order because this is our focus. Will be looking for this area. And we'll just box out the things that we're going to be looking for. Okay, so I have here something that's going to be like the demo project that you'll be working with. I'm actually going to come over five feet. And I'm making sure to think about how much space I'm going to be having in the long run for the entire design. So I mentioned I do 10 feet and I have Ff to make my regions, which you can go through with Annotate. And we probably want this as my bathroom. And this will be my a I'm going to put this as off. This will come in here and put back to my region. And this is one of my closets. Her closet. Some men like a big someone like it's small but I'll just put closet. So yeah. And so you can see the closet might not need to be as big as the bedrooms. So we'll probably take extra size for our bedroom. And we'll come in here and bring this office edit boundary down. So It's big closet, right? Ten by ten. And we probably going to add another grid line CI, make this work. And I know this is sort of playing a little bit like we can do anything, but I guess you could consider a imaginary boundary line, the b here and here. So you can consider this a little more real. And we'll just make those is a center lines. So we're still good. So we have our closets here. When I have a master bedroom here. Let me just make in our region. And we actually probably want to help this area be a little more fertile. Come back over here. And when are they? This one is seven over here. Make this, if this a is actually this would be f, this will be e. We'll keep our grids actually coming out a little bit too here. We're going to extend an MIT to this. They're all constrained to each other, so that's fine. That works out five. We'll do the same thing here. All right, So and the idea is also to have a porch that is going to be a good size over here. And we can always just come back and add the dimension here. And then we could over here, part two, outlines with other spaces. We'll go ahead and just copy everything. And then we'll change the label. And we'll say this is our laundry. And we'll put our entry here because we want to have a second floor. We'll go ahead and establish some space for that. So we can say entries here. And then go ahead and add our region. And so this is a 10 by 10 spacing is not large enough. So we're going to make it a little bit larger. And we're going to come in here for our stair already. We're probably going to be looking at putting a stair that's gonna go 18 feet. So we'll go ahead and test our numbers. So of this is gonna go up. I'll be about 20. So we're going to calculate r. And we're going to just offset impress. Oh, well we can just select this line and click Offset right here. And you probably want to offset three feet. And we want to select Boltzmann same time. So we fest control and we will select the whole thing. And so now we're going to close that. So we have an idea where our stair is going to be. We're just going to go ahead and clip this living. So people come in and they can circulate through here. You can go upstairs or they can go through to the kitchen. And this will be the kitchen. Finally here. That's a little bit closed and private. And the second floor kitchen. And so it's a little interesting how you would go in this space. The kitchen would be here. So the idea is it's, it's always like a little vague and venture to figure how things would be. We're thinking about this being the water and this being a true, probably actually want to switch these and probably want to, in our industry have a little bit of a axis going here. So this is already 20 feet, so we have a little bit of play. You might just say your entry will just go straight through here. And you have the ability to go to the kitchen on the way and maybe after another interstitial space. So go ahead and make the entry a little bit smaller. So you get a little bit of design. In addition to learning Revit. And you can even say this is a now we have a little bit of a dining space that will probably extend into here. So of course they may get valuable dining space. We come up five feet, make that a 10 by 15 dining. And so this is the plan for what we're gonna do and to talk about what's going on upstairs. Upstairs, we'll probably keep it that simple. In fact, we might even just want to have a straight stare up as opposed to turning this. So we offset about 18 feet to get to our second level, which is in the right direction. And click O for offset, where phalange, just like here, and just made it F to do that. So we actually bring that to the front. And so you have a hallway but that little wall right here. So now let's go into our revit information. I'm going to say this is our working plan. We're not really going to detail the segment 4 out too much. The second floor, we're pretty much day within this realm. Let's start making this a massing. And we'll call this our working level one. And that's a workflow issue. You want to keep things light well so you know what is going on, so you come back to it.
41. Developing Concept In Place Masses: We finished our Revit programming for this modern OS. Now we're going to work on bringing it to life. So now we are looking at our program and we want to come in and mass it out a little bit. So that'll help us tremendously as we're working with it. So to mass out a project, it's very useful to just start making in place masses. Where you can just say this will be this, this will be this. We just name our first mass. Okay, so now we're going to create our mass. So let's go in here. Go from this particular region. And we're going to add some solid geometry to it. Okay, so we're gonna go here and make our mass. And we're going to be picking our form when it come all the way here. And what we're gonna do is now bring that up. And now we're going to create a solid form from that mass. So right now we have a bit of a location for it, and it says 20 feet, so we probably only do 10 feet. And now we have our basic mass here. If we're going to come over here and now make our second mass. And we're gonna come over here. And this mass is going to be a little bit taller when 3D. And now we want to click create a form, solid form. All right, we're going to make sure we're selecting OK. And we're going to create a solid form. And we're gonna make this 120 feet. So this is our two-story mass.
42. Articulating Masses : Now that we work with a visualization mass of the house, we can start adding walls. So the way you would do that is you put just click wall and we can just select this edge. Or we could click here. It says pick faces. And our first wall be about are generic. Actually going to be more like a 12 inch. And we can tell it if we want, we want the ID on the center line for right now, meta first wall. And then we're going to start our second wall. And then we'll do a third wall. In this design will be like our test study, where we're going to have solid and void. So one way to keep that is we're actually going to make them all glass right now and we're going to divide it into some generic forms for R, what we're looking for.
43. Massing Curtain Walls: Our three masses are gonna go down to our structure down. But we want to come in and start making our curtain walls. So let's go into curtain walls. A curtain wall is, we can look for properties. Is a wall that can be glass, it can be panels. As a lot of options. You can see it could be grid and there's a lot of different things that you can do to, and we'll just going to start simply by using the same pick faces. And we'll make this a curtain wall and we'll go ahead and do shaded so you can see it. And we'll also do a curtain wall here. We want to come back over here. And what's going to happen is we're going to actually move this mass back. Or actually these lines for the walls are gonna go out because this will be a curtain wall.
44. Planning Walls : If we go back to the plan, will press Escape. We'll see that we want our our porch to go out a lot further, but we're probably not gonna put glass when our port. So we can already go ahead and take this this wall. And we can go to our level 1. And we can go ahead and here's a way we can deal with this rhombic lot cleaner. We're just going to select all of these fulfilling working elements. And we can just, we can delete these. And the great thing about in fact, we'd go ahead and select all of these. And all we need to do is go to our filter. And all we want is our detail items. We actually want our texts as well. We'll just like that one by one so you can see how we clean up our drawing. We also can make a new drawing to be another way to do that. Pretty much now we were just working with our voids. And so we know that this wall is actually going to be coming back. And you can see from this. So we're gonna come back 15 feet and our Stonewall, and we're going to be using stone, concrete. It will be going out. And we're going to also make where we have this coming out. We want our walls to come out just a little bit more for design aesthetic.
45. Incorporating Site Considerations: We wanted to think about where light's coming in for our project. Say we actually are going to say Son is coming out from this other direction because we want to have our son access to our master bedroom, as we can see from our plan. So we won't have it too much going in, right? So to do that, what we're gonna do is just go out one foot on each side. And we're going to extend out our walls. And when I press EX, you can also do that by clicking the wall and go into modify and clicking either a line or you can also do extend. I like to extend. A line is here, and so I would get used to the function and protocol there.
46. Aligning Building Geometry: We leave, we want to have some other things align. So I click that face. Now we're going to click this face. So that'll be coming out. This rule will have our glass. And we'll also want to put glass on this face. So go back to wall. You press W, same thing. And we're gonna do the same thing where we do that. So now we have what we're going to be putting glass and put glass there. And now we can start to complexify it just a little bit where we want this to probably go down though. In reality, we might have had that deal with another wall. We're just going to be simple about it. And we're gonna go down negative three. And we're going to go up too. 23. Now, we don't need this to be the same height as that. So I'm going to click this. And we're going to do 13 feet and will probably come up three feet. So do 16, 32. So just playing with masses and Revit. And we're just determining our form right before we start working on anything. So that's working with your masses.
47. Adding Floors to Masses: Now we come in and at the floor and ceiling so we can finish off idea of what we're working with. So our floors pretty much going to be very simple. We'll click our floor and go to our walls. And we'll go ahead and just stop at the wall. The very simple about it. And when it click, it's going to this edge. And that's going to be our first four. And it's given us issue. So we can make sure we this because it's the curtain wall or glass is actually going to go underneath it. So a wall needs to be omni curtain wall. We'll go ahead and save this project. And save this project. All right. And so now that we've added one floor, Let's add our, our floor over here. And we also want to align this middle wall with this one. And him just make sure that we're working with our walls lines here. And this line should be stopping at this homework on that later. We're gonna make our second floor that would make a ceiling roofers. And we're going to work this side. So I'm selecting here, here, here, and here. But for these we're going to come down six inches. So we go, I'll be on the glass. And actually if we look at our working plan, we actually have a little of the entry. So we're just going to be walking in. So I'm gonna go ahead and bring the class him a little bit later, but we're going to leave the the slab for sale right here to work on anything else. So now we look at floors and we have our glass. Now let's put in a simple roof. And then we're going to add the second floor. And the second floor is going to actually be very simple. If we look at our levels, we have 0 and 10. So we actually probably want to we can just select our floor. And all we need to do is press Copy to the next level, copy this. And we can click on Paste and we could place a line is selected levels, will click this. And there we are. We have a second floor.
48. Adding Roofs to Masses: Now just to make the roof, we're going to actually do this same thing we had done before. And we'll put Level 2 for this roof and have a level three will make it. And we're just going to use the edges when to use these walls. And put this one will come over here and and our roof should be on the other side of that wall. And we're going to align this. And we'll put our roof out as eight inches past here. And actually we probably want to have a roof that goes a little bit further. So we'll do eight, 10 marches. And so we'll do this one the same. So as little bit of a detail. And we're not going to attach it right now. And we'll actually go to our elevation. We'll go to our elevations of a start to a linesman. Things that we're doing, em is you can see we, it's sudden out with 3D model, but it's great things about it when we start putting information, it's already ready for us to work. From our elevations. If we can go. This is our ceiling language or knock knees right now. We can go to our any elevation. So I'm going to start from this elevation. It's called self, which is projects cell. We're gonna make sure this roof isn't with a I'm going to go to a site plan to see that our roof should have this is going to be a flat roof on needed to do to make that happen is click on all the mines or select them all and take off defining a slope. And we're not going to attach it will actually have a simple slope. But we're not going to do that right away. A one on 12 or something. So water can slip away. Yeah. And for myself view, we're gonna go ahead and make another level. So it was like me with that grid. And when it does go up ten feet and it's our level 3. And so you see our grid is and our elevation as well. And when to do the same copy. Actually, roofs on this side. So we're gonna come down to the top and we're going to be making a, we're not seeing our level yet. So what we're gonna do, so we can see that level is we can make a new view. We're going to be going through making a plan view and automatically selects level 3. Level 3 would only be a roof, but it's useful for us. We're actually going to go a little bit lower so we can get the other walls. We don't have to go through working, so we'll close that. And this roof, we can let it know that it's going to level three is going to be using the same walls. Will just select walls. And let's suppose this lectin, that edge, we're going to start here. Outside of that wall. I'm going to come out 18 inches just like the other one. And we can make sure it aligns by looking at our site plan and 18 inches. So now all we need to do is go back in there and take out the slopes. And that, that's something easy to then attach. And so now we have a beautiful set to really start with.
49. Planning The Second Level : And one beautiful thing for living room is probably going to be pulling this. So it's a double height living room. So our stairs is going to go up and we can come back. So we're gonna go to our second level. Now. We are going to look a little bit at the working for this purpose. So we can see that our living is here. What we could do is have are a little bit of a walkway to come back or we could always go in and come back. But the idea is to probably put this here. So we have this entry to the master bedroom here or to the stair. And then someone could go to their room or go to his balcony. So that i'll, I'll do a little diagram for the second floor for you. This would be our hallway. And there would be a landing here. This will be our second floor. And then have one room up here. And then you have a overlooking balcony to the living room. So you can imagine taking these. There'll be like this overlooking space and can have a double whitespace for that balcony. So using this grid and we can go to level 2. We already have that idea for what's going to be happening. So we can come into our floor plate. And we're going to edit the boundary when it come back ten feet for now and over here when it come in. And we get to look at whichever level we want to. So you can see that this full plank and LAN, anything we're looking for, we can even go into a working levels, see what things are doing. So we can align straight to this line. So we have our space upstairs like this. And we'll just make that very basic.
50. Modern Project Planning Conclusion: And what we're gonna do now is look at that. So we see what's happening. Okay? Do I have any walls? And so for our little structural walls. And now this model sort of says what's going to be happening with our design. We're going to add in our floors or circulation and a couple of walls. And then you'll see this is island, but we're going to look into some of the conceptual things to go on with this section.
51. Chapter 5: Developing The Modern Plan: After developing a little bit the plan, which is the same way that we develop the plans and other lessons. Let's go ahead and add a stair and also work on the curtain glass system. So you can understand some of the complicated systems that you can figure out, which it's a simple steps in rabbit. So here we have our plan filled out with it. Couple component families and laid out just for basic understanding. But if we go into a 3D model, we've saved the project again. Looking at our 3D model, just automatically generated. We have taken off a roof and we see that occurred. And while it doesn't have any doors in it, and we actually can't put doors in a curtain wall. So we're going to figure this out in a different way. So one of the things that we can do is actually go in here and make sure all our walls are stopping where they're supposed to stop. Up to level two. And the same thing goes here. And we're going to add in some level on the second floor when you add a stair. But we first off, I want to make sure that we're doing our best in terms of how these designs are working out.
52. Planning the Curtain Wall: So let's look at the curtain wall system. This is a curtain wall. You can see in the properties. After we need to hide all of our masses, we're going to just right-click and just override view. And we're gonna, we're actually going to just hide this element. So now, now we're clicking occurred in class wall and we can just verify that the right one is selected here. So what we have here is a curtain glass wall that goes over 30 feet. And right now we have the same thing going for entry, but we probably want to have some divisions in it. And we also want to make a door in it. So let's start dividing a curtain wall. Also, we want to consider things like this. Where a wall hits a curtain wall. Do we want the how, how that would terminate? So one thing we could do is you could easily come in here just like other walls. You can separated and actually move this wall out. And we're going to align it. And they will not have these curtain walls tie into this wall. So that's, that's the nature of our design currently. We can look at it in 3D to see what's going on here. And we probably want to have this curtain wall is not exactly meeting up where we want it to meet. So I'll show you a nifty trick. We can just extend it here, but we can also go inside and right-click. And here's some options for ends you can choose to dragging in or disallow and N. So there's a lot of things that you can customize a rabbit and that's just one of the major ones. Okay, so now we've done that little detail here. You can see we look at the plan, that we have a master bedroom that just pretty much has open walls on both sides to closet. So we won't be doing that there, but that's one of the ways that we've dealt with it here. And we've also close this front wall, so the wall into here.
53. Curtain Wall Fundamentals: So curtain walls are very beautiful. You actually can do more than just glass curtain walls, but you can divide up a wall into an interesting composition rule. So here we have our curtain wall. And all we need to do is start to put a grid on the wall. And one thing that's good for me is to have a grid that might mimic the doors inside. So I've made seven foot doors. And so we probably want to start these at three feet. Might need to change our cabinet. And we want to come back up four feet. So it aligns with our, it'll be aligning with our insights and we actually can quickly click our, our element here and just make a Information deal here we just select both of these sinks and move them up six inches. So now we have a lot of things aligning here. And we probably this 10 foot triptych glass might be a little bit too much. So we're gonna go back to Architecture tab, go to our curtain grid, and we're going to choose a two-foot side. Molly and end. Now, after our grid, we can add our margins using the morning command that we just click where we have our, our lines, a, B, C. Now we have 3D and divide it by volume so it's more buildable and interesting. And also we could come in here and select these, each of these molecules is actually a family. And we could also just select the entire glass. And we see that there's an issue about selecting the individual volume. So what we can do is we select the volume, we can make it a little bit smaller. And we also saw we can deal with them all at the same time. Just go and click Isolate category and select all of these millions to be me go super fan when I'm super thin. So now we've gone back to our mode here. Now let's do that same element to our glass here, and we will be coming in here. And four are open dining room. Considering how are we going to deal with our second floor? For now? I'll show you how to edit some of your curtain wall after you've made it to, let's just go in and work on it now. All right, so we're going to come here and do a similar sort of element. But i'll, I'll make a clarification that as we go into Architecture tab that are curtain grid, that we want to make sure that we're aligning with our elements in the plan. So we ever 604 here. And as we see, we have a little bit of a system going on inside. We have choose whether we'll keep it with the old one. But we also want to make sure that we're going to consider how much our size of our door. So we want to have a double door right here. And we're going to have this space going up. So what we're gonna do is do our same three feet from the bottom. And we'll just go ahead and do that on all of our grids. You can see the, the, the dimension right there. And don't worry if it's not in the right place, you can always click on it later and type in where you're looking for. And we're gonna go back to editing our curtain grid. Come over here. And a three-foot, then it's seven foot. And one of the things about adding doors is the door's going to be creating a unique condition. So we're actually going to go into our elevation view. So we can start to make notes on how we're going to do this. So if this is going to be our bit of our division, you probably want to come in, maybe remove this curtain grid for a moment so we can, and that's how you do it. Just use Control and make sure you're clicking that grid line. And you can just select it and you can delete it if you need to.
54. Adding Curtain Wall Doors: Door is going to be right in the middle of this hallway. So we can get that from this wall and this wall. And that creates a little bit of a private space here. So we're going to ourself view. You can't draw lines. You can only draw a model lines in your 3D view. So doing this and the elevation view. So I can have detail lines that I can take away. And so want to have this door at three feet. And since since it's a pair door, lets us do 30 and 30. And so what we can do is now saying that we do want to have occurred in grid that's going to be seven foot up. And we could make this a unique section right here for our door. And so what we do for that is actually we can continue this going up. There's a little bit of design and all of the elements that you have here. So we have this element going up. And we'll just probably make another one at the floor and one at the top of the force. Well, so you have one foot floor and to do another three-foot. And at the top will have one comes down three feet. So it's almost like it's 33 feet three times. All right, so we have this element going on and we want to subdivide this lower one. You can look at it. So we can put a door in here. And so right now there's no door. And we don't want to put a three-foot exactly right here, right now. And the reason I'll show you later. But we are going to add this. We're going to make actually one panel because this is going to be a family for a unit. And so what we're gonna do is select. Now you can see as we cycle through the objects, we can select each one. So this is our, our curtain panel right here. Because we haven't added millions. You can select it, but it's not really editable. So we're going to come back in here and we're going to start adding emollients, but I'll show you a new fun feature with your current grade. You can actually choose a particular segment. I don't have to do all the segments. I could just do this little box of segments. And what might be useful, of course, is to isolate this element. So you see, we're just dealing with the curtain wall. And I want to come here and add three feet, but I don't want to go over here, so I'll just say one. And there's also other options, but this is what we'll use for now. So we'll have three-foot, four-foot. And this will be where we're going to put a door. So now we can add our millions. And we wanna make sure that our one-inch modern Moines selected. And we can just select all get lines. And immediately we can do is we set to very high and isolate to see if it's showing our, our divisions. But it actually, it, it sort of shows it in our 3D. So, so now what we can do is when we control and cycle through, you see it selected. We want to come in here and edit it. So or a curtain wall isn't yet editable. And we were trying to get in here so we can edit that unique panel, but actually it's not locked, so I think we actually can go in and change it. So we're actually going to change this unique one. Would just say edit type. And we're going to load a family of doors and we're going to load the curtain. These occurred in areas curtain double storefront. We're going to click on that. I'm going to press OK. And there we are. We have our front door and we're gonna work on our entry little entry porch later. But right now that's does what we're looking for. And we want to come around to the bedroom and we'll do both sides. And then we'll do the living room.
55. Developing the Plan Detail: We've done a couple of changes to the plan, so I'll go over them just so you can get a little bit of a feel for the things that you go through as you're learning and designing and rabbit. So now we're looking at the rear of our model and we're seeing, we probably want it some, some walls over our closet. And the looking at the plan, we probably want it to have a larger sort of porch over here and bring in the wall so less light will be stopped from coming into the building. So this is definitely figuring out that solution better. And we actually do stay on our grid. You see here, we're still doing our 10 feet. Okay, so now that we have this, let's finish this curtain wall off and we're coming here and looking at our curtain wall. And we'll look at the plan. So we're selecting it, we see the blue lines around it will isolate the element and run off the bat. We know that we want to have some exit doors and this is the master bedroom proton have just in the middle. So it just walks out into this walkway. And for now that we have that in mind, we can keep our center line for a little bit. But we're probably going to change at around because we want to have our doors in the middle. And we could also have just a pair of doors. Right? So now, if we go back to our curtain grid, maybe can just do our our doors and have this eight inch reveal that we've been doing before. And the doors will be a pair, doors is a five-foot pair. So we can just do it that way. Where we're looking at the symmetry that we can achieve as well. And just saying if that would be a valuable thing or not. And we probably actually want to forego this middle element. Now we have our, our middle that we want to keep, but we want to come over three feet. So we can actually have to come back over six inches because we want to have a five-foot door here. We come on the other side of this. And just to make sure that it's in the middle, we'll just click on this element and we see it's six foot seven on both sides. And so this is going to be our our door right here. And we can also just add our curtain grids and one segment. But we also can make a curtain grid we actually just select over here. We can have our eight feet and eight feet similar and just the doors different. And so we have probably want to keep our three feet down here and it's three feet here. And to keep our aesthetic, we'll just do one segment and three feet here. And this is where we had say, well we keep our aesthetical, what we changed it just a little bit. And one thing you also could do if we go back, we actually can, of course, add our three feet and just make sure it's deleted in this area. And we just go to curtain grid and we just click on it and we can just add, remove a segment and we just want to remove that one and now it's removed. And we can go to our mammalian system. And we want to just all gray lines. We just come in here just like we did before. It's not locked. So we could just come in here and select down and get the family that we want. And we want to do our curtain wall door. We go down to our plan. Now we see our curtain door here.
56. Setting Up Visibility Settings: All right, So now we're gonna go to the annotation and we're going to work on the type of visibility for the walls because right now the walls are see-through. We want to make it a little more unique. So let's go into visibility, graphics. Some visibility and graphics. You can set various items to show any the way that you'd like. And so right now, this view, we actually want to override some of the settings for the wall. And right now we have it where we've clicked this item, but there's no override for the pattern. So we want to do a solid fill and we want to solve for both foreground and background and press Okay. Now when we click Apply, you can see now that we have dark walls. And so now that's going to make our planet a lot more readable. And we love how we're sticking on our grid.
57. Planning Site Elements: As we now have our curtain grid, we can look at that. We have our curtain grid on our architecture. It seems like a nice modernist piece. We probably want to come and put a little bit of a rail here on our edge. Now that's actually quite simple. And in our front we probably won't need it. And one way to, of course, on the form, this is our site plan.
58. Importing A Topography : I'm going to import a site plan into our drawing. And that's going to help us inform about where height set. Because if obviously you can walk straight into the grass and your building, you don't need to have a big height. So let's go and do that. And from our site plan, I want to import into the Revit model and we can import various different types of files. We're going to import a cat. And we're gonna go into a working folder. And I have a topo already set up that aligns to this model. And this topo. When, when anything is imported in, it comes in, it's pinned. So I appended. And I just place it in the area where I would like to have that. As you look at it and we see that the topo is going down in the back. So to get a 3D topo topography from this, we're going to have to go to a massing insight tab. And I'm asking insight tab will allow us to get a topographic surface from this. So we do that. We're going to click on topo surface. And then the topo surface before. A lot of times we placed a point, but now we actually can create it from the import and we can just select the Import instance. And we could select that right here. And it says Which layer, and since there's only one layer for this file went into it, we can just press Okay. Now if we look in a 3D view, we'll see section. And so you can see it's actually probably too high right now. So one of the things we will now work on is getting section so we can understand about some things in our model.
59. Developing A Working Building Section : So let's make two sections and we make sections via working with views. And we just click on this section tab. So right now we want to view looking this way and maybe a view going this way. So one that goes through the house. So we click. Sometimes it's a little bit slow. If it doesn't go all the way through, you can always do this. And one thing about sections, you can always just reverse the direction you have. You can change its view set. Let's go ahead and look at it to look at a section, you double-click on the circle. And it will show you what's happening in your building. And so this shows us that our site is too high. So we probably want to come click on it and come down maybe two feet. So our building would be above it. And that's one reason why we have deeper walls. And the way this actually is designed is that this little slope is going to be where the water is. So we just make sure that our front is over the site and that our our RER is as well.
60. Editing Topographies: And so far our topography here. What we can do, we have a low action item there. We can go ahead and actually divide the topography. And one way to do that is we can isolate this layer. And you probably want to cite our building. We probably want to come and fight a little less over the water on our building. So we probably want to design it. Looks like we're working with our site. We call it a pull our building back a little bit. And sideview, we'll of course see the entire topography. And we added the surface here. And one thing that we'd like to do that would be really nice, would be probably did come back. And we can click on any point and see where it's elevation. This is one foot six. And if we need some more one foot six to just make up model. And it's negative one foot six, I believe. We've just come back over here. And it gives us the that were a little bit limited to objects in the view. So we just pull this back and we could even cause this, this is our last level. This select all of these. And we'll make sure we have our control selected. And get all of these. And all of these and get all these. Press Move. It is pull that back. So now as we look in our model will have a lot of space to work with when we're putting things down. All right, So we moved our site up a little bit. And we don't want any of our building to really be on the water. And in fact, one of the things about it is we'll probably have it a little bit of a beach here. So we're going to play around, play god little bit with the site and make it so we actually get more ocean view. We're actually going to mirror it. So you might have had the house. And another way if you would, design this way. So we'll have the water going this way and our edge will be cantilevered over it. Okay, so now we go back to cite. So we actually see what's going on. And actually we're going to undo for a second. And we're going to make sure that we're, when we mirror, we're going to mirror our surface and our Topo. And you'll see why later. We're not going to make a copy. We're just going to mirror trade off.
61. Subdividing A Topography: To get our section from our topo, we're going to go inside and we're going to break it down so we can work with the cat line. Sometimes you can't work with guidelines unless they're exploded. So that's one of the things that we're going to work on. So we can get our model editable. So we can get a good typography and they will be able to visualize what's going on in our site. Right from our site tab. We have our CAD and we want to put our previous one to the side. Let me know if you want to come back to that in this one so we can work with it. We want wanna go ahead and explode it. So now each of the lines can be worked with. And we're going to go inside of it. Now we'll go back to our massing tab and we'll go for sub-region. And now we're going to select one of our lines. And now we will, from this line go to our HER edges. And we'll see actually will try to test it. Because we want the region probably go a little bit further out if we want to do a. So you can see that now we have a region, but if we wanted to a view, we probably go a little bit further out. So we're going to edit that boundary. We're going to edit the boundary to go as far as we want. And then we're going to edit the actual. And we can choose the point at the same time. Go out. And we're going to take our surface when edit that surface so that we have a similar sort of thing going on where we're not limited. But our motto goes out as far as you want it. The cell. And they will have to we'll have to come back and make sure things are fine with our divide. Okay, So you've seen how to work with that Topo. And we're just going to edit the boundary. And we're gonna take our points and we'll hit the current edge. And we'll come over here. And you know that you can, of course, they don't have to be direct loan that you can go out further. So this is a cool thing. So because it's water, you know, the boundary might move anyway. Okay? And now to actually set it to water, because this right now is generally will set to dirt. So that is the domain region. But we want this sub-region to be water. And we can set that to water by going to our materials.
62. Applying Site Materials: So now we're going to be looking at materials. Materials are great, private has a lot of good selections. So we're just going to keep it simple, but it's going to be really valuable as we work on this model. So to put it in water, you look at our material browser. We have the same sort of selection of materials, but all the materials like actually are not in this model. So you can see there's quite a lot of materials, but you can search in the search bar. And for each material There's identity where you have a name, you could describe it. There's the graphics of and how it's going to appear above or below. And then you have the ability to work on its appearance and its color. And then there's some physical and thermal properties for doing other types of calculations. Right now, since we don't have our water in the model, we're just going to go down to the bottom here where it says you can create Open Folder or you can just start from scratch. We're gonna create a new material and we're going to call it water. And we can just change that. And this name here, water. In our graphics, it's going to display this, why we have so you will probably do a little bluer. And then appearance. We're going to switch this when it come in. And what happens here is now we see the asset browser, which has a much larger set of materials in Revit. So I expand this all out. You can see that has materials, different places, different floor types. We're going to search. We're just gonna do water and wait for that to load. And here it has a tropical blue and water clear. I think we like tropical. So we're gonna go ahead and double-click it. And it was waiting for that material. And now it's loaded. So press. All right. So now let's set to water and pressed. Okay. And it's pretty blue. But now we see our site and it's right on the beach. So it's a beautiful little Fe2 there.
63. Planning the Second Floor: So now we have our modern house setup very basically, but we don't have a second floor. So now we want to figure out a little bit what's going on with the second floor. Second floor for this structure is going to be pretty basic right now we have a roof over all of these, so we take out our roof will just go again to hide it for temporary. We both need a way to get up there and we need to have something clear happening when people go up. So one nice thing we probably want to do is actually bring our walls up in this area to level three. And we'll just select these up to level 3. That's where our roof is. We want to have our stared see how long it's going to be.
64. Chapter 6: Introduction to Revit Building Systems: Rabbit has several built-in system to help you add different features for your architecture that go from railing to stairs to even the trends of walls. And so these are some variable systems that we're going to go into. So you can be prepared for any type of project accessory that you need to add.
65. Adding Rails : We're going to add a rail as we see our house here that has a large portion which will be exposed if we're looking at 3D view to just the elements and the drop-off gets a little tall over here. So just making a little rail would be great. So here's how we make rails and Revit. You can see there is a, a button for Rails and then you look at there are some options. You can sketch a path or you can place them on a sterile ramp. We're just going to sketch a path for now. And we're going to start by choosing this line. And when to just go all through the edges. We're going to come all the way back. And that's just the way we're gonna do it for now. And just to make sure that we're getting these lines because it doesn't seem like some of them are going through. So so it's good to always test and make sure everything is going through. I'm going to just stop and do it this way. And making sure that monitor where do I have my starts in my ends of my my lines? See this one's a little bit for off. Okay, now we have this and we can just use that line. And when we press Return, it says it needs to be continuous. Rails we have a little bit of an error will go on here and fix it. One of these relative is not continuous. So I'm making sure to see if there's a and I think this is our little overhang right there. I can just fill a and I use F for fillet or you can use this trim to corner. And then we do that. We can go to a 3D view, take a look at the type of rail that was made. You can see right now it's not super-structural, but it's rail. So here's how we can actually start to customize this. Well, you click on it, you see the rail is a family and there's a couple of different types. There's the regular there's a handrail, that's a pipe. And actually that would be nice for us. And if we go inside the family, besides the properties which talks about the offset where you can put six inches, it can go up or down. You can also have it where it will go inside or outside of that line. So it will come in from that border. You can see here. And of course, if ever we want to break it. The thing about railing is that it has to be continuous. So if we wanted to, for instance, put some stairs here, which we're gonna do in a moment. We would want to just create a new rail over here and use the same properties.
66. Adding Stairs : Heirs in Revit are very well calculated, but you still have to make sure you're getting the right result. We're thinking about maybe a ten-foot stair that goes down right here. And we're going to start that by clicking on our stair button and all the options for stairs or inside, you can see from our properties, some of the different families. We can have monolithic of precast air. And this is more for internal that has a wood stringer. So that's how the wood construction is. We're gonna do each type of those and we'll just change it in the family. And we're only going to need a few to get down to the grade. We're gonna make a little floor out here that will walk out like a peer into the water. So so now we just need enough to get down to that level. And so now we get to look at where do we start and where's, where's the lowest point in whereas the top point. So if we're trying to start at level one and we're going down negative two feet. That's one way to say, okay, those are our goals. Now what's actually happening? Before we start to calculate the stairs? Let's work on getting it to the length we want. So we wanted to be at 10 feet. So you can see this diagram, a stair, and we'll break into the different parts. It tells you how many risers. So this is a riser that goes out and each one of these is going up. And these each are the treads, 1, 2, 3, and 4 writers at three treads. And right here on the side it gives a bit of railing opportunity. So we want to now look at what's happening in 3D with our stair and we see it. It's going up in the wrong direction, so we probably want to come back and flip it or rotate it. We go to level 1, see it? And we can select this and we can click on our rotated and we want to go 180. So now we also want to center it. And one way just as simply center it might be to just do it after we finished his family. But we're going to jump into this a little bit. So this is a stair system and This right here is our side Stringer. And so we've chosen a assembled stair. So that's going to be like would set of stairs. We also could sketch our own stairs. And it's going to go basically a belong to same set of ideas of sugars, a direction in edge. We're going to finish this their first. We're going to make sure that it gets to the top and the bottom of our level that's desired. Now, before we do that, we are going to make a little bit of a peer. And our peer is going to be that same 10 feet. And it will go out. And we'll have it where it'll go out 30 feet. And then we're actually going to move the base of it. So it does this. So now we probably want to get our stair to be above this. We want this to go down. Negative two feet, would see if it's too low or does it fill our criteria for being over there? Okay. We probably have it just a little bit higher, so I get a one foot six. And we want our stair to generally get into this pier. And so we're gonna go back to our level one. And we're going to draw a construction line using DL. It's a detail one. And we're just getting our center point here. And we're going to move our stair. So that's center, the arrows on the center. Just nice. We can move this text as well. So now we have a centered stair. Now we're trying to calculate where exactly the stair is so we can have it fully aligned.
67. Aligning Rails: Now you see that this is a rail and this also is a rail right here. We actually can match properties of that type of rail to this type. So that's really nice for we want to have it more or less continuous. So we're going to have to cut this one. And what we can do to cut this one is select on this rail and the Sharad of that command. And we can edit the path. And what we can do is there are two ways of doing this. We're going to split it right here. And we can either use one rail. And all we could use. Because right here we see we have a little bit of a joint issue, but it does get us having to Rails and all we need to do to get the other side so we can be centered. Is again, we can even start to say one of the issues we have now is that our center is not Perfect. So if we could really start to have more aligned centers that would be desirable. So if we now want to center on our door and we just want to have our back portion off centered. Can just come in right here. And using this, we could probably go into our our slab and have a little concession for centering on that. And that's just a real simple thing. If you are in Revit, you know, you might want to adjust the floor. It's this simple and all these things will line up for you. So it's going to correct one, the stake here. And now we have it where we started to get some of these little relationships to be more perfect. Now we see our rail is needed to stop here. We're going to extend our rail to this point. And we can do our, our real exercise that we did before where we put our rail on this edge and come in. And and again, like you have to mind when sometimes it doesn't keep things continuous and always come in and check if it's continuous. And just press go. And then we can press match properties. And match properties is something I'm using all the time. Match properties is done. It's an incredible tool. And we just click one type and another type. And then we're going to make sure that we're getting our same offset of negative 3 offset path. And right here, you see it's sort of floating with, that's fine for what we're doing is really basic. So yes, so now we have it where we have a walkway that opens out and it's a little bit off-center, but the same time our walkway here is off-center. So it's a little bit of asymmetry coming to the end of the house.
68. Custom Rail Paths: Okay, so now we have our stair going down and we we've had it separate it, and it's just, we can keep that simple. I will show you a method really quickly on how to make a little more complicated real. You actually can. When you're making a rail. You can have different start and end points. And rather it will do all the math for you. So right now, we could actually have a slope to any, any rail and put it right here. We can have this slope. And this slope would be according to how far we say this will go. So if we say that this point is going to be a little bit below the rest of the rail. We're going to say negative one foot six. And we could go onto our 3D view and see what our result is. And we see that we would get a rail going out here. So we can even match the type MA. And you could get that. But for right now, I'm fine with this very simple, modern rail.
69. Calculating the Second Floor: To work on our second floor, we're going to have to probably use a little bit of tools that are in Revit to see what's going on and make sure things are working with first second level, we want to have a second floor that looks over both the dining space and it looks over into the living room space. So that's going to be our challenge for putting a second floor together and work with stairs that will go from the top to the bottom.
70. Adding the Second Floor: We can see from my second floor currently it looks down below. And so that's a useful thing to say, where are we going to put our stair? We're going to go ahead and put our stair first, and then we'll start building our second floor around the stair. So if we go to our stair button and it's very straightforward, we're going up from the first to the second level. And we'll set that in the properties. Base levels, level one, level two. As we look in here, we can see the actual number of risers and desired is the same. So we have 18 risers. And so this is, that's fine. We can just go in here. Click Okay. And we're going to look in our 3D view so we can see what's going on. And so we look at our 3D view and we just hide a roof key that are a real currently runs it to the floor but there is no problem. We can change the shape of the floor. Go back to level 2. And we could very simply make a line for the edge of the stair and go down. And we can go to fillet. And now we have probably want to have our wall extend to the edge of the kitchen. And we might want to even have it where there's a bit of a walkway here. So in the end of the day, we'll have a little bit of a overlook in the coupled low bedroom, been here now. Ten by ten, we can have a simple little space. Or, you know, it's a possibility that it might be a little bit small. Though we have maybe a little room for balcony here. Let's go ahead and look at that. And it says, do we want to attach it in things? Say no. Let's look at our 3D to see what's happening with our stair. So immediately you see that we have stair that comes up to this second floor. It's little walkway. We have forest, they're a little bit of rail.
71. Adding Stair Landings : What if we wanted to have a little more gentler stair? So we have a long year. What if we wanted to have like a bit of a stop in between? So it's very nice to add more authentic designer stair so we actually can do lending. So let's try a landing between this stare. Right now we have we have 18. We come back down and we, we start at nine and we add a simple landing. And we'll just go ahead and we actually probably want to just make another run. There's probably several ways of doing this. And it tells you, like, when you're making it, It's Bacon automatic landing in between the runs. So and I'll just show you that so you can see you can't directly make a landing. We actually go backwards. We actually could have made it where our Ron would start and go in this direction. It's showing how many stairs we need. So there's a couple ways of doing this. And that way could lead us, shorten our stair entirely so that people could get up over here. The only thing, of course, would be to say, when people, when there's a turn, are we having enough space? And one good thing about revenues as well is we can always do this. It's parametrically located. Excuse me. Make sure you're clicking the right point. So if we click on this there, you click on that arrow. If we want to do something like that, it automatically adjusts the top riser. So now we have a stair that turns a little bit, which might be very useful for us because a landing what soften the space a little bit. We only have to mine that people would be walking underneath here. So we don't need that to be too small.
72. Adjusting the Second Floor Footprint : Let's try this one now. Let's align it with our desired balcony edge and also less to align it with our wall. And so this sort of stare would give us a few more opportunities here. And let's look at how that will look in 3D. So, yeah, we can see it be a nice little stair that people could walk under and it could get to the top level. So let's, let's work on our top level to make sure it can work with this there. We're going to just choose one of the lines that we're gonna work with that line. Here we are choosing that line and this line. And we're just kinda Philae. And we're going to fillet here. And then we're going to make sure we have everything lining up. We're not going to attach anything right now. Yeah. And so now we have our second level. Let's both work with adding some few walls. Just for privacy sake. We can say we can make a little space, but sort of maybe a modernist loft up here.
73. Adding Second Floor Railing: So a little concourse through here would be nice to help set up this space to be a nice little loft area. Okay, so we can add a rail same way that we've added one outside where we just come in here. And let's make one for each side. Will add another rail. And you could always make the make a shortcut that you understand. So it's never that you have to always press the buttons in rabid, it's good to know. Quite a few shortcuts. All right, so we've made that line. We see that this line of sort of missed because it didn't go fully. But I think we have a solid line now. These are on the second floor us and we look up into the second floor and we see a nice little subtle spaces. And because this doesn't need to go up, we can go ahead and make this the decide what we'll do with this one. I think we'll just go ahead and make both of these going up to level two right now. And what it could be is just a very simple little partition. The typical look over. So alas, and we're going to select these walls and make sure they stop at level three. That's where our roof is. And we'll go back to a level two and put a little door in here. So we have a little space upstairs, little bit of refuge. Alright, so that's our second floor. We probably want to use that same style that we have in our first floor. So and we'll we'll work on that. So now you have a second floor and resonance.
74. Chapter 8: Introduction to Sheets: Having a house that's true stories. And any sort of amount of complexity is so much better by having wall section, that building sections. And so that's what we're gonna do with our building or modern building. And we'll start to get into that and how that could actually be placed in our project sheets.
75. Adding View Templates: The first thing is we know that we're going to be putting things in Sheets is that we were saying a particular one way of look items, looking at this page and then another way of looking on this page. And we, since we want them all to be the same, one thing we actually can go in here and do is create a view template. So to make our view template, we're going to go in and just set in the architectural plan the overrides. And the first override we're going to do is going to be our visual style for our walls. So we're going to come in here and do walls. And we're going to override the cut pattern. We're going to come in and say solid is going to be a gray. And do a solid here. And it's going to be that gray. And we'll press OK and Apply press Okay. And we can go ahead and set this same template to all of our plans. And a template is set up for us. So we can see that it's really good to set up templates for your workspaces. And let's look at some other things that we can make it a template. Right now we have a topography that's visible and we don't really need that. So we can also hide our our Topo. And that's by clicking on our view template. We're working on it and our architectural plan is one of the working with and we have a particular setting and this view template is really useful as you start to make different viewings style that you want. View Templates helps you organize bigger pages so that you're keeping the same. You can also import and export new templates and relevance. So now we have our basic sets and if we want to change, it will just come back here and change that.
76. Aligning View Crops: One thing that we know that we're gonna do is we're going to have this in a sheet. Is we're going to start cropping it to the area that we like. So we're going to edit the crop for right now. We're just going to simply make a region around on our floor plan first because we're going to probably make a site plan that has bigger information. So this is the one we would probably want to use. And we're going to go ahead and copy it. So having two levels will be made the same language. And we're going to. So now we can see our first level. And what we're gonna do now is we're seeing if we can go back to our Level 2. So we want to have the same crop. And we're just going to copy it. And we're just going to copy that profile line. We're going to go to level 1. And we go in here. We can press paste aligned to the current view. And there we have, we have the crop that we want and we're gonna, it's gonna make it really useful when you start putting this on sheets. And it says Save Project and we'll do that. Okay. So now let's start putting our project on the, on the sheet. Then we can add other information to it.
77. Adding Sheets: Hi. So now we're gonna go to sheets and we're going to add our first sheet. And we have an object for a 30 by 40 to sheet. We're going to load another one and we're going to go back. And this is our family's folder. And we want to load a 24 by 36 seat that we've worked on earlier. And we'll just load that up. It's 24 by 36. I'm going to go ahead and make sure we're getting the skills that we want from our plans. And so this is about for 8 eighth of an inch. So that's nice. So we're going to move our second level here as well. And it's a lining up and that's nice. So we have our two stories.
78. Editing the Title Block: Let's go ahead and make some new sheets. And we'll label this one. We'll change it just a little bit. So it's the family is going to be a little bit neater where we pull down all this information. Now we need to do is stretch it down. Would just clicked on the areas and the line automatically brought the other ones down. So think that's working great. And we're just updating the actual file. So be mindful if you want to save another one.
79. Laying Out the Sheet Set: What we're going to call this project name. This is our plans. And we look at our sheets, we see a floor plan sheet. And you actually can't copy or duplicate floor plans. So you have to make one per item. We're just going to use the same template. And we're going to call this would be our our elevations, building elevations. And we're gonna make a third one, will use the same template. And we're going to call this our building and wall sections. And then we'll we'll come back and make our final sheet. We will rename this. And you can rename it here. You can name it actually by right-clicking it. So this is going to be r. So we have our building section, we're going to make a cover sheet. So that's sheets going to be a little bit different. We're actually going to make that a 100. If you've noticed, also, Revit will automatically order your sheets according to their name.
80. Adding A Sheet Schedule: So now that we've made several sheets, it's good to always come back and work on the sheets to have the order. So now that we have a cover sheet, we can go ahead and put some information about how many sheets, as well as start putting the information that we want on there. So for our cover sheet, we probably want to make a list of the sheets. So one way to do that is using a schedule. So we'll go ahead and say new schedule. And we see that this is already under here, so it's going to be a tight schedule. So since it's already here, let's go ahead and click it. And what we can do is we can click sheet, name and number. So there's all sorts of information we're going to add like suddenly codes approved and revision. We're just going to start with those simple to you can always add more later. Now we have our sheet named Sheet number on this, and we can just cover sheet and drag the sheet list just like all the other information we need to do is move it over so it's full. So we're ready to put this together and we probably want to come back actually in the over here in the schedule. And put in our sort of formatting will put drawing set. So now we see that it's automatically updated here. And now that we see there's a lot of information in the file that we probably don't want to use. So we're actually going to go on our family and edit it. And we're going to take out some of the information that we don't need right now. We're not using any structural engineer, but if we wanted to, we can always just put that information in here. But we see it's actually probably a dynamic luck. So we actually leave one. Since we just want to be simple about it, we can just make a simple title. And if we have a desire to put an image in, now I'll show you how to make a image into a Revit file.
81. Adding A Project Logo: Okay, so we're going to add to our title block little more information as we're customizing a little bit far project. I think we want to go ahead and add in a image for our logo. And I'll use the motion from logo, that's my studio. And all you do is going to the Insert tab, click on image. And in my folders I have an asset. And I just click on the image. And the middle, it has a particular scale, but don't worry for jpegs, you can always resize it. And we're just going to keep that simple and make sure that it fits in our box. And I think one tile is, is probably enough. We'll just put a logo and here. And so now we have that logo and it's ready to roll. So we're going to load into project and close it. And we'll say, yes, we can save that. And we're going to replace the existing.
82. Adding A Cover Sheet: Let's go into make some of our items that go into the sheet. We're going to first start by making a proper 3D view, because right now all we have is our, our basic 3D view. We don't have a particular view. And as we build our sheet set, it's going to be important to have this. So we'll just make our will make a camera to see the house. And then we're going to make some interior ones as well. So now we just want to expand this out a little bit, but we do want to see how large it's going to show up on our page. So that's an important aspect. Probably come back to develop this by walking out a little bit. And we're just starting with this view. We'll add some shadow to it. And that'll be fine. We probably want to change the time of day just a little bit. And we'll just go into here and choose another location for the sun. And then we'll try this location. And that gives us a little bit of visibility or so that'll be fine. And now we want to probably close some of these tabs. It's always good to have tabs, Cool, So we don't focus on too many things. Are cover sheet, we're going to add that that new perspective, we'll label it. We're going to rename IT perspective. The older later. Don't worry, you can always undo. Put that onto our cover page. And so we get it a little bit larger. We're going to be clicked into it. We're going to come in here. And we'll make it a little bit larger for this crop view. And we're going to just do a walk in. And we're going to append a little bit. And it's not going to crazy. We can actually right-click on this view will and, and increase that or decrease the focal length. So it's more normal inverses like really far away. And we'll just escape out of that. Now we have a view of our house. Might want to possibly go down a little bit, but for now, this will be fine for our cover.
83. Customizing The Cover Viewport: And so now that we have our cover image, we can actually see that we have on our title block, little name, and we probably don't want that particularly on our viewport. And so since that's the only type of problem on and go on our edit our types. We're going to duplicate it to viewport and name it no title. And in this family, we can just turn off the family option. And the line weight is fine. We're only going to really see our image now. So this is our front page. We can edit the image if we need. And so now let's start building our other pages.
84. Introduction to Elevation Development: Making elevations in Revit is really simple, is I've gone through in some parts of the lesson. You just got to make sure you have the exact crop you want to, you can be going back and forth between your crops and also where it's located on your plan. That's an important part of this. If we look at our first-level plan for our project, we can see that our elevation tags are in the viewport. And we'll look at that elevation. You click on the pretty much the base point. And we've chosen only one elevation from this base elevation tag. And when we click on it, we see that our line of plane is right here. And it's important to know where that is because if we go too far back out, if you can see where our contour lines are, it might not get the site, so it's important to keep that. So you can have a line of sight. And I'll show you the example different. So that's looking into our East elevation. So if you go back and you see right now that that's actually a west elevation. If we come back too much, you actually will see like a cutoff in our site. So since we don't want to do that, we'll go back over here and make sure that it's in the right location.
85. Cleaning Up Model Lines: Also one thing that's important is I have a couple lines here that I use just for construction purposes. So I'm going to probably convert these into detail lines on our site plan. Or actually we're going to even would be better way because now their model lines, if we just put that in our working lines, that will help it from getting in the way of our project here. So we can just select those working. Mine's, select them all and we've got to convert those lines. And so now here you look other views Enough, see them because there was just a construction line for us. And also we see outside of the crop right now. So we're just going to hide the crop region and make sure that we're cropping the view.
86. Setting Up Elevation Views: All right, so now let's look at our elevations to see we have information we want, we have our datum. We probably want to bring that up above our building. We have for our little grid and then we also have our levels. And if we want to change a name to a level, we could just click in here. And it will change in all of our corresponding views and floor plans you will see here. And then we could just say, we say second floor. And so it's really useful and it will just update immediately. And we could just say this is our roof. So and it changes in the corresponding views. So that's great. And we probably want to have it all caps us to keep our system go into saying. And so now we can look at our other elevations. You see you have to name that we want. We see we have a bit of a sight line there. And one thing that we have, you can see also we sort of see that the sideline is different on different drawings. So you might want to come in here and set a particular dimension that we want for that. But again, that's something that you can always do by going to your particular crop window and aligning it. You can say we want to come to this level and then go down. If you go to Edit D crop, he might say you want to go down, click the line, and then we go down five feet, something like that.
87. Adding Elevations To The Sheet Set: So let's put our put our elevations on our pages. And just really be simple about the ones that we're using. And we see that our front of our house, building elevation will go south. Then we'll circle around. So do our west elevation here. And then we'll do our north elevation here. Then we'll do our East elevation here. And now we can just come back and align these things that are a title box. And the, if you see where the title went and went to the lowest level of the crop. So the crops are a little bit different. Whether it's not really going to affect our drawing right now. But we probably for visual purposes, might want to come up a little bit. Alright, so now we have these and let's probably number them. As we see actually the numbering is already done. So very nice. Our crop is visible here. It won't be printed, but it's nice that sometimes turn it off. So here we have a nice set of elevations ago with our drawing.
88. Planning Sections: Now it's time to work on sections. And sections are going to be a great part of understanding how rabbit works, because it'll show up on all my drawings and we will be able to look at information, will make a building section and a wall section. To make our section, we're going to start with our first floor. And we're going to actually look at the section that we made earlier. And we're going to probably make some new ones when it come into our view tab. Let's sometimes a habit to click the Architecture tab. And we're going to choose a direction that we want. And we want to come back and have another section tag. And we'll have one actually going through the stair. We see something of what happened, that the building will have another section that will go through the floor. So you see that balcony condition on the inside. And so let's break down each one of these and start developing that building section. And then we do some wall sections. Good, this is our first building section. So we might make a template so we can get the same type of information, each one, probably going to movies. And so what you can see right now is that you can see your cross-sections in your sections. So that's a nice little element. So you can have information that's cross-referenced. And this going to turn off my crop for a second so I can add some detail lines. So you have little detail lines. So right now I actually have my line weight. It's turned off and turmoil my weights back on a see the thickness of the walls and we can see how things are going down. You see a little bit this balcony here. You see the closet spaces. So that's, that's looking good. So this is going to be our label. This section is our east and east, west section. And then we'll go on to our other sections. So that's why we have that are East-West, North-South section. So we'll call this section uniquely bedroom section. And it goes uniquely for the bedroom area over the bedroom suite. And probably wanna bring our grids down just a little bit. And when this cross section down as well. So it looks like it's floating a little bit. That'll be interesting and nice detail. Now let's go back to our other section that we have here. Ever stare section. You see the little detail what happens with our stair? And this is pretty good. And we'll see that sometimes elements move our response each other. And we're just going to call this our stair section. And then finally we're going to go to first forward to open our last section. And we'll call this our living living room section, living spaces section. And so there's automatic view give given to these size at 1 eighth. And I think that'll be fine for us.
89. Adding Sections To The Sheet Set: So now that we get our sections made less add them to our section page. So now what we can do is probably collapse all. So we can only choose the drugs that we want. We want to choose our sections. And we'll just place them and then we'll organize the order. And we can align which one would probably go best beside the other one. And we'll put our, our wall sections to our right. So let's put these. So we have are the last section that we need to add is going to be.
90. Adjusting Sections On The Sheet: Section. So now we get to make sure we have enough space. And now align our different elements on our page. Might want to keep the same ordering as our last one. So our r one was down here. We can go back to our sheet to see to order we had. And it's good to keep the same format so that one is going to be at the bottom right. And we just simply can move this over. No, sorta us out for that. And so now we have a set of our sections on a page and they're aligning. This is not exactly aligning. That we need to just move that so we can align that. I'm doing with this this one machine, two directions. And we'll make sure that we're de-select that. Make sure that we're selecting that, not just selecting the view-port. Sometimes easy to select the viewport when you're trying to just move the tax. And so we're just doing a basic view of our project. And we can currently see are our little crop bar might not want to see that. So we could actually select the ones where we see the crop. We turn the crop view off in the cell. Now we have the right things.
91. Wall Section Concepts: Wall sections and rabbit or a beautiful way to understand your building and be ready to make a detailed set. And there's a lot of things that rabbit gives you to help make really successful wall sections. So we're just going to go into a few of that so you can be ready next. When you started next to a project detail. However, you can use the same knowledge you know from different sources on how to put buildings together. You're just going to use it in a Revit, terminology and sense.
92. Chapter 9: Introduction to Wall Sections: Using Wall Sections really benefits understanding how big rabbit goes into building information modeling. Every wall's intelligent. And you can put a lot of detail already in the model. We're about to go through to develop some wall sections from our Revit model. And we'll be using some systems that we can download from the Revit library to make really the details also will be developing the type of wall. So you'll see how to really start to work on making proper wall sizes in revenue.
93. Planning Wall Sections: So here you see our basic building sections. And we know that we want to start breaking down some of these into good basic wall sections versus just the building section. So here's how you do that. We're going to close my other drawings. We're just going to select a particular area. And then we'll detail that area. One critical area that would be great to detail is this right here. So let's make a wall section and here's how you make while section. You can really just do a callout. And call out is a rectangular area. You can have several types of call outs, but this one we're going to make into a regular rectangular callout that will make into a wall section. So always do is highlight area. We click once, and then we have a tag already associated with it. So we might want to make some other wall section. So it's good to just go through our drawing little bit. Say where do we want to show major connection? So just like in a design project, you might be part of, you want to have particular information about your drawing. And so these are two conditions that we want to deal with. And our third condition that would be you will sue to find would probably be one in our our balcony. So just scared little bit of the balcony condition. And one would be our wall section at our glass wall. So let's start to build these.
94. Planning The Wall: And as you build these, what we can do is we can also start to define the wall of the robot. So the curtain wall is pretty much defined. The other wall that we're going to use, which was our stone, is a little less defined. So we're gonna go into that material also and think about some of the things that go into it, as well as the materials. So we go to our first full plan. We see that we see are building section shown out. However, we don't yet see out where our wall sections are. But don't worry, we'll we'll start to see that as we go into the section where we had these. So if we start with this tag on our east-west section, all we need to do to see what's in that tag is double-click on the symbol. And the symbol, we have three different levels. And we don't have any particular information at the moment. So one thing we know we'd probably need in our model that would be useful that we can make very quickly is going to be a foundation. And the foundation is actually quite simple to make in red it we're going to be making some things in 3D and we'll also be making some things in our detail.
95. Structural Considerations: So we're gonna go to our 3D section and we're going to isolate our walls. And we're going to come over here and click that. We're going to isolate the category. So now we see all of our walls. And as we have a grid pattern for this design, the grid pattern actually plan to a structural foundation. So that means we're gonna go to our structure tab. And you have several different items that you can add to your drawing. You know that your beam, you can add different walls, columns, braces for right now. Only thing we're probably interested in is likely piles that will go down to the foundation and maybe compiles under each of these big walls. And we don't want to be super specific. Where we can start is considering a pile for each of our grid points. And the powers will ruin underneath the the building.
96. Sketching A Pier Foundation: We think about where we're going to go. I'm going to use regions to describe where we're going to be placing these piles. We would probably place them underneath these points. So you see right here I made a region and we're going to make a red family region. We currently don't have any color ones except for solid black. And we actually will use a transparent. And we'll just go in here and actually duplicate, make red transparent. And it's already transparent. And we just need to set that color to red and press. Okay? And since we can't really see it, we're gonna go inside and make sure we have that as a solid fill. All right, so now we have a, an idea where our structure will go. And now we're going to, we're actually going to take this to a new drawing type. We're going to make just a first floor. We're going to duplicate with detailing. And we're going to rename this to structure. So as we've started to figure out what's going on below here, it's going to help us see that we're in that drawing, figuring out how will we make that structure. And rabbit is great at helping you develop good structures. So this copy and this CO, and we're just going to copy it. And we actually want to copy multiple male. Each one of them just kinda do make each center line on here. And since we're just knowing we're doing 10, just do this way. We'll just do 30 feet. And we'll do our last one at 10 feet. So the way we have a little extra unit will take out. The way the structure is going to be for this building, is going to be peers that will go down underneath. We don't have to do it on along every part. We cantilever some of these out. But since this is a 30-foot span, we might actually since the wall stops here, we can go ahead and probably do just one more. And then I'll do a little diagram of the structure idea. And it's very simple. You can come to wrap it with very simple or very complex structure ideas. And you could do that. So you see here this is the type of structure that I'd like to put for the house. And I'd probably add another one right here. And we'll come up. And this one might go up 15 to meet the end of these. And actually we probably have a structure at the end of each of these walls. Anyway. We'll do five feet. And this one will come out with these three pieces. And so now we have a structural grid that will support our building. But we still want to have certain visual characteristics about our building.
97. Setting Up A Foundation Plan: To start dealing with our structure, it would be really useful for us to actually, we'll close our second floor here, start to make a foundation plan. So that's also very easy and rabbit. But because we want to really keep it simple, we're gonna go into our elevation. We're going to copy our first floor down and we'll use that copy as our foundation. Would just that's a simple way to do it. We are going to cancel actually at now. We'll just actually just create a plan. So that's one way you can do it. I did that with the roof. Now, sometimes you will have containment issues. So one way to just get around that is just go to View and plan views. And we're going to actually add a, a level this way. And it's not really visible in this joint because it's what's going this way. But we can just a line it up here now. And this will be our foundation level. And one of the things you're seeing now is because I have the the crop on that. This is outside of the range. And crops actually, they don't let you change. Here's, here's another thing with levels. Levels have two sides. You see some details. You actually cannot move this to this side. You'll just move the level. So that's a thing to, to mind. So what I'll do now is just click the other side is just to drag this level so it matches the other ones. And this is going to be call Foundation. And so now we're going to create a plan that aligns with the foundation. This is going to be a floor plan. And currently it doesn't select this level yet. So we'll see if Foundation was created and it was when we created the level. And so this is where we can start to employ our structure of system. So we already have the idea where we want our structural members. We can even isolate this category and just copy all of these and press Control C. And from our foundation, we can go ahead and paste to same place. And when it comes down, we can isolate or isolate category and make these into a group. We'll just leave it as group one. And we can be set Everything's and now we're going to start putting foundation details in. So before we put these n want to coordinate is to look at that detail. And if you notice this is still showing a floor plan. One way to get around this is to make sure that we're view range is only going to be from the ground down. So our cup plane, now that we're on our foundation level, we could go up only two feet to the top and one foot six from the foundation level. And this right here is a diagram in Revit that shows how view plans work. Ranges work. So I'm going to have this cut plane below the building and the top of it, it's going to be below the floor so we won't be interrupted. So as I apply that, you can see, you can almost see that the major walls. So one thing about this type of wall, which is very nice for us to be using. We're actually going to be using it. So it's a stone veneer. But we have to think about what happens underneath the stone. The stone will rest on piers going down. And it's, it's very simple to make some structure idea. Right here you can see this is your foundation wall. However, since we're going to go down to the peers, we probably want to go ahead and sort of figure out how that's going to look.
98. Developing A Concept Foundation Structure: As we go into our east-west section, now, you will see that we have our wall going down, we have our floor. And then I'm going to dot n where we're going to see up here. And this is a thinking exercise. So I think in Revit, you're going to find to answer your thing, how would I do this? So all I really want to do is put something underneath the wall. Essentially, I want to keep this veneer down to the foundation and then the pile will start somewhere below here. And if I can just do like mine, the show What's going to happen. I'll take off the crop region just a little bit. We're going to have She's our alliance level. We wanted to have a floor coming down in our floor. Actually. Using detail lines here. Our floor is going to it's going to be connected into our, our peer. And I'll just make it this really big. So the peer will sit in this sort of Y. And then we'll have our floor resting in this particular fashion. And so this is just an assumption for how we would organize this. Our peer would not be something we want to really expose so much. And so we'd have like a detail between the wall and structure, but we're not gonna go into too much of how this works. We're just going to make a basic section idea.
99. Setting Up Foundation Plan Parameters: So as we're figuring out our foundation, we're going to have to learn some things about Revit. Revit is really sensitive about where points are. So right now we see a grid. We just made a foundation. But the foundation doesn't appear to have any regret levels. Well, we look in our elevation, we will see that our grid lines are actually not going in intersecting with this level. So when I come back and do it this way, I just went below the level. You can see the grid levels. So now we do the same thing for our front view. For myself. We're just going to make sure that that intersects with the level. So now that we have all this information, we can continue forward. We also want to make sure that we're our plan view and view range is not going to be outside level. So I'm seeing some furniture when I make sure that it stops it two feet. Or when I say it stops at two feet above the foundation, you don't have the information I need. So one thing that we're not seeing now, and we're actually going to close a lot of these views. It's good always to simplify what you're looking at. We can always open these again. Will we are comparing what we see in this view versus what do we see in this one. And we're saying that we're probably a little higher than we want. Cut plane is at 0, probably see a little bit higher for a coupling. So we can see all the above. We can start to detail how this wall is going to be.
100. Planning A Structural Wall: So to detail the wall that we're going to put a foundation while we are finding again, the type of relationship you want. And if we go to our sections and we look at our callout, we've made a mock detail of what's going to happen. Our exterior wall is going to go down to appear in the peers. Also a part of what's resting on for our our floor framing, which is maybe a slab over a deck. And so we'll just go with that for now. And then so this wall, since this is actually inside we, we probably want to, we liked the idea of having a stone. Even as a stone, we'd probably just have it as a veneer. So one way so that our building will not change and we go to the first floor, is we have to choose what's going to be the exterior. So now let's put together a wall that's going to work with our building information. So we have to determine how did we want this wall to be? We have layers to the wall and I'm going to turn off the line weights. So if we want this wall to have maybe three inches on both sides and maybe have a CMU in the middle. And it probably be a little bit larger. So as V this out one inch, we see that to actually have a detail, it might be a lot different than what we're imagining. Also it think about how would it get to a certain height. And so to, to flesh this out, we can use the same width. And we probably are going to be a little bit different for middle wall that we don't have to exactly be that way. Well, one thing we're considering we make in our wall. If we're gonna do an eight inch wall, we're going to have insulation before I finished material. So we might do a two-inch rigid insulation. And this is how you sketch out like what's going to be in your wall. So two-inch interior installation. And then we'll just sort of imagine if we can we can find this in specification, a 1.5 inch stone material. And our exterior depends on which side of which type of building you're doing, which side installation is on the selection is on one side. So we'll say for this client it will be on the inside I X the exterior side. We're going to have a stone veneer as well. So a stone veneer on inside, outside and a CMU here, we're going to have moisture barrier here and a little bit of a gap. So we do our gap. We're going to be pushing that out a little bit. So we lose a little bit of space in our wheel wall section. But I think we have enough to be happy with. And now since we have an interior wall, you probably don't have three different types. So what we're gonna do is start going a little bit beyond our generic wall. And we're going to click on this family and we're going to hit Duplicate. So we're going to name our first one exterior. Are B1 or A1, things that are A1 exterior to your insulate it. And just like we had before, we're going to go into our structure. And we have some lines that are helping us figure out what was going on before. So we'll actually need to align this when we're done.
101. Defining A Structural Wall Family: Wall types in R, a ballpark of, of figuring things out and then going seeing that actually be done. So just pay close attention. This will require some research. We're going to just play around with some basic values that would probably fit and can be developed later on. All right, so as we go into structure of this family, we also see some other properties that are available, including identity data, analytical properties. And you could also choose one particular material. But we go into our structure. There's also some different how things will, will fit at the end. But as we go through our structure and go ahead and click. And now we see that the structure is where we start to look into the assembly of that family. And so each, each assembly is sort of like a family of its own. So let's build that structure. So we're going to have the core boundary and we're going to have the finished side and outside. So we already said that we're trying to have a 1.5 inch stone veneer is we click on material. We go again to our materials in Revit or he placed a water. So if we want to do stone, we just clicks down here and see if it's in the project and we don't have it. So we can just go create a new material. And I'll put this as a stone veneer. And this new material has a default name. I'll say a 1.5 inch denier. And our parents will go ahead and change that to stoned from our Revit library of materials. And we think it's something like a bit of a ashlar coarse stone should be nice, or maybe even a slate. Let's, let's try slight see how that will look. Maybe not, maybe we'll actually look at this stone. I think a limestone might be the, the best for what we're looking at working with. And let's see if we can get a bit bigger, bigger sound look. And you'll see this in elevation when we develop it. And for material, we probably want to go a little bit more like a solid stone. Look. We'll look at bluestone and I think I should have something that works for what we're trying. We're being a little bit ambitious. Okay, so we'll do a simple blue stone and just be a simple material. So we have 1.5 inch on the exterior. And just like any sort of wall structure, we actually going to call that our finished layer, finish one. And we're going to come underneath that. Instead of a substrate which is a moisture barrier. And it might be in the project not. So we can just make it simple, create a new material, and it's going to be a waterproofing. So water whether or moisture barrier. And it depends on your region. You'll have it in different places. But this is going to be our I share a bit of a substrate. And then we can put a slight air barrier here. And we don't really have to put up material. Well, just like half inch. And then our structures are going to be the CMU. Sorry, there should that's put in, right. And we want to make this a concrete masonry unit. And so we're going to come though. We could have made it a port slab. We're just doing simple for this example. We're going to do rigid insulation on the inside. And one reason why this is important is that it's going to actually show up. And if we click on this preview button, it actually we set my, my drawing a little bit. Don't worry that happens sometimes. Want to be simple about it. Sometimes it, we said it will just quickly write it back in here.
102. Applying Wall Types: We've detailed are while out a little bit using the same things that we said before. So keep simple about this. Make sure to write down the values have just in case something doesn't go right as you type it and make sure that you understand that a, a membrane layer has 0 inches, while other layers have to have more than 0. So just keep in mind and we'll, we'll see some of the things that revit has and putting together that wall. So right now we've put in our wall thicknesses. And now as we look at our preview, there's some other options we're not going to deal with right now. But if we look in, we see are essential wall section coming from our stone, our year gap and ER, membrane. And then our structural material are same. You are rigid insulation and our stone on inside. So this is our wall assembly. And we're going to press okay. And we figured that out, that's an A1 exterior insulated. We follow me say stone veneer and press. Okay. And now that we've added that, you can see that you, the wall sort of soda looks the same. Make sure this is that type for us. And what we can see when we actually see that style is we had to go over to detail. And right now detail is closed in our view template. So as opposed to tell you in a view template, well, we can also do is actually create a call-out in this plan view so we can start to see what's going on with our wall. Disco inside of you. And now for our callout, it's going to be a section. We don't need to show this, so we're going to hide this, this other section. We can click on the button here which says coarse, medium or fine. We go to medium, we start to see what's happening with this wall section. And so this is our exterior, this is our interior. It's pretty much doing what we're looking for. We probably want to center the wall on our CMU because it's going down to the foundation. So one way to do that is to go back to our edit, our type, and come in here. And you see that the core has a boundary right here. And the sides are actually going to be all. This is going to be our inside and it's going to be our outside. And so the core is based on here. So the walls thinner line is actually not what's really important to us. We'd rather have the wall on the core centerline to make that happen. Now, we could say a line. So a line is you actually get to from the Modify. I use a line all the time. And so I use AL for a line. So we're going to align the wall with the face of this material. So we're actually going to do it manually. We'll put that wall. And don't worry, most of things attached to we'll do this and if you have any issues, we'll change it. There. You have our wall assembly. Now we want to deal with what's happening to our walls that meet this wall. And we'll move our tag outside of the drawing a little bit.
103. Defining A Non Structural Wall: Right here we have wall that's on the outside, and then it comes to the inside. What would we like to have on that wall? I think I'd be really happy to have this as a word wall. That would have a similar sort of issue going on where the water on the outside and we come inside. Now it's going to be a bit of a wood veneer and there's going to be insulation. Using wood framing would be something I would like to do for this section. So we're going to call this wall duplicate. We're going to call this our b2. We're going to call this Sue-Je, exterior interior wall. And so we really want to have the same material probably treated differently on both sides. So we want to make for this wall, we're going to design it. We're going to design it to have a 5.5 inch, which structure? And the structure will actually hold our installation so we don't have to add something different. However, we're going to have a gap on the outside and our entire material negotiate against the wall. So like we said before, we're going to have a a would exterior and we'll just use the like the wood material of Sue-Je bond. So, but because it's going to be a little simpler to just use a word that we can find for right now, we'll, we'll use one of the words that's in the program. We use birch. And we're going to duplicate this. And so this is something you learned in working with materials. Sue-je is a Japanese method of using wood. We're going to come in here and as opposed to this varnish, we're going to go ahead and copy this so we can make a new material. And this often happened when making walls that you're gonna make new materials because you're doing different conditions. So now we haven't do material here. And so we don't have to really struggle too much with this. We're just going to turn down the brightness. Just be a dark sort of wood. And that'll achieve our purpose. Or look right now for the Sue-Je is going to be a finished. And we're going to have like 1.5 inch of it. We're actually going to insert that below as well. There are finished two. And we'll just copy that same word. And we'll do it. We'll do a smaller piece on the inside and outside. We're going to insert a air barrier of like half-inch, an actual one of course you can do for in your own studies. And then we'll have a membrane layer is 0 inches. So that's this, our air, our weather proof barrier. We don't have to put that in now. I'm now as you look at the wall section, we can see that we have our air barrier tom material and then we have our structure and our interim structure will be attached to that. So we press Okay. And now look at this in our call out. And we're going to name this call out. Typical wall. Typical. And we'll make sure nothing is selected. And we'll say, this is our stone. Stone to wood to wood detail. And we can get near and say plan detail. So that's one of our details now.
104. Reviewing Wall Details: All right, So having a plan detail, having a little more intelligent of what's going on in our our first floor, help us start to look at what happens beneath it. But we also want to come down here and make sure that all of our walls are now sort of informing this same system. So our exterior walls are going to be doing this. And R are central wall is going to be doing a little bit different things on the inside.
105. Completing Wall Types: We've gone through our model and added some detail to our walls. And now we want to probably go from a waltz to start looking at what's happening in our wall sections. So these will all have types and you go Look, I've made a, so you can see all the little connections. I made. Three major types of walls, these interior chips, malls, this exterior walls. And one thing to do for the walls that I've done for our gypsum walls that came into structure. And I wanted the ends of the structure to be wrapped and the material so where it it does have two different sizes of Sue-Je. I probably want to use the same on both sides. And also, if I come down here to where it says, What am I doing here? I could just say at the ends I want to wrap around the exterior. And this set inserts. I can also wrap, but I don't typically work with that. So now we have this. And so now we look at the details. We see that our material wraps, creates a nice little effect. Also, we see that this material is an exterior, internal, internal or exterior condition. So I'm going to click split or SL. So I just split this wall. And the outside part of the wall is going to be r. It's going to be exterior, so only some insulation. You can get really detailed with this and rabbits. So that's a cool thing by Revit, it keeps the same thickness, but we want to make sure that it's it's going to be doing what we wanted. And since there's a little bit of a size change, we're going to have to probably make this a little bit unique. So the first thing we wanna do is flip the wall. We don't want to have this condition. So this will probably play around with sorry. It's the other way, sorry, apologies. So this sort of condition will tell us something about our model where whereas we've made a interior dimension, we probably want to come back in here. And even as we go inside, we want to have it where our wall will keep the same structure. And that's one of the things that I've added here. And we just keep this sort of thing going. So you will never have a situation where the wall is different thickness. And so now, even though one is entirely interior and this this is just blocking, you have a similar dimension going all throughout the building. Okay? So now that we have this, we can go to our 3D. And now we'll start to look at our building. We click on realistic down in the visual style. Give it a little time to load. It's going to start showing that the material that we've been selecting. And you can see the design is coming up nicely. Seeing our stone or wood and glass. And so that's creating a unique effect for us as we working on our design.
106. Integrating A Foundation Wall: And we see now that we have more intricate wall type. Now we can start to place are just Foundation will also want to keep that generic. We're going to put that below our wall. And we're going to to help us as we are aligning these sort of things. We're going to hide our these elements. And so now you sort of see what's happening. So we're trying to locate our foundation. It's going to go beneath our walls as we're building our building section, we want to have a model that's pretty competent and what it's showing. Okay, So right now we see this is not exactly where we want it. So we probably want to come out. And now if we go in and see a medium detail, we can start to see what's going to happen with our wall. So we put our peer going SREB it no, This will see that. This TO by 12 here. And if we turn on wireframe mode, we'll go to our view templates so we can change the type of the range. And if you look at a view template, we can change the display. So we have the option there. And we want to work on things like the displays. So we're gonna go to Model is play. Okay, so we've just changed the model is y. So we can look at our model and wireframe so we can see how our peer is relating directly to our wall. And so now you see that the walls, the goal is a structure to be aligned below. And we can see that that's really what's happening. We have a structure that's right underneath our wall. And so now we can start to place these. And what even, we can even do, because we have this one here, is we can array it. So here's how you do arrays in Revit. So we click there one item and we want to have, let's see how many grid points we have. We only want to do one for this one, but we're going to come up later. And we're going to do seven in a row. So we can already make that seven. And we'll just click seven. And we'll just look about the last. And so it says you can group and associate and talk about the numbers. So all I need to put as the first location and the last location. And rabbit artery, we put all these in relationship to each other. And they're actually a group. So if you ever moving are changing one of them, You change all of them. So because they're still connected, really by the top and the bottom, you can just come in here and select both top and bottom. Move it 10 feet. It's moved all my peers. So I want to come back now. And I really don't need this grid diagram anymore. We have lot of information from it. And we want to copy this one. We'll copy this ten feet down. And no worry about the fact that it's copying from an array. It just means that it's a group that's going to be operating. So your changes to this inside of here as we look in our 3D model will not be reflected. And so one of the things that the goal is to do is like we were shown before. It goes to a level in it's going to be resting on a beam that goes this way. And these are, they're going to be beams between your your peers below here as well. Then on top of the structure just goes up. And we opted to use CMU over this. This beam is not a simple, super simple structure, but It's something basic to accomplish what we're doing for this project. So we actually can break the group as well. We can ungroup it. And now we can group it again. We just simple without this. Like we said, we want to go up 20 feet. We want to choose our base here. And this is going to come up 40 feet. And because this one stops, we're gonna come back down and let it with this once. And we're going to push this one out to the edge of that wall. So is the we have up here that's here that we actually need to pull back over here. And that means the same thing is here. We want to have this item coming over here. And it's a little bit off, don't worry, we can put it back. The simple dislocate that right there. And then all of these items, we're going to come in, pull it to the edge here. So now we have a building on piers.
107. Developing Defined Details: Making your drawing sections and rabid gives you the opportunity to understand your model more and figure it out before you go because you're making it three something, you make a 3D something's just make his details. Let's go to the methods of doing things simply in details. So right now we have a foundation plan where we share some of our peers. This building is going to be appears. We're going to have some columns. But obviously sometimes some of these details we don't know as we talk with the structural engineer. But if we go back to our call-out where we've shown part of what's happening with this wall. We can start to figure out other things from them. One of the things we want to start with this probably now click on our detail level. So now we see what's happening with the wall. And so that's going to already helped us tremendously because we have our mock section right here. We can start to say what's going to happen below here. And we can already start to consider things like our floor is, is very simple. Can we make that a little more complex? And so one way to do that is to also edit the family for the floor. And one thing we'd simply do is we would probably say that there's going to be a sub floor above wood framing that goes below the floor. And there's going to be insulation on the inside of this. So we're going to simply add a little bit of structure to this floor. In our core is going to have this finished layer. And it's going to be three-quarters. And our structure is going to be a basic sort of 11 and a quarter inch wood material and our finish is going to be a subfloor. So we'll just put wood for now and we'll choose one of the nicer woods. Software lambda will be fine. We're actually stained with me nicer. Okay, so this is going to be a shock for, for that we're just going to show for this model. As we develop that, we see that it's updated in our model. So now we turn our line weights back on. We can see that we're seeing the same you that goes down to our peer. And again, it doesn't matter. Structures you find how things would actually be when you work with the structural engineer. But we're just trying to detail some of the ideas to start the project.
108. Revit Detail Families: One thing that Revit does is rabbit has lots of families for making details. So let's look at some of those, start to put some of those in the model. So what we're gonna do when we're working with annotating and making details. We can go to our detail components here and we start to see that there's not that many in the project. If we load the families, we can see in our rabbit family folder, there are some folders for details. We could look down here below. It says detail items. So these are specification for materials. It has to have some concrete to wood, to different types of connections. So this is actually really helpful and I'll, I'll break it down so you can see some of the elements and you could pretty much look for anything that you're looking for based on the specification category. So CSR is one of the base or master spec. That's a Specification guide, really dictates this folder and it has some great details for you to put in your model. So what we're looking for is a would probably some concrete, but also wood frame. And so we're gonna go down to here. We've clicked on wood and wood framing. And his right now some, some sections of cut lumber and rough and nominal cards. So we're gonna go for nominal cuts. And it gives us where we have one by eight. We're probably going to be using two bytes, which is seven and a quarter by 1.5, actual dimension, two by six, two-by-fours. And that's going to be maybe even some two-by-two. So those are going to be things that we use in our project to press. Okay, so we've loaded several different types. And as we see, things are not super clear in this section. We might not actually be seeing this element in this section. So when we see things like that, one thing we can start to say is, let's go another level down. So we add this wall section. We have some elements that indicate things that are Gamow below, but let's start to work on below this wall section into a section detail.
109. Updating Revit Structure: Well, we've just had a cough. My structural engineer and he's told us that we can't put our concrete up to the wall and have it on peers. For our purposes. That means we're just going to have a concrete that goes down very far. But we will put the other parts of our building on peers. So understanding that we are going to go into our 3D view where we've shown our foundation. We're going to come in and we're going to ungroup both our peer sections. And we're getting real with each level. That's how Revit can help you. And we're actually going to come down with our wall five feet. So our wall currently got a particular dimension. However, three obviously don't want our finished to be going all the way down. One of the things we might just be interested in doing is actually just creating a either we're going to change the type of wall or we're going to make a wall underneath it and I think making a one and if it would, would suit. So that wall that's going down is going to be a little different. Probably going to have the stone going down to it, or it's going to be caught with a bigger unit of masonry. So we're just going to simply model that out. It's going to be a fatter unit. So we have our eight inch masonry right now. We're going to do a thicker unit underneath it that's going to catch all this material. And it's really going to catch material from the outside. And so this wall will meet where this wall stopped. So this goes negative three. That's where our foundation is. So our topic is going to be at the foundation. We're gonna go from negative five to the foundation. And we'll go to the 3D view to see what's happening. And all we need to do is align and you can align your 3D objects. This wall dot here. And since this is all going to be under grade, it'll work for our purposes. So that's going to be how we're going to structure this area. And we'll probably do the same thing for our middle wall. And all we need to do to get that done. Let's copy from our center line because we're using that grid. That grid is come in handy here. So our little wall that goes all the way down is going to be for both of those. And that's what's going to happen at these areas. And we will show that. And then we'll have beams that run underneath to catch the floor. And these these peers probably will be also helping us as we were figuring out the span. So we're going to keep this simple again. But we do want to have some accuracy and our details.
110. Updating A Section Detail: Detail that we're showing is that we're going to have. And you can see it already in here. A one size unit come down to meet another size. And trying to figure out what's going on here. This is our thick wall. A thick wall is not yet big enough. So we're going to come in here and we're going to add the type and make it a little bit larger. So I can capture that big unit that's happened above it. So we're actually going to make a new wall cancel out of here. And we're gonna make a new 16, a one-foot for generic wall. And we're just going to keep this simple right now. And are 16 in our structure would have had four inches. And so now you see it captures all of our pieces here. And though this piece will actually probably die at the floor. All right, so one thing we do in making this structure is as we start to get accurate, our Joyce will probably die into the CMU unit. And we're going to make a region to show the other Joyce going in that direction. So we just coming and we're going to make this go down here and we're building our section. And so right now, you can see some of what we have happening here. Since this is below, we're going to actually have this as poured. So we're going to pour this foundation. And one way to denote that it's actually coming in. We can actually do that in Revit will just make it into a concrete material, go into structure. And we're going to select concrete. And this will be poured. And we'll call this cast in place. And it will come with a Material. And we'll go to our section is we'll look a little deeper and this is how it's going to look and they'll be fine for us. Okay, So now we see, we still see a bit of a hatch here. And as this is going to be our detail, we probably want to have a little more information. So we're going to go back and pressing DC, and we're going to load a family for CMU unit. It's going to help us start to aligns moral foundation details with actual structure. So here is the directory where we're going to find our concrete masonry unit. There are two folders, one for concrete and masonry. And we're going to choose the folder that has masonry. And so as we click on masonry, we see concrete masonry unit are sort of interesting. It says concrete unit masonry. And we're looking for a typical CMU. And we're just going to look at the top. So a section I should do, and we don't read the side, so you see the different types of families. And then there's some different types of elements as well. We are using a sale or something. We also have those options. We're just gonna do a CMU core section. This one, we want to start at our finished floor. And that's where our structure is going to go up. And since we've opted to go up with the more concrete unit, think that's going to be fine for us. We're just going to find out from this information where our base is going to be. So our wood framing, we'll go on to our concrete and we just go down eight inches. Eight inches again. And we'll find out where our foundation really needs to be. And this unit is duplicated. So we're gonna go down six integers. And we see that our foundations little bit high, it probably needs to be down so we can have coursing CMU. And we're just going to measure that dimension down four and three-eights. So we're going to change our foundation here to negative three foot four. And pretty much it's going to be five-eighths. So we went down. So it'll be 32 foot 75 eighths. Let's see u that gets where he wanted. Okay, sorry. I'm gonna put that in. Our previous one we did was write three foot four and three-eighths. Okay, so now we have a proper depth. And then all we need to do is actually a line for a wall to go down. And so we see that our CMU's or run into our concrete foundation. And it's a continuous so it will have be it It's a type of pier, but it's going to be like this in showered continuous wall. And so we have our wall that comes out and bears. Now we actually don't have a floor material, so we'd sort of have a little bit of an unclear detail also. We haven't made our CMU's go up yet. So now these are for they're gonna go up four times eight, which is 32 inches. And so now we have a, a wall section and let's press T L. So now you see what's happening with our floor. And what's going to happen is we're going to have insulation. And that's going to be one of our little installation issues and we probably will close it. Maybe to put like little ways to keep moisture from coming into the building.
111. Updating A Sheet Set With Sections: So let's put our section on a page so we start to figure out what's going on and we can have it. So we'll at least have an idea of a basic set. So now let's go to our close all our windows out. We've learned a lot, but we need to wrap it up. We want to take off some of our construction lines because we have a lot of our drawing working for us now. And then we'll go back to our sheets and look at our cover sheet. It has all the drawings that we are using for this project. And we'll go to our floor plan. The floor plan is looking nice. And then we'll go to our elevations. And elevations are also looking nice. Probably wanna make sure that our every drawing is going to be cropped properly. And then we'll go to our building and wall section page. And now we get the chance to put some of our our wall sections where our building section leaders and we can just close our other dry and so those are fine for right now. We will be going back and forth between the plan. And second as we're organizing our drawing. So now that we have some sections set up, Let's put out a call out which our wall sections. And you'll notice that when you put this on the sheet, immediately, it actually started to populate information. So this was located here. So now it's called 5, 8, 1, 0, 3. And you see that right here now. So it's called five. So let's put our other sections on the page. And so this is going to be our detail. And we'll just say our foundation detail. We'll call it that. Click on that detail. It should have that selected. We'll just call that view name. Come back over here. And we'll just say that foundation detail. Typical foundation, deeper detail. Alright, so we have this and it's called out here and now you see it's reference back onto here. And now let's add some more other sections here. And and even one of the issues now is it's listed in our sections. And we actually have no division between building section, small section. But actually rabbit has a separation. So we actually click on our wall section then start to click on them, clicking inside of the drawing. So now we're in that space. We can choose wall section. And we do that it will show differently. The project. Let me click on this drawing. And since it's not a building section, it's a detail section. We can just click on detail. No-show this one differently. So now we start to see is organized in our Project Browser section and detail views. So that's really helpful for us. So now we have another couple of section that we want to add his here. So we place this section and we probably want to have our sections next to each other. So we're going to be moving our building sections over. We also want to come in here and probably make sure that this is going like this. And we're going to align our our walls that the small things we're doing and we're making sure that our or continuous footing, which is a concrete wall, is going to be our 16 edge. And so since this is a wall section, one thing we can go back as well and do is so we can be similar to all of our wall section. We actually can come in here and actually use a view template. View template will help us get the same effect on all of our drawings. So we'll just simply set up a basic view template for building section. And we see that there's already one actually in Revit. And we'll see how that looks. And this actually is sort of at the wrong scale. So we're actually going to come in here. We'll undo that. And we'll, we'll go and we'll, we'll edit that one. So b, the cell that we want. So we'll call this architectural sketch section. We'll duplicate it. And we'll just call it a architectural section. And this one's going to be at 1 fourth inch. So it's, it's, and this is going to actually be our wall section. So architectural section. So this is going to have a different scale. It's going to be very medium. And right now the only thing we want to sort of differentiate, alright, so see it as a couple of different elements that's shown right now. But in general, we would probably want to come in here and pull out our level. And now we're going to deactivate the view and come back into paper space. And we could set up this section in the same manner. So by having that view template, it makes everything work together. And we double-click off there. So now we have a wall section on the edge. And we can, OK, we can see all of these sections right here. One at the edge, one at the interior. And to make things nicer, we can, of course line up some of these viewport cuts. And we can line up our YOU tags. And we can work on numbering as soon as we get all our drawings and the page. So this was a wall section and it still is looking at labeled as a building section. So we just come in here and change that. And we also have this section. So we're gonna do the same sort of system of making this into a wall section and making it part of this view template. And have a lot of space for our browser right now. We just move that down and we'll just say architectural wall section. And see this is one of the floating sections that we'll show our beam, but it would not show through the floor. And since we might put notes later on, we can already see that we will probably have to do a little bit of research waiting for these drawings if we were to make a full set from them coming into this building section. And we'll probably move this over. And we're going to change this level. So it's not on both sides. We go and of course, fixing your model as you go. And make sure our walls are doing what we want. So this this all right here is native to be 16 inches. So it's just that simple. You could be working on your model and designing and fixing errors all at same time. That's a cool thing about it, is it just gives you so much power. That is one of the things that as you put information and you need to check all your drawings. Rabbit is a perimeter system so things are changing all around. So it's good to make sure you're in control of that.
112. Adding Balcony Details: And while this is sort of at the dining room, we're actually going to make this into a detail and we'll call this, we're going to base it off the architectural wall section, but we're going to duplicate it. And we're going to call it a architectural building section or detail. So now we're gonna make our details operate according to the same system. So we choose the quarter inches and we're going to keep that level of detail. And so now we see some of the issues of our design. Our railing is a little bit out. So maybe we need to put it at three inches and or negative three inches, so it comes in. That's already very useful. And because we already have our template end for our systems, we see our floor has a deck, but we don't have any structure there. So we can just come in for DC. And very simply put in some, some wood framing. For this floor. Probably do two by two by 12s as well. And we might have like some trim to come down here. And also we probably want to have a ceiling so we can find those same materials and our classifications and specification folder. So now let's work on this detail. We're going to add some information to it. As we've been building our detail sheet. We want to have some more information as we're going to go in. So it's like sort of build as you go. Now we want to put some trim and to our model as well as the ceiling. We go to wood and wood. We have some options for sheeting inside of a wall. We also have option for Some mill work and no work is very valuable. That includes some trim. So we're going to include this sort of nowhere section. And we just would be fine with having like a one by four or one by 61 by 12. And that will my 10 as well. And the way this works is this is going to be a little section. But we also have the option. If we would rather have a variable, there are some variable as well. And we're going to turn out are allowing me to teal so we can get this to exact location. And if you if you remember, this actually is a floor family. So the thing is if we want to actually make our own floor, we could go in here in DC and load the family for a sort of a wood material. So architectural woodwork here, There's lemon, it's section is wood trim. So different types of wood trim. We're interested in maybe just and laminates section. And the way this works is you just draw a line and it'll give you a little bit of the material. So this is a very, very thin material. So our forward probably laminated on top of shielding. And where this is a particular dimension, you actually might want to have it where this would go over here by small amount. And we could pull this up. And so we can cover this area. We can either get a measurement and say we want this maybe one foot and maybe one for two. We actually can come in here because it's a family. We can duplicate and we do by 14. And we'll just make this simple, and we'll just make it 14 inches. And we're just move this down. So now when we add our ceiling will go to DC and we'll load a family for the ceiling materials. You can find the ceiling materials as a finish. And you have ceilings right here and it would see a Cusco ceilings. And there are some options. We probably want to do, something like a gypsum board. So gypsum wallboard section will be fine for us. And this works the same thing as laminate flooring. You just draw a line and it will make a side. So we ofcourse, we want this to be at the bottom of our Our blocking. And we're just going to align it. And because it's gone a little bit slow, we're just move it down by hand and move it down by hand and then move it up. And so now we have a little bit of a detail here for what's happening with our floor. And we see that are having a little bit of an issue here where we're going to have maybe our floor is going to rest on top of a plate. So one way to do that is actually since this is probably going to be continuous, we're just going to make a region that will black over it. And we just can do something like this. And we'll just come back out. And this will have thin line to find. And this is going to just click on the blank space to make sure this is a solid white. And we're going to come back to DC when to place a detail component of a two-by-four for our wall. And we just come down here and we'll just do a double top plate. And put that in here. And it already has sort of a bit of a system here. And we see this in the background. Is this is actually near some casework, since we don't want to show that we're just going to hide that element. All we're concerned with. In fact, since there might be all sorts of items that are in your drawing, one way to help your section be a lot clearer is actually you can go in your section and you could turn off visible items. So we're actually going to go in our architectural template and we're going to set it up a little bit so we don't have too much information. One way to set up your, your information is you can change which parts of visible and you can also change how the model is shown. So that's the 3D model. And so as I go into here now and press okay, I can have my model as either not showing, and I'll show you that one. And it says, Don't display the model. So you only see my detail lines, my detail items. Or I could say halftone, and I think halftone could be fine for now. So now we don't have really a gypsum material here, so we're going to come back and since our walls are all gypsum, we'll just use the same one. And we'll just rotate. It will probably change the rotation. And one way to rotate by custom location, press the press than item, click Rotate, and then you press the space bar. And now we can come back here. We wanna make sure that this is a little large and five-eighths. But it's fine for what we're doing. We'll have our ball coming up here and we'll, we'll align our bottom to the top. And though we might have a cock beading reality, we're just going to simplify this. Right now. We will put some trim in though, because this is the modern house, but people might like a little trim. As we know that that's going to be an r trim folder. I'll be sort of fun here. So yeah, so now we have our, our little internal section. And if, if our framing was running the other direction, we could just go ahead and just make these every 20 inches on center. And that would build the communication of the drawing. That one dot here. We don't need. And we'll move these 40 inches. All right, so there we have our balcony section and we'll rename that to balcony section.
113. Setting Up Annotations and Legends: So one of the first things we're going to do when making our detailed tags. We're just gonna make it simple legend and then we're going to use the same type of thing to go from legend back to the item. So we're going to use a number like one or two. We're gonna say this is what's being pointed out in our tags. So you see it when we're going through it. Alright, so the first thing we're gonna do is come back to our project browser. And we're going to go down to our legends and we're going to add a new legend. And we'll just say drawing For section details, section notes. And it says one-quarter one-quarter inch sorted. We find it's not it's probably going to be good probably to do it one to one. Because it's just me making a list and making notes. So just going to make a text file now comes all the way up. And I'm just going to label it here. Section notes. I'm going to come with another text is down below. And we just do TX. And same thing you go from go into annotate. And we'll just say one. We're going to be the cant element of gypsum wallboard. To just do one, we will take up the stud framing and then we'll put three CMU unit. Masonry. Stone veneer is number 4. And we'll do five is going to be our wood flooring. Curtain wall is going to be one of our elements. We're gonna get to that one shortly. And then maybe seven, we're going to have a unique identification for our insulation. And so just very basic notes. I'm just adding it here and our section notes. And all you do is go on building and wall section page. And I just put section notes, drag it in. You probably don't want to have a tag here. So we're going to make this too no title tag. And sort of big for the notes, section 3 probably when I come down to like 33 seconds. And in fact, we probably don't need to have, this is so large. We wanted a little bit larger. This, we're not getting much of an option here. We're going to go a little bit in between. So we'll say duplicate. And we're going to make a 1 eighth inch Ariel. And we'll just come here and set the text size is one over eight. And so now we have our section notes and we're just going to make a little box for it as well. We can do that just by pressing D L or detail line, making a box around this. And make sure that that's going to be a thin line. And press control to make sure we're selecting the whole one. And there we go. We'll probably be going through our section details to do these are secondary does what we get to communicate some of these specifics about drawing. You also probably want to add to our tag some of our Sue-Je bond bond panel. And we'll just keep it basic for now. So let's come in here and add our pillow. All these see in our concrete foundation. So that's our peers and we'll just label it as concrete foundation for now. So we know that we're going to be labeling that in our little detail section here. So immediately we know that we probably need a little more space or we can move the drawing over when they come inside of this drawing. And some people like to, some people like to do this separately. I like sometime to do this in a drawing. Like see how it's going to look on the page. And so one important thing is to start pulling these, these tags out. So there's no way. We could just press TX on this, call, this eight. And that's going to be, we're going to make sure that we're seeing what we're looking at. So it's currently not showing it, I think because there's a little bit off the page. So one thing to do when you're saying that your notes not pairing up, you can always choose your annotations to be visible. And that's in your Detail View. You can make sure this is clipped off so.
114. Adding Annotations And Legends: So now we have this, we probably want to make this smaller like we were doing before. This could be 330 seconds and we add a little tag to it. And that could be pointed at our copy foundation. And you can of course, do a cheat sheet and having our copy of our information, as we're figuring this out to the page. Select all these control copy. And as opposed to work in this file which might take longer because we have all these things in it. You can collapse all, Yeah, and look at our sheet. And all we want to look at is our foundation section. So typical foundation detail, just click that. And now we can just copy that text somewhere. And we can just make that a little smaller so we can see it. And now we can just rock and roll with what we're doing. And we'll just make some multiple tags and we'll get to each one. So we can put focus on are this is our stone veneer and are still always going to be an insight as well. We see now if we look at this, our wall and this side is actually backwards, that's no worries. We can just select on it. Go into our first floor. We will look at this side. We know our installation is going to be on the other side. All we need to do is come back here and make sure it's the center of that wall is going to be on our center line. And we go back to that foundation detail. Couple things change, but most part it's saying we could even hide it if it's not shown what we're trying to add it show, for instance, like right here. We don't need to see this installation down here. So one way we could get around that is to make a region. Let me just press my shortcut for making regions. One thing that would actually be beneficial is to really just go ahead and make all these elements out of detail items. But for now we'll just simplify. And we're going to make these. The top one is going to be invisible lines, but this one is going to be a thicker line. And what's going to happen is we're actually going to take this right here, which leave this as invisible and we're going to place them as wide at the back. But it's still going to be on top of the building and we're in a comma, we're going to make a picture for what's going to happen to the ground outside of our building. So so outside our building we probably want to have some grading, which is the site work. And it's very likely will not be on this side. But for our purposes, we're going to actually, either side now would be uniquely using, will be uniquely using our, our, our families of detail. Regions were building this as we're going. And so this is going to actually be Compaq fill right here. And then we're going to put concrete. So for right now I'm going to leave this here and then I'm gonna come back and put this as concrete fill. So right now, we can already just put that here because you're not going to see the concrete. So this is going to be our concrete fill and we're going to communicate with that with a cross hatch at the moment. We're going to hide our typography. And we're going to hide this wall. Before we hide it will as opposed to the blocking and out, which is the one thing. I think we can just block it out for now. But that's going to be option in the future is to just start to me draw all these elements. Anyway. So we're going through, we've labeled our concrete foundation, we've labeled our stone veneer. Now let's label our CME masonry unit. Labeled that is three. And now we want to look at some of the other items we have here. Since we're inside, we can always do our inside tag for our internal stone veneer. And we click on this. And we have to think about what's happening on the other side of our page. So on our, on our final page there'll be a lot of information to the right and left. So keep an eye on a zone is important. So that's looking at the veneer now will point to the going inside and that's going to be our installation. And just like that, we've labeled our wall section, we haven't labeled a for yet, so that would be really good. So right now it's all I see is like some stud framing. So I think we'll put nine as we put our sub fluorine as well. Just escape out of this too many things. And all we need to do is probably these things up and be careful because your model is behind the drawing. So you can hide the model if you want and you doing this. So that's what sometimes people do and working on details inside the model. So I'm going to put for the wood flooring. And there we have it. I've labeled this drawing and we'll probably know again, there's another pass where you could add more information. And another thing that we might be useful. So it's not really useful for this drawing, but we'll add it anyway is a drawing that communicates some of the thickness information. So I'll exit to go to the different sides of the of the structural material and the finish. So that's a useful we'll detail that I placed in here. We're going to make sure that this is going to be part of our architectural detail family. And so that's useful right now for us. We want to come back in here and make sure this top line is showing as a cut line. So when it come and make this to be a wide line. And there we have it. We've made our first foundation detail, and this is obviously going to be bigger on the page right now. So we are going to come in here and resize if we need so we can have it okay, so it still fits. We'd probably want to move all these texts tags and a little bit all these war information to come in.
115. Annotating A Balcony Detail: And we could do some of these same tags right now in our balcony detail. And you can very simply just say that we're having our stud framing with two. And we don't have to add the arrow afterwards. Actually. We actually already have it set by clicking here to be making points when we're doing that element. So that's really cool. So we're trying to get our gypsum wallboard. So all I do is pull up from here. And that's our first detail because the ceiling and the wall are all gypsum. We could just simply pull this down. We could align these texts and we can add another line. So we have a double noted text there. And we want to highlight our wood flooring as well. And that's number 5. So we could just come up. And I did that. So I keep the line that's always like to have things aligned. And I'll just type in here five.
116. Details Conclusion: Congratulations. If you've gotten through all these section going through your plan, your wall sections, your elevations, you've made a modern house. So it's a lot of information. If you have missed anything, you can always go back. I talk about quite a lot of different methods, but you can use them every day and your Revit.
117. Chapter 10: Introduction to Rooms: The room, family and Revit is an incredible tool to give you information about a space. You can also turn around user information to get quantifiable information. Factory how many people can fit in the space, how much it will cost because you have the square footage. Or you can even use it just the color code and understand what's going on in space. This is something that is your plants and other parts of your model. And we're gonna get into how you can use that.
118. Adding Simple Rooms: Adding rooms in Revit is not a difficult task. Here is a basic plan without any of the room tags, but I've actually created some rooms already in this drawing. But if you want to start adding rooms, all you have to do is go to the Architecture tab and click on row. And 0 show spaces where there might be a row or what were their art rooms. So this is, I've actually gone to my model Nate rooms that actually can see the space where there isn't one. And I could click on room. As you can see, the room is for this area between these walls. And I could simply give a title like closet and also have a woman any tag or any, any room that's made in any of the views. I can always come back and click on tag room. And any view I can come and put a tag on. So you can customize your room tag that has some inflammation as above. And it's also a family that you could also come into to double-click and choose different type of information that's shown.
119. Room Attributes and Schedules: One incredible feature in rabbit is the ability to make room schedules. Room schedules, and information pertaining to individual spaces are something that rabbit gives you lots of control and power over. It's again, another part of the building information modelling that rabbit provides. So we'll look at how to get that from your plan. How to make a schedule like this, which can be used for various means of assessing your building, adding particular information, maybe even making a price per square foot to your building. Let's get started.
120. Understanding Revit Rooms: We started on our first floor. But you can see where we've added labels to all of our spaces that are interior. You can also label our exterior. But for the purpose of this, we're just going to label the interior. We'll put text over the exterior spaces. Though that also could be in your schedule if you had planned that. And you see we have our rooms and I've just used the built-in tag and read it. And I've selected room tag with area for all of them. As you can see, when I put a control or press control over the room tag, it shows you an x, that x is the area of the room. Now, one thing about this, this doesn't just include the room walls. This also includes the volume. If you can see, when we put down the properties, will just drag this down. All this information is contained within a room area perimeter, the height, and also volume, which is something that you have the setup. For our purposes, we will not be needing that. There's also a different identity data and finished data that could inform if you're going to send this to an interior designer or a contractor, you could start putting all this information in this tag. You could even show it if you have a custom tag to show that information. For now, we're just going to use the area to make a room schedule.
121. Custom Room Boundaries: Now that we have all of our rooms, one thing about this is you can see these few lines that are in the project and you click on it, it says room separation. That's one way that I've divided spaces that didn't have normal walls. You click on any wall. You'll see there's a check mark down under constraints. It says room bounding. If we take it off, that would, for instance, we tick up this room bound will give us an error. The error would mean from this, he says that multiple rooms are enclosed in the same region. That's because rooms close off the boundaries or the boundaries of the rooms. We're going to click Cancel. Another way to divide the room also is 2 from the Architecture tab. Click on room separator. This ladder allows us to make lines. And now when we press control over the room tag, we'll see that there's a division. And we could simply say that this is a water closet for a toilet. So that's how you divide a space that might have an open wall. Or if you have a very big space like this where big openings, that's how you would divide that space from this space. So I've divided the model interior. These are all interior into these spaces. Now show you what a happen if you had tried to make a room outside. Now, since the outside of spaces in bounded by walls, you can put a tag out there, but you'll get an error message. And it'll say it's not an enclosed region. So if we had come out and made room separator, we could make walls around the area. But a problem might be that there is no ground, but since we paste the ground, we don't have an issue. We're going to take that off because we're fine with just two an interior. And we will look on the second floor to make sure that those spaces are also labeled. As you can see, we've labeled the loft. And also I have made a room separator line around the entire balcony. Now some people calculate stairs separately. Since I've included that on the ground floor, that will be the basis for measuring that.
122. Introduction to Schedules: So now let's add our room schedule. To add a room schedule. You're going to come down to schedules. In the browser. We're going to collapse all. You can right-click new schedule or quantities. You can also make this going to View and clicking on schedules. So those are two different ways that you can make a new schedule. And we're going to scroll down to Rome in the category. And then we'll click OK. And now we're choosing the items that we want in our schedule. We're going to start off with the room name, then the room number. And we're also going to put occupancy and we'll show you why. And then we are going to the WAF, some of the Finnish information. Like I said, before, you could put this information in your room schedule. So you can start to, you quantize all the information for that row. And now we're going to go into some of the other properties. We would like to group this by number. And we'd like a header and a footer that not with the number more base on the occupancy. And so we're going to use the occupancy. Not exactly by code. For this project. We'll just use it by a particular differentiation between a main living space or an accessory space. And we want a header and a footer to these sections. And then we're going to click on formatting. And because we haven't placed area, we're going to come back here and include area. And when we click on area, we're going to add the base of the formatting. Click Calculate totals. And I think that's enough to get our room schedule started. Now, currently, we can see that all the organization is a little bit all over the place. So I'm going to go back in here with our sorting and grouping. We're actually going to organize by our occupancy first. And we'll put a header and footer for the occupancy and they will put numbers second. And that clear this up. And as you see, I've gotten here for each of the rooms spaces and our detailed what is is if it's accessory or if it's circulation. And you could change it very simply. For instance, for balcony here. I can just click on circulation and you see that updated immediately. And we also see that some things that are here that I've deleted from the project. Don't worry, what you need to do to remove rules that aren't be included. If you just click area and you can say that it is greater than 0. So that's one way to make sure you only show worms and the project. And the toilet is something I would make as the accessories will slowly make sure that our texts gets it. And the loss is going to be part of the living spaces. Okay? So you can see from this very simple going from the rabbit schedule in eight by the floor plan of labeling the rooms, that all this information is in the project already now we have to do is make a schedule.
123. Updating Room Information: So one thing that people might be interested is in changing the numbers. You actually can't change the numbers. And make sure if you're going to switch a number, you get an error message. You want to come back and change the other ones so rooms can't have the same number. And then you could fix it.
124. Room Area Grand Total: And currently you see there's a total for each of the occupancy classification success me circulation, but we don't have a total total. So we actually will go back in the fields and then go to sorting and grouping and make sure that we include grand totals at the end. So we see for a house that our square footage for our interior condition space is 1923. So we could use this both for estimation of the cost of the project. Also in using to analyze things about the space. Maybe we want to have less living space because it costs more. Or maybe we could reduce the circulation because it's not that critical. These are all things that can be done innately from rabid using the formation of schedules.
125. 34 LIFE SAFETY 0: Life safety plans, in addition to several different types of code information that will make sure your project is permanent with approval are things that are typically on commercial projects. This project is starting to get large. And though this is more of a residential course, I'll go into some of these elements that will help in the next commercial courses, but will help you in Revit if you're doing bigger buildings. Rabbit has a lot of great information about things like safety analysis of your building. So doing something like a life safety plan will be something that can help you to develop your building to the point that it won't be safe for the occupants and that it will get through coding or permitting process.
126. 34 LIFE SAFETY 1: We could use a typical floor plan. And we'll close this one I made and we'll just make a new one. We're going to duplicate the first floor plan. And we're not going to I'm going to duplicate it with the detailing, so that'll kill our room tags. And I'll just call this first floor life safety plan. And as I go on here, one of the things that are done to help this process go forward is in my architectural plan are actually made a life safety plan template. And one of the key things that aren't here is make it halftone. And one critical thing as well is because we don't need to mini section tags. We'll go ahead and hide these. Tags like callout tags will hide section tags. Also elevation minds. This is how you make a View. Make sure that it's giving information that's needed from it. And you don't have to put information. That's good too. It is to what you're trying to show. A click is okay. So this is now our life safety template. On this plan. We know some critical things that we want is we want to know the distance from the farthest point. And what I've done is just simply split the house. And to saying things from this, I will go here. Things from this side. This particular area will go here, and this area to go here. So we'll just go for basic. I'll make a hidden line from this point, which I say is going to be the farthest point. So let's start. So I'm making these to be in the center of the spaces. And it has to get all the way to the exit. And then I'll come back. And I will make a, I will make a region. This is going to be a solid black region. And that'll indicate the point that is the furthest. And then I'll make another region and I click F for my regions. And I'll come back over here. And all I need to do now is flip this. And only one of these at each my doors. And I'm only going to make a path to that bottom one. And these actually are going to be solid white. We wrote that to one, go to 180 and go into current include this one. And so if I go back to my schedule to see how much occupancy is in the building. The building is 2000 square feet. About our divide that by 200 and I get 10. And that's the normal for residential occupancy. That means that 10 would be the total of people leaving. And I'm not going to fully calculated out here. But because this portion of the acid here, I'll just simple simplification purposes. Put that into free with the mostly made from here. So I'll do 33 and then I'll do four. And this is an extensive how to do life safety. This is as basic. Putting some of that knowledge that is very much going to be valuable in larger projects. And you'd be really accessing the IBC for the International Building Code or the International Residential Code. If you're doing these. So far, I've already made these. And one thing to now do is to find out this travel distance. This will be one of our major differences. And so as I move up, I can measure this by going to my Modify tab. I'll measure this distance. Measure. We just click here on the ruler and make sure we click chain. And I'll start from the middle of here. Now just keep going along this line. And now I'm not going to click it yet. But we see that it's listed as 38 foot 11.5 in the total link right up here. So I'll just put it back down there, but that's where it was listed. So we'll just put our path of travel as as 40 feet and inches. And one thing that you do on these code plans as well is you'd label the doors and all my doors already know they're all going to be about five-foot give or take. And so they're all double doors at five feet. I'm going to label this door width equals 60 inches. And we could say that the 10 foot occupant over the point 2, this is again in your codebook. So I would definitely reference going to the code for your location. And the equals the total occupancy that we could be using. The actual sixth. So that's 60 and it is over 0.2 equals 120 occupants and the actual equals 10 occupants. And this is merely an exercise showing the concept that would be different for commercial. But you could do that just in the same manner. And so you put the same thing here. This one would be four, and this will be three. And above here would be three as well. And one thing for coal as well, though we've had several different types of walls. Sometimes for larger institution, you might have a rated wall and something like a laundry that's on a larger scale would be rated. I've turned my detail line on and I've made a line type for path of travel. And any type of wine, can you want to make something unique? You'd go to the Manage tab, and you just go to additional settings and lifestyles. And you could create a custom line and made this a six inch waistline, that's red and 1 eighth inch dash. That's how I made my my weighted wall line. And that's also I'm in my path of travel lines. Really partition you show it somewhat like this. And that's how you make your fire and life safety plan. And you'd be including things like fire extinguishers and also location of different devices in bigger projects. That's also something that would be included in the RCP. This project would just show this for now.
127. Chapter 11: Introduction to Reflected Ceiling Plans: The reflected ceiling plan is a part of seeing a project from the upside down. So that you can understand and put elements like lighting fixtures, different elements that will go on the top of a space. Whereas floor plans typically look down the space you're going to be looking at, and rabbit gives you some awesome tos do that. So I'm going to show you how to put some basic ideas of families into your model and also see some different places where you can find different manufacturers who make things, lighting different furniture, different applications to the ceiling. You can also pass in your model and we're going to do that. And also we'll go through how to calculate how you're going to navigate what is shown in your RCP.
128. Setting Up A Reflected Ceiling Plans: The first thing we want to do in making a ceiling planet rabbit is come over here to the ceiling plan areas. Now, rabid automatically generates a ceiling plan for you. Like click here, and you see nothing in it except for what's happening above. And currently you can see one particular detail element. This is a ceiling I've detailed right here. And I've just met that a compound would take so link for the exterior in this area. But I also like to do make ceilings for the interior. So the first thing I do is click ceiling. And rabbit has our options for an automatic ceiling to click. And it will take all the enclosed spaces in area. Or I could sketch ceiling. The one issue with it being enclosed is if you want to have certain features in it, like a break or if you want to use that ceiling uniquely, that would be an issue. We're gonna go ahead and do both this base. Go ahead and choose this compound ceiling gypsum over metal stead. And now we'll also add some ceiling. This easy to do for different spaces. For this base, which is a little bit different. Because as we have seen before, this ceiling goes all the way to the top of the building and do only be a ceiling below, that'll be under this stair area. So we actually will make a ceiling for this area and they will cut out some of the walls though. It could make it go through the walls. I feel more comfortable for it to be cut out if it's going to be near it. And so one of the things that we're seeing here is that this ceiling is going to be continuous around the walls. So it will wrap the walls. And it will end at this area. And some red. We can do quite a lot of interesting ceiling forms. Now this is going to be flat. But there is the ability to do other types. And finally, for this I'm going to take and I'm using fillet. Quickly, get to this. I'm going to align this. And so now we have a ceiling, will make sure that it says eight feet. We might change that. And so we have this ceiling and we count a 3D view. We'll look at the ceilings that we've added. Pick an item so we'll see where it is. You see that it's sort of interrupting with our our ceiling. So for our glass and Paul wanted to go to the bottom of this roof. So we'll click that. And we're just align it to the top of the top of the ceiling, to the bottom of the roof and will align here to be the bottom of the second floor. Then if we were completing all of our ceilings, we would also have done a ceiling. And it's simply sketching it for the second floor. And now we'll just include the area from here to here. And we're not getting into detailing it, just basically describing where it's going to be. So that would have been the ceiling that's above the second floor. And we're going to align that to the bottom of the ceiling. Bottom of the roof.
129. Planing Ceiling Components: Now we want to do things like add different lights because right now it's just empty ceiling and there's no light in the building. So one reason to sort of plan out your lights is to think about how your lights are going to help a person. Are they fill the space? Will you have enough lights? When you think about that, you say, okay, let me be a little more strategic and placing lights. So I plan lights using maybe a construction line. I'm going to use a red line here. And I like to get the center of spaces. So I know explicitly where my lights will be. One thing for here as well. It's useful to use the underlay option. So if you're mimicking something underneath, that's going to match with your lights. It's good to go ahead and place that. And one thing I want also, as you think about a ceiling pattern, and I'll show that in a little bit. And I'm going to add a ceiling plan in a little bit that will show a little bit of detail as we put this project together on the ceiling. That's a little bit off. So we move that to me where I want it to go. We're going to be very basic with our lighting and would like this space. And we'll just focus on detail in this space. And you can follow the same pattern of finish the rest of the space. And one thing I like to do to figure out where lights go on a bigger room is I'll use a circle in the center. Because we're going to use multiple lights. Come out something like seven feet. And we mirror our copy line. If you want to have something like an axis. It's also useful to this. Get that setup. Now that we have most of our lines, just go ahead and make the lines that are straight. That's going to be really useful. And remember this is a copy of the floor plan, so this will let me to align things and it won't damage my final floor plan, which is very important to me. And we're going to focus on the bedroom wing for this part of the exercise. And the other lighting is going to be very simple. We're going to just have a pendant light over the kitchen and some work lights that will go next to the range. Living or will be hung lights. And we'll have some dependence. Or Scots is on the different sides of the French year. And for the entry hall, we'll have some pin that's hanging and that way. So this is our schematic and conceptual layout for the lights that we're going to add.
130. Adding 1st Floor Ceiling Components: So let's start adding lights. To add lights, you're going to add it just like your custom components. And I press CAM, but you can also just go here, press, place a component. And I'd like to show you how you can load them. The wife have some in the model already. So you can just click on Load Family. And if you scroll up to the main folder of the US imperial or you're using the other systems, find that category and you go to architectural, you'll find by clicking on internal, you'll see a wide variety of lights. I've chosen the flat round light, and I've also chosen a pendant light. And there's quite a lot of options in there. I've chosen a slight know and I've already imported into the project. So, but you can play around with these and find out what Revit as offer. You can also download from different company websites or rabbits city to place lights sometimes. And now navigate to the light here. And it is, you can see what this slide tells different wattage information is a wide variety of information that and can be valuable in your projects. So mine that. So some projects you can place directly on the ceiling. And since we already have an idea of where we want to place these, we can just already start lining them where we want it to them. And the great thing about anything that's placed, we can always come in mirror anything that we want to show you and we're just approximating here now. And some places where we don't have ceilings, we can just come back later and add a ceiling. There would be placing our lights. Make sure to press the right button here and here. So now we have ceilings and all these areas. And we press CAM, place our opponent again, replace these lights. And I go, I sing as well. The very simple over here. And it's quite easy to go from here and just place my lights in the places I want them to be. Right now. Rnai is a little bit of the centers that we wanted on. So we'll click a line and we'll start aligning everything. And as you can see what the ceiling plan we're looking up in the Klan, but I've used the underlay so we can see all sorts of things. And it is very useful as we're putting things in our model. And you see here, I've also actually made a symbol for a smoke detector. So sometimes you'll show those in our model, is showing you a little bit of that. I'll go ahead and align all these. And it's very simple to get things aligned. And it is near the wall. The lights on the walls. Sometimes, sometimes it's on the points that we have. And if this is the right location can just test. You see this axis here can be maintained. And this line is like an match that one. Both these can be placed to come here.
131. Adding 2nd Floor Ceiling Components: Now we want to start placing some of our other lights, including our ceiling elements. So we actually have to go to the second floor to see per second floor ceiling. And we're actually would do is simple. You just come into a simple line. We get the light that we want here. We press cmd to get our life here a little bit off center. And we only have very few lights here. Everything else in this plan is going to be a a light along the path, while light for some of the spaces below. So before we were underlain for the floored right below, but right now we want to underlay to see the ground floor. And I wanted to do to get that. Let's click here. Now, this is going to be lit from the second floor. So we can do two things. We can both light this balcony and we'll make a copy of this so we can do our detail lines. And we want to make the lining to be around the perimeter will come in like one foot. Press Control to select that whole lighting. And we only want to have lighting maybe at this corner point. And so we would maybe have a lighting year highlighting here. Lighting. Maybe this could be in-between. These two are just using the extend command to give us some locations. And we can use that same syllabi and we're just going to mirror it. And this one will come out over here and displace these. Come back here and align these. Now we do want to make sure that this is being hosted in the proper object. So we're going to actually look up here the motto, and we see that it might have been placed in the wrong area. That's the reason why you didn't see check. So these lights are we want to make sure that they're going to be in the right location. So now that we have allocation, we actually can do one final set to make sure that we're catching this. And we can now turn off the underlay. And now we're pretty sure that it's going to our second floor ceiling. And I will test and a 3D model. We can see our lights where we want them to be. And our final set for these on the second floor is as mirroring.
132. Adding Custom Pendants: And now we wanna do some lights for the living area and for the dining area. And they're going to follow the same pattern that we did. These are going to be a little bit different. We're going to come out. And we're actually going to use another lighting family that we have. And that's going to be our pendant. We've gotta do a powerful pendant. It's going to be very high. So in the pendant family, some families give you the option of how low your light's going to drop from the ceiling. Now we want to drop these pretty low, maybe six feet. And this is the family parameters. And if we go to our 3D view, we can look. And we see that this tendon is dropping low, but we probably want a little bit lower. So really go to, we're going to duplicate this one. Go to eight feet, and click that here. And so now we can be sure that it's going to capture the space below. So we go back to our second floor working file. And we're going to draw a detail line to organize. And draw another little line to mirror. In this same arrangement is pretty much going to be for the dining space. So we just copy these down. And we're interested in having one light that will go to hit the pathway here. And another light that would hit the pathway here. If we go to our 3D view, we see an array of lighting that goes through a project.
133. Adding Sconces: Now we're going to add some Scots is. Now Scott is our working a little bit definitely because God is there going to be on the wall. Just type in SCOTUS, I go to place his family. And so I wanted to scan's above each of the Vanities. But also I wanted to Scott's I would go within the bathroom and also this little study area. And we'll just do one. We'll keep it simple. In this one we didn't see and make sure we didn't double place it will hide this roof. Some of these ceilings. Yeah. And one thing to to note that some of these ceilings will probably need to be lowered. And we're just like in our model, we can see that these things are somewhat where we want them. You probably want these lights right here to be higher than the mirror. So we place a mirror in detail in the full bathrooms. So I'll do the same setting for all these. We want each of these to be about seven feet.
134. Adding Plan Regions: And finally, when it come into our first floor. So we have these basic scans is laid out. We really would like to see all the Scots is as this is our RCP. So because they're a little bit taller, I think a way to figure to show them would probably be to just use a plan region. And so we could do that by clicking on plan and plan region. And we just do here and make sure that this is going to be able to show our ceiling. And we wanted to come down a little bit further. And that does what we're looking for. Do that there would do that here. And that helps us get all the lights that we're using in our project. And we'll copy this plan region over. And so we have a nice set of information there.
135. Adding Manufacturer Revit Families: And we'd like now to add both the ceiling feature and also a ceiling fan. And I've actually included a ceiling fan and I'll show you the website which I got it from. There you can go to Rapid City. There are also some great fans on the website for the company, big as fan. And that's where I got this ceiling fan. It's a great product. And also I went to Armstrong, Armstrong cells, a lot of great ceiling and accessories. And I've used that in a recent project. These wonderful panels. And I downloaded the Revit file, so I'll be adding that it's the project as well. And you can go here and there's a lot of great ceiling company. And it's very valuable to create a more beautiful architecture.
136. Adding Other Manufacturer Components: So we're going to place the fan. Now, here's something about some of these families that you will download. This is the from the biggest fan collection. These actually will require. And I'm going to reset this view. If I tried to place it. A plan for some reason, it sometimes has issue placing on the ceiling. That's because it's set on vertical phase. But if you click place on phase, it will let you do that. Sometimes people, for that reason they'll it is as opposed to placing it on the floor there, they'll make sure that that gets into the ceiling and we can look and we could see what happened to the fan. And it's looking like we're not seeing the fans. So I'm going to hide this. Now. This plan, it was placed up, upside down essentially. But don't worry, you can just click on referrers. And now as we go to our seating plan, for our first four, we see that the fan is there. So that was a great little detail. And now we'll go back to components, press CAM. And now we want to play some of our Armstrong ceiling. And these are from there, What Works line? And we can do that same thing. We can place on the work plane, a place on the face. And I want to rotate these. And I want them to be about some size like this. And I see that it probably place it on the floor. So I'll do that same thing where I hide the floor now because I'm not using it. Turn out that underlay. And so now we'll click this in. And I believe this is gotten to the right place and we can just quickly check. Yes, and we see that it's fitting on our ceiling perfectly. Alright. So we can go back to the first floor. And we notice that it's a little bit taller than a wall. You want to align it with the wall. We'll use our dimension tool. We find it's eight inches too big. We'll scroll down. And this particular family has a length here. We actually will go ahead and make it seven feet. And we're going to align it to the edge of this wall. And we'll make sure we're not if we actually work in the facility plan. And this is made in one-foot increments. And we do three more, we'd be good. And so one beautiful thing about this is obviously it says now as light here, you actually can stick one of our other types of lights and it would not into rub too much. So it's a nice little item that we could show as a design aesthetic. Where we have little bit of a play with multi materials. And that's our ceiling plan.
137. Updating Ceiling Plan Labels: So very simply we made a ceiling set. And if I just go right here and add a basic tendency to the kitchen, and we'll just do like a regular one. And we'll just alignment here. I will just align this one. Now we're looking at 3D model. And we can see that the ceilings are looking pretty nice. And you have that nice ceiling in your kitchen as well. And this is a beautiful way to detail your model ceiling. And because you have a neat little plan here, you could place your notes and really just the detail out. Some of the same things. One thing you do to quickly put the ceiling plan room names is you could just go to another view. Select all instances. Just copy. Go back to your ceiling plan. And you could paste the current view. And immediately you have your ceiling tags, sometimes for sealing time. Or using the ceiling tags. People want to avoid the tags being straight over the finishes so they'll pull them out. So that's also another option. And don't forget if you're moving it outside the room to click leader. And so you just do that for each of these spaces where it would hide some of the detail. And if it doesn't, then you could just leave it. And one thing we're also could do is select all instances of this and make sure we're only just showing the room tag. You don't need to show that number.
138. Adding Ceiling Detail: One thing that we can add to a ceiling plan as is feasible in this IV detail is a thickness and structure of r2. And you can also add to the ceiling plan elevation tags. And we're going to show you how to do both of these things to complete information about your ceiling plan.
139. Adding Ceiling Structure: So we're going to start by looking in the 3D view. And as you can see, we've opened up so you can see the ceiling element, but you don't see the silane currently. So we're going to hide all. And this detail was from this area and the ceiling to a certain area. And I've updated the structure, the ceiling, but let's look at the ceiling structure. So just like the walls and floors, you have the ability to make a ceiling of any type of structure. Again, like this interior layer could be just structure. I've made the gypsum wallboard the structure for this one. Though, of course, I could add the different structural elements since I was attaching it almost directly to the roof, I decided to go ahead and use this roof as the structure. And so that's clearly reflected as you look at my IV detail, that it's there is a structure that will connect directly to the underside of the roof and it will come in. So I decided not to Show that in the material itself.
140. Adding Eleveation Tags and Annotations: That structure is starting the finish is at 20 feet. If we go to our second form is reflected ceiling plan. One of the ways that I could demonstrate that in the plan is by using an annotate elevation or spot elevation. And if I click on any point, I can see that the issue for this plan is that the ceiling is too high. So I'll have to come in and change the elevation from the Architectural Template. So currently, I have it set with a particular view range and I'm going to make that custom for each view. And so we're going to go into view range. And as opposed to being at the top, which is the roof, gonna come up, three edges. Click apply. As well as with three inches of view death. As you can see, I just changed the view range by both extending. The top. Two is one. And I've extended the level of the view debt, which is 6. Click Okay. And now we actually should be able to see our roof and I'm using tab to select it. This does say the ceiling. So now I can just add a spot elevation. And I'll tell you the ceiling height of the roof. And this currently has a leader. I don't have to put a leader with it. And we do the same thing for this roof. May see it. It, it gives us the ability to lead to a location, but we're just going to keep it simple. And I can move the eye can simply move the texts of this here. And there are some other things that could be added is you click on this by elevation. You could be having a lot of different information about the text. And you can also customize that. So another thing that we could do is actually with T g, we actually could tag the roof type. But you definitely have to add one of those tags into the model. So these are some custom, really advanced tools that you need. You could always just add a text tag and just say GWP selling. Just include that for both of your spaces. We'll just come back out. And we would continue the same element for the first floor. And in the first floor would again go to the view range where they come up three inch from the top. The top is actually 10 feet and the ceiling is right on that line. You just do a spot elevation here. And it's actually going to be the same. And most of the spaces. So you typically would put that anywhere you have a sibling that's by itself. So the ceiling for here, it's going to be a little bit lower. And you can imagine some other items ceiling with locate their response to perhaps you will locate it according to where different HVAC might go and similar items. Places we don't have a ceiling, you're going to see a sibling element. Wireless. Hvac would be something on advanced level that you could place into your model or your engineer could be placing in. And we could, of course, this, just like before from our model, come in and tag all the ceilings. This with a basic label. It D that typical include a tip tag and there let people know that this is going to be a common elements throughout the project. And give them an, a tag here. And things that are open. We could of course tag that is open to above this. So this would be easy to understand for a contractor. And if you're planning to a client, just aligning the text too, they've been shaped that. And the stair could be detail itself. Sometimes that will include its own particular set of tagging.
141. Chapter 12: Introduction to Material Takeoffs and Estimates: Whether your project is bigger, small, being able to estimate the cost of it, and what actually is going to go into making it built is pretty important even from the beginning. So whether you're an architect or you designing your own home, read it gives you some awesome tools that help this go for. In this part of the course, I'm going to go through using the tools that are built-in and rabbit to look at the items and information in your model and start to get totals and SMS about each of the individual materials and assemblies. And I'll show go through how you can total this up and put this into either a Revit form or get it ready for exporting into whatever program you use for estimating.
142. Estimation Concepts in Revit: As this project is a very real set of information. And whether it has incredible BIM or building information modeling tools. The question is, how can we get this project built using the most of these tools? And one of the answers is that we can estimate the cost at every stage of construction. So this model is still basically an SD or a schematic design model. Yet, because we have all these systems and all of these are quantified in rabbit. That means that we can go ahead and put them into a schedule within the program and start to see how much this project will cost.
143. Estimation Resources: Before continuing with looking at this pricing, I do want to show you a good resource outside of Google. Google actually has some great tools for estimating your project. You can do a simple Google search. And I'll show you, show you very quickly where if you ever want to find out materials, for instance, you want to find the brick cost per square foot. Google has several different sites that can help you price that unique material and Revit itself. It calculates all of these things within side. A good resource that gives you accurate is RS Means. And it's accurate information about your cost estimating that can be very valuable if you're starting to say that this project is worth it. And over time you'll figure out how to estimate by simpler methods. But if you really wanted to quick estimate of how somebody is going to cost. Other than a Google search, you can start building your calculation. And this is something that's very valuable.
144. Estimation Tools in Revit: Let's get into how rabbit has tools for cost estimating. So we'll look at a cost estimate that I just put together for the Stonewall. Our project has for stone particular divisions. And we'll look at those 1234. And I've detailed these walls out with various systems. But if I wanted to just see how much the stone was, I could make a takeoff for that. I've also made an entire takeoff for every single wall that has all of the assemblies. So let's go through and make a stone wall takeoff from the beginning. So the first thing we're going to do is from our schedules, go to new schedule, and we're going to choose the new material takeoff. So click on that. And as you can see from this new dialogue, we have several different things that we could be pricing or making a material takeoff, which is a shorthand for saying it's for pricing. So we're going to go down to all. And what we're going to do is use a unit cost for each of the walls. And I'll show you how we'll get that. But if you look up here, you can also see things like furniture and different types of k square, which are things that you could do one by one. For instance, if you had two cabinets, they might cause the same for the wall. We're going to have to use square footage. So there'll be a very good thing for you to see and you'll see how to use this when you're thinking about other items because it goes by the same logic. Okay, So we're going to leave the name and we're gonna leave the new construction and we'll click OK. Ok for a material takeoff. We want to have some very specific information and it's going to be all around the material. So we're going to scroll down first selecting family and the family and type. Then down to the material area. The material cost, material description. And for right now, that material name right above the description. So we'll put that higher. This information will help us deliver the takeoff. But we also wanna make sure we get a total which is multiplying our area times the cost. And I'll show you how to put in the cost for each material. So to create a total, we're going to click effects. And in here, we'll just call this total is going to be a formula. And it's going to equal the area times using this asteroid. The costs. And it's going to be divide it by one foot squared. This is so it will be in the proper units. And we can click Okay. And next we're going to go into how it's going to be sorted. We're going to click family first. And then we'll click family and type. And at the bottom we're going to click grand totals. That'll give a grand total at the end of how many units are there. And then we're going to scroll up to see the formatting. And we're going to click on total. And we're fine with the other formatting. What we want to make sure in this drop-down, that instead of a no calculation, we're going to add a calculate totals. And we're not really changing things in appearance, so we'll click OK. All right, So now you see all of the walls in the project and their assemblies. For instance, our basic wall A1 has concrete masonry marrow offering, rigid insulation and a stone veneer. And so you'll see that it's on both sides and this is one wall assembly. So it'll be double. And you see this for all the walls in the project. And you also see a price at the end of all these.
145. Setting Material Costs: Let's go into how we can get the prices for one system. We're first going to go through a 3D model. So we can actually work out the prices for the stone veneer walls. So this downward arrow wall, which we've detailed a little bit more, we click it and we go to edit type and structure. We'll see the assembly of this wall, which starts and ends with the stone veneer. And in the middle it has the metal furring, has a vapor retard or it has concrete masonry units on the inside and rigid insulation. And one thing to make this appropriate, I have to put metal furring on the inside. Though. Metaphor ring can go in-between the insulation. So we'll give it a quarter-inch deaf so we can have that included. But it's going to give us the mesh we need so we can price it. And so to get the price to a material, we have to go to the Material dialog. And so with each material you have your settings. If you go to the Identity tab, you'll see that there's a place for a cost of the material. So if the cost from your research shows 750, you could change that here. Revit doesn't automatically put prices in these drawings, so you'll have to go and find that for yourself. But when you put it in there, you can always make a chart of the different prices that you can place into your model. So let's look at the net offering. We click into metal furring. And for my research, I found a price of about $1. Now, be mindful that if you want to include the construction costs and the material cost and the contingency that you will have to make a note of what you're putting into that price. So I will estimate that this is for my material only. So the construction costs will have to be calculated later. I'll click Okay. And vapor retard or this is another system that would require a little more complication. So it's always good to research how you a price each element. For concrete masonry units. It's very easy to find that system. I found the price of $5 average. And then for rigid insulation, it's very expensive. So this is also a chance for you to research. If you find something too expensive, maybe something needs to be changed. I know it's less than costs a lot of money. So it's good to research. It will just go with this Google answer. And you can do research to find out what's best for your project. You can also decide to change the installation or the assembly method based on the price you see here, that makes sure that your entire assembly is going to achieve what's needed for your project, including an exterior wall that keeps out the weather, also the water, and also it maintains the look that you need. Having metaphor ring and a stone veneer as a very good assembly. With rigid insulation. We'll make sure people inside the building are well and that the material will be taken care of. Mainly that all the material more fluid that gets inside will be able to be pushed out. And that's also going to be an issue considering the vapor retard or being honest side. This is something we do research in your region, what's best and most appropriate. So we set these material, we set the prices. So let's go back to a material takeoff so we can calculate.
146. Estimating Material Cost by Square Foot: Now that we've assigned a wall material to each of our parts of the Stonewall. We're gonna make a new stone wall material takeoff from where we started. What we're going to do with this is make sure that we're only going to see the stone veneer. Though the sound veneer has many different elements. We're going to first see what's happening with this down. Then we'll look for all the other elements that are in the project for this takeoff. Right? So what are we gonna do to remove items? We're going to make sure that we're we're going to first include what we're looking for. So we put stone veneer. And so this takeoff just from what we've placed in here, tells us that we already have a estimate that it's going to be $45 thousand for our stone. That's a lot of money. So being able to estimate quickly and seeing, hey, maybe this is too much for my project. Maybe we want to come back and shorten the wall. Or maybe you want the interior materials to be a little bit different. Some sort of way to balance the project. And maybe if this costs a certain amount, maybe we will say one finishes or a system and another part of the project. By putting this together, we've made it easy to use the power of building information modeling to inform our design. So when you go and you've talked with either if your client or if it's your own house, you will be able to come back or talk to contractors before a project gets developed. So you can really start getting a price that you want. And a design that matches in an intelligent way. Takeoff for other materials can be done in the same way that we've done for the stone material takeoff. I want to show you just in case we want to duplicate and do the same thing for the Tsugi bomb wall. We can just come back here. And now our filter can be shaggy. And we'll just make sure from looking at a larger, a larger takeoff. And we'll see that the Shirky bond, we scroll down this call back to LA, will go in here and change it. So that should change our Shirky wall takeoff. So we now see the price out b for all the sugary bond.
147. Estimating Material Cost by Unit Cost: In case we wanted to make a estimate for our other systems more like a unit. We can also make unit by unit takeoffs. And of course, the benefit here is that you can just get it from your model though you could also just count them in your Excel sheet will make it from the rabbit system. This also could use be done on elements like Windows, fixtures, or unit costs that are not by area. Start by saying new schedule in quantities. And this would be for our doors were starting from scratch. And we would do similar family, family and type. But we also scroll down here and choose things like the cost. And we would put count. And we come here for our total. We just put cost times 1. And this is something where we could add like a PHY or some sort of thing that would affect the price. For instance, if is hardware costs a certain amount, we could just add that in. And then we go to sorting and grouping, which is family, family and type. And in formatting, you'll know that in cost, it does give us the ability of calculating the total. We could also use this total that will include some of our other factored in price. And we click Okay. So that already gives us our count and our total. But we wanna make sure that we come back to our formatting and our grouping. Make sure there's a grand totals in our format. When we click on cost and calculate totals, click Okay. And we see that there is no cost because we didn't set it. And we also want to put a total under our count. So we have a little bit of numbering as well there. Okay, so what we can now do is we can look at our model for a moment, but then we'll come back here and say the pricing. This is something you can also look on a catalog like Marvin doors and windows. So I'll hide some of these items. And you could use something like Marvin. And as you can see, the pricing is both for doors in the curtain wall and in regular systems in the project. And if you make a custom door, you'll find it listed custom in your takeoff. So this is listed as a door schedule. So that's another funny way of doing a takeoff. Whereas the take-off could get a little more information. You could just do this as a schedule. And we're going to come here and we'll say that our our, our research that we can quickly find for a curtain wall door. So it talks about the cost of installing it. We'll go ahead and take a unit. If we said it's it's two hundred and six hundred per linear foot and we're typically doing three-foot doors. We'll go ahead and say it's about 600. For each of these, you click Okay. And then for the, the Dumbledore, go click 1200. And we'll come back. And we'll also say wood door costs, three-foot door costs. And look at a something about 400 is something that we'll just use for this model. So we'll do actually 350 because these are not entry doors. And that will change it for all the types. And we know that this smaller door, well, this actually is a this actually is the biggest store. So we'll put this one at 400. And so now we've seen the pricing for our doors done with a schedule, but it could also be done on the take-off is you can see this takeoff, which is a little bit different because you'd have to go into the material. But the schedule is the natural way for pricing unique unit elements. Now we have our pricing system, but we can use on any system, you can price walls, we can price fixtures, lighting, everything can be done within Revit. It's a great system and it's a great use of building information modeling.
148. Chapter 13: Reviewing the Drawing Set: Now that we have several drawings and a model built for the building that we want. It's time to really look at our set and start to figure out what things we can do to make it complete and also what we can add to make it more understandable for whatever part of the phase that you're in. This might be for starting to show a client. This might be for showing a contractor for building pricing. And this is not a construction documents set, but you'll already see the skeleton that can go into a construction documents set. So let's get started looking at set.
149. Updating the Drawing Index: This current L0 is our set. General notes page. You zoom in. You see that I have added to the set of drawings from our base section, which is architectural drawing set into having both cover general notes, an architectural section and even a structural section, which I didn't add. So I'm going to show you how I made this, but we're going to look at this set in general. So let's first start looking at what is in our set. So this is the schedule for the architectural drawings that we have. It currently, it has an unusual order. I'm going to fix this so that you can actually see the discipline. We originally made this for a few amount of sheets, but I wanted to increase the order about how these are organized. So I'm actually going to start from scratch so you can see the process. So the first thing we're gonna do is close these and we're gonna go to our schedules tab. We're going to make a new sheet lists so we can make our sheets. And so the things I wanted initially were of course, the drawing name. We scroll down, we'll see the sheet, name and number. But for some reason it typically just organize it in a very basic function. But what if you want to have a cover sheet that goes first or an index? So some things I've added a section ID and also a discipline. Now discipline is already in red it. So I've Eric session ID and section ID is, is the basic variable. If you want to add a variable, you just go by clicking the little pencil. You name the type of information that you want to act. So this one is just already made. So I don't really need to change it, but I'll I'll make one. So you can see right now I've just was editing an existing one. If you're gonna make a new one, it has to be made with this button we perimeter. So I'll just name this one item. And I'll put, this is common. And we're gonna put in text. And now it's in the drawing. And this is also part of the family. So each sheet will now have this information, but we're not going to use it. I'll take it out, but I'm going to add what I've added before, which is a section ID. And a section ID, is this going to be a way of organizing the drawing and you see what I'm working on with it later. So I'm mostly going to click the filters. And for the purpose of our working, we are not really wanting to see this section ID or the discipline after each drawing. So we're actually going to hide some of that neck be done through formatting. But we are going to use V information to organize our set. The first thing we're going to organize our set is by section ID. Now, we're not going to put a header and footer except for by our discipline. And actually we're just going to use a header. And then we're going to divide it by the sheet number. And we're actually going to focus when organizing the sheet number. We're going to leave it this way for right now. And I'm going to show you how to organize some of the sheets a little bit later. Now we can click on formatting. Right now, I'm going to let everything stay. And then we're going to change it before we add it onto our general notes page. So we can just go ahead and start press. Okay. And now you see a sheet lists That's aren't organized. Some of the drawings I just added are not organized. So I'll show you how you can add them. So these are discipline of architecture. And actually I'm going to put this as a separate section. And all in each do is put a number on it or even just give it its own section. So as you can see, when I numbered it, because that's the top thing that's in the sorting grouping. The number would determine where it will go. So now a number that interior and it went in likewise order. So they are both organized by the section ID in there, by the category and then by their name. The section ID actually matches the discipline. Each of them has that. But so far I've just made it simple where I've put the section ID separately, but you could use that as a function. We're going to do it simple for right now.
150. Adding Consultant Sheets to Drawing Index: I'm going to collapse all of the drawing so you can see the sheets that I have. So I have organized these into a framework here. If you don't have a section that you want to add perhaps for a consultant and you're just going to have to add it in this schedule. So I'm going to show you how to do that. So you're going to right-click when you're in your, what you put your mouse over one of the entries, are you going to insert a data row? So it comes in with a auto-generated number. Like if I wanted to do AES 1.6 and I wanted it to be a structural details page. Then I can just come over here, put structural and give that a four. And now that's on my sheet lists. All I need to do now is go to my general notes. I'll double-click on this and I'll take off the previous one. We are going to come back to the one that we just added was our sheeting sheet listing and I all correct the language. Right now, we see that there's a lot of information and I only wanted to show the sheet number, name, and some of the totals. So I'm going to double-click and go back to this. What we're gonna do is now go to formatting. And we're going to click on I D discipline. And we're going to turn those into hidden fields. So now we're going to get is are her name and number. And now we probably want to organize it where we put our number above the name. And you could do that before. Sometimes you just want to create a schedule fast. So now it has our proper order. And so now we'll go back to our original notes. We'll close with these. There's a lot of eyelids open right now. And we're just going to go to a general notes. Now has only one I'm trying to work with, and I'm just going to expand this o. So we have our drawing set. And we're actually going to change the name. Last thing we're gonna do, a drawing set. And there you go.
151. Adding General Notes: Now, for the general notes and abbreviations, I've just added some general notes that you can actually find all mine. These can be specific to a project. So make sure that if you're going to add these, that they're valid to what you're working on. If it's a residential or commercial, make sure those notes apply. And notice that I've added are pretty much in shrugging the contractor. And it talks about different details for how Wallace would be dealt with or a particular envelope. And there are all sorts of specification and journals that you can place on the cover sheet. It's not trying to show everything. If you're doing a larger architectural project, you'll have specification book. So this is to give those basic general notes, like it says. And abbreviations are really important for if you're adding to your note section. And all I did to make these was at textbox. So you can also make a legend that has this. But I was just simplifying for a simple sick and I made my title and then I made my my box where I was pushing, pulling items and I just copy them in. And I just organize it on the sheet. And so that'll help you just start to organize your project a little more.
152. General Browser Organization: So one thing that is important when working with sets and general and working with your drawing is to have them organized. And there is a way to help organize your drawings. It's called using the browser organization feature. And I'll show you some of the ways that I've organized this set. How you can also start to think about yourself, how you will organize it. So I'm going to collapse all and just go to my cover sheet. And you'll see that right now, these are the built-in project browsers settings. You click on views. And I've actually edited these because you typically will see the different titles, but you can actually changes. I'm going to right-click overviews and category and there's a button browse organization. As I click on this, we get to this browser organization dialogue. And it tells you different ways you can organize your drawings. So now I'm going to click discipline. And these are actually all architectural. I didn't change any of the disciplines for these. So if I right-click and click the type indiscipline, it'll make that as a sub-category. So that's one way to develop that. Now, one thing I wanted to make unique was by making a category feature. And the way I did it was I just added this as a new family. And I just changed what was sorted and grouped. So I'm going to actually do that with a new one so you can see how it's done. And I'll just name this as classification. So all you need to do is make that new item there. And here we don't yet have classification. So I'm going to click Okay. And we'll click Okay here. And we're not currently organized by that way. And that's because this actually is going to be a project parameter. And so I add category here. I'm going to now add a, now a new text feature in it's going to be called classification. And this is going to affect the views. So as you can see, the categories can be for any of the families, but these are going to go into our views. So it's going to be added as a tag in each of the view families. And now all I need to click on is in Texas also fine. Actually going to be grouped under views. But this is fine for what we're doing. And I just want to take a look at those and press Okay, and compress okay for the perimeter value. And we just leave it blank for most of the values. Now we press Okay. So now that I've pressed this, I go to my browser organization and I'll click classification. And since they're all the same classification, you're not going to see difference. So I'm going to edit this. So I'm going to put classification first. And then I'm going to put View. You see here, we're going to put the type. So we're just gonna see what that is and we can look at the other views to see what those are. But we're going to just focus on this right now. So I'm organizing by classification and type press. Okay? So right now they're all the same classification. These are the types. So now if I go to, for instance, this first floor plan and I scroll down in the properties. You'll notice that it does have classification. Right here, it's text under view. And the reason why you can't edit it is because it is currently with a template. So we're actually going to just to make it simple when to go to one of the drives. It doesn't have a template. And we'll go here to this and we'll see we can change the classification and it's listed as a text. It could have been placed in the identity data. We're actually think that we want to change that. Now you can see that now I have two categories. So someone could say the classification could be a date, the classification could be a anything you want. So I could put schematic set. And now the classification is schematic set and this regular. Now if I go back to browse organization, are really could just simply come into classification and actually sort by the type first and then by classification. And whereas before it was even if we press Okay, and press Okay here. Now what we can see is when we click on the floor plans, now we have a subgroup under flow plan of schemata set. And if we go back to the project parameters and we click on classification, we'll know that we can actually change this location here. So right now it's under texts. We actually can put it under Identity Data. And that might go were a lot of other information is being about project. So press that. Okay there. So now when I click on a drawing like floor plan, I can see under Identity Data, scroll down the classification. And so the view template actually can change. If you click on the View Template, you actually can choose this value right here. So you can either make it to be included in the template categories or it can be a custom items. So I'm going to click off for this included. So now you can choose the classification per drawing. So now if I scroll down classification, I can simply classify here. So now we have something called DDI set and schematic said. And that was the same way that I use to make the classification that I wanted to use first of category, but you can make multiple ones. You can organize your drawing Have you want. And so this is a critical way to start to organize what your drawings are organized within the model.
153. Sheet Browser Organization: For working with your sheet set, there's another level of browser organization. So now we'll go to our sheets and we'll right-click. And there's also another browser organization, checkmark. Now you can actually organize your seats in a similar way. Right now I'm organizing by a sheet prefix. So you'll see that what that entails is I have it organized by the sheet number and the first two characters. So if I put the first character and I press Okay, we'll come down, look at our, our sets and we see the first Item. Now if I go to browser organization and I click Edit and go to group and sorting, and I use the first three characters, I press. Okay, you see are organized by the first three characters. And there are some other organization methods including drawn by now they're all drama the same person. So there's some various ways that you can organize this. I like sheep prefix because I get to put the different categories together. You actually can use a similar ID to each of the pages and organize these by that as well. But this is a common way that you can control your drawings within your model. So now you can organize both your model drawings and the sheets and how they're going to be developed.
154. Chapter 14: Reviewing a Comprehensive Set: Our Revit project is currently set up and to quite a few sheets and a few of the pieces of the project. I will make it clear so that it can be developed as something that can be built, that can be communicated to a client, your team, et cetera. So let's go into what's in the set currently and I'll show you some things that I worked on.
155. Course Productivity Tips: Now your time with the project is going to pay off in the end. So I give you an assignment in the course, you can be going through similar elements like putting things together. These are so boring that I don't want to show you all the little details, but I know that you're going to figure out that there are so many tools in Revit to help you. So let's go through some of the sets and I'll show you some of the things that I've done.
156. Adding Site Plan, Setting Project North: Right now we have the modern house project, and I've titled this as our cover sheet. And the next sheet is our general notes. And so we've added a site plan to this. Now this site plan is very simple. It was made probably from the beginning of the project and I just added some basic lines and some information that will clarify what the project is. I just titled these items and you can see the rabbit model. Sometimes people want to add a shadow to that. So that's also an option. E-jet, you'd have to come out and make this shadow a different feature to the project for this drawing. And also we can sort of change the project norm. Because right now we're just showing this with the project north that used to be in the place where we actually want it to be self. So I've actually rotated all my plans so that the sun was going to come into the other direction. What we're gonna do here is we're actually going to change the project position. So if I wanted to keep this orientation, the way I would do that is by going into a duplicate play, a duplicate drawing. So in this page to the duplicate of that is my working drawing. We currently see that the sun, and we'll see the sum by clicking on sun slider. The sun. But here we have it as a single day. And if we go to the morning and we just thick and apply, we can see that the sun is starting it starting over here. So that means this is our East. So for this is western ease, this must be n4. And so the problem with that is pretty much throughout the day, the sun's going to be away from our living area, which we want to have some F. So we're going to press, Okay, we're actually going to rotate the project more. So we're going to rotate to North. And I'm going to do is rotate this. And we just wanted to do it for this view. And that's because now when we go back to our general notes, we'll see that our drawing is silane, same location. But now when we put a shadow on, we'll see that the sun is coming from this orientation and it's going to be going right into our living space. So I've added a north arrow from where the North is currently. And so I've completed my page and shown a great set of information for someone who's just starting my page after the cover sheet.
157. Aligning and Keying Plans: The next page that we're gonna go to after I collapsed, these is our A1 set. So n my A1 set, I've added life safety. And some people will make a category of ls. And so I'm gonna change this to ls one. In then you can see in this page, this is the life safety that's included. The exercise we worked on to show different areas. And so I haven't made a legend. But some of the items that would go in a legend would be saying the one, this is a fire extinguisher. We're just kind of write it in here. Rated wall. And this is this something that you will add to your various pages. And I'll just put this here. So I'm not going to add any notes right now. These are just some of the ideas you could do to finish off a drawing like this. The next page is going back to our A1 section, our first floor plan. And you see we've organized our first floor plan is it's centered here. It's in the middle of the page. Again, you can add your notes, a title, all the rooms. Let me click on the second floor plan. And you see that the first second floor are aligned. I just made sure to copy lines into make sure everything's in the same place.
158. Organizing Section and Detail Sheets: So now we've placed items. We don't have a a2 section currently. A2 would be our roof plan and we're going to add that typically. But I've actually made it for the site plan. Sometimes people will place the roof on the site plan. And that would be where we just would make it pitch. But we're gonna go back and add that later. We'll quickly look through the set. And we've added the the first floor ceiling plan. The second floor ceiling plan. So these are all aligned and you can see the same things happen where we're aligning our building elevations. And we may, or elevation the same scale as our plans. And so now you have like this rather regular rhythm. And if you go to my 85 section, you see starting with my building sections and a place where people can write notes. And I have four major sections through the project. And I've also hired at all the walls that I wanted to get wall sections out of. And I've placed them my wall section sheet. And also I've made views for each of the details that were important. And there are so many details that you can add, but I've just selected a few. And as you're going through, maybe from your schematic design to design develop, you start to see which ones are valuable by talking with maybe your manufacturer saying, Hey, can we do this? You contractor, things that need more information, you include this method. If you're doing a construction for a commercial project, you'll probably have to so many more details. I know that I've done hundreds of details on projects. So there is a reason to understand why this ease of locating it here and seeing it is so valuable. So now we'll go to our section details page. You see some basic section details from these drawings and I've shown you how you can organize the top to bottom for a particular system. So you just take your wall section and come back and you section details and put it all together. And you can, of course, continue to expand out your section notes as you add information about your project.
159. Introduction to Roof Plans: Roof plan could have incredible impact your project. It's telling how you're building envelope be covered. And it could show a beautiful aspect. And people look at your project and those from the inside, it'll tell you how it will affect them by going up into the space.
160. Setting Up the Roof Plan view: Currently I click on a roof plan that I've maybe auto-generated for the rabbit plan. And I see that it's not really showing a lot of information and it's definitely not shown on the first level. So we're going to go inside and we're going to make sure that we're seeing the proper view range. Currently. It's starting at the roof level. And we actually want it to start. We can actually go to the foundation with make sure that the view depth, its foundation as well. So now you're shows a lot more information. So we don't need to see this is some inside information. So we're actually click on this and press Hide. And we actually do want to see the crop region. We actually notice that the crop region is probably not where we want it to be. So we're going to go to the first four. We're going to copy that crop region, like clicking editing. We clicked on this, that it won't edit that one, but we're going to edit this one. So we're going to click Edit crop. So now. So now we have our roof plan.
161. Adding Roof Slope: Here's an information that would be critical to add or roof plan. Currently see that we have a roof and it's very good slope so that water will go in a desired direction. We don't want to just ride on people who are going through the space. So we're gonna go into a 3D model and look at the building. Internally, we see that these are likely flat. So we're going to look at Edit footprint. And there is no slope on any side of these. So we know that a minimum slope that would be advisable, it's probably a quarter inch on 12. So that's probably for a metal pan roof or a ply applied one pi or two pi system roof or another type of panel. So we're going to try to see what happens when we slope it down from this direction when I click on this edge and we actually want to slip off from here. So I'm going to click defined slope. And we're going to do one-quarter 112. We're going to make sure that it's not too crazy going to attach. So it acts about attaching, we're not going to attach. So now we see that there's a slope. So we know we're, we're just gonna go and we're actually going to make a gutter. So it doesn't go on to the people who are right there. And we're gonna do the same thing here. We're going to edit this footprint. Want to turn that base edge to define a slope. It's going to be a quarter on 12. That means that it's going to probably be a flat roofing system. So you can see some of these details have caused a little bit of a system issue here. And don't worry about that for right now. What we can do is come back to our plan. And because we sort of saw things go a little bit higher, we can add actually a wall to cover this little gap. And all we need to do is know where that wall will start, starting it when we go on the first floor. And we'll click W. And we're going to use a generic offer right now. And this would probably be just another siding wall. And we're going to start this all at 10 from the first four. And it's going to go up. We're going to just do two for right now. And it's going to be connected. And we're going to just go across the edge of the wall. From wall to wall. Now if we go to a 3D view, we'll see that we've added a wall in. It's going up too tall. So now we can just click actually attached to O, attached the top. There'll be here. You want to be careful to make sure it stays alone edge of the wall. And now we're going to align this edge of the wall then. So this could easily be set to the same type of wall. Has this. And make sure that if you're going to change that, we'll do Tsugi interior. So we can just make sure that it's Segment change its top and bottom cooking. So we've added that. And we do the same thing over here. And we just go to our south elevation to find out how tall we were. So it's 20 feet. So now we actually can go to our second floor. And now we'll go to our second for some organize that. We're actually going to start at 20. And actually this is the second four plus ten. And go to, we'll just go from edge to edge. We'll go to our 3D view again. We see that this wall, you can just click attach to the roof.
162. Adding Roof Gutter and Fascia Profiles: Now we've added our roof and it's a lot more realistic, a ripple effect that we don't have any gutters on the roof. So we're going to add some gutters to this roof. By going to Architecture tab and the roof button, we look down and we see that we have the ability to add a fashion or gutter or soft it. So we're going to start by adding a fascia. The fascia is where it's going to. We're going to put like a really small fascia, right? Nasa is one by 12. And the idea is, it goes onto the solid line. So you actually can choose multiple lines for a fascia. You actually can wrap a fascia. Now just show you that so you can see that. So it just follows the edge. And why would go from here to here to here? It would just stay with that, that edge. The ideas, depending on the type of system that I'm using. The fascia would be nailed on to you and then the gutter would know up to that. So I'm going to add now cutter. It's gone inside of this. And I'm going to choose the fascia edge. And we're going to click off, unfortunately, do it again. And it just is currently doing a five-by-five. I'm going to just choose these edges and press Enter. And now we have our gutter. And if you click on gutter, you can see that they're all connected. But I can always add or remove segments just by clicking on it. And I can move these segments around. The same goes with the fascia. You just select on the original line in. You could just remove the one you see there. But I want to keep that there.
163. Adding Custom Downspouts: Now the one thing that's lacking is now having actually a down spout. So I'm actually going to make a custom family does show where the dance about we go. It's going to be a model in place component. And we're just going to choose generic. And we're going to start on our roof plan. So now that we see are her down our gutters. We can add our down spouts to follow where these are. So I'll put one. We want to keep the the down spell, sort of aligning with these. We could always just do a straight extrusion. That's one option for making down spouts. And we just expand the bottom to hit the surface and oh, probably go underneath the floor and it just starts there. And we can align the bottom with here. So that's one way of us making our gutters. Another method would be to actually make a gutter that would be along a profile. So one way to do that is to actually make a sweep. And it has to both choose a profile to their path. What this actually is that the path is where the profile will go long. And I could simply say, I'm going to use this wall to draw this profile. And I want something that will make sure that it's on the right wall and pick a plane. And just make sure that it's selecting the right plane. Now, we say that we want profile that comes down and goes to the ground. Because we want a little bit of a curve we're actually going to come up to here. We're going to fill a this art. Impress. You check mark. So now don't think we need to do is come back and add the profile. We can use one that's in the model. Or we can just make one our own. I'll just make a custom one. Now this is looking down, so just beware for how it's going to look. And I'm just going to make a very simple one. So it's going to be. Probably want to keep the metal language because the other items are metal. And I'm going to turn off families with teal. And we're going to do three inch by three inch to make sure that it's centered in the middle here. And we're going to use here. I'm now going to look in 3D, made that edge. And that looks a lot more beautiful. So I might take this one away slowly. And one of these, which is currently attached to that wall, my add one of these right here, this edge and wanted this other edge. And I also want to make sure that it's going to have enough clearance for that door. Cannot currently take it off aligning that wall. And I'm going to copy them. Msd going to align them. The smooth edges. This one going to come and make sure that this one is going to go all the way to the top. Some edits sweep. And I'm going to click on the path and bring the entire path way up to this. Then silly. Now this one goes down just like the other one. And we click front. We see that now we have our gutter here. And we just want to have one on each side. So they have that one, add it. And now when I add a gutter to the other side. And we just wanna make sure that it's an array location. You will use our roof plan to organize them. And it's little bit short. So we're going to edit the sweep again for this one. And then work on the sketch in that path. Now we need to do is align that were extend that line and press Okay. And now we have a drainage system for our roof. We click Finish model.
164. Annotating the Roof Plan: So now that we have our roof plan with our drainage, the only thing we need to add is our direction of R roof slope. We're not going to currently agony openings, but you could of course, Azure openings for different types of ventilation. Or if there's an access to the roof, you could add that. We're just going to be simple about it. So I'm going to add a direction arrow. And I'm just going to put my one and a quarter on 12. And I'm just going to use a detail lines to show that direction. I'm going to make this, make sure to focus on the text. Make this into a family or a little group. You can make into a family. We're just going to make it as a group right now. And we're going to copy this till it's here. Yeah. And bless you going to label this type roof, thin metal roof. And we're also going to label our parapets and look at detail. They did draw that, so we're going to name that, that'll fit. And we're going to label our gutter and our doubts about because this is over in the other part of the project, I'm going to mirror the notes. And this in a little bit of a different position because it didn't say anything. And we don't need to see our doors in this view. So I'm going to hide the category.
165. Adding The Roof Plan to the Sheet Set: And there you have a roof plan showing some basic information. And I want to make sure that this has its own page. And we'll just add that to the set. And so now they added the roof plan to the project. Sometimes people will hide this site element. Sometimes people add shadows to the requirement, just like with the site plan. So just make sure you mind what time of day I would probably do closer to click single day on the sun settings. I'll choose in the morning. Actually probably want to do. In the summertime. Sun is higher in the summer. So yeah, and we're not really picking up some of our information from our habit. So we are going to make sure that we're seeing everything that we need is a quick check. And our view range is going to be 20. So our, our system isn't. Hi. Click here, some settings. Change the time of day here and we're going to do 12, 29. Now we have a little bit of a shadow. That's what we're trying to get a little more shadow and press. Okay, so now we have a good roof plan and we ever move for our model.
166. Chapter 15: Introduction to Interior Elevations: Interior elevation kind of form a lot about a project and help you really figure out what goes into being a good project. The interior details are all influenced, the anterior location, the experience. And so revit has a lot of great tools for interior elevations. So we're going to add that and there's gonna be some customizing. We need to make sure that everything's coming out right, but we only have a few. So let's add that to our set.
167. Setting Up View Tag: To start with our interior elevations, we can nearly just come into our view tab and click on elevation. Now, if you click here, you can see the interior elevation is a set. Yeah, we want to do that of our cabinet tree and that will be fine for what we're working on currently. So we have our cabinet tree in our bathroom and in our kitchen. So we currently this is something you have a new Revit files. I go every time I'm teaching to come into that tag and decide how we want it to show. Currently it's doing a 1.5 circle color head with corner radius. And we actually want to create a into your family that will go with the interior elevations. And we're going to rename this. Actually when a duplicate and to your elevation. We're going immediately turn off some are Annotation Categories. And you can always do this once and then replace that. But if it's your first time or if you come to the project, we don't have it. It's useful to know how to do this. So we're going to turn off our section tags. Elevation tags are and we'll just sort of start there, press Okay. And currently it's this half in circle. So we're going to say half inCircle tag only. This is going to change how it's going to look on the sheet currently has a name and an arrow and a name. And all we want to have the film arrow with the filled arrow with the number. And x is we don't have that. We can actually go back into here. We can make sure it has it. Because we only need the filled arrow. And the view number. We're going to click on here, press Okay, and we're actually going to find the elevation mark, body circle in the program. So search. Okay, Well it was, and now we see where we're dealing with. So detail number, all we need is the duplicate this. And it will just be detail number. Click on this. Currently the issue of detail number is not filled in. Vision. Mark pointer, circle. And so we actually would say go click to mark pointer. And this is actually what we wanna do. This detail number is not filled, so we duplicate this detail number field. So it's a little bit like a circle with an a circle. The mark pointer is where we're looking for. So we want this to be filled. Now the reference tag, but it won't put the name. We'll click. Okay. When I click this and we'll say, we name this detail number only. And this will point to the proper detail number field. And press OK. Save the project. Detail number only is okay. Now it's it's it's not on a page. It doesn't have a number.
168. Setting up Interior Elevation Views: We're going to make this onto a page when a double-click to check out the interior elevation as they are. So the interior elevation as they come in, they actually have the elevation or the level tags and different grids. Let's just some things that we probably don't want. We're going to come in, we're going to expand the walls because we really want to control how the ceiling and the floor will show. So I'm gonna go back into the View Template. Now click on market will interior elevation. And we're going to override some of the annotation. We're going to turn off levels. And that's actually modal category. Actually annotation. To make sure you find out where it is. We're going to turn off our grids as well. Press Okay. And so right now what we have is looking at our cabinets. However, we don't have any cabinet tree currently. So we're actually going to go into our Revit Families and we're going to bring in some cabinet tree. We're going to add cabinet tree where we're dealing with some of this cabinet areas we're looking at to the allele elevations that would probably need that as well. So we actually have some generic tall cabinet placeholders. We don't currently have the families. So we're going to add that in. And we can already see some of the nice things that have, like her sink. And we can look at r and we'll just call this our kitchen. And our first one is our master bathroom. And one right here, which will pull back positive it over here. And we'll call this, and we can actually move our edges right here. We'll call this our powder room. So we'll set up these, all these interior elevations right here and we're gonna do pick all of them to make sure that they're all selected. And we're going to turn these all into our standard view template that we've just created for interior elevation. And one thing we can also do here now is we want to control how our ceiling and our ground look. So we're going to come with our detail region, which actually are Fill. And we're going to use solid white. We're going to use a thick line, especially with is a sworn ground. We're going to do the same thing for each of our areas. The kitchen is enclosed by walls, so it's still valid for the kitchen as well. If you had an area where I was walking to another location, it might not do this. Or you can make one of these edges and invisible line. We'll do the same thing from S to bathroom. I use FF for my regions. Now, this edge right here is a curtain wall. So I might just leave that as an invisible line on that edge. Because you will see this wall. And I'm gonna make it also make sure that it goes to the top of that wall. One thing I've done in the model is I've made all my ceilings to be attached to the underside of the structure. So it's not a separate structure from the roof. And I'm going to make sure each of the ceilings are at top of the wall. Okay. All right. So now we have our opening and we need tar cavitary in all these drawings. So let's add some cabinet tree.
169. Adding Restroom Cabinetry: There's a lot of great cabinet tree families in rabbit. There's a lot of ones that you can find in other locations. You also can make some custom. I'm going to start with some revenue cabinet tree. And it will make a custom one. That's a generic opponent just to show how some of the detail you can get with your model. So first, we actually are going to bring in a rabid family, press CME for opponent. And we're actually going to load one. And we're gonna go to the rabbit Imperial. And when they go to casework and we're looking at a base cabinet. Are you probably want to double for this little vanity. And you like the double unit here. And so we're going to locate it on a wall. We're going to make sure the press Spacebar and would allow it to this one. And I'm going to turn off always be teal. And I need this to go to the inside of inside face wall. So three-foot, one and a quarter. So the cab, the tree itself. We'll probably just be three feet. And you could add some blocking on the side. And now we're going to look at this one to see what we've come up with. So we see that it might be backwards. And get our first formula, make sure our cut line is going to be one of our cabinet tree and currently it is not. So we're going to move this cut line and that's what this is far too elevation just like for exterior elevation. So now we see everything here. And but it's not centered and we want it to be centered. When looking at a wall of our doors showing up. So we probably want to hide the door. We can see exactly its orientation. We go back to the first floor plan. This see that it is centered. So we can come back and we'll make sure a little region filled region is this one. So we can see that we've made a cabinet tree element and we don't currently have a sink family in here. So that would also be useful. We go to our four, go back to our components SCM, We're going to load a sink family wellness, go back out and we're gonna go to planning and architectural fixtures. And this is our sink. This is going to be your little vanity. Round. Good. And rotate it with base bar. And place that in here.
170. Utilizing Section Box Plugin for Views: And we've actually made a, so we don't have the community hide here. We've brought in one of our rabbit plugins, which is called in our add-ins folder. We've added the plugin section box. We'll click that, define that in a record store. And we're going to call this sink. You can find multiple rabbit plug-ins in the Revit store, pretty much the rabbit App Store. The auto section vivax is one of the ones I use. I don't really use many other ones. As you can see it just by clicking on the item and clicking Auto section box, you give it a title. It will give you a 3D view of that area. You can disclose shade it, and it gives you the bounds of this area. You can always move it up and down to see what you need. That's really cool. What I recommend you getting it.
171. Modeling Custom Cabinetry: All right, so we see here that we have a very tight situation with our door. So somebody to be mindful, we're not really going to deal too much with that. But in this bathroom, we know we want to vanity here. And so one way to do this simply is to start making custom components. So this interior elevation of this powder room is basically finished, but we know that as we don't have our vanity, it's got to be a little bit issue. They have a mirror and a cat. It's, so that's where we're gonna go into making some custom generic families. And it's just going to be a generic component here. So you're going to model in place. We're going to just call this generic for now. And you can always come back in here and change it or copy your model into a new generic category later, we're just going to call this the mirror. And this is going to go on this face. And just to make sure that we're getting on the right face. Yeah. Then like this. And we want to have it go up to the light. Then come in maybe one inch and come down maybe two inches. And we have this and since we just wanted to probably be three-quarters inch, just put that as our extrusion certain end. And we can just choose the material. We'll just come into the material and wanted to be a mirror. We just wait to that loads. If the mirror is not in our Revit model. You can just come down here and just added. And we'll go to identity and label it mirror that little case. We'll come into here and place this asset will go to the asset browser, will choose mirror, which for that to load. And we'll choose the basic click. Okay, we'll finish the model. So now we have our mirror, and here we can label that in our interior elevation. We're going to do this with our We should, this text is 160. Now we're going to make a custom cabinets so we can have it going the full length. Really create another custom component. And we can just use that same wall and it's probably already set. And now we're going to pretty much make it into sections. I'm going to make sure that we are using the right. Okay. And so we're first going to make the base of that full cabinet. And this is going to come out to feet. Then we're going to make a kick, and then we're going to make the drawers separately. And you could simply come in here and make sure this is the cabinets material in your Revit materials family is pretty harmless process of adding and making cabinets that are custom. But it's also beautiful. So now I can click cabinets. If it's in here. Yeah, it's not. So we just click. Okay. So now we have this and make sure that it gets all the way to the edge. And what we want to now do is make a void formed to deal with our kick. We're actually going to use this right here. That's a face. And when to use that same kick that was in that object. We're going to be in negative four inches. Now we're going to get sync to see what it did. Make sure it's working properly. And it is almost make sure it's It's going in that direction. So you see it coming into up on there. Now we're going to make the drawers. You were going to make sure that pick that plane. And we actually still want to make sure that it's hitting this dimension. But we know that we want a little bit of a feel on this edge. And because these are joined, we want to probably come back and separate them. Be careful what you put lines on another line. Now I had to do one side and I'll just mirror it. And I'm going to come down a quarter inch. We're going to make sure that this top actually it's all the way to the edge. And when they come in, make sure this has a reveal of one-quarter inches long. And we get to choose whether this will go all the way over. I think it would be nice if it actually went all the way over cell and actually aligned here. We have a little bit of a continuity for little when a tomato 18. So I wanted to reflect it. It's going to be what we're looking for. So do that. Then. Get a proper center or use Control a to select all these lines, again, troll and tab. And that will get to mirror this. And it's not perfectly centered. So I'm going to make sure that we're getting this on proper centering point control. We get that. We wanted to get our other edge. And we're going to make sure that this is three quarter inches offset. And this will be the same family, but we're going to change it to cabinet selected source. And this is cabinets material. Choose this. Now. Set this to be cabinets as well. And you can copy the type of type material. We could our sink finish model. And we're going to keep our generic model. We're going to take this other model album picture. We want to make sure the sink can get through here. And so when it comes back in to the generic model and edit in place. And we're going to make a void For the sake. So long as we get our general area for that. And we probably want to get this hands maybe E2, E2 style. As we go into our section box view. Now this product has to be a negative, negative one foot. Make sure that it will be cutting our form. Here. We're going to say cut and make sure it's cut up in sync.
172. Noting Interior Elevations: And that's our our mirror and this is our sink and all we need to do to finish this tour elevation of our vanity is the correct door swings. And then add our dimensions. And for doing these sort of dimensions, since we want to make sure that we're communicating proper dimensioning. We'll just get to edge to edge. Emissions place in this dimensions. Fine, as long as our chemistry mentions are good. And probably the edge. And a cabinet maker would understand what we're trying to do this. And we're just going to go to our top of our seek. We see that the T7, That's fine. You can always come back and sort of show how the different sections are. And you could always, if you want to make it more specific at that as well. Yeah. And this drawing is for interior elevations, going to make sure those are at quarter. It just gives you these will make our dimensions. 116. These look clean that up. I'm going to add this and we're going to work on the other sections. In the same way. We're going to add the kitchen wall, cabinet tree. And as well the cabinet tree in the master bathroom.
173. Setting Up the Kitchen Elevation: For the kitchen, we have a unique situation where we have two tall areas and then we have a counter area. And we see here, if we go to our floor plan, we right-click, we can go back to four, can really quickly or by clicking finally, varying views. As one way to see the plan where something is mentioned. We'll just go to the first floor plan. And we can look here, we can see the type of situation that's happening at the kitchen counter. And so now we see that our candidate a little bit in the wall. So we want to move this so it's flush. And we could just use the align tool. I press ALL line that counter out. And now we had made these placeholders. So we have to adjust them so they can be more appropriate to where we're working with. And we'll probably make one and then just mirror it on the center line. So let's go in here and start editing it as we put it right into the right places. Our counter current comes out one inch and that's fine for us. So can we flush? We're just going to make sure that that's two. We're actually going to change this when I edit this witness line and make it to the inside face of the wall. And we need this to be two feet. And we're going to align that lower cabinet to be two fetus wall. What this dimension here for the third cabinets? To be two feet. Actually, since we probably want to have a refrigerator one edge, we're going to import it Here. We're going to make this going to be the width of that refrigerator. I'm going to touch on this. Add three-foot lines to help us align it aligned to here. Now everything is over this lower one. And we're going to get it refrigerator from the family. We're going to get a proper center line, The than drawing. And so we're just going to use this other our center line and we're gonna make it in the centerline family of line styles. We can load our refrigerator. Getting our prefer X is okay. Now we're gonna put our refrigerator right in our model.
174. Adding Appliances: We're going to load our component for error. Our iterator. From the families of Revit. You can find this in the specialty equipment and domestic. And we'll do high-end and just before refrigerator, refrigerator. And it's going to be just a really simple refrigerator. Will probably want to have the over and under. It's going to be at three feet over and under unit. We're going to rotate it so it's prints out a little bit more. And then we'll align it back into the wall. We're going to make it so it doesn't have a label when you click into the family, but to edit the type. And we're going to turn off the label and press. Okay. We're going to also flip it so that it has the right orientation. We're going to press M, m for mirror. Your shortcut that you have. So now we have our refrigerator. I'm going to do now is get this cabinet tree to match.
175. Modeling Kitchen Cabinetry: We're gonna go to our kitchen roll. And one thing we're gonna do is we're going to have our cabinet tree go to the same height as refrigerator. And then we're going to put some upper cabinets. And they were going to have a suffered up here. So we're going to just start with here. Make sure kitchen distance is the same, right? So, so again, we liked the Revit chemistry, but we can make a custom one that looks really nice. So let's go to this family. We're going to add our candidates in here. Okay, so we have this, this is already sort of doing what we want. We just want to come on top of that and add a extrusion. We're going to pick the face. That's where it's going to be loaded. And we want to have 1234 and then we have the side element. Depends on how much distance via that. Currently. We have four foot three. So our calves are about to probably want to only have bro probably only have four. So we're going to make our two middle cabinets. And we're going to make sure everything comes up. We're going to use a void form to take out the could. Just make one of these. And they should. This is N1. And this goes up four inches. Yeah, What we're gonna do is we're going to have a top element. And then we're going to six inches. And we're actually just going to supply this. By extending this up. We will just trim lines, Offset one queer. Split these up here, do that same thing. So now we have our little cabinet and make sure we have a proper center. You're not sure that things are centered though. Is this verify? So trust but verify. This is our center between the refrigerator in this element. So we're going to come back and fix that other one. I'm going to take this, move it over 1 eighth of an inch. The mission, this is in the center of this area. Now we get to mirror everything that we want to use. And this one is going to divide into three. Want to start the middle and it would've been offset above it and below it. That same thing here. We'll take all of these mirrored. On the other side. We're going to make sure that this is our material cabinets. Load a little bit. Okay. And they will make sure that it's coming out three-quarter Blanche, and make sure we care of anything that's outstanding. These weren't joint. So just Philae, all of these when I make F L to flutters. And now we also see that this is sort of not high enough. Come in. We have our same reveal all throughout the cabinets. And we get all the vertical edges. Base cabinet tree here. And we're gonna make our void. For the kick. This is four inches and it's this push that. Now we're actually going to go to our first full plan and make a section box in this area using our plugin. And we'll call this kitchen. This comes out so M60 before deserve this cabinet tree. And I say It looks nice. So now we just want to add a cabinet tree element and we probably want to match this refrigerator. So we're actually going to go back to our kitchen wall. And that's part of the design elements. We can start to express and design aesthetic between our different elements. So yeah, just leave that. I'm probably want to have this mirror in between here. So let's do that as well. And just make this scenario between answer they're all the same height. So it has a nice modern vibe.
176. Modeling Tall Cabinetry: We started to put the same aesthetic in this top piece where we add our void underneath this. And we can just go ahead and we should that's at four inches. And this initially this is in our cabinet. Yeah. And then to create our extrusion to be on the top of this face. And we can just simply take some of these lines. And we're probably going to have a location with some of the items skill I could become Michael a. Now we just take all of these and this mission. Select these Newcomen one-quarter inch and one inch here as well. Actually, in this next section, I'm just going to be for microwave. We want that to be about 24 inches. Now it's currently mass, so we just come up 19 inches. And then go ahead and just copy the next segment on top of this one. And this could be three quarters of an inch. Yeah. Actually, it's pretty perfect. And so where we could have a microwave going here. We probably want to have this as double. These, these could be single, and this can be done why we actually could match this cabinets above this. I think we're going to now make the little double scientists. Now we have this nice modern fringe element.
177. Modeling Wall Cabinetry: And we'll just draw, and now our uppers. Israeli could be from the same. Actually you can just copy this to be the uppers. Didn't have used the same object, but I'm just going to simplify it for now. And the upper, they're typically going to be somewhere about this high this kind of habitat. When it come to this family, when edit it. Void, vase to equal up here, this atom up. And we're going to take away the top of that. We're actually getting even just take where the bottom will actually be easier. Move that down for each of these same fashion. We actually can align multiple at the same time. Using one at a time. We get to be careful with that. You can use that multiple line tool right here to do that. Now we're going to just bring down the top of that. So now we've exited edited, that extrusion scenario occurs that will match the mode is the wide and big. So it might even want to have in this class.
178. Kitchen Elevation Dimensions: Now that we have a proper sooner you go ahead and make sure that you consented. Pull this down, turn into a center line. And this come over here and add our center lines or our tour opening lines, four lines, each of these. And another way to actually quickly do this is we can always make it into a group. Might be a nice, easy way to get this for multiple areas. Go is come also. You can actually change it individual group. You could just ungroup it and make it a unique group. And so you'll have one for each of these. And this one is going to actually go this one. Now all we do is enter dimensions. And actually I might leave the upper part there for it. Now. It actually looks so nice. The pennies are rounded elevation right now. So we can now simplify some of these dimensions using theta. And here is work out that later I'm just matching this.
179. Adding Interior Elevations to Sheets: Now we have three elevation for anteriors. So now we can go ahead and put those on the interior elevation page. So now we've just collapse all so we can get a command over our space. We'll go to our interior elevations page. And we'll go ahead and just take a look at our two elevations here. We'll just put them right in. And one thing for these currently, the chord scale, the page, be big, but that is a tuple scale for these types of drawings. Let's look at this. We can match these elements.
180. Adding Cabinetry Details: So one thing you might do with a set of interior elevations for cabinet tree. So you might also make a drafting view that has a detail for how that cabbage will work. So we'll make a drafting you for that. Yeah, I will just go to our view. And we'll just create a drafting for you. And this is going to be at we'll start with the quarters here that looks at the person. Be fine. Next, probably be an inch and a half. And only thing we're going to be drawing here is a wireline for our wall. And make this three feet. We're going to go up six feet. And this is going to be our cabinet tree. An offset three feet to the top of her cabinet where you go into nav. And it will then come out two-foot one. We're going to turn on allowing wait till you see what we're looking at. And we typically come in one inch or 1.5. Now just do 1.5 and now, now just show my four-inch piece here. So that I can now do is actually start to you use a little sort of wood panel fill and we're going to do a three quarter inch. This is where we'll just show. So our detailing in I'm actually going to come in here. And it, and I'll make this line actually are medium line. So the outside you ficus and rotate it. And sometimes the way people have it, they'll say right here is going to be stone. Maybe the same style, but it will be something similar to the one for the wall. Yes. This tenant, that would too little bit of creation. So this would be our typical section. And this will be coming out three inch. I'll come down quarter of an inch. So allow me so to detail. And that top section is gone. And this sum here is going to have a little bit or ill as well. We're actually going to take this line and we have here and move it to the out reveal here. And our outer line is the one that's going to be that we're going to come in here and there's ever little piece Shen here literally and have one right near the bill. And we're asking that little wood back. I would probably not be the same material, but we're gonna leave it looking this way here now, depending on how you want it back. And Alda, you might put that there and not, and we're not going to draw the hardware for this one. And please draw this right here. So yeah, this is our typical detail here and we're actually, we'll come back over here with our backsplash. In a backsplash kind of like four inches.
181. Adding Cabinetry Details to sheets: Now that we've developed our cabinet 3D towel or basic idea, we can put that on our interior elevation sheets and it will help with that entire process. So now we're looking at, we see our view here for our cabinet tree. We see it's in the detail area and we have labeled as a detail. So it's going to be in our detail subcategory. So now we go to our validation page and we want to make sure that it's the right scale. So we're gonna see that LM here, and it's pretty decent. So this is a good, good basic set to say how we're going to have this built for that area. And so now we have our interior elevation that you can add to your set. And you can help really start to make the project more beautiful.
182. Chapter 16: Compiling the Final Set: Now that we've gotten to the end of an incredible course, and we've gone to all sorts of exercise. We made a modern house and we learned all the basics and fundamentals and the advanced features rabbit. Let's do a PDF of our set. And this is something I can help you. As you will also see the model in the class files to figure out, Hey, how can I do this? And as you go through the class, you'll be thinking about this. And so PDF and print it out. This is something that you could always be doing as you're going to be project. Let's print this out.
183. Print Settings: So I've added all my sheets together. So all I need to do for printing is come to File and click on Print. So I like to use blue beam, which is a great PDF printer. But you wanna make sure that you're using a printer. This one is Adobe, that is used for good printing. So I'm using here for my 36. Sometimes you wanna make sure that you have the right settings you want to set and make sure that things are clicked on that are going to be working for you and make sure if you're going to use color or black and white, it's selected. And make sure to think also about the landscape or portrait orientation either but you can setup here. You also have the choice to combine multiple sheets. Currently it says the current window, but I want to print multiple sites, choose the set to be printed. And I'm scrolling down and I'm gonna make sure to check none because you're selecting multiple sheets. You only want to get certain ones, but you also can print different types of views that are in the project. You don't just have to print sheets here. So I'm going to print the sheets that are part of my mindset. And I will come back and just get everything, have it all clicked. That's all the sheets that we want to use. And we're going to save this as a set. We also have options to make him do it, but they'll be fine for now. To make a new and show you that you just have to select the different set, just save it as a different name, give it a title, and then you just press OK. But we're going to use this set for buildings at one. And we also have this ends session setup where you can set up for one particular view versus the main setup. And that's where you can set that up. You can also choose the quality harasser. So that's for renderings. And this is really important to click on Hide on reference right here because things that are not in the project can be hidden. So you want to check out some of those settings if you're trying to do a unique print, and you also have the option to print in reverse order. Let's go ahead and click OK and make sure that we're combining multiple files and want to choose a location. And when to use a PDF folder, we're going to attach the date. That's really helpful. And also the label. So we would just keep a simple name for that set. And we'll click Okay. Something's harasser, like the rendering. And we're going to click Save. And we're just loading it and waiting for it to finish. It's always good to PDF the project out while you're starting because you can mark it up or you can show it to your team. It's good to have the ability to go back and forth between you and your project team. So PDF and it's important part of that process.
184. Reviewing the Final PDF: And our Prentice finished. We can see that it does have a border and the title block is opposite visible. And so we can see all of our views, each of the abuses or setup. And you also see that the order is with a cover sheet last, so we can just move those manually into the front of the set. And so the way we can do that is we just make sure we look at it. We can expand out this tab. So this is from Adobe PDF. Again, whatever PDF viewer you have, you can use that. And if you have other consultant drawings, like a visit and a sheet set, you can just attach it with your PDF program. And all the drawings are not organized. Just like we had them in the project. So you can see that the modern house is quality project that you can build your skills in rabbit are growing AM, if you could do this project, you could do any project.
185. Chapter 17: Intro To Dynamo: For those who want to go a bit
further with these rabbit, I'm looking for a quick
introduction to Dynamo. And obviously there's a little
bit of understanding how to work with that within Revit, I'll go ahead and get you
started for this introduction. So Dynamo is a great program in funding for the manage tab
right next to the macros, where you can put in
scripts and do like advanced computation
from your models. When you loaded it
have the option to create new works with commands
that are called nodes. An open recent files. You can also go to a form, get resources for starting out. So find different codes. The menu that you
have, of course, is to open files and this is activated when you have
actually opened a file. I'll go ahead and
open a file so you can see some things
that I can actually do. As I go to this tower file. Actually has a lot of information
that's done within it. And I will just show you,
you see like the elements of a file and then I'll go
into those one by one. But essentially this is a
file that's created and actually will both
create geometry, will create levels, real quick. Floors, walls and roof, which we'll look
at the Revit file. The rabbit firewall also have this information
because it's 3D view. So this is actually a
pretty inclusive function all generated with can dynamo. So that's the cool
sort of power that you can do with the Dynamo
script restaurant ago, starting from scratch. So you see like some
elements that go together as well as the
talking about the interface. So I'm actually going to
go ahead and close this. I'm going to save this. We're going to load a new file. From that file, will
be able to be looking at sort of how to do
things from scratch. I'm also going to restart dynamo that one
of the reasons to do this is you need to
have to run a dynamo file, focus on the current model
that you're working on. So that's one way
to refresh that up.
186. Creating Dynamo Graphs: Alright, so as
things are learning, we just go to full
screen on dynamo. Dynamo is a particular version. Make sure what version
you're using for Dynamo is to watch enabled thumb and you let you open
and save your files. Also export STL
images of the file. You can also import libraries. You also see ways
to create notes. These notes to sort
of explain the file. And you can add
different geometry by copying paces are
aligning, selection, also in change and
adjust the view, as well as a download plugins,
which are called packages. You also can change
different types of settings for the file,
how things were shown. Also, you can do
certain things that are included like generative design. And you also can use
the help menu and also see a different
notifications. One step lower. You will also see the library. And the library, you will see different what are called nodes. So nodes are for
creating information, some nodes are for
querying information, some nodes are for
changing information. So that could change
something about a model. But there's also an environment. As you can see, this is the
Canvas or graph for Dynamo. Or you can switch back and
forth between different code that's made and geometry
sort of previewed. You can do things like
zoom in and zoom out. From here. We're going to
look at the basics for creating a dynamo graph. Also, look below where you
have men automatic start. Essentially you
want to be creating your inputs and your outputs. For instance, a, if
I want to create a group of numbers and points, I could go into basic. And it talks about the type
of points I could create. And I could just
create numbers here. I could create three of
these and just press Control C and Control V. Also that can be done through
the edit menu to copy in. These elements will
just copy paste. Now for creating points, I'm appealing to
geometry and points. And I can create a point
by a XYZ coordinate. Right? And what I have now, the model is a point. So that's sort of a
basic method of just creating geometry
that's in the model. But we also could do
some interesting things like work with list and list, have the ability to create
things like ranges. I'm gonna start with sequence. And what I'm gonna do. And you see the way I've
connected like this function, this node with this number node, is by clicking on this
arrow and plugging it in. And I'll do the same
thing with this one. And this one, I plug
it in and unplug it by just clicking on
it and clicking off. So that's the easy
way for these. And this is a node again
as the input output L. So when you hover
over it, it can tell you the end result
of the product. And also it gives you
different options. If you right-click over
it for how it's going to work and turn off the preview, what your turn it back on. They'll be able to see it. You can also have labels that
you can show or not show. And you also have option for different options like if you want to create
it as a group. For instance, someone
turns into group control G and point Fn. Okay, for sequence, if I want to do like a
list of numbers, I could just start with
a list of numbers. And actually instead of always doing going through the
list or the library here, I can also just type
in elements here. For instance, I want
to do a number. You just type it in here. And I could just copy and paste and do that
same sort of set. However, for this amount days, I said I wanna do ten numbers and this is actually going
to be accepting integers, but it will accept
it as a number even though it's that way, I can step by one. What this end result produces, I hover over the output. It sort of shows
me the end result. So it says zero through nine. That's fun actually, because
I started at one or a zero. If I started at one, it
would be going 1-10. So now I can actually do
a similar sort of thing. Why have points? Another way again, like I said, is to right-click
over the canvas. Actually can create a point. This method that can be taken. These points here. One of the ways, the fact that we actually want to
just do x and y. One way we can actually
make this even more interesting is we
actually could go ahead. And instead of what's called
lacing by just this number, that number at same time. If it had laced it by going. So 11121313, for
both dimensions, we actually create a grid. That's I'll show you that. And that's by the longest. Actually, it's by
a cross-product. The shortest and longest
will not produce that, but that would produce that. And what we could do
is from this point, we can easily go back
to geometry and create, maybe if you wanted
to create a circle. And we could do a circle by
center point and radius. And we can do one
at each of these. One way to, of course,
even separated out is here we just made it
right next to each other. In the grid is sort of very close and we actually
made this number closer to 40, gets spread that grid out. And we change this
number step to four. We can spread that
out as well, okay? And so we could even have
said still just zero to ten. We just wanted to spread that out and control bees and
other way to go into the geometry mode where we can be rotating and everything. You see I've made all these
fees are not yet into the Revit model that I want to create these
interactive model. These of course, can be floors, it can be columns. There's also an ability to just create a variety
of elements for this, but this is just going to
be like another group, sort of a circle function.
187. Creating A Dynamo Tower: Now we're going to work on
making a tower in Dynamo would use geometry all the way
to scripting elements. So you'll learn a lot and
you'll see it in a Revit model. It's going to be the
greatest part about it. I'm actually going to,
just for the final Show, for this sort of
basic introductory, I'm going to go into
create a rectangle. She sort of when it starts,
it starts very small. When I, when I
create a function, a new function will put
it like on the canvas, sort of in the middle area. So I've done all these assembly. If I want to, like I said
before about not showing them, you can always just select
all of these elements. If I'm not really trying
to show it or I can just select the last of these sets. And I could just right-click and just turn off the preview. And so that's one
way of avoiding too much information
on the screen if we're not using that. But if I want to do
something like this, or maybe I'm doing a rectangle. If I don't want to make numbers, I can always just
double-click and just create a code block. If I wanted to make something
that's 20 ft by 20 ft. This is a rectangle and it's going to be just
from a regular plane. And this is our plane
is going to be normal. We actually don't even
need to put the plane. That's definitely an option. I'll just simplify it. So you see there's
multiple methods for creating same sort of thing. We're actually going
to replace that. Let's create a length
and a width here. And ideas. If I wanted to create a tower with
something like this, I can very simply just
use the function of translate that goes into some of the other
types of functions. Because geometry is
something that's more of this in Dynamo. But if we want to edit it, we do have a jump,
jump tree function. I will just actually go by going from the search
menu to translation. And from translation, I can be pretty much moving this element. And here we're going
to be using list. And I'll do that sequence from the sequence where there's actually a built-in value
that's typically going 0-10. Adding one. We're going to do
another code block. And we're still
starting at zero. We're gonna be stepping up
ten and going by ten as well. And I just plugged these all in. That sequence could
be my distance. And to get my direction, I'm
going to create a vector. And by coordinates XYZ. And because it's gonna be a
vector that's going upward, I'm going to go ahead
and make a code block for a value of one. Plug that into that direction. Now you see like a, pretty much a set of stories for this tower and it's
pretty, pretty thin. But same time it's sort of getting what we're trying to do. And this come back in here, patrol be to go
back to this space. This is just creating
those flip plates. The point at which
we were expanding, we wanna do something
like rotating. We also have option
to rotate that. And I'll right-click again. This is just quickly locate that function where
I rotate object. I'm just going to
rotate but a degrees. So I could choose
that same geometry, mixtures on the origin and use that same axis and just change
it by a list of degrees. And I could even just
take something like this and use the same code. I would just be
rotating ten each time. And our origin point, we could just get that by doing a basic point, point
by coordinates. And that's pretty much the home. And so we rotating those. And whereas I've done
translate before, I just come back here and just because that's sort of
where I was starting at, I can just come and right-click over and
turn off the preview. And if I just want to
keep those as my plates, I say I want to create
this into Revit. I could both views the geometry. That's here. And it would it
be plugging into a rabbit? The rabbit
functionality where I'm creating things
like flow plates. The way you're gonna do
that is just going to element's going to floor. And the idea is when
you're printing floor, you just use the option of floor type of poly
curve or curves. And I'm going to use
this based on curves. It asks for a level. I don't have any
levels at the moment. But I can easily create levels for my model I'm
just going to do is simple. Just creating levels
from the elevation. Those elevations are actually
going to correlate to the same points that we were
going up where we look here, we said 010 all the way to 90, put those elevations and those level elevations
can pop in here. And so for rebel, revolt objects, there's
something called selectors. And suddenly go ahead and use the selectors to figure
out the flow type here. And you see all the types that you have in
your Revit model. And they plug that in. Take an outline curves
that we have here. And these sort of
plugged in properly. Let me just do a quick
test for sort of issues. One of the reasons that's
having issues is this cyclical because there's
been much one of this element and
ten of these twice, you need to change how
the lasing is going. So longest is going
to be the right one. And as we go back
to our Revit model, we see these floors are created whilst can be created
in that same sort of way. One of the reasons why
it's not going to be as straightforward as for
the particular curve. If I would actually take my, take my number that I
have set here is pretty much one starting
at zero to ten. If I change it to one
degree instead of that, you see it actually
updates my model directly. Using this information, I get saved this
function right here. As my floor function. I could come back
in and just like I've created these forests, come back and create
a wallet as well. And I could come back and very simply be working with
something like my curtain wall. I will just right-click and
I'm using similar curves. But what I'm gonna do
is I'm going to explode these curves when he's levels and I'm also
going to offset them. So I'm going to go
first to offset. And we're going to
offset all the curves. Just by a little bit
difficult. We have like a curtain wall that's
sort of inside. And we're going to
go ahead and choose all the final geometry here. When offset all of these. And right now it's
actually plug it back in. We're going to use
something like negative 3 ft and
it's already in feet, would just plug
that into distance. Maybe because of this size, you might want to even
start to expand out words. We first were doing rectangles
that are printed by 20. We might just go up to 40. And so it's adding
a lot more space. And you've seen it's dynamically
connect with a model. So it's actually producing
a piece of architecture. But what I can do now, I can take these and now these
are on these every level. I'll go and show
you the function. We go back into just
looking at dynamo. The function for creating walls. So much of the one day it's creating the same
structure for floors. And so you'll see that I can choose different types of
things to create walls. So my curve and height is what
I'm gonna be working with. And what I'm gonna do is
take my curves however, because it's four
curves meet as one, we're going to have
to explode those. There's no worries. It's
actually pretty simple. We're going to go ahead
and press explode. And what that's gonna
do is that's going to explode each of these
lines into four. Those are going to work here. I'm going to go ahead and
just bring our levels. And wouldn't do a
wall type selector, just like we did the
floor type selector. And this is going to be
going up and it's gonna be our Schar storefront wall. That's gonna,
because it gives us the morning and already Afro
hydrogen each one of these, because we've gone up ten. We're just going to put ten. We're going to do that
with the code block. One of the issues
is having is sort of in how it's sort of relating
for each of these levels. So all we need to do
is make sure that everything is
coming in properly. This is exploited. We just can't look
down here. It's going to be zero to ten. This one here is
going to be ten. This we can again do the lacing and longest just to test out what sort of
things might be the issue. We'll look at this little
notification to find out what challenges having. And what we're trying
to do is maybe debug it a little
bit so that we have our height properly,
leveled properly. We're having a
little bit of issue. Curve and level. I think again, this is one of the things that we run into. It's good to always
the final way to debug a funnel what's
going on with your code? But I will just test, make sure things but
at the same level. So this is ten. And this also is, we actually have extra
level from the floor input. But we actually meant to go
but to the level input retina come back over here and
she's level instead of that. As we go back to the road model, That's where we have plugged
in, everything is working. So one thing we would need
is finally just a roof. And that would just be
one level above here. And we'll just
create that slightly created the other levels. Actually, we'll just right-click and create a little
bit elevation. And we'll just type
in that same name. And whereas before
it was at number of zero to 90 When do
this at 100, 100 ft. This is our final code where we would just go ahead
and turn IT group here. This is our wall, Fn, this is going
to be our roof fn. And what we're gonna do
is I'm going to take that final element from the curves that were
used for order for the walls. And we're gonna go ahead and use a list element to find
out pretty much the item. We're getting that
item at the top index. That's the top index
is gonna be nine. We'll just put that
in the code block. Plug that index, plug this, listening to that list. Now if I'm going fast, it's just just trying to
give you overview. You'll have this
complete code to work with and experiment. But this is definitely a
valuable thing you can do within using Dynamo. So it's good to sort of
understand some of these things. Okay, so that's the top profile. And again, this is just like any of the types
of you're creating. You just be going back-and-forth between understanding
this to create it. But I'm going to use a
roof by Alan extrusion. Or actually, I think we want to do the simpler one
by the curved. So you always have
multiple methods. We should observe that she knew that top curve and when
to use a roof type selector. And here it is. See that
tool tips for there. And we're just gonna
use a generic 12th, going to put that
in the roof type. This is gonna be that
top-level at 100. And as we go back
into the Revit model, CVs created a roof. And so it's very simple. Opposite from this
point. Could very easily come back in
here on the view and create for parents choose everything and it's not the right name
at the moment. So let's click. Okay. That's actually not
gonna be damaged with challenge to repair. But that's something
that you also can just fix and within dynamo. But for this purposes, we're just going to call this
our simple tower exercise. You can see sort of
how I've done this. To repair it. I'm just going to
simply come back and I'll just show you sort
of working methodology. If we have a dynamo open, we could just simply want to finish with it disclosed dynamo. When we close it, we've actually sort of
baked the geometry. And as we can go
into things like elevations, weeks,
Everything's here. If I'm not using the
existing levels, I can always just
take those back out. Things shouldn't
be connected with it as you're connected
with my new levels. But pretty much as soon
as you develop things, you actually can come
back in and place things. So if it's affecting any other
views, Let's come back in. And this is pretty small. But as you would
sort of understand, you know, it's a little
more complexity. So to work with strings. But the idea is now that things
are in your Revit model. You can very simply come
back in and, you know, just things that's part of the brilliance of an extra five. And we can just
simply adjust this. Make sure we get
those down again, 123,456,789.10. And of course, you could customize if you
want to say it's the roof level, put
that like that. We look at any of the floors. We can see everything is set up. You can of course, create
your core for the building. Very simple d by
creating your shaft. To know, go down. You just go up from your bottom
level to your top level. Even up to the roof. And sort of create
your atrium element. And you do a wall there as well. It is like a basic will be
a five-minute through 6.2. Or you could also set the
parameters for this one, go from one to the roof as well. There you have it. This is using the power of
Dynamo where you can of course create
simple geometry. We creating
interesting geometry. You can both query information that's in your model,
export it out. I will just be a simple
thing you'd get like the basic functionality
for Dynamo. Again, the collection
is very good. I have courses on
worked with Dynamo, but it's a great
resource for architects, designers in on it. And I think it's
something that you should also explore and
learn more about, but it's pretty powerful program and it's in the Managed tab and I'll include
the scripts so you can understand more about
working with Dynamo.
188. Complete Revit Guide Conclusion: Congratulations and well done on finishing this complete guide through Revit intermediate. I am Brennan again and I've helped you because you are such an incredible source of inspiration for me as you're going through and developing your understanding Revit. So I've put toward the concepts in this class to help you figure out what it is that makes rabbit great. We've worked on in modern houses I, and going through all the elements, making really detailed walls and working on how this building information molly, can produce an incredible and quality set of design documents. So if you remember this course, as we went through a lot and house who worked on grids, we worked on the different walls and different parts. And we really mastered having different levels and Revit and using things like curtain walls. The same understandings will apply to any project you do in Revit, you're going to add that same thoughtfulness and understanding and you should be ready for any project. If you're ready for the next level in Revit and the advanced guide, then look in my profile and you'll see the links pretty much I've gone to add it linked to show you some more things that you can learn a rabbit if you have questions about this course or if you want some more fundamentals, or you can always access your questions in the thread. And also, of course, I am always here. I love to see you show your projects and PDF or JPEG, share your progress and keep moving across. As I know, you'll be advancing your skills and I wish you the best in modeling and design and revenue.
 Brandon A Gibbs, Architect & Innovator