Transcripts
1. Intro:
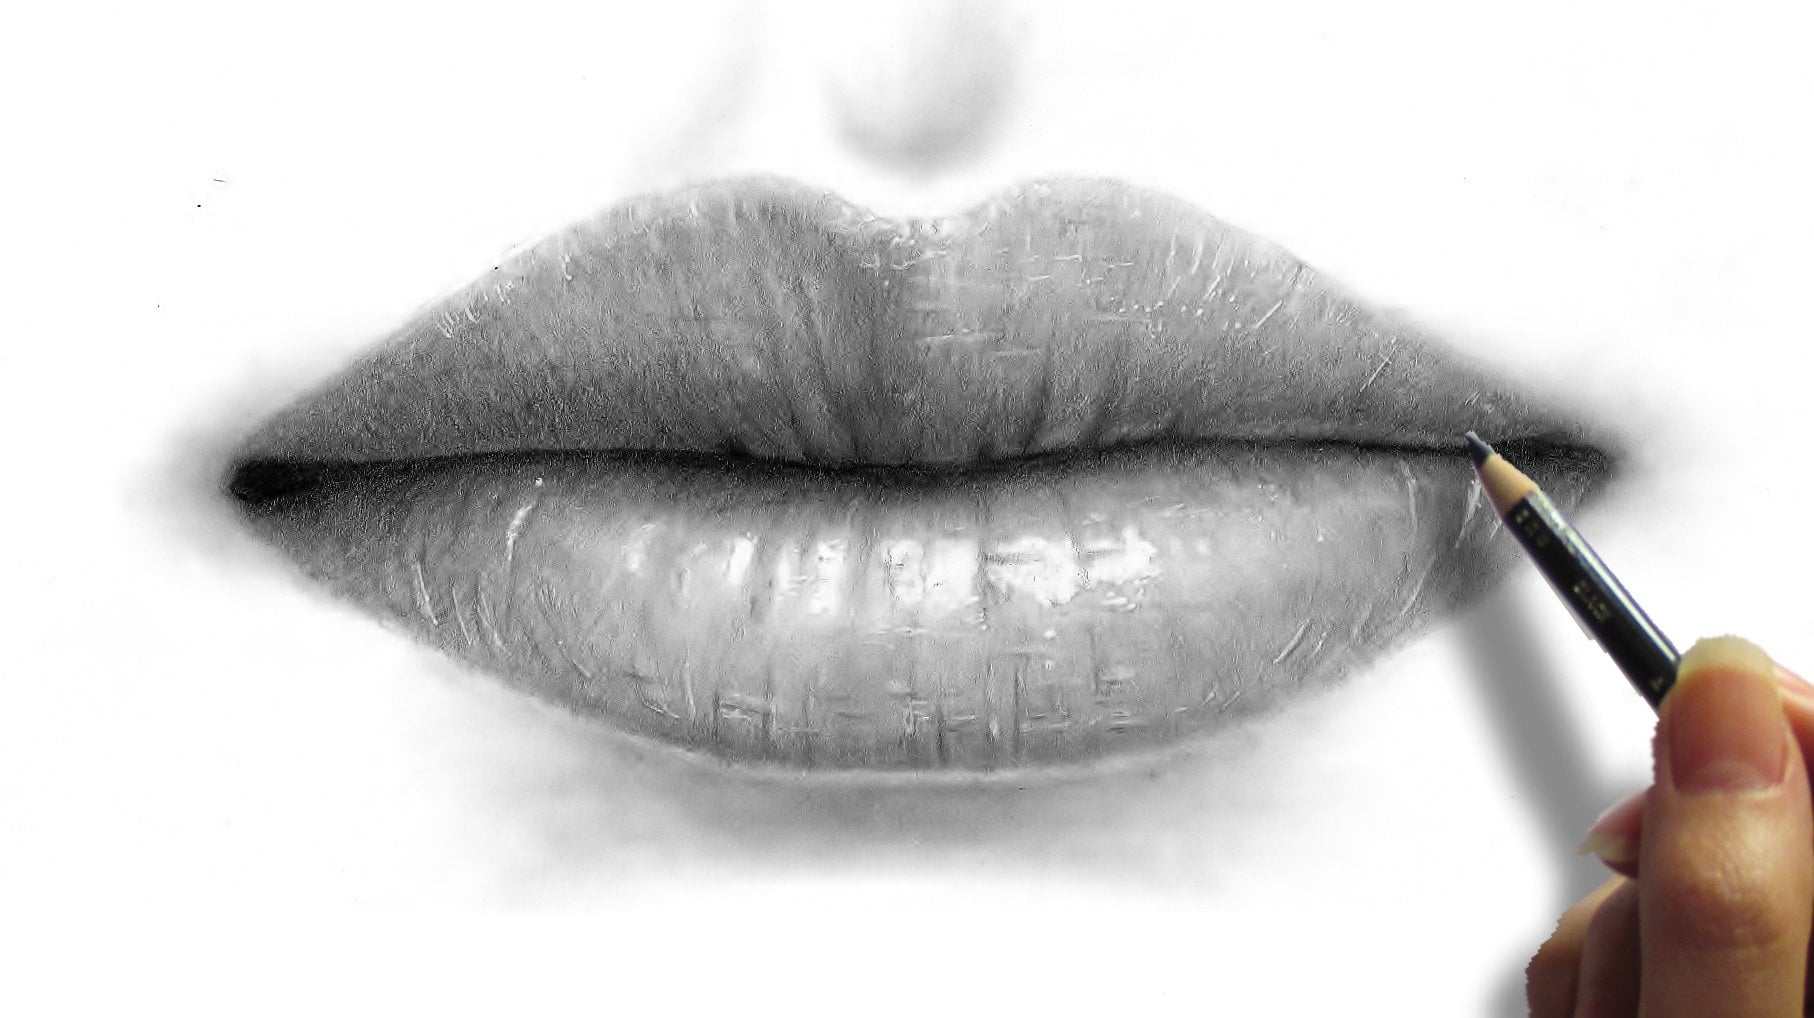
2. Art Materials: Hey, guys, is Jasmine in this video? I want to show you everything that I use for my drawings. But of course, you should try as many tools as possible and choose the ones that work best for you. I use this paper by far Briana Bristol. This is a very thick and started paper. It weighs 250 grams per square meter or £145. I usually draw on a four paper former, so this paper is very thick in starting and very, very smooth, and I use it for both graphite pencils and color pencil drawings. So it injures a lot of pressure that I apply when I burnish with my wax color pencils, and it is also very smooth. So the graph I can be evenly spread, or it and I always get a nice, smallest extra er. And of course, some people like to work on or off texture paper, and this is also something that you should experience for yourself, said the best known and probably the best drawing paper brands are Strat, More stone hedge for Brianna canceled and Salt. I use cast a Line 1000 graphite pencils by Farber Castell, but you can choose any other brand such a stellar Mars blue McGrath for co high nor or pencils by Prisma Kohler or card ish. There, wind and salt. So all these brands are high quality, and, um so whichever you choose there will work similarly. So I just have both these pencils by Faber Castell, and they're pretty good. So I didn't even try to work with any other brand and a graphite. Pencils are available in different harness ranges from nine B, which is soft and nine age, which is hard. Some of the numbers and letters on the end of the pencil indicate the hardness of the pencil, so the letter age that means hard and so the spencers are very hard so that I actually like pencils. They will produce light tones and be pencils. They are black and they are very soft, and they will produce very dark bones. And there's also an F pencil, which means fine and which have like medium harness in an age B, which is, as its name say's something between too soft and hard pencils. And I use it. Worry often because I don't have to change the pencils off, then I just have to change the pressure. So this is a must have pencil. So I recommend using pencils of different harness to make sure to get the right tones where you're drawing. So if you have a lot of tones you're drawing will be more realistic. So 16 age or five age is there something that you should consider purchasing also a B or seven B? And as I mentioned HB, and then you can purchase to age so you don't have to have the whole scale. You can only get 56 pencils to start with, but of course it's easier if you have the whole scale. So if we have 20 pencils, it's always easier to work. You can also use a mechanical pencil. I sometimes I use is for when I drove the hair, and then I want to create the hairs of the same thickness without sharpening. So this is also very good for tiny details, so I have to be lead in an HB lead, so I don't really often use this one, but it's really a good thing to have. So, as I mentioned before, for a good drawing is it essential to work on the dark part and to achieve a really deep black color? And it's often a problem with the graph I. The more layers are applied, the more the area world glossed, so our charcoal pencil can be a good solution in this regard. So Ford arrested or drawing you can use graph I. But you should definitely try to work with both mediums to see which one you like more. Then the graphite border, which is ideal for fine uniform textures, large areas or backgrounds. You will see I will be shaking the sky, and so many things with graphite powder is really useful to get. I mean, one jar costs like about $23 you will have that for you for so many years. And if you don't want to purchase, you can create that with a pencil and sharpener. I can then throughs full for blending or for applying to Graphite Potter, of course, a tissue and also blending stomps, which always like a press, the right off papers. So this These are various food to plant tiny areas and then libit bigger areas. Q. Tips were very good and also, you can use it. Caughtem pads. I use a simple hand. Hell sharpener erasers are very important. I have a lot of types of for a race or have this plastic one which is good for erasing larger areas. And when we want ill eliminate more eso kneaded eraser. It is also good so and I also have mechanical a razor's it won around it dip and one a with this squared actually rectangle shape. So there's air very useful that you buy them once and then you have just to buy reveals. And I have this one eraser in pencil by fiber Castell. It has white and red gums so red here on the left side, you can see and the wide come on the right side and I also have an electric eraser. But Hill League celeb using a lot of this wants it costs like about $10 with 10 refills. And after that you have to to purchase on river feels it is battery operated? Actually, it is very good for really eliminated a lot of graphite. I'll be also using a whiting, Jap and actually white markers bear unit Posca. So these air very good to create highlights or the drawn areas. So no matter how hard repress, even when we use an electric eraser, we just can't bring back the white collar the paper. And because the graph I had scholar the fiber of the paper, and then we can apply a white marker. A. So this markers are very good, and there's a Ropeik, so they look pretty good over the drawn area. But if you don't want to purchase this, you can just look around in your house. Maybe you have some Gua Schorr liquid character like this one, and you can also use it to create highlights or the drawn areas, so those are very good for that. The most important is to use a fake medium. So up until extender is also very good when you have very short pencil that you can use can put it in the extender. And you can also use this one for color pencils or charcoal pencils that this is records that you can use your pencils and without throwing out anything, it will give you the balance, and you can insert around shape of the pencils and hexagonal and even triangle or shape. And this extender, I will be also using the drying compass and a ruler. I have this one that shows inches and centimeters. So I will be telling you both No matter where you believe you can draw along with me. And sandpaper is also good for graining. Cheese of shape Tip off the pencil. And, uh, I have this brush. This is like makeup brush for eliminating the dust and the graph. I So we shouldn't do that with fingers like never s so you can get this one and then use only for a graph I
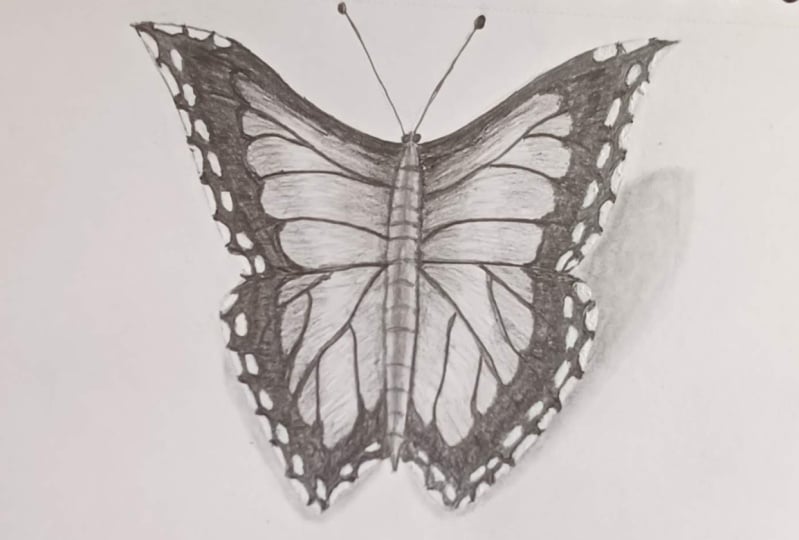
3. A Butterfly - Part 1: And now let's draw in butter flying. And let's start with his, its body here in the very middle. So something like this just ask because you want good. And then we can draw the wings so wherever you want, just tried to make them symmetrical. They can be like different shapes. I want to draw something like this and tried to make them symmetrical, a similar goals possible. So if you need, you can measure take measures, fingers or with ruler. - And I just wanted erase here. This and I want to create some patterns before I start shading and the those typical white dots over the edge of the butterflies. So if we have white in jump and we can leave them, we can color the whole area with Blackman with a black mental, and then we can create them with the white in Japan or with y marker at the end. That's for those who don't have these dues. I want to show you how to do that, and so just we will have to draw around these dollars and they will stay white so we can create those daunts next, right next to the edge like this just all around, so they don't have to be the same. Some of them can be smaller, some of them bigger. Okay, Same in this side and also next to the edge. Like this 12 dots next to each other. You can be bigger, smaller. So I'm not sure that the butterfly with these patterns exist. But it doesn't have to be Samos. Those existing ones can change something and create as we wish. So you can play with patroness and creed. Do we want Can you? But I want to make something similar to the blue water flying. Okay, so here we can also great some batters like this. So here we're going to have the black edge with this white dots. And then we have to use a lot of pencil in the inner area. Just something like this is again so we can sketch it this way so it doesn't have to be a line like this can make it like this. And also those patterns that butterflies usually have something like this. It doesn't have to be strictly the same. Nothing real life nature do something similar. Yes. And then we have to try to do the same, to recreate the same on the life sides. To make them as symmetric as possible. Just take a look at your right side and tried to do the same here in the left side. - Let's start shading and let's start with this the body in the middle and I'm using an age B pencil, and here we want to create a bit darker area here in the middle. So that's why I want to press harder. And though we have to Chris, less and less as we shade actually draw. There was the edges that left and right, and just in order to make to make this body look a bit around like this. Eso here you eat pressed less unless or you start using a lot of mental. And now we can blend it a bit with a Q tip to make it look fluffy floor soft and that we can create some patterns within age defense of something like this, like tiny horizontal lines at random. This here Itkin gonna create some head your eyes for they What do they have here like this and also some betters. It's not just avoid making it look flat and like boring and at some randomness and some matters. This no can blend this dining lines with blending stump now. Okay, so if you can lighting it up the edges, if you want her shade more anything and then let's call her the edges that I mentioned that we have to leave out. Why dots and just color around them with an A B or with a nine B? So with the word dark pencil empress very hard. And, of course, very carefully next to the ad, just and next to these white dots so pressed very hard, because here you want to create an absolutely black color. I just want to lean my hand cause I don't want to touch paper with my skin because I want to shade later with the grab my border. And I don't want to myself with the paper, and here you have to just cover everything patiently. Something big's a lot of time here, This step here also, you can recreate the shapes of these dots someone you draw around them. You're shaping them, - and let's also Cardiss. Upper Edge also can be absolutely black. Weaken Just's trend in this lines. Since we have this, um, we're dark pencil in hand. Like this. Someone's make them more visible no less than the same on the right side. - And now let's shade the inner areas of the wings. And let's start here next to the A B area, using it to be because we want to make the grand and position from 82 very light pencil Inter school next to the 80 area to previously drew and go a bit over it and shade little bit next to it like this. And of course, we have weakened strengthened these battles with a to be just go over again and press harder like this, and we're going to shade it with the lighter pencil, so we have to see it through delayer that stuff's lighter pencil, so to be pencil is still very dark, but not all stark us A. B and if repressed lightly, we can create Pree bright. Don't so just pressed harder. Next today be a little bit less as you draw away from it and create some patterns like this
4. A Butterfly - Part 2: in here. Also, don't forget the strengthened is so Here's a to be called time. Okay? And now we can shade still using to be here this offer area and to start right next to its body, your particular nickel for area and then we want just start here. So just play the tape of your pencil here and moved until away from the body like this and lesson to pressure with each stroke. So here we want to create a smooth grade end because this very dark pencil should be continued with the lighter pencil in the next step. So just like this and lived off slightly until you can see it has that gradation it gradually disappear. Center the paper. So here the upper part has to be, like a little bit bigger. So which means that we have to create longer lines and us We work downwards. We can create shorter and shorter lines like this. Such a squeak, confident strokes like this. And I'm still using it to me. Can it just like this? Okay. And the same here left side. So just slyly lived off rental. Also finish heat stroke and press harder at the very beginning of his strokes. And, of course, try to make this to side symmetric. Sure, it should be the darkest next to his body. And then two become louder and louder. Now I can see that the body looks to a bright. But of course we can go back and Larkin, And later, if necessary. You know, you can see that the bodies too bright comparing to the surrounding area. But we can always go back and dark and it later if necessary. So because we don't know how it will look at the end when everything is done. Okay, Now, let's go to dinner. With an age be just go over The previously drawn strokes that we drew would still be and same here, press horn over dumb and lift off the pencil as they finish each stroke. This and same here, left side. Just go over there to be lines and makes off the mental slightly a person finishing stroke . Well, is that the same from the opposite direction here from this edge that we also shaded with a B and after that to a to be. And now we're just gonna dinner over this with an h B and same here We go over to be area and lessen the pressure with interest, Role like this to make a smooth gradient between the stones. So it really does take a lot of time. You don't have to do it this fast. Is your hand my hurt? Just leave it for the next day. So you don't have to draw it all in one sitting because it's a lot of work and them probably your hand will hurt. And here in the upper area, Lincoln Kovar form part like this with an age be and here we can it breasts order or it is better nous that we created his lines. Okay. And some here number right side. So lift off the bantam slyly to create a smooth granite and again And now let's use to age or to highlight it parts. So just go over in the same direction did but it with an HB in daughter pencils, such a school over it, pressing very lively. I think this and also press harder next of the age be area. Unless unless here in the middle to greet smooth, radiant. - I can see that this area is still pre highlighted. So it's the brightest here and on this butterfly, except is why dogs and it's still free drunk. So it's not white. Actually, we should coloring, too, so which is shaded and seen here on the right side. - And now we can blend it with a Q tip and let's start order lighter areas and then just gold doors darker. It is so here. Use a clean Q tip over the lighter areas, and when you become sturdy, just go over to the dark areas. So we want to make this butterfly looks soft. That's why we have to blend it. And now here, after blending with, we'll see whether we need to shade more. Are you going to stay like this? And I was emotional. We can go out the door, its body. We want to darken it. I'm using it to age for this, and I also want to go to us line Butterfly. The wings like this so that there's wide thoughts can come to expression because, like this, they're not quiet visible. Just a separate them from the background like this. See? Okay so that now they it looks they that they belong to a part of life and not to the background turned same all around. So if you accidentally go over, there's why. Dunce, you can't just apply white market or no and made down white again. Okay? And now we can create a cast shadow which will make the our butterfly look more three d. So the shadow would be cast by the wings over the surface when the butterfly standing. So something like this similar shape to the wing like this, this upper park and be like farther from the butterfly. And this lower barking me closer like this in here also, I just love it. So as you can see, this wing is a bit wider. So that might mean that that this is more visible and this is lift off much more lift than this. Once it look at it would cast a shorter shadow are something like this here, so you can use a Q tip or you can use a tissue and I want to use a T shirt. Just placed a piece of paper or the butterflies that I'm want to go over it because I wonders why daughters to stay want, and I just want to go next to this paper like this. Suffered this. You have to shape. I'm not a piece of paper. The place like this here wings. So one color it. Yeah. And where does smaller parts? We can use? A Q tip. I just tried to make the area us. It's most responsible. - I wasn't gonna see this. Guest shot Shadow will enhance the wide dance the wings and they become more visible. But we can't create a cast shadow all around butterfly only on some areas. But it is enough to suggest it all. The wine doctor, the part of the bottle. Front wing. So here you use just what you want blending and applying to gratify water. Someone is so you can see that now the butterfly looks like on the page and looks border from the paper. Actually closer reviewers, I just want to make this anti glory like this Should gradually disappeared into the paper. Here. Also, it can have a bit. That's a machin if you accidentally go over the white dots. I just applied them again with a white bend. The marker. Okay, I said something like this. I hope that you have learned something in this tutorial, and I'd like to see your butt of life. So that done, drawn only one like this. But try it with different patterns, with different shapes, with different casts shadows.
5. How to Draw Black Hair: you can let me show you how to drop like here. But in order to be able to erase over the black hair and sue, create highlighted flyways. We should apply five age or six age first. So wherever you want your hair to be drawn, just go with the five age I'm using Fire age. It can be also six age, seven age. So here you don't have to draw hair by hair. Just cover the area like this and don't press too hard. Okay? And now we can apply an aide be I can use nine B or six B or seven B and just start heared dull. So here we have to go from the top to make the way and from the bottom till midway. And we will create highlights in the middle this way and just the least off the pencil. Slimy as they finished, each line said that the each line can gradually disappear into the paper like this, so some of the hair skin me longer and just care about hair. Take your time and great hair like strokes. So at the end of each stroke that it should be it likes most Grady in. But when the pencil stroke and this five age area this so this baby is pretty soft mental, and you can see it's already the tip is around. So they're soft and they will run. Oh, faster than age rentals And OK and Lester the same from the opposite direction like this. So just start here. Of course, if you draw the whole hair, you can create lock by lock and just the same way like this and awesome banks. So this is the point drawing toe hair interest school towards the made the doors a highlight and also lift off depend self slyly and you can see it are already looks curvy, this lock and kind of shiny and it looks like it bent here in the middle. And now, since this highlight it seems to be to Bryce for the black hair, we can go over with an H B and, um, pressed to heart just go work like this and somewhere breast harder somewhere for a slightly but dumpers to corn because on age we bent looking also creed Very dark strokes. If you breast hard. And of course, it can even skip some hairs or there is like this and see now the highlight is quite darker , but it's still highlights. You can even go just away that within eight B and same here. Just go over in a B and leave off the pencil here. Court highlights. So since we have applied five age as the first layer, we won't be able to create too dark areas over that. So it does matter which pensively apply. First, let me show you a quick example of what I'm saying. So I want to apply five age first just the way I did with the hair like this. And now I go over with an aid be and I pressed pretty hard. And now let's apply a B as a first layer, applying the same pressure so as you can see authority quite darker. And now, when we want to create highlights with an eraser over this areas, so you can see that we can easily create them where this where we applied five age first been ordered. This which is just a simple eight B first layer. So it's kind of impossible to created highlights with an eraser, and I will show you this in our example. Okay, so first of all, I want to cut the top of my race or my mechanical eraser because I want to create a very sharp edge. I think this. And now as I Moshe, we can create some high like you flyways by raising here like this. Overheard it. It's quite easier or the highlight to do, but it's much more difficult to do over this darker areas. Yet it's still possible with this mechanical razor. I mean, you can use that with the kneaded eraser. It's too soft, so it won't remove anything, so you need it, but harder. Every surface. That's not even an ex sector knife it that might do something, but the lines aren't very, very signing something. They're not quite illegible. That's why I suggest doing it with plastic. Razor, have this mechanical go once forward area and then you have to caught in again, secreted clean, deeper fit In order to to be able to remove graph. I okay, here also this and then I just turned queen side of the eraser and I can do it again and I can create brother highlights. It's over the same highlighted here this. Okay, What Can I move here, for example? So just take random, okay? For now. Okay? So we can dark in some areas if we want, make it darker and we can also create the dark flyaways. So just place to declare council and just gently and And just use a quick, confident strokes like this and over the highlights. Swat just a random without following in any patterns just like this. So this flyways are always important. The dark flyways and highlighted flowers. Hey, that's it. So you're gonna add some darker areas within eight B making use nine b. So they are quite same. There's no big difference between seven B eight beer and I'm be just some of the areas pressed very hard to make them darker, then the honors looking and that's it.
6. How to Draw Brown Hair: OK, and now let's draw brown hair. And here also, we have to apply first layer with a five age or six age, and I just want to cover the areas that I want my hair to be. So it's gonna be good banks or blocks with this. - Okay , just call her the areas, or you want example to be like this. And now we can go over with an age be you can even use an age or F to age and just start on the top. There was the meat area and, um, press hard. So let's imagine you can even use an age or to age to age, and some of the hairs can be longer and go over the whole length. But majority of this hairs should stop before the highlight. This so here also. So just lift off the pencil slightly to create a smooth, radiant, so each stroke. Each hair should gradually disappear into this basic Tom and force changed the pressure on your pencil to create different tones like this. So just hair by hair patiently and some of them can go or highlights because we want to highlight to be in the middle this block and change the pressure. Great, darker and broader fears and same from the bottom two. Midway just lived off the pencil before you reached a highlight. And as you can see, it looks band because of but this way of drawing. When we drove this way, it will look of bones here, and the medal can even blend it with blending stump of it. Since it looks Bree harsh. Well, that's good dinner here. So here the same just started a bottom and press a bit harder. And then you just released the pressure. As you draw each strokes towards the highlight and some of them she's go over the highlights to make them different. So for the sake of randomness and to divide these locks and strands individual, here's and let's blend just want to. So every time I don't dry hair, particularly brown, are blond. You should learn it because it will make it look soft and shiny and more natural. And then you can go over again and blend again until your career done. The texture that you ones you see, just some of the hair can go over to highlight, and they can be much darker, done surrounding hair. So as against see, it doesn't look black. And it doesn't blond as just star in the middle when we want to draw brown hair. No, it's blended a bit and that we can make this one too same here. Start in the bottom and towards the high life and leave off the mental slyly when you approach the highlight. As you can see, the highlight is also pretty dark. Yet it's why broader than the upper and lower areas. So the lock look bent. Okay, so here we can work more on this, Or you can leave it like this banas always wants and so flyways. So here also, let's use this mechanical a razor and just go over like this. You can see that we can create highlighted flyways easily over dis h B. Because we have under it we haven't five age underneath, Okay, just a random anywhere you want. And of course, let's create dark flyways. Yes, just don't fresh through heart. I'm using HB and just all ordered place like this. So every time a draw hair don't forget to break the edge is when the hair in the background of with fly wings and, of course, order here like this. So back at me, much darker. Okay, again, that's it. That can even be like like brown. You know what? Always dark. And it's so don't go too dark, because because all I can always add more. It's quite if it good, too a raise and to make it brighter, so just don't press too hard because you can always dark in it.
7. A Glass Cup: let's draw glass cop using this reference photo that I have taken for us. And so you can take your own picture with the different shape of cop it. Just make sure to place it under the strong light to get a nice cast shadow and also the highlights or the cop. So, first of all, we have to drop to paralyze. And for that I want to use this roller and just a drawn with one son of it. You can see, like, about three inches. You're awesome. One for our line. So it's like eight centimeters. And here, like three inches three point to like this. Okay, you know, we can draw at the upper part and the bottom off the glass cup with amusing h pencil. So want to create, like, something like elliptic line like this. So something like this here, we should should check it up in the mirror because we have to make it symmetrical, and, uh, we can figure it out only when we take a look at it in the mirror. Then we can see what, er our glasses symmetrical enough. And let's create a bottom area. So the same shape of the upper for something like this. If you make it more carved, it will be like us if it is standing in closer to the viewer's eye. So here I want to create, like, bottom off the glass Cop also has some highlights and shadows and that we can see through the glass. You know, so and heroes. So this is the bottom of the glass. We should also check it up in the mirror part of proportionality for the symmetry. And now I suggest shading it all with graphite powder because we can create much smarter Dexter than to draw with pencil. So just wrapped a T shoot around your finger, dip it into the ground five father and place a piece of paper over the party to want highlighted. So here somewhere, it's a highlight in art reference photo. So we're just going to shave here like this and just go over the background to because we're going to erase, stop far and just shady own like this. Go over the edge of this piece of paper and she's completely And when you lived off piece of paper, I can get something like this, and now we can place it here or the edge, or actually order background next to the edge. The auto answered the glass and let's shade to just speak up a bit of a graph fire and go next to the edge like this. Go. So these areas as it consumed a reference photo this shadows has to be quiet, darker. It's also mentioned Don't worry about the graph either to see around the glass. So we're going to a race stuff later. And, uh, no, we can do the same here with this edge, which it should be much lighter. So don't let this time, don't they? Your tissue into the graphite. But use that that you as much as you have on your D shoe and just shade next to the separate piece of paper like this and try to leave the area for the highlights. But of course, if you go over, you can erase that just like this. Okay, And since we already have graphite daughter and tissue at hand, let's great a guest shadow, too. And then we can work with the blending stumps and with pencils. So just place it over the glass like this and just carefully creates are actually shade. The guests shadow the shadow that is cast by the glass. So here, next to the glasses has to be like a little bit lighter, dense, like a bit far from it. Just like that, you can see in the reference bottle. It's like this here. We can also use a bit of a Q tip. So here, like this, and also here. Okay. Okay. I know we have basic shadings, and now we can go into the does. And now we can start creating highlights and shadows so we can start with highlights or with the shadow. And so I actually want to start with highlights and to erase, hear the background just here around the glass. You're also and so we can create the highlights of here We already have. Right? And we can actually lighting it up if necessary. And I'm using this pencil and eraser just like this carefully. So it was against. See, I'm not grating and high lives exactly the same as in my reference photos. So they can differ, you know, to be the same as a reference vote open different, you know, for speaking, remove There's dust with brush, so just gently touched the paper and removed a graph. I worry one. So here, for example, I want to make this edge the laurier between the highlights in this shadow parts forint. This and here we have one highlight. So I like working with this pencil and eraser because, as you can see, I can make the movement just a way I do with my pencil. So it's a bit difficult with the kneaded eraser, but it can try using down 12 if you find it tomorrow. Comfort table. If you like that, more as you can see now, it looks more like glass cop, from the reference bottle to to the highlights. You know we can create tiny highlights here at the bottom of the glass, and I'm using this tiny mechanical razor. It's who a race here does be dining details. So wherever you see it in reference photo just the same. If you can't create bright enough highlight, you can use a wiping job and a white marker. But here orders glass. We don't have such wide highlights. There's are mostly, like pree bright, but they're not too brides of May. It's enough if we removed. It's within a racer and we can do the same here in the upper area like this next to dream your son. So it's not quite risible, but we're going to shaded and it will be more of a civil for now. It's okay like this, you know, we can shade a bit and I want to use a B pencil. So here we have, like, three dark areas and we actually have to create also dark areas to give the picture depth. And so here I just creed this, uh, darker area with the B pencil. And as you can see, the highlight next to it already looks brighter. You're awesome. And here we also have and the bottom every Doric areas. And there's an age be also impressed, harder even to be and then depressed, like lighter but not nothing. Good doctor done that. So the whole bottom has to be quite darker than the rest of the glass came. I know we can blend it with a blending stump and she ate more were necessary. So you're also and that's it. I think that's OK. So you can and more details you want. And I like to see your results feel free to show me
8. A Footbal Ball: And now let's draw football bowl. And of course, we have to start with a circle. So that's what we have to use it. Drying compass. But let's draw a circle on a separate piece of paper. And so the distance between the needle and my mental lead, as you can see, it's like 1.5 changes form, like for centimeters. So if you want to draw the same size me. And let's just greed a circle separate piece of paper this and now let's cut it all, which is Caesar. So just closet through like this carefully and, uh, you escorted all and just carefully because we need perfectly round circle, so very slowly and carefully. Okay, stop. Okay? And don't throw all this piece of circular piece of baker because it will need that later. And now, place it over your sheet off a favor. Summer in the middle. And here we have to use a graphite bader. So rob t shoot around your finger, dip it into the Grand Fathers and shake off the excess asleep. I want to make it too dark. And here we have to imagine our light source. Someone like my light source is coming like here somewhere from the left side. So I want to shade the right the upper right side of the wolf much more so, something like this and just hold a separate piece of paper. Just keep separate piece of paper in the same position all the time and shade. You start here next to the edge. So here it has to be the darkest and then us. We are running out of the graphite on rt shoot. We can start shooting. There is the left side Georgia left. There's the left upper corner. And as you can see here, I pressed less and less and also here, living next to exert on my highlight, to be here somewhere, so just next to the edge. Because we also want to suggest action and the upper left corner. Let's light a bit more here in the lower side. So there's a so called south shadow, so it has to be the darkest and as you go towards the upper left corner, you are running out of graph I and you are lessening the pressure, and this is how you will create a smooth, radiant and as well give the ball around shape. Okay? And when we removed a separate piece of paper, you get something like this going to see how it now looks like a ball and has a round shape . And now we can draw the patterns of football that typical with the Pentagon's and hexagons . And so let's start with the bender going here in the very middle. So we have to make depending them five equal sides with five equal corners. So something like this you don't have to make it perfect on the first try. Just try to make it like a Broxham mainly, and then you can improve. Its you can see here have shorter. Now I want to make it bigger. Yes, So if you need to, you can measure besides mint, make them the same. No, I just want to make it bigger. Don't. Hey, here we can measure sides. We want to make the same. So 1.6 centimeters. This is also much got long, so just approximately don't have to be perfect. And then we have to make. So there's our dependence or black and hexagons are wipes, and the black Pentagon's are surrounded on Lee by white hexagons, which means that we just have to draw the lines from this corners like this. And here. Don't you forget that the ball is round, so depending goes, Won't want have this shape so they won't be quite visible, is it? Just go here also. And then we have the beginning of the Pentagon. But let's focus on this now can like this so and this line has to be us longer as this one . But it becomes it should be a bit shorter because it's ah and turning. So we can see the whole language of this because it's it becomes curry here summer. Okay, And here don't we have, like, again Pentagon, which comes like this? So just to line away from this the end and then it go some summer like and then we can see all the sides of this bunch of because it's disappearing and same here. So he rehab starting point, and it's disappearing around ball like this. You make this lines or the edge of the curry. Okay, same here here also made him Kirby. And then later we can call or dumb what's first determined their position because the black areas, they can't be erased. So we have to make sure that everything is in the right place where we want it before we start shading and actually coloring. So here also just so big curry like just. And now we can connect these Bender goes with Corbett line like this It was against, you know, we have hex Agos around each bend ago like this. And of course, before we start coloring, let's just more of this pendant so that we don't have to think which one is black. So this has to be colored and arrest stay like this. So this way you will know which one to corner. And now we can color this Pentagon's. But it is important to use different Malia's because so that here, this one pentacle will be absolutely black. So we have to use an 80 or 90 for this is in office if you use an HP. But produced since the black color or value is also when highlighted, is not black anymore is great. So we have to use like a lighter pencil. OK, we can start coloring these illuminated Pentagon's with an age pencil so just carefully next to the edges. And I applied circular emotions here because we want to create smooth texture with an age mental been here next to the edges, you compress harder because there's an address of it and in words. And let's color this one too, also with an age mental. Okay, now we can continue with an HB two color this upper left part of this Pentagon. So something like this here, this half and also here because there's the parts are more illuminated. And then we're going to continue with the darker pencil and same here applied the same pressure and circle is, um, circular motions. And here you have depressed harder. Also shade doors, the right a lower right corner. So still here you can change the side of the Bandidos if you call her over to edge. So it is always better to make them smaller first, because you can always make them big girl and also here, next to the edge, because the edge is also always illuminated and just very carefully next to Dedge. So the edge is also always always more eliminated, and it won't be black. It will be dark, great, so we can also shave the edges with with an H B, and you're so we can I'm lighter areas next to the edge. - No , let's also shade here. Just edge on a J B. Okay, and now let's use a six B or you can use a five year seven B two Kohler, this one. And since this one is found in South Shadow, it has to be absolutely black. So use a six B six b and press very hard. So I have to create absolutely black color and just very careful angst of the edges so other can see these. Bender goes. They're actually all black. The skin of this material is black, but when illuminated, it won't be black anymore. It will be great. And here next. So this is actually what we created with an age be. It's a reflected light that's reflecting from table or something, and, uh, it won't be also black, so the edge will be black and it will suggest the roundness of the ball suppressed less and less, and so shade stores it and then, of course, make this too. Values flow into each other, and we can also always erase a benefit if necessary, We will see later. And let's continue here. I'm so using a six Be. But here I want to press a bit less so here you can use a three B or for being, as you can see. So this here is black and this is a great So there is difference because of the light source. And now I pressed less and less also shade. There was the age be and I go a bit or age be because I want to blend these two volumes to make the edge between them invisible. So they have to flow into each other like this and same here. - You know, we can cooler this one deformed this Pentagon Dennis left. So I still use a six B and I press a little less and oppressed here. Else I mention it can use this re be or for B And here also made news values for into each other. And actually, we don't have to blend these under guns. What? They're just OK like this. I don't have to blend them the blending stump or something, you know, Let's just blend these edges between the white hexagons with blending stone to make them look a bit bent inwards afterwards. Seward. So they're bend inwards like this. So this one line seems to be too dark. I could just go over. It's a new razor of it. And now let's great guest shadow. And so if on light source is coming from the upper left corner, the can shadow will fall or the lover right corner. And take that piece of paper that I told you not to throw out at the very beginning and place it's over the ball succor it completely like this. And then Roberti shoot around your finger dip into the graphite powder and it created cast shadow. Just hold this piece of paper. So if your summer just go over this sort of core piece of paper in here, my horizontal moments like this okay , And when we lived off this peace a favor weekend, something like this. So here we can shame. Or can it? Morty does or change something so and now tried to draw with different patterns or even basket bubble or something like this
9. Droplets - Part 1: again. Let's draw water droplets and let's shade the paper with graphite powder completely before way start shading and drawing the droplets. Such a spore. A bit of graph I on a separate piece of paper and just Rupp a tissue around your finger and dip it into the graphite powder and just spread it over the paper with horizontal movements . And now we can also use horse until or even circular motions. So just press very hard and tried to create even Dexter for the background. - Okay , so the next thing is to create the shadowed areas under the droplets. And so if our light source my life sources coming, as you can see from the left side I want to create. For example, if mind droplet is this big looks like this, I want to shade this part of the droplets. Next it sad where the light source is coming from and I just want to make it darker, something like this. Maybe last and 1/2 and then we have to shade less as we shea towards the right side. So we have to create a great in transition here. Also, we should use that circular motions because we want here to create a smallest extra er so like this and I was against C, it becomes louder and louder as I'm lesson into pressure, and I'm using B pencil. You can use an age be or an F pencil, but darker than a B pantos. It's not really good. It's And let's first terming the position of the droplets if we want to draw, so just draw them at random wherever you want. I use a B pencil for this can create them with HB so smaller and bigger ones, the first tiny ones and big ones and then to next to each other like this. So just a random. They don't have to be circle or shape, but elliptic like this can be like this. So just very wanted random. I was here a big one, elliptic this. Okay, and we should do the same with each one of them. So here in a very left side, we have to shade stronger and then just to lessen the pressure and here, somewhere in the middle, we can actually stop shading and make this shade floor into the basic color of the background like this. Here we can start using a letter while you So I still use a B pencil. And unless in the pressure, But you can you start using an age be enough for that age and so on. Okay. And now we can blend it with a blending stump. I just use almost a circle emotion like this. Okay, so something like this and almost the same with the rest of the droplets. - Okay . And this one connected. I mean, these two connected trouble, it's shave the same way on the left side. So I just don't want to repeat myself. It could under the same all the time, with each and every dog, crumple it. And so we just have to press harder on the left side and to lessen the pressure. Also a shade towards the right side. And I have one too. What can use a blending stump to blend this smaller ones? And we can use a Q tip to blend. The bigger ones just like this can see how the shadow gradually disappears into the basic color. And these areas should be us. It's most us possible. So just keeping blending until you created smooth texture. Okay, okay like this. Now let's great highlights on the other side of the droplets. So here, just use a no racer. I'm using this one in pencil, and I just want to eliminate to gratify. So here I start over the edge and the highlight should be the broadest here. And then I'll say and raise the graph line through the center of the droplets. I just lessen the pressure because I want to Aires less and less so. So this highlight should also gradually disappeared into the basic color. I like this eraser in mental because I can use it just a way. I used pencil, and here also do the same. I just lessen the pressure on my area, sir. Two areas less and less. There is the center of the droplet, but you can use it needed a razor for any order did you want? But the method is the same. Denies it can see there's no clean edge between the shadows and highlights, so you can't say where one starts and another ends, and I would carry well. It's fast food brush. Sometimes it's enough when your staple, but here in the very middle you can even use and kneaded eraser. Where is just enough? If you place you're kneaded eraser and just leave off. He would be eliminated too slow bit of graphite Enforce. If you overdo it, just go over with a Q tip. So if you're highlight is to to bread, you just go over security and dark in it again. And here also as a shade towards the center. You're droplets. I just lessened bread her and also my The tip of my eraser becomes dirty. So it will illuminated last of the graph five. And when I want to Cherries here on the edge, just clean the tip of my razor. So here we should create that smooths Grady in but from the highlights of the shadow. And this is a very good practicing and this is a very good drawing for practicing this because we need this in almost every drawing. And I could see her becomes better on site breast less less okay. And I have one more year in a small one. - And now the next thing we can create the cast shadow that shadow that is cast by the droplets over to surface. And so, if our light source is coming from the left side. The shadow would be cast or the right side. So here, just go. I'm using a B pencil and I carefully draw here next to the highlight that I just created in a previous step asac breast, like not too hard. But so I want to create a dark and here next to the highlight. And then I just want to breast last Unless as I shade away from the droplet. So here also that grant immunization is important smoke grading to achieve here. So from the center of the cash shadow from the darkest part of Gash added to the
10. Droplets - Part 2: background or the table surface, and we can achieve that by lessening to pressure. So it will make the droplets pop on the paper like this, and I also want to blend it with it, blending stump and just carefully next to the edge. But quit because this edge between the highlights over the droplet and the cast shadow has to be clean. And, of course, the cash shadow should be the darkest right next to the droplets that we can go again and press of it harder. And then we can blend again because after blending, we will remove a bit of the graph. I and it will become a bit brighter so we can go over again and darken it if necessary like this. And I'm using a beep until old of time. But you can use a beep until next to the droplet and then start using an HB foreigner from the droplet, and you can that make did the address of the cash out of the order edges with a to age, for example, so you can do that way. But you can also learn to change the pressure on your pencil. Enter team this gradation so to create a lot of values. What? A single pencil. And if you know how to do that, if you practice a lot, you will know how to do that. Then you don't even need to use all the pencils. Can't just like this, you know, concede that this droplet looks kind of three dimensional. So I just want to go again next to the droplet. And this time I want to press much harder with the B pencils are going to see how different this value is. Assam pressing harder. So I don't have to use to be or darker because B pencil can also produce a very dark volume or when repressed corn. Good. No, like this. So we can do this the same with each and every droplet, even with this small ones. And of course, the bigger droplets will cast the bigger shadow and and a darker shadow and just same with each and every truffle it And just make this edge between the droplet and, uh, casts shadow the shadow it guests order surface of the table. Weren't droplet there, phoned to make it very, very clean And sure, that's very important. So they'll make the edge wavy or something just maybe very clean and sharp. Blend it. You know, you can add more shade because if you shade too much, it just go over with a blending stone and you were lighting it off, and I can see how the highlights seems to be a lighter or much brighter than it waas before we shaded next to it. Because the cash shadow, the the dark value of the guest shadow will enhance the highlights. This highlighted area droplets. So actually, this highlight, it doesn't have to be wide, absolutely white. But of course, we're going to create different kinds highlights later, right after this step. So just focus on the step singled that step time. You couldn't even do one droplets from the beginning to the end and then another one and song. But I just want to do them all at once. So you don't have to to draw this much can try only one. Okay, you in this small er's? Well, that's no. We get these small ones. They're breathe difficult to make. Okay, so here we have two droplets next to each other. So this cast shadow between them has to be much darker. So we compress Horner because this area would get even less lied, because at this droplet underwrites, I would block the light so it can be a much darker here like this, and then just lessen the pressure as a shade away from it and let this gas shadow, like, gradually disappear into the backgrounds up. I don't want to repeat myself, and this is do the same with each and every droplet. - I can't know we can create a highlights. Actually, the reflected lights Oh, murder droplets and some light source that is reflecting over the droplets so we can make it by eliminating Teoh graph I with an eraser like this example, Hewitt can make two dots I wasn't going to see. We can we can't create that bright area. And here we actually we need absolutely white. So we can even try with an electric eraser which, which actually can't a rage more. But it's still not white enough. So I suggest using a white or bake marker or any other, or bake maybe medium and just apply it over there, trump it and you can see how wide this is now. So I'm using this, uh, 0.9 in between surplus and something like one millimeter thick, 1.3 And this one Is there a 10.7 millimeters bean type? So it is good for this small droplets said There's also has some like reflected light. So just here, over the shadowed areas and not over to highlight it because there will be quiet visible or the shadowed areas that we did did in the first step. So just hear somebody could make one dot or two. So, like this. Okay. Is it Cancino? The droplets look shiny eso, but if you make $2 to make in each and every bigger dog drop that you can make to this and are bigger droplets, you can make bigger life with light. You can see it's quite easy with this marker, and it's a bake. And I really like to use that even or my carp and so drawings. So it's a very good thing. And as you can see now, the droplets look what? And, um, they look like a droplets and they look like water and we can make more. So I like doing this. We can make more like three we can never make them or the highlighted areas still be quiet , visible and highlights It are not to want like this. And here we can make some changes if you want. And for example, I want to make this moves Grady in more flawless here over the main area. So I just want to through this was the Q tip cause I could see still see the visible lines . So anyway, also can make some and some glossy effects. After that, I will be using this ruler and it just place here over them. I like. And I want to use this, uh, mechanical eraser and I just moved. It's like this out of the I see. So just place over the like this, like, tiny dot and move away from it like this and that we can do this like, make some cross a line like this and same here just and just lift off lightly, linguist. And here also like this one smaller. Okay, you know, it kind of looks glossy. So here you can play with this thing, son. Great. Something like this here. It can also create something like this. Maybe one shorter lines. So, for example, here the kneaded eraser is not really good. I mean, it want erase, do much of the, like trajectory, fear, but it next to the ruler. So now it's to sell for this. No, I won't do it. This thing here. So this is of course, good for so many things where we actually is not recommended to use This mechanic was reserved, but here, this one is good. That's why I mentioned tools. It's worth getting more counts of the razor. Frazer's okay, so, no, you can practice different shapes and more. And of course, you're describing in transition of this most gradin is good drawing for practicing the and I hope that you have learned something. I'd like to see your droplets and I hope that you enjoy this.
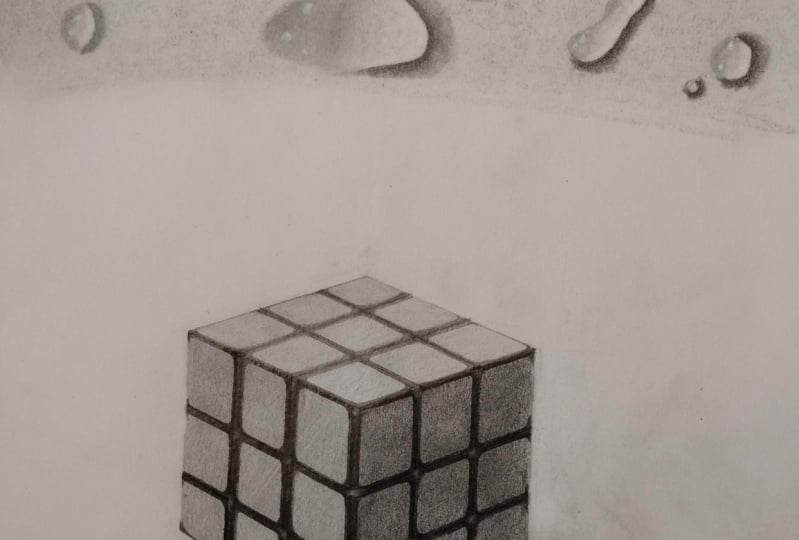
11. A Rubik's Cube - Part 1: OK, No, let's draw a aerobics cube. And, um so here I want to start in the bar middle to create, uh, edge between the right and left sides or so called faces. And I want to set up the line like 6.5 centimeters. 20 This. It's like two inches and 1/2 and a bit far from its someone to draw the a vertical line from the corner of the right side and says this one was 6.5 centimetres. This one is 5.5 something like this. It's like two inches to 2.1. And let's just take the measure here from the between days to allies. This for 0.7 millimeters, So 4.7 minimum we want to mark on this side you're in approximately here. Same height. We want to mark draw the vertical parla line Parliament to this also five points five centimeters or 2.1 inches. And I'm using a B pencil for this spirit can use an HB or any other pencil. And let's just connect this the ants of the lives like this and here against you. Now we have two sides to faces aerobics que cuba. And we only have the upper face. German position, the upper face. Okay, so this is this edge is closer to the viewer's eye, so it has to be a bit longer than these two inches. Okay. What can no, we have to draw the edge. The opera answers of this her face, and to determine the corner of it would just have to place our roller over this line at. But just don't draw over this area because we're going to use a very light mental, and it will be visible even if you erase that, you will damage the paper and it won't be smooth. So just draw something Sar above its like this. So it will be placed here summer. So here, like this. Just mark this here in the very middle. Okay, so if this line is like in my case, is 5.2 centimeters long or actually, two inches. So I just want to sue create here to a little bit shorter lines, set up this, eh? Just or these sides can look closer, appear closer to rears I man. So we have to take the measure with our drying compass like this. So here is the distance between the needle and my pencil lead. So as I mentioned, it's like 5.2. So I just want to reduced it to five just a little bit, this little bit and then keeping Dinu in the same position. Just mark here somewhere, so it will be connected here. We have to create the the cross point here somewhere under this line, and we just do the same from this corner. Just place it here and here. Okay, so we have our cross points over here. You know, we just have to connect this corners like this, Okay. And two areas this because we don't need these lines anymore. Okay. Okay. So, no, we have to create those nine parts of each face their bigs cube. And so the list armament measuring here. If the heart of this line is 6.4, the upper squares have to be the longest or so actual. Let's make marked here 2.4 and then, like, the next line will be like 2.1. So it has to be less than the upper one. And then we have here 1.9 or something like this. So this is the longest. And here we have to do the same on both sides. So here I have the five points five. So I have to mark the first squared upper square, like 2.1 and then just like this 1.9 and that we have left like 1.6. It's the same here, 2.1. It's a little bit of measuring what we want to make it proportional like this, the same of better side and before we will forward less of the same on each end. So here I have five and 1/2 centimeters. So we have to divide those into three. But not not actually. Equal space is so the 1st 1 has to be like 2.1 on this side. 2.1 on this side. And after Dad, it has to be like 1.8. They have to be a smaller and smaller, and here we have. But then we have 1.7. It's the same here. 1.8 boys. Seven. Okay. And now you don't have to mark the another end of this line here. But you just put your another roller here. And just in order to make Parlow line to this endeavor middle Just, uh, Helene them. But, um, parte off your ruler on the nutter and just move. It's like this here and then just Creadon a vertical line like this. Yeah, You're just saying just carefully and hold both rulers, don't let them move, okay? And now we can connect even these lines like this. You You can see that these squares are not even squares. They are Roberts. And of course, we're going to create thick lines over this tiny lights. So there's are just for orientation, and we can make them even, like, bold or suppress very hard, because you will have to see them through delayer like this. So when you make sure that they don't look good, proportional and in the right place, just go over again, sprint in them like this, and here just want also. And so now we have only to mark on over the upper edges, killing this And here we have, like, five centimeters. So the 1st 1 can be like to the second 1.7. And here we have left 1.1 same here. Like market, too. Work with 1.7. And here we have blood and now have we have to connect the days daunts this this and same here just carefully. Okay, And now we have easier job because we have only to shape and to create this thick lines between the tiny squares. And so let's start with shading the upper face. And I want to buy a T shirt in my hand because I want to touch with my skin. This squares and I want to use a six age too shade this squares for the upper face, and here I'm using surgical or emotions because I want to create a very smooth texture, and I just go over and over again until I covered a paper completely So here. Also, that circle is a method is very good way of covering the area evenly, it says. You can still see the lines between the squares, and we're just going to strengthen them later, so it is important to see them through the layer of six age. You can also use a seven age age age or nine age four age, so but this area has to be very bright because it would receive the most life. So here this area, you don't even have to blend with the tissue. Later, just go over and over again until you create smooth texture. Just take your time and carefully next to the altar edges and next to do I'm not a face or side. Your Rubik's Cube Inter school orders lines. So I have blind normal pressure here. I don't press too hard and not too widely justly else needed to colored paper because we want to apply the same pressure all the time. In order to create small Steck stir, you can see that I created done one square pre darker, so I just want to place my kneaded eraser and just leave off. Come see I can lighting it up this way. I don't know why it became. It's much darker and I apply that same pressure, so it will also depend whether we have raised the area or not. Remember, I have erased here where wars marking thoughts so after erasing the area won't be the same . So when applied graphite, it will be different. Then ordered areas where we haven't erased anything where we haven't touched the papers, so I have to take care of that. - Can I have one more section? But this was six age that this is actually the yellow color. If you want to use color pencils, just my yellow color. Okay. We could try actually a lover too. Blend this. And then if you go over the background, it just recent. Okay, so it has to be smooth. It's possible. Okay, Now we can shade this too basis with two different volumes. And I want to use on age Spencer for this whole side. And let's do the same here. So just circular motions all the time. And just trying to cover the areas evenly. So on age, mental is like meet volume. So it's quite dark, erred in six age, and we're going to use darker pencil for the right side. So here. Same. Just go over the lines in between this sections squares, and you will still be able to see them And just carefully go over flying, sir. Start circles and less is and the same pressure. Old time. But of course, if you see sewer latter area, you can go over again. Pressing but harder. You can even use a graphite water if you want, but you might shade order rest of the areas. Some think it's quite easy to do like this. Maybe, thanks more time, but it's easier and just tried to use around. People fear pencil so it will make to progress faster, and the area will be smarter. Even cheesier shaped people of pencil can create with the sandpaper but the sharp point of pencil. That's not good. So if you use the pencil with a sharp with a well sharpened point, it will create a lot of different tones, and it will take a lot of time to cover two areas. It's good for details and so on and offer dues areas here. We're gonna you can see that this sad is darker than the upper face and, um, us on my show. We're going to make the side on the right side even darker, so they will have to be different because they have different colors. So they have to have different values. And of course, it all the bands on the life sores. So that's why I mentioned you don't have to use defenses that I use you get things like different values. But just to make this three sides difference, it follows that suborning. Okay, we can shaded birth. We can blend it to bits with you should know, I think this. So if you say some, So if you see some imperfections, you can raise them just the more carefully like this. If you see some funny dark dots or lines, just eliminate them or if you see some very light area, just go over again. And, of course, the background. If you have when you blended, you have applied. Some of the graph might just erase the background to make the edge between the blood background and the cube clean like this is that this eraser is very good for this spree Hand in. Is it to use? Okay, I can't know. We can use to be pencil for this side and same here. Just try to create smooth texture to apply the pencil evenly. So this side has to be the darkest. You can see that I'm trying to blind not circle ism, but just strokes. And it turned out to be much darker. We have to apply same technical all the time. Can And if you want to try out something, just trying on a separate piece of paper before he applied to your drawing.
12. A Rubik's Cube - Part 2: okay, It's known better. So just go over the lighter areas and shade them more to make the edge clean so that their ground has to stay a white. Can you and I can go back and, um, shade more so are necessary if you need to. And as a final step, we can create the edges between these tiny squares. And now let's just strengthen this lines in between the squares. But we have to create a very thick lines, and I suggest using roller. So here in the upper face, even there's a areas which are actually black. There will be also more eliminated. So I suggest using an H Bensel and just go or it and then bill a bit move ruler to create a thicker line. I think this or you can create to parlor lines and then just feel the space between them. Just make sure to make it straight. No way given like this. Okay, something this Another studio. Same with the rest of the lines. So I'm using an age pencil, but I have to president quarter in order to create, to draw over to six age area. So if we did this before we shaded all this tiny squares with the six age agent to be one blending it, we would mess up with these lines that we're creating now. So that's why it was better to shade them first and then just to strengthen days lives that are still visible through the layers of those pencils. Okay, something like this. And now let's of the same with the rest of the lines. But this time I want to use an eight b you can see for be 90 order. There are mental, but he was at least four B because there's have to be very dark. My this see from this one could be even a whiner. - Same here, just carefully can see that it was drawn one line under this initial line and one upon it like this to create to barlun lines. And then I have just to feel in this space between it is important to make straight lines and to make them the edges shopping clean. My guess. Here also, that's why we should use a ruler. And as I mentioned, I'm using an £80 for this and this is very, very dark mental. So we need to create this lines to be to make them very dark, absolutely black. - And now let's and do the same here with this two edges, just it lower part has to be drawn with an aid be and the upper part has to be drawn with be with an age pencil because that's the bar is more eliminated. This okay? And here above the line, Just use an age pencil was emotion like this and we can use to age in between to make them these two Bali's flow into each other so that the edge can appear around this same here and now we can create some details for example, these dinos squares to make the corners around. And I'm using an eight B. So just here, next to the corner it is Ah, it has to be around. So just like this, make it round and each and every square the same. So here we can go much more into the doors and make it more precise, like this is See how it looks more real now because those corners or not like this, but they're around, actually. And for the order areas, let's use a big lighter pencil because this areas received more light. So just like this, - Okay . And here the same on this side, just each and every square made the corners around like this discover a little bit this corner and make it round. And we can do the same with this. Squares over toe, upper face. But let's use an age pencil, so each and every quarter make it around. - Well , let's just create here kind of cast shadows or actually, the lower edge of these two sides like this Amazing to be. You're also that's just made two corners around and just very carefully to preserve the sharp edge. And, uh, Mr Stay straight, we should actually use a roller for this. And then we can shade above the lines the tree creates with ruler. So it's always better sitting here. - Okay , lets great highlights over to protecting areas between these tiny parts plant Rubiks Cube and I want to do it is with an eraser. So just here in the very middle, just created tiny highlights like this, so you don't have to remove the graphic completely. You can't even remove If you used on a B pencil like me But you just get a little bit leading it up here where the highlights would be like this. See in here also in here also, - Gary Heroes. You know, if you're very still much to school or it with a pencil again, and it can create the shape just drawn around it, okay? And now we can create a cash shadow. And let's suppose that our life source is coming from the left upper corner. And Celeste, this place two piece of papers here, like this one over decide and one here. And I just want to dip my cut of blood into the graphite water. Yes. Here. We have to called these two papers family and just cool over them. And to continue overall are grind papers. So here, just a little bit on the left side. So here on the left side, just a little bit. And that bit longer. Human right side. You like this? Okay, we can see what we need to shame more here next to the cube. So if we didn't hold our paper properly, there will be a some space that is not shaded, so just go over it with a Q tip. right next to the Cube, and that's it. I hope that you have learned something in this tutorial, and I'd like to see your results.
13. An Umbrella: okay, Now led to draw on umbrella. And so we have to draw one line here and, uh, something like G letter to have a true orientation. So it has to be perpendicular like this. So just approximately something like T letter. And here now we can draw to elliptic shape. Here are on this line for Did the visible part of the inner canopy like this something like this and the same of this side of the of this main line that we did We create it, so we're just going to get raised up. But we need death for orientation. No, let's just areas this line and no, we can always line the umbrella this oper part so something like this Typical shape and try to make it us symmetrical as possible. And here of the benefits interest, uh, create at one part of the shaft like this, some looking actually change their shape if it before we start shading it, if you want to make it bigger now we can colored this chef and let's just great Parle lines the lines parlor to this to one me some. My shop seems to be too long and also want light on this side My this the sensitivity to think not gonna deliver. And now we can shade it And I'm using an age pencil and just carefully next to be and just - let's use a Beat Council here and said here in this inner area, because this park receives the last light like this and also this, well, our area using a beat down until here just want to use a roar. And of course, you press last unless those air shade upwards because you want to make it around. And as you can achieve by creating us most Grady Int Well, I guess. And though let's have drawn the handle here, the bottom So it has like a typical curvy Hey, something like this. And then I want a line parlor to it. I can't even be with thicker than this far. My, that's and I want to use a B pencil here for the lower area here because this very gets the last line and also here this area and also the top of it. This And though we can shade the rest with an age pencil pressing lightly and here we can connect these two volumes with an age be because they're still volumes should flow into each other. My, this No, we can also had some highlights or them from the research. So here this area will be highlighted. And here this fossil can also create some lighter area here between the handle on the shaft . And now we can shake this canopy and let's just strenghten offline spurs because we're going to shade or this area and we want to see down lines. So here it can go over it into D desk. This cannot be between the rips and here also can't and they are up a T shirt around your finger and dip it into the graphite water in shake this canopy like this. Of course you can go also over the background, so we're going to erase this. So here you can see how I have damaged the paper. When I was erasing that line and it's a visible now, after I haven't blood graph I water, so we have to take care of. It's not to touch or two error and raise the paper, but we're going to shade that farmer more a bit more. Russia just areas water area. Kim. We can see that this way of shading for uh produces much smoother dextrose. Then when we draw with a pencil, like even when we use the circle is a method that this is still better and, um, and it's better for this texture that we want to create here. So if you don't have a graph I borrow, you can always created to yourself the with sharpener and eventual I can. No, let's shade this inner canopy because it's of course, it gets less light. And I'm using a Q tip for this and, of course, graphite powder and just shade it. So it has to be much darker than the owner gonna be. So just like this and very carefully, you can see that the ones we have erased the paper. It is difficult to create this most extra. So now we have to feel end is lighter areas, and I'm using blending stump Firdous and, of course, next to the edges. And I just dip dip of my blending stump into Graphite Potter because it doesn't have enough graphite on it. Okay, looks quite smarter. You know, we can create this rapes inner area and I use a six p for this here. Like this. There was this, uh, center here Has to be a bit Kirby. And let's use an age Bensel for the reaps here on the altar area. I'm personally Lyly. You're also unless you're shade here next to the ribs. So this area would get, unless likes how much just used planning's thumb next to the reap. Okay, something like this. And lastly, we can create some cast shadows. So here, let's suppose that this is standing on a table and just you know of it with a Q tip in the ground. High water just here, supporter from this bottom area, it wouldn't cast a shadow such a then ah, object only here next to do next to the area of the displaced that just touching the table . Then here. Let's opposes. This is also standing the table, this two parts and they would just have to shade them. I'll hear again use a bit of the show, the shade, like over a larger area
14. Knitted Fabric Texture: No, let's draw a needed fabric, Dexter. So something like wool thread that interviews and crazy the close, actually so But when it's, ah, highly detailed and assumed, so it just kind of a repetitive pattern that is also good for you to practice. Let's start to create the actually the rose and a single units. And so we have to create, like to the lines parlor to each other, something like this. And then we have to create here also like in this direction, and tried to make them the same thickness as much as possible and that we can go and make more so just the same distance between these two. So it has to be to look the same when you take a look at it upside down and just the same thickness approximately. Of course we can. He's like, perfectly the same, but just approximately like this. So yes , pretty difficult to make them say the same. But that's why I shouldn't have this good to practice drying these butters. It might maybe won't be successful. First try and then you just try again and let's create the same role above it and honor it something like this course the same. Lang's same with approximately so something like this. And, of course, the same things. It's fried to ring. Okay, let's make one more rule here under it. Also the same heart as much as possible. - Going to see that my pattern is absolutely not perfect. But the gates, My first try. So it doesn't have to be perfect. Let's make one more rose. And now we have four rows and four columns. Course it can be more. This is also very good to practice patients. Not all of this pattern, but any kind of pattern like mine doors and so on. So you can practice with those two. And now we can connect these threads with the Cory aligns. So something like this and of course, the same thickness of this Strad. And just like this goal. Oh, so also, double line, great double line to connect is like this. Okay. And also try to make them the same cell as much as possible. Okay, something like this. And here again do the same in this room. But this done. Let's go behind the lower area of this operable like this to just go behind this. Does this have to be in front and this goal behind like this? So the same thinking is the same as here in the upper area. Just, uh, dropped behind the lower parts of this. So, like this dancing here just go behind. So that's I did the same all the time. I want to repeat myself. So it is very good to practice your observational skills. And, uh, when you try to make the patterns the same, it is very good practice. And when you create one, you just take a look at the upper one to make the same us down one and on the left and the right size. When you have drawn already and tried to cope e se to draw what you see so that I can be the same much as possible. You're gonna see I have this off lines that dinner could access. I do know were it will connect. Okay, Wiccan, they raised them later. And of course, we're going to shaded all to practice shading as well. And here we also have so here the same. You can even take a measure of men treat your finger or to roller if you want to make it exactly the same. But for the very first time, it's enough like this. It doesn't have to be perfect. But of course a learned to take measures which your eyes and this breakfast will help you take measures. What? Your eyes. And if you create this all one more time, it will make it better. Because you you will know we'll have experience and you will know better how they will connect. And so Okay, I'm almost on. This is two things. So when you zoom in any fabric texture not any but ah palm it or some bull close it will see this pattern and now we actually have to do the same. So if you turn your paper upside down, you will have to do the same. But do not turn it upside down but tried to make it from like that. So just the opposite of what we just did You also go behind these. It is upper areas like this and connect with the lover part of this here like this. And now you see, they are intergrated now. So this one go can go out like this. So see it is the same that we did just upside down the same here. Because in my case, it's like, thinner and thicker and course not, definitely not perfect. But as I mentioned, it doesn't have to be. So next time I draw this pattern of will be better and then you just erase Styx aligns her not necessary. But of course we're going to shade and all. And here, just so off course, this thread here is the part of the next look. But we don't have to draw a lot. Okay? And let's did it here the same. Just go behind these like this, you hear? It can also connect days. I don't know. It can erase everything that his out of these main lines. So here I use this mechanical erasure by dumbbell. It is very then it's tape and I can a race here dues Think Dios So I can go in tiny spaces and herrings. You know, it looks and we know those unnecessary lines. You can also make some spread thinner or thicker. If you have mistaken somewhere, you can change it. If you want to make it, you better. You know, we can start shooting and I want to use a blending stump. So here we have actually to go next to the edge and everywhere and to shade it next edge like this said to make it look around and last Flat skin, dude, even it with a pencil and dental blended. So just like this to give it some three D Thank. And now let's do this on Leawood is straight areas just next to the edge within a trends. Yeah, You can dip your blending stump in a graphite father if necessary. If you don't have any graph I on the tip of your blinding stuff and come pick it up And before you apply it, - we can also raise They're graph. I don't wait. Applied over to brag background. Nice to distract. - Yeah , yeah. We can also go next to the edge. Well, bit within a dream, Bensel And just right next to the end, make subject Grady int here between the Imagine this shaded area to make it look more around. - So here also, as you can see, that smooths great and is important and shading. And this is also good trying to practice it on smaller areas. You see how there's no look more around and just don't press too hard just right next to the edge and thus breast less in the last issue. Shade inwards. Okay, now let's shade the parts that receives last light. And so there's parts that go did go behind distress, for example here, so we can actually colored them whole. And I'm using an H three here for this, and I just want to color it so they are behind and they would get less liked. And here you can also make them sicker and if you need to and now let's shade. Also, these are behind, but this time we can use a mining stuff. Or we can even use a ladder pencil and to shade them, particularly particularly here in the large area to shame more and then a bit lasting upper area like this. It will also make this thread look around, and I'm using it to age produce, so just feel it completely and then pressed harder in Laura area. Or you could even use it to a different pencils. Purpose im se mini drool. - And let's also shade this upper parts. And let's suppose that our light source is coming from the dog. So we should shake on late dlr area with this. Could it offer area looks illuminated this foreign. Same here. So this areas that already goes behind these, the threats, they can also be shaded completely like this cause they already get last white in here, also in the lower area by this. Okay, so I thought, Well, something like this and, um, r can create different batters. And Herm Lopes here just I had a little bit of pencil next to the edge. So here you can go in more into details and try to make it perfect the next time in full, be better.
15. An Apple - Part 1: No, we can draw an apple and so we can start with a circle. So here in the middle of the paper, we can draw a circle. We don't have to use a drawing compass because it doesn't have to be perfect circles just approximately the shape of an apple. So whatever shape you dropped will be good. I guess something like this can also create us sunken area with where the stem is growing from since are here and also just them. You can also draw some, I believe, just to make a drawing board Interesting. So here. So we're it's unveiling this. So the diameter of my apple is like about eight centimeters or three inches. So just to let you know the size of my apple, if you want to draw the same size and now we can start shading here, we have to imagine where our light source is coming from. And I love my life source to come from our point of view, which means that we have to create darker shades all around and then two great lighter and lighter shades as we shade there was the center of the ample and I want to start with a five B and just very carefully next to the edge. So I just want to odd line it now Here. Also, we should use a Circle ism technique supply tiny overlapping circles and ah, you press harder. Nice to the edge and release the pressure is a shade towards the center. You can use a fore be or three B because I have to be five b. - Let's continue with to be just go over five B area of it and then just released a pressure. What a shade towards the center to apple. - Okay , now it can use the lighter pencil and I want to use an age mental and same here. I just want to go over to age area a bit, and then to a lesson, the pressure. As I shade there's the center, and here we can also shade this edge between the protruding and sunken areas like this and also relieves the pressure is a shade downwards. Here you connect, you hear, can connect these areas. - You know it can go over the previously shaded area, and you can blend them this way. Hurrican use a tissue or blending stomp. But you can also blend them. If you go over with a lighter pencil, you can see how I'm listening to pressure. So shade there is a center for apple and I'm creating a smooth, radiant and it will be it will give for an apple a round shape. It will make it look around that transition between the values. And now let's use to age. It's the same here. Just go over the produces shaded area and, um, and shade There was the center releasing the pressure from this pencil. So here we have just to skip this system. And so here we have to have the highlights. It here, deep in this sunken area, were just them is growing from and this edge has to be dark so they can be separated. They can look separated. So here also other Shakhtar's this, uh, dark edge. Just, uh, press less and less so you're somewhere I want to greet highlight, which has to stay through the whites or much, much a brighter day and arrest Answer here. I won't be using also one more A lot of mental after this one. I know we can use for age to shave this area between the highlight in this tiny area that I have marked responses a bit. It's the same here. Just go over it over to the to age area and then press less. Unless is your shape doors the highlight and also shade here in this sunken area, pressing a lightly still using for age and just lessen the pressure ASU Shade onwards. You can even create kind of shadow that its guests by the stems something like this. It's work that we can even use a darker pencil such an age being so something like this, which means that the Stam is guessing the shadow over this around edge here at the top. Now we can blend it with a T shirt, and then we will see whether we need to shaded more. So just skip this highlight in the middle. Is it gonna see after shading, there's some areas become a lighter, so we will need to shade them more. And here for this opera area, use a blending stump or a Q tip because your finger with a tissue wrapped around it is too big for this area, and you don't want to mess it up I just use a Q tip? No, since we have lighting up, these areas that we did with the to be Let's go over again of it were necessary because there is a clear edge between the dark and light values. So I'm using to be again. I'm here. Well, when we shade with the to be over a two age, we won't be able to make it too dark, but we can make just appropriate volume.
16. An Apple - Part 2: and I just wanted dark and a bit. This area also, and I want to use an age be. You can see that after blending, some of the values become brighter, so we have to go over them again. But it is important to blend because what can create it's most texture, I thought. That's why it is important to use a very think paper, said involvement. Wrinkle after so many layers and so many shading and pressure and always blend after when you have shaded a bit resplendent. - And now, since that I have my apple shaded. Now I can see that the whole shape is like a narrowly natural, so it should be a bit water here. Of course, it can stay like this, but I just want to make it a bit wider here in the upper area. So just like this, you can see we can always change the shape of it, but we can't make it smaller. And here on the left side and I'm using a five B pencil that they used for the to shave the edges. The area next city answers, and I would just feel it with a five B same here on the right side, just want to feel feel this area. It's a fine, be and just very carefully because the other edge has to be sharp and clean. I just want to add a bit more. - You know, we can create some patterns that the apple's usually have some vertical stripes, and I'm using a five B something like this. So here in the middle of it can create straight tribes. And then they have to be more curry as we drove them throwers the edges. So, like this, I'm using a five beat. But I don't press too hard, so I can go over again if I like the stripes so we don't have to draw them over to highlight it is the high Allies is so bright that we can't see any patterns over it because the apple is shiny. So here in the middle, make them straight like this and, of course, make them difference so they don't even have to be. Tribes can see creating something like nick soon dot somebody thinks or is. This stripes should be lighter over two highlighted areas, and they should be darker here and in the shadowed areas so this drives wonder straight here in the middle, and Kerber and Kerber, as we draw them away from the center, said There's always also suggest the roundness, often ample, so it will make it obvious that the apple is around, which is important, too, to create. And also you can make them here over the dark area, just person very hard and no weaken blended. These stripes within age be, and also I want to shade this area are on the highlights, sort of like an to enhance the highlight. And I'm using the age be and this step so just to make this whole area a bit off a darker it. Meanwhile, I'm blending these stripes that we just drew. So when we draw our on the highlight, we can make it to look a brighter so we can enhance the highlight. - And if you make it too dark, just go over that. The new erased her like this and you can eliminate a bit of shade to graph I we miss. We can also blended the bit With Q tip. You can see how the highlight now looks much broader after trying have shaded the surrounding area and I can see now after blending the stripes looks last prominent as I'm blending them because we don't want it to look like watermelon. Yet we want to have some stripes. No, let's just create those tiny specks. Or that the Apple's usually have, as I can see, I have created appointed deep off my eraser so I can create tiny, tiny dots and just a trend. Um oh, over apple. - Okay , Just like this at random, please. And if you don't like, some of them are you find him too bright. Just go over to stop it, help them with the blending stump, and you can see they become Dr. Or if you want to eliminate them, just go over with the pencil. It's like this. So if you don't have this eraser you can use a whiting job on like this one are white marker and just created dots and stop it with your finger like this. So these dots are pretty difficult to make with the kneaded eraser. So that's why I always mention in recommend getting different times off erasers. - Now , if you're set of started when an apple, you can draw a stamp in the leaf and, of course, the guest shadow. And so let's start with the stem. I want to use an age be here and here We have to make this thumb that on the right side very dark. And here also the left side and then in the middle it has to be lighter, so it can suggest it's a round shape. Such a si was the same mental and press less as a shape towards the center. So for belief, we can use an age be and, uh and of course, we have to shade it all just carefully. Next changes. Yeah, of course. We have to skip these wings in the middle or we can shade the whole leave and then suit create the wins with with an eraser. So I just want to skip them and to shade around them. So here we have one away in in the middle. And though we have tinier ones, so this diner, once they grow from this main one. And so just like this, And now let's shade it with a blending stump carefully. - Also , go over this Wayne's of it because they're not actually want. They have to be much brighter than the leaf. - And lastly, let's great guest shadow. So if our light source is coming from our point of view, will have got shot of summer behind Apple and I suggest using graphite bottlers So just erupted pea shoots around your finger and vivid into the graphite and just go here behind like this a little bit under the apple also like this. And then it should grow a little bit behind something. Okay, something like this. We can also go here next to that apple because the next example we have to have darker cast shadow, - and I also want to use of it to tip. Okay, and that's it. So now next time, trying to make a little bit letter apple and darker ones and experiments with the light source my sources to have imagine your light source coming from them left and right side and she your apple accordingly.
17. A Teaspoon: in this video. I want to show you how to draw thesis. Boone and I have taken a picture of a teaspoon and I have printed it out on my drink paper . And so I want to draw it here on the right side so I can see it the whole time. And you will find us the paper attached so you can bring it out and draw on it, of course, printed out on the on your drawing paper that you use for trying. And let's start with outlining. So here, on the right side, we have to create a shape similar to this spoon. And let's just mark the upper area your summer and this the lower part so we'd know how long we wanted to be. Okay, so just approximately you don't have to copy. They had to do exactly the same, just approximately the shape of a spoon. I can also sketches with Dutch lines, see how it will connect, and then you just go over with a full line. And so if everything looks fine, you just go over with the full line carefully, and I'm using a three age for sketching, so it's gonna be bigger or smaller. Just approximate live tried to all lined the similar shape as much as possible. You can also check it up in the mirror to see whether this is symmetric, and now we can start shading this spoon. And so if you have something like this, you can praying out. I'll attach this one, too, so you can just put beside your reference photo and see which one value you want to use for a particular area. For example, here we have You can use it to age and say It's quite similar, of course, not everywhere but but two ages regally here for this one we can use to be and song and, uh, here on the left side, Wiccan. It's like for B or five B. I saw as I mentioned. I have taken this image off my tea spoon and said, These are the shadows that the I have called with my camera so depends on where the light sources going from so you can experience with with taking the pictures and, uh, what you're spoon so that you can have different highlights and shadows. And so if you want, but you can make this fun first, and then experiment with which your own for dog roofs. So I want to use a five B here for this darkest area. And just to make it simple, I will be doing exactly the same. So I won't be changing anything. Usually when I draw from reference what I tried to change something to elder the things. But this demo just really tried to copy what I see to make it easy for you to understand. And of course, there's it'll have to be in the same areas, just approximately and of course, shader. Very carefully mixed to the edge. But of course, it can be darker or lighter, then the reference photo. So you really doesn't have to be the same. - Okay , press very hard to feel to tooth the paper since you won't have those white dots of the paper visible. And now, since we don't have at these dark areas anywhere else, we can start using liar pencils. Now, we can continue this area here next to it, and I want to use an age be for this and of course, very carefully next to the edge and here we have also highlight we can outline and shade around it, you're going to see the shape of my teaspoon. It's not exactly the same of this one left side, but it's OK. And here we can also use the circle is, um, method because we want to create smooth texture. - So he was an age be here, and I press pretty hard, - okay , for no this So for duress, we're going to use lighter pencil And now let's a draw here this area with a to B So this is also pretty dark and just very carefully because you can change the always line how we can also create this edge here on the right side, with a well sharpened to be pencil. - You will look much better after we will have added to cast show just carefully and don't press too hard. So you should write a ghoul over multiple times so I can see how I'm doing this way. So I go over it once and it don't breast heart. And then I go over once again and so to to draw in layers. And I want to press too hard because if my makes some mistakes, I won't be able to erase them completely. And here also, department, we have like gonna house line the darker edge. And I'm still using it to be for this. You can even use market fire. If you want to see the details better, it might be helpful. Okay. And so here it can shade a little bit more. - Now we can use an age pencil nice to deep previously shaded area here. And then we have to press less and less us. We shaped towards the highlight, - and I just want to go order age, be area to kind of blend it. You can also use it blending stump you want and of course, pressed harder here, next to the black areas. And now we can use it to age for the rest of the shadows. So here, next to the highlights and I'm using it to age here. - I'm still using it to age. We can shave here along. I'm press very lightly. So here we have to press normally next to the left at here, the edge of the left on the left side. And we have to lessen the pressure. As you can see here we have smooth, radiant. So here. It's a quiet, darker on the left side, and it becomes briar under right sites that we have to less under pressure. As we shade towards the right side, where we can use a lighter pencil. - We can all some planet of its just carefully. I want to make here some improvements and then we can create the cast shadow because this is the only thing left. - Okay , now we can create a cast shadow, and for that it is enough if we use blending stump. So here we have to greet this one that this just a little bit farther from the spool and just very carefully. So here it is connected to the sport and here, also in the lower area, and that we have to make them separate. Sorry. Here, you can see that Akash shatter was suggest that this sport is like a farther from the surface, and it was suggest the shape of the spoon. Okay, something like this. Now we can do the same here, but were carefully because this area of the spoon has to stay white. And of course, the cast shadow should be darker next to this bone. And, um it should gradually disappear into the paper you can even use. We can't even use a pencil here next to the spoon. I'm using a three age. So here, next to the spoon, press warder and release. The pressure was his shade away from it. I thought this area has to be us most as possible. And I want to use even h be here next to the spawn because I want to make it even darker. - Okay , so that's it. I hope that you'll have learned something here. And I'm curious to see what kind of photos you can take with dispose or forks or anything else and how you will draw it.
18. How to Draw a Human Ear: in this video. I want to show you how to draw in shade an ear and let's start with an old line. So here, when we draw near, we don't have actually too much to draw. So because the ear is mostly shading about shading, So I want my ear to be like and this is the top and sorry here to bottom. And so we control just the online first, that typical shape on here, so it could be any shape. I mean, it could be wider or longer. They're like this. And there were here that the part of the secure just separate part of the ear I'm using a three age for shading. So here, I don't want to press too hard because these dextrous shouldn't contain any lines. So here it, like, have a like sunken area. And here we have the whole behind this little board, that's it. Just approximately again, be any shape here. We also have kind of a sunken, tiny area. So here we have already to face. And now let's share the whole area with a T shirt and the graphite borders just go around this area and shaded. And if you need. You just strengthen your outline. And so, if you want to see it, just trended in again when you can still see it under the coats of graphite. But if you want to see, they're just strengthen into bits like this and apply it circle or emotions all the time. So just like this, So it's a bit different type of shading, But I I want you to try to shake like this, said to practice the try something new and see which method you like the most, and, uh, which meant it brings you good results as against see the The texture is very small, and I just want to strengthen the odd line one more once again came before we move forward . Unless just erase this graph. I so here around the year next to the edge like this just carefully next to the edge So we can even use a mechanical eraser because with this to weaken ash, did we canaries? It's more precisely so . This is also the skin can stay shaded just here around the year I raised to gratify, - and now we have a basic don't, so we can now start creating highlights and shadows and we can start with the highlights. Or we can start with shadows and weaken. Do them both. A little bit of this and a little bit of that I get and I want to start with shadows. And first of all, I want to create here Teoh Shadow that this separate part of the ear casts over the years. So I don't even know how to call it. And I want to use it to be for this. So just here next to these, uh, next, this is separate farm for a year. That's so something like this. And here we have signing protruding part, so overdoes it Should it would cast the shorter shadow like this. And then we have here sunken area where it would cast a longer shadow. So this way we're suggesting that this tiny protruding area is closer to the viewer's eye and I just want to feel it with the to be. I'm just careful next to the edge here. Also, it didn't go in this upper area like this. So these are the darkest parts of the ear that we're shading right now. - Okay , We can also planet a bit blending stump. Then here also, we have Ah, this, um, sports that the stays, um, over the whole. Inside the ears of this also would guess shadow like something like this over this sunken area. Just a similar shape of this protruding part of the skin are here like this. And we can also feel it and tried to create su ah, small stature. I can see that this parts of the ear now appears appear separate from each other. So there, on different planes and different dimensions, we can also blend this as of this edge. Um, Dan, at the end of the cash shadow, it can be blurry. But next to this separate part of the ear, it has to be sharp. In here we have, like, a double guest shadow one s cows. But this part and one by this. So we compress a bit harder here like this because the two parts casts a shadow or this tiny area. So it has to be gonna double darker. Okay? And now we can create some highlights, for example, here or this protruding area, so it is usually highlighted. So I have studies, some reference photos and in the mirror might years, so you should do the same and, uh, to see the shape of the ear and everything, and then you can draw a realistic trying here. Also, we would have some gonna very bright highlights, almost a white and also here inside and this sunken area. And I want to use this eraser and pencil and here also within a race. Or sometimes you have to press very hard someone to make a white tight light, and somewhere you have to press less. So, uh, and of course, if we want this highlight to gradually disappear into the basic tone off the skin because of this aren't the brightest highlights that we should have. And now we can create the a bit lighter shadow than this one that then this cast shadows. So here in this sunken area and I'm using a blending stump which has quiet fried, and it and I also dip it into the graphite fodder where I need and moral graphite. For example, in this area, I wanted to be darker than I go here first. And then as I'm running out of graphite, I'll fly. It's on over the area where I need less craft. Five, for example. Here just don't press too hard but broader. Press lightly and go over again and again. So here won't we also have to breast last unless also a shade towards the highlighted areas to create a smooth Grady ins in order to make this, for example, this one part, uh, to make it appear around here. So a bit far from the highlights. - And now let's shade the edge so all around, because we have to make this at the edge. But look around. So here, pressed harder over the edge and just less at last, us a shade a little bit in words just like this, that the answer should be the Baracus. But of course not to door like this, it can see that it already looks around and just dip it into the graphite fodder and just carefully go next to the edge again . Here also this part. It's also yes, so the answer is not should be sharp but shaded to it should look around. And now let's great the less bright hot highlights. So next two days, uh, almost wind highlights that we created with a plastic eraser I don't want to use in your research. So we have to create a high large between these very bright highlights and the basic tone of the skin. And we have just a step next to it. And we can remove Justin off the graph and here or display training area. Just, uh, topic carefully like this because you don't want to remove a lot of gratify. That said, this is why I mentioned that getting different times off erasers is good. So here, ation use a plastic one. And here, also next to this one groovy highlights. So now we have a clear edge between highlight and the basic, the tone of the skin. So we have to make it kind of blurry. And to make this to values that flow into each other everywhere we have, like a round shape, we have to and create a little bit highlight in the middle of it. So, like here along this length and even over this porch, the tune. But this found over the whole just like this can see that it has no around shape. And we have a hurricane, a shade next to the edge. And here Also, this area has to be a bit highlighted in the middle. So just don't place your eraser and move because you would raise too much. Just stop it like this. So you want exaggerating? Won't overdo. Okay, We can make here but time, right? I just wanted to dark in here. So this is it. We can also add some more details and shade more ignite over necessary. It's a free number here. I want to. It could be darker. And then let's just drop it of the hear That kind of goes behind year. I'm using age three furnace, so just, of course, avoids drying over to here. So here we have kind of, um we would have curry hair. And also those tiny pairs that can be both behind a year, so that can be longer. That can be shorter. Just draw some of them or the ear. This trend, um, with quick, confident strokes. Also, this like this here? Yes, and I don't know. As we draw the hair upwards, we have to make it more straight selling this. We can also blended to bits with t shoe to make it look soft carefully. Here also so here somewhere we have skin and here a Gallic and drop motor hair. If this, it's just place. I had to dip of your pencil over the edge of the ear and then just strong downwards how it can use a finding stump next to the year. So not did he shoot? It's difficult to avoid the ear, and here we can draw some highlighted. Here's flyways like this, that we can darken Cem areas if you want. And at Let's just create here, that shadow cast by the ear or the hair. I'm using a five B here. So to make this area much darker, something like this. Okay, that's it. I hope that you have learned something and see you in the next tutorial.
19. How to Draw Landscape: A Palm Tree on the Beach - Part 1: Okay, Now let's draw a landscape. And I want to draw a palm tree undersea soul to draw the sky. The sea and sand actually waves the phone. And here, somewhere in the middle, I want to draw palm Tree. So I want to use acquire paper and I just want to measure from the top like I want Teoh the horizon to be summer under and 1/2 paper. So I want to measure, like, 11 centimeters from the top here. And I have 10 centimeters left s so I want to measure here 11 centimeters and now it Just connect these two dots and you get the horizon, or actually the edge between the sky and the sea. So it has to be absolutely eso the line has to be straight. That's why we should use a ruler. And now prepare graphite powder and rub t shoot around your finger, dip it into graphite daughter, and and we can start applying it at a top because the sky should be darker and a top. And then I was Iran out of the graph five we can shaded downwards. So we have to create. That smooths Grady In between the darker and ah, lighter stones. And of course, it has to be a big, darker at the top because the sky is always a lighter next to the horizon and just a blind horse until moments only. So every time when you did been to grab my border, start ordered top to apply that large amount of graphite, order top and then go downwards where you don't need that much. It can make a darker lighters, but important as to make it darker, dump and lighter here to bottom, so to created smooth, radiant. - Now the next thing is to create the clothes over the sky so you can skip it. But I think it's a good idea to practice green the clothes, and I want to use this. A razor electric right or a certificate gives it was any other razor I only needed. A razor is not good enough it, so it won't remove a lot of graph eyes. So and just start reason everywhere you want to make the clothes. So the upper part of the clothes is always toe. Brightest actually is absolutely white, and the lover area is like a sound shadow, so it's a kind of great. It's almost the same value as this guy, so you can create into shape. Let's remove this dosed with Bush and I want to create one I want you to see. But this one can be seeker bigger. And now we can create tiny, tiny clothes. Just make sure that you have appointed people your eraser. So just like this around a bigger clouds and, like separate ones. So these are the clothes in the distance that they're smaller. So anyone here next to the edge of random and here next, these Biggers long because wants bigger. This is how they are formed in the nature. So just trying to make them natural. If you can't make it white, absolutely white again, you can apply a bit of the wide marker here in the upper area. Just a little help of this marker, and then it will be white again. So just already offer areas so they're quite visible here in the upper part of the sky, which is darker. So we have to make that contrast. It's under loads and this guy so just go over to top of the clothes and also all around Yes. And now we can create the lar parts of this uploads, which are also very eliminated. They have to be a lighter than this a lot, or actually self shadow off the clothes. So just tiny line here all around. And so this will be the shape off the cloned like this. And I'm using this mechanical already, sir. So here also. So this is the lower barbs loads, which is also eliminated Game. And now we can also lighting up the self shadow. And I want to use a needed a razor for this because I don't want to line it up too much. So just gently watch it with numerary, sir, because it can be almost on star cost of sky. So if you can see that all these razors air good for different things, so you can't actually removed a lot of graph five with needed a razor. Actually, you can remove as much as you can with our electric one. So they're all good for something. And here, for example, electric eraser would remove too much, So it is good to invest in a few and racers. Okay, You're gonna see now that this is still pree bright lights No s bride as the upper boards. I must do the same here. - And if we want to remove it more use plastic eraser again Here . You can see that. I touched my paper with my finger and, uh, after I applied the graph, I bought er It can be seen, so just getting over It's greeting card clubs. But we have to pay attention to that. The next thing is to draw the sea or ocean. And so we have already determined the position of the horizon. So we have to make this upper part of the sea much darker than and then we have to make it lighter. So I suggest using a ruler such displays it here. And so I want to use an age B pencil for this offer area and, of course, tried to make it straight this and between the sky and, uh see. And then we can cover this top area of the sea. So I'm using an HP pencil and was a measure. This has to be darker then, uh, rest of the sea. So just like this, and, of course, again, uh, changed a pressure to create some darker any lighter areas. And as the next volume, we can use a to age and shape right after the age be area. Some of our words like this and of course, apply only horizontal moments. You can also press harder next to the HB area and then lessen the pressure. I was withdraw downwards, - and now we can shave the send with a graphite potter just away with it with the sky. But this time we don't have to which it actually creates most grading, but make it same everywhere. Such a step your T shirt and graphite water and applied's here overdue bottom of your paper . We can also use some surgical our membership shade here next to D skies and we can also blend it this way and then we're going to create a foam. Word is areas. Since I were here, where I'm pressing less okay, here. Also, we can create kind of feel something, so the heels air usually dark hair dark, but they will be very bright in distance from a larger distance so it can use a blending some for this, or maybe a little bit of to age this just make this edge and just blurry of this Mantei nor heels. So they're just far away from us. So the objects and distance have to be lighter and they have to be less saturated. And also their edges should be blurry, some using to age here. So just to add a little bit something to the picture because it's a pre empty like this, they have to be of like some more things than just sky and sea. So the more things we add to the picture of the moralistic give will be. But of course, elation exaggerates. - Of course we can learn it with a blending stump. What was gifted? Okay, you know, so we can apply a bit more of the age beat here again, and two drunken it again because after bloody we can you probably have line on your dog and off course this area here. Just apply some of the lines, darker lines or dis lighter area, the next being like this. Of course, horizontal lines. This and there can, of course, so impressed very lightly used for me and only some areas that pressed harder in order to create darker lines are actually ways - and now we can create the phone. So here, between the sea and the Santa, and I want also to use a electric eraser, you have to like, um, like this and also tried to make different shapes on, uh, some areas can go over to sand. Some areas can go over the scene. And, of course, we're going to find a wide marker to create some more. He does.
20. How to Draw Landscape: A Palm Tree on the Beach - Part 2: course that just don't make it straight. Like the horizons. And it doesn't shouldn't be straight like this. I know. Let's great the guest shadow under the phone. This is the shadow that is guest by the form, order, stand some using blending stump. And of course, this way we're going to make this farm more prominence. Such us like this, right under the white area course , you increase some dots and lines order form. You know, let's create some details of the foam and with the want marker or with a wife in Japan. So here, just some waves random like this. And, of course, like wonder do wave splashes does something we haven't like a lot of dos tin. Some tiny dots just create them. Order. Mom, you don't want it to be too bright to stop with your finger. One it's with We can use also this one being time to create some jobs, tiny dolls with this. Okay, so I'd like to see how your farm turns on. This is pretty interesting to do. Some cares how you will resolve that. I'm waiting for your results to see. Okay. So we can at more or going this. You can see that I'm also scribbling. So you hear anything? And now we can draw some downed trees or anything over this. So I want to draw one palm tree. I want to make the branches us. If the wind was blowing And, uh so the branches go and, uh, there was the right side And let's get started with the trunk. So sorry. Here, I'm one too. Draw its and, um and so we have to give trunk a round shape eso I'm using a beat Bensel to cover the right side of the trunk. So here also, we have to imagine our light source. I want my life source to actually sound like to come from the upper left corner. So the right side of the trunk will be darker and I want to call her it with a B pencil. You can see I'm just going over to waves over to see in order sand. And I can call her these areas with the Beeb mental. Okay. And here because also add, some branches are actually the departs of the branches next to the trunk, cause we're going to drawn branches separately. Just show you where I want my trunk to end. So something like this this Okay, so we used a B pencil for career step, and now we can use it to age and draw here to meet area. So next to to be edge, press a bit harder and then just less under pressure. As you draw, there's the left side of the trunk like this. So else you can see it becomes the same wall you as the sand. So, in order to make them different will have to erase a bit of the graph. I'm so we're going to do that in the next step. So here, just focus on creating a smooth texture between the B and it to age. Pencils like this and just lessened of pressure was a shade. There was the left side, and this way the trunk will look around. Well, we can create here on the left side gonna highlight where the left side of the trunk and I should separate it from the send like this and just here next to and then you breast less and less with an eraser. And here also in the upper area or C this and we can. Also, it creates some patterns or the tree or in the trunk. I could Chinese or is until lines a trend. Do your old order trunk and I'm using a B pencil for this. And of course, the pattern should be darker under right side of your trunk in the shadow. And they should be lighter here on the left side of a drunk. Okay, This You know what can also create some branches or something at random to make it more realistic like this. And now we can draw the crown so we can just start with made tone and I want to use an age be and then we're going to create the leaflets behind and, of course, to create highlighted over this. It's so we can start as I mentioned. I want my branches to look as they are blown with the wind and so that they can go something like this one of them. Of course, you don't have to trawl them like this. Drop them regularly. Here is so looking more or less branches. Okay. And now we can go much more into details and to create branch by branch and also like leaflets and just a weight they are and palm trees. So hearing it and operate area, we can create a bit darker once. So I still use an age be all the time like this and also mention later we're going to end some darker areas and to create the highlights, Americans have changed a pressure with an HB pencil to creeds, different values and just focus on the one branch at a time. - Some of these leaflets can go just at random if we look around and of course, all of them have to be stick to the branches. The majority of them should turn, but towards the right side we want it to beer as it was blown window wind. - So just create this line in between are actually the brunch. Not sure have to call it. And then these leaflets going from this one gun Chandimal like this you can see now it looks like a new wind. So just try, always do something different, but you haven't seen anywhere else before. That is not about usual. So as you can create unique or ward and , of course, plays a separate piece of paper order send because you don't want to smart it and the fat from your skin, you can. You spread order. For far. It's on. Good sign this step using HB and later we're going to work with different pencils, but I just want to simplify it. To use a one pencil, you just step and just make them at random. Some should be longer, so shoulder. If some of them should be bent more, some of the some of them were straight. Can you? Then we can also blend them a bit with a blending stump. Not too much, just I love it. And no, we can create some darker parts, for example, behind these and like me to tell us we can create darker parts and I want to use a six B so use at least three B or four B or darker and to Anselm darker parts, for example, of the leaflets in a shadow and just create those. So here, in between this leaf, it's a draw and, um, prince warder. So just some of them should be darker can also feel here to space between this mid tones that we just created so that this shadowed leaflets with look the that behind like this So you're particularly over to see send. The sea is it's a dark all you It can be quite visible way. Use a six b and press harder. And also these lower branches are owns. They always get less lights. Right now we can create some highlights what the racer just here? Or do leaflets to make some of them highlighted, particularly here over the sea. There are two Dockers and darker areas that can be quite visible. - So it's saturated to school group Bensel planted a bit And now let's greet the cast shadow the shadow that this guest over descend by the branches and by the crime. And so actually so here also yet to imagine our light source something dark sound like where is coming from? And a summation. I want my letters to be in the upper left corner. So I want to create cash. Addis um we're here something like this and I'm using an age B pencil. Sorry, it will be cast here someone like this. So here in the middle of we have to create absolutely the the darkest cast shadow unbroken . And here we can also created gas shadow the shadow cast by the individual branches. My, this this is something like this and we can also blend it. The shoes are going to use a goddamn bad blended. And then we can add some more shadow if you want. Here, next to the trunk, it is always the darkest. We can also add some water imperfections here to the or to send some food brains or something like that. So you won't be, like, empty like this. It has to have some things like individual branches and leaflets fallen and so on. I'm using blending stump Firdous. But of course, don't exaggerate. Okay, That said, I hope that you enjoy this tutorials and, uh, hope to see your results for three Teoh Spanich questions any time and see within ex tutorials by line.
 Jasmina Susak, Pencil Artist