Transcripts
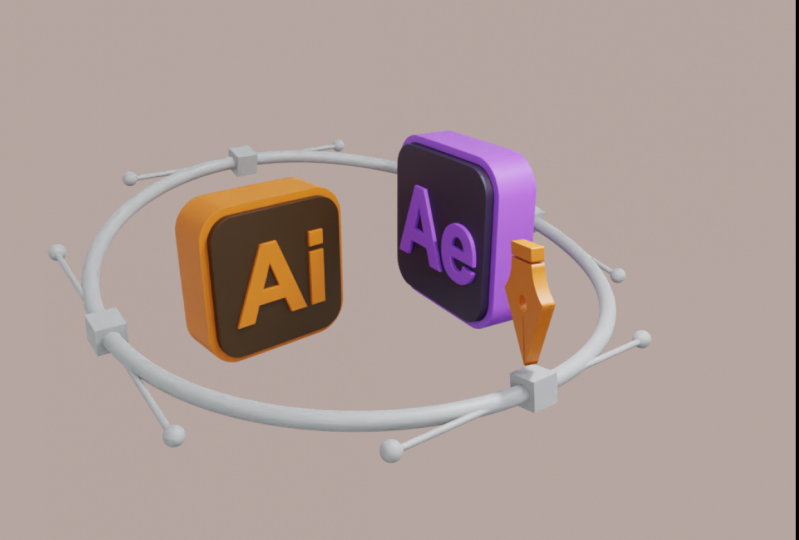
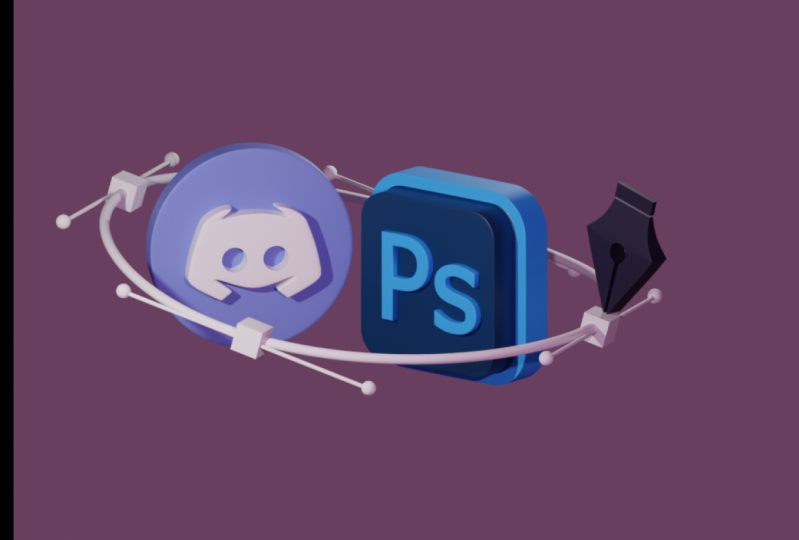
1. Class Introduction: Hello everybody and welcome to another blender course. My name is Dina. In this course we are going to create an open emission of 3D icons of Adobe Illustrator and Photoshop. Discourse is beginner friendly, although you will need to know how to navigate and basic circuits. In this course, we will cover several topics. Firstly, we'll start by importing reference images that you can get from the link with the description of discourse. Next year we'll start muddling icons and adding text. Later on, we will continue with learning how to use SVG files and how to import them into Blender from Adobe Illustrator. You will be able to see how SVG files can be useful. After that, you will continue by animating the whole scene entity will finish the course by adding h, therefore, lightning on the scene, adding materials, compositing background, and Final Render Settings. At the end of this course, you will have, I'll call an image that you can use for your portfolio and show it on social media. So let's begin and see you in the first video.
2. Modeling Out A 3d Icons: Hello everybody and welcome back to our first video in this course. So as you can see here, I've now on my desktop, I created a new folder, which is called TD icons animation. And you should do the same because that's the best way to stay organized and all the files that I'm going to save a need for this course. I'm going to save in this folder. And as you can see here, we have, we have those two images. So the first one is a reference image, which you can get from the link of the description of discourse. And here we can see all adobe icons here. This we are going to muddle out later on. And the next one is this Ben SVG, which we are going to talk later on in discourse. So right now I'm going to close this and the reason for the indices because I'm encouraging my students to stay or guys always and not to waste time later on sorting out the fog, the files and the folders. And now we can go and open our blender. So right now, as you can see here in this right corner here on display spin. Currently we are working with planned depth 2.9. But if you can get any version about this, you should get it because of the new features and bug fixes from the previous version as well. So let's go and create a new file under General. And we have this default cube, default point light and also default camera right here on this left side. So I'm really, I'm going to turn on my skin guests Adnan. So here in this corner you will be able to see all the shortcuts that I'm going to use in this course. And now I'm going to go and delete my q by pressing exit on it and confirm it. And now I'll press number one to go in front orthographic view. And with the shifting a, I'm going to search for the image. And here I'm going to import image. So right now I can go and navigate to the folder on my desktop. And here I'm going to import the reference image PNG. As you can see here, we cannot see the other SUGMs because the way we are going to import SLA pile is going to be a little bit different. So here I'm going to import my reference image and now I will go and others will be scaled skill and the G And decks. It's to decide. And here in this image properties, here, in these properties menu here, we can go and play with all these settings here. But the one that I want to have is going to be this. I want to disable this from being seen in perspective view. And also I want to turn on transparency actually needed for now because I'm going to use this reference image and just see the way how those icons are looking. But if you want, you can go and play with the capacity if you need it. And also here under this filter selection, you can enable this. For selecting, selecting. And as you can see here, now, I uncheck it and I'm not no longer able to select this image. I'm going to keep as it is. And now we can go and start modeling those icons out. So first, let's go and create back color and default cube with a shift in day, I'm going to search for the tube. And now we test and Z I will go and scale this down. So to about here. And now by pressing tab, I will go in edit mode, or it can go here and fantastic mode. And now I'm going to parallel those out edges. So first I will go and select search too, Edge Selection and shift I will hold and select all this site, site edges. And now we can go and press control MB to battle it out. But if you want, you can go and scroll it up. And here you can see that you will be able to add more loops to support the whole, the whole, the whole look of this cube. So now we have something like this. I'm going to keep everything as it is. And the next step I will go and search to pay selection. And I will select this top face here. So the next stage is going to, I'm going to press i for inserting face here. And now I'm going to also press E for extruding up on the Z. Make sure that you look on the z-axis. Sought to about here, lets see how everything is looking so far. And I'm going to change shading to smooth by pressing correctly and currently split. And if you've trench to smoke, you can see that we are having issue with this geometry. And the way we can fix it is by going here in the did the properties. And here we can just enable this outer smoothed option. And C is going to smooth out the whole mesh. Next, I want to go back in my editor. Now I can go and switch to the edge selection once again. And now it out, I'm going to select those two edges here. And now I want to battle those out as well. So I'm going to press Control MB. And also I will go and variable this out. So I'm going to add a little bit geometry there. So to about here, I think is going to be fine. And also I'm going, I will need to bevel the, this button edge as well. So once again control MB. And as you can see, we are having a little bit issue here. That's because we need to add a little bit more geometry. Well, so by going in under modifiers, we can add subdivision surface. And as you can see here, we are having issue with this edge here and they can fix it's very easy by adding edge loop here. So all almost year and also here. So let's see how everything is looking so far. Let's go and pull this here. Actually we can go and turn the cage on. Let's pull this all the way down. Oh, it's here. And now it's looking much better than before. So let's zoom out and see. So the only should, the time herring here and I believe this she's a little bit to tick. So I'm going to go in x-ray mood. And by searching converted selection, I will select all these buttons and it's g and z out. Going to pull this up. Here is going to be just fine for this, for this 3D icon of this adobe softwares. So by pressing one, I'm going to go in front orthographic view. And as you can see here, I'm going to add and create two of these. So the first one is going to be Adobe Illustrator and the next one is going to be at o Photoshop. So first, let's rotate this sign by pressing f x and 9490 degrees. So now is looking toward us. And now we will need to add also this text here. So with a shift and day, I'm going to search for the text and the disk volunteer is Myriad Pro and I believe that every, every computer got death font by default. So you will not, you will not need to download it externally by a website and searching for it. And now I'm going to press LAX and 90 to rotate this text for the 90 degrees. So now we can see it. Let's move it to the side by pressing G index. And now I'll press tab. And here I will go and change its x. Here, I will write down our AI for Adobe Illustrator. And now here we have this letter here in these properties menu. And here I'm going to go under font. And for the regular, I will go and open font here. And now I will need to navigate to my font collection, which is right here. Let's go and search for the Myriad Pro, which is right here. And as you can see here, we have a little bit of a variation of this font. And for this, I'm going to use this Myriad Pro, the regular one. I will press Open Font and now we created that font right here. Next step, I want to go. And as you can see here, our origin point is right here in this left corner. And I'm going to press right-click to change it. And I want to be in the center of this text. So now I can go and scale it out. But as you can see, this one is a flat. It's not 3D, it's only 2D. And we can go and add actually here under this text properties here, we can go and search for the geometry right here, open it up. And for example, we can go and extrude it out like this. And for example, we can go and parallel it out. This loop to be sold. It doesn't have like perfectly straight flat edges here on this corners of this font. So now we can go and actually the best N. And here under item we are going to go enter, turn it, the position here. So I will press him change here x to be 0 and now z also, and change it to 0. And let's see if this tube is perfectly 0, it is. So now we can go actually, and here I'm going to navigate to MODIS in the front of this vec, vec called ICANN. And as you can see, we can go and scale this just a little bit like this. And now we can go in top orthographic queue to see if everything is correct. So here I'm going to write down minus 0.06, like this. And now we can go and actually duplicate this by pressing Shift in D and I will go and two cookies on the x axis. Very simple. We can add Photoshop by pressing Tab, and now we can just go and write down P S on Photoshop. And for example, you can go and let's say they can do also InDesign as well if you want by pressing ID or Adobe After Effects. So we can just duplicate this. And here instead of ID, we can just write down AI. So here we will need to do a little bit adjustments. But as you can see, very simple, we can go and create those 3D icons as well. So that's it about this video. Stay tuned because in the next video we are going to add a little bit details to our scene. And also we are going to set up our camera. And later on we are going to create 3D bendable as well associate, there.
3. SVG To Blender: Hello everybody and welcome back to our second video in this course. So as you can see here, currently we are working with Adobe Illustrator. But if you don't have Adobe Illustrator, you can just get in the file that you will get from the Lincoln discourse. And the reason for this is because I want to show you how you can use SVG to create the 3D logo. Very simple and very easy. So as you can see here currently we are having this icon out append. And as you can see, by pressing gay, you can go and see that we are done. We don't have a lot of these anchor points, which is really good. So the way we are going to export this and important in the blender and later on, create a 3D model of it. We will need to actually SVG files for it. So I'm going to select my pen here. And by going here under file, we can go just save S. And here instead of it's already there. For the SVG, we can just save it for the pen, pen dot SVG. Press Save. Let's go and replace it for now. And here, as you can see here, everything should be just fine. So you can just press OK and that's it. And I want to show you one more example. So let's say, for example, that we have this cube and for example, I'm going to go and move this to the side. And we have another polygon here. And let's say this is, this is your logos that we can go and also export this by going, just go here, save as and let's say the example. And I'm going to press OK. So now we can go and open our blender back. And the way we are going to import our SVG falses we miss by going under file and here is input. And here we need to find SVG Scalable Vector Graphics. And here as you can see, we have those two files, but we cannot see now reference image in this folder. And the reason for that is because we select that we want only to c and the input SVG files. So we can select both of this, I believe. And let's go. And as you can see here, we cannot see it, but it's right here under this pen SVG. So I'm going to go and select it. And as you can see here, actually it's, it's hidden. So I press edge to hide this Adobe Illustrator icon. But actually it's right here under Penn SVG. And also you can go and import the other one that I exported as a example. So as you can see here, we have those two the same as well. So you can go and scale them and do whatever you want with those curves. And you see that blender is importing this SVG files as curves. And the good thing about those. Is, you can go under geometry here. And for example, it can just simply go and start extruding this out. But as you can see, we cannot exclude it both the end, we can just go and press Control N j and both of these. And now instead of 22 curves, we have only one curve. And now we can go and extrude it out. And by default is selling this SVG material. Right now, I'm going to delete it because later on we will add our own material. So as you can see here, very simple. We got this 3D pen look. I'm going to press cyclic to train the origin point. I'm going to press right-click and change the urgent went to center of mass and the volume. And here it can go and scale it up a little bit so we can see better. And also here under this curve settings, it can just go and for example, we can increase a little bit depth here if you want. So let's see. So right now we don't have perfectly flat and sharp edges. And also, for example, we can go and decrease offset just a little bit. So now we have a little bit more shape here, a little bit more space, and I'm going to lower it down to extrude as well. So let's zoom in and see how everything is looking so far. And for the bevel, I will just keep it as 0.001. And I'm going to guess a solution here to the maximum. And everything else should be fine. So now also you can go and do the same here. O ticking go and extrude it in Gentofte together by pressing control and J. And as you can see, very simple, you can add your own logo and create your own style of 3D of your logo and try it. Now we have the span that we are going to use for our animation. I'm going to delete this example, S, U, j. We didn't need it. So we can press right-click and delete. And now I'm going to go and Tractatus on for the 90 degrees were scaled up a little bit. And we have this 3D pen as well. Eight it within blender, very simple and easy. F Now I'm going to unhide the Adobe Illustrator and everything should be fine. So known issue that we are having is this ban is currently curve, but I want to convert it into mesh so we can go under edit and under many search, search for Convert. And now we will need to convert this mesh from curve. So don't pick this because it's already the curve we need mesh from her. And now you can see that it actually changes the shape of it. And right now you can go and pull it to be in this first collection and try it. Now, we can delete this empty collection here by pressing just excellent. And now we have those, those. Outline, outline that we need to a little bit adjust entry name. So let's go and first, parent dose for each, for each icon. So I'm going to select this vec. And now with the shift and select and under font and control MP, i'm going to parent it out. So now if you move this font, you will be able to also move the back as well. So next, I'm going to select for the Photoshop here, also here for the design. And then the last one is Adobe After Effects. And now we have only those and those four texters here. And also we can go and also converted those to the meshes by using the same technique that we did previously for the bento. Also this one here. And the last one is this. Aftereffects saw I'm going to convert that until the meshes. And I can show you that disband tool. If you go in edit mode is having currently bed topology. And that's one of the bad sides of these kind of techniques using SVG to the two k t td objects. But if you don't want to, to, let's say, do some, some texturing cod texturing. Or for example, if we want to animate the d's with it to be bendy or something like that, you will have program. But if we want to have this simple and basic animation or something like that, is going to be just fine. Also, I'm going to rename it. And now we have green our scene collection as valid and we have cleaned our our outliner. So I'm going to rename the testis here. So this is VS, this is id. And the last one is eight. And everything should be just fine here. Also, I want to select my camera and my point light here and my referencing image. I will need first to enable it here. And I want to move those to the new collection. Let's go and call this collection too. Actually, it just fine. So now those objects that are not invited to animate to be animated that evolve in different collection. So now we have organized our scene collection and that's the best way to stay organized. And for example, if you're working in a bigger figure company, those kind of, of renaming and keeping clean is going to say your time, andalso is going to improve your work. So that's it about this video. Stay tuned because in the next video we will start animating our icons and also going to set up our camera associated there.
4. Icons Floating Animation: Everybody and welcome back to our data and discourse. So here as you can see, we created our TED I consent also v at, at, at this SVG pen. And now we are going to start animating our scene. So first I'm going to go and move those to decide which I'm not going to use for our nation. Because someone to create a loop animation with those G, This G element. And now I'm going to set up first my cameras. I'm going to enter in camera you by pressing 0 on an unpaid or you can toggle it here on this. And also here on this bottom part, on, on this camera here in this Properties menu, we have this camera settings that we can use and play. So first thing that I want to change, I want to change from perspective. I want my camera to be in orthographic view because I wanted to have the style for our animation. And now with the Shift Enter key, which is this disc about depth, I will enter in camera fly mode. And now you can use your keyboard to navigate around your scene. And let's say to about here is going to be fine. Let's say. And here I'm going to actually zoom out by changing this orthographic scale. And if you try to move back by pressing S or V, we can not do it. And the reason for that is because we are currently working in perspective view, in orthographic view. But if you are in perspective view, you keep S shifting, achy and press W to move, to move closer or further by pressing s. But as dimension, I want to have this orthographic scale. Let's increase it to about here, lets say. And now I will go and switch back to and simple selection. And now first, I want to animate this scene by going here in animation workspace. So right now on this left side we will be able to see what's gamma ray async. And on this right side, to animate the whole scene. So first, let's go and select back, back our camera. So I'm going to select camera here. And now here under this viewport display, I want to turn on this compositing guides. So I want to see cen centered here, which is right here. But you really need to turn on these overlays. And also I would like to see thirt. So I can follow this third rows for creating the scene. And also, for example, we can go and under the space part out, we can turn it all the way up. So right now we can see only what's going on camera. We can not see anything but except that. So now as already mentioned, I want to animate those 2 first and later on we are going to use this Pentaho for something else. But I want first to animate it, those two. So they are looking like they're levitating actually. And I'm going also to scale it up a little bit. Let's say something like this. And now I'm going to press enter to see the scale here. And I'm going to copy this one here. And I will also do the same right here on this second one. So now they are both actually the same size. See, everything is fine here. And now I want to apply those by pressing. First. Actually, let's go and see and set up the composition. And here we will need to turn on this outer smooth on those letters here. Because we had previously issue with a shadow. And right now we can go and set up our composition. So let's say I want this one here to be, and I will go in top orthographic view here. And let's say I want this one to move it closer. I also want it to be a little bit rotated. And also, let's go and place it right here. And now I want to animate this as they are levitating. So first thing that I want to do, I want to decrease number of key frames. So currently, by going here in DC output settings, you can see the frame rate is set to 24 frame this seconds. And it means that it's going to have 1024 frames per seconds, but I'm at my animation to be five seconds slug. So here in this in this menu, I can go and multiply 24 by with five. And you can see the fear right now having 120 seconds here. And now if you play this animation, you can see that nothing is happening. And the reason for that is because we don't have any key frames yet. So first, let's go and go back all the way here on this first keyframe. And now here I want to decide how my animation is going to be. So first, I want to insert my starting position to be the lowest end here. So let's say I want to be right here, so I'm going to press i and I want to insert location here, but I want only to be on the y and the z. So I can go and actually press rightly care and insert single keyframe. So right now as you can see, we have only keyframe on the z location. And I want to be as L, the dimension to be loop here. So I will duplicate this key gave him by pressing Shift and d. N right here in the middle is the 60th sub-frame. And let's go and move this a little bit here on the top. And let's say we want. To rotate, but we don't have any rotation keyframe here. But I'm going to insert, Give them here on this location by pressing Catholic. And now we have these three key frames. So this one and this one are the same, and this one is only on this top. So now if you play this animation, you can see that our icon is moving up at, now is going down. And as you can see, it's moving way too fast so we can go and actually this lower it down here a little bit and you can go and pressure rightly to replace the keyframe. And also this one here. And say to about here, right-click to a base keyframe. And now I can go and deleted here. And the first one, we can duplicate this one with shifting D. And now if you play this animation, now is moving much better than before. Also, I want to have a little bit rotation as well here. So let's say on this giving, I want it to rotate a little bit. So I'm going to insert keyframe defense on rotation by present i. And also now I can go and delete the last key frame. And now with the shift in D, we can duplicate this all the way here on the 120 frame. And you can see that it is not rotating at all. And the reason for that is because we don't have any keyframe on the 16th sphere. So here, let's say I want to rotate a little bit. Here on the left. We can go and press right-click and insert key frames. And now if you play this animation, you can see that it's actually a little bit. And we have a little bit of notation here as well, which is the nice settle affected we are having for this kind of animation. So next, let's go and animate the Photoshop icon so you can see that we have this, the lowest point here for this illustrator icon is on the first keyframe and the highest one I want to be here to be on the peak Photoshop here. And now we can go and rotate it actually. Lets go and move it out a bit here. I wanted to cross this. So now they are interacting a little bit better. And now I want to insert keyframe on this first keyframe on the z, I'll press right-click, insert single, single keyframe. And also our best I4 inserting keyframe under rotation. Now I can duplicate this all the way till the end. Now on the 60th frame you can see we have green, green color, which means that we have keyframes on this, but we don't have on this specific CCS keyframe. So now I'm going to change the z location here to go down. And also let's go and change the rotation as well, maybe on this negative bi here. And you can see that we've changed the position, but we don't have the, we change the value of this key frame, but we don't have give him yet. So I'm going to press right-click and it suddenly became yellow. And also here I'm going to press just i on the, on the keyboard. And now if you play this animation, we have this kind of animation, which is very cool ads, we can use it for sharing our social media or sharing, or using corn for our portfolio and so on. So that's it about this video. Stay tuned because in the next video we'll start adding, also curves around and T will start animating our Pentaho. So see you there.
5. Finishing The Animation: Hi everybody and welcome to our fourth video in this course. So right now, as you can see already unlimited our two icons so they are both levitating. And the last thing that we need to animate it, you're going to be D spent tool on the site. So first, I'm going to stop animation and let's switch our workspace back to the layout. And now I'm going to add circle around. And I want this pen tool to move the anchor points of depth curve that went around. So before we start adding object, I want to show you on my internet browser how actually is an anchor point is looking. So as you can see here, we have this cube that is controlled point and also we have those Beziers on the site. So we are going also to make those as well. So let's go and switch back to Blender. And now with the shifting a, I'm going to add a simple circle around. And now in top orthographic view, I'm going to scale it up. And as you can see here in this pair properties, we will need to go and add also depth a little bit. And also don't forget to increase the resolution. And also here in this resolution menu here on this properties. So right now I'm going to go on the side you and also I will, I'm going to decrease a little bit depth here on this geometry. And now I'm going to go in top orthographic view. Let's scale this up. And as already mentioned before, we will need four cubes for this circle because the work force for cubes actually for points that are creating circle. So first I'm going to increase here resolution preview, and also now I will add four circles, four cubes that are going around. So with a shift and a, I will go at simple cube. And now with g and tax, I'll move it to the side. Make sure that you are having the circle going through the tube because that's how it should be. And also, for example, you can go in edit mode here on this curve. And you can see also actually here on this curse that we also have in blender as well, those anchor points. So now in top orthographic view, I will need four on the side, so I will press N And here I'm going to make it deeper and C6. And I will scale down just a little bit this circle that does going around. And now the next commonly duplicate this on dx, but this time is going to be negative. So minus, minus 3.6. And now we will need also on the song dx, I will give 0 and here I will write down to 3.6. And now also the last one is going to be on this other side, so minus 2.6. And now we have those four control points that we can animate and also more in order to change the shape of the circle that is going out. And also I want to add those Beziers. So as you can see, that is simple, simple lang But In the end, we have those balls though that we can move and control the shape fit. So now let's go back in object mode and we will need to create only one end later on. We will duplicate those on those cubes as well. So with a shift and a, I will go and create single base year. And now with the G and Y, I will move it to the side so we can see how it's going to look like. And now I'll go in edit mode. And as you can see, you will need to align those to be perfectly straight. So breast a, S and Y 0 to, to make sure that they are both having the same, the value on the y axis. So as you can see right now, we are having flat, flat curve. And now with this depth here on this gem t care settings, I will go and add a little bit Geometry. And here we have this simple base year. And now I will also want to add a simple UBC here, Soviet shifted day. I will search for the UV sphere and I will train shading from flat to smoke by pressing right-click and changing to smooth. At. Now, I will go and scale it all the way down. And before that, I want to convert the, this, this curve two to be the same and to be the shape back to be the mesh. So I'll go make duplication of it so in order if I lose it so I can return it back so it's shifting D, I will duplicate one on the side. And now I want to convert this one here by going here under Edit. And I will search for Convert. And this time we will need to convert the this mesh from curve and try it. Now if you go in edit mode, tick acidity got phases and also edges and vertices. And now we can go and duplicate those balls here. So we can go and scale this down. So actually one here is going to be just fine. And now we will need on the other side as well. So I can write down minus1. And now I will go and join those two together. So here I will go and select all of these entry control and J I can join those. And now I can place them. They should be. So here we will need one. And actually we can just write down t 0.6. Now you'll need another one on the other side. So with a shift in D, we can duplicate. Now we need on dx, but this time we are going to rotate it for 90 degrees on the x axis. So to about here. Here is going to be either change origin point to be in the middle of this year. So I press right click and I learned then this origin point to be center of the mass. And now I'll write down here on the y to b naught. And 0.63 for dx and on the other side is going to be negative, so minus 3.6. And we are done as you can see here. So the next step, as you can see, we are going to go and move this to decide our bento for now. And now we need to align all of this to be in the middle of our scene, of our icon as well. So we can go and select all this together. And now I will move it to be in the middle of those. We can also scale down a little bit. And now we can go and entering camera view so we can see how actually is working. And now I will go and maybe scaled up a little bit, and we can also write it as well. So now it's looking more interesting than before. And now we can go and start animating those, those anchor points and the spent fuel as L. So first I will go and place the mantle where it should be. So I want to dismantle, to control this cube here. And now I'm going to rotate it for 90 degrees. Let's scale this down. And now we can see in the, in the gamma review how actually is going to look like. And we are going to go and move it on d y to be in the front. Like so. And now I want, while this curve is changing the shape, and I wanted this cube actually to going down and to change the shape of this cube. So I actually want to animate this type of this kind of effect with this curve. So in order to do that, you will need to turn on ad done. So I will go under edit here under prefaces. And I'm going to search for any and all. Some even need to turn on this atom. And now here, if you press and you have this new tab open, and now here we will be able to insert defense on those points, but you will need to check the point. And now we can start animating this shape as well. So let's go and switch our, our workspace back to animation. And now we will need to turn on this enum all add-on by pressing the n. And we are going to select all this points as well. So let's return our first key frame here. And now we can go and in edit mode, we can press here, I insert keyframe. And now we can move keyframes away. And now with the G and G, we can, for example, move this up and insert another keyframe here. So now if you play this animation, you can see that we actually, we're actually pulling the spring up and it's already animated. So now with the shift in D, we are going to duplicate the first keyframe. And let's move it on the 60 at three. And now the second one is, given that is undeterred 30th frame, we can duplicate as well on the end. Also the last one is going to be this one here. And now let's play this animation to see if that actually is looking good. So with control in space, you can actually actually maximize the view of your workspace. And I believe this is way too fast. Soviet need to slow, slow it down. So let's select this. And for example, instead of going all the way up here, we can go lower it down just a little bit. And now let's insert another keyframe here. On top fit. And let's delete this key frame on the 90th frame. And with the shift and D, we can duplicate it. And now it should be slow, slower than before. And we can also, for example, replace this first keyframe as well. So now we can delete 68120 its frame. And now with the shift in dvy can duplicate first frame on those two frames as well. So now it's a little bit slower. And now actually I like the way how our animation and the last thing that we need to animate is going to be this pen tool and also this anchor point on the end. So let's stop our animation and let's return on our first keyframe. So the position of this should be, should be the same on the same height as this curve here. So we will need to append those with control NP. And actually we confront this pen tool as well. So here we can see how actually is going to look like. And for example, it can change the rotation just a little bit here. And now with the Shift and left click, we can select all of this and flood control MPV can parent Those two this cube here. So this is going to be the first keyframe position. So I'm going to press i for inserting key frame on the location. And now we can move on the 30th frame, which is this frame here. And to the G, we can move it all the way here. And now on top of it, we can insert another keyframe. And now we can just go and duplicate on the 68. And on the 19th. The last one is going to be the same as our first frame. So Let's Play Animation. And as you can see that now is looking much better than before. And also we can now get rid of this, this duplication of the, of these busier curves. And as you can see, we also need to move those on our first collection. So I'll select all this. And also this measure curve entry m. I will move those to the first collection. So now I want to make sure that selecting back my collection as active one, the first one. So let's play animation one more time. And now I will go and camera view to see if actually is good. And now it's looking much better than before. So that's it about this video. Stay tuned because in the next video we are going to do the Final Render Settings. Nd will do the lightening and applying materials as well associate there.
6. HDRI,Materials,Compositing And Final Render Settings: Hello everybody and welcome to our last video in this course. So here if we play this animation, you can see that we have done written emitting the whole scene and now it's time for materials lightning and also Final Render Settings as well. So first thing that we are going to do, we will add lightning to our CNN for the light, sunlight to use HDR, ice retreating get from the HDR. I haven't dot com. And now if you go here on this top of their webpage, you'll be able to CHD rise and all different images that you can use for lighting up the whole scene. And for mine. I would like to use this Judea. And it's going to be this photo studio, 0.01. and now I'm going to download this image in 4K resolution. So right now we can go and open our blender back. And now for the shading, we are going to actually entertain shading workspace and Now we will need to import our HDI. So here it's set by default to object and to need to switch to the world. And if you zoom in, you will be able to see those two nodes, the output and also background. And now with the shifted a, I'm going to search for an environment texture. And now I will need to plug in this color, color. And also I will now need to include my image right here in this node. And now with the control and T, i will be able to bring mapping and texture coordinate as well. But if you go under additive preface, you should always keep this node wrangler hadn't turned on. And the reason that I was able to do it, the shortcut is because of that. So instead of wasting time searching for those nodes, you can just control NT by clicking here on this note. And immediately you will be able to get mapping and texture coordinate there. So now for my render, Andrea and I would like to change two cycles because it's going to be much higher quality than eBay. At now, if you turn on the rendered view, you will be able to see, you will be able to see it the whole scene out with the HDI. And I would like to give mine transplants. So here under film, you will need to turn on transparent. And later on we are going to add background with compositing. So we will have flat image for the background. And now see, I will, I will switch it back real quickly to show you if you want for for, for example, to ratify the environment behind the scene, you can just go and write it on the z location. And you can see that it's also the whole image is rho images rotating. And now you will be able to decide how, what kind of light you would like to have on your scene. So from mine I'll keep the fault may be a bit more on this side. Let's see. So to about here is going to be just fine. Now I will switch back my transparent once again. And now we can go and search to the world from the, from the wall to the object back. And now also we are going to include material store scenes. So now we can go and work in lockdown mode. So here for the Photoshop I can, I'm going to create a new material. And for the, for this, I'm going to use this reference image for the picking color and material for our icon. So first let's go and select this Beck. And here I will go and use eyedropper tool. And I will need to dis dark material here. And also I will need to go back in edit mode. And now here I will go. I will need to also select my my text as well and also apply this light blue for this text. So now you can see that we will need to separate it and separate the background from the front. So I'm going to select all these faces that are going to have the same color. And also this one here. By holding Shift and out with the left lift, I will be able to select loops. Also this one here. And now we'd see I will be able to enter in circle selection. And now I will go and Kate up new material here. I will select my text color as well. And now I will need to assign it here for this front. And now let's go and talk a little bit on the Adobe Illustrator. So here for the text, I will use this reference image color by selecting a base color and selecting eyedropper. And now for this Beck, I will use this inner part. And also as I did for the Photoshop, I'm going to select this back as well. So here I will need to select all these faces together. Also this small one. And now it see, I will be able to select this back part. I will create a new material here. I will pick the same material that I have for my front as well, and I will assign it. And as you can see here on the Photoshop, we will need also to include this small faces loop here and assign it to the back. So now here for these cubes, I'm going to keep everything the same, but I want this one here back D1 to be Glue one. So something like this. And also I would like to have colors on those two balls as also our press L to select those. And here I will go and create a new material. And I will select this material that I had for this cube as well. And now I can press assigned to a sand dam. And now also for example, you can select the color of your pen tool as well. So let's see what it can picked here. So maybe some dark yellow is going to be just fine for these kind. And also we will need to remove our reference image. So let's move them and move it to the side. And now as you can see, we created our images here. So now let's switch to the layout mode and let's turn on rendering view. Here are some tips that you can get here. So for example, if you are having windows, you should always use GPO. So instead of rendering or only with professor now and GPU can help end increase and speed up your rendering time. And here for the samples, I'm going to leave it as this is going to be just fine. But then forget to turn on denoising here under render. And then next that you can go, you can go all the way here, at the end and here for the color management, you can, for example, select a different kind of look. So for example, if I selected this medium, high contrast, higher contrast, you want to include con, higher contrast in your scenes. So for mine, I'm going to use this medium high contrast. And for example, you can always turn on these curves. And here you will be able to play with those values and set and change the lightning as you want. But I'm going to keep mine as it is. And also here in this output settings, you will be able to select the resolution of your Ender. And also you will be able to select how to select how long your animation is going to last, and also frame rate as well. But first, I will need to include my background. So I'm going to press render, render image just to render one single image so I can turn on my compositing and import also my background for it. So let us say it. So as you can see, our rendering is done. So now under compositing, I'm going to lower this down. I'm going to nodes here. And now I will need only one single node, which is alpha over node. So with the shifting day, I will search for alpha over Note. And now I will need to plug in this image to the second slot here. And right now we cannot see anything that because you will also need new Evernote to see how's it going to look like. And now you can also plug in it here and here on this image, you can also change the color of your render, of your background. So for mine, I'm going to give something like this, The navy blue or maybe a little bit darker. Let's try darker colors. So something like this is going to be just fine. And for example, now you can go and start the start rendering, but you need also to change the file format here in this output. So instead of P&G, I would like to use a Vijay pick for the highest quality of your animation. You also need to increase the quality to 100%. And now you need to press render and Render Animation. And your ending is going to begin. So that's it about this course. I hope you had fun creating those icons and see you in the next one.
 Nodiken 3D, 3D Artist and Animator