Transcripciones
1. Introducción: Hola frame, mi nombre es Hunter. Soy
diseñadora de emociones gráficas con sede en Australia. Y en este curso, voy a ayudar a ponerte en
marcha dentro de Adobe Illustrator. Y te enseñaré la mayoría de
las herramientas que se utilizan en casi todos los proyectos de ilustración o diseño creados
dentro de Adobe Illustrator. Si eres un principiante completo, este es el curso para ti. Te pondremos
en marcha en el software. Te enseñaré los
fundamentos de configurar un documento, navegar por
el espacio de trabajo. Y luego nos
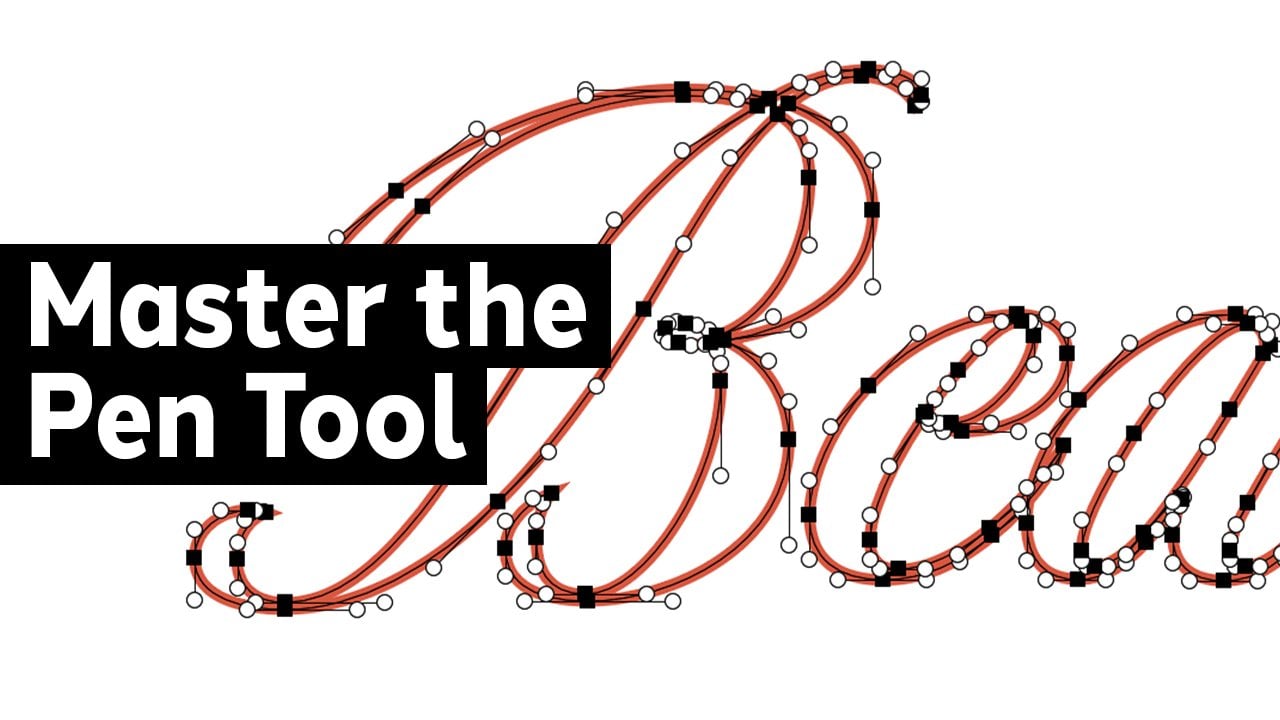
sumergiremos en algunas herramientas básicas, como la herramienta Pluma, como crear formas usando la herramienta de curvatura. Utilizaremos la herramienta
constructor de formas. Entonces usamos la herramienta de tipo. También haremos un par
de otras cosas como hacer algunas
transformaciones básicas. Y también
te mostraré cómo exportar para imprimir y también web. Ahora puedes seguir
a lo largo descargando los archivos de ejercicio abajo. Y también en esos archivos de
ejercicio, hay un código de lista de verificación, la lista de verificación lista para imprimir, y es solo una lista de verificación que puedes usar
cuando vas a enviar un diseño a una
imprenta. Y puedes pasar por los
pasos y comprobar que
tienes todo
configurado de la manera correcta. ¿ Está bien? Espero verte en el curso.
2. ¡Hola!: Muy bien, bienvenidos
al curso. Solo quiero
atropellar unas cuantas cosas antes de que saltemos
y empecemos. Si eres nuevo en Adobe, entonces es posible que necesites
descargarlo y puedes
venir a Adobe.com. Justo en primera página. Tiene un inicio, una prueba gratuita. Puedes obtener una prueba gratuita de siete días con las aplicaciones de Creative Cloud. También hay beneficios para ser estudiante y
es posible que desee mirar algunas de estas
otras opciones. Como volver atrás. También puedes ver todas
las apps aquí abajo. Si voy a la cima
creativa y diseño, bajamos a ver todas las Aplicaciones
Creative Cloud. Ver aquí, este es el
que recomiendo agarrar. Se trata de todas las aplicaciones de Adobe. Por lo que todo aquí, excepción de la
sustancia se encuentra aquí, está incluido en las aplicaciones de
Creative Cloud. O simplemente puedes comprar
la única aplicación aquí, que es Adobe Illustrator. No obstante, si
vas a estar usando otras aplicaciones como
InDesign y Photoshop, que son bastante comunes de
usar junto a Illustrator. Entonces en realidad es más barato
comprar todas las aplicaciones juntas. Así que acaba de venir aquí
que tiene miedo juicio. Adobe te dará
esta app para descargar, que es una aplicación de escritorio de Creative
Cloud. Y inicias sesión en ella con
tu cuenta de Adobe y
puedes bajar aquí e
instalar la app. Entonces tengo instalado
Illustrator, y dice que está actualizado. No está actualizado o
simplemente decir actualización por aquí. Si tengo que mirar,
dice que se actualice. Y luego a partir de ahí solo
puedes hacer clic en Abrir. Otra cosa de la que quiero
hablar es del proyecto. Este curso en realidad
tiene archivos de proyecto. Y así si vengo aquí
a Proyectos y Recursos, bajo los recursos aquí
tenemos los expedientes de ejercicio estudiantil. Estos serán los archivos
por los
que estás trabajando en el curso. Y luego tienes lista tu lista de verificación
impresa, que no necesitamos eso
hasta el final aquí. También, quiero
ver tus proyectos. Por lo que aquí puedes crear
un proyecto y solo escoger tres proyectos que te
gustaría subir. Y solo creas un título y solo
subes una imagen
o una captura de pantalla de lo que has hecho y un
poco sobre lo que has
hecho y tal vez lo que has encontrado más interesante sobre el forro Adobe Illustrator. Y voy a pasar y
echar un vistazo a su trabajo. Y ustedes otros alumnos
podrán ver lo que han hecho. Puedes publicarlo.
Si lo publicas, también puedes editarlo. Entonces si vas y pones
el proyecto, el título, la descripción y sí dices el primer proyecto
y sube una imagen. Puedes publicarlo y luego volver y
editarlo más ligero. Pasemos a la siguiente
lección donde realmente
empezamos dentro de
Adobe Illustrator.
3. Cómo conocer Adobe Illustrator: Muy bien, por eso hemos
lanzado Adobe Illustrator, y esta es la pantalla que te
da la bienvenida cuando abres Illustrator por
primera vez. Ahora, algunas diferencias
entre la tuya y la mía. Si nunca has usado
Illustrator antes, no
tendrás ninguno de
estos archivos aquí abajo. Los archivos recientes.
Eso es todo. Entonces todo lo demás debe
ser exactamente igual. Ahora por aquí
tenemos algunos presets para un nuevo documento en
esta cajita aquí, también
tenemos algunos
grandes tutoriales realizados por Adobe que
podemos ir y mirar. Podemos venir aquí y
decir Ocultar sugerencias. Sólo quiero que todo sea los archivos recientes en los
que he trabajado. Ahora por aquí podemos cambiar
cómo vemos los archivos recientes. Esta es más una vista
en miniatura para que podamos ver lo que contienen los archivos. Volvamos al ListView. Nos da un
poco más de información cuando perdimos, la abrimos, el tamaño de la misma, y qué tipo de archivo espantoso. Lo que voy a hacer es
subir aquí a File Open. También puedes simplemente hacer clic aquí en
el botón Abrir, y hará lo mismo. Si hacemos clic en eso. Ahora podemos navegar hasta donde estén
nuestros expedientes de ejercicio. Y sólo vamos
a abrir tres. Para empezar
en Adobe Illustrator, solo
podemos hacer clic en
eso y presionar Abrir. Aquí abajo. Vamos a hacer clic en Ignorar. Esto abrirá el nombre del archivo. Puede notar que mi espacio de trabajo
es diferente al suyo. Lo que vamos a hacer ahora
es restablecer el espacio de trabajo. Ambos espacios de trabajo
son iguales. Lo que puedo hacer es llegar
a la cima aquí. Aquí hay un pequeño ícono
que dice Cambiar espacio de trabajo. Podemos dar click en eso. Y voy a ir
a lo esencial. Otro lugar en el que puedes cambiar el espacio de trabajo está en Ventana. Puedes ir Ventana abajo al espacio de trabajo y luego
hacer clic en Esenciales. También voy a restablecer el
diseño así que solo puedo hacer clic en Reset Essentials que un restablecimiento
todo vuelva a la normalidad. Ahora, en esto, esta zona blanca
aquí se llama mesa de trabajo. Podemos tener múltiples
mesas de trabajo en nuestro documento. Entonces si bajamos por aquí, puedes hacer click en
la Herramienta Mesa de Trabajo. puede decir que se ha
abierto la mesa de trabajo número uno. Lo que podemos hacer es entrar aquí, click y arrastrar para
crear una nueva mesa de trabajo. Entonces va a crear
arriba o número dos, se
puede ver que por aquí
en nuestro panel de propiedades, tenemos algunos ajustes
que podemos ajustar. Podemos seleccionar cada tablero de
arte usando la herramienta de tablero de arte y simplemente
haciendo clic en el nombre por la parte superior. Simplemente seleccionando la mesa de trabajo. Podemos eliminar una mesa de trabajo
seleccionándola y presionando la
tecla Eliminar en el teclado. Ahora podemos cambiar el nombre de una mesa de trabajo, pero sólo seleccionándola y
suficiente panel de propiedades. Tendremos por aquí el nombre de la mesa de trabajo
que tiene su tablero de arte uno. Y podemos nombrar esto
para empezar. También tenemos un bonito
set para este tablero de arte. Tenemos un
tamaño personalizado establecido a ella. Y también está en retrato. Podemos cambiar esto
y hacer clic en él para
hacerlo horizontal y
cambiarlo aquí. También podemos mover
cómo tablero alrededor, qué, seleccionarlo, y
arrastrarlo alrededor. Ahora, nuestra obra de arte se moverá con la mesa de trabajo siempre y cuando tengamos esta pequeña opción
aquí seleccionada. Si volvemos a nuestra
herramienta de selección, que está en la parte superior, esta herramienta es como una herramienta
segura y es una de las
herramientas más utilizadas en Illustrator. Y nos permite seleccionar objetos y
moverlos en su totalidad. Puedo seleccionar Grupos completos y formas completas y
moverlas alrededor. También notarás
que aparecen todas estas guías y esto me
está permitiendo ajustar mis objetos a
otros objetos de la página. Si deselecciono
todo usando mi herramienta de selección y solo
haciendo clic en esta área, puedo venir aquí y
tenemos algunas opciones. Por aquí. Estamos mirando
las opciones de snap. Y solo
querríamos que este de aquí, Snap to Point, se encienda. Siempre y cuando eso esté así, todo se ajustará
a Point y hará que sea muy fácil alinear objetos. Muy bien, La siguiente
herramienta que
usaremos mucho es la herramienta de selección
directa. Esto nos permite seleccionar
formas dentro de una forma. Este es un grupo abajo
de abajo aquí. Nos está permitiendo
seleccionar una forma. Al solo hacer click
una vez en la forma, se
puede ver que los viejos tiempos de
anclaje puntos que aparecen esas
casillas blancas se llaman
puntos de anclaje y determinan a
dónde va el camino. Si acabo de seleccionar este cuadro aquí, verás que está seleccionado el punto de
anclaje. Estoy usando mi herramienta de
selección directa para hacer este pequeño mango
saliendo de ella. El pequeño círculo determina
la curvatura del camino. Ahora si vuelvo a
mi herramienta de selección, se
puede ver si hago
clic en esto ahora, todo está en grupo. Y podemos desagrupar
las cosas yendo a Desagrupar
objetos y grupos. Entonces si lo desagrupo aquí, se
puede ver que hemos desagrupado
estas formas desde aquí, desde arriba aquí. Si miramos nuestras capas, también
podemos ver el grupo aquí. He desagrupado el texto
de la ilustración. 12, el grupo abre aquí
usando un pequeño error, se
puede decir todo lo
que hay dentro del grupo. Estas son todas las formas. Aquí hay
mezquitas de recorte. Cargas de formas que construyen
esta mano presionando el botón. Ahora si por alguna razón ninguno
de estos paneles aparece. Ahora el
panel de propiedades es bastante nuevo Adobe Illustrator
y necesitarás la última versión de
Adobe Illustrator. Creo que se
introdujo en 2018. Si quieres encontrar otros
paneles que abrí, como el panel de capas, puedes ir a ventana aquí abajo. Afilar las capas. También teníamos el panel de
propiedades aquí. Si necesito abrir
un panel diferente,
un panel que me gusta abrir
es el panel de color
porque se abre automáticamente cuando hago clic en las muestras y
hablaremos de eso más adelante. Puedes acoplar el panel
simplemente seleccionando esta barra, arrastrándola, voy a arrastrarla hacia abajo hasta abajo aquí. Dirás que aparece la línea azul
en la parte inferior. Puedo pegarla a las zonas así que voy a
dejarlo caer en la parte inferior. Se puede ver que el
panel de color ha sido incrustado. Inhale. La herramienta de selección
nos permite seleccionar formas en su totalidad y podemos hacer clic y arrastrar para
moverlas. Y en la herramienta de selección directa nos
permite seleccionar puntos
particulares. En el interior. Control Z nos
permite volver atrás. Aquí abajo. Contamos con la herramienta Zoom. Si hacemos click en la herramienta Zoom, sólo
podemos hacer click y
acercamos a un área. Ahora si mantengo pulsada
la tecla Alt u Option en
un Mac y solo hago clic, alejaremos algunos otros
accesos directos que puedas usar. Un vale la pena recordar. El caso Control o Comando
más y menos, que acercaría y alejaría. Y también la tecla control 0, que centrará la
mesa de trabajo hasta la ventana del documento, que es esta gran área aquí. Otra forma de pintar en el documento es
utilizar nuestra barra espaciadora. Simplemente mantenga pulsada la barra espaciadora. Afilará automáticamente la mano A
en cualquiera de estas herramientas,a en cualquiera de estas herramientas, excepción de la Herramienta Tipo, podemos hacer clic y arrastrar al
dolor en nuestro documento. Muy bien, volvamos
a nuestra herramienta de selección
como herramienta exterior para
anular la selección de la forma. Simplemente podemos hacer click off en un área que ya no tiene
forma en ella. Podemos simplemente presionar Control S
y ciudades pequeña estrella aquí. Cuando presionemos Control S, se guardará el documento. También podemos ir a
Archivo Guardar aquí. Está en gris porque
acabamos de salvar. No necesitaba hacerlo. Lo último que
quiero mostrarte es cómo crear un nuevo documento. Crear un nuevo documento. Puedes ir a Archivo Nuevo. Me impactó este
pequeño panel aquí, que nos permitirá
crear un nuevo documento, podemos escoger algunos ajustes de. Aquí arriba. Ahí están todos estos
diferentes ajustes. Entonces en Australia,
usamos I4 e I5. Pero si estás en EU, usarías carta y
LIGO mucho más que A4. Si lo selecciono, también podemos
cambiar los puntos por aquí. Puedo cambiar eso de
puntos a decir, milímetros. O si estás trabajando con web, lo querrías en pixeles. También puedes
nombrarlo a medida que creas el documento aquí y
cambiar la orientación, la cantidad de mesas de trabajo aquí. Una vez que hayas hecho todo eso, puedes golpear Crear. Eso creará un nuevo documento. Yo no lo nombré,
así que es sin título. Y podemos
entrar en un inmueble. Y también se puede decir que podemos cambiar las unidades
para el documento. Por aquí. Puedo seleccionar cualquiera de las unidades, digamos que quiero ir pixeles. Además, otra cosa es
si pego Editar mesas de trabajo, quiero este paisaje y podemos rápida y fácilmente,
cambiar la orientación
del opcode. Por último, podemos ir Archivo, Guardar como, y eso
nos permitirá guardarlo como documento. Podemos nombrarlo, podemos
ponerlo en cualquier lugar. Y podemos decir Guardar aquí. Porque este documento está en blanco. No voy a salvarla. Yo quiero que voy a hacer es
sólo golpear la pequeña X ahí. Y diré Guardar cambios en el documento de Adobe Illustrator
sobre titulado antes de cerrar. Sólo voy a golpear No, eso cerrará el
documento sin guardar. Muy bien, eso es todo
por esta lección. Pasemos a la siguiente.
4. Crear formas básicas en Adobe Illustrator: En esta lección,
vamos a repasar los conceptos básicos de la creación de formas, y estaremos usando
algunas herramientas básicas de formas dentro de Adobe Illustrator. Lo primero que
vamos a hacer es dejar Abierto este Archivo de Trabajo. Número tres, para empezar
en Adobe Illustrator, y vamos a utilizar este archivo aquí. Lo que voy a hacer es usar mi herramienta Artboard como la última vez. Y sólo voy a
crear una nueva mesa de trabajo. Voy a seleccionarlo y
venir a un costado aquí. Solo va a hacer clic en
Nueva mesa de trabajo. Y va a poner una nueva
mesa de trabajo directamente al lado de ella. Y podemos nombrar a
ésta formas básicas, excusa la capital. Entonces una vez que hayamos nombrado eso, ahora
podemos usar esta mesa de trabajo. Ahora hay una ligera línea negra alrededor del tablero de arte seleccionado, y es posible
que no puedas verla. Si hago clic en esta
mesa de trabajo aquí, la línea negra cambia y
ésta tiene una línea gris. Si hago click en el Aquí, se
puede ver que vuelve a cambiar. También se puede ver
que cambia
aquí en las propiedades
sin nada seleccionado. Muestra que tenemos nuestra
junta número dos seleccionada. Podemos cambiar entre
los dos y
se les envió
usando la herarquía, estaban usando este
desplegable y seleccionando la mesa de trabajo que queremos y eso hará activa la
mesa de trabajo. Usaremos algunas formas. El primero es la herramienta rectángulo. Puedes usar M en el
teclado para seleccionar esto. Es el de arriba. Podemos simplemente hacer clic y arrastrar
para crear un rectángulo. Sin dejar ir, sólo
podemos crear una forma que nos gustaría. Haz todas las cosas
al dibujar una forma. Si hacemos clic y arrastramos la forma hacia fuera y sostenemos turno
mientras estamos haciendo eso, podemos encajarlo a
un cuadrado perfecto. Esto funciona igual para todas las demás herramientas
que crean formas. Nada es si hago clic una vez, puedo crear un rectángulo
de un tamaño determinado. Por lo que tal vez quiero
85 molino por 85 mil. También podemos hacer algo
que no sea un cuadrado. Entonces digamos 85
mil, bio, 150 mil. Y puedo golpear
las mediciones de R K podrían ser las diferentes como en pulgadas
y eso está bien también. Volvemos a nuestra herramienta
de selección. Con las formas seleccionadas. En realidad podemos
transformar la forma usando estas
cajas limitadoras a su alrededor. Este cuadro limitador nos
permite hacer clic y arrastrar la forma en
cualquiera de los cuadrados, en cualquiera de los cuadrados
en los bordes exteriores, puede hacer clic y arrastrar la forma para que
pueda cambiarla. Si quieres mantener las
proporciones mientras lo
escalas, puedes mantener presionada la
tecla Mayús y eso mantendrá las proporciones de la forma que ya has creado. Si pasa el cursor por fuera del área de la forma y
hace clic y arrastra, realmente
puede rotar. Una vez más, mantener presionada
el turno ajustará a este objeto en un ángulo de 45 grados. Puedes dejar ir para
aplicar esos cambios. Otra cosa que quiero
mostrarte con creación de una forma es si
volvemos a seleccionar esa herramienta rectángulo, pincha y arrastra. Podemos sostener Turno. Pero si también sostenemos Alt, podemos escalar la forma desde el centro de
lo que hicimos clic. Si dejo ir la tecla Shift, no
tengo que restringir las proporciones a
un cuadrado perfecto, y se escalará
desde el centro. Esto funciona también en todas las
otras formas. Muy bien, agarremos
otra forma. Si hago clic y sostengo, se pueden ver todas las otras
formas que tenemos aquí. La herramienta elipse
funciona exactamente
igual que lo que ya
tenemos como rectángulo. Para que podamos hacer clic y arrastrar. Sostenemos turno para
un círculo perfecto. Suelta el turno por una elipse. Podemos arrastrarlo hacia fuera. Una vez más, si sostenemos el Alt, podemos escalar desde el centro. Y Alt y shift pueden
escalar desde el centro mientras limitan las
proporciones a un círculo perfecto. Y dejamos ir a
aplicar la forma. Utilizando nuestra herramienta de selección. Podemos seleccionar esta forma y se puede ver que
el cuadro limitador crea un rectángulo en los bordes
exteriores de la forma. Si usas mi barra espaciadora
muévete de nuevo por aquí. Puedes ver aquí crea una en los bordes exteriores en
esta caja a su alrededor. Se llama la caja limitadora. Podemos usar ese
cuadro limitador para transformar la forma. Recuerde, mantener el turno puede
restringir las proporciones y mantener Alt puede escalar
desde el centro. También podemos seleccionar
múltiples formas manteniendo
pulsada la tecla Mayús. Y usando nuestra herramienta de selección
para hacer clic en múltiples formas. Al igual que así. Si bien todos estos seleccionados, podemos usar la barra espaciadora para desplazar con solo mantenerla presionada
y pulsando y arrastrando. Entonces podemos dejar ir
la barra espaciadora. Se aplica nuevamente a la herramienta de
selección. También podemos usar la
tecla Delete para eliminar todo esto, o podemos usar todo esto
y arrastrarlo por todas partes. Voy a usar
delete, eliminarlo todo, y pasar
a la siguiente herramienta. Ahora la herramienta polígono
y la estrella para trabajar exactamente igual en
cómo los dibujas. Shift los ajustará
a una horizontal. Y también tenemos
algunas otras opciones. Con esto. Podemos utilizar las teclas de flecha arriba y abajo para añadir más
caras a la forma. Aquí se puede ver que puedo quitar caras usando
mi tecla de flecha hacia abajo. Podemos hacer un triángulo. Si sostenemos Turno, se romperá. Ahora no va a hacer
nada en este caso, pues la forma ya
sacará del centro. Usaremos nuestra
tecla de flecha arriba y hagamos un pentágono. Sostenemos Turno y lo dejamos ir. Puedes ver aquí hemos
creado un pentágono. Ahora tenemos esta pequeña
opción aquí para agregar más lados usando
el cuadro limitador. Se puede ver aquí,
vamos a un plus y un menos. Si arrastro eso hacia arriba,
se quitan caras. Y si lo arrastro hacia abajo
y agrega más caras, se
puede decir la
pequeña cruz ahí, que se mueve cuando dejamos ir a
través fue donde la teníamos. Si arrastro esto hacia arriba,
volvamos a cinco caras. Ahora la opción en todas las formas excepción del círculo son
estos bordes redondeados aquí. Si hacemos clic en eso,
podemos hacer click y arrastrar para redondear los bordes. Esto también se aplicará
en nuestra transformación. Por aquí. Tenemos esta pequeña
opción tipo esquina, y va a
redondear las esquinas. Y esto se llama widget de esquina
en vivo. La última forma es la Herramienta Estrella. Esto funciona exactamente igual. Puede utilizar sus teclas de flecha arriba
y abajo para agregar caras de topo. Para que podamos escalarlo. Pero tenemos otra
opción aquí. Presiono Alt y sostengo eso abajo. Se puede ver que cambia la
forma en que dibuja la forma. Si sostengo Control, puedo extender la
longitud de h estrella. Puedo hacerlos muy largos. Entonces cuando suelte el control, se escalará en consecuencia. Y puedo añadir más lados usando mi flecha arriba y la tecla de
flecha hacia abajo para eliminarlos. Vamos a dejar ir. Lo que voy a hacer
es eliminar las formas, estaban dibujando algunos rectángulos
más. Voy a usar M en mi
teclado para conseguir el rectángulo. Dibujemos unas cuantas plazas. Quiero mostrarte cómo
alinear las formas. Si selecciono mi herramienta de selección, puedo seleccionar todas las formas. Y aquí abajo, tengo
algunas opciones de alinear. Puedo alinearlos verticalmente. Puedo alinearlos
todos a la izquierda. Vamos a deshacer ese control Z. puedo alinearlos todos en
el centro verticalmente y alterar la derecha verticalmente
sobre un eje vertical. Eso
lo va a alinear a la forma que es la más correcta. Alinearlos horizontalmente
en el eje horizontal. Si se pueden ver las
formas moviéndose alrededor. Otra cosa es que puedo
distribuirlos uniformemente. Entonces si tomo esta
forma aquí fuera, mueva esta en
el centro aquí. Como lo siento, y
selecciona todos ellos. Sólo estoy haciendo clic y arrastrando
con mi herramienta de selección. Puedo seleccionar estos tres
puntos y distribuirlos uniformemente usando el Distribuir
Horizontal. Entonces si quiero éste, dale click sobre él y
cambiará el espaciado entre los centros de todas las formas
para que sea exactamente igual. Otra cosa que
podemos hacer con alinear es decir si muevo estas
formas aquí abajo, selecciono todas estas formas y
quiero alinear todas
las formas también. Podemos desperdiciar todos estos seleccionados. Simplemente puedo hacer click sobre la
Forma por segunda vez. Eso lo convertirá en un objeto clave. Y se puede ver la opción
que se cambia a objeto clave. Y ahora puedo alinearlo al
centro de ese objeto clave. Ahora esa opción aquí es
alinearla a un tablero de arte. Puedo seleccionar eso y
alinearlo a la mesa de trabajo. Acabo de alinearlo desde el
eje vertical y horizontal de la mesa de trabajo. Ahora todas las formas están apiladas. Selecciona viejos tiempos,
ya hemos repasado esto, pero podemos ir Objeto, Grupo o Control J. También
puedes hacer clic derecho en
ellos y agruparlos. Y las formas tienen una jerarquía, los rectángulos en
su propia jerarquía. Por lo que podemos utilizar el panel de capas para ajustar donde
se posicionan. Podría mover esta
forma a la cima y mover las formas alrededor
si quisiera. También puedo hacer eso haciendo
clic derecho sobre la forma, yendo a arreglarlos y
enviarlos en una dirección. Éste
lo lleva al frente, trae hacia adelante, hacia atrás, y envía hacia atrás, y luego algunos atajos allí que tal vez quieras recordar. Como se puede ver una vez más, tenemos aquí los
widgets de esquina en vivo en la plaza, que podemos ajustar aquí. Lo último que quiero repasar es la herramienta de selección directa, y es caso usado. Si selecciono una forma, se
puede ver que puede
seleccionar solo quiero
anclar punto en la esquina. Ahora esto tomará un
poco acostumbrarse. Si selecciono una forma, puedo hacer clic y arrastrar
solo un punto de anclaje. También puedo seleccionar
múltiples puntos de anclaje pulsada la tecla Mayús y pulsando. Y luego puedo arrastrar dos puntos de
anclaje a la vez. La
herramienta de selección directa también me
permite seleccionar solo una esquina. Entonces tal vez quiero que éste
sea un fin puntiagudo. Y luego puedo hacer click
aquí y Mayús-click en líneas de
viejos días aquí y
arrastrarlas hasta la parte superior. Se puede ver que podemos crear formas
muy únicas utilizando la herramienta de selección
directa tenía para jugar con esas herramientas y tratar de
entender cómo funcionan. La mejor manera de hacerlo
es solo un desastre alrededor. Usa Control Z para volver
atrás y deshacer errores. Pero juega alrededor, haz algunas formas incómodas
como las que tengo aquí. Trabaja cómo funciona la Herramienta de
Selección Directa, cómo hacer estrellas, cómo hacer pentágonos. Y luego puedes pasar
a la siguiente lección. Te veré ahí.
5. Uso de la herramienta de construcción de formas en Adobe Illustrator: En esta lección,
echaremos un vistazo al uso la herramienta constructor de formas para crear formas
únicas como
esta aquí. Esto se compone de
múltiples formas que
utilizamos para cortar de otras formas, va a crear esta forma. En esta lección. Lo primero que me gustaría que
hicieras es abrir el archivo de ejercicio
número cinco usando la
herramienta constructor de formas en Illustrator. Si vamos a nuestro panel Capas, también
puedes encontrarlas
bajo Capas de ventana. Se puede ver que aquí arriba tenemos una capa de dibujo
y vamos a seleccionar aquella que nos
permita dibujar esta forma. Ahora en el uso de la herramienta constructor de
formas, necesitamos crear otras
formas que podamos usar para cortar de HLR. Si agarramos aquí y echamos un
vistazo a las formas
que necesitamos para crear. Lo primero que
estoy notando es que me gustaría crear un círculo. Voy a usar
la Herramienta Elipse. Recuerda, simplemente haz clic y mantén presionado la herramienta Rectángulo y
baja a la herramienta elipse. También podrías
aprender el atajo, que es L en el teclado. Simplemente haga clic una vez y haga clic en Ir. Usaré mi
barra espaciadora para desayunar. Lo que voy a hacer es
recrear esta forma. Pero por aquí que
se puede ver lo que está pasando. Voy a hacer es
crear un círculo. Ahora lo que voy a hacer es crear más
suerte en los labios. Entonces es un poco aplastado. Lo aplastará un poco y tal vez tire de ella
sobre este archivo. Ahora podemos utilizar la herramienta de selección S. Podemos arrastrar esta forma
y duplicarla. Lo que podemos hacer es ir a
editar, copiar y editar, pegar o pegar al frente para
pegarlo frente al objeto
en la misma posición. Sólo voy a pegar. Y podemos dejar caer esta
forma en su lugar así. Podemos seleccionar estas
dos formas y alinearlas en el eje
horizontal. Ahora lo que voy a
hacer es bajar a mis muestras y
simplemente golpear default. Y luego volverá a poner las
muestras a la predeterminada. Ahora, podemos editar esto. Se puede ver cuando
seleccionamos ambas formas, se
puede ver el camino
detrás de esta forma aquí. Sólo voy a
superponerlos un poco menos. Selecciona ambas formas,
di dónde está. Continúa arrastrándolo a través hasta que tenga una forma con la que estoy
contento, esta. Entonces podemos usar una herramienta de constructor de
formas. Y se ve
así por aquí. También puedes usar Shift M para
obtener la herramienta constructor de formas. Al utilizar la herramienta constructor de
formas, tenemos que seleccionar
las formas con la herramienta de selección que
nos gustaría conectar. La herramienta constructor de formas
funciona simplemente haciendo clic en las áreas que le
gustaría crear una forma. Aquí se pueden ver las
formas que se
dividen por los caminos superpuestos. Se puede ver que en este momento el área punteada es la
forma que voy a crear. Si hago clic. Si acabo de hacer clic una vez, se
puede ver que se ha creado
esta forma aquí. Y también queremos eliminar
estas dos formas para que pudiéramos usar la
herramienta constructor de formas o simplemente usar nuestra herramienta de selección
para deshacernos de ella. Entonces volvamos a
nuestra herramienta de selección. Y si echamos un vistazo a esto, se
puede ver que estas
dos formas se han dividido y la
broca intersecante está conectada. Así que ahora puedo eliminar esas dos formas externas
y arrastrar esto a su lugar. Una cosa que estoy notando, así que si simplemente
lo estiramos un poco para llenar esta forma,
estirarla. Entonces podríamos
arrastrarlo de nuevo para trabajar en ello. Por aquí. Lo siguiente que voy a hacer
es usar mi herramienta rectángulo. Iré al centro de
esta forma y se puede ver que la pequeña
x está apareciendo. Puedo hacer clic y arrastrar hacia fuera. Puedo usar mi tecla alt para
escalar desde el centro. Sólo voy a dibujar formas
directamente al centro. Al igual que así. Suelta. Y ahora tenemos esta
forma que podemos usar. Ahora el duplicado la
forma más rápido y más fácil. Podemos hacer click sobre esta
forma y
arrastrarla sin dejarla ir. Si mantenemos pulsada la tecla Alt, se
puede ver que está
duplicando la forma. Ahora cuando dejamos ir,
podemos rotar éste. Vamos a deshacer ese clic aquí, rotarlo por 45, y arrástrelo a su lugar aquí. Al igual que así. Entonces solo
querríamos arrastrar esto hacia abajo, duplicarlo nuevamente manteniendo
presionada la tecla Alt
y arrastrándola. Sólo arrastrándolo hacia abajo. Y luego podemos usar el objeto. Transformar, transformar de nuevo, y eso
lo duplicará una vez más. Y ahora podemos usar la herramienta constructor de
formas para conectar todas las formas. Solo tenemos que hacer clic y arrastrar por todas las formas
que nos gustaría
conectar y cortar y
pasar a nuestra herramienta de formas. Y luego vamos
a usar la
tecla alt para quitarle estas formas. Este es nuestro control plus o
Command Plus para acercar. Sólo vamos a sostener Alt y arrastrar por encima de las formas aquí. Y sólo estoy
dibujando, haciendo clic y arrastrando las
áreas que no quiero. Si cometes un error, solo
puedes usar
Control Z para deshacer y redibujar las formas. Sólo estamos dibujando en la
zona que no queremos. Así sólo estoy manteniendo
pulsada la tecla Alt. Dices que el, el viejo K cambia
el menos y el plus. Ahora hemos creado
esta forma aquí. Ahora podemos seleccionarlo todo. Y lo que voy
a hacer es en realidad agruparlo en el
panel de propiedades por abajo. Tenemos una opción de grupo
que podemos usar. Ahora lo que queremos hacer
es rotar este 145. Vamos a arrastrarlo. Este lado. Acabaría de poner, intentemos negativo 45. En el panel de transformación. Ahí está este pequeño ícono de
rotar aquí. Y podemos rotar cualquiera de
nuestros objetos seleccionados. En este caso, es el grupo. Acabamos de golpear Enter y
eso lo esconderá así. Ahí vamos. Tenemos ese lado.
Ahora lo que voy a hacer es arrastrar otro lado hacia fuera y
rotar éste por 45. Vamos a hacer doble clic ahí. Acaba de poner en 45. Grados, simplemente lo
arrastraría a su lugar. Vamos a usar Control
y plus para acercar con esas muchas formas seleccionadas con nuestra herramienta de
selección. Si pasamos por encima de la forma, se
puede ver que tenemos estas
pequeñas guías apareciendo. Así que ahora mismo estoy
flotando sobre el camino. Si bajo al ancla, que está justo en la esquina, puedo hacer click y arrastrar esto para
ajustarlo al otro ancla. Arrastrémoslo hacia fuera y
hagamos lo mismo, desselecciónelo, luego desplace
el cursor sobre el ancla, haga clic y arrástrelo a su lugar para que las
esquinas puedan encajar. Ahora lo que voy
a hacer es seleccionar todas las formas y usar
mi Herramienta Constructor de Formas. Lo que voy a hacer es simplemente
deshacerme de estas áreas aquí. Pequeñas zonas pequeñas. Podrías acercar
usando tu control más Ks y luego usar
tu barra espaciadora para desplazar. Sólo me estoy librando de las áreas superpuestas para que tengamos
líneas rectas aquí. Cuando hayas terminado,
puedes presionar V en el teclado para obtener
tu herramienta de selección. Alejar el zoom usando Control
o Comando Menos. Una cosa aquí es que
quiero darle la vuelta a esto. Para que puedas ver aquí
que los iconos voltearon. Otra cosa es que los hemos
rotado demasiado. Se puede ver todavía
tenemos los ajustes aquí para la rotación. El único tema que
tenemos es que
ya hemos cortado las formas aquí. Voy a dejarlo en
una rotación de 45 grados. Puede optar por deshacer esto y crear una rotación
que sea menor. Lo que voy a hacer ahora es probar
las opciones de volteo. Decir que esta forma no quiere ser volteada aunque
utilicemos las opciones futbolísticas
tampoco en el panel de transformación, no
podemos conseguirlo de la manera correcta. Lo que voy a hacer es
devolverlo al original. Si deshacemos todo el flipping que hicimos hasta
obtener la rotación. Atrás. Ahí vamos. Vamos a deshacer. Una vez que tengamos por rotación, si acabamos de volver a poner esto a 0, es muy cool y cuando lo
volteemos ahora va a ser bueno. Ahora lo volteamos por negativo 45. Se puede ver ahí
que ha sido volteado. Otro tema, hemos hecho la herramienta constructor de formas
antes de voltearla. Así que vamos a arreglar todo esto. Desseleccionar todo. Whoops. Hemos cortado un área que no
debería ser atrapada. Volvamos a una forma
Bueller para deshacer esa. Se conectará esto
hasta el borde. Al igual que así. Por último, quiero compartir un
truco para ampliar las vainas aquí. Haga doble clic, entramos en el grupo y luego
puedo seleccionar la forma. Voy a ir a
objetar abajo al camino. Sólo voy a
compensar el camino. Vamos a entrar cerca de cinco. Vamos a encender y
apagar la vista previa. Cinco píxeles se ve realmente bien. Entonces podemos hacer doble clic
para salir del grupo. Y luego una vez más,
quiero hacer aquí, enviar éste al rango de
transformación de atrás aquí, acabamos de hacer clic derecho
organizar, enviar a atrás. Entonces lo que puedo hacer es
entrar en este grupo
también y ir a Ruta de objeto, Desplazamiento de ruta por cinco píxeles. Golpeó bien, doble clic hacia fuera. Y luego podemos seleccionar todas
estas formas y acercarnos. Usando una herramienta de constructor de formas. Aquí, podemos quitarle las áreas que no
queremos solo dibujando
en las zonas. Otro pequeño truco con la herramienta constructor de formas
es si haces clic y arrastra y luego mantén presionada turno
como lo estás haciendo. También estoy sosteniendo mi
tecla alt para quitarle objetos. Se puede ver que podemos
crear una caja de marquesina. Vamos a unirnos a estos. Como unir esas dos formas hacia arriba. Echemos un vistazo. Poco que podríamos querer arreglar
es esta forma aquí. Lo que podemos hacer es esto. Está en Ponto. No necesitamos entrar en
detalle con esta herramienta. Simplemente le haremos clic una vez
y solo nos uniremos a eso, no ir a este punto de anclaje. Directo hacia arriba. Simplemente crea un
poco de forma ahí. Vamos a seleccionar todo. Usa un constructor de formas
para unir estas formas. No lo has hecho. Aquí hemos creado el logo. Lo que podemos hacer ahora es escogido el color pequeño truco
cuentagotas aquí. Bajar y seleccionar la
naranja ahí abajo. Después seleccionaremos
todo esto y vamos a ir objeto abajo a grupo. Entonces podemos arrastrar
esto a su lugar. Lo siento, capas. Lo que podemos hacer es 12
abajo de la directriz. Desbloquea la guía. Entonces solo esconde el grupo. La parte superior de ahí. Eso va a ocultar a los guías
que lo tenemos. Así es como usar la herramienta Shape
Builder en Illustrator. Pasemos a la siguiente lección.
6. Cómo usar la herramienta de curvatura: Muy bien, En esta lección
vamos a echar un
vistazo a la herramienta de curvatura. Y la herramienta de coraje es una herramienta realmente genial
que reemplaza a la
herramienta pluma y es mucho más fácil de usar porque ayuda a calcular las curvas
y todas las esquinas, en lugar de tener
para hacer eso tú mismo. Para este proyecto,
vamos a empezar en
la pantalla de inicio. Si tienes documentos abiertos, haz clic en este ícono de
casita arriba, y se irá a casa. Entonces lo que podemos hacer es
bajar y crear un nuevo documento. También puede dirigirse a
presentar nuevo documento. Lo que voy a
hacer es que ya lo
tengo todo configurado aquí. Por lo que queremos un documento
que sea de 500 pixeles, seleccione píxeles, 500
pixeles por 500. Y lo que voy a
hacer es poner en una noche. Acabo de conseguir un sin nombre copiado aquí para que
o podríamos documentar. Y lo que puedo hacer aquí es simplemente
dejarlo a una mesa de trabajo. Desplazemos hacia abajo. No quiero este CMYK porque no
lo estoy imprimiendo.
Y voy a ir a RGB. No te preocupes si
no entiendes esto. Y también voy a
bajar un poco los efectos de la lista , 250 PPI. Vamos a golpear Create. Eso creará ese documento. Y ahora lo que
podemos hacer es ir Archivo. Y abajo para reemplazar aquí, podemos ir Place, pincha para abrir nuestros archivos. Vamos a navegar
a los expedientes de ejercicio. Y tú dices, aquí tienes seis bocetos a mano de
dibujos animados. Vamos a seleccionar eso. Y lo que vamos a
hacer con las opciones aquí, puedes golpear plantilla, comprobar eso encendido, y golpear place. Eso va a colocarlo
como archivo de plantilla. Y también lo va a bloquear
y soltar la opacidad. Una cosa que
quiero cambiar es el tamaño de esta imagen. Lo que voy a hacer es
desbloquearlo 12 días abajo. En realidad puedo
seleccionar la capa haciendo clic en el Stoltz
en mi panel de capas. Usa mis
teclas Control M menos para alejar el zoom. Entonces podemos simplemente escalar esto
hasta que encaje en el documento. Entonces voy a usar la tecla Shift
y Alt como hago esto para escalar desde el centro,
esquelético camino hacia abajo. Y lo volveremos a
colocar en el centro. Entonces puedo usar mis comandos de control y 0 teclas en
un Mac para acercar. Y luego podemos bloquear esa capa. Entonces podemos empezar a trabajar en ello. Lo primero que voy
a hacer es salvar esto. He creado accidentalmente un
nombre que es demasiado largo, pero vamos a ir Archivo. Y voy a
ir Archivo Guardar como. Y voy
a navegar a donde quiera guardar este archivo y guardarlo. Voy a guardarlo encima de otro archivo que
ya he creado. Y haga clic en Sí y golpee. Ok. Ahora podemos usar la herramienta de
cobertura, que es ésta de
aquí abajo. Podemos seleccionar eso. Y es un bolígrafo con un poco de
línea ondulada fuera de ella. Podemos empezar a usar estos dos. Necesitamos seleccionar
la capa por encima la plantilla para
que podamos trabajar. Y luego empezaré a mostrarte cómo usar la herramienta de curvatura. Por lo que la herramienta de curvatura
funciona haciendo clic para agregar
apunto y luego haciendo clic en la siguiente posición que
desea agregar un punto. Se puede ver aquí ahora está creando una curva basada en estos dos últimos
puntos que he trazado. Podemos crear curvas
realmente bonitas. Ahora verás que tenemos un relleno que viene aquí. Y eso es porque
aquí abajo tenemos un campo. Entonces si dices que esta plaza está al frente,
actualmente es blanca. Pero acabo de bajar aquí
y golpear el icono none. Eso va a deshacerse de él. También puedes hacer las mismas
propiedades por aquí. Si selecciona el relleno
y pulsa el none. Seguimos usando
esta forma aquí. Podemos crear curvas
realmente geniales. Ahora quizá no queremos
crear una curva, queremos crear un punto. Lo que puedes hacer es en el punto, doble clic y eso
creará una esquina afilada. Podemos hacer doble clic de
nuevo, así. Al hacer doble clic
crea una esquina afilada. Entonces solo haciendo clic una vez que se vuelve a subir a
una esquina curva. También podemos editar cualquiera de
estos puntos así. Al hacer click y
arrastrar los puntos, volvemos a nuestra herramienta
de selección. Podemos eliminar esa forma. Lo que voy a hacer es escoger un color de trazo
del panel de apariencia. Da click en este pequeño cuadrado
aquí al lado del Trazo. Y vamos a escoger
un color que podamos ver, azul o algo así. Vamos. Y luego podemos cambiar
el tamaño del punto, que es el grosor
del trazo hacia arriba. Ahora lo que podemos hacer es
crear esta forma. Voy a ir más allá
del final de esta línea. Verás el motivo de
eso en un poco. Y entonces podemos empezar a
trazar los puntos. Ahora esto tomará un
poco de tiempo acostumbrarse. Tendrás que
practicarlo un poco para averiguar cómo
usar esta herramienta. Puedes hacer click en estos
puntos y moverlos por ahí. Al igual que así. Moveremos estos
puntos para crear algunas formas realmente
únicas como tal. Si presionas control en el
teclado y haces clic en off, desseleccionará las formas
para que puedas empezar de nuevo. Si vengo aquí abajo. Ahora lo que puedo hacer es que no
quiero hacer click en el camino, así que tengo que
pasar el camino y crear la forma a partir de ahí. Seguiremos dando vueltas. Vamos a tirar este punto
hacia abajo un poco. Pasaremos el
punto una vez más, usaremos la tecla de control para
desseleccionarlo para cualquier cosa. Y luego vamos a crear
éste aquí. Anula la selección de ese, poco, deseleccione todo y
último por aquí. Ahora, voy a usar
una elipse para esto. Da click en mi rectángulo, baja
a la elipse, y sacaremos
una elipse aquí. redimensionaremos y lo
moveremos a su posición. Entonces lo moveré
duplicándolo. Sostén Alt para duplicarlo, y luego solo
escalaremos esta elipse hacia abajo para que encaje
ahí. También aquí arriba. Tenemos dos elipses, así que los arrastraremos en su lugar. Duplicar la forma usando alt. Sólo escalar esto. Estoy sosteniendo la tecla Alt
para escalar desde el centro. Y ahora lo que podemos hacer es
usar nuestro objeto o editar copia. Y luego iremos a editar, pegar al
frente, crear una nueva forma. Entonces voy a usar mi tecla
alt para escalar esto hacia abajo. Al igual que así. Voy a
moverla un poco. Ahora lo que podemos hacer es empezar a
colorear esto un poco. Ahora no hemos pasado el color, así que vamos a usar los colores blanco y
negro. Así que utilicemos nuestro defecto. Y lo que voy a hacer es usar un relleno de negro y
un trazo de ninguno. No necesito un trazo y
llene esta forma aquí. También usaré un relleno, pero esta vez
va a ser blanco y un trazo de negro. Voy a bombear un poco estos
golpes. Se puede ver así. Ahora lo que queremos hacer aquí
es conectar todas estas formas. Entonces lo que podemos hacer
es seleccionarlos a todos. Vamos a seleccionar todo. Simplemente pulsando y arrastrando de
ella con la herramienta de selección. Utilizamos nuestra confiable herramienta de constructores de
formas antiguas para conectar todas las formas hacia arriba. Sólo estamos click una vez
en esta área aquí. Haga clic una vez en esta área, y una vez en esta área. Ahora lo que voy a hacer es usar mi herramienta de selección
y se puede ver que las áreas superpuestas
se han cortado para que
pueda eliminarlas. Dejaremos esa y tenemos una forma dando
vueltas por ahí. También voy a arreglar
esta pequeña área aquí. Seleccionaré esos
dos círculos ahí. Y si no queremos usar y venir aquí y hacer clic en
la herramienta constructor de formas. También puede presionar Shift
M en el teclado. Entonces conectaremos
ese TD, así. Presiona V en el teclado
para tu herramienta de selección. Entonces podemos seleccionar todo. Y voy a usar el
cuentagotas una vez más y solo subir y seleccionar
esta forma aquí. Ahora se puede ver
algunas cosas que han salido mal al hacer eso. Añadir pequeñas líneas
aquí han desaparecido. Y esa es la jerarquía de capas. Entonces si abrimos nuestras capas, puedes ver estas
pequeñas vainas aquí. Detrás de esta forma aquí
que hemos seleccionado. Simplemente anule la selección de todo, seleccione esa forma, haga clic derecho en ella. Y podemos arreglarlo. Y podemos enviarlo a la parte de atrás. Si volvemos a
nuestra herramienta de curvatura, se
puede decir que
podemos ver todos los puntos aquí que podemos editar. Quiero mostrarte algunas
cosas para terminar esta lección seleccionando un punto y eliminándolo
con la herramienta de curvatura, podemos deshacernos del
punto que es súper práctico para limpiar líneas. A menos que puntos que tengamos, menos errores que
tendrán aquí estos dos puntos, probablemente los puntos más
necesarios eliminarán uno de esos. Y se puede ver, lo
limpia un poco. Dejaremos estas líneas aquí y dejaremos todo eso.
Se puede ver ahí. Hemos creado la mano tan fácil en la sección Primeros pasos. Por último, es posible que quieras crear un fondo como lo hice en
la puesta en marcha, y son solo dos elipses. Simplemente sacaremos uno,
duplicado un poco. En este caso, voy
a usar la herramienta pluma. Es un poco
más efectivo. Y lo que podemos hacer es simplemente dibujar una línea recta
hacia abajo así. Y crea bonita
caja grande a través de todos ellos. Entonces podemos volver a nuestra herramienta de selección,
seleccionar todo, y usar la herramienta
constructor de formas para conectar cosas que
conectarán todo eso. Lo que puedo hacer es seleccionar
todo lo que les dio mis propiedades en grupo. Arrástralo a su lugar. Seleccionaremos toda la mano
y agruparemos esa. Arrástralo hacia arriba, luego haremos
clic derecho sobre él, arreglarlo, y lo llevaremos
al frente. Ahí vas. Ahora podemos ir a mi panel Capas y ocultar esa capa de fondo. Y se puede ver que hemos creado una bonita mano con un botón usando
la herramienta de curvatura. Muy bien, te
veré en la próxima lección.
7. Cómo usar la herramienta de bolígrafo: En esta lección, te
mostraré cómo usar la herramienta pluma en
Adobe Illustrator. Ahora la herramienta pluma es una
de las herramientas más utilizadas, y es una de
esas herramientas que puede ser un poco difícil de dominar. Ahora te enseñaré los fundamentos de la herramienta pluma en esta lección. Pero si quieres mejorar
tus habilidades de la herramienta Pluma, sí
tengo otro curso aquí en Skillshare que
te enseñará a dominar la herramienta pluma. Y pasaremos por algunas técnicas
realmente avanzadas para crear vainas realmente bonitas. Lo que voy a hacer es
bajar a la herramienta pluma aquí, es P en el teclado. Si recuerdas el atajo. Lo que vamos a hacer es empezar en estos trabajando en layout. Y acercaremos aquí. Un pequeño truco con zoom, en, que aún no he enseñado. Fácil si mantiene presionada la tecla Alt u Option y tienes un
mouse con una rueda de desplazamiento. Puedes acercar y alejar usando la
rueda de desplazamiento del ratón. Si mantiene pulsado Alt y empuja la rueda de desplazamiento
hacia adelante, se hace zoom. Y cuando tire de la rueda de
desplazamiento
hacia ti, usa las matemáticas. Yo sí entiendo que podría
ser difícil hacerlo encendido, digamos una laptop o una Mac que
no tiene rueda de desplazamiento, hay
que usar las teclas
convencionales Control plus y menos. O podríamos usar la herramienta de zoom y hacer clic y
arrastrar a áreas como esta. Volvamos a la herramienta pluma. Acercar y
vamos a empezar aquí. Lo primero que estoy revisando
son mis muestras. Si acabo de cambiarme mis
muestras para que mi trazo sea negro y mi favorito no
sea más que
al revés. Queremos que el trazo sea negro. Ahora estamos listos para ir
y volver a casa desde
mi panel Propiedades. Echa un vistazo a mi talla de punto. Es uno, estará bien por ahora. Entonces podemos seguir
los puntos de anclaje. Y funciona
igual que la herramienta de curvatura, excepto que no crea
automáticamente curvas. Cuando agregamos un punto, solo
crea una línea recta. Cuando agreguemos un segundo, verás
que sigue creando una línea recta. Podemos bajar aquí. Puedo volver arriba. Y después para cerrarlo, se
puede decir que
esta herramienta que la
hemos convertido en
un pequeño círculo, este pequeño círculo
junto a nuestra Herramienta Pluma. Eso significa que estamos
cerrando la forma. Ahora esta es una forma completa. Lo que podemos hacer ahora es pasar
a una ventaja más complicada. Vamos a usar la herramienta pluma. Hacemos click y dibujamos
las líneas rectas. Ahora lo que vamos a hacer aquí es
que solo pasaremos directamente por aquí y pasaremos eso. Y dibujaremos esta pequeña
sección como forma separada. Ahora vamos a venir aquí y
lo que queremos hacer es trazar un punto al
inicio de la curva. Pero sin dejar ir, queremos hacer click y arrastrar. Y podemos sostener la tecla
Shift para apretar
nuestro punto de anclaje o un mango. Lo que estamos haciendo es
arrastrar un mango aquí. Y estamos sosteniendo
la tecla Shift para ajustar el mango a una horizontal. Y sólo vamos a
arrastrarlo hasta aquí. Y podemos ajustar estos encendedor. Vamos a bajar hasta el fondo aquí. Queremos conseguir la
parte inferior más punto. Daremos clic y arrastraremos en la dirección que
queremos guiar. Siguiente. Vamos a
arrastrarlo y
verás que falta
por completo la línea. Camino queríamos que se fuera.
Tenemos que editar este mango. Aquí es donde entran algunos
atajos y hace que sea mucho
más fácil usar la herramienta pluma. Presiona la tecla Alt o
Opción en un Mac. Trae esta pequeña herramienta. Esto nos permite editar manijas. Podemos venir aquí y agarrar
este pequeño círculo aquí. Podemos editar este mango y
podemos arrastrar esto hacia adelante. Y luego podemos usar nuestra tecla
ALT y bajar aquí y ajustar esto. Y cuando terminamos,
podemos soltarlo. Ahora podemos volver aquí arriba y seguir adelante con ese camino. Vamos a usar la tecla alt de
nuevo para editar este mango. La mayor parte de la celebración
Turno para chasquearlo. Podemos seguir adelante. Ahora. Queremos
bajar al fondo de aquí y arrastrarlo por la dirección
opuesta, opuesta. Esta vez, vamos por ese camino. Y ahora seguiremos adelante. Entonces podemos usar la tecla alt una
vez más para editar ese manejador. Ajusta los mangos para que
el más completo sea la curva. Volvamos aquí arriba. Haga clic en la esquina. Usa la barra espaciadora para pan y ven todo el camino hasta la parte superior y
haz que sea una forma cerrada. Ahora podemos trabajar en
este poquito aquí. Lo que vamos a
hacer es simplemente hacer clic una vez, ven por aquí. Haga clic una vez. Y voy a ir
hasta el fondo aquí. Sólo hazlo bonita curva grande. Queremos tirar de
nuevo este punto al final
porque como se puede ver, esta guía es tirachinas colgando
por ahí haciendo estas grandes. Usamos el bien para
tirar de eso de nuevo. Simplemente mantén presionado Alt,
arrástralo todo el camino de vuelta hasta que esté en
el punto de anclaje, que es esa caja cuadrada. Bajemos
aquí, pinchemos una vez, e iremos hasta aquí. Voy a dibujar
éste en un ángulo. Ya terminamos después de eso, todavía. Puedes hacerlo bien
y luego dejarlo negro. Por lo que ahora podemos usar la herramienta de selección
S, seleccionar todo, y usar el Buscatrazos en el panel
Propiedades, y simplemente presionar Unite. Y eso unirá
las dos formas. Básicamente funciona
igual que Pathfinder. Al unir todas las formas
que se seleccionan. Es hora de ir a terminar. La última carta. Haremos lo mismo aquí. Ven por aquí. Agregar dos asas arrastrará este mango de nuevo ahí porque va a
ser una línea recta. Vendrá todo el camino hacia abajo que
tenía justo antes de la curva. Bueno, éste, voy
a usar Control Z para volver y
voy a arrastrar hacia abajo, quiero iniciar estas curvas. Puedo ir algo así. Para detener la curva. Queremos volver a arrastrar
este punto. Lo que voy a hacer
aquí es que quizá no, tal vez necesite ese punto aquí. Si agarro la
tecla Alt y arrastre eso, acabo de estudiar eso
para que pueda volver atrás y arrastrar ese mango
todo el camino alrededor. Quiero bajar aquí
y arrastrar por aquí. Puede utilizar este mango. Aquí. Solo estoy sosteniendo la
tecla Alt para ajustar el mango. Volvamos aquí. Agrega un punto ahí. Bueno, esto manejó
de nuevo y continúa alrededor. Ahora esto tomará un
poco de tiempo acostumbrarse a trabajar como usar. No es la herramienta más fácil de alinear. Muy bien, sólo
voy a hacer clic en este punto y
bajar directamente a través de esa manera.
Y recto hacia arriba. Ahora voy a
hacer lo mismo aquí. Arrastrando los puntos, arrastre un puntero
así. Ven por aquí. De vuelta en. Refuerzos, ¿verdad? Una última cosa,
se puede ver que hay un asa volando por un costado. Lo que vamos a
necesitar hacer para editar ese mango y arrastrar
ese hola vuelvo a entrar. Eso se conecta. Entonces lo que vamos a hacer,
selecciona estas dos formas. Presione la herramienta constructor de formas y simplemente haga clic una vez
en la forma aquí. Y eso uniría
las dos formas. Unas cositas aquí arriba. Hay un rodaje de RV. Entonces eso es causado
por el camino aquí. Así que utilicemos nuestra herramienta de selección
directa. Y es causado por este
mango que va más allá del camino, podemos usar nuestra herramienta de
selección directa para tirar ese mango de nuevo
al punto ANC allí. Ahora lo que podemos hacer es
seleccionar estas tres formas. Estamos usando nuestra herramienta de selección, luego solo sujetando Mayús y arrastrando sobre
esas tres formas. Simplemente cambiando el campo
con la huelga una vez kin. Y entonces lo tienes.
Vamos a nuestro panel Capas. Desbloquea la capa de ilustraciones. Podemos esconderlo. Queremos un inodoro abierto. Muéstralo. Y solo queremos ocultar el grupo superior que ocultará todas las guías para
estas obras de arte. Lo tienes. Así es como usar la
herramienta pluma en Adobe Illustrator. Pasemos a
la siguiente lección.
8. Uso de color en Adobe Illustrator: Muy bien, En esta lección
vamos a echar un
vistazo al uso del color dentro de
Adobe Illustrator. Ahora no voy a ir demasiado
en profundidad con esta foto. Explica por qué abrimos el panel de color y lo
colocamos aquí abajo. También te explicaré
cómo usar muestras y colores dentro de Illustrator. Lo que puedes hacer es abrir, trabajar, dar seguimiento por ocho. No te preocupes por
el latido
completado al final de mi nombre de archivo. Simplemente significa que este
es un archivo en el que estoy trabajando. Puedes acceder a los
archivos terminados si lo deseas, pero abre el que no haya
finalizado al final. Y será exactamente
como es en este momento. Ahora lo siguiente que me
gustaría que hicieras es abrir el panel Muestras. Podemos golpear hasta ventana,
abajo a Muestras, y todo está en orden del alfabeto para que lo
puedas encontrar en S. Entonces vamos, hemos
abierto muestras. Ahora mi
panel de muestras se ve ligeramente diferente a cómo se verá el
tuyo. Básicamente, todo esto
cambió es si entramos en este pequeño menú de hamburguesas
aquí es que he seleccionado la vista en miniatura grande desde la pequeña
vista en miniatura que vamos a sólo para que pueda ver los
colores un poco más fácil. Muy bien,
lo siguiente que me
gustaría mostrarles es que
podemos añadir y quitar colores. Ahora deberías tener los mismos
colores aquí que yo, pero los tuyos podrían ser
diferentes
dependiendo del documento en el que
estés trabajando. Y viene de los presets que miramos al inicio aquí. Si escojo un preset diferente, vamos al arte y la ilustración
y crear un documento. Se puede ver que los
colores se han cambiado. Hay mucho
más brillante que lo que tenía. Para que podamos cerrar eso. Por lo que depende del
documento y podemos guardar estas muestras en
un documento de Illustrator. Entonces si pasamos este
documento a alguien más, tienen todos los
colores que necesitan. Entonces lo que voy a hacer
es añadir todos los colores de este documento a
aquí como grupo. Lo que puedo hacer es
seleccionar todos los colores solo hacer clic y
arrastrarlos a través de todos ellos. O puedes presionar
Control o Comando I en el teclado
simplemente significaría Seleccionar. Todo lo que podemos hacer es bajar
a la parte inferior aquí de su panel de muestras y
simplemente golpear nuevo grupo de colores. Entonces lo que vamos a
hacer aquí es el nombre. Voy a
dejarlo color grupo uno. Y vamos a
ir Obra de Arte Seleccionada. Y también vamos a
desmarcar el proceso global. Ahora el proceso global simplemente básicamente significa
que se pueden editar los colores más claros y
cambiaría los colores
dentro del documento. Vamos a golpear. Ok. Y tienen
todos los colores se han añadido a tu panel de
muestras. Ahora lo que podemos hacer es dar click en las otras muestras
y simplemente ser ellas. Puede seleccionar todo el
grupo haciendo clic en la carpeta de la izquierda y simplemente golpeándolos
abajo abajo aquí. Y también puedes seleccionarlos haciendo clic
en el primero, sosteniendo Mayús y haciendo
clic en el último que quieras
eliminar y luego
construirlo así. Verás que ocurrimos
en Era mientras hice eso, lo que pasó fue cuando
seleccioné esas muestras, todas las muestras,
seleccioné un color de relleno. Es necesario asegurarse de
que no tiene ningún color seleccionado cuando está
eliminando muestras. Hagámoslo ahora sin
nada seleccionado y
no agregaremos los
contornos blancos a todo. Quiero mostrarte
por qué abrí el panel de color y
es un poco
un error dentro de Adobe Illustrator. Todo es cuando cambio las muestras aquí del campo a
la cigüeña, en
realidad
abre el panel de color. Entonces si saco este
panel y
lo cierro y luego cambio el trazo, lo abre hasta
donde lo tuve por última vez. Es un poco
molesto si solo quieres editar los colores
aquí y lo cambio. Y luego quiero
editar el color. Pero cada vez que este
panel está apareciendo y en realidad en este
momento no
hay forma de arreglarlo. Lo que hago es simplemente atracar dentro Illustrator para que siempre esté
abierto y fuera del camino. Cuando cambio, todavía
cambia por aquí
porque está cambiando los valores
en mi selector RGB. Pero no se interpone en mi camino abriéndose frente
a todo lo demás. De acuerdo, lo último de lo
que quería hablar es si alguna de estas
opciones se oculta. Entonces si estas opciones están ocultas, puedes hacer doble clic en
el color del panel. Y esto funciona para que
otros paneles
también tengan múltiples opciones. Simplemente puedes hacer doble clic
en el nombre. Y te agregará y
te mostrará todas las opciones. También puedes usar este
pequeño menú de hamburguesas para hacer clic en Ocultar opciones. Ahora hay otra
forma de seleccionar colores, y me gusta usar HSB. Es sólo una forma de
mirar los colores. Entonces la
saturación y el brillo del tono de éste. Podemos seleccionar una
forma diferente de seleccionar colores, RGB, rojo, verde y azul. Entonces estamos editando los valores rojo, verde y azul. Podemos cambiar eso
para trabajar con cualquier
archivo en el que estemos trabajando. Tal vez estamos trabajando con CMYK. Por lo que queremos utilizar los selectores de color
CMYK. Muy bien, por último,
solo quiero
repasar rápidamente los colores globales. Te darás cuenta que cuando agregamos estas dos muestras panel, agregamos todos estos colores. Pero si hago doble clic
en este color, entra y editarlo. Y golpeó Okay, se puede
ver que no pasa nada. Lo cambié para leer. No pasa nada en mi documento. Si deshago ese control Z, doble clic en él ahora, global, presiona Preview o desplazado hacia un costado
y cambio mis colores. Se puede decir que aún
no pasa nada. Y eso es porque
cuando lo cambié a global no estaba conectado
a este documento. Si selecciono todo y
luego lo agrego a las muestras. Ahora, iremos al Grupo Color dos y convertiremos el
proceso a global. Golpe. De acuerdo, se puede ver que todos
los colores globales tienen un triángulo pequeño
en la esquina inferior. Ahora lo que puedo hacer
es deseleccionarlo. Y digamos este
pequeño buzón aquí. Vamos a hacer doble clic en él. Hagamos esto. Cambiemos el modo
de color, HSB. Y vamos a entrar en el amarillo. Haz de este pequeño
buzón amarillo. Hit Preview. Ahí vas. La caja de arena está
cambiando demasiado amarilla. Otra cosa a señalar
con esta cajita es la razón por la que
estos latidos aquí en las muestras es porque son capa
gris que se han
cambiado para ser opacos. Entonces si vamos a nuestro panel de
propiedades aquí, se
puede ver que este es 29% y éste es cincuenta y seis por ciento. Vamos a alejar Control
o Comando Zero para llenar el tablero de arte
en la pantalla. Lo que podemos hacer es que también puedes usar esto para organizar
tus colores. Entonces si quisiéramos cambiar este fondo
a un color diferente, podemos seleccionar el
fondo y hacer click en el color que nos
gustaría. Al igual. Para que pueda ir Control
Z para deshacer eso. Eso es todo por el color. Sugiere que juegues
con esto, agregando muestras. También puedes agregar
colores haciendo clic y arrastrándolos desde
el bit de muestras. Entonces arrástrelos así. Ahí vas. Puedes escoger cualquiera de los
colores que te gusten. Escojamos un color de aquí. Simplemente puedes arrastrarlo
directamente así. Se puede ver que los globales cambiarán automáticamente a global
porque ya están en las muestras. Eliminemos eso. Muy bien, te sugiero
que tengas un poco de gramo de jugador con
los colores globales. Cambia los colores de
este documento aquí, y juega con el uso de
colores entra aquí, cambia los colores de aquí
usando el selector de color. También puede utilizar el
panel Propiedades para cambiar los colores haciendo clic en el Relleno
debajo de la apariencia. Y la huelga bajo. El aspecto
también podría cambiar los
colores de relleno por aquí. Muy bien, eso es todo
por esta lección. Y te veré
en la siguiente.
9. Herramienta de pinceles para texturizar formas en Illustrator: De acuerdo, en esta lección vamos a echar
un vistazo a cómo usar pinceles dentro de
Adobe Illustrator. Ahora sólo voy a estar
hablando de la herramienta de pincel. Y en este ejemplo
particularmente, solo estar mirando
texturizando dentro de formas. Y así vamos a trabajar un poco con máscaras de
recorte. No tienes que
entenderlos demasiado. Eso puede ser un
poco complicado. Pero ojalá pueda romperlo realmente simple para ustedes chicos. Básicamente. Si ves este episodio
un par de veces, deberías poder comprender
cómo usar pinceles y máscaras de recorte. Ahora, el ilustrador puede hacer máscaras de
recorte
automáticamente con los pinceles con una característica
llamada dibujar en el interior. Si abres el archivo nueve, pincha dentro de Adobe Illustrator, puedes acceder a este archivo aquí. Pequeño matón aquí. Tenemos unos
pinceles texturizados sentados sobre el costado. Solo asegúrate de que el
fondo esté bloqueado. No deberías
poder seleccionarlo. Eso va a estar bien. Ahora estos pinceles Seward
se cargan automáticamente en Illustrator. Ahora tengo este bar arriba aquí
en la parte superior que tal vez hayas notado en
la última lección. Y se llama barra de control. Y me he encendido porque
lo uso personalmente. Es una característica automática a Illustrator que se
ha quitado desde que lanzaron
el nuevo diseño del diseño esencial. Lo que puedes hacer para mostrarlo es ir ventana y simplemente dar click
en el control. Todo lo que aparece en la barra de control aparece
en el panel de propiedades. En este momento es diferente porque no
tenemos
nada seleccionado. Echemos un vistazo a
cómo usar un pincel. Ahora la herramienta pincel está aquí abajo. Se ve así. Y también es B en el teclado. Si agarramos la herramienta pincel, lo que podemos hacer es que hayamos
seleccionado un pincel, se llama
pincel de dispersión número seis. Y el tuyo podría estar
en esto por defecto, puedes cambiar el tipo de pincel en el panel Propiedades y
también ayudando al control. Y sólo vamos a desplazar hacia
abajo y recoger el número seis. Tengo algunos otros
pinceles que tal vez no tengas
como el número siete. No creo que haya incluido
ese en el expediente. Con ese pincel seleccionado. Lo que puedes hacer
es empezar a dibujar. Y como se puede ver, simplemente dibuja cualquier color que sea el
color del trazo. Entonces si seleccionamos el
trazo y escogemos un marrón, dibujará puntos marrones. También podemos alterar el tamaño
del pincel ajustando
el tamaño del punto. Se puede ver que
es bonito como pequeño. Se puede ver que el
pincel crea vainas. Dentro de Illustrator. Simplemente puedes hacer clic
y arrastrar y dibujar. Y crea un camino
con muchos puntos. Ahora podemos editar cuántos
puntos nos gustaría crear haciendo doble clic en el pincel y cambiando la fidelidad. Entonces si lo cambiamos hasta suavizar, podemos añadir una k Puedes ver ahí que es realmente suave
y taladra unas líneas suaves. Debido a que estamos usando
un pincel de dispersión, realmente no
tenemos que
preocuparnos por lo suaves que son las líneas. Se pueden deshacer errores mediante el uso
de Control o Comando, dijo. Muy bien, pasemos a su lugar y empecemos a trabajar
con algunas de estas formas. Ahora, voy a usar
atajos en esta lección ya que hará que este
proceso sea mucho más rápido y mucho más fácil. Lo que podemos hacer es presionar V en el teclado para
la herramienta de selección. Voy a empezar por la parte superior
y seleccionar el pelo de este hombre. Entonces bajo las muestras de
nuestra barra de herramientas sobre el lateral, podemos cambiar el modo de dibujo. Tenemos cajón normal, que dibuja en la parte superior de las formas. Tenemos empate detrás, que
dibuja detrás de todo. Nos han dibujado por dentro. Vamos a
seleccionar, Dibujar dentro. Seleccione eso. Entonces podemos usar nuestro pincel. Pulsemos B en el
teclado, pincel completo, y podemos escoger el color
más oscuro como una huelga. También queremos escoger un pincel de
dispersión de algún tipo. Escojamos el número cinco. Empecemos a dibujar alrededor. Se puede ver ahí,
cuando dibujemos nuestro odio, pincel de
dispersión creará marca y dibujará usando
unos pinceles de dispersión. Podemos cambiar nuestro pincel
usando el panel
de control aquí en las propiedades
y seguir dibujando. Y puedo usar estos
para sombrear a mi hombre. Esto creará
una máscara de recorte. Si vuelvo a mi herramienta de
selección, haga clic en desactivado y vuelva a cambiar mi modo de
dibujo a la normalidad. Verás que esas
casillas se han ido. Se puede ver que
todavía dan forma por aquí. Esta vainas por aquí, pero están dentro de esta capa aquí. Si selecciono la capa, puedes decir que si
hago clic derecho
dice Release Clipping Mask. También podemos hacer doble clic en
la máscara de recorte para
abrirla y editar algunas de
estas partes dentro de aquí. Todo dentro
de la máscara de recorte está recortado a la forma original. Vamos a desseleccionar todo. Si selecciono esta forma y voy
a dibujar al interior una vez más, se
puede ver que no podemos
seleccionar esa opción. Y eso es porque
ha creado la máscara de recorte. Y no necesitamos volver a
usar la opción. Podemos entrar en una máscara de recorte, luego usar ese pincel para
dibujar más patrones. Saltar de nuevo,
y vamos a elegir una, otro exigente como es. Y iremos a dibujar por dentro. Aquí abajo. Dibuja en el interior. Se puede ver
que estos pequeños rotuladores aparecen y que solo muestra el área o la forma que
estamos dibujando en su interior. Esta es la única forma que podemos dibujar
en el interior en este momento. Pulsemos B en mi teclado
para recoger nuestros pinceles. Vamos a usar el
cepillo de dispersión número ocho. Seleccionemos un nuevo color. Selecciona tal vez mucho uno. Podemos empezar a usar el color. Ahí vas. Podemos deshacer usando el
control o comando XID, dibujando más así. Podemos dibujar de este lado. Y se puede ver
ahí que podemos hacer algunas texturas rápidas. Seleccionemos la siguiente forma. Vuelve a dibujar normal
y dibujar dentro de nuevo. Y luego te pueden
agarrar la forma del cuello. Y puedo seguir
dibujando así. Pulsemos V en el teclado. Salir sobre dibujar dentro del modo. Iremos a la nariz, lo
cambiaremos para dibujar
por dentro y continuaremos. Si no entendías
cómo funciona esto, sugeriría ver de
nuevo
inicio de este tutorial y obtendrás una mejor
comprensión de lo que está pasando. Voy a seguir adelante y
terminar durante este hombre. Muy bien, ahí lo tienes. Juega un poco con
esto, diviértete con él. A lo mejor toma algunas malas hierbas
y colores locos, agrégalos a tus muestras y sombra en algunos colores
diferentes. Puedes utilizar cualquiera
de estos cepillos. Sus pinceles deben cargarse
automáticamente con el documento y
se puede jugar con los
pinceles usando textura. También puedes usar la tecnología. También puedes usar pinceles
para crear otras obras de arte. Pero para este ejemplo, voy a
mantenerlo realmente simple y mantenerlo a texturizar. Vuelve a ver este video si es necesario. Y pasaremos a la siguiente
lección. Te veré ahí.
10. Cómo usar la herramienta de tipo: En esta lección,
vamos a echar un
vistazo rápido a la herramienta de tipo en Illustrator. utiliza la herramienta de tipo
febrero e ilustrador. Y hace lo que
dice crea tipo. Las herramientas apretadas
aquí abajo, es la gran T, y también puedes presionar
T en el teclado. Vamos a hacer clic en él. Lo que pasa ahora puedes ver un cuadro de texto o nuestro
cursor ha cambiado. Y se puede ver que
nuestras propiedades
del lado también han cambiado para incluir un personaje
y yo párrafo. Ahora si quieres más opciones, ya sea
puedes ir a los
tres puntos abajo, aquí, y también abajo
del panel de párrafo. O puedes ir a buscar estos
paneles en las ventanas. Entonces iremos a Window
abajo al personaje. Debería estar aquí
en algún lugar por aquí abajo y escribir el tipo Panel de caracteres. Simplemente haga clic en eso y
se levantará el párrafo
Carácter y
el panel de tipo abierto. Voy a atracar este panel simplemente arrastrándolo y
hablando
por abajo en la parte inferior. Se puede ver que algunas opciones
un oculto para que podamos hacer lo
mismo que lo que hicimos
con el panel de color. Simplemente haz doble clic en él y
estaba mostrando las opciones. También podemos entrar en el menú de hamburguesas y venir
aquí, Mostrar opciones. Lo que puedo hacer para usar la herramienta de
tipo es simplemente hacer clic una vez y pone
a cabo Loren Ipsum. Por defecto, esto
es realmente útil. Entonces podemos buscar una
fuente de nuestra elección. Ahora estoy tratando de
pensar en una fuente que estaría en tu software. O puede buscar una fuente
usando el menú desplegable. Si solo haces clic en la flecha, puedes ver que tenemos
unas fuentes de arrendamiento que podemos usar ahora tengo
algunas fuentes que se
cargan desde las fuentes de Adobe. Sólo voy a escoger
uno, digamos Garamond. Aquí se puede ver que
podemos cambiar el tipo. Para que podamos cambiar
esto a tipografía. Y puedes ver aquí que
podemos seleccionar el tipo. Ahora, ahora mismo es bastante pequeño. Podemos cambiar el tamaño del punto o el
tamaño de la fuente. Simplemente podemos dejar de
usar los errores. Si sostengo turno y hago
clic en la parte superior, subirá por
incrementos de diez. Ahora hay algunas
otras opciones aquí. Podemos cambiar el estilo de fuente. Podemos cambiar nuestra cursiva, negrita. Estoy seguro de que has usado
un procesamiento de palabras. Estoy seguro de que has estado
seguro que has usado una plataforma de procesamiento o software como Microsoft Word, y puedes hacer todo
ese tipo de edición. Tenemos un montón de
otras opciones
aquí abajo ahora no vamos
a pasar por todas ellas, pero vamos a pasar por
estas cuatro aquí. Lo que puedes hacer aquí es
este es el dejar. Es un espacio entre
dos líneas de texto. En este momento no
tenemos dos líneas, así que volveremos a esa. Tenemos el espaciado
entre dos letras. Este es el espaciado individual entre la P y la altura h. Simplemente
puedo editar eso
poniendo mi cursor
entre los dos. Si sostengo Shift y lo hago, se
puede ver que podemos cambiar el espaciado entre
dos letras, así. También podemos hacer clic
y arrastrar para seleccionar todo el texto y cambiar esto
algo así como óptico. Esto significa que el ilustrador
trabajará el espaciado entre él y tratará de averiguar
lo que se ve mejor. Podemos pasar al seguimiento. Y ese es el espaciamiento
entre cada letra. Toma en cuenta el kerning y el
espacio entre cada letra y luego pone especia
extra entre las letras, las
extenderá muy lejos. La otra forma de dibujar el
tipo es hacer clic y arrastrar. Esto básicamente
creará un cuadro de texto. Bajemos nuestro tamaño
a algo así como 24. Y quiero
mostrarte una opción rápida. Puedes ir a escribir y puedes ir rellenando con texto de marcador de posición. Se puede decir que
lo llenamos de Loren Ipsum. Y aquí viene en el dejar. Dejar es el espacio
entre las letras. Solo queremos hacer click sobre
esto y ponerlo a pedido. Si seleccionamos todo ese tipo, si acabo de hacer clic una vez
en este cuadro de texto, presionamos control a,
seleccionamos todo ese tipo, entonces podemos cambiarlo a auto. Ahora con todo lo seleccionado, puedo ir a escribir y rellenar con placeholder que se
llenará de más texto. Gira esto un poco hacia abajo. Lo último que
quería mostrarte con tipo es que puede funcionar como
una máscara de recorte, como hicimos en la última lección. Puedes crear
mezquitas de recorte por tu cuenta. Escojamos una fuente,
algo así como Arial. Todo el mundo debería tener esa. Y bajaremos
y escogeremos la fuente Arial Black,
realmente gruesa. También podríamos convertir
esto las dos capitales. Bajemos aquí
y escogemos el TT, las dos grandes T's
y vamos todas las gorras. Al igual que así. Lo que puedo hacer ahora es
arrastrar este texto por aquí, seleccionar ambos, clic derecho en él e ir a
hacer máscara de recorte. Y la capa detrás de ella, ese gran Leo ha creado
una máscara de recorte. Ahora tengo algunas garrapatas de lujo. Seleccionemos ambos cuadros
de texto. Y lo que podemos hacer para editar la máscara de recorte es
hacer doble clic sobre ella. Y básicamente este es el modo aislado flotar
aquí mismo en esta área. Puedo cambiar el tamaño de ese
bonito gradiente grande y puedo moverlo alrededor de
algunos colores más agradables. Y se puede ver ahí que
podemos editar fácilmente tipo. Juega con esta herramienta. hay montones de
otras opciones Aquíhay montones de
otras opcionesque pueden ser un
poco complicadas. Por ahora, no
vamos a entrar en ellos. Puedes
probar esto por ti mismo. Y pasaremos
a la siguiente lección. Te veré ahí.
11. Transformaciones básicas en Illustrator: En esta lección,
vamos a echar un vistazo las transformaciones
básicas
y cómo hacer alguna edición básica de formas usando algunas de las transformaciones que
Illustrator tiene dos Alpha, vamos a ser utilizando
las transformaciones tanto en el panel de propiedades
cuando seleccionamos una forma. Y
aquí hay múltiples que
vamos a mirar. Y también vamos a ver las opciones en el clic derecho. Aquí se puede ver que tenemos algunas transformaciones
en el cerro. Entonces empecemos con
el panel de propiedades. Y esto también forma parte
del panel de transformación. Para que podamos abrir eso
a una transformación de ventana. Y se puede decir que
tenemos un montón de opciones. Ahora hay algo
llamado
formas en vivo dentro de Illustrator, y vamos a echar un
vistazo a eso de
aquí cuando creamos algunas formas. Pero por ahora vamos
a echar un vistazo a esto. Este es el valor
y XM y por lo general está a
la esquina superior aquí. Lo que pasa es si selecciono esta forma por aquí
y arrastra esto allá hasta la esquina de estos puntos para que puedas
ver el marcador y subir 960. Y esta es una, un 169 sobre la Y, que es la muy cool. Si deshago eso. Se puede decir que también
tenemos el ancho y la
altura de la forma. Y actualmente está vinculado. Si rompemos ese vínculo, significa que podemos cambiarlos por separado sin
mantener las proporciones. Podemos usar un turno y teclas de flecha arriba y
abajo para editarlo. También podemos poner en un número
particular. Si deshago eso. Otra cosa que
podemos hacer es
vincularlos y usar un poco
de matemáticas aquí. Entonces podríamos decir plus, digamos, más diez, más diez píxeles. Podríamos decir que quiero
dividirlo por tres. Podríamos poner en alguna masa. También podemos utilizar los
asteriscos para los tiempos. Podríamos decir pinzas para y hacer
algunas matemáticas dentro de esa caja. El siguiente es la rotación. Es bastante sencillo. Podemos poner en el valor aquí. También podemos escoger
algunos bastante tontos. Este de aquí es el cizallamiento. Si echamos un vistazo a este
más ajustes para cizallar, pero es sólo la cantidad
de cizallamiento que
tenemos en un eje horizontal, que básicamente es sólo
deformar la forma. Echaremos un vistazo a
eso en un segundo. Veamos si ese
restablecimiento de nuevo a 0. Hablemos de eso. Deshazlo todo el camino a una
nube es normal de nuevo. También tenemos estas otras
opciones aquí abajo, que es escalar esquinas y también Escalar trazos y efectos. Echemos un vistazo a algunas
de las otras opciones de forma. Echemos un vistazo a la plaza. Por lo que la plaza ha
traído todo un montón de opciones. Esto también es todas estas opciones, nítidas en el
panel de propiedades también. Para que puedas acceder a ella aquí. No hay necesidad de abrir
el panel Transformar. Para este video. Lo estoy usando porque se mantiene
abierto mientras trabajo con él. Muy bien, por lo que hay menos opciones aquí. Tenemos el ancho y la
altura del rectángulo. Y también se retrata aquí. También tenemos la rotación aquí dentro de las propiedades del
rectángulo. Una vez más, tenemos una opción de radio de
esquina. Miramos a esta estrella. Podemos cambiar esto individualmente con solo golpear las flechas. También podemos cambiar
el tipo de esquina. Para que podamos cambiarnos, golpearlo un poco, lo siento, y luego cambiarlo
a un borde biselado. Entonces si
acerco, mira eso, es
un borde recto. Y también podemos
vincularlos a todos para que todos se
vean afectados por el mismo equipo. Mantener turno
lo cambiará por incrementos de diez. Una vez más. Esta última opción
aquí quiero mirar. Éste es si restablezco
esto a los colores
predeterminados, por defecto, lo que significa un relleno blanco y una raya negra. Se puede decir que
tenemos esquinas a escala, así que vamos a crear algunos rincones. Lo que podemos hacer es escalar las esquinas
dependiendo del tamaño de la forma. Si desmarque eso,
dirán lo pasa cuando lo escalemos,
golpeamos un límite, y
cuando lo escalemos, hay esquinas se
vuelven realmente pequeñas. Podemos decir, quiero escalar
esquinas. Ahí vas. Escalará las esquinas
con la forma y no
golpeamos ese límite
de la misma creando un círculo. Escalar trazos y efectos. Si echamos un vistazo al tamaño del
punto en este momento, y solo tomamos esto, mira esto cuando lo escalo. Si escalo esto planteado, se
puede decir que está
escalando el trazo hacia arriba. Hay algunos
casos en los que esto es útil, especialmente con opción de efectos. En este curso, en
realidad no miramos los efectos, pero habrá un curso
futuro que
hablaremos todo sobre efectos
dentro de Adobe Illustrator. A veces esta opción
es muy útil cuando estás escalando formas
en un nuevo documento. Y quieres mantener
el tamaño del trazo. Pero la mayoría de las veces
mantengo éste sin control. Vamos a deshacer eso y
volvamos a la normalidad. Ahora círculo tiene algunas
otras opciones. Si dibujo un círculo, tenemos algunas otras opciones aquí, que básicamente
hace un gráfico circular o decir aquí se
llama ángulo pi. También podemos ajustarlo mediante
el uso de los pequeños círculos que
se muestran afuera aquí. Por lo que podemos hacer un gráfico circular muy fácilmente usando estas
mediciones aquí. Usando y cambiando el inicio
y el acabado y los valores, podríamos hacer fácilmente Pac-Man. Vamos a rotarlo. Ahí vas. Pac-man, magenta, amarillo. Lo último que
quería mirar es si nosotros,
vamos a bloquear esta selección de bloqueo de objetos de
capa de fondo. Si quisiéramos voltear
las cosas en este documento, digamos por ejemplo,
este árbol, selecciono este árbol, voy a hacer clic derecho en
él y agruparlo. Queríamos darle la vuelta. Podemos entrar en algunas opciones más aquí bajo la transformación. Podríamos usar el panel de
propiedades aquí, que eso lo voltearía. Es realmente rápido
y muy fácil. Pero también podemos
querer usar algunas de estas opciones
aquí tenemos mudanza. Esto moverá la forma en la
dirección horizontal y vertical que elegimos. Y podemos escoger una
distancia y un ángulo. Así que digamos que queremos
moverlo diez pixeles, pero queremos
moverlo hacia arriba. Por lo que podríamos cambiar
eso a 9090 grados, moverlo recto
hacia arriba en diez píxeles. Esto se vuelve realmente útil. También podríamos decir
que queremos copiarlo. Vamos a deshacer eso. Haga clic con
el botón derecho de nuevo, vaya a Transformar. También tenemos nuestra rotación. Y se puede ver que
tenemos simple rotación. Podemos previsualizarlo y
también podemos copiarlo si queremos. Haz eso. También tenemos las opciones
Reflectan aquí. Se puede decir esto unas cuantas opciones
más aquí. Podemos reflejarlo en un ángulo muy específico
si queríamos. Podríamos copiarlo aquí
también. Tenemos escala. Aquí se puede ver que
podemos escalarlo en un uniforme por porcentajes. No uniforme. Podemos hacerlo realmente amplio. Al igual que normalmente mantenemos las cosas demasiado uniformes
porque no
queremos deformar las formas. Y una vez más, tenemos
las opciones para escalar trazos y efectos y
también escalar las esquinas. La última opción es la cizalla. Esta es la misma que
la opción que teníamos. Puede empujar todo en un
ángulo y realmente estirarlo. Pero tenemos más flexibilidad. En lugar de usar el panel
Transformar, podemos compartir en cualquier
dirección que sintamos. Ahora digamos que queremos
usar la opción duplicada. Otra forma de
hacerlo es moverlo. Por lo que queremos mover esto en
una dirección particular. Digamos en horizontal
queremos moverlo 50 pixeles. Volvamos a cambiarlo a 0, y queremos
moverlo por 50 pixeles. Vamos a copiar. Otra cosa rápida
es la transformación. Nuevamente, fácil de usar el
atajo Control o Comando D. Simplemente iguala eso un montón de veces y se
duplicaría de nuevo, hará la misma
transformación que perdiste la cabeza. Si muevo esto por ahí
y luego presiono Control D, seguirá moviéndose. Si lo muevo mientras sostengo
Alt, lo duplicaré. Y luego al presionar Control
D, lo duplicará. Ten una jugada con algunas
de esas opciones de transformación, y juega con lo mismo. Puedes voltear las cosas. Tal vez podrías voltear el Holoceno y ver
cómo se ve. Y pasar a la siguiente lección.
Te veré por ahí.
12. Exportar para impresión en Adobe Illustrator: Muy bien, En esta lección
echaremos un vistazo a exportación para su impresión
en Adobe Illustrator. Ahora voy a seguir una lista de verificación lista para imprimir
que incluirá en los archivos de ejercicio y que solo se llamará lista de verificación lista para
imprimir. Y solo seré una lista
de chequeos de cosas que debes
revisar al configurar tu
documento para imprimir. Ahora, lo que puedes hacer es abrir el número 12,
exportando para imprimir. Fue, por supuesto que no va a tener
al maestro al final. También quiero
señalar que ahora estoy usando la versión 2022 de
Adobe Illustrator. Entonces mi capa ha cambiado
ligeramente, pero básicamente es solo ventana, el espacio de trabajo esencial
para que puedas restablecerla. Y también he encendido la barra de control
porque la uso un poco justo. Lo primero que tenemos que
mirar es el sangrado de documentos. Queremos asegurarnos de que
hemos añadido algún sangrado en el borde que se recorta
después de que se imprima. Esto simplemente hace que sea más fácil
para la impresora imprimir hasta el
borde del documento. Lo que podemos hacer es ir a File
down to document setup. Por lo que sólo haga clic en eso. Y aquí se puede ver
que tenemos una hemorragia. En Australia, es más
común usar tres molino, pero la impresora puede
indicarle un ajuste diferente, por lo que es posible que necesite usar cinco o diez dependiendo de las preferencias de las
impresoras. Tienes que hablar con la impresora si estás trabajando con ellos. Lo pondré a las tres
por ahora y le pegaré bien. Entonces agregaré esta línea
por el exterior. Entonces lo siguiente que
tengo que hacer es asegurarme que mis antecedentes
salgan a la sangría. Ahora es mejor
configurar el sangrado cuando realmente
estás
configurando el documento. De esa manera ya que puedes empujar
parte de la obra de arte
hacia fuera dentro de la hoja y
trabajar con las sangras. Se puede hacer eso
yendo Archivo Nuevo. Y cuando configuras
el documento aquí, eliges tu preset, lo redimensionas al
tamaño que te gustaría. Y aquí abajo
tenemos la cuchilla y
parecía tamaños puntuales, pero si cambiamos
esto a milímetros, que es lo que uso, puede poner a
ustedes tres molino. Pero por ahora, ya hemos
creado nuestro documento. Entonces lo que voy a hacer ahora es seleccionar esa capa de fondo, solo redimensionarla
al área de sangrado. Sea lo que sea fuera, esta línea negra
terminará siendo cortada, pero imprimirá todo
fuera de la sangría. Ahora sólo tengo la
parte frontal de esta tarjeta. Simplemente mueve esto un poco
hacia abajo, por lo que se ve un poco mejor. Eso también sería una parte trasera a la tarjeta que debería
simplemente incluirse en el mismo documento y también
necesitarían sangrar si se trata de un fondo
blanco. Entonces digamos si es por eso que no necesitarías empujar
el cable hacia esa zona. Lo que vamos a hacer es
dejarlo volver a entrar. Otra cosa que
podría pasar es si el dorso de tu
tarjeta de visita también es rosa, el mismo rosa que este, podrían elegir un papel
rosa en lugar imprimir rosa y eso
ahorrará en costos de impresión. Muy bien,
lo siguiente que tenemos que hacer es organizar las capas. Ahora como ya está más
o menos organizado. Pero si tuviera un frente y una espalda, agruparía el frente y lo
pondría aquí en su propia capa. Sólo voy frente frío. Podrías llamarla
tarjeta de visita desde algo así. De los negocios, dios. Entonces solo crearías una nueva capa y simplemente
seleccionarías la parte posterior. Y podrías presionar
Control o Comando X, y eso lo cortaría y luego Control o Comando F
para pegar en su lugar. Lo siguiente que tenemos
que mirar es cualquier tipo. Si tienes escribiendo
tu documento, pongamos algún tipo hacia fuera. Si tuvieras algún tecleado aquí, que
tendrías en el dorso de la tarjeta, como tus datos. Es necesario delinear esto porque es posible
que esté utilizando una fuente a
la que pueda acceder la impresora. Y sólo puede
crear algunos problemas cuando están imprimiendo o cuando la impresión está abriendo el archivo. Todo lo que haces es
seleccionar todo el tipo que sigue siendo una tipografía. Puedes hacer clic con el botón derecho
y bajar aquí, Crear contornos que se
alternan en nuestro camino, lo
que significa que ya
no se puede editar con la herramienta de tipo aquí. Y significa que es una especie de, no se
puede hacer mucho con
él después de esto y no
se puede volver a darle vuelta al camino, al camino tipo, solo
hay que dejarlo así. Por lo que vale la pena duplicar todo
este archivo. Si necesita un tipo de esquema. Y solo guarda la versión
esbozada también o algo
así. Muy bien, entonces lo que voy
a hacer es eliminar el tipo. Y lo último que
tenemos que hacer es muestras de correo electrónico. Olvidé ventana
abajo a las muestras. Y sólo voy a arrastrar
eso a un costado aquí. Sólo voy a abrir eso. Al igual que así. Lo que queremos hacer es añadir
estos colores a las muestras. Entonces si selecciono esto, solo
puedo añadir eso. También el rosa que encerraría ahí. Y añadir eso. Después vamos, hemos
añadido los colores. Estas son muestras globales, lo que significa que podría terminarlas. Acabamos de agregar los
colores a las muestras. Si tienes otros colores, simplemente elimínalos y solo mantén
los colores que sean necesarios. Sólo lo limpia. Y sobre todo si terminas dando el archivo AI
a la impresora, más probable es que no lo hagas, pero solo pueden ver qué
colores arriba verá un EU. Puedes trabajar con colores
Pantone. Y lo que pasa ahí es que los colores Pantone son
gran biblioteca de colores. Los libros de color de código. Entonces están debajo de aquí. Y escogerías uno de estos. Por lo que podrían ser sólidos codificados. Y te darían
el número del Pantone. Cada fase tiene
un número pantone, 345 c. y puedes
buscar eso aquí arriba. Cualquiera que sea el número que necesites. Te daré los tonos de bolígrafo
que quieres usar. Este rosa, tal vez un
color Pantone que necesites usar, o incluso el negro podría
querer ese Pantone. Y de esa manera, hay que añadir el tono de pan
al documento aquí. Panteones afilados, si
poco difícil de decir ahora. Pero este pequeño punto en el triángulo a
increíblemente difícil de ver, eso solo significa que
es un color mancha. Entonces si hago doble clic en
él o libro color aquí, esto está mostrando que
es un tono de pan, Pantone,
negro neutro, color libro. Si pego bien, eso significa
que es un tono de pan. Por lo que tendríamos que seleccionar todas las formas con
los mismos colores. Simplemente asegúrate de que el pago
a su vez se aplique a eso. Y el rosa, tendrías que encontrar aquí un rosa
que te guste. Lo más probable es
que elijas eso con la impresora. Ahora lo que vamos a hacer
es en realidad exportar esto. Lo que podemos hacer es bajar
Archivo a Guardar como. Y lo voy a guardar
en la versión maestra. Y llamaré a esto la tienda de caramelos
afilados. Simplemente llamaré lista a esta impresión. Lo que podemos hacer ahora es cambiar
el tipo Guardar como a un PDF. Aquí abajo, Adobe PDF. Si tuviera varias
mesas de trabajo y tú
crearías múltiples
documentos ahí. Así que di que si quisieras
también crear diseño para T-Shirt en la misma
en un tablero de arte de diferente tamaño, tendrías que exportarlos
por separado como PDF diferentes. Por lo que puede seleccionar la mesa de trabajo. Pero si tienes dos
hojas de tarjetas de visita, entonces lo que haces es
escoger la misma. Quieres ambas juntas
en el mismo documento. Ahora lo que puedo hacer es golpear Guardar, y eso va a aparecer
con estas opciones aquí, guardar Adobe PDF. Lo primero que
haré en la parte superior es seleccionar los presets de Adobe PDF. Queríamos impresión de la más alta calidad. Lo que puedo hacer aquí abajo está
marcado Ver PDF después de guardar, lo que simplemente significa que abre Adobe Acrobat después de guardarlo. Y queremos bajar aquí, marcas y sangra, sólo
voy a encender
todas las marcas Impresoras. Y entonces lo que podemos ver aquí que tiene todas estas cosas. Entonces hay unas marcas de recorte
estar donde cogieron. Y voy a desactivar la información de la página y las barras de color. Puede que no necesites marcas de
registro, pero sólo voy
a dejarlo ahí. Lo siguiente es lo que vamos a hacer es encender la configuración del sangrado del
documento, que llevará ese tres
molino del documento sangrar. Ahora podemos golpear Guardar PDF. Eso guardará el
PDF y lo exportará. Y luego vamos, este es el documento que usted le
envía, la impresora. Ahora te pueden decir que
apagues todas estas cosas extra. Pero lo que pasa aquí es que
mandas esto a la impresora, lo impriman, y luego lo más probable es imprimir
montones de versiones de esto, aunque lo azulejo, luego
Dakota en las líneas negras. Entonces todo ese extra será
cortado de la ciudad principal, ven con un borde realmente limpio. Muy bien, eso es todo para
exportar para impresión. Voy a incluir este documento
aquí para que lo veas también incluye el archivo
AI ahí. puedas abrir eso
y decir lo que he hecho. Puedes mirar aquí y echar un vistazo a cómo lo he
configurado en las capas y todo. Te lo limpiaré. Y te veré en
la próxima lección.
13. Exportar para la web en Adobe Illustrator: Muy bien, En esta lección te
vamos a mostrar cómo exportar para web. Entonces hay algunas opciones y
las pocas formas de hacerlo. Lo primero que voy a hacer es duplicar aquí la mesa de trabajo. Entonces voy a usar mis datos. Simplemente haga clic en el
nombre en la parte superior, arrástrelo a través y luego mantenga presionado Alt y eso lo
duplicará. Lo que quiero hacer
aquí es exportar. Tenían logotipos como dos versiones
diferentes. Quiero exportar uno
como una versión blanca, cambiará el color a blanco, y uno como versión negra. A lo mejor también quiero
exportar esto como JPEGs. Entonces vamos a empezar
explotándolos como PNGs, lo que significa que el fondo, puede ser transparente si no
hay color allá atrás. Lo que vamos a hacer es ir a presentar. Y hay dos formas de hacerlo. Exportar como exportación para pantallas, esta es otra opción
aquí que te da todo
un montón más
opciones para elegir. Y vamos a repasar eso
al final de la lección. Iremos a Exportar Como esta es
la forma rápida de hacerlo. Y seleccionas JPEG o PNG, o puedes escoger un TIF si lo
necesitas. También está SVG. Entonces, si estás exportando para
web como un logotipo para web, SVG puede ser una opción realmente buena. Si estás trabajando
con un diseñador web. Simplemente significa Gráficos
vectoriales escalables. Entonces es un archivo
que básicamente
se puede escalar infinitamente
como un gráfico vectorial. Se está utilizando cada vez más
en web para iconos y Legos. Pero para esta lección, iremos PNG, lo que significa
un fondo transparente. Podríamos decir Usar mesas de trabajo. Podemos simplemente seleccionar el número uno. Pero en este caso, me
gustaría exportarlos. Me gustaría utilizar
los tableros de arte. No revise Usar mesas de trabajo. combinará con
imágenes en una sola imagen. Personal para seleccionar Usar mesas de trabajo, pero seleccionaré todas, lo
que significa que las
exportará por separado. También puedo escoger un nombre para esto. Voy a llamar a este logo de caramelos de
herrero. Y pondré un V1
al final de la misma. De esa manera se puede cambiar uno. Cualquier pequeño cambio que uso V1 0.1, y cualquier cambio
importante en el diseño, subo a la versión dos para poder realizar un seguimiento
de qué versión. Y es fácil para mí
agarrar la versión más ligera. Sólo tengo que mirar
el número más alto. Entonces voy a hacer V1 0. pegaremos a Exportar. Estamos
yendo algunas opciones aquí. Ahora tenemos una
opción de resolución, dependiendo del tamaño
que queremos que sea. Entonces si esto es un
logotipo para un sitio web, exportaríamos una versión
separada que es realmente pequeña para el sitio web. Por lo que cualquier cosa que vaya a la web, queremos agregar 72 PPI solo
hará clic en eso. Podemos omitir
las siguientes opciones. Además, si no hay color de
fondo o cualquier forma en el fondo, podemos escoger transparente. También podríamos escoger un fondo blanco o negro
si elegimos. Por ahora, sabíamos que
iba a mantenerlo transparente y acaba de golpear Okay. Y eso debería exportar
ambas imágenes. Entonces si vengo aquí
exportando para web y la encuentro, Aquí están las dos imágenes, para que puedas ver aquí. Ahora tenemos al Smith en
el blanco y en el negro. Muy bien, lo que
voy a hacer ahora es añadir algunos antecedentes a estos. En realidad, sólo necesito agregar un
fondo al blanco. Puedo ponerme negro. Y
lo arrastraremos. Lo centraré
usando el panel de alinear. Arrastrémoslo de
nuevo y seleccionemos la mesa de trabajo y luego
centrémosla usando el panel de alinear. Entonces solo queremos
enviarlo a la parte de atrás. Así que haga clic con el botón derecho
hacia abajo para arreglar el centro de vuelta, eso lo enviará a la parte posterior. Ahora qué días de exportación como JPEG, lo que podemos hacer es exportar,
exportar para pantallas. Aquí se puede ver que se
recogió los dos tableros de arte. Y así lo que puedo hacer aquí
es el logo negro de nueve minutos. Logotipo y por supuesto, registrador
blanco. También es posible que desee
poner los números de versión. Entonces V1, V1. Por aquí abajo, podemos
seleccionar un par de opciones. Por lo que podemos seleccionar todos los tableros de arte. Podemos decir que queremos
incluir la pala. En este caso no tenemos sangrado, así que sólo voy
a desmarcar eso. Y por aquí podemos decir, queremos variar. A lo mejor queremos exportar
los documentos completos, por lo que queremos combinar
las dos imágenes. En una imagen solo
significa documento completo. Tenemos una salida aquí. Lo que puedo hacer es
simplemente abrir esto, seleccionar, esta barra aquí, presionar Control o Comando C, y simplemente pegarlo. Tengo la misma dirección
y luego selecciono la carpeta. Puedo hacer un par
de cosas aquí. Puedo decir, quiero
crear una subcarpeta. Quiero ponerlo en una subcarpeta en la ubicación
que he seleccionado. También puedo decir que quiero abrir
la ubicación de la exportación. Y puedo decir que quiero escalar
estos o simplemente formatearlo. Entonces voy a seleccionar
escala por defecto. Y aquí abajo, podemos
sumar una escala a estos. Es súper práctico exportar
estos realmente rápidamente. Por lo que en este momento tenemos
antecedentes en uno de estos, y los vamos a
exportar como JPEG. Y podríamos seleccionar una cualidad. Entonces si vamos a web
donde recogiendo más, 100, y luego modificamos el dimensionamiento de la
misma en el lado de Adobe
Illustrator Photoshop. Una vez más fácil retocar el dimensionamiento de las imágenes en Adobe Photoshop. Como se puede ver, el
tamaño de exportación tiene ALL peak a JPEG ID. También puedo sumar escalas esto, si agrego dos escalas, va a escalar
a una vez, lo
que sólo significa
que va a ser
exactamente del mismo tamaño para que
salga lo que creo
que es 500 pixeles por 500. Y sólo voy a
dejarlo caer a 0.5. También podríamos trabajar con
una resolución aquí, por lo que un PPI, también trabajamos
con un ancho y una altura. Aquí. Lo que voy a hacer es 0.5.
Exporte uno que sea normal, y exportaré uno
que sea el doble del tamaño. Se puede ver aquí que
necesitamos cambiar todo esto al trabajo un AT grande. Y le
dará algunos sufijos, que pondremos al
final del documento. Cuando lo exportamos. Lo que podemos hacer entonces solo exportar, eso exportará todas
esas versiones. Podemos abrir eso. Y luego llegamos a un 0.5 veces. Si hacemos clic derecho en esto, vaya a Propiedades,
deberíamos poder decir que bajo detalles
el tamaño de la misma. Entonces es la mitad del tamaño, a diferencia de éste
que es de 500 píxeles. Vamos a mostrar algunos detalles. ¿ Dónde podemos mostrarlos? Panel Ver Detalles. Entonces 501 pixeles por 500. Y por aquí
tenemos mil
quinientos mil. Por lo que es sólo ponerlos
en carpetas así. Perdidos. ¿ Por qué exportamos es un Archivo. Exportar legado. Legado solo significa la
antigua forma de exportar. Esto tiene muchas opciones aquí y puede ser un
poco confuso. Pero lo bueno de esta
forma de exportar es que te
da el tamaño de archivo
que será aquí abajo. Si miramos GIF 4.95 K. Así que lo que voy a hacer es seleccionar
un, un JPEG alto. Tenemos 21 kilobytes. Podemos modificar estas opciones aquí. Lo que voy a hacer es entrar aquí. Digamos que queremos
chocar con la calidad 100, porque hasta 36 k, podemos seleccionar todas estas
opciones aquí, el tamaño de la misma. Podemos escalar esto
porque es un vector. Podemos escalarlo hasta 2 mil
píxeles si queríamos, podríamos escalarlo con el
porcentaje del tamaño. Otra cosa está aquí bajo GIF, verás la tabla de colores. Sólo tenemos
algunos colores aquí, pero podríamos editar los colores
aquí si quisiéramos. Podemos editarlos en el camino de salida. Lo que voy a hacer
es simplemente bajar cuesta abajo. Jpeg, select, JPEG, progresivo. No quiero ningún desenfoque. No voy a máxima resolución
ni calidad. Podemos bajar y golpear Save, y nos
pedirá un lugar guardado. Logotipo de Smith. Vamos V2, V1, 0.1, y pulsamos Guardar. Debería salvarla. Si abrimos esto. He estado muy lejos ubicación. Aquí. Lo hemos salvado. Pasaría 36 kilobytes. Esa forma de ahorro, una muy buena manera de
resolver el tamaño de los archivos. Y es realmente importante
en la web cuando estás trabajando con grandes banners
e imágenes de banner, quieres que los tamaños
sean lo más pequeños
posible sin
perder calidad. Aún quieres que sean nítidas, pero no quieres que sean
demasiado alta resolución o dos mayor calidad porque toma
más tiempo para que la página web se cargue. De todos modos, eso es todo
por esta lección. Y te veré
en la siguiente.
14. Personalización de tu espacio de trabajo: Muy bien, En esta lección
voy a echar un poco
de un vistazo a la personalización de
tu espacio de trabajo. Es hora de que resuelvas lo que
vas a hacer en Illustrator y empezara
personalizar el espacio de trabajo para que se hacer en Illustrator y empezar adapte
a tu flujo de trabajo. Tengo aquí abierto por aquí,
bajo Window Workspace. Se pueden ver estos dos
espacios de trabajo en la parte superior aquí. Una vez pinceles indirectos,
y uno es un espacio de trabajo. Ahora tengo que reconfigurar el espacio de trabajo uno
sobre los pinceles. Uno está configurada para cuando estoy haciendo pinceles de Adobe
Illustrator. Así que tengo todo lo que
necesito aquí para usar cuando estoy haciendo pinceles dentro de
Adobe Illustrator. Y entonces lo que sucede
suele ser que creo los
pinceles Tradicionalmente, así que dibujo en un pad y así uso Photoshop para editar la
imagen sacada del pad, traerla a Illustrator. Y yo uso el panel de traza de imagen aquí para trazar la imagen ese vector. Y luego usualmente
edito ese vector y lo convierto en un
pincel luego aquí. Y luego trabajo mucho con
el panel de apariencia y las Muestras. Y siempre mantengo
abierto
el panel Propiedades y también el panel de colores. Razón por la que mantenemos el panel de
color abierto es por ese pequeño glitch
que abre el panel de color. Ahora estoy usando Adobe
Illustrator 2022. No estoy seguro si eso es
glitch todavía existe. Podría darle una oportunidad si
cierro este panel
y cambiarlos. Sí. El panel de color aún
se abrió automáticamente, así que siempre mantengo esa oscuridad. Pero básicamente lo que sucede
es que puedes personalizar esto. Lo que encontrarás es como estás
aprendiendo Illustrator y a medida que continúas haciendo
mucho más tutoriales, haz más cursos,
probablemente te encuentres que, oye, uso mucho gradientes, y depende de tu
estilo de ilustración. Rara vez uso gradientes, así que realmente no necesito
el panel de degradado. Pero se podría decir, quiero que el panel de gradientes se abra para que
pueda dejarlo ahí. Además, depende del tamaño de
tu pantalla. Este proceso lleva
un poco de tiempo. Creo que este este espacio de trabajo
me llevó un par de semanas
en realmente hacer ejercicio y estuve haciendo pinceles durante
un par de semanas antes de instalarme en esta capa y
aún podía cambiarla. Entonces es un proceso
que sigue cambiando. Pero básicamente, una vez que hayas
creado un espacio de trabajo, puedes ir a Ventana, ir a Workspace, y luego
simplemente pulsa New Workspace. Y lo que sucede es que
puedes nombrar ese espacio de trabajo. Golpeaste. Ok. Lo que sucede es cuando vas al espacio de trabajo
Ventana,
aparece aquí. Puede seleccionar ese espacio de trabajo. Tengo dos espacios de trabajo. Entonces lo que pasa es que uso principalmente el espacio de trabajo interactivo
sobre los pinceles. Yo uso cepillos uno cuando
estoy creando pinceles. Desde ese espacio de trabajo es si
quisiera guardar el espacio de trabajo, así que si hago cambios, así que digamos que abro
el panel superior. Vamos personaje. Y quiero usar el carácter o el panel de caracteres
más que la primavera, el panel Carácter ahí dentro. Quiero usar el panel
Carácter más que pinceles para que pueda dejar caer
todas estas cosas. Simplemente arrástralo. Y quiero el
panel de personajes al frente. Puedo decir, oye, vamos a actualizar el
espacio de trabajo para poder bajar aquí y crear
un nuevo espacio de trabajo. Yo recomendaría eliminar
el último. Por lo que se podría decir, quiero administrar los espacios de trabajo y quería
eliminar ese 1 primero. Estando aquí, pega Okay. Entonces lo que pasa es que
podemos ir Window workspace y luego podría eliminarlo de
nuevo, Administrar espacio de trabajo. Suprímase, sí. Y entonces lo que
podemos hacer es ir a Ventana, Workspace y nuevo espacio de trabajo
y luego entrar aquí. Cepillos indirectivos. Si lo nombra
lo mismo puedes anular. Es. Actualiza el espacio de trabajo,
anula lo que había allí. Este proceso vendrá con el tiempo y te
diré un rato
para que trabajes el espacio de trabajo
que disfrutes usando. Y tengo una pantalla completa, que es bastante grande. Así que tengo mucho
espacio y pantalla inmobiliaria para trabajar con
muchos paneles a la vez. Entonces me gustan todos mis pétalos abiertos. Pero es posible que tengas una laptop, MacBook o algo así. No tienes tanta
pantalla inmobiliaria, por lo que puedes usar
tantos paneles como pueda. También. El panel Propiedades
es un panel súper bueno para simplemente tener siempre abierto. Simplemente cambia todo el tiempo, mantiene la alineación y también la barra
de control arriba aquí. Yo uso este panel todo el tiempo. posible que no lo uses si
eres un nuevo usuario de Illustrator silver
y la característica anterior, que está en el control de ventana. Es posible que no lo uses.
Otra cosa, puedes personalizar tu barra de herramientas. A lo mejor solo haces cosas como trabajar con pinceles y realmente no trabajas con todas estas otras cosas como esta, todas estas cosas gráficas
aquí que nunca he usado. Y así puedo
mantenerlo escondido. Hay algún tipo de cosas
que no uso. Puedo mantener eso escondido lejos. Algunas
modifican herramientas que nunca uso. Solo puedes mantener
las cosas escondidas. Puedes personalizar esta suerte. Creo que he traído
esta herramienta
aquí , la herramienta de medida. Esta es una herramienta realmente útil. Simplemente haz clic y
arrastra y te da información sobre el ángulo y
el tamaño de las mediciones. Y uso esto cuando estoy
haciendo cosas isométricas. Y luego puedo entrar en mis preferencias y
usar ángulo de restricción. Algunas de estas cosas son
un poco avanzadas, pero
aprenderás a personalizar tu espacio de trabajo con el tiempo
y son muy recomendables, realmente ayudaron a
acelerar tu flujo de trabajo. Junto con la creación de atajos personalizados y
cosas por el estilo. No veremos eso en
este curso, pero sí, solo creando un espacio de trabajo en el que te sientas cómodo y que incrementa tu flujo de trabajo y la velocidad si estás
usando Illustrator. Y tiene todo lo
que lo necesitas, será diferente
a lo que tengo porque tu flujo de trabajo
será diferente. Creas diferentes
ilustraciones como tal vez creas patrones en
Illustrator o creas logotipos. Y no necesitas paneles que
tengo abiertos como rastro de imagen
y cosas así. Te recomendaré
jugar con
ella y no tiene que
ser un proceso rápido. Puede ser el próximo
par de semanas o meses. Poco a poco agregas un panel, tomas 100 y que no
sientes que necesites. Simplemente personaliza el
espacio de trabajo a tu gusto. Muy bien, eso es todo
por esta lección. Pasemos a la siguiente.
 Interactiv, Graphic and Motion Designer