Transcripts
1. Introduction: Hi there. My name
is Dan Scott and I'm an Adobe certified
instructor for Photoshop. Now together in this course, me and you are going to learn everything we need to know
about using Photoshop. This course is for beginnings. You don't need any
previous knowledge in Photoshop photography or design. This is our project
based course, which means we're not
going to go through every single tool in every
one of its little settings. What we're going to do
is we're going to set practical real world examples. And then learn the
tools and features necessary to make it
both beautiful and easy. You'll learn how to
easily enhance images, correcting the light
and the color. You'll know how to add, remove, and change
colors in an image. We'll select, we'll mask, and we'll combine images. You'll learn how easy it
is to use generative AI. Yes, Artificial Intelligence and Photoshop to accomplish
amazing things. So much fun. We'll
also add logos. Then we can create beautiful
flyers and posters, plus some banner ads, where we can magic
upward background or completely remove objects
and people from images. Before the end of the course, you'll have the skills
to mask anything, including the dreaded hair. Using those amazing
new masking skills, you'll be able to click out
images and start playing around with some interaction with things like type
in the background. Together we'll work
through lots of popular visual styles and learn the tools and tricks necessary
to make them easily. There's my favorite section where we'll learn
how to distort, transform, and
manipulate images. We'll make our own
graphics using simple techniques to create graphics like this from scratch. You wouldn't be complete as
a Photoshop user without the solid retouching skills that you'll learn
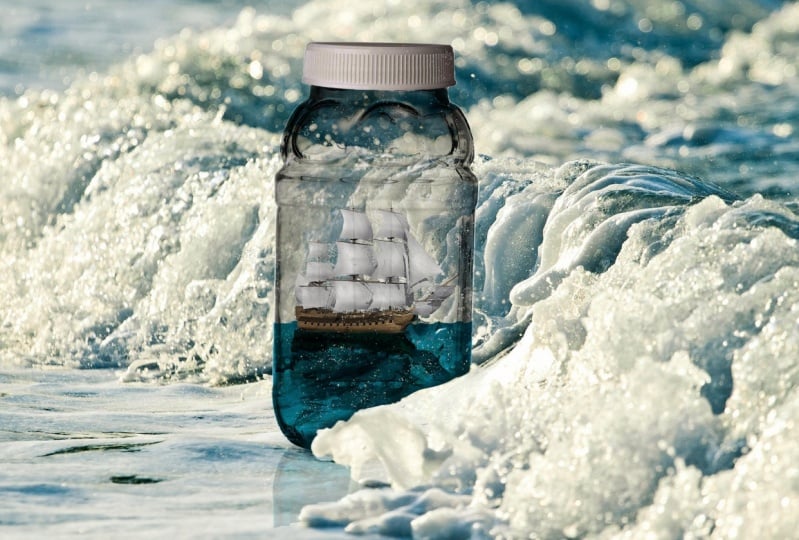
here in this course. And finally, any good
Photoshop user should know how to put an
island in a bottle. There are exercise
files that you can download so you can
work alongside me. There are also assignments
that I set throughout the course so that you can practice your skills
as we're going. So if you've never
opened up Photoshop or you have and you really
struggled with the basics, follow me and I will
show you how to make beautiful images
inside of Photoshop. The end. Good, wake everybody. Sound eye camera guy, guys. There's no other people here. It's just me. Bye.
2. Before you start this Adobe Photoshop CC Tutorial: Hi there, in this video we're going to just
get everything set up for this course... so it all runs nice and smoothly. The first thing you'll do is
download the exercise files. There will be a link on the page here... to go off and download those,
so you can play along. You don't have to, but obviously it will
be easier to have the exercise files... to work along with me. The next thing to do is just getting
your work space like-- it depends on-- what I mean by work space
is just what Photoshop looks like. Sometimes it looks like this,
sometimes like this... sometimes it looks completely different. Everyone, right now, get it all
looking the same by going to 'Window'... go down to 'Workspace',
and let's click on 'Essentials (Default)'. It's kind of there, that's the basic
kind of layout for Photoshop. Now yours won't have this group
of images, that's specific for me... but what you might do is--
it might still be looking different. You can go to 'Window', 'Workspace',
and click on 'Reset Essentials'. That just kind of rejigs it to make sure
it's kind of as it was out of the box. That is quite handy if later on
you're dragging this... and it somehow gets connected
to this thing over here... and this bit gets dragged down... so if you ever get lost
like this, you're like... "Man, everything's everywhere." Let's go back up to 'Window', 'Workspace',
and go to 'Reset Essentials'. And it goes all back to its happy home. The other thing you might do,
this is more optional. I have to do it when
I'm teaching because-- on a Mac, it's under 'Photoshop CC',
'Preferences', 'General'. If you're on a PC, it's under 'Edit',
and it's way down the bottom somewhere. So go to 'Preferences', 'General'. You might click both of these... where it says 'Reset Preferences on Quit',
and 'Reset all Warning Dialogs'. That's just kind of like... if you've made any changes
throughout the software... it's going to kind of reset it
back to the defaults. You might not do that. I do it so that yours looks
exactly like mine. If you are kind of a reasonable
user of Photoshop... you might just leave that,
because you might have made some changes... and you don't want to,
I guess, wreck your changes. One thing to note though,
if you reset your Preferences... it's 'On Quit', that means
you've got to go to... on a PC, go to 'File', 'Quit Photoshop'... or on a Mac, it's under here,
'Photoshop', 'Quit'. Just quit it and open it back up... and only then will both
preferences be redone. Next thing to note is,
I'm using CC 2018... that's the version of Photoshop,
if you're using an earlier version... you might find some
of the features won't work. Now, what features won't work?
There'll be a few of them. If you are using, say CS6 or CS5,
which is quite old now... 90% of this course will still work. So, should you do it? You should. There's going to be a few things
that don't work, and that's just... I guess, you need to upgrade
to the newer version... but there'll be lots of useful stuff
in here still for you. But double check, you can go to 'Help',
and go to 'Updates'. Just make sure you got the latest version. One other thing you might notice,
the difference between yours and mine is... you might not see this 3D option here. And a couple of little weird things,
under Filter and Render. We're not going to cover them in this kind
of Essential course, that's no big deal... but if you are finding later on,
after this course, you're like... "Man, why was there 3D in Dan's version,
and not mine?" It's probably, just your version
of Photoshop-- it was not your Photoshop,
it's your laptop or your computer. It's probably using what's called
a 32-bit operating system... and it just won't work with 3D. Photoshop can kind of come in
a couple of flavors... and it will do its best
on your operating system. So if you've got an old operating system,
really poor old laptop... fans are coming on, it's over stressed... it might not do these things
just because your computer can't... just can't handle it. So you might have to upgrade-- the same version of Photoshop, but
you might have to get a new... upgraded laptop or computer. The last thing to cover is the
use of the images in this course. So you got the exercise files,
you can totally use them... to practice, and follow along with me... but if you want to use them
in your portfolio... or some of your actual work... your professional work... you need to go and license the images. Now I've got all these images
from Adobe Stock... it's stock.adobe.com I pay a monthly fee, and I get 10 images. You can start your 30-day trial,
and get 10 images... but you've got to go and find those images,
and pay for them to use them... or just go and switch them out. So do the examples with me, then find
some other free stock library images... to use for your portfolio,
or your commercial work. Great places to get free stuff from,
there's a couple here. Pexels is really cool. Just good quality,
high quality 3D use images. There's that, there's freeimages.com There is-- unsplash.com
is really cool as well. Really awesome images. There's another place,
deathofthestockphoto.com Same thing here, you're allowed
to use them commercially. Another way to use it
is Google images, right? You can't just do a search, can't just go,
I'm going to use, I need picture of a shoe. And just steal stuff from here. What you can do though is you can
figure out which are allowed to be used. So you can go to 'Tools',
and you can go to-- I do a couple of things, I make sure
I want to find large images... some good quality ones. I want to find 'Usage rights',
and I want to go... This one here, 'Labeled for reuse
with modification'. This I could use, but I wouldn't be able
to mess with it in Photoshop... so I want this license. It will cut it down to--
the less gets quite small... but you can see, large images that
I'm allowed to use in my work. So, that's a way of getting around
image licensing. Or if you've got the budget,
jump to Adobe Stock. Another paid one is Shadowstock. Another paid one is iStock,
they're all really good. Adobe Stock tends to fit in
with Photoshop a little bit better. All right, this is a really long video. We're all ready to get
started with Photoshop. Let's actually start making some stuff. All right, let's get into the next video.
3. How to use layers in Adobe Photoshop CC: Hi there, welcome to the first video. In this video we're going to look at
how layers work in Photoshop. It's quite fundamental. As a bonus we'll learn the super quick
auto fixing photo features in Photoshop. They're called Auto Tone contrast
and color. What it will do is it will help us
really just understand layers properly. You can see, my layers over here... and you can see my super
awesome adjustments. All right, let's go do that now
in Photoshop. First thing to do is open the file
we're going to be working with. We can do that under 'File',
and go to 'Open'. What you're looking for is
the exercise files you've downloaded. Then find a folder called '01 Layers',
open that up. Inside of there should be one
called 'layers.jpg'. Click on that, then click 'Open'. Remember, this video is going to
do a couple of things. It's going to show us how to use layers
which is quite fundamental to Photoshop... but it's also going to introduce one of
the most easy photo adjustments... you can do in Photoshop using
the automatic features. So we're going to learn both of those. First thing we need to do is... we need to make sure we can
see our Layers panel. If you can't see it, go to 'Window',
make sure there's a tick next to Layers. I can't see it, there it is.
Make sure he's open. You'll see 'Background'. What I'd like to do is instead of
just changing this version here... I'd like to create a duplicate
of that layer... so that I can make an adjustment... then kind of see the difference between
the original and the updated version. That's a really common thing
to do in Photoshop. To do that you right click the word... where it says 'Background',
and say 'Duplicate Layer'. Now this window appears, and what
we'll do is give this a name. We're going to call this 'Auto Tone'. Let's click 'OK'. Now what's happened here? Can you see, down here
in my Layers panel... nothing really visually has
changed on our screen... but you can see, down here,
I have two layers... one called Background,
and one called Auto Tone. They're both looking the same. What I want to do is do this
automatic adjustment... and you can kind of tell... which one you've got selected,
kind of goes a lighter gray. So have that selected, and go up
to 'Image', we're going to use 'Auto Tone'. It's one of the really quick
easy things you can do. Open up an image, and if,
like our original there... if the lights and the shadows,
the mid tones aren't all quite nice... this automatic feature
will go and adjust them. So that's Auto Tone. What we really came here though
is to learn about layers. You can see at the top here,
it's a little high... because it's kind of small... but you can see, Auto Tone... you can kind of see, the icon... or this thumb here has changed
to this newer version. You can also see, the background
has that faded out version. What we can do, imagine you-- when you're looking at layers,
you see the top one first... you imagine you're a bird flying above... and you see this one first,
and it's blocking out the guy underneath. To turn this top one off and make it
visible to see the background... see this little Eye icon here,
just click on him. Now that one completely can't be seen,
completely transparent. And you can see the background underneath. It's just a good way to
turn this eye on and off... to see whether you've made
a good adjustment or a bad adjustment. You can go back to that original,
you haven't wrecked the original either. You can always go back to it if you like. Next thing I want to do is,
let's turn off the eyeball, Auto Tone. Let's click the background layers
so it goes this lighter gray. And let's duplicate it again,
so right click, go to 'Duplicate Layer'. Let's call this one 'Auto Contrast'. So we looked at automatic tones. That's one of the automatic features. We're going to go through
the other two that are quite useful. Real quick and easy as well. So I've got this kind of faded out version,
let's go to image. You can see, we've done Tone,
let's do Auto Contrast. Now this effect is definitely
better than the original... but it probably wasn't
as good as Auto Tone. You can see over here, in my Layers panel,
I've got Auto Contrast. Let's turn the eyeball off on it
so we compare with the original. You can kind of see,
this layers stacked here. This one's invisible, so I can't see it. I can turn Auto Contrast off
to see the background... but if I turn Auto Tone back on,
I'm like, "Good for me, personally." It's hard to see, I guess, when
you're watching this video... because this color depends
on your screen... but you'll probably notice
Auto Tone's a nicer one. Let's look at the last option and compare
which automatic feature we like. All the while getting used to layers. So I'm going to turn
the top eyeballs off... and have the background selected,
right click it, 'Duplicate Layer'. This one is called 'Auto Color'. Let's click 'OK'. Go up to 'Image', let's go to 'Auto Color'. And pretty good, looks pretty close
to Auto Tones. If I turn Auto Tone on and off... depending on what resolution
you're watching this video in... you might not see very much
of a difference. A little slight difference, just kind
of maybe, tonal range, one's a bit more... or it's got a warmer feel to it. And Auto Color is just
a tiny green tinge to it. A couple of things we've learned-- Let's kind of finish off layers... then we'll talk about these adjustments,
and where they're good for. In terms of the layers what I'd like you
to do is practice turning on... let's say I wanted to
just see Auto Contrast. So I'll turn this top one off. One of the things I guess I like
to ask my class when they're live... is like, "Hey guys, I'm turning
Auto Color on and off"... "Why is nothing changing?" Everybody goes, "Yeah, we know, Dan,"
and eventually somebody says... "It's because this one's on top." We're just getting used to this,
we're getting started. You can play around with all
these guys underneath... and nothing's going to happen... because this guy's on top,
he's blocking the view of the other things. Now two other things before
we move on from layers... is that you can change the order of them. So let's say that auto--
you want Auto Color at the top. What you can do is, grab Auto Color... by clicking, holding,
and dragging the text here. Drag, see it turns into like
a little fist, like he's grabbing it. And you can see, little blue line up here,
there it is. That will drag it just above contrast. If I keep going, another little
blue line up here. You go crazy, it gets lost. You just kind of drag it, just keep
an eye out for the blue line. So, at the top there,
means Auto Color's on top. Let's say I want Auto Tone on top. Let's say Auto Contrast on top. You can drag it down, drag it up,
just looking for those blue lines. The last thing I'd like to mention about
layers before we move on is background. Background's special, so when you open up
a JPEG or a PNG... often it's called background, and one of
the big things is that it is locked. The trouble with that is that... it won't do it, okay? Doesn't like it, so what we
need to do is... we need to give it a name. That's the best way to kind of
play around with the lock here... or remove the lock. You can double click the word 'Background'. Up here you can give it a name,
I'm going to call mine 'Original'. The cool thing about that is that
the lock has been removed. I've never in my life gone,
"Man, I wish that lock was on there." It's just a pain. So if you're finding like, a bit weird,
it is a bit weird, don't know why. Just one of the Photoshop things. So call it Original,
now I can move it to the top... and do what I like with it. We'll bring it up here because
it's going to become... more and more important
as we go through the course. Just something that you can't do
the background, because it's locked. You can lock it again by clicking
this Lock icon whenever you want to... but, that is it for layers. Now what I will do is -
just turn off the original - is these three here. I don't want you to leave this class
thinking Auto Tone's always better. It's not always. This is kind of doing-- later on in the course,
you'll look at Levels... this is what this is trying to do. Auto Color is dealing with
Hue & Saturation. We're just doing it automatically. The thing is, if this was
a different image... you might find-- because in this case
Auto Contrast didn't do a great job, right? You might find it's actually absolutely
perfect for the job you're doing. I find the auto features
is really good when I'm-- I don't want to do
amazing photo retouching... I just want it to be better. Let's say I'm uploading photos
to my Facebook... or a business web gallery,
and I just want them to be better. So I'm going to open it up in Photoshop... smash away at Auto Tone... because I figured out that was the best
one for my kind of photo shoot. Then just keep doing it and saving them... so I don't have to go through
and do any hard core adjustments... that we're going to do a bit later. So just quick and easy... but don't think Auto Tone
is better than Auto Contrast. It really depends on your images. Last thing we'll do is we're going to
save this file. So we're going to go to 'File',
and hit 'Save'. Something strange is going to happen. It's not going to save it. It was called layers.jpg, you can see
at the top left here... but because we've added layers,
this is a specific Photoshop feature... JPEGs can't have layers. So it needs to be saved
as a different format. And Photoshop is clever, and says,
you need to be PSD. Now if you're on a Mac like me,
yours might look like this. That's fine... but see this little icon here,
just better if it's opened up. I'm going to make mine
a little bit smaller as well. If you're on a PC, it's already open. On a Mac, just click that to open it up. You don't need to change anything. We're going to call ours 'layers.psd'. All it means is it's going to be
very similar to the last one... except it's got this little bit in here. The file size is going
to be a bit bigger... but it's great, because it's
got all these layers... that we can go and turn
on and off later on. Let's save it as 'layers.psd',
and click 'Save'. Now this pops up,
we might as well cover this here. Maximize Compatibility, this is always on,
you never want-- just means that this is likely
to open in older versions of formats... sorry, older versions of Photoshop.. So if you're sending this to somebody
who has CS6 or CS5... it's more than likely to kind of open. The file size gets a tiny bit bigger... but it's not worth turning that off
to save the file size because... just means somebody might not be
able to open it up. You can click 'Don't show again',
I can't, because I am a trainer... and I need to show this to everybody
that's new, a pain in the bum. Let's just click 'OK', and ignore that. I'm not going to mention
it again for the course. All right, let's go to 'File', 'Close'... and move on to our next video.
4. Basic navigation & how to combine images in Photoshop: Welcome everyone, this video
is just going to be... an introduction to
navigating around Photoshop. We're going to combine
these three images... all into this lovely little collage here. We're going to move him around,
we're going to resize him. We're going to practice
zooming in and out, and navigating. No, not super exciting,
but super fundamental. Let's get into it now in Photoshop. The first thing we're going to do
is open up a bunch of files. Let's go to 'File', 'Open'. What I'd like you to do is,
in your exercise files... there is a folder called '01 Layers',
double click that. Inside of there we want navigation,
we want 'Navigation 01', '02', '03', '04'. These are the images
we're going to combine. Now you can open them individually
by selecting, and clicking open... but that can be a bit tedious... so what we're going to do is
click this first one at the top here. Then hold down 'Shift' on the keyboard... and click the last one,
and it should highlight them all. Or open them up individually,
whatever works. Let's click 'Open'. So in Photoshop when you've got
more than one document open... it transfers them into these tabs
along the top here. So click on the tabs, just get used to it. So these are all the images I've got open,
four of them. Now what I'd like to do is combine them all
into this first image here. So we're going to start
with 'Navigation 02'. That's the one I want to move
into this Navigation 01 document. Now there are lots of ways of kind of... copying images into files,
and moving them around... but I'm going to show the way that--... I guess it's just kind of
future bullet proof. It just works with, later on when we
get to slightly complicated things... like Layer Masks and Adjustment Layers,
this technique is still going to work. The technique is pretty simple. Use the 'Move Tool'. It is the first tool in the Tool Bar here. All you do is click, hold, and drag
your mouse, clicking, dragging... drag, drag... Hover above this tab for about a second,
and it switches. I still got my mouse down,
still holding, holding... let go. It's a bit weird, I know, I promise. I totally understand. Let's give it another practice though.
Let's go to 'Navigation 03'. Same thing, I'm going to
get my 'Move Tool'. Click, hold, and drag. I'm holding my mouse down,
holding my left mouse key down. Holding, holding, hovering above
the tab, then letting go. That is the technique. It's kind of weird, but it's
kind of future proof later on. Let's go to the last one here. Click, hold, and drag, drag...
hold, hold... let go. I've got a slight problem,
this one's a different size. Now I've resized these first ones... just to make life easy,
and it's fitting in here perfectly... but more often than not you're going to be
kind of combining images... and they're going to be
really different sizes. Sometimes they can be really big,
if you've taken them on a... quite a high end digital camera,
that can be really, really big. So this is going to bring us into
some more of the navigation things... we need to learn throughout this course. I'm going to pile them all into here. Don't worry if you're like,
"Man, these shortcuts, there's too many." We're going to kind of reiterate these
all the way through the course. You'll find that the ones we cover
right now in this video... are going to be the ones that
you'll use forever in Photoshop. At least the ones you use the most. Couple of things I want to do now. I want to transform this guy here,
just too big. So what I can do is-- I've got it selected; I know it's selected,
because over here in my Layers... it's got that gray highlight... and I can turn the eye on and off,
so I know it's the right one. Then go up to 'Edit'. Let's go to 'Transform', and let's go
to this one that's called 'Scale'. This one you're going to use really often,
'Edit', 'Transform', and 'Scale'. And what I'd like to do is-- now depending on your screen
you might have to zoom out. Especially if it's a really big image. So we're going to learn one of our
first shortcuts for navigation. We'll learn a couple in this course. The really common one is,
if you're on a Mac, hold down 'Command'... and tap the '-' on your keyboard. It's kind of at the top there,
near your numbers. You'll see, it zooms out. If you're on a PC, hold down
'Control', and tap '-'. So '-' zooms out, and '+' zooms in. So get a practice with that. Hold down 'Command' on a Mac,
'Control' on a PC... just tap '+' to zoom in, '-' to zoom out. So minusing is going to allow us
to see the edges... of this Transform Box we've got here,
when we're scaling. Now what we're going to do is-- you can move it around
by clicking the center. Avoid this little cross here in the middle. It's just the center of rotation... not something we want to
mess with at the moment. Anywhere inside of here moves it around. What I'm going to do is,
I'm going to kind of line it up. Photoshop is a really cool tool. It's on by default, it's called
Smart Guides, and it just says... "Hey, did you mean lining up
with this guy?"... and you're like,
"Yeah, exactly what I meant." If yours isn't kind of
snapping to the edges like mine... go under 'View', and just check that,
under 'Show'... down here, you got a tick next to
'Smart Guides', make sure that's on. What I want to do now is resize it... I'm going to grab this
bottom corner, just drag it. What you'll notice is that,
if I just drag it... it's going to potentially distort it. You could drag it and kind of
hopefully get it there... but nice little trick is,
while you're dragging it... before you let go,
just hold down the 'Shift' key. If yours has all gone a bit wrong,
let's hit 'Esc' on your keyboard. That's the "I didn't mean it" button. Hit 'Esc', let's go 'Edit', 'Transform',
hit 'Scale'. Now when dragging this corner here,
hold down the 'Shift' key. So down on your keyboard,
hold 'Shift', grab the corner. And what you'll notice is
that it locks the height and width. Now we're not looking
for perfection here... just get it kind of close
to these other ones. We'll look at doing it perfectly later on,
but get it kind of close to the right size. Last thing you need to do
when you're using Scale... is that you need to hit the 'Enter' key
on your keyboard. Otherwise, it's kind of half way through,
see these dots in the side, it means... "Hey, I'm busy doing Scaling now,
you can't do anything else"... because if you go up to your
Panels along the top here... you can see, they're all grayed out. Just means you can't do anything
until you hit 'Enter', or 'Return'. So let's zoom in, you know
what the shortcut is? Remember, it is... 'Command +' on a Mac,
or 'Control +' on a PC. I want to go in nice in Type... because I want to show you
one more shortcut before we go. And that is kind of moving around... once you're in this sort of,
kind of really close... you have to be zoomed right in
so that the image goes off the edges. Say I want to go over here to the right. You can use these little sliders,
this is the cave man way. If you feel like you want to be
a cave man... you can drag these little scrubbing things
up and down, that totally works. You might feel a little overloaded
with shortcuts already... but if you aren't, let me give you... one of the really common
navigation shortcuts. It's that, you just need to
hold down the 'space bar' key. So 'space bar' on your keyboard. You can see, my little cursor changes... from that little Move Tool
to the little hand. Then just click, hold the mouse,
kind of drag it across. That's going to be it for
the basic navigation Photoshop. We're obviously going to build
on these skills later on. If you feel like, "Man, I'm not good
in getting every single one of those"... don't worry, we'll cover them again
and again as we move through the course. So just to recap, whenever you need
to move one image to another... click on it, grab the 'Move Tool',
click, hold, and drag, wait. Drag it down, let go. You'll often need to resize,
it's under 'Edit', 'Transform', 'Scale'. But to make sure the height and width
doesn't get all distorted... you hold down, which key was it? Let's test, say in your head. Yes, hit 'Shift'. Shift just means that height and width
won't get distorted. Remember, when you're finished,
you've got to hit 'Return' key... otherwise life doesn't work. Couple of other shortcuts that I jumped
to there was the zooming in and out... which is 'Command + and -' on a Mac... or 'Control + and -' on a PC. And holding down the 'space bar'... allows you to click, hold,
and drag, and move around. All right, that is going to be it
for this video. We're going to get into doing... some actual Photoshopping
in the next video, I promise. Let's finish there,
I will see you in the next one.
5. How to fix an image using levels in Photoshop CC: There. In this video, we're going to look at
something called levels. It's the thing I do
the most in Photoshop. I open up an image and I sharpen up the blacks
and the whites. Ready? Come on, here's
another example. Looks good, and then,
bam, looks better. All we're doing is
making the blacks and the white superstrong using
something called levels. Let's go and do it
now in Photoshop. All right, let's get started
from your exercise files. Go to file open and
we're working in our exercise files
and we're going to be using two color double
click to go inside there. Inside of here, we're
going to open up levels. One click open. All right. So the first thing
is we're going to find this adjustments panel. Okay, This is where
we find a lot of the adjustments we're going
to do in this color section. If you can't find it, go up to window and come down until
you find adjustments. And it should have a
little tech next to it. Wait there, wait
there, wait there. Hey, I just wanted to point out a difference with one of
the updates for Photoshop. Is that under adjustments panel, yours might look
a bit different. The difference is this new thing called adjustments
presets. It's very cool. We're going to do it
later in the course, at the end of this section. Okay, we'll do a separate
video on it for the moment. Those, just so we
can continue on, click this little arrow here, twirls it up, and hides
it down the bottom here. I can't remember
what the default is, but you might see this
little icon here. You can switch it to
be in this grid view. Okay, view, Grid view,
it doesn't matter, but that looks like I've got it in the
video to carry on with. You might do that and then go to levels and
you can carry on. The one other thing that is new, okay, is this thing
here has appeared. Okay? We're going to do
this later in the course. It's not useful for the
things we're going to do in the next few videos. So Well, it's not in
the videos because it didn't exist and we don't need it now. So I'm
going to ignore it. So if yours is on the screen
here, but it's in the way, what you might do is go you, I'm going to pin you. Okay? Pin the barbosition. And then just kind of like put
it out of the way. Okay. And we'll get into that
later in the course as well. But now you're ready
to get back into it. Get, well, Dan, I will. You enjoy the rest
of this video. Cool, and if you hover above them all you
can kind of see, I can't point to it as well, but you can see the
name appears up here. Watch, Okay. The one you're
looking for is levels. It's this kind of histogram
looking bar chart type thing. Click on him once, cool. And what ends up
happening is nothing except to know that we've got this little new layer that we'll talk about
in a little bit, and this bigogly thing opens up. Okay, Now this thing is
simpler than it looks, okay? 'cause let me show you
the technique here. Basically, this is all the color information in our document. And you'll notice
down the bottom here, there's a black little pointer. There's a kind of a gray
one and a white one. Basically what it's showing is, is that there's no
really white information and no really black information. There's a chunk of other stuff. There's quite a
lot of light gray. You can kind of see and
here's a lot of light gray. And even then, that
doesn't really matter. Basically what you
want to do is grab the dark eye and drag
him to the right. Click, hold, and
drag him. How far? Just keep an eye on
my image over here. You see the farther I drag
him, the darker it gets. What we want to do
is basically you drag him to the
kind of first hump. Okay, so halfway up, the
first little hump here. And you'll notice that if I
turn my preview on and off. Okay, so my levers layer here. Turn the eyeball on and off. It just really sharpens up the
shadows or the dark parts. Same with the other
side. Grab the white, drag it to the left. And how far do you drag it? Basically, just halfway
up the first hump, or at least until you feel
like it's looking good. Okay. There's no, like
absolute science here, it really depends on your image, but that's the really
good place to start, drag the both ends in until
the halfway up the hump. And often it'll fix your image, there's no specific
way to drag it, it just depends on your image. So I can drag it to the
left and it lightens it up and drag it to the right,
and it darkens it up. So it really depends
where you want it to be. I'm just dragging
it back and forth, looking at an image until I find something that I like remember, turn the eye on and off. Have I made it
better? Have I made it worse? Okay, it's better. It's pretty over saturated,
It's pretty sharp. And that my friends is
how levels work and it is the thing I do most often
when I open up an image, especially if it's something
I've taken myself. And it's a way to kind of really get the rich blacks
and the pure whites. And what Photoshop
has done is that it's put it on a layer that
I can turn on and off. So later on I can come back to this and either
make adjustments. Okay, or just turn it off
and go back to the original. It's very quick, it's very easy. What you're going to do
now is a little exercise. Go to file, go to open. And there's one in,
they're called levels two. Now what I've done throughout
this course is that if there's ones that
I've taken from a website called unsplash. Unsplash is a cool website for commercial use images that
you don't have to pay for. The only thing that they
require is that you leave the artist's name and
where it came from. So that's what I'm doing.
So this one here came from a paid stock library site. They don't require
it. I paid to use it. This one here, I didn't pay for. But Matthew Hamilton, in
his amazing photography, just needs to be
credited here anyway. So open up levels too. Click open. Go through
the same process here. Go to your adjustments
panel, find levels, drag the hills in from both
sides the center slider. Try left and right, depending
on what you're looking for. And that will give you
some practice with the most common thing
to do in Photoshop. In my opinion, and in
my current opinion, it is time to get onto the next video. Alright,
see you over there.
6. How to enhance colors in Photoshop using vibrance: Hey there, in this video
we're looking to... enhance colors; I hate saying
the word make colors pop... but that's kind of how we do it... which is trying to kind of
lift some of the colors. So we're going to take this image
that we've been working on, and we... just kind of richened it up,
especially the background stuff. This image here, ready, 1, 2, 3... Colors are definitely enhanced,
and maybe some popping going on. Now this technique is, after Levels
is one of the first things I do. So, step 2 in my fixing up my images... is Level's first, which we did
in the previous video... then I look at Vibrance. Just to kind of lift and raise some
of the colors without going too far. We might have gone a little too far
in this image... but that's okay, let's learn how
to do it now in Adobe Photoshop. To get started we're going
to open up two files... from that same folder called 02 Color. I've got open 'Vibrance 01'
and 'Vibrance 02'. Vibrance 02 is from Malvestida magazine. So we only have Vibrance 01 to start with. Now what we're going to do is... in our Adjustments panel
we're going to use this one here. It's like a kind of a V
with a gradient in the middle. It's the vibrance adjustment,
click on that. Now I just mentioned that Vibrance... is a good replacement for
saturation in most cases. So if you have delved in Photoshop before,
and you used the Hue & Saturation slider-- Saturation's fine, but Vibrance
is definitely better. Why is Vibrance better, in my opinion? Vibrance, what it does is,
it looks at the image... let's say, the shoes are
quite red already... but there's kind of colored boards
in the background... they're quite washed out. So what Vibrance does is... watch this, if I drag out
Saturation to the top... kind of to get this blue color
in the background here kind of popping... this red has to be over saturated... and gets too much, so I'm going
to turn that back to 0. What happens with Vibrance,
watch this, when I drag this up... you'll notice that the blue
in the background gets better... but it leaves the already
saturated colors alone. So generally it's just a really good-- I don't normally drag it up this high. I've got this example, just because
we've been using this already. Let's have a look at the Vibrance 02. So, same thing. I'll go to my 'Adjustments' panel,
then go to 'Vibrance... Watch what happens when
I drag up the Saturation. Kind of, like, I'm going way too high,
I'm going all the way up to 100... but you see, the green start
getting quite strong... and the blues come out of here. Let's go down, up, down, up. But the problem is, these colors that
already had quite a strong color in them... they start becoming kind of,
I don't know... surreal, hyper real,
just a bit too saturated. So, let's leave this here
and crank up this Vibrance. You'll notice that the greens
are the leaves. You might not notice,
so I've gone up to 100... and I'm going to knock
the Eyeball on and off. You'll notice that the blue in here
really came on strong, which is cool... and the leaves got a warmer
kind of green in there... but you'll notice, the bag down here... or at least the colors in here in the,
I'm going to call it the scarf... they get a little bit more
but not as much as these. So it's more like the already
saturated colors just get a little tweak... and the ones that are just quite weak
in terms of the color saturation... kind of, going to lift it up to match
some of the more saturated colors. All right, that is going to be it
for Vibrance, you can use both of them... Vibrance and Saturation
to go completely overboard. That is it. All right, I will see
you in the next video. Goodbye, Vibrance.
7. How to change the color of something in Photoshop using Hue: Hi there, in this video we're going to
change the color of stuff. So we're going to change the green,
and make it pink. Then, actually pick any color we like. Same with this one here,
we've got red shoes already. Green shoes. All right, it's super quick,
it's super easy. We're going to use the
Hue & Saturation Adjustment panel. Let's do it now in Photoshop. To get started let's open up two files. They're in the same color folder
we've been working in. Open up 'Hue 01' and 'Hue 02'. With Hue 01 open,
let's go to 'Adjustments'... and to change the color, we use this one
called Hue & Saturation, click on him. What we want to do is, under Hue,
this Hue slider here... grab this little, I call it little house,
white house. The little arrow thing there,
click it, hold it, and drag it left. And slowly but surely,
see the colors updating. Cool, huh? Drag it all the way to the right as well. That will be through your full range
of colors that are available. One thing you might do--
I'm going to pick any sort of color here. The other one you might
play around with is Saturation. So the colors are not quite
poppy enough for you. Click, hold, and drag it up
a little bit. I'm going to max mine out,
goes a bit too high... but you can kind of see,
I can just raise it up a little bit. And I want to do the same thing for-- This is the one we worked on earlier
for Levels, Hue 02. Do the same thing, open up
Hue & Saturation. Drag it around, see if you
can change the color. Nice and easy, and fun. Just a little side note here. I've worked on a few
jobs where I've been... in charge of photographing,
say a product... let's say it was glasses... so we photographed, there was
the same style, but a range of colors. So what we did is we--
well, what everyone does... is that you photograph
kind of one of them... so we picked the color red,
and we photographed it. We get the right angles,
and we tried a few things of lighting. We get it right, and instead of-- Now if you're on Amazon or eBay... and you're going through
the different color options... and somehow magically that shared
all those glasses... or they're in the exact same position,
but different colors, and you're like... "How did they line those up,
and photograph them all perfectly?" They didn't. It was somebody like me who went,
"Yeah, let's just do one"... and later on, in Photoshop,
I'll go and adjust them. And I just sit-- like I said,
there were the glasses, I went... "They are the blue color,"
then I grabbed this slider, and went... and, with the blue color. And I'll be looking at the glasses
in my hand, and looking at Photoshop... and going, "Yes, it's close enough." And it was that-- it's like,
I felt like it was a confession. But that's... that's the easy and quick way. Color matching is super hard... regardless, you know,
lighting and stuff affected. And if you're like me, had no budget,
and just needed to get him done... it's a quick and easy way
to adjust the Hue. So practice with Hue 02,
and I will see you in the next video... where we'll start looking at
selectively adjusting Hue. I'll explain more in the next video.
8. How to change just one color in Adobe Photoshop CC: Hey there, in this video
we're going to change... just one particular color in an image
rather than the whole thing. See the yellow in the glasses here,
and the yellow in the shoe... ready, hey presto, magic. The green, and blue, and all sorts
of other cool colors. It's got the pink. Same with this image,
all sorts of cool colors. It's only affecting the shoes,
not the color in the background. Let's learn how to do that now
in Adobe Photoshop. From the same folder that we've been using,
called 'color'... let's open up 'Selective Hue 01'
and 'Selective Hue 02'. We're going to start with '01'. And we're going to go, like we did before,
we're going to use 'Adjustment Panel'. And we're going to go to
'Hue & Saturation'. Now the problem though is if I use Hue... I just want to change, say,
just the shoe here... so I'm going to put it back to '0'. I want to change just this part,
or just the yellow. The yellow of the sunglasses
and the yellow of the shoe here. To change it, if I want to make it pink... way to go. So the yellow sunglasses are now pink... which is awesome, but everything else
has changed color, it's kind of cool... but it's not what we want,
we want to just change the yellow... so put him back to '0'. Now what you do is, see this thing
that says Master... it's doing everything, what you can do
is you can be selective about the colors. So you say, "I want to just change
the yellows, please." Click on the yellows, start dragging that. Voila, it will affect just the yellows. Cool, huh! So now you're going to be... Nice! Like always, it's an Adjustment Layer,
turn it on and off. I can always go and amend it. Now there will be times when... let's say, I want to change just
the sunglasses' yellow, not this yellow. That's going to require us to do
a Selection and a Mask... which is a little bit later on
in the course, definitely doable... but if you want to change
everything that's yellow... super easy, just select it
from this drop down, and adjust it. I'd like you to practice
with Selective Hue 02. Adjust both the background color
and the shoes. So reds, this guy here,
and giving it a way of Cyans. So do the same thing as we did earlier on. Have a practice, and I will
see you in the next video.
9. How to make an image black & white in Photoshop CC: Hi there, the name of this video
is pretty much a give-away. We're going to turn colorful images
into black and white images... but the cool thing is,
we're going to have... lots of control about how
it goes black and white. Same with this one, black and white it. Color, black and white, we're even
going to add a tint to recolor it. All right, exciting times,
let's get into it in Photoshop. So to get started, it's 'File', 'Open'. Let's open up two files
from the color folder... it's called 'Black & White'. There is an 01 and an 02,
we'll start with 01. There's a few ways in Photoshop
to make things black and white. The best way, in my opinion... is under 'Adjustments',
there's a slider here. This one here called 'Black & White'. Second row down, third one, click on that. Again, it's this non destructive layer,
which is cool... we can turn it on and off. Up here, depending on what you last did... you might have set it back to Default,
and that's made it black and white. Now what's cool about this
is that it is adjustable. So if I turn this eyeball off,
you'll see that this-- this is kind of considered reds, right? But let's say, when I convert it to black,
it's this gray... but say I want it to be darker,
the reds I can drag this way. You can see, you can kind of, like-- you got more control about it
going black and white. Rather than going full black and white... then trying to fix it with
something like levels... you've got this kind of full control here. So just go through and decide... like you how you want this thing to do. Let's say I find this too dark,
so I'm just going to raise the reds. I kind of want this color here,
what color is it? It is like a Cyan, somewhere it is Cyan,
trying to make it lighter. I thought of making it a little bit more-- I want to come out, I guess. So just work your way through
till you find something you're happy with. One little tip for you is this option here. If you hover above it--
it's got a terrible name. It's got this 'Drag in Image
and Modify Slider'. You can click on this little hand here... and what it allows you to do... instead of having to work out
what color that is... you saw it before, I turned
the eye on and off... and like, you're Cyan, you're Magenta... and turning it back on,
and trying to adjust them here. You can actually just drag on this. I've got this selected,
goes a darker color. Let's say I want to darken up this... I click, hold my mouse. I drag it right to make it lighter,
drag it left to make it darker. So often this is just easier. I'm just going to kind of drag it around... maybe the background needs
to be a little bit lighter. So picks the colors for you. Say this guy here, I want you to be
a bit darker to match this. Now obviously the colors are being used
in more than one place... so you will find that you might
have to rob this one... and kind of deal with the consequences... where the colors are being
used over here as well. Later on when we get into Masking... you will be able to kind of just
work on a particular object. For the moment, we're just
doing some adjustments... clicking, holding, and dragging. Let's jump to the second example. Do the same thing,
and I'll show you one last trick. So 'Adjustments', then we
go to 'Black & White'. I love this little inky stuff in water. We'll use this little bit
throughout the course... but using it now mainly because
I am sick of looking at shoes. I've decided for a shoe theme
for this course. I kind of regret it, running up
like video 10. So now we've got ink in water. What we're going to do is same thing
as before, we can just adjust these... but it's probably easier
to click on this, and say-- because you've seen, there's two
main colors in this ink splurged thing. So I'm going to turn them on,
and you can just kind of start dragging. Let's say I want to make everything dark,
I'm just dragging it to the left. It just kind of picks what colors-- work around. Maybe a bit too dark down here. So that on art drag out thing
is pretty cool. I'll turn it off. The thing I wanted to show you
was this thing here called Tint. We kind of looked at something called
Color Eyes when we did Hue & Saturation. This thing here works the exact same way... which is the handy way of doing it,
black and whiting it in one color... and going to 'Tint'... and this color here is the color
that's been applied. So it's got the sepia old world color now. I can click on this,
and you can pick any color you like. So you drag this Hue slider up and down... to find that kind of color range you want. Let's say I want kind of a warm pink. Click 'OK'. And now when I go to my little
on art slider here... I'm going to decide to drag it,
so it's just a bit brighter. Cool, huh? So it's a good way of--
you meant to be using it just to tint it... but we've totally colorized
this thing here. So that's the extra little tip. And that is it, black and whiting
is pretty easy, you get a better control. Little bit of extra adjustment
with this slider... and you can tint it if you need to. And always, it's non destructive... so this thing is just underneath,
ready to go. You can delete this layer by clicking it. See this trash can here,
you can delete him. I'm super happy with myself,
so I'm going to leave it here. And yes, I'll see you in the next video.
10. How to add a gradient to an image & text in Photoshop: Hey there, it is Gradient time. And what we want to do is,
this image here... we've added this cool retro kind of
style Gradient. I'm going to show you how to do that now
in Adobe Photoshop. Let's go, first up let's
open up two images. It's in the same color folder.
It's called Gradient 01 and Gradient 02... from Jordan Andrews.
Thank you, Jordan. So we're going to start with Gradient 01. We're going to do two things. We're going to add Gradient to text... and we're going to add it to
the image in the background. We'll do the text first,
it's the easiest to do. We're going to have a full
section on doing Type... a little bit later in the course... but for now click on this capital T,
your Type Tool. Click once on your keyboard. And over here, in terms of the font size,
pick a font, any font you like. And size, I've got mine up to about 80. Yours is probably defaulting to 10 or 12... and over here, we're going
to type in 'All'. And I put a 'return' in. Don't worry too much about Type
at the moment. To move your Type around
we're going to use our 'Move Tool'. And I'm just going to click
and drag it around. So adding a Gradient to this. Changing the color of the font is easy. You can double click it here,
make a new font. But let's look at adding a color. To do it you need your Text Layer selected,
there's mine. It's got the gray box around it. And down the bottom here
there's one called Effects. And there's one in here called
Gradient Overlay. Now what you'll find
in Photoshop is that... pretty much true of everything
you do in Photoshop. There's like three or four different ways
of doing the same thing. What I'm trying to do is,
I'm trying to give you, I guess... like there's about three different ways
of applying Gradients. This way I feel like is the most
bullet proof in terms of future proofing. Just means it's going to work probably
on most circumstances... whereas some of the other Gradients
don't work in all cases. Anyway what I'm saying is that
later on you might go... "Hey, why didn't he show me
that version of this thing?" and you like it better, it's totally cool. Do it, if you stumble across
a different way of doing something... totally, there's nothing
right or wrong about it. I'm just trying out,
I guess, cut it down... to some-- the usable, the
most usable versions. So, Gradient overlay. And by default it will depend on
what you last had selected. Now what we're going to do is... where it says Gradient... click on this little arrow here. Let's move him up so we can kind of see. Click on this little drop down arrow. By default you've got some
horrific drop shadows. Well, Gradient, sorry. Some terrible ones.
If you need rainbow colored Gradients... you, my friends are all in luck. So what we're going to do is
have to go and customize it. Let's start with this first one,
black to white. It's the easiest one to customize. Let's click on the little arrow
to pop it back up. What we want to do now is
change the colors used. You do it by clicking in
this color bit here. That's why it's a little bit confusing,
using Gradient Overlay. So you click anywhere in this color box,
this thing pops up. And what we're going to do is
use the bottom parts of these houses. So, not the top parts. Use this bottom bit, so just double click
this first Color Swatch. And using this Hue slider,
drag it up, drag it down. Find a color that you want to use. I'm going to use this one, click 'OK'. Double click this white house. Same thing, drag this Hue slider
up and down... until you find a color you want to use,
then click in here... and you'll have that blue to purple... or at least magenta.
Click 'OK'. Let's click 'OK' again,
and have a look at some of the settings. So where it says Reverse,
just flips it top to bottom. We're using the Linear style,
so it goes in a line from top to bottom. You can adjust that, which angle. You can see, now it's going
kind of more left to right. From this side to this side. You can decide any size. Linear, you can play around with Radial. You can experiment on your own,
the different ones, Angle, Reflection. Just kind of different ways, you can see,
the Gradients are on both sides. We're just going to go for Linear
in this case. In terms of the Scale,
you can lower it down... it makes a bit more sense. Then it's just got only a tiny Gradient
between these Type here. I'm going to leave mine at 100%. That's what yours is probably set to. Now before we do the images
I'm going to show you-- Gradients are kind of back end, right? When I, I guess, not even that long ago,
maybe six, seven years ago... Gradients, I didn't even
have in the class... because who use Gradients?
Gradients have come around full circle... and are super cool now, right? Well, at least I think so. Where I get my Gradient colors from? I'm going to show you a cool little site. It's this site here, it's called Grabient. I love it. All it does is, just show you
examples of cool Gradients. Once you've found one you like,
let's say we click through here. You can see, there's a bunch
of different options. I like on page 2, this one here,
it's my favorite one. You'll probably notice it
from other videos that I've made... but this is where I get my colors from. Now to get those colors into Photoshop... the easiest way is,
see down the bottom here... there's this yellow and pink. So those are the two colors, right?
If you click on it... that is the number you want. So it's hash, then it's got some
letters and some numbers. So just copy that on your keyboard. On my Mac, it's 'Command C' to copy. You can right-click and go to 'Copy'. Jump back into Photoshop... and in Photoshop, remember what
we clicked on to change color? It's that big color bar there. Double click the blue house. And this is where it goes down here,
I'm going to paste it in. And I paste everything. I don't think we need the hash,
doesn't seem to mind at all. You can see the hash is over here. So that's an easy way to pick
a color from the internet. It's using these letters and numbers. Let's click 'OK', I'm going to
jump back in to Grabient. Grab this end here, grab this,
I'm going to leave the hash off. Copy it, back to Photoshop. Double click this house, grab him. Paste this one. I love those colors, and I click 'OK'. Click 'OK' again. You can make any last adjustments
but that's it for-- it doesn't really matter what it is. We've done it for Type,
I'm going to click 'OK'. Doesn't really matter what the layer is. There's a little adjustment
we need to do for images... but if it's a logo you've brought in... or a shape from somewhere you've made
in Illustrator, or brought it... or drawn it with the Shape Tool,
which we'll look in a second, to do. You can just have it selected... down to 'fx', and go to 'Gradient Overlay'. Now the next thing I want to do
is this image in the background. It's a slightly different process... because first of all,
if I click on 'Background'... this 'fx' is grayed out. This is going to happen
throughout our Photoshop course... where you just-- it's locked,
it's called Background. To unlock the background,
double click 'Background'. Give it a name, mine is 'Shoes'. And now it becomes unlocked,
and I get that 'fx'. So that's half of the thing we need to do. Now click on 'fx',
make sure that layer is selected... and go to Gradient Overlay. Just like we did before. The only trouble is... it's kind of doing exactly
what happened here... but I can't see the image. So what ends up happening is,
you need to-- we've talked about all of this stuff. It's this one here, Blending Mode. Blending Mode is a way of this Gradient
blending with the image itself. So click on 'Normal' and just--
Dissolve does nothing. Darken, does something. And you're just going to have
to work your way through... until you find a way-- a blend that works with
your particular Gradient... and the colors in your image. Now there's no, like absolute one
you should pick from this. It really depends on your image
and the colors in your Gradient. So it's a bit of a lottery. So click on 'Multiply',
if that works for you, and it's-- I'm just going to work a way through
until I pick something that I like. I'm going to turn the Opacity back up. 'Color Burn', 'Linear Burn'. You're just going to watch me now
go through them all. 'Lighten', I kind of like, it's kind of
got that retro 80s... but in that kind of hipstery way;
it's hard to explain, right? But Gradients are cool now. Lighten, I know,
Screen's kind of a nice one. 'Color Dodge', not so good. I'm not going to go through
every single one of them... because I decided... I either like 'Hard Light',
or 'Light Screen'... and that's totally-- sorry, 'Lighten'. It's totally just based on
my Gradients, and my images. I'm going to leave it there. So that's the difference
between doing images... and just save straight off text, or shape. Is that first of all you need your
Layer unlocked. Then you add the effect,
like you do normally... and just make sure,
when you do add your Gradient... you change that Blending Mode. Before I go, probably a super
important point... that I haven't brought out yet... say you want to adjust this Gradient now. I'll turn it off, see All Star here? You can kind of see the structure. That's my whole layer,
and these are the effects. I can turn either the Effect
or the Gradient itself off... to show through that original red color. So what we can do to edit it-- so to turn it off that's all we need to do,
just leave it there... but to edit it I'm going to have
the Eyeball on. Double-click the word 'Gradient Overlay',
double click. And you'll see it's gray here,
and it's got a little tick. You might be accidentally
on something else... so I'm going to untick that,
make sure this is gray. And that's where you can go
and make adjustments. Let's say I don't like that anymore,
so I'm going to reverse it... or play with a different
Blending Mode as well. But that's how you make adjustments. I'm probably going to turn it off,
and make this back to white. So text selected... on our Properties panel here
would tell me... the color that I'm using. I clicked on it, and to get white... just as a little other thing
before we go is... watch this, any of these Hues,
it doesn't matter... if I click, hold, and drag, and I'm
dragging kind of past where I need it... because up in the top left is white,
and down in the bottom left is black. So what I do is, instead of trying to-- some people like to try and click in there,
you get it pretty close... but if you click, hold, and drag pass... I'm holding my mouse down
and dragging it past... that assures it's white. I'm going to click 'OK',
and if you want to tidy this effects up-- I've turned it off so you can't see it,
but say that you are pedantic... and you got a bit of OCD and you want
to get rid of this... you can click, hold, and drag it... to this trashcan,
and that will get rid of it. All right so it's project time. I'd like you to practice
using this one here. I don't mind what text you use... but definitely play around
with the Gradient on the image. Go to Grabient, pick a color,
pick your own colors. You can do your own colors. I'd like to actually see
at this time though. We've been doing,
you've been following me along. What I'd like you to do is,
I'd love to see your own one. So dig through your files... and see if you can find an image
that you're happy to share. It can be your family,
it can be your house. You can take a quick photo now
of yourself, and just-- I want to see what kind of
Gradients and stuff you're doing. You can either post it
here on this page... or you can share with me on social media. On Instagram, is bringyourownlaptop. On Twitter, it's danlovesadobe. Either way, do an image,
can be this one... it can be your own one, and I'd
like to see what you've done. All right, that is going
to be the end of this one. Let's jump into the next video,
I'll see you over. Bye.
11. What are Adjustment Presets in Photoshop: Hi everyone. In this
video we're going to look at adjustment presets, Kates and new update
for Photoshop, little update for the course. And you can see if I hover
above these thumbnails, it changes the image
quite dramatically. Presets, they're easy
to apply and now that we know how to adjust
the single adjustments, things like levels in black and white that
we've done already, We can now adjust and explore some of these presets
that are made for us. They're super awesome.
Let's jump in. Al right, to get started,
in your exercise files, there's one in there
called adjustment presets 1.2 open both of
those in Photoshop, we'll start the little red
cars, my little Datsun. And over here we might have
like closed this down. I got you to do that earlier
in the course, okay? And so we're going to work
on adjustment presets here. So if you can't see it, go to
window, go to adjustments. Okay? And here we are. So in adjustment presets, you might be on list view, okay? Which you might prefer because
you can see all the words. I'm going to be
in grid view so I can squeeze more on
the screen, okay? And all you need to do is
just hover above any of these thumbnails and
look, ooh, okay. It goes and applies a bunch of settings presets to
give it a certain look. Let's dig into one of
them. These will change. They're only new. They keep adjusting them.
They keep changing. They keep adding more to
them for you for the moment. Let's have a look at
Creative Dark Fade. It's a cool look right off on not doing anything,
just hovering above it. I click at once. I want you to see what happens to
the layers panel. I click at once, We even made a little
blue line around it. The thing that's
happening, it's adding two of our little adjustments
that we've done before. We've done hue and
saturation, right? Brightness and
contrast. We haven't just one of the
other adjustments. The reason the presets
are at the end, the reason I share
presets now is because we understand some
of these single adjustments. So this is not a big
leap. It might be. Let's have a look. They've
decided to get this effect. Is it called creative dark? You can't see
creative fate, okay, That they are going to add a single adjustment called brightness in contrast,
which is this one. And then the hue
and saturation one. Which is which one is
it? That one there? Okay, so somebody at
Photoshop has decided combining these two are going
to give this cool effect. It's just a great
way of kind of like you've got a vision of
what you want to do and you're unsure how
to get it through the single adjustments.
Now there are presets. Even if you don't like it
fully, we can adjust it. Let's say you like it,
but it's a bit dark. Okay. I can click on
brightness and contrast, and I can go to my
properties panel. Okay. And look at this.
Even though we haven't in this course used
brightness and contrast, we use levels instead. That's what I would
prefer to use, That's what I've
taught you so far. Don't worry. This person likes
brightness and contrast. Whoever made the preset
brightness down. Brightness up. Okay. And you can
adjust these now, so get the preset kind of
close to where you want. It was quite a
contrast the image, that's why this one's not doing as good as, maybe as it could. I'm going to lower the
contrast down to zero. If you double click
these little hills here, it'll reset it back to zero. Okay, with the brightness, I'm going to have
it about there. The other thing that's making this preset work is there's
only two in this one. There could be ten,
there could be just one, okay? They've got two. To get this effect,
I'm going to click on the word hue and saturation. Make sure on my
properties panel, bam, we know what we're
doing here, don't we? Q Look, I want to play
around the hue slider. They haven't done anything with the hue slider on this one, So I'm going to double click it to get it back in the middle. They've dragged down
the saturation. See that's got -50 I
can move that back up. Move it back down, make it
more saturated up to you. They're really cool, like
jumping you to a point. And then you can go
through and adjust them. Let's look adjustment presets two and have a little
bit more of a dig in. I've got the layer selected, I have adjustments, I've got adjustment presets, I'm
going to go to more. The one that I want to
open up is creative, okay. There's loads of
cool ones in here. I use a bit of the
cinematic ones. They look pretty
cool to get started. Like the soft CPA ones are really good one to
get to that CPA look under creative, I
quite like this one. As a general rule, dark
fade and you're like, oh off, I'm not doing anything member
just hovering above it. But when I hover across it, I'm like, oh man, that's cool. It's a certain look okay. If I click on it,
it's going to say it's done both hue and
saturation and brightness. Again, you're, oh, I didn't
know that it teaches you. And now I can go
through and say, all right, hue and
saturation properties. What have they done? They've lowered the saturation. Sometimes what I look in is earlier I remember we looked
at the different colors. You might go reds.
Did they change anything in here?
They change anything. Yellows, Nothing in greens cans, blues, magentas.
They've done nothing. They just lowered
the master color. Okay. Which is all the
colors down a bit. You're like M. That's simple.
What if they weren't here? All they did was
the same as before. It's kind of very the
same look that I liked in the first preset that
we did on the red car. They just lowered the brightness
and upped the contrast. Oh, does good. It's teaching me how to get a specific look. The one thing that could be
confusing when you are new is we haven't
covered things like groups and we won't
for a long time, they put them inside this group. Okay that you can
turn on and off, they just group them together. Can you see this
like little folder? You see this little
arrow next to it? It's just a handy way for them
to group things together. These little white
boxes are confusing. We'll look at them
later in the course. They are something
called a layer mask. Ignore these for the moment.
They don't do anything. This group is here just to, meant to be helpful,
so you can turn both of them off
at the same time. Can you see they dim? Or you can turn just the
brightness off, or just the hue saturation off? The one thing is like once
you've applied adjustment, that's why I hover
above them quite a bit. If I hover above it, it just
gives me like a preview. If I click on them all,
click, click, click, click. Can you see what's happening
in the big old mess? I'm going to go
undo, Undo, undo. Let's say I accidentally, I've got two of these
things fighting it out. What I'd probably do is work out which one I
want to get rid of. Let's say I want to get
rid of this dark fate. I want cross process, but
I don't want this one. How do I get rid of
it? I can delete these individually or I can delete the whole group,
which I might do. So I'm going to click on it, the way thing with Photoshop. If I delete on my keyboard
or hit the trash can, it's wanting to delete
the layer mask first. You're like delete the mask. You're like, yes, do
it? Nothing happens. The little white box is gone. You're going to have
to delete again. Do I want to delete the
group and a its contents? Yes, please. I'll do
that one more time. Can you see here if I click
on this, it's highlighting. Can you see the layer mask? The thing you don't
know about that we'll do later on that
doesn't do anything. Okay, if I delete it's going
to delete the layer mask. Okay, then we can click on that same thing again and delete all the group
and its contents. I'm going to do one more
one just to save you time. If you click on the
layer, you can actually click on the folder
name and hit Delete. And it will delete straight
the grouping contents. It's up to you and how
clear you want to be. Watch this. It's got
that highlighted. If I say no, delete the
folder and then delete, you can skip that first step, but I want to show
you both. All right. So what do you think of
the adjustment presets? They're really handy
for somebody who knows the basics of doing their
single adjustments. Let me show you how I
do it in my process. I'm going to again,
click on the folder. Delete this. I'll
show you what I do just so you get
a good sense of it. Open folder, I'd
go to adjustments. I'd start with a single
adjustment first. This image is
pretty nice anyway. But let's say it's
something I've shot, I'd go to my levels first. Something that I often do
is it doesn't need much, but I feel like that could work. Whites don't need
to go anywhere. Okay, I've added my
own single adjustment. Now I click on this image, I'm going to say
adjustment panels. I want to add a bit
of like style to it, so I'm going to look at
the adjustment presets, which is just a group
of these things. Okay? And I'm going
to go and say, let's find something
Wackier landscape, okay? And you can see here,
let's have a look. Landscapes, Only subtle
adjustments to this one. I do like that one. I do like a bit of a faded,
old dark background. The good thing
about it though is that it's added a folder and all it's done here is that member that doesn't
really do anything, it just houses the thing
inside of it at the moment. It's just human saturation.
It's interesting. What has it done? I like it.
Alright. It turns out Dan is sucker for just lowing the saturation.
That's all it's done. I do want to have a look in here and see if it's
done anything else on any of these other
color channels. It has done nothing. There you go. I learned
this about myself today. Doing this one is that all the presets that I like are basically just human saturation. And knocking down
the saturation, instead of going
through adjustments, I could just go and say, let's get rid of you,
let's see if we can do it back to all. Let's go single adjustments, let's find human
saturation there. And just go -40
exact same thing, okay, than using the presets. Anyway, I'm finding the presets
helpful for learning how things are constructed
rather than hitting the Internet
and figuring out like, what's the best way
of doing a CPA image. All right, we're getting
a bit long here, but I wanted to make sure I don't know it's an update
and it's a good one, especially when you're
new. All right. That's it. Have fun experimenting with the adjustment presets
that you like and learning a bit about what you
really like to kind of do with your images in
terms of the adjustments. All right, that's it,
see in the next video.
12. How to use Generative fill in Photoshop : Hi everyone. Welcome
to this update video. This new feature called
generative, Phil. It's probably the
biggest update for Photoshops since
layers were invented. Okay. It is amazing at making stuff in your
images for nothing. This image is a photograph that I've got for months splash. Okay. And I'm going to
show you, we're going to add a tree. What kind
of tree we're on? A dead tree. No, let's have
a dead lying down tree. Okay, We use prompts to tell Adobe Photoshop to make
stuff from nothing. See the road in the
background here. Look goodbye road again, generative, Phil, Hello, car. What kind of car? Old car. New car, Crash car. White car. It's at a flying dinosaur. It's at a giant dinosaur
with a couple of eyes. It's n always perfect bananas. What you can do,
I'll show you how to add stuff to an
existing image. And this image here was
completely made from scratch. Okay. Didn't exist. We just told it to be alive. I'll show you all the pros, the cons, the s, the don'ts. I'll show you how many
credits you get to do this with at the end, and also whether we're allowed
to use this commercially. We are is the short version.
All right, let's jump in. All right, to get
started, there is a folder called three shapes. Open that up and open up this
one called gen fill one. Okay? And to initiate the
generative fill, okay, we need to use this one here, the rectangle marquee tools. Click on that one once, okay? It's this little dotted
lines rectangle thing. K second tool down. We're going to start
with just drawing a box. Click, hold and drag, drag, drag a box roughly around. That doesn't matter now to get this thing kind of
kicked off and going, okay, we've got a selection. You can click on
this option here. It says generative, Phil. Okay, so let's give it a go. You'll have to sign
some disclaimers about you agree to
use it, So do that. And then in here we want
to go through and say, actually I would like to
add a tree and enter. Okay, before you go too
far in this course, on this video, at
least there are credits that you are using
while you were doing this. At the moment, for me it's
like I get 1,000 per month. So it's not a big deal,
but you should know that I'll go through
that more in the end. So if you're like, don't
want to waste my credits, wait to the end and I can
show you how much you get. But look how cool that is. It's new. It's awesome. It's the robots so
good over here. A couple of things
to note is that over here we've got this new
layer icon over here. See this little sparkle thing? That little sparkle thing says, I've been generated with
artificial intelligence. Okay, the cool thing
about it though, is that it is a separate layer. Can you see I've
still got my old one and you can start
to see the join. You can see it's messed with my mountain in the
background there a little bit, but
pretty fantastic. It's matched the tone, the theme, the colors. It's spectacular if you're
watching this in the future, which you have to be because
you're not here right now, it gets better and better. The one thing it does
do though, sometimes it coughs out like
some weird glitch. There's like a person in
there or something over here. There's variations,
other properties, it should have defaulted
to variations. You can see by default
you're given three. You can see this one,
not quite what I wanted. This one here is
a good contender. Okay, let's try to
give you some options. What you can do though is
if none of those are good, you can just keep
hitting Generate and it will give you
another three to pick from. There you go. I
got another three. Okay. Choose from
the thing is though, the original three hasn't gone. This panel here can just
be made a little bit smaller by dragging the
top of that one there. You can see there's the first three and there's
the other three, and we can decide which one. The other thing to note
is that if I go on my background layer or close the file and come back later on, you can get back to those
variations by clicking on this little sparkle
thumbnail thing here. And you can see there
are my variations there. Again, they're kind of
like baked into the file. Uh huh, this is
unbelievably amazing. So we're using generative fill to add like as an added a tree. What you can do though
is see this rock here. I can grab that same tool, the rectangle marquee tool, drag a box around it. And then I can hit
Generative Fill. And then don't put anything
in here. And hit Generate. And what it's going
to do is going to look at the rest of
the image and try and kind of smush stuff
on top of it. Ready? Sady? Award, bam. Got rid of it. Look how good it is. Okay. So you can use
it both to add things and to remove things like
this road here, okay. I'm going to see will
get rid of the road. Sometimes it adds
more road. Okay. And you can use, now that this is over here, I can either hit
the Generate button here or down in my
contextual task bar. Okay, up to you which
one you want to use. Okay, I'm going to click both. Oh, actually I'm not
going to click both, I just going to
click one of them. Now, in terms of
how long it takes, it depends on what
you've asked it to do, how big your actual resolution
of your original image is, and how good your
Internet connection is, how slow your computer is. There's a lot of factors, but I feel like for what it
actually produces, it does in a pretty good way. It's actually happening on the cloud, not on your machine. Oh, look at that. Bam, gone so good. One of the things that
you'll run into though, while you are using
generative fills. Let's say we're
clicking on this tree here, we're missing with it. Okay, if I go and add, say, an adjustment layer
like we did before. Let's say we add preset. Okay, We went year and an
always goes to the same one. Kay adds it and you're
like, oh, what's going on? Okay. The layer order
is really important. See over here. Remember that
folder we got earlier on? Okay, close that down. Inside of this
little folder here, can you see the folder icon? Inside of it are
my brightness and contract and my hue
and saturation. It affects everything below it. Remember what could you do? I'm going to grab this folder. Click hold and drag, drag, drag. And you see the little
blue line that appears. Just make sure it's at the top. That's one thing
to consider when you are generating these things, they all look like the
part of one image, but actually they're
nice and separate. Okay? It's called non
destructive editing. It's perfect but can catch you out if you
are doing adjustments. All right, so what I
want to get across, let's click on Tree
and we can go back to properties in here. What you end up happening, like me as a creative,
some of these things, like trying to fudge in a
tree from some of the image, might be still part of my
job because I might have to have a specific image and
a specific photograph. But let's say I just need
to compose something here. Okay, I'm going to
use generative fila. But then my job ends up becoming
like a prompt designer, like, how do I tell this thing? Can I tell the computer
to get the result I want? You end up playing
around with things like I'm getting better at it. You will get better at it too. Okay, so I want a
dead tree. Oh, cool. Okay, and I can go
through my variations. If I keep going through them, I go back to the original ones. Okay, it's just
the same as using this icon as it is over
here. There's my icons. Pick one that I want.
Remember, you can keep hitting Generate to
get something better, but you might be like,
okay, it's a dead tree that is laying down. Okay, maybe that's the
thing you're looking for. You end up doing this type
of thing with generative AI, coaxing it to get
close to you want, you can get better at it. They give you nice little
tips on how to do things. There you go. Oh, look
at that lying down. Next I want to add
a car over here. And I want to show
you because it just gets you run into problems. We are dealing with a bit
more advanced stuff here, kind of throwing them
all together mainly because generative Phil is so exciting and
new in Photoshop. I want to early in
the course and yeah, this video is going to be a little bit longer because
I'm going to have to introduce a little bit more advanced stuff
as we go along. So we've found like, we've
jumped ahead a little bit, we have a little bit
because I want this kind, I don't know, I want
this video to be bulletproof on its own. So what we're going to
do is let's add a car where you have this layer
selected is kind important. If I'm on the tree
layer and I use my rectangle tool and I draw something out, that's
where I want my car. Okay. It'll work. It'll look through all the
layers underneath. Okay. And draw me a car. Let's
go, let's type in car. I'm going to use my fast
forward editing mode. It's worked kind of. But you can see the car layer
here is above the tree, but below these two here which are the roads that I've removed. Okay. So I can now grab the car and just move
it above everything. Probably want it underneath my, what do you call it,
adjustment layer. But can you see here?
It's looked down through the document and it's
matched this background. But anywhere that it had
these guys over the top, can you see it kind
of mix it up a little bit when you are adding a layer? Let's delete this one here. Okay? Instead of
clicking the trash can, you can drag the
word car into it. That's what I do a lot, it
gets rid of it. One big go. What I want to do is
make sure that I'm working on the tip
topmost layer. I'm probably not on this. I'm going to turn that
off for the moment. I'm going to work on top
of all my physical layers. Okay. Then I'm going to
grab my rectangle tool. It incorporates them all when it makes them. So I'm going
to do the same thing. I'm going to make sure it overlaps and I'm going to
type in generative fill, or I can just type in
here and there you go. It's working, but it's
taking into account these other parts that I
had that can be tricky. Awesome car. Okay. Again, I'm going to do classic car. Classic.
Will that work? Speed along. Actually pause.
Is there a cat driving that? Anyway, Egos, pretty much
the same as the last one. Okay, I'm going to go red. You can see I don't
really need to be particularly keyword rich rather than a sentence structure, okay, Or wholesome,
okay, broken down. You end up kind of going through these
iterations of like, okay, that's kind of it,
that's it, that's it. You can get more
and more specific. Start with something
generally kind of the direction you want to go and then kind
of go from there. Some of the results
like nature is perfect. Absolutely perfect.
Okay. I think it is. Anyway, as good as I
could do as a retoucher, some of the things
like buildings and cars, especially people. Okay. It does like
the human brain can kind of work
those things out that you're like
don't work like that. Okay. So some of the
more artificial things you're creating will look
a bit wonky sometimes. Sometimes they come out perfect. This thing's getting better
and better over time. I bet you, if you're doing this now and you're watching
this in the future, it's coming out way
better than my version. Not really broken down enough. This one here, wait, that they're going going for a
crash instead of broken down. There you go. Whoa,
Being a bit of a prompt designer or prompt creative is a big part of using some of this
generative AI stuff. One last thing about
generative AI or generative fill is the size of your selection
will change things. If I do this and I type in, I want to pterodactyl, I totally had to Google that. Spend a yes trying
to spell it myself. Disappear at the
front. There you go. I have a rectangle size will give me a very
different result. And if I do a
Pterodactyl, this size. Okay. Hang on. All right. I was hoping for a redactor
and that's what I got. Anyway, sometimes
it's not perfect, sometimes it has
more than one eye. The size of the selection
box counts a lot. If you do them really
small and really thin, and I type in birds plural, we'll get far away birds. If you do a big overlapping
stuff, you'll get a close. There's a little bit
of trial and error, but know that the size
of your selection will determine a bit
about what happens. Oh, that's a weird one,
it thinks my bird. Because you can see
the horizon down here, like it's all blurred. So it's trying to
match that focus. But this is not what I want. Okay, I might have to do. There you go, Small selection. I put flock of birds
and wow, swarm. And you can get
selection matters. The other thing to note is that you can type
in any language. Most languages, I think
it is 100 languages. If English is not
your first language, try typing in your prompts. Because you might be
more articulate in your language, you
can type in there. The other thing to note is
that these variations carry on with the actual file. You see this one
here, this one here, they all have variations and our file size
isn't very big. It's only about 2
megabytes or something. It's getting bigger and bigger
as we add these things. If you've got a
really high res image and the file size is
getting really big, you can go through and
delete the ones that you're not using to get the file
size down. All right. Next thing about
generative AI is you can actually make new
files file new. Okay, I'm going to go to Photo, I'm going to go to
default Photoshop size, I'm going to use seven
x 5 " at 300 DPI. You can use whatever you want. I'm just giving
something to start with. What you can do is use generative
AI as the entire thing. I'm using the same rectangle, marquitoain, I'm drawing a
box around the whole thing. I started just off
on the screen. Can you see if I start
dragging over here? And I click and drag,
grab the whole thing. And then use generative fill. And I say something
like Field of Grass with old house in
the background. Use my speed AI, Cool huh? Just made it out of nothing. It's used bits of other images
and model them together, and smushes them together into this composite. Look
how cool it is. Let's say you like this one, but it's too low in the grass. You start doing things like bird's eye view to try and help it get the
angle that you want. Okay. I'll use my AI fast
forward button again. We ooh, look at that. See some of them wed
they're in there. Oh cool. And I'm going to put a season in there, fast forward. Bam, I put it in winter
and now it's all wintery. Okay. You can add
literally say with snows on trees or are there you go. So this is like a whirlwind
tour of generative Phil. As our skills get better, we'll be able to use
generative Phil better. Okay? But it's new and heart
and really, really good. So I want to check it in here at the beginning
of the course. The other things and
questions you might have, as I mentioned at the beginning, about credits and
commercial use. Let's talk about credits at the moment, what
Adobe are doing. Okay, last updated
this one here. You're watching
this in the future. It could have changed by now. But double check how many credits you're
allowed At the moment, it's very expensive
to generate AI. So what they're doing is
if you have a membership, I have this Creative
Cloud app membership, so I get to do 1,000 of those
generate buttons a month. Okay, They don't roll over, but I get nowhere near it. And I'm a heavy user. Every time I go like this
and I had to generate, I'm using one more
of my credits. Okay. During this course
where I've been showing you, I've probably used
about 10:15 credits. Okay? They're all coming
out of my credit limit. Okay? Have a look
to see which one you're at and double check
what it is at the moment. Okay. So if you've just
got Photoshop, okay, You've only got the
Photoshop license, you've only got 500. Even then I solvent got to 500. Okay. If you're using the photography suite
or just light room. Okay. There's all sorts
of different use cases. This will change and
the price of doing these computations will come down and you might
get more credits. I might get less credits, but
I found it's very generous. So don't let that hold
you back about, oh, I'm going to run out of
credits that monthly and you have to be a pretty heavy
user to get anywhere near, I don't even go over 500. The last thing before
we wrap up is, can I use it for commercial use? The answer is yes. Double check. Like I'm using generative
AI guidelines. You can Google this,
this may update. But it's always been Adobe's position that anything that they create that is out of beta use, like Photoshop or light
room or anything using these generative AI features is allowed to be
used commercially. I've been a lot of conferences and that's what they've said. They've listed it in their
documentation, let's say here. But don't say that. Dan said, go and
double check for yourself if you think you
might run into problems, most people aren't going
to have a problem. If you're a large
company, you've got a legal department, go ask them. Okay. Get them to double check. Yes. You're allowed to
use them commercially. Yeah. But again, do your own
research and be wowed by. Look how cool that is,
all generated from generative AI in
Photoshop. Ah, so cool. All right, that is the end
of this mammoth video. But it's a mammoth tool. That is awesome stuff. I hope
you enjoy it's lit update. And I'll see you
in the next video.
13. Class Project - Ai Haunted House: Hi everyone. It is
class project time. What is a class project?
It's definitely not boring homework.
It is fun practice. What we learned in the
last video project time, what I want you to do is
it's nice and simple. What I want you to do is I'll outline it in a second,
give you a little brief, and when you're
finished, I want you to upload it to the project
section on this website. I want to see it on
social media as well. I'd love to see it. Okay, so tag me in
these different places, join these groups and edit and tag me in
Instagram and Twitter. I'd love to see what
you for this one, I want you to use generative AI. I want you to create
a new document, give you landscape or
portrait. Up to you. I don't mind about the file size and resolution. Not worried. Okay, If you're looking
for something though, go to photo and just use any
of these, that'll be fine. Okay, You can switch
it from portrait to landscape depending
on what you want to do. I want you to do similarly
that we did in the last video, where we created the
grass in the old house. You can build this up
with one big thing and add a little
bits afterwards, or build it up in small parts. The goal here is to
make a haunted house. There needs to be these
things as part of it. Everything else, I want you
to use your own creativity. Think how extreme you go
is totally up to you. Okay? There needs to be a house, some animal creature
in there somewhere. One tree, lots of trees. I want you to do something
with a sky something spooky. Okay? I want you to hide
something in there. Robotic. Scientificly, Just put
it in there somewhere. Now these aren't really
like hard and fast rules. I want to give you
some boundaries so you can go make something. The main goal here is to practice using generative
AI to create things. Find the limitations,
get a bit frustrated, work around them, get them
done, get bit better at it. So don't worry if you are
sharing these things. If it's the first
thing and you're not that happy about it, you're just getting started, I'd still love to see it. Have a look at the rest
of the things that get supplied through
the social media. And you'll see there's
lots of different levels, people just getting started,
really advanced people, putting it out there really
helps you at least get started on the journey
if you are new to Photoshop. So yeah, have fun. Create a haunted house. There's no right
way of doing it. Our main goal here is just to practice generative
AI in Photoshop. Now you can either save a J pig. Okay, we haven't done that
a lot in this course here. So you can do a
screenshot, okay, Work out how to do
a screenshot on your computer and
you can upload that. We'll get full on saving and
things later in the course, but screenshot will do for now. All right, go off, have fun. Don't take too
long. Just a bit of practice before we carry
on with the course. Oh, when, if you're
looking for this file, it'll be in your exercise files. There'll be a PDF in there
called class projects. What you'll also
find is later in the course I'll introduce
class projects again. Okay, this is kind
of an update video. So I've kind of squeezed
in a new project in front of all the
other ones we do. Okay, So if you do, you'll meet me later in the
course and I'll gay like, hey, you should do
class projects. What I already done here anyway, enjoy the project and I'll
see you in the next video. Once you've done, you're
not homework fun times, al right, that's it, bye.
14. Creating a specific sized document Adobe Photoshop CC : Hey there, in this video we're going to
create a document of a specific size... in this case it's going to be a postcard... but you can do the same thing
for US Letter, or A4, A3. It's a great way of getting
started on a specific size... ready to go for your project. All right, let's learn how to
do that now in Photoshop. To get started what we're going to do is... we're going to create a new page
and bring our image into it. I find that's so much easier. It doesn't matter whether
you're new or advanced. It's just easier to do it that way... rather than let's say
opening up the image... and then going to image,
and going to camera size... then kind of cropping it down,
and which way does it crop in. That's a way of doing it, but I'll show you
the sneaky way, it's a little bit easy. To get started what we're going to do is... go to 'File', and we're
going to go to 'New'. I find it's better to create a document
the right size... and then drag our content into it. Now in this new document window you can
totally start typing sizes and resolution. You can change it from inches,
to pixels, to millimeters. At the top here are some handy presets. So I can go to 'Photo', and I've got
my kind of traditional photograph ratios. I've got print, there's my
US and A4 sizes. Now just know that there's this
little thing that says 'View More'. All sorts of stuff all tucked in there. 'Art & Illustration', 'Web'. The one we want, we want a postcard... and this is hidden under
'Art & Illustration'... you can see him there. Click on him. Now just so you know as well,
this is the US size for postcards. Postcards turns out weirdly
as I've moved around the world... aren't the same size,
like business cards... they're all different in different
parts of the world, which is weird... but anyway 4" x 6",
I want mine to be Landscape. Just leave everything here matching mine. The resolution the same,
and the color mode. We'll talk about those a little later
in the course, they're boring. Not boring, but we'll do them
a little bit later. So if yours looks like mine
let's click 'Create'. So this is my postcard. First of the thing we want to do
is we go to 'File' and try to save it. Weirdly in Photoshop, there's one
of those little weird things... where it won't let you save it. Basically it's saying,
like you haven't done anything. Nothing worthy of saving at least,
I don't know why. So you can either do something,
like grab the Type Tool and start typing... or just go to 'File', 'Save As',
you end up at the same place. So what we're going to do is -
I'm going to put mine on my Desktop. I'm going to call mine 'Allstar Postcard'. Now at the end here, I like the V system,
V1, V2, V3. Never call it Draft or Final. Final is like the kiss of death. You call it Final,
you'll be calling it Final2. Some of you are laughing,
because that's what we do. I do it too. V1, V2 works for me,
and I'm going to click 'Save'. Next thing I want to do is bring in
my Gradient kind of background thing. So I'm going to open up the file
I was working with earlier. So, say you are following along
with this course... you might have a file saved
somewhere neatly... that's got this Gradient that we worked on
in the last video. If you don't, you can go
to 'File', 'Open'... and open up, under 'Exercise Files',
under '03 Shapes'... there's one called 'Gradient Image'... just to save you in case
you forgot to save it. I'm using this original one, it's got
text and stuff on here. What I want to do is-- I'm going to click on the word 'Shoes',
whatever that layer is... and I grab my 'Move Tool',
click, hold, and drag. I'm going to move it, hold, hold. Holding, holding...
and drag it down here. Why I find this easier is... can you see, it's actually
not the right size. I find it just easier to do this,
and maybe transform it. So with it selected,
'Edit', 'Transform', 'Scale'. And I can see, it's just a little too big,
I can hold down 'Shift'. Still the wrong proportion... so I'm going to click on over there,
holding 'Shift' in the corners... and get it to the right size. All right friends, that is how
to create a document. Doesn't really matter what you're doing. We did just a postcard, but
you can do anything... and I find it easier to, like... bring everything you need into it,
and resize it to what you need... knowing that it is ready to go. All right, let's get into the next video.
15. How to draw star square circle shape in Photoshop CC : Hi there. In this video
we're gonna make shapes and more shapes and
other shapes and oh, it's a rectangle
with a corner on it. There's a star
with another star. Oh, it is shaped, tastic. Let's get in there
now and learn how to do this properly in Photoshop. All right, to get started, basically we're
going to be using this little menu item here. So I click hold
and drop it down. Okay, so I just
click hold, hold, hold my mouse key down
until I get these options. Let's start with the
ellipse tool, okay? And what we're going to
do is up the top here you can pick a fill for your
ellipse, so love it to click. And then pick anything you like. If you want to pick
a more custom color than just the random
ones in here, you can click on this little
kind of rainbow ice on here, and you get that color picker that we've used a few times. Okay. Slide the hue up until you find something
you want to use. Pick this one click, Okay, cool. And you can just click anywhere up here to
get rid of that, Phil, drop down, great. So what we want to do is click, hold and drag, okay. And you'll get kind
of any old shape. So if I got to edit,
step backwards. And what we want to do is we did this with the rectangle
marquee tool. Who remembers what
key we hold down on our keyboard to get it to
go to be a perfect circle? Yeah, you remember it's shift. Okay, so if we hold
shift down, okay, it just kind of makes the
height and width locked in. Okay, If you get it to
a size and you're like, well it's not quite right, you don't have to
keep going back. You can go to Edit, Transform
Path, and go to scale. Okay? And the same
thing, Hold down, shift on one of these edges, drag it out and you can
make it nice and big. I'm making mine super big. Something like that.
When you've finished, hit Return on your keyboard, otherwise it doesn't
work, Hit Return. Yeah, that's how to
draw an ellipse. The cool thing about using
this particular tool here, they called shape paths, is that they are scalable.
They are vector. They can go up and down
in size, no problem. Let's look at some
of the other shapes. We're going to use a rectangle. It seems pretty boring, but hold on because there's some
things you can do with it. So with it selected, pick a fill color, I'm
going to use black. In this case there is. Don't have that selected
Edit step backwards. Don't worry about the
color for the moment or What you can do is
see this Layers panel. You can click in
this dark gray area that makes sure
nothing is selected. Now I can pick a fill
color of black, black, even stroke is the line
around the outside. I'm going to turn it
on just to show you. So I'm going to have a white
line around the outside. It's going to be
say, three pixels. Just for an example. I
don't really want a stroke, but I want to show how it works. And what we're going to
do is we're going to draw a rectangle about here and you're like,
yeah, that's a rectangle. Dan, what you've got to see
is this properties over here. The cool thing about using
this particular tool is that these can be adjusted. You can see that the
stroke here can be made really thick.
That's too thick. Okay. You can decide
where the stroke sits, which is this option. I think here it is, this option. First one, there's the inside of the square that is across. You can see either side of that square or this one is
the outside of the square. I don't want any
of them. I don't like you stroke and click on it. And I'm just clicking
on the Strokes, that little icon there and see this little red line that
means no stroke, please. Okay, awesome. Other things you can do with rectangles
still not very exciting. Is these corners here? Yours
is probably Defoldedo. This where it's got a dark
gray box watch, click it. It's not really obvious, Okay? But if you have it off, so it should look
like this, what I'm going to do
is you can change the one particular corner. So I'm going to do say,
20 pixels in this corner. Hit return and you can see
I've got a 20 pixel radius. It's not probably big
enough for you to see 50 pixel radius. I'm going to zoom in so we can all see it together
a little easier. The person editing this
video is probably like, you should have
done that earlier, You've had to move
around anyway. So a nice little trick with this is who knows what
50 pixels is like. It really depends
on your image size. So what I find quite useful is see these little icons here. Pretty much all the
icons in Photoshop. You can hover above
them. See this like Little Hand with arrows. Click hold, and drag
it to the right. You can see it goes
up and you can see my little cartooning over here. Drag them back to
go to a square. Drag them back, you can
lock them together. So when you do drag them all up, they all go together,
all back to zero. What I want is I just want
this one to be a little bit rounded and we're going to reshape it later
on when we do our type. It's going to be that box there. Eventually a couple other things we'll do is I'm going to
zoom out, come on minus. And I want to do stars up in
the corner, these guys here. Okay, So stars are not tricky, but watch this click
and hold down. They come under this one
called the polygon tool, give them a click
and by default, okay, it's going to give me a polygon not sure
what shape that is, pentagon, I want
to say pentagon. You can change the sides. Up
here I can have ten sides, now something I can't name. Let's go to undo. I'm
using the shortcut edit. Step backwards is this one. Here on a Mac it's
pretty crazy it's command option steps backwards. On a PC it's control oltz
just steps backwards. Okay, so I use that quite a bit. I'm probably going to use
that from now on the course. If you see me going
backwards and undoing, I'm just going to this option here using my sneaky shortcut. Great. So what I want to do
is I want a five sided star, but what I want to do is see
this little cog here, Okay? Before you start
drawing, click on Star. Everyone. Quick little update. They've changed a tiny bit. Say I want a star,
that's five, okay? And this little cog here
that I just went into, they've changed a
little bit down here. Instead of clicking the
little star button, you get a star ratio 100% it's gonna mean a
normal pentagon, okay? But if you want the star option, you have to play around
with this ratio. 50% gets you the
normal star option. Okay? And if I drag one
out, we get a star. And the other thing
that flipped, which I'm going to do in the rest of
the course the wrong way. If I went to 15% and
cranked up the sides to 50, 50 little stars and
an inset of 15. It used to be that you
get tiny little indese, like 15% would be this way, but the moment it's
flipped around, so you get a really spiky star. If I go back to this tool
again, it's the opposite. It's 85. Okay, let's
give that a go. And that's more the starburst
that I was in this video. There you go. Simple
Change, no star button. You just have to use the inset. All right, carry on. Play
around with the inset. 50% is going to give
you a traditional star. See this one here? You can
undo it and just experiment. Have a little play around
with the Indian spy. Like I quite like this one. If you get down to like 15 and then turn the sides up to 50, you get this kind
of like starburst. That's quite a handy one for. I don't know, It's
how I buy my wine. Okay. Look at the
label and does it have lots of these
gold stickers on it? I don't even read them, but
that's how I buy my wine. With this layer
selected, I'm going to click on the trash to
get rid of it and I'm going to get my star polygon
tool sides back to five. Click on the little cog
and I'm going to say 50% If you go to 80% they're
going to be super spiky. You can smooth the
edges of it as well. Just have a little experiment. We're just going to do
a traditional star. Okay, I'm going to draw out if you want it straight. Okay. It's our magical key
that we've done. We've used it a few
times now because at the moment it's just
going to be any old size. So I'm going to drag out and
hold down the shift key. You see it locks it into
like more usable shapes. It's not straight up and
down, I don't know why, but this way. Here we go. Eventually, I got
it. Okay. Hold shift and just rotate it
around until you get it's locked into a symmetrical shape.
That's what I want to say. Let's have a look at
changing the color of this. So with this layer
selected at the top here, I'm going to pick white. One thing is that, say,
this color disappears. It's probably because
you're on your move tool. If you're on this
layer on a move tool, it's great for moving around. But if you want to
go back to shape it, okay, just have
this tool selected. Make sure that layer selected
and this will pop back up. You could leave now because
that's almost it for shape. So I'm going look at
some opacity because I want to recreate this
kind of star effect. And this thing here hang around, I'm actually going to draw that circle down there as well, so you can totally leave how to change the opacity already. Yeah, I want to transform this
guy to make them smaller. Okay, so layer selected,
edit, transform scale. Now what I'm going to
do for the rest of this course is that
is a super long way. I'm going to use the
shortcut and it's this one here, free transform. It does a bit of all
of these things. It does scale really easily. So I'm going to use command. Okay, you don't have to, you can come in here and
use this version. But command is just a super
good shortcut to learn. So it's control on a PC. So we'll hold command, okay, And same thing, hold
shift in the corners. And I can resize it, so
I want it to be about that in return, I want
another version of it. So I'm going to right
click it and I'm going to say duplicate layer polygon. Okay, What I'm going to do is the one at
the bottom probably. Okay, so this guy's on top,
this guy's on the bottom. I'm going to stretch
him out using my super new
shortcut ready anti. And I'm going to scale it out. If I hold shift, okay, I
can drag it out there. Then I can grab anywhere
but the center. And try and line them back up. And that generally works. Another little short cut I'm
going to share with you. Okay? So I'm going to hit escape as escapes that,
I didn't mean it. I'm going to go back
to where it was. So I've still got two stars
on top of each other. The bottom one though,
I'm going to hit my command or control on a PC. Holding shift makes that
come from the top left. Okay, but if I hold shift an
option on a Mac or Alton PC, So look down on your keyboard. Hold shift and if
you're on a Mac, hold shift an option if you're on a PC hold
shift and Alt. And what it does is can
you see the difference? It resizes from the center. I don't want to like
bamboozle you too much for a shortcut so
you don't have to. You can just line it up. You
shift and just line it up. But I want to make mine a bit bigger than it was about there. Nothing really happens
except this bottom one here. I want to lower the opacity. See the opacity slider here? Just going to lower it down until I find something I like. I'm actually going to
use the transform. I'm going to make
it a bit bigger. We've got to drop
shadows on that one. That's going to make it
look nicer later on. But we're not there
yet. Yeah. If I want to re I'm going to
resize this top one as well. Actually I want both to
go a little smaller. Holding down both of those keys, you I'm going to do the
same thing for the circle. Okay, this guy selected my lips. I'm going to duplicate him. Right click. Duplicate layer. You should give them a name. I'm going to be honest
with you, I never bother. I'm sending it to somebody
that I need to impress, Okay? And I'm going to my manten to grab one of these side bits, hold shift and option on my
neck, make it a bit bigger. And what I'm
probably going to do is I've got the big one on top. I'm going to put it
underneath with it selected. I'm going to go over here
and pick a new color. We're going to look at specific
colors that might match the background in
a later tutorial, but that's what I'm doing. So this guy's on top,
this guy's underneath, and he's just a
little bit bigger. You could play with the
apacity of this one as well because it looks kind of
cool. Black bar here. I lower the apacity of lots
of them just to kind of, I don't know, start
showing through things. That's kind of cool when there's a bit of transparency going. The last thing I want to
do is I want to get this. I want it to be longer,
so I'm going to use my command on a Mac, control T and PC, and
just drag it out. The cool thing
about live shapes, can you see that corner
is still preserved. It doesn't matter how
long it doesn't distort. Okay, I'm going to
drag it so it's off, even past the edge,
it doesn't matter. Enter on my keyboard
to finish it, and I'm going to use it
as a kind of off page into the bleed type box. One other thing I
want is a little circle down here, okay? And I'm going to be
lazy, instead of drawing out ellipses
and giving it a color, I'm going to grab this guy. I'm gonna right click it. I'm going to duplicate him. Yes. I'm going to give this one the name because
you're watching me. Let's go for small,
small circle. Okay? And I'm going to transform it. Holding down my short keys, grabbing anywhere
but the center. And it's going to go
down here somewhere. Okay, is it return
on your keyboard? That's our epic shape
building video. Done. Let's get into the
next video where we start adding type and then
we'll do drop shadows. Load's more to do,
but let's do it in a following video. Bye now.
16. Stealing Colors & Adobe Color Themes: Hi there. In this video, we're going to pick some
colors for our shapes. I'm going to show you a
cool place like this to get some ideas for colors, I'm also going to
show you how to steal colors from an image. Let's get into it now, and get started. Welcome back. First up, if you can't work on the file that
you've worked on in the last tutorial, if you are just jumping into this particular one,
if you've got a file open, and in the file called
Exercise Files, Shapes, there's is this one
called coloring shapes, open that one up and
that's where we're at now. We just randomly picked colors, and they don't quite
suit the background as much as I want. I'm going to show you two awesome things to do with color. This should probably have
been in the color section, but it's hard to separate them all out into
sections too much. We're going to look at just
how to get nice colors. I get stuck in like I'm
using that gradient there, I've used probably on
every second job in the last six months just
because I like those colors and it's hard to break out
of your color schemes. If you look at any moment
designs is either this green, that I want to
say, I don't know, mandarin, peach color
and, baby blue. All my work's done like that. The way I get out of
that comfort zone, and find other colors, the nicest way is
under "Window", and it's under "Extensions", and I don't know
why they hide it. It's such a cool little thing. "Window", "Extensions",
"Adobe Color Themes". You need to be connected to the Internet for this to work. This little panel opens up. Now the initial
one's a bit boring. It's this" Explore" one that
is quite exciting for me. Can you see here? It's nothing but just a bunch of cool colors. Scrolling down, there's some
really cool stuff in here. You can do searches in here. If I need something
from the 80s, hit return, it'll do a search, and that's some pretty
successful 80s colors. I'm from Auckland
in New Zealand, weirdly, if you
talk in Auckland, there's universities,
there's council colors, you can find all in there. If I can find obscure things
from an Auckland council, then you can probably
find maybe your brand, and your corporate
colors in there. I'm going to get
rid of it, and I'm actually going to go "Create", and then back to "Explore". Yeah, like just
some cool colors. You can say "Most Popular"
this month or all time. I'm going to go to all time, and yeah, some cool colors. The best way to use them is say you decide
on this color here, click on this
little dotted line, and say "Add to Swatches". Ignore this "Libraries" thing, we'll look at it later on, close that down as well. Now what we can do is we
can click on my "Ellipse". If you're using an earlier
version of Photoshop, often you still need
to go back to any of these paths tools and you
can use the Fill up here. I'm using a newer
version of Photoshop, so "Ellipse", we can
change it here as well. Click on it. You'll see
down the bottom here, those are the five color
swatches that we've added. I can go, you, you. It's just a way of, I guess, picking colors that are nice. Same with this
ellipse color here, I'm going to turn
the opacity back up, and I'm just going to
pick one of the colors. It's still not
quite working with my colors in the
background here, but what you'll find is, it's just a neat way of busting out, and getting color options. You're doing some logos,
awesome designs or web work, and you just need
to have like three color options for the client, go to "Adobe Color Themes", and just find some new
stuff. I'm waffling. Next thing I want to show
you though is how to really steal colors
from an image. It can quite often be a nice way to definitely
match the colors. I'm going to have this
front ellipse selected, I'm going to click on this, and nothing really
needs to happen. You need to click
on this Hue slider. We're not really
going to use this, just move them out of the way. Then see little Eyedropper, we can start working
through this. The trouble is that it doesn't
update this automatically. It's picking the
color, which is cool, but it's not going through. Let's click "Okay", now it will work. I've picked
the pink from it. I'm going to grab the
green, same thing. Click on the "Color Swatch",
grab the Hue slider, and just move out here, and I'm going to pick
one of the colors. In this case, an orange. Now, are the colors
working for me? I'm not that happy with them. What I tend to do is I
say this color here, I can use my same trick,
pick a different color, say I pick something from here, something a bit warmer, and what I want to do is maybe just drag this little
circle down a bit to get maybe something
that is close to it but maybe darker that's
being used in there. You might find that
works good for you. I'm going to click on this
one, do the same thing. I liked that color. I just want it to be like
a darker version of it, you just drag it straight down. Yeah, I've made her ugly. What I'm probably
going to do is I'm going to play around,
now you can leave. We've learned how to
do little tricks. Remember "Window", "Extensions","
Adobe Color Themes", pretty cool and you can
use the Eyedropper tool. You just need to
have it selected, and start stealing colors
by clicking on this, and clicking on this, and you can just pick colors
from there using that. Great explanation there,
let's hit "Cancel". I'm now just going to mess about picking
colors that I like. You can hang around if you like. I don't like this
mud brown color, *** brown, with it selected, I'm going to go to this, go to this, you don't
have to click from here. I'm going to click on this one. Now the circles are
the same colors, but I want this
top one to be like this green. I like that green. I randomly picked
it, but I think it compliments this
all very nicely. "Eyedropper Tool", click "Okay". Yeah, I'm happy enough with it. One thing though,
if you were dealing with corporate colors, you can click on this, and just type them in here. Hopefully you've got a corporate
spec manual somewhere. Ask the marketing department, if you are the
marketing department, and you have no idea
what the color is, import the logo, and
just use the same thing. Use the "Eyedropper" to steal
the color from the logo. It's not exact, but good work or type in the RGB colors
or the CMYK colors, if you can find them. I'm going to hit "Cancel". I am done. That is the end of the video. Let's get into the next
one. All right, bye now.
17. How to create text in Adobe Photoshop CC: Hey there, in this video we're going
to look at Type in Photoshop. There's just two big, two basic flavors. One is like this text box here,
which types on forever... and then there's this one
here, the Type Tool... which has effects where you
can kind of get it to-- Type to kind of be a
bit more body copy-ish. We'll learn some tricks about resizing... and some other quickie
little things as well. So let's get into it. So we are continuing on with the
file from the last project. If you are just jumping into this one you
can open it up by going 'File', 'Open'. And in your 'Exercise Files',
under ''03 Shapes'... you can open up this one
called 'Coloring Shapes'. Open that up, and you'll get
close to where we're at now. We're going to use the Type Tool. It's reasonably simple, there's two
kind of main ways of using it. Now one thing to note is, because we're
working with all these shapes... Photoshop really likes to-- If I've got the 'Type Tool' selected... and I'm on a Shape Layer,
like this Ellipse... it's going to try and combine the
text into this shape here... which is not going to work for us. So if you do run into that problem,
go to 'undo'... then go to 'Select', and
go to 'Deselect Layers'... there's nothing selected. So there's two ways of adding text, right?
If I click once... and I start typing... 'All Stars'... it will just go on forever, I'm
going to select all this text. I'm dragging my mouse across it... and I'm going to pick a friendlier
font size for you guys to see. So if you click once, it's just
going to keep going forever. You can put a 'return' in. So let's say I want All Stars on two
lines, I can just click in front of it... hit 'return', and I've got a return. Let's ignore the giant Leading. Actually no, this is just a Leading, so
I'm going to select both of these guys. It's because I was playing
with this earlier. Leading is the space between the lines,
and it is this option here. You can kind of hover above it,
it's called Line Spacing here, no Leading. You can set it back to-- often 'Auto' is a happy size. Now the other way of adding Type is... let's go back to our Move Tool, it kind
of like connects that text you've done. Grab the 'Type Tool' again, and
instead of just clicking once... which types on forever, we're going
to click and drag out a box. I'm going to kind of
start half way in here. I've got to make sure no
Layers are selected... or at least, none of these Shape Layers. I'm going to click hold
and drag a box like this... and by clicking, holding, and dragging... what it does is it allows you to have
what's called a Fixed Width box. Just means when I start typing... it's going to break
down to the second line so it's really good for body Text. We're doing this option here where we
want the text to kind of snap around. A couple of useful things... is I'm going to select all my text,
and delete it all. I'm going to pick an appropriate font size. 20 is too big for in here. A proper Font size is,
I can't even remember. Let's go for 16pts in this case. I'm going to pick a Font. I'm using Museo Sans Rounded,
I like it, it's pretty. You're probably not going to have it. It's just that font that I've downloaded
from something called Typekit. So just have a little look
through here, pick a font. Pick a weight, this is like
bold, light, medium... but especially the Font size,
get it to something like 16. It's probably still too big,
let's put in 12 for the moment. And I want to show you a
couple of other things. One is, let's say you want
to put in some fake text... because you don't have it yet, right? I'm going to switch mine off
being capitals, delete that. Mine's on capitals, because
under Advanced here... I clicked on this button earlier when
I was working on a side project. That just says, whenever I type,
make it all capitals. I've turned that off and I'm going
to close that back in Advanced. Is not that advanced. Just has some extra stuff that
you might need to close it down. Back in there, please. So I've got 12 points,
I've picked the font. Instead of just typing in,
like mumbo-jumbo... because you don't have
the text here, right? You're waiting for the client to have it. There is something in here, it's quite
handy, I'm going to delete all that I'm going to go to 'Type'. So my cursor is flashing inside of here. 'Type Tool', flashing
inside of here, 'Type'. There's this one called
'Place Lorem Ipsum'. You probably know what that is already... if you don't, it's just mixed up
Latin words, it's like... they're actual Latin words,
they're just in a random order... so that they're just good to hold
the place of text until you get it. There's lots in there, it just
dumps a big lob of text in there. So if you delete a word, it's probably
going to replace by another word. It's just, there's so much
kind of spilling out of this. What you can do is-- I can click in there. Go to 'Select', and go to 'All',
so it's selects all the text... and find a font size that works for me. '10-point', 'Font', 'Weight'. Now we're going to do
a couple of things... but we're not going to go
through every font option... like Centered versus Right Align,
you'll be able to work that out. This one is the space between lines. What I like to do as well,
you can type it in here. You can go, "I want it to be 24." On these icons, we've looked
at it before... you can click, hold, and
drag on these icons, right? Just kind of drag them up and down. If your computer is old and slow... dragging that thing just is painful,
you have to type it in, sorry about that. To move your Type,
grab the 'Move 'Tool'... make sure you're on that layer,
and I'm going to move them around. It's going to work for me. What else am I going to do?
I'm just going to add some Type now. I'm just going to basically
add this stuff in here. You can totally leave now,
there's no super awesome-- All right, one super awesome trick. See this All Stars thing here,
so I've got the layer selected. Instead of going and playing
with the font size... which is fine, you can
drag it up, drag it up. I'm going to undo and put it back. What I like to do is that same trick we use
to scale up these circles, works for fonts. So 'Command T' on Mac,
or 'Control T' on a PC. Long way, remember, is under
'Edit', 'Transform'... and there's one in there called 'Scale'. I find this is easy, holding 'Shift',
I find I can get the Font size that I want. Roughly there, hit 'return'
when you're finished. You can see, it's bumped
it up to a weird 44.44. In terms of the Leading,
I'll probably drag it down a little bit. I'm probably going to make
this bigger now. Now you can go,
there's no super extra tricks. I'm going to grab my Lorem Ipsum. I'm going to drag it so it lines up,
grab this rectangle. I grab this, I'm going to move it up... and I'm going to grab my Type Tool,
I'm going to put in that 'C. Taylor'. Let me check, you made some Suede shoes. If you're not huge on fonts,
often it's nice to see use the same font... but different weights, so this one's
the really thick, 1000... or if it was another font it
might be called Extra Black or Bold. I'm going to turn it down to like 300. Yes, 300, I'm going to go for... 100. Font size again, instead of using
Font size I'm just using the 'Command T'. There's a little bit of dragging
this thing around, moving it around. Getting it how I want. You can keep typing it out,
often a nice little trick is... this All Stars layer here, I'm going to
right-click it, and duplicate it. I should give it a name,
I'm not going to... just going to drag it down because
what I want to do is grab my Type Tool. I'm going to put in a web address,
so this one's going to be www.scottshoes .com Font size too small. 'Transform'. scottshoes doesn't exist, so I made
that up because it's my last name. When you're doing it,
give it your own name. It could be, smithshoes. I think that's an actual thing there. Look, I've spelt shoes wrong. I kind of like it, it's kind of like... I don't know, feel like it's foreign... maybe a little too foreign,
nobody's going to find my website. Awesome! So that's going to be it
for the basics for fonts. We are going to look at doing
type around a line in the next video. So let's go and do that there. All right, see you there.
18. How to warp text in Adobe Photoshop CC: Hi everyone, it is time to bend your text. Warp it around, do some
different shapes, adjust it... and definitely look at how to
turn it into a fish shape. All right, let's get started. So to start off with you need some Type. I've got this one here,
this layer here called 'All Stars'. I'm going to start bending that one
like you saw at the front. All we need to do is, with that Layer
selected, be on the 'Type Tool'... and then there's this option up here. It's kind of a T with the underline
underneath it, click on him. Click on it, and nothing happens. Get ready for amazingness.
Ah, arching Type! Lower arc Type. It’s up to you what you're
looking to do with the Type. That's kind of getting okay,
I'm not hating that. My favorite is always the fish. Everyone needs fish shaped Text. Once you've got the one you want,
the style that you like... it's definitely probably a fish. You can play around with
these options underneath. Just decide where it bends, how it bends. It's more just playing around... and getting the type how you want. I'm going to get it back to
regular by hitting 'Cancel'. With it selected go up to this
'Bending Text Tool' option again... and go through and experiment
some of the other ones. 'Inflate', 'Squeeze'. I don't do it too much, ever... except a fish. That's destroying text,
and I'm not a big fan of that... but you might have a good use case
for it, so there it is. Let's click 'OK'. One last thing to show you is, if you've
got it and you want to adjust it... say it's like too archy for you... with that Layer selected,
you can click back on this... and it jumps back in to where you were. And you can keep editing it. You want to get rid of it,
go up to here, to 'None'. Let's click 'OK'. That's how to kind of bend and distort it. Next one we're going to do is... I promised you, Text on a Path... where it kind of follows a circle,
or any sort of a shape. Let's do it in the next video.
19. How to get text to follow a line or circle in Photoshop: Hi there, in this video,
trying to be clever here. It's text following the path. We even do this where it kind of goes
around the top and around the bottom. Let's learn how to do that now
in Photoshop. To get started we are going to
do the squiggly line first... then we'll do that kind of bag shape. So the technique is called Type on a Path,
so we need a path to start with. There's a few ways of making it,
we're going to use the Pen Tool. If you click and hold down the Pen Tool
for a while, hold, hold, hold. We're going to use the Freeform Pen Tool. If you are a Jedi master with the Pen Tool
or the Curvature Pen Tool... you can go and use those,
but if you're a mere mortal... grab the 'Freeform', it is just as
it sounds, you can just draw things. To make your drawings a little bit nicer,
there's a sneaky trick... see this little cog in here?
Click on that. What you can do is,
where it says Curve Fit... you can crank it up a little bit
to say something like-- It goes up to 10, but 10 is probably
too much, go up to something like 5. What it allows you to do is... when you draw, I'm going to draw
like a little wiggly line there... it just makes your lines
look a little smoother. Turn it down to 0, and it will
follow your mouse perfectly. It's up to you what you want to do. That's basically it. Paths are weird, they don't
appear in your Layers Panel. They appear in this Paths Panel,
which we're not going to really look at. All we need to do is go to 'Layers',
grab the 'Type Tool'. You don't need to change anything. You just grab the regular old Type Tool,
and watch my cursor here. It will zoom in. You can see my cursor has got the box
around it, watch this when it changes. Can you see? A line through it, that means
it's kind of following this path. So be careful where you
click on this line... because that's where the text
is going to start. So I'm going to click once, kind of
towards this end here, and voila. I start typing. So it's going to follow the line around. If you're finding yours is not working
it's probably because-- I'm going to undo, I'm going to go
back to the beginning here. They say it's not working, I'm going
to hit 'Esc' on my keyboard... that's the "I didn't mean it" button. Get out of that. Before you go and click on here,
is to pick a font size. So you can do it at the top here. If you've got a font size of,
something really big... it just doesn't work to fit on this line. It feels like it's not working,
it is, just, your font's huge. So pick something really small,
start with 5pts, or something. I've got it 10pts, and it work fine. Click once and start typing here. You'll notice I'm a terrible speller.,
lots of deleting. So once you've got it here
you can do some adjustments. To do the adjustments,
you can select the text. I'm now going to make a bold text here. I'm going to pick a color
that you can actually see. Dark green. Say we want to adjust a few things. Say we want to adjust the start point
or the ending point. Actually before we do that you can
just say 'Center', and it will put it... kind of in the middle
of the beginning and the end... but let's say we want to
leave it left aligned... and we want to just move this along. To do that, it's this tool here. It's underneath the Type tool,
it's called the Path Selection Tool. You might have to click and hold down,
you want the top one here. With it selected, there's two main things,
there is this dotted end... and there's this little cross
at the beginning. You can kind of see, that icon changed, see
the little arrow that appears either side. It's beginning and the end,
so I can click, hold, and drag it... to say that's the beginning, or I can drag
it all the way to the end here... and make sure it's the beginning. Now I'm very specific about
where I'm drawing... because I know if I click, hold,
and drag this, and I drag it down... everyone's on the other side,
and everyone's lost. It can be a little weird to get used to. If you do get it on the other side... find the beginning again,
that little cross... then try and flip it over. Can get weird, even I find it
a little bit troubling. So I'm going to flip it over again. So, the crosses... sorry that cross at the beginning... and this... I leave it in here because I'm going
to show you, it's a little bit hard. So the cross is the beginning,
this guy here can be a little problem... he's the end of the line. Not there, it's wherever this dot is,
because what can happen is this. We don't do that either, flip back across,
there's a little dot. If I drag it up here, can you see,
that word disappears... there's just not enough room... for that word to appear with this dot
so far up, so you can drag it back down. Be careful not to drag it
on the other side. To move this whole thing around,
just go back to your Move Tool... and you can click and drag it. To go and start editing again,
make sure you have that line selected... and you need to grab the Type Tool
to adjust the text... or this Path Selection Tool. We're going to start working
on this circle... because what we want to do is this,
where it goes top and bottom. So there is not a like a magical way
of doing it. It's basically what we did up here,
but using a circle. So I'm going to go over here. I am going to grab my tools over here. My Shape tools, we looked at these earlier. I'm going to use Ellipse, but what
I'm going to do in this case... is instead of using the shape
which draws my shapes like earlier... I'm going to switch it to Path. The big thing to remember though is,
later on in this course it remembers Paths. When I draw things,
they don't appear as layers... they appear in here,
it's a bit of a weird thing. So later on in this course,
when you're trying... to draw a circle, and it's not appearing... you can email me of course,
but it's probably because... you haven't switched it back to Shape. Just show you that, switch it back
to Shape when you're finished... it causes less problems, but I want
in this case to be a Path. And I'm going to draw a circle,
I'm going to hold 'Shift'. Going to draw it roughly the right size.
I'm going to grab my-- I'm going to move it around using
this tool here, the Path Selection Tool. I'm going to grab it,
so it's kind of there. I'm going to transform it
using my 'Control T'... and I'm going to get it so it's
kind of sitting inside here. We need to adjust the circle later on,
hit 'Return' when you're finished. Now all we need to do
is grab my 'Type Tool'. Just be careful when you are clicking
on this line to not get this version... which has got a circle around it,
or the square around it. This version here with a line through it,
you can see, a little tree. I'm going to click there at the top... and I'm going to say, this is... 'Scott Shoes'. I want to do a few things,
I want to rotate it around. Now what we can do is,
you can play around with the... I guess Center Alignment,
Right Alignment to try and get it... or what I like to do is just rotate it. So what I'm going to do, is I'm going
to click on my 'Move Tool'... because I'm halfway through my typing... so some of my shortcuts don't work. If I try and type 'Command T' now
it doesn't work... because I'm halfway through typing. So what I'm going to do is go
back to my 'Move Tool'. I'm going to 'Edit', 'Transform',
and I'm going to use 'Rotate'. Now I hope you're okay
for a little bit of a shortcut I'm using 'Command T'. We've used this a few times in the course
for resizing, right? We hold 'Shift', and we hold down... 'Option' on a Mac, or 'Alt' on the PC,
so 'Shift Option'... and I can shrink this thing in and out. It's kind of half what I want,
but I want to rotate it as well. The cool thing about
using that shortcut... which is 'Command T' on a Mac,
'Control T' on a PC... is that, watch this, if I grab
the corner, it's scale... but if I hovered just out here
I'm not doing anything... just moving my mouse out here. Can you see, it turns into like
a little rotation arrow. So now I can click, hold, and drag it. Just kind of rotate it around,
move it here. Kind of get it to where I need it to be.
'Enter' on my keyboard just to commit that. I'm going to pick a font,
I'm going to use white. Font size, it's going to be
a lot smaller, 6pt. It's moving around the line again,
so I'm going to have to rotate it again. 'Command T', and just drag it around,
'Scott Shoes'. Scale it up a bit. Another little thing that's
happening there is... I'm trying to drag, and it's
kind of snapping to things... which is kind of cool... but sometimes you're just like... "Go where I want you to go,
instead of jumping around." You can go to 'View'
and turn 'off' Smart Guides... but what I like to do is... on my keyboard, we just
use the arrow keys... so look down your keyboard,
just the up, down, left, right. You can tap things around,
it's kind of handy. Hit 'Return' when you're ready, that is
going to be the top part of my circle. Now what you assume is you can type
along the bottom of that same circle... that's not possible. What you need to do is just
have a second Ellipse... make sure it's set to 'Path'... and draw out another Ellipse. Don't worry too much about the size... because you're going to have to resize it
to suit the circle and the font you pick. To move it around go back to
the 'Direct Selection Tool'... get it roughly in the right position. Grab the 'Type Tool', click once
down here, and I'm going to say... 'Established', we totally missed it;
'Esc' key. I'm going to go to 'Edit', 'Step Backward'. Remember, you got to look out
for that perfect icon. I got it flashing in the right place now. 'Est. 2019'. So it's doing what the top one did,
which is the outside. Now remember, when we were doing this,
and we flipped it over by accident... we want to do it on purpose now,
so grab the 'Direct Selection Tool'. What we'll do is click,
hold, and drag it... and you want to drag it
so it's on that other side. It's a bit fiddly I know,
just click, hold, drag it... until it flips on to the other side. Now I'm going to use my--
back to my 'Move Tool'... using 'Command T',
or 'Control T' on a PC. Rotate it around to get it
to kind of where I want to go. Turn on my keyboard, it's looking okay. Now if you are thinking, "That seemed
kind of painful, Dan"... it is kind of painful in Photoshop. It does it fine, Illustrator does
it better, as well as InDesign. They do this kind of like
Type on a Path thing a lot nicer... there's a little bit more
sophisticated tools... but Photoshop does it fine. You can leave now, I'm going to go
and play with my fonts. I am going to grab my 'Type Tool',
and say, you are the Lite version. I want it all to be Lite. I'm going to play around
with the Tracking as well. Hit 'Esc', I'm going to undo. And here's your Lite version. I want you to be this superhero version. You can see, it kind of
adjusts the lines... there's a lot of rotating to get
everything to look nice. Same with 'Estd'... I'm actually going to drop down
the font size to something smaller. The same thing here. I'm going to make you the big heavy one. And I'm going to make you-- If you're finding it hard to select on,
I am finding it hard too. Back to my 'Move Tool',
transform it around a little bit. Actually what I might do
before I rotate it around.... with this layer selected... this one here, we haven't really looked at,
it's called Tracking or Kerning. It's the space between letters,
I'm going to drag it up or down. So I'm going to say,
I want it to be about 50. Because it's on the inside of the circle,
they're kind of starting to touch. With Scott Shoes, I want it to maybe
tuck it in a little bit... because it's expanded out,
so maybe '-50'. Now there's a lot of rotating and resizing. So we're nearly at the
end, or we're at the end. What I'm going to do is add that
kind of S in the middle here... and set you a little project. So I've called mine Scott Shoes... you give yours your own name,
pick your own fonts. See if you can get the type to bend round,
make it look nicer than my version. And we're going to pick
a big kind of like... we're picking a logo type,
and I'm just going to cheat... by going to the 'Type Tool',
clicking once out here. I'm going to type out capital S,
I'm going to go through my fonts. I've already gone through my fonts. Lying, the one that I want is-- so it's not a logo I've designed,
I've cheated. Just used the font.
What is it called? It's called... Hobo? Hobus? Not sure. I'm going to grab my font size
and just make it nice and big. You probably don't have that font... so go through and find
a font that you like. Use a nice big kind of logo type. I want to see what you make. So you might have a really long name... give it your name, pick some fonts,
circles, colors.... I'd love to see a screenshot
of what you make for your brand. Doesn't even have to be shoes,
just be your name. Just wanted you to prove to me
you can do Type on a Path. When you're posting it... give me, out of 10, how painful it was. I still find it painful, and I'm pretty
good at this. You might find it even more painful,
so out of 10... 10 being mind-blowingly
brain-melting painful. And 1 being super, super easy. I don't know what you're
going on about, Dan. So send it to me on social media,
Instagram, I'm bringyourownlaptop. On Twitter I'm danlovesadobe,
or just post it here on this page. Thanks for tuning in,
one of the longer ones. I will see you in the very next video.
20. How to add a line around the outside of type in Photoshop : Hi everyone, in this video we are going
to add Stroke around text and objects. Even, we're going to get bit
fancy with double strokes... that have patterns in them. All right, let's go and do
that now in Photoshop. Hi there, to get started you can use
the file that we've been working on... or just work with any file. We'll start with adding Stroke
to the text, then an object... and doing multiple Strokes, over exciting. We start with the All Stars text. I've got it selected here in my layers,
make sure it's this light green. And adding a Stroke around the outside,
use this little 'fx' the icon down the bottom, click on,
and go to 'Stroke'. It's that easy. Now yours is probably going
to look nothing like mine... mine remembers the last thing I did,
yours is probably going to be... going through it there,
black and like one point. So you might be looking at it and going... "I can't see it." It's a little bit hard
to see it, right? So grab the size, crank it up. You can see, in my case, it depends
on what position yours is set to. I think it's probably by default,
set to Center, I think so. So inside, is the inside of the text. You can kind of see, when
I get to this size... it's all on the inside of the font. Outside and Center. It struggles both sides
of the outside of the text. In my case I want outside. I'm going to lower it down a little bit,
I'm going to pick a color. Now, you can pick a color from in here. What I'm going to do is, I'm not
going to hold anything down... I can just click out here anywhere,
and it picks colors from the document. So find something you like,
that maybe ties in with the background... that's going to work for me. I'm going to click 'OK'. Yes, that's adding stroke to text,
click 'OK'. So you really like it and you
want to do the same thing... to this 'C Taylor' here... what you can do is you can
right click the layer... so I'm right clicking the word,
not the icon or anything else... just the word 'All Stars', right click it. There's this one here that says
'Copy Layer Style'. So that's what these things are called. This little button down the bottom here,
it's called Layer Style. All of these are Layer Styles. So right click, and say 'Copy Layer Style'. It has copied it,
I can find the C Taylor layer... and right click him, and say,
'Paste Layer Style'... and along, he comes for the ride. I don't like that so I'm going
to go to 'Edit', 'Undo'... but that's the way to do that. Now you can add strokes to anything,
we've done it for text... but you can do the same thing for objects. So this little rectangle here,
I can right click and go to 'Stroke'... there's nothing different. I just add a stroke around it. The only thing you might notice is that
it's kind of faded out, you're like, "Hmm." Like it should be exactly
the same sort of color as this... and the opacity is right up,
and it's not the same. It's because we actually lowered
the opacity of this rectangle... earlier on in a previous course. You might not be following along
in order but all that's happened is-- let's say I'm going to adjust this to be
really big, and pick another color. Click 'OK', what's happening is,
see this opacity here on this layer... so the layer selected,
the opacity was set to 50... but turn it back to its pure black color,
and that stroke comes back to life. Both of those things I hate,
so I'm going to go... to 'Edit', 'Step Backward', 'Edit',
'Step Backward' to get rid of the Stroke. A better example would have been-- earlier on in the course we made
these circles here, there's this one... and I made a second one
and expanded it out, just so that-- I'd probably do that with an
extra stroke around the outside. Earlier on in the course, I guess we just-- I want you to stick to
your current skill-set... but now if I was redoing this, I would
do a circle with the pink Stroke around. Now let's go a little bit more advanced. So this All Stars Layer here... I want to-- I'm going to show you
how to add more than one stroke. It's a handy trick, and I'm going to
show you some patterns and things. So, with 'All Stars' layer selected
I want to edit the Stroke. Let's just say I want to edit it,
no double strokes just yet... all you do is double click on
this word here called 'Stroke'. Not Effects, double click on 'Stroke'. And I can go in here and just edit it
if I like, so that's editing it. Also in here is the chance where
I get to add more than one stroke. There's a few of these Layer Styles that
allow for an extra version of itself... or as many as you like actually. So 'Stroke', 'Inner Shadow'... there's a few of them
you can have doubles of. So in this case, 'Stroke', I want
to hit this '+' plus button... now I have two strokes. Now the trouble is that they're
the same size and the same color... that don't show over here. And what happens is, it's a Layer Order,
like your layers over here. So the one on top gets seen first
and covers this one underneath. So if I change the one underneath,
watch this, and pick a different color... I'm just going to pick random color . Nothing happens, because it's
hiding underneath this top one... which is this more peachy color... but this one underneath,
if I make it a bit bigger... cool, eh? Kind of pokes out the sides. That's how to add double strokes. Now, I'd probably pick something. It's gone bad, yeah, it's okay. I'm going to go a little bit further,
double strokes is kind of advanced... but this next bit-- I don't want to blow
your brain, but I want to give you... like there's some cool easy enough
tricks to do while you're here. If you've made it this far in the video
let's go bit further. So where it says 'Fill Type'--
we've done 'Color'... that's the normal one, 'Gradient'... as you imagined it, Gradient,
we looked at that in an earlier video. You click on this here
to change the colors. Let's look at this one called 'Pattern',
it's quite cool. It's quite cool for this
particular style here... this kind of like 70s Basketball
kind of thing. You can see-- I'm going to
zoom in over here... I've got this kind of like lines
that run around the outside. And that's coming from this pattern,
so you can change this pattern... there's some cool options in here... Straight Lines, Vertical Lines,
Horizontal, Squares, Dots. There's lots of things in here. Those top ones are quite cool... all the rest of them,
they're a little bit... I wouldn't say lame, lame's a bad word;
these are lame. Down here, they get, usable-- So I'm going to go to this one
here because I quite like it... you can play around with the Scale,
I'm going to make it a bit smaller. What you'll notice is that,
remember we had-- this was actually a pink... and what was it, I can't remember,
so go back to 'Color'. Yes, it was pink, so it was pink... and then I applied this pattern,
and it goes white... and you're like, "What happened?"
It's basically where the pattern... see this pattern here, it's got
a black line with a white outside. Now we're not going to go through how to
make your own patterns in this video. Basically it's getting the white
from this little square here. There's a thing we can do
to get round that... we can go into the Blend Modes. We've looked at Blend Modes
a little bit in the past. We haven't really gone into them hard core,
we'll do that later in the course... but it's just the way that this pattern
is blending with the background. In this case, behind it is
this green circle. So at the moment,
it's not doing anything... just sitting on top, normally. Dissolve never does anything... but then when you start getting
into Darken, and Multiply,... can you see the different effects
that are applying here? So have a little look through
which one's going to work for you. In this case, I'm probably
just going to go to Multiply. It is really hard to know what they're
going to do in these cases because-- it's not you, it's basically the
top pattern texture and color... mixing with the bottom pattern
texture and color. And because those are always different,
well, normally always different... every time you use something
like 'Soft Light'... you'll be like, "Ah, it's different
from the last time I used it." And that's not you,
that's just part of Photoshop. Even me, I have to go through and go
this painful kind of like.. "Let's see what all these will do." It is painful. 'Difference', it's kind of cool. So I'm going to go back to 'Multiply'
because that's what I kind of liked. I'm going to scale it down just a tiny bit. Up, big bit. I'm just messing around now. That's okay for me. All right everyone, so that is how to
create a Layer Style using the Stroke. We've added multiple strokes, and we got
even fancy with that Pattern Stroke. Remember, you can copy and paste them
by right clicking the layer, going 'Copy'. Not paste, go and copy, and then... pasting it on a different text document,
or across document. Say it's a completely different document... open it up, paste it across... and it's a way of keeping consistent
strokes and swooshy lines... that you've spent some time making. Let's get into the next video
now where we look at... Bevel and Emboss. My absolute worst of the Layer Styles... but loads of people like them,
so we're going to do them together anyway. Let's go.
21. How to a bevel or emboss to text in Photoshop CC : Hi there, in this video it's all about
Bevels and Embosses. Making this kind of 3D effect,
I'll turn it off, turn it back on. All right, I'm not a big fan of it, but... you might love it, and that's okay.
I will judge you still... but I won't do it to your face,
don't worry. Let's jump in now,
and learn Bevels and Embosses. So we can add that Bevel and Emboss
to any shape we like. Instead of text we're going
to do this circle here... so I'm going to click on the circle. Make sure it's selected,
turn the eye on and off... so you know you've got
the right one selected. It's down here, under 'fx',
'Bevel and Emboss'. And that's it, pretty easy, okay. So you've got some Bevel and Emboss styles. So the default is, in a Bevel,
looks like it's kind of a little disc. The things you might adjust... there's lots to play around with,
but the main one's the depth. Can you see how sharp this looks now
around the edges here. I'm going to turn it down a bit,
and the size... how far that creeps in,
and then the 'Soften'... you can turn it so it gets really
fluffy around the outside. So just play with those. Those are your main ones
to play around with. The other thing you might play
around with is, see this Shading? This angle here is quite interesting. Well, not interesting,
but you can see, it's headed-- it's going straight from
top to bottom, watch this. I can make it look-- you can
kind of look at this icon... or my little option down here.
Let's move it down to make it easier. You just click anywhere here,
and decide where you want it to go. That is our Bevel and Emboss. Let's look at a couple
of the other options. So there's Outer Bevel,
which I kind of like. I don't kind of like, I don't like-- I've gone through phases though,
I hated Gradients a couple years ago... but now you can tell,
I'm overdoing Gradients. Let's look at Emboss,
kind of looks like it's sitting... kind of, it does outer and inner. There's Pillow Emboss, looks like
it's kind of like sitting inside... like it's resting on a material. Just go through and have a little look
about these things that you want. Play around with the settings you want to. That is going to be it. I'm going to leave with
this one, click 'OK'. And as soon as I'm finished, I'm going to
click on it, and drag into the bin. You might love Embosses,
there's nothing wrong with them... just personal taste, and that's nice. If you love them, we've got
an exercise coming up in a second... and you can cover the whole thing in
Bevel and Embosses, and share it with me. And prove me wrong. All right, that's it for this video. Let's jump to the next one.
22. How to add a drop shadow to text in Photoshop CC : Hi there, it is Drop Shadow time. You can see this text here, this text here,
both have Drop Shadows applied. It's not super hard to do,
but we're going to look at it. We're going to do it for objects as well,
these stars have Drop Shadows. Just turn it back on. It's not going to take us long... but also I'm going to throw in some bonus
did-you-knows at the end. So hang around, and yes, let's get started. To add a Drop Shadow
to text or any object... just make sure it is selected
in your Layers Panel... because it's a light gray color. Let's go down to 'fx',
and go to 'Drop Shadow'. That's how you have imagined it. So we'll do a couple of little things... just to get a little bit clued on,
and how it works. So by default it'll remember
the last thing you've done... so yours won't look exactly like mine. So Opacity, obviously is just how
see through-iness it is. I'm going to lower mine down a little bit. Now in terms of Drop Shadows, it depends. I like mine straight up and down, like 90°. Kind of pokes off the bottom there. In terms of Distance,
it's how far it's away, give that a play. And the size is, how kind of spread out
or dispersed the shadow is. So it really depends. I often just punch in 3 and 3
for these two. That's enough for what I do,
it's either 5 and 5, or 3 and 3. That generally gets to the kind of
preferred stuff that I like. You might hate that, and you might like
a big giant fuzzy one, so do that as well. There's no right or wrong, let's look at
two extra things, so let's click on 'OK'. Let's say that I like this, and I want to
add it to this layer as well. So I can right-click it,
I can go to 'Copy Layer Style'. Find my scottshoes, there it is there. I can right click that and go to
'Paste Style'. I'm going to do it to these
two stars as well, so this star here. Can I do them both at the same time?
Right click, 'Paste Style'? Oh I can. This bottom one here, the opacity change,
so I'm going to lower the opacity again... because that's what I liked about it. One last thing to talk about
when it comes to Shadows. I've got this top star selected, let's say
I don't like it going up and down. I liked it on the text
but I didn't like it over here. So to edit my Drop Shadow I just
double click the word 'Drop Shadow'... and move it out of the way,
and let's say I want to change the angle. What's going to happen is,
this guy here, 'Use Global Light'. Let's say I move it to the other side here. It looks great, but did you notice it
changed over here? You might have not. Let's see it all changed. It even changed in this here, under the
Bevel and Emboss which we did earlier. Watch, when I move it around... can you see, they all change,
that's the use of Global Light. Just means that every Layer Style in
this whole document will be affected... with the Light Angle. That's kind of cool, because you want
them all to be hitting the same angles... but now because we didn't,
I wanted to be 90 for them all... but I'm going to, for this one
particular star, that I've got selected... I'm going to turn off that. Watch now, just that one star is working,
and adjusting the way I want. I'm not going to go through
all the settings. You can play around with the
contours and the noise. You can play with the Spread,
I never do those... so we're going to leave it for the moment,
and let you experiment... but that my friends is how
to add Drop Shadows. All right, next video.
23. Presenting your Photoshop work for your portfolio: All right, to make this work we're going to
have to do a little bit of a hack. What I mean by that is that... there's some skills you're going
to learn further in the course. Things like Smart Objects and Layer Masks,
with which we're going to make this... a very perfect non-destructive
professional version... of what we're just about to do... but we don't have those skills, so we're
going to do a big old hack version... where it works, but maybe not
the most professional use. So what we need to do is
kind of smush all of this together. At the moment, it's all
separate layers and stuff... we need to kind of smash it into one layer. To do this quick and easy at the moment... what we're going to do is
we're going to leave-- I've saved this version where I'm up to. It grays out when it's already saved. So if you're like,
"Man, it won't let me save"... it's because you've already saved,
and nothing's changed, watch, to move it-- Then it goes, "Hey I get to save it again,"
so I'm going to undo that. Let's save your document,
then let's save a backup. So let's go, 'Save As'. We're going to keep that one original
with all the layers... so I can do adjustments. Now let me go on to my 'Desktop',
I'm going to call this one... 'Hacked Postcard'. It's not hacked, it's just,
we're doing it badly. Click 'OK'. What we're going to do is,
we're going to go to 'Layer'... and we're going to go to this one
that says 'Flatten Image'. You can see all, my good work
and all my separate layers have gone... I can't separate them out,
that's the bad bit. The cool bit though is it allows us
to do the Drop Shadow... when you're kind of moving it around. First up, we need to-- we have
that kind of continued problem... with background, and it's locked. So just name it, I'm going to
call this one 'Postcard'. So that's phase one,
it's got rid of the lock. Next one is, we need to expand
the background a little bit. The easiest way, it's under
'Image', and go 'Canvas Size'. Canvas size, think of it as your page size. So at the moment we are
using inches, '6 x 4'. I want it to be a bit bigger either side. So how much bigger? Maybe one
and a half inches, '7.5'. That was at '5.5', either side. Click 'OK', I've just got a bit of
extra background now. The next thing I want to do
is add a background behind it. I'm going to make a new layer,
this little tuned up page here. I'm going to call this one 'Background'. With it selected, I'm going to say... I want to go to 'Edit', and
I'm going to go to 'Fill'. So I'm going to fill that layer with,
what color? I'm going to fill mine with black,
you might say Foreground, Background... you can pick a color,
I'm just going to pick black, click 'OK'. Problem with the Layout Order
is obvious now. Background's at the top, so click, hold,
and drag them underneath. Now what I want to do with this,
you could have just picked a solid color. What I want to do is add my Gradient
that we did earlier because... remember, I'm over doing Gradients
all the way through this course. So what I'm going to do is go down to 'fx'. I've got that layer selected, 'fx',
I'm going to go to 'Gradient Overlay'... and it's remembering the default
that I had from the last one... but remember, if you click on
the word 'Gradient' here... you can double click these two
little houses to pick new colors... but that's in an earlier tutorial... jump back and check out the Gradient one
if you want to know more about it. What I might do is change
the direction of it... I'm going to lower the Opacity. I'm lowering the Opacity in this case
because this black is my background color. It's going to kind of darken it out,
so here's the black... I'm just kind of raising
it up a little bit. Finally what you want to be. Click 'OK'. Now we're going to use our Drop Shadow
and Rotation, so click on 'Postcard'. Let's rotate it, you could go
to 'Edit', 'Transform'. Use Rotate, but now we're using
super-duper shortcuts... remember, which is it? If you can't remember, it is 'Command T'
on a Mac, or 'Control T' on a PC. Not there, just a bit further out,
click, hold, and drag. I don't know why it's on the angle,
it's just like, I don't know. Just thrown down in a casual
but professional way. Not sure why it doesn't work that way,
has to be on that kind of link. When you finish, hit 'Return'
on your keyboard, or 'Enter'. Now we're going to add our 'Drop Shadow'. There's not going to be
much more than that. That's what we're going to do. We're learning it now because it's going to
be part of your homework in the next video. So hang around if you like,
I'm just going to add a nice big shadow. Opacity 'up', Distance 'up'. Do the angle. Size wise. Beautiful! I never play around with the Spread,
you'll see-- it's not why, it's just like the choke. Just kind of moves the Drop Shadow
further out. I just never use it, you might love it. Let's click 'OK'. That's our little gangster lane. We are now going to add a bit of text
and get on to the next video. Totally skip ahead now, because I am
just going to add some text... but you can stay if you like. This is like a client presentation, right? So I'm going to say,
my super-duper client is going to be... I'm going to keep these
on all separate lines. Actually I'll put a 'return'
in, 'Client' and 'Project'. What I'm going to do, select them all,
I'm going to say, that be 'Right Aligned'. I'm going to use a different font. Museo I've been using through this course,
you don't have that probably. It's a font you can download
from Typekit... if you want to go and do that. It's part of your Creative Cloud license,
I'm not going to cover it all now. I'll use the Slab, it comes in
a Slab version as well, which I like so. I'm going to be on the Lite version. I'm going to grab this font,
bring it down, the Leading. I'm going to do the Leading here. Not so much Leading,
not so much Font Size either. That will do it for me. I'm going to duplicate this. Now we're being using the right click,
'Duplicate'. I'm going to share a little secret. If you hang around,
you get the super secret. Watch this, click, hold, and drag it
to the new window. And it makes a duplicate,
and gives it the name 'Copy'. There he is there. Awesome, huh? It pays to
hang around sometimes. I keep telling people to go mess up here. And then I give you a super secret trick. So this one here, I'm going to use '900'. The client for this one
is going to be 'Scott Shoes'. The project's going to be their
'Spring Sale Postcard'. I'm reluctant to date these things... because I've got stuff in my portfolio
that's like 10 years old. Just holding on in terms of being okay
to add to this, still add to it... but it might be a big client,
or I just want to hang on to it... so I don't date them. What's going to date this though
is the Gradients. I think I'm catching the end of
this Gradient phase as well, I feel like... the whole Instagram Gradient
filter type thing... is going to be it in a little while... or else my portfolio is Gradient-tastic. So that's going to be it for this video. Next video, we're going to
set a project for everybody. Let's jump into that and do it now.
24. Project 1 - Creating your own postcard: All right it is homework project time. Don't think of it as homework,
think of it as... ways to really solidify what you've learnt
so far, and I promise you... I've taught this loads of times
and if the people who bother... going and doing these little extras... they really find the benefits,
or at least find the tools stick... a lot more than just kind of
following along with me with the videos. So your homework, that's not
really homework, it's fun stuff to do. You'll find the outline
in your exercise files. So 'Exercise Files', there's a folder
in there called 'Projects'. You can open either one of these,
ones a Word doc and one's a PDF... whatever takes your fancy,
they're the same. And in here it explains
what you need to do. I'll quickly run through it here. Basically it's creating your own version
of a postcard, and sharing it with us. You don't have to share it with me,
but I'd love you to. So these are the requirements. So you choose your own theme,
pick-- you might have a business you work for... your own kind of like side hustle
that you do stuff for. It could just be a church group
or a social group... or anything you can think of
to do a postcard for. Choose your own image, you might
use one from your cell phone... or if you're a photographer,
use one of your own... or go grab one from Unsplash;
I want you to fix that image. So something from Unsplash is probably
not going to need much fixing... but if you're using your own one,
go through, do the levels. Just like the Hues, and Saturations,
and Vibrance. All that whole section on adjustments,
have a look through that. I want you to add a Gradient,
it's totally optional. I'm into Gradients, as you know. See if you can do this thing,
even if you don't do it... you know, don't want it in your final... you don't kind of like hideous Gradient... you can-- I just want you to
run through the process... just so you know about Blending Modes
and those types of things. Once you have at least one shape-- I kind of did them all to try
and fit them all in for this course... so we've got circles and stars,
and rectangles with corners. You just need at least one. In terms of colors, you might let
the image drive the colors... like we did for some of these circles... or you can go to Adobe Color Themes
to get inspiration for colors. Remember, there's five Color Swatches
that it picked for us. Next thing is you need to have just
some text, like this standard text here. You can kind of copy the structure I had,
you're allowed to use Lorem Ipsum... but you also need to do that
text on a path. Remember this badge down the bottom here,
where it kind of wrapped around... or maybe the stripy stuff on the line. You can do either of those. One uses of that, or two, or ten,
but I want to see that. I want to see at least two Layer Styles... so that includes Drop Shadow, Strokes,
Gradients, Bevels & Embosses. Have a look through the whole list,
we didn't cover them all in this course. You might find, experiment with
another one, and surprise me with... inner feather or outer feather. I can't think of any other ones,
but two of them at least. Then I want you to present it, not exactly
like this but in that same sort of vein... where we saved a version of the document,
we flattened it down, then we kind of-- It doesn't have to be on an angle,
get your piece straight in there... but a little Drop Shadow to
make it look like it's-- you might put in the background
a photograph of a desk... so it looks like it's sitting on a desk. That's the way I'd like you to present it
for this particular exercise. Then I want you to save and share,
and over here just says save a JPEG copy. We haven't really done exporting yet... we did saving, but just so you know,
'File', 'Save'. Well, 'File', 'Save As',
an option in here is JPEG. That's the easy one to share around. You can just take a screenshot,
on my Mac, it's 'Command-Shift-4'. Hold those keys down and I can drop
box around stuff, and then on my desktop... you hear the little snappy noise,
that on my desktop will be a screenshot. It's an easy way to do it as well. On a PC, can't really remember,
there's a Print Screen button somewhere. You'll have to Google that one,
or do this 'Save as JPEG'. That is it, my friends.
Well, I want you to share it with me. You can DM me if you don't want to
share it publicly, but share it publicly. Great places are Instagram, just tag me. You click on that link to get
to my Instagram account. You can tag me in Twitter as well,
there's a Facebook group. Just getting started, I'd love you to
get in there, and start using that... but we just got going with that, and yes,
you might be the first one there... but share it in there, but also you can
use these accounts as well if you prefer... and you can use a Direct Message. If you're not much of a social person,
just as an assignment... depending on the website
you're looking at... ends up on a couple of places
where you can-- there's an assignment section... or you can just use the comments
underneath the video. This video right here, you'll see
a comment section, share it there. All right, that's it. You don't have to do it, of course,
but please do, but if you do... I'll see you in the next video
in a couple of hours. Maybe a lot longer than that
depending on your current Photoshop skills. And the people that are
going to skip it here... I will see you in a couple
of seconds in the next video. All right, let's go.
25. How to crop an image in Adobe Photoshop CC: Hi there, this video is all about cropping. You might think, "Hey, cropping is not
that exciting, I'm going to skip along." You can, but there are some secret tricks
in this video, I promise. Things like deleting crop pixels,
and rotating it. Hang around, it's not a long video,
let's get started. First thing, 'File', 'Open'. In your 'Exercise Files', there is
a folder called '04 Cropping'... and let's open up 'Cropping 01'. Now on your Tool panel over here,
grab this fifth tool down, the 'Crop tool'. You notice, in Photoshop if you hover
above these tools long enough-- watch this, if I hover above it... you're not sure what the icon does,
these little things pop out... kind of explaining what they are,
this is the Crop Tool. Crop tool is easy to use, grab any of
these corners that appear. So this right one here, I'm
going to crop it in, so it's-- Those shoes are a bit more central. When you've got it where you want it
to be, hit 'Enter' on your keyboard... and that's it, you've done some cropping. Let me show you some other
ways of doing it... let's go to 'Edit', 'Step Backward'. Even though I'm on my Crop Tool,
I can't see the edges... kind of just click on it again. Pops back into life. Now what I want to do is
I want to proportionately crop it. I don't want to just kind
of randomly pick a size. I want it to be the same height and width. And that's true-- who could guess
what shortcut I hold down... to kind of lock the height and the width? You guessed it, it's Shift,
hold 'Shift' down. It means that when I'm holding down shift,
the height and the width are the same. So I'm going to get it to be there,
and then click 'Enter'. More tricks with the Crop Tool. Let's go 'Edit', 'Step Backward',
click on the tool again. What I'm going to do is crop it in,
it doesn't really matter. Going to crop it kind of there. And what you can do now is,
you can do two things. You can move it around by clicking
and dragging anywhere in here... and it does kind of weird,
it drags the image, not the crop... I find that weird, but anyway. Say you want to kind of move it over here
to about there, perfect. Let's say you want to rotate it
a little bit as well. So all you need to do is just
hover anywhere outside, anywhere. Can you see the little bent arrow? That guy there, click, hold, and drag. If you're like, I'm not sure
if you are like me... but I find this is a really
weird thing that happens. Click, hold it, give it a wiggle around,
see what you want. This can be really handy
if there's like a horizon line. It maybe not straight, you can kind of
drag it, and get these lines to line up. So get it, move it around,
get it just practicing... I guess with this Crop Tool. Then when you've got it where you want,
hit 'Return'. Awesome! Now there's one last thing for
this particular Crop technique... is I'm going to go to 'undo' again... go back to my 'Crop Tool'. There's this option up here
that says 'Delete Cropped Pixels'... that's on by default, I'm pretty sure. Check yours, if you're working on
an old version of Photoshop... it's not going to be there,
it's reasonably new. With it on, it means when I crop it down,
and hit 'Return'... and let's say I grab my 'Move Tool' now,
unlock the layer by naming it. I can just move it around. You can see, it's kind of cropped
it down, and deleted any excess... it's gone from the edge there. So what I'm going to do is I'm going to
'Edit', 'Step Backward' quite a few times... until I got my big image back. I'll show you the difference. With the Crop Tool here
let's turn that off... and now I'm going to crop it down... so I'm going to crop it to there... hit 'Enter' on my keyboard,
it looks the same, right? But if I grab my 'Move Tool' now,
watch what happens. Can you see, all that stuff that we
cropped off is actually still up there It's hidden and won't
kind of say 'Print'... but it is still there. Now I find I keep that on all the time,
or uncheck it all the time. So 'Crop Tool', I make sure
that's never on. It's useful, sometimes you want crop... it might be stuff you just don't need,
you want to get rid of it. I find I'll leave it off because then it
gives me the option to go back later on... go to my 'Move Tool' and go... "Actually I want to kind of
just adjust it a little bit." So that's the basic cropping in Photoshop. Let's get in and do some specific size
cropping in the next video.
26. How to crop an image for a frame in Adobe Photoshop CC: Hey there in this
cropping video, we're going to crop
to a specific size. Let's say we've
got a photo frame and it needs to
be an exact size. Or say it's for a magazine and it needs to be a four or US. Letter. So we're going to
show you how to do that, get it into the
perfect dimensions. But what we're also going
to do is I'm going to show you how to No background
there, no background there. Already magic up
more background. Cool, huh? Let's do all of that. Now in Photoshop to get started, open up cropping two
from our exercise files. Now we want to get
this into say, a photo frame or into a US letter document
or an A four document, something that's a
really specific size. Okay, I'm going to
show you how to do that now in Photoshop. Now, just say, you know, like we did with the
postcard earlier, I find it's easier to go to file new create the size
that you want. Okay, so let's say
it's five x seven. Okay, Create that document in here and then just drag
this image into it. My move, tool, drag, drag, drag, move it in so it has
to be rotated around. And I can see it's
not quite big enough, so I'm going to
have to resize it. Okay, I'm using my
transform tool, I find this is an
easier process. Okay, don't worry if you
don't like that way. Let's do it the official way. Okay, so I've got
this image open. I'm going to grab
my crop tool and up the top here
instead of a ratio, we're going to go,
we're going to pick one of the default. Okay? This one here is a real traditional photo
frame size 5 " by seven, by default, it's going this way. So I want to flip these across. You can see it just needs to be trimmed a little
bit either side. When you're ready,
return and there you go. Let's crop to those
specific dimensions. I'm going to go to edit. Step backwards,
just so you know, up here we've picked
seven by five, but let's say you've got a different photo frame
or anything else, right? It is six by four. Okay? You can just
type it in there. Just type them in.
Flip them around. Okay. It's up to you now. You can type, instead of
one of these default ones, you can go to the top
here and go to width, heightened resolution to say, actually I want
this to be, I'm set 2 centimeters in my preferences because I'm based in Europe. You can change yours in
your preferences 2 ". But let's say I
want mine to be 29, 7 millimeters, okay, by
two, 10 millimeters. I'm gonna flip mine around. That's kind of an four size. So you don't find that
kind of preset in here. You can just go and type it. The only thing you
need to be careful of, let's say we're on five by
seven and you finish it and you love it and you
move it around, you're like, that's perfect. Return return on my keyboard and then later on you're just working on a different document. And you're just
gonna run into this, there's gonna be a gotcha, is that you're like, okay, I'm just going to go, you know, I'm gonna grab my crombingoI'm, just gonna kind of stretch
this out and you're like, hey just, you know, it's kind of locked
in this resolution. So if you leave it like that,
it's going to remember it. And it might be
months before you get back into the cropping tool. And that's where I get E mails. I'm like, Dan, my cropping
tool doesn't work and it's just got to go back to
the top here and go to Ratio, not ratio. Go to with heightened resolution
and go too clear now. Okay. I've got that kind of
like full control again. All right, a little
update to this video. We've got a new technique to do. I used to use content
to wear expand. It was brilliant, okay. But the new version,
using some of the generative AI
features, is spectacular. This video needed an update. That's why it looks different. And I sound different. I
sound different mainly because I'm getting over
cold. Sorry about that. So what we're going to do
is do that stretchiness. We're still going to
use the cryptlkay. I'm going to expand it out. Okay. And by default
you just get this like transparent hole. Okay? But up the
top here, check. Okay, You can switch it to
generative expand, okay? So we used to use
content to wear field. You can practice with that
and see the difference. But generative expand
is using AI features. It's pretty amazing, Okay. And we don't put anything
in there we can hit. Just generate the,
oh my goodness, just more sand, more
sky, more beach. You've got some options
over here, okay? Ours is pretty generic
on this side here. Either of these seems to work, but what you can do is
you can add a prompt to it instead of just
expanding it and guessing. You could say, I'd like a
beach hut in there, please. Okay. So we're making it wider. Let's say for Facebook
banner ad, like the header, that's on Facebook, or
maybe it's a leaderboard for online advertising.
You could see. Okay. Dan thought he'd be clever and just do
it in the first go. Any guesses why that didn't
work so well for me? Why is beach Hut not that good? I bet it's because if I do, I'm going to undo
a couple of times. What I want to do is do a
different selection size. It tried to fill my
whole selection. Whereas if I do this, okay, and do the exact same thing,
I'm going to do beach hut. Remember, selection
is important, so we've expanded
it, that's awesome. Okay, using our crop. But then depending
on what you want in that extra generative stuff will come down to where
you do the selection. Oh, look at that. It's even faded, like
in the background. Look at that, matching
the focal length. That's what I love about this.
Okay. A little bit blurry. Look at that one further back, closer to it, matching all
the colors matching the sun. Oh my goodness. Actually
invented that sun. Did it? All right. You get the idea. Let's have
a look at another example. So cropping three, okay? So this one here is
trickier, right? So it's tricky ish, okay? It actually does a
pretty good job. And so let's say I want
more bricks, okay? Just going to drag it down, make sure it's set to
generative expand. And just hit Generate.
And hopefully we'll get the sun and
we'll get the bricks. It's amazing, huh? If you've ever done it like
you've cropped in, you've either been the
photographer or you've got a shot and it's cropped
in, you're like, oh, I need some more space for, I don't know words or
background, or discoposition. Look how good that
is. That one there, you can see maybe not the best, but we've nailed it. Awesome. Okay, go
one other thing, let's test it a little
bit more, okay? And let's go up
to this one here. Can it invent more person
or at least more dress? That's pretty complicated, huh? Good. Very tall. Okay. But the building. Look at the building on off. That is magic. Oh
man, it's good. All right, so that's the
cropping all the way around, some basic cropping, and then generating more background
where there was none. Awesome. All right, that is it, I'll see in the next video.
27. How to straighten the horizon line using Photoshop CC: Hey there, this video
we are going to straighten this horizon line here, it's just a
little bit off. We're going to use the cropping tool to do it and we're going to invent new background using
the content to wear scale. Go from this to that. It's nice and straight and
there's even more background. Same with this one. Okay, we're going to
straighten it up, invent more background,
make it look awesome. Let's jump into Photoshop
and see how to do it. Alright, let's open
up the images. Let's go to file and go
to open in cropping. There's cropping 4.5 Thank you. Hunter Johnson and Caleb
Throll, Ecroth. Anyway, sorry. Okay. So we're going
to be working on this first image here and we'll get you to do that
as a practice. So let's have
cropping four open. Let's grab the croptal. Basically all we want to do is straighten up the horizon, okay? So to do that, there's a little option up
here that says straighten. Click on that, okay? Nothing really happens except your cursor changes to
this like little level. What you do is you click hold
and drag across the image. Okay? It doesn't have to
be all the way across. Just wherever you can
get a good sense of the horizon line and it
just rotates it for you. You can manually do it, but it's just the nice little easy trick. Now, using our extra
skills from earlier on, you can see it's
cropped it inside, we're going to lose those
pixels right here, let's say. I want to, actually I want
to keep most of it okay. We'll try to at least
see how it goes. Okay, so I want to
rotate it and then I'm going to make sure.
Content to wears on. Remember just to cook
a little reminder, we're not using
content to wear now. There used to be a tick
there that you saw. Okay, we're using the drop down to go to generative expand. It's way, I'll leave the rest of the video in the old style
just so you can compare your version with this
generative expand with the content of ware fill
that I do in the course. All right, carry on and
compare and see how good the new version is and I
have to resize it again. Yours is probably on
by default, it's okay. Now click return
on your keyboard, or you can click the
little tick up here and hopefully fingers
crossed, it starts. It's pretty magic, huh? So it's invented
more background. Straighten the horizon line. What I'd like you to do
in the second exercise, do the same thing. Okay, so grab your levels
tool and drag it out. Hit Return, make sure content aware is there have a practice, super simple, super cool. Let's get into the next video, yet another cropping video. Who would have thought
you could have a whole section on cropping?
28. How to copy from one image to another in Photoshop CC : Hey there, in this video we're
going to take this tea cup... add this storm, and have storm in a teacup. It's a couple of quick
selection techniques... using the Marquee Tool in Adobe Photoshop. Let's go and do it. First up, let's go to 'File', 'Open'. In your 'Exercise Files', there's one
called '05 Selections', open that up. Open up 'Marquee Tool 01'
and 'Marquee Tool 02'. Thank you, Rawpixel. Let's click 'Open'. So we've got this kind of storm video,
and we've got this teacup. Yes, I know they have
nothing to do with shoes... I've got a shoe theme going, right? Just showcase these two tools. They had to make a storm in a teacup. So what we're going to do,
the name of this project... well I guess the project
that we've been given... is we need to make an Instagram post,
it needs to be the square format... we need to combine this, and this... into a post ready for Instagram. So in Instagram, 'File', 'New. We're going to create a new document,
this is the way I prefer working. And over here, an Instagram post... double check this,
at the moment it's 1080 x 1080. So 1080 pixels by 1080 pixels
is a square post. Don't worry about resolution. Make sure it's on RGB,
it should be like that for default. So copy everything that I've got here,
click 'Create'. Let's go to this '01' tab. Let's first of all use the tool,
the 'Rectangle Marquee Tool'. It's the second key down. If you can't see it you might
have to click, hold, hold, hold. Grab this top option, the square one. All we're going to do is drag out
a selection like this... and copy, and paste it... but because it's going to
be square for Instagram... I'm going to go to 'Select' 'Deselect'. What key do I hold down on my keyboard
to constrain the proportions... make the height and width the same,
that's right, it is 'Shift'. I'm going to hold 'Shift' anywhere
about here, and drag out... and get it to kind of where I want. Now you can move the selection afterwards,
so I'm holding nothing down... I'm still on that Marquee Tool... and I can just move that selection
till I find it's kind of like-- like how I want it to be centered,
I kind of want... I'm not even sure how I want it
but that's how I'm going to do it anyway. So I've got this bit here,
I'm going to go to 'Edit', 'Copy'. I'm going to jump to this
new document that we've created. It's called 'Untitled 01' at the moment. Let's go to 'Edit', let's go to 'Paste'. It's a little bit big, we're going to use
'Edit' 'Transform', 'Scale'. Remember, 'Control T' on a PC,
or 'Command T' on a Mac. Hold down the 'Shift' key again
on the corner, drag it up. I'm going to get mine close enough,
and hit 'Enter' on my keyboard. That's going to work for me. So that's a Rectangle Marquee Tool. We've done a square, you can obviously
use it for any type of rectangle. Let's look at the next one,
Marquee Tool 02. We're going to use this tool. Hold down the 'Rectangle tool',
and grab the 'Elliptical Marquee Tool'. Like the Rectangle Marquee Tool,
I can drag out any old Ellipse. Long, small, thin, tall... but what I'm going to do is
go to 'Select', 'Deselect'. I'm going to hold 'Shift' key down again
to get that perfect circle. I'm going to drag it out. Big enough, not too worried,
I'm going to move it... because I want the kind of eye of
the storm in the middle there. Then I'm going to go to-- I'm going to use
my shortcuts, you can go to 'Edit', 'Copy'. I'm just going to use 'Command C' on a Mac,
'Control C' on a PC. Jump back into my Instagram post,
and hit 'Paste'... or 'Edit', 'Paste'. Let's scale this one again,
'Command T' on a Mac, 'Control T' on a PC. Hold 'Shift' to get the corners
to do what you want... and make it look like there's
a storm in a teacup. What's going to happen is,
you're going to have to-- I'm holding 'Command T' to resize it,
and then moving it at the same time... by dragging it anywhere, but that target. I'm going to get it kind of close,
there we go, feels okay. When I get it where I want it to be-- now if you're finding it's
kind of jumping around... can you see, it's just-- the Smart Guides
are appearing, those pink lines. If you're getting it close, we can use
our keys on our keyboard. So I'm just tapping my down arrow
on my keyboard, a little bit left... and you can just use that for kind of
like fine adjustment. Hit 'Enter'. That my friends, is a storm in a teacup. Now if you are a kind of
a seasoned Photoshop user... you're just kind of refreshing yourself,
if you're thinking... "Oh, why didn't you do a Layer Mask?" or, "Why didn't he blur the edges
a little bit?"... we'll do that in an upcoming video... but for the moment we're using
the tools and the skills that we've got. So what I want to do is--
let's save this now. I'm going to set you a little project,
so let's go to 'File', 'Save'. I'm going to save mine on to my 'Desktop'
and this is going to be my... 'Storm in a Teacup'. I always call it 'v1' for when
we do adjustments... or the client comes back, or I adjust it. Hit 'Save'. Maximize Compatibility,
remember that's just there to say... that the file size gets a bit bigger,
but it means... that older versions of Photoshop
are likely to be able to open this. If you are trying to keep
the file size small... uncheck that, but it might mean
that if you send it to someone... and opens it up in an old version
of Photoshop it might not work as well. So your project is--
let's go to 'File', 'Open'. In your 'Exercise Files', '05',
there's 'Marquee Tool 03'. I'm giving you the kind of base here. This one's from Brigitte,
thank you very much. You can go check her out in Unsplash
for her other photographs. What I want you to do is go and find
another thing for this center here. It doesn't have to be a storm... but go to something like Unsplash
or find Google Images. Find something that you're allowed to use
if you have access to a stock library site. Unsplash is a good place Another one is freeimages.com I can't think of anything else
off the top of my head... but go find an image and see if you can
put something in a teacup. It can be a storm,
it can be anything you like... but I'd like you to make it
a square frame... like we did in this whole tutorial. So square, with something inside of it
using the Elliptical Marquee Tool... and I'd like you to share it, so post it
on the projects here on this page... or in social media, in Instagram
it's bringyourownlaptop... tag me in it, I'd love to see what you do. On Twitter I am danlovesadobe. All right friends, go have fun
with this one... and I will see you in the next video.
29. How to crop images inside of text : Hi there, in this video we are going
to crop images inside of text, like that. It's super easy to do. We're actually going to push it a little
bit further where we take an image... and do some kind of glitch
effect type stuff... where there's a letter,
it's inside the text... where things offset,
it looks kind of cool. All right, let's get in there now,
and learn how to make this in Photoshop. So first up let's go to 'File', 'Open'. Let's go to '05 Selections'
in your 'Exercise Files'... and there's one in there called
'Clipping Mask 01', open that up. Thank you, Sydney Rae. I love this texture,
but what I want to do is... like you saw at the beginning, I want
to kind of mask it inside some text. Pretty super easy to do
So grab the Type Tool.... click once in here, and type in-- I'm going to type in my name;
luckily my name is nice and short. I am going to do it in all caps. I'm going to select all the text
and I'm going to pick 'Slab Serif'. So in my search here,
I'm just typing in 'slab' to see-- Slab Serif is the fonts that have the big,
it's hard to point at them. Over here, see these Serifs,
but they're the big slabby Serifs. I have only got two fonts. I'm going to use my Museo Slab,
you might not have this font... but pick any old font. Make sure it's bold, or extra bold,
or black, something nice and big. Now let's scale our font size up. There's a couple of ways,
I often just use the Transform Tool. Often always, you can use
the fonts over here... but I just hit 'Command T' on a Mac,
'Control T' on a PC. Hold 'Shift' and drag it up. Nice big font. Click 'Enter'. All that needs to happen is that... the image needs to be on top of the text,
which is kind of weird. I can't drag this up here... so I need to name it by double-clicking
the word 'background', give it a name. Concrete. Just make sure it's just above the thing. What you need to do now
is have the top thing selected. In my case my image is above my text. Just go up to 'Layer', and go to this one
that says 'Create Clipping Mask'. Click on that, and magic happens.
Cool, huh? And the thing to note down here... is that there's this
weird kind of structure. I'll undo it, so you can look at this,
'undo', 'redo'. See this little arrow appears. That just kind of indicates
that this guy here... concrete has been clipped
to the text underneath. It's a little bit complicated, I guess. One of the perks for it though
is if I use my Move Tool... and I have the concrete layer selected,
watch this... I can kind of move the concrete
to kind of where I want. I ran out of image there on the left
but I can kind of move it around to get... kind of-- I like that better. Same with the text, I can click on
the Text Layer and move that around. So it depends on which one
you want to move around. Just make sure it's highlighted over here. Awesome! I'm going to move it across,
I'm going to show you how to add-- because at the moment it's got
a transparent background, right? I'm going to show you two things before
we get into some more advanced stuff. If you want to move both of them
at the same time you can click on this top one,
hold the 'Shift' key down... and click on the one underneath,
and now they're both selected. Now they both come around. Next thing I want to do is,
I want it on a white background... or a background, I don't mind
what color it is. So let's click off these layers here,
so I got nothing selected. Let's go to this one here
that says New Layer... it's like a turned up page here. It's at the top there,
I want it to be at the bottom... because at the moment
there's this checkered board. That's fine, it's see-through,
which is awesome... but I want to make it a specific color. So with this Layer Selector,
I'm going to call this my 'Color'. With it selected,
let's go to 'Edit', 'Fill'. In here where it says Contents, you can
pick black, or white, or 50% gray... or you can just pick on color. Then go through the colors that you want. You'll start to see a theme in my classes. Everything's kind of like Keeley green,
I like it. Click 'OK', click 'OK', that's what I want. I might add a Drop Shadow here,
Bevel & Emboss. So that's the gist of it. The cool thing about it as well,
the text is editable... if my name is no longer Dan... I can double click this, I can grab
my Type Tool, it's actually the easiest... and click kind of somewhere in here... and my name can be Jan,
detecting my mom's name. Look at that, Jan and Dan. So that's going to be this one.
Let's look at the second exercise now. Go up to 'File', go to 'Open'. Let's open up 'Clipping Mask 02'
by Reinhart Julian. I'm not sure who's Julian Reinhardt,
not sure. Regardless, the image is epic;
I love it. Now this example is basically
exactly like the last one... but I wanted to show you, I guess... some creative uses of that
Clipping Mask technique. It's not just kind of like
jamming text inside of images. It's kind of a cool effect at the moment
where there's this kind of... glitch offset image type thing. So just like before, going to grab
the Type Tool... we're going to click once, I'm going
to type in 'D' because that's my name. We're going to pick a new font,
I like Lust. If you're like, "Man, I want some of
those fonts he's using"... you might not, but if you do... you want to go check out
a website called Typekit. We don't have time to go
through it just yet... but it is part of your
Creative Cloud license... and that lets you download epic fonts. So say I want just a big D. Hit 'Return'. What we're going to do is
the same thing as before. Remember, has to go above,
so I'm going to name it first. 'Shoes', it's going to be above. Then with that top layer selected,
let's go to 'Layer'... 'Create Clipping Mask',
and it's mocked in there. What I also want to do is duplicate
this layer, so I want two of them. So that could be it, right?
We've done from the last exercise we did. But what I want to do is push it
a little bit further... like you saw in the intro. So I want to duplicate the layer,
this is going to be my 'Shoes 2'. Good, well-named. Can you see in the structure here,
trying to be a Clipping Mask as well... but watch this, if I just
drag it underneath... it kind of loses that Clipping Mask. Now not to freak you out... if you are freaked out,
just stop it where we-- stop now... but if you're ready for
a little bit more action... what's happening is, that's exactly-- These two here are what we've done so far. I've made a duplicate down here,
and dragged it down to the bottom here. The thing is, because it's not
got any Mask... it's actually just filling in
all these gaps around here... but watch this, it's actually a separate-- Moving it around, I guess, helps us. Be on the Move Tool, click
anywhere but the D... and just drag it around,
and get a sense for it. What I want to do is kind of offset it. Just because that's the kind of glitch,
kind of cool effect. I'm trying to get this D to stand out
a little bit more... and I just want a, I guess... move it over a little bit,
and what I might do is... with this particular layer I'm going
to darken it down a little bit... to kind of emphasize these
laces within the D. So with this layer selected,
let's look at adjustments. There's a few different ways. Probably the easiest way
is to go 'Hue/Saturation'. So make sure you have 'Shoes 2'
at the bottom selected, Hue/Saturation'... and just drag the lightness up,
I said, never use this but... in this particular case,
actually quite a handy thing to do. That's what we're trying to do,
just kind of like-- you could go through
and drag the saturation down. Can you see, I've made it gray
in the background here... or drag it right up, probably too high. You could mess with this, there's no kind
of right or wrong here. It's, I guess, we're just trying to do
some creative glitchy type stuff. Next thing I want to do is just
crop this whole thing down... because I've got this extra stuff down
the bottom, so I'm just going to go there. Probably crop it a little
bit at the top as well... to get my D in the center. It's a little bit in the center. When you're ready, hit 'Enter',
and that's us... that's our kind of cool
glitch effect Clipping Mask. Now we've done it for text here,
you can do it for anything. So if you know how to download shapes ... vector shapes, or any sort of shape... I love heart, an emoji,
some sort of Twitter icon... if you download those,
and bring them in to... copy and paste them into this file here,
into Photoshop... you can use those to do
the exact same thing. So image on top of it,
and make it a Clipping Mask. All right, it is homework time. So what I'd like you to do,
is I want to see two versions. I want to see text on an image,
just like this... and then, this kind of glitch effect
version of the text. I just want you to use your own,
obviously, initials... or you can make another one for my mom... or my brother, or my dad,
we all have three letters. There's Ben, there's Wal. We all go by three initials, so you can
make one for any of my family. You can pick your own initials, it can be
the whole word, up to you... but I just want you
to pick your own image. You'll have to pick your own font
because you probably won't have mine... but pick your own image for this option,
and I want to see this one... but I also want you to do this
glitch effect thing as well. So go off, find your image,
do your giant letter... and just kind of offset them,
and follow this tutorial again. Like always, share them on social media...
or share them in the projects on this page. Instagram, I am bringyourownlaptop. Just so you know,
when you are looking for images... there's kind of two nice places. Unsplash is really nice because you
get to use them commercially... without having to pay for them. Or back link them, or anything like that. Some beautiful images in here.
Easy to get kind of inspired out of here. You can use Google Images, that's fine,
say I want to use shoes... just make sure when you are doing this,
under 'Tools'... go to 'Usage Rights', just make sure
you check this one... 'Labeled for non-commercial reuse'... because you're not going to
be selling this thing... you're just using it for practice. If you want to use it for your portfolio,
you need to use this, 'Labeled for reuse'. Cuts down the images... but it means that you're not going
to run into legal troubles. Or just jump back to Unsplash,
these guys are awesome. The photographers here are super generous
with their images, I love it. All right friends,
that is it for this video. We'll see you in the next one.
30. How to remove the background in Adobe Photoshop CC: Hey there in this video
we're going to cut these shoes out and stick
them on this background. Okay, we're also going to cut the shoes out and stick
it on this background. They're on their own layers. Okay, we're going to use
the quick selection tool. It is some of that
Photoshop magic you were promised when you
opened up the program. It's super quick.
It's super easy. Let's learn how to do it now. Let's go up to file.
Let's go to open. We're going to open
up Quick select. Okay, And there's
going to be 1.2 Thanks Chris Barbara, I tried. Let's go to quick select one. So these are the shoes we're
going to be cutting out now. We're going to be
using this tool here on your tool parts. The fourth tool
down, make sure it's the quick selection tool,
not the magic one tool. And up the top here, these are the settings
for the brush, basically how big it is. Okay. Now mine's, remember
the last thing I was doing. So we're going to
have to change these. See this little drop
down error here? Hey, click on that and it's going to be different
for every image. Generally a good
starting point is 50, yours is probably set to 50 by default, it's a good start. In the hardness, I have
it at about about 85. Okay. That is just, I like
it kind of but not too hard. No magic number just
in this top one, it can be 100% The quick
selection tool is pretty, it's got a bit of
magic in there, so it's not as precise. So I'm not too worried about the hardness we need to do
is click hold and drag. Click, hold and drag. You
can see I just click, hold and drag across
this little bit and it magically jumps out. Mainly because there's a nice
good color contrast, okay, between the shoes here, or I'm not even sure
what to call them, but these things
in the background. And I can just keep dragging. Okay, keep dragging.
Keep dragging. And keep dragging. I
get the whole thing. Now, I've missed a
little bit over here, so I might have to zoom in easy. Okay. You might have to
change your brush size. I'm going to try and do
it with a bigger brush, because I'm lazy, I just
nip the edge there. Now what might happen is you might go a bit too
far like that. You can either go
edit step backwards, okay, or up here you can
switch it to the minus. Okay, we're in this plus,
like adding to the selection. This minus, okay, removes
from the selection, and you can just paint it in. I'm just clicking, holding, and dragging until it gets
to where I needed to be. Now don't worry perfectly, these kind of these marching ants that run
around the outside, they're a good representation,
but they're not perfect. There's going to be a little
bit of fudging either side. Okay, It's not like
a real solid line, so don't worry too much until we've actually done
our mask and check it. So let's go back to plus. Okay, you want to add
to the selection. Holding, Spacebar, clicking,
holding and dragging. And I was going to drag across all of this and
hope for the best. Pretty good, pretty
good. Miss that bit. I'll just click once on that. Yeah, pretty amazing
selection. Going to zoom out. What we're going to
do now is we're going to go to edit, copy, Jump to this second version
and go edit, Paste. Okay? Or you can use
your click hole, drag, drag, drag option that I've been telling you
to do every time. Either way works in this case. Okay, going to drag it down
and it's an okay selection. Now we're going to work
ways of refining it, but that's a good simple start. Let's look at a different
way of doing it. So let's go to file open, and let's look at
two other files. So it is quick Select
3.4 many and Sydney, this one here is
going to be copying the shoe into this
background here. We're going to have
the shoe selected. We're going to grab a
quick selection tool. The triggers here, this one has already been
cut out onto white. Instead of trying to
select all the shoe often, it can be easy to
select the background first and then invert
that selection. Show you what it means. I'm
just going to click and hold, drag across the background,
around the sides here. Eventually it goes, oh well you probably mean all
of this background, you can see I've got all
the background selected. Now what I'm going to do is
I'm going to go up to select. There's one in there
called inverse. Have a little look there. You can see the marching
answer around the outside. Because basically, if I copied
this now and copied it, moved the cross, paste it. I've just got like the
background. It's kind of cool. But what I want to do is go
to Select and go to Inverse. Okay, now I've got
the shoe selected. There's one little bit, the
shoelace hasn't been done. Perfect. Okay, I'm going
to zoom in a little bit. Okay, now my brush is too big, so I'm going to go up and change my brush size up here.
Okay, drag it down. Now what you'll find
is you'll learn a short cut pretty
quickly in Photoshop. Any brush tool, we're going to look at loads of them
through this course. Is that if you look
at your keyboard, next to the key, there's
those two square brackets. Okay? Open and close
square brackets. That is the short cut for
making it bigger and smaller. Okay, tribe worth of those. One will make it bigger,
one will make it smaller, I'm going to make
one smaller, so it's an appropriate
size for this. And I'm just going to click
hold and drag across. Don't worry if it
doesn't get a perfect. He says, missing a
couple little bits. It's these marching ends aren't like the perfect representation of what you've got selected. There's a few little white dots there that need to be picked up. But now case this is
going to be fine, I'm going to zoom out, so
I've got my shoe selected. Let's go to copy and edit. Paste. Cool huh, now we're
using a copy and paste method. It's not the best way.
In the next videos we're going to do a layer mask. But from the moment at our current skill level,
it's working perfectly. Oh, except for this guy here. Okay, I forgot about him. So I'm gonna go to undo
so he's not there. Go back into here. Zoom in. I'm gonna show you a
couple of more tricks. So remember you can go to minus, okay, and just move this bit. There's a lot of
towing and throwing often when you're
doing selections. So I try not to do to these shortcuts, but
just the good ones, If you hold down the Alt key on a PC or Option key on a Mac, can you see my little cursor?
It's a little hard to see. Can you see it
changes to a little minus, plus, minus, plus, minus. And you can see it
toggling up here just by tapping that key,
that's what I use. Hold it down. Click and
drag. Click in there. Once, let go grab that bit. Minus add. There's a lot
of towing and throwing. Now I'm going to go
to copy, go to Paste. And I've got that
little hole in now. Okay, that's the basics for
the quick selection tool. Add to the selection,
you remove it, you change your brush sizes. Then often what happens is you just need
to tidy things up. Okay, this shoe in particular. Okay, I'm going to go
back to my move tool. I'm going to use my scale tool, which is command on
a Mac or control on a PC, scale it down. You might have
noticed that when I scale mine down, I'm
cheating, right? Instead of scaling it this way and then this way it
somehow magically went in from the center is command for my transform
or control T on a PC. Hold down shift to make it
do its proportions, okay. But if you hold down Alt as well or option on a
Mac shift option, you can see it does
it to the center. I like that little shortcuts. A bit of finger gymnastics, K holding shift, and
either Alt or option down. It's a bit of a pain. I know, but ignore that shortcut if you're finding
getting blown away. Dan's Too many shortcuts
in this video. Getting into the
right sort of size. I'm going to hit return and what I want to do is two things. I probably want to darken
the shoe up because the background has got
a nice strong black. This one here doesn't
seem to have it. And I want to add a
bit of a drop shadow. Drop shadow is easy. I got this layer
here. Let's double click the word layer
one and call it shoe. With it selected and
highlighted ex drop shadow. It's up to you in
up to the image, but I'm going to
crank up the size. You can see it just adds this. Yeah, dragging up
the capacity size, maybe even the spread, just to give it a bit of a
black hue around it. I'm not using distance,
you'll notice. Okay, I don't want to have
like a drop shadow that way. You might like it that
way. I'm just going for zero distance so it fuzzes
all around the outside. Provi you on prev off
just to make it look like it's sitting there a bit
better. Let's click Okay. One of the other things I find is quite
obvious when you've copied one image from another is often the levels
are different. Okay? They're strong blacks
and whites that do that. Let's click on the shoe layer and let's go to adjustments. And we're going to use levels. We've used them before, okay. When we've corrected our
images, click on this. The difference between what
we've done before and what we're going to do now is
if I adjust the levels, I'm going to radically
adjust them. Can you see It's adjusting
the shoe and the background. Okay. So what I
want to do is see this little insignificant
little thing here. Click on that. Okay. All that
happens is that just tells levels to work on the
layer directly underneath. See, the little arris is just
this layer, not this layer. Okay? As long as levels is
just above the shoe layer, the levels are only going
to affect that layer. Okay. And I've
totally wrecked it, but now I can do adjustments. And it's just for that
specific little layer. Okay. What am I trying to do? I'm trying to just
make it look like it's part of that background
image a little bit more. Increase the whites
a little bit. It's mainly the grays. I
feel like they need to be a bit more. How do I like it? I'm going to turn
the eye on off. See what I'm trying to do there. All right, let's look at
that original image as well. Do the same thing
for this. The levels I feel like are fine. Okay, all I want to do
is add a drop shadow. Drop shadow and sneaky
trick you can go into here. Click on the shoe
layer, right click it, say copy layer style. All of these things in
this little affects, things are considered layer
styles. I'm going to copy it. I just click anywhere in here. Okay, and said copy layer style. Go over here, find that
same layer of my shoes. I know it is because I got
the eyeball on and off. Right click and say
paste layer style. I've got the same kind of thing going on there.
Eyeball on and off. You can see it just
kind of settled as it in that image a
little bit better. It's not total reality, right? We've got giant sandals
across some graffiti, but you get what I mean, Right? All right. It is time
for an update for this video rather than
replacing the whole video. The first chunk of this is being perfect tools you need to know and probably still
a lot of what I go to. But there's a new feature, it has a couple of limitations. So I think it's good in addition to what we've learned
already in this video. And it's this option here, actually, you can't
see it at the moment. What I'm going to do is
I'm going to, because we've done some selections
already, right? So I'm going to get a
file and I'm going to go this one called Revert. I haven't showed
you this before. It just gets back to when
the file was opened. Instead of going, do you hit Revert and we'll
go back to the. Where it works really good
is this contextual task bar. Now there's this option
here is remove background. You've probably
clicked it already and gone that it's pretty awesome, it does a pretty amazing job. There's a couple of problems
with this particular one. It's the best of the two that we've done already
in this course. We'll do the same thing. We'll
drag it over to this one. Okay? You can see it's done
a pretty amazing job, right? Didn't have to even get the tool and figure out the brush
size and color it in. The only trouble is we have
a very similar result except that, uh, what do
you call that thing? Oh, there's a name
for it, you know, it, whatever that
thing is called, you pull yourself up by it
and there's a hole in here. Can you see there's
a hole in the shoe. So it's pretty good, like, it depends on how
crisp the image is. It can be, it might just
be the thing you use. But what I find is often it
can get me really close. And then I need to use
the quick selection tool that we've learned
already in this video. Let's do the other one.
Let's go this one here. So remove background,
it's like pretty magical. Does this one really
good. Except in the first way we did this, I didn't want the lollipop, but it's got the
lollipop because it's in focus, it's
part of the scene. So yeah, you're like, okay, so this one would be
fine if we wanted the lollipop because it's a
pretty amazing selection. But if we didn't
want the lollipop, use the quick selection door. You can be a bit more
specific on picking things. Now, how would you use
these in combination? Let's say we want
to get rid of this. What I can do now is grab the quick selection
tool and select this. Color it in, good enough. What I can do is, can you
see over here in your mask, we have black versus white. Will zoom in. You see there's white bits are showing through.
Black bits are hidden. What I can do is I can say I want to make a selection of this and I would like
everything selected to be black so it can't be seen. What I do is down here, I can say I'd like this
to be filled with what? With black, and it
should go away. So that's how you
can combine the two, the fancy remove background
feature with the fill option. All right, let's do the
same thing for the shoe. Show the shoe did well, except it's these parts
a little bit broken. So I can do it either in this original one or in this new one. We'll do it in this new one
because it's easier to see. Grab my quick selection tool. I'm on the plus I've
found a brush size. Okay. I'm going to
zoom in a little bit. I'm going to say we did this
in the last one, right? We want, you remember holding
down my O K on a PC option? On a Mac there's
a bit of adding, and a bit of subtracting. A bit of adding.
Subtracting, let's say. I'm happy with that.
What I can do now is make sure I've got
my mask selected. Because if I click on this one, this is my Acho image.
That's my mask. If I go image filled with black, it'll work but fill
it with black. What I want to say
is on my mask. Okay, I would like member
black hides things. I'm going to say I would
like to hide this thing. I've got selected,
fill with black. It's gone de select. Let's do the opposite for
this guy here. This one here. We could use a quick
selection tool, but I actually could just use the rectangle tool
because I can be pretty vague with this
one because I just want all of that to be
black. This and that. Same again, make sure I'll
get my mask selected. Go to fill, Go to black. Okay, and don't use black. Whoops, You'll do this. I'll leave it in the course. And what ends up happening is, see over here, I just told you like black is hiding stuff. And you're like, didn't you just say black would hide stuff? It does look, made
a big hole in it. So I'm going to undo and I'm going to say I'd like
to fill it with white. White shows things through I, I want to see this
little light chunk here. I'm going to deselect
and then we're good. So the remove background
option is amazing. Often though, you need
to tie it together with a little bit of selection
and adding to the mask. Removing from the mask, that
does get better and better. You might be in
the future going, hey, my shoe didn't
even have a hole. The amazing power behind
Photoshop using some of the artificial intelligence
gets better and better and things
might change a bit. But the go a couple
of features for the price of one
in this video and how to combine them,
the feature combos. What will happen in
the next video as well as I'll give
you a class project, but it'll be past that didn't have the
removed background. So make sure you experiment with removed background in the next video for the
class project. As well as the quick
selection tool, both important to know. All right, that's it I'll
see in the next video.
31. Class Project - Quick Select Tool: Hi there, it is class project time. I've separated this out
into its own video. I'll do this from now on,
it's a little tidier. What I want you to do is, I want you to
open up 'Quick Select 05' and '06'. They are, this shoe,
and this background... I want you to use the
Quick Selection Tool... to cut out the shoe and put it
on the other background. I'd like you to add the Drop Shadow... kind of make it feel like it's
nested it a little bit better. You can use levels if you feel like
it needs it, that's totally up to you. I'd like you to share the results. Okay friends, go forth, copy and paste... and a little spoiler,
don't forget the little space in here. All right, see you in the next video.
32. How to put text behind a person in Adobe Photoshop CC: Hi there, in this video we are going to
add some text behind this woman here. It's super quick, super easy,
let's go learn how to do it in Photoshop. First up, in your 'Exercise Files',
open up 'Quick Select 07'. So this particular trick
is reasonably easy because... we can use the Quick Selection Tool
which we've learned in the previous video... but also because we're
copying and pasting it... not to another image where
it can be quite obvious... we're placing it back on itself,
and it's pretty forgiving. So, super quick and easy, which is nice. Grab your Quick Selection Tool. In terms the brush size, I'm going
to go up to, you can see... my brush size is going up,
using my square brackets. Change it to about 50. I'm going to do a really rough pass... so I'm just going to click, hold, and drag,
try and get it up the middle of the legs. Here we go. Then into here, I'm just
getting the bulk of it in... then I'm going to go and tidy it up. I'll zoom in. It's looking okay.
So now I'm just going to zoom in... and just work out these parts here. Now what you'll find is that this image
works reasonably well because... everything's in focus,
except for these shoes... they're a bit of the pain part... but there's still enough contrast
in the background. If you're working on a separate image,
and it's just never grabbing it... and you're just like, "What's wrong?" it's just, sometimes it just can't do it...
see here, the gray of the shoe... and the background here are very close. There is still enough contrast that
I can keep clicking in here and get it... and if it goes too far I can
come back out of it. Remember, holding down the 'Option' key
on a Mac, 'Alt' key on a PC minuses. So if it goes out too far you can
minus it back, like that. Just going to undo
because I just ripped mine. So now I'm just going to kind of
slowly work around it. You can speed up now
because it's just a lot of this. And like I said, it's pretty forgiving... can you see, how this is--
the very-- the colors-- We humans know that the shoe ends there... but the computer has to kind of
try and read pixels and colors... and they can't really see the difference. Again this is pretty forgiving
so I'm not worried anymore about that. It's good across the back,
a little bit there. I'm going to minus off, so I'm holding...
'Option' key on a Mac, 'Alt' key on a PC. Across here, I'm not worried too
much about the hair in this case... we're going to look at a better
technique for that later on. I'm holding on the 'Alt',
just clicking in here... it's done a pretty good job
across the nose. And I make a nice tiny brush,
get in there. Wrong brush, hold down 'Alt',
and click in there to remove the mask. This can be a little confusing... when you're looking at negative selections,
you're like, "Oh, man!" It's a bit of a brain bender... because I've got this selected,
but also the background... so I want to get rid of it... I'm going to use minus '-' to get
rid of these holes here. Again, that is good enough
for our little project. I'm going to zoom out,
so I've got our good enough selection. The other thing to know
is that if yours is... if it's out of focus, becomes very hard. If it's the same color as
the background, very hard. She's wearing gray, like a light gray. Running gear, that would be tough. Also note that this image is quite large,
so 'Image', 'Image size'. It is quite a few pixels across, like 5000. That's kind of typical of a good
high-res image from a DSLR camera. If you've got one, it's only like-- check yours, if it's going badly,
and it's only like 500 or a thousand... it's just not a very big image... there's not a lot of detail in it
for Photoshop to work out the edges. See if you can get a larger version
of the image. If not, you just have to do your best... and potentially look at some of the other
masking techniques later in this class. All right, a lot of talking,
I've cut a selection. What I want to do now is copy and paste it. So I'm going to go to
'Edit', 'Copy', and 'Edit', 'Paste'. The cool thing about what
Photoshop does is that... it pastes it back exactly where it got it. You'll see, now I have two layers... so I've got this bottom layer, and now
this top layer, both sitting on top. Now what we need to do is... slide the image or the graphic,
or the text, in our case... in between these two layers.
So I'm going to grab my 'Type Tool'. Click once, I use the word 'So'. Font that I'm using, I'm using... I'm using Roboto, which is a free one,
you can download online... the one that Google uses for YouTube. I'm using the Condensed one... because I wanted a nice tall font
to kind of poke out from behind. So I'm going to grab my 'Move Tool'. You can see now, not working. So it's all about the layer structure,
grab 'Soul'. Click, hold, drag the word... and you'll see this little blue line
appear in between them. There you go. Now it's a matter of, with this
layer selected, I'm going to use-- I could change my font size,
but I'm going to use my shortcut... which is 'Command T' on a Mac,
'Control T' on a PC. I'm just going to make it super big. I'm going to make it look like
it's sitting on that line. Just happens to be a good kind
of spot for it. That kind of interacts with the background,
but you can still tell what the word is. That sometimes the hard bit,
you have to pick a font and a size... that makes the font actually legible... and doesn't turn it into a strange word,
or becomes illegible. That could be you. I'm going to do one last thing
before I leave. With this layer, I'm going to add a bit
of a gradient to make it... try and match the background,
I know it's fake... but a little bit of background integration
wouldn't go astray in this case. So I'm going to-- with the Soul layer,
I'm going to go down to my 'fx'... and I'm going to go to 'Gradient Overlay'. In here, it's remembered
the last thing I did. So depending on what yours is set to
click on this color bar here anywhere. Now the first house, double click it. This bottom one here, I just went through
and picked a gray. I'm dragging this around,
and I drag it all over here... and picked a kind of a darker gray. You can kind of see it adjusting
in the background here. You can pick colors from the document... which is actually probably
a nicer thing to do... but I want a kind of a warmer color. Not quite that steely gray. Now I'm just messing about, click 'OK'. This top one here,
I'm going to keep as white... you can use any color you like. Click 'OK', click 'OK'. You might play around
with adding a Drop Shadow. That's ugly. '5', '5'. 'Angle'. I'm not going to,
I'm just messing about now. I don't like the Drop Shadow at all,
so I'm going to cancel that. I'd like you to go through, practice.
I want you to use your own text. You can use Soul, it's fine,
just send me your example. Maybe pick a different text,
could be your name. And experiment with the Gradient
and Drop Shadow. All right, let's get onto the next video.
33. How to create a layer mask in Adobe Photoshop CC : Hi there. In this video, we're going to learn
what a layer mask is and how to create it. It's super simple.
Basically, it's this black and white thing that goes over top of an image. And the cool thing about it, it allows you to do
cool stuff like this. Where I can move my
image within the mask. I can disable the mask. So it's really like
copying and pasting, but I have a few extra professional controls
at my disposal. Let's learn how to do
that now in Photoshop. Okay, so it's time to go
back in time a little bit. We worked on a project. Okay, it is in your
exercise files under five selections
and masking. It was way back here where we
took marquee tool 1.2 Okay, so I'm going to open
up both of these. Before we used our selection
tool, which was really cool. Okay, we use the
rectangle marquee tool, hold down shift, and I
got a nice big circle. I moved in the right place
and then I copied and pasted. Now from now on, you're never
allowed to copy and paste. Okay, we have to use something
called a layer mask. And they're pretty
easy to implement. Any selection, you can use
the quick selection tool, the magic one tool, or in our case the ellipse
marquee tool. Instead of heading
copy down here, it's this little icon here. All right, just a
quick little update. I wanted to just reiterate how
cool this little thing is. He's kind of in the
way sometimes, right? It's called the
contextual task bar. He changed, he's
contextual because if I have nothing selected,
I get these options. But it changes when I do my circle ellipse,
marquee thing. Okay, can you see down here,
I have different options. In this video I just showed
you how to go down to here. Can you see this button to
get your layer mask going? Okay, you can The exact
same icons here will change over time as Photoshop decide which goes in here
and what goes in here. But have a look. Often
it can be like the thing you next need to
do in Photoshop. It can be tricky to go like, al, right where the heck
was that thing now, because it's all hidden
around the place. Yeah, they've
brought these things to life and I think
they're really good. So you can hit that
exactly the same thing. Okay. Other things that are in here we'll do
throughout the course. So just keep an eye on this bar, because something
that you might be doing very often, okay, like invert selection,
Select inverse. Whereas there it is, there, it's quite the long thing. Whereas look, it's a button. I can sek the background instead of the circle. Invert it back. Okay, All right, that's it. Contextual task bar is awesome. Car on with the video, enjoy.
Okay, so click on that. Nothing really changes,
removes the background. But look at the layer
structure over here. Can you see the actual image? Is fine. What's happening is
there's a mask over the top. And you can see the black
parts hide the background. And the white hole in the middle shows us the image through. There's a couple
of perks for this. We're going to use
our move tool. Click, hold, and drag, drag, drag the center of
it up to our tab. Wait, wait, wait. Come
down. There we go. Why is it cool? Okay, I'm
going to transform this. Remember command on a Mac, Control on a PC, And I'm just going to scale it down
to get it to where I want. Nothing much is different. Okay, from where we did it, we're just copying and pasting. What ends up happening is get the right shape,
get it into the spot. Return to get rid
of my transform. What's really nice about
it is a couple of things. You can unlink this
little chain link here. It means the image and the
mask are actually separate. You can tell which one
you're working on. Can you see the
dotted white line that appears when
I click on them? I want to work on the image. Watch this. I grab my move tool. I can move this around within my mask to get it more aligned. I can work on the
mask separately. With the mask layer selected, I can move the mask around. Okay, it's not
what I want to do. I'm going to undo
and I'm going to link them back together
by clicking that just kind of empty area where the link icon was.
It gets better. So we've done that
change and what we can do is with
the mask selected. Okay, you'll notice that our
properties panel adjusts. The easiest one to start with is this feather. Watch this. If I crank up the feather really high, can you see over here? It's kind of feathering
the edge of my mask. Whereas before, when we use the ellipse mark tool,
really kind of sharp edge. Whereas now I've got a
little bit more play here and I'm just
going to kind of, I don't want it to
be super feathery. Okay. But just a little bit more in tune with the
rest of the image. So it's the same basic
principles as we've learned, except we click on this button here and it gives us
a few extra options. Let's double back to, let's look at the Quick
Selection tool. So I'm going to
grab Quick Select 12 and do the exact same
thing as we did before. Quick selection
tool, grab my shoes. You're going to make my
brush a little bigger. I'm going to drag
across the mall. Grab across the mall,
Drag across the mall. It's pretty good. Missed a
little bit of white there. There was a little bit over
here too, from last time. Cool. Instead of
copying and pasting, all we do is click this button. Same net result, but I
can grab my move tool, click hold, and drag
them over to this tab. Okay, let them go in here. And the same rules apply here. I can maybe feather
this a little bit. Okay, And as we go through this particular video series
where look at layer mask, we're going to dive into some of the extra special bits where we can tidy up
the edges in here using something called
select a mask so that my friend is a layer mask that is considered non
destructive editing. And it would be something
that I considered absolutely essential for a professional
person in Photoshop. It means that I can do a really quick mask for say, a client. Just to get, maybe it's from my cretive director and
I just want to say, hey, what do you think of
this thing real quick, I haven't done a
perfect mask, but it's just a super quick one. Then you can go back into
later on and you can do things like right clicking it and disabling the mask to
show the background. Okay? Or you can right click
it and enable it. Okay? I can also go back
and refine it, maybe playing with feather. And in the future video, we'll look at Select and Mask. All right, so let's
go now and look at some slightly more
advanced layer masks.
34. Class project - Cut a person out & put them into another image in Photoshop : So it's class project time. We're going to take the girl that we
made before, with the Quick Selection Tool. Instead of copying and pasting it... we're going to add that
Layer Mask over here. Once you've got a Mask for her,
I want you to go and find a background. I've found this grass, I don't
want you to use the grass. You can use the grass,
I'm not going to know... but I'd love for you to go off
and find a different background. Use something like Google Images to find
a background where you can place her... or use Unsplash to find a background. Then I want you to put
them in the image... and then we're going to
use the Burn Tool... to try and settle them in there
with a bit of a shadow. Now again, I've used grass,
you can use anything you like. The weirder the better, in my book. I've used super simple grass,
not very exciting, Dan, come on. Now there's one tool in there
that you haven't used yet... it's called the Burn Tool for the shadow. I'm going to keep going in this video
and show you how I made this one... so that you've got the tools to
go off and do your class project. When you finish, make sure
you share it with me. I'd love to see what you did.
Take it away, Dan. So I'm going to be using '07' and '08'. So let's do this together,
and you can watch me... then use your own background image. You could even use your own model. Now one little tip here is,
it works perfectly for this image... just using nothing else other than
the Quick Selection Tool. What you can do is
you can turn on 'Auto Enhance'. What it does is it does make
a better edge on it. It does take a lot longer though,
so if you've got a-- watch this, I'm going to click and drag
across a bunch of it, then let go. It took a fraction of a second there,
but this is a super-duper Mac. If you've got a really old,
whatever the opposite for super-duper is... if your laptop is that laptop... you might find it's
just not even worth it... because it takes so long to do selection,
so I'm going to leave it off... because it did a fine enough selection. Basic stuff, I'm going to go
and fix it in a sec. This one, we have to be a little,
take a little bit more time doing. Why? Because it's going
against a different background. Remember, when we put the Type behind it... it's pretty forgiving when
you're copying something out... and pasting it against its own background. That all looks good, so now,
going to zoom in. 'Command +', 'Control +' on a PC. I'm just going to start hitting
things like the laces. Do I want to turn Auto Enhance on?
Let's do it. Grab the sole there. Every time I click though, painfully slow. So what I might do is... let's do the hard stuff together,
we've done it before in the last tutorial. So what we'll do is, I'll get the editor... just to speed up my painful
slow selection process... and I'll see you once
I've got my selection. Actually, quickly before you do though... if you're watching this video by itself,
without the larger tutorial... the one thing you will need to know... is to hold down the 'Alt' key on a PC,
or 'Option' key on a Mac... and just click on the stuff
you don't want selected... You can say, I didn't want this. I'm just clicking, holding,
and painting. Go away All right, super speedy time. I am back, that is a good enough selection. Now what I'm going to do is... remember, not copy and paste
onto another one. I'm going to use my new super sweet
Layer Mask technique. And all I do is click the button. You can see, all the black bits there. Hide the background, and the white bit
shows through her body. Grab your 'Move Tool',
click, hold, drag, drag, drag. I'm putting mine on
to 'Quick Selection 08'. So you've found your background. The hardest thing about
finding a background... is getting the perspective right. So there's going to be some... lots of trial and error probably
for you to find the right background. What I'm also going to do is... I'm going to transform her down,
she's a bit big, I'm going to zoom out. I'm using 'Command T',
or 'Control T' on a PC. This is totally like---
I'm looking at it going. Where does she look
believable on this grass? You might argue, "No way, Dan."
It's a terrible example. I've literally got one eye closed,
and I'm kind of like tongue out. Yes, about there. About there, hit 'Return'. So that is pretty fake,
she just plonked in here. So what I'm going to do is show you
a cool little trick... to kind of start blending
the background a bit more. So with the 'Background Layer' selected... we're going to use something
called the 'Burn Tool'. Now it's over here,
it is this guy, Burn Tool. By default it's going to look
like this little pedal here. Click and hold that down,
and grab the 'Burn Tool'. The Burn Tool will make things darker... the Dodge Tool, just so you know,
makes things lighter... but the Burn Tool is good
for faking shadows. Let's grab the 'Burn Tool',
changes the brush size. I have to make mine a lot bigger. Actually I'll leave that bit in there.
I was like, "Why is it getting bigger?" It's a target on your screen, if I tap
'Caps lock' on my keyboard... turns it back into the circle
which I can make bigger and smaller. Some people just like having
caps lock on as a target... rather than seeing this big brush,
but if you do get lost when you're new... check caps lock, could be that. How big? I'm going to have mine about... you can see up here, about 500,
now drop this down. We're going to have 500, and we're going
to have the Hardness at '0'. It just means, can you see kind
of the icon there, it's a fuzzy edge. If I go up to 100, you can see
it's got a really crisp hard edge... I want kind of a shadow
to have a nice soft edge. 'Background Layer' selected,
'Burn Tool' selected. And in my case, Mid Tone's going to work. Exposure, play around with it,
that's how dark it makes it. This will depend on your image,
if yours is quite a dark background... you might have to work with shadows. If it's quite a light background
work with highlights... just experiment with through those three. All I'm going to do is this,
kind of just paint it. I'm clicking, holding,
and dragging my mouse. Can you see, just building it up slowly. You might have to turn
the Exposure down a little bit... so it's not so aggressive. I'm going to have mine up
so you can see what I'm doing. When you're working, you might work with
the slightly out of touch. I'll make my brush a bit smaller. So there's going to be bits where it
looks like she's touching the ground... and bits where it isn't. So I'm just trying to cast a shadow
for her, basically. I'm happy with that enough. It's okay. What it should have done,
is duplicated the background... so I've got kind of a wrecked version
with all the shadows on... and a version that's not wrecked. By wrecked I mean adding the shadow to it. So before you get started
make sure you duplicate this layer... and maybe call one called
the Shadow Layer... so you can turn it on and off,
and see how you did. I'm going to cheat with some editing magic. You're back, so super fantastic editing,
I should have done this in the beginning... but there's my original Layer,
I've worked on the Shadow Layer... it's a duplicate of it, but watch,
I can turn it on and off now. What you might find,
if you go too hard core... you can lower the opacity of
the Shadow Layer as well. Watch when I lower it down. You can kind of tone it back too. It always happens, you always get too far. You don't know you've gone too far
until you've gone too far. So, the Opacity Slider,
with the original behind it... really this is kind of a nice way
of undoing it, or moving backwards. One thing we might do as well--
I'll show you in this case... my one's okay, it's the Levels. We did this in an earlier tutorial. Remember, when we copied
and pasted that shoe... it just wasn't the quite-- the blacks
and highlights aren't quite the same. It will be the same thing
for this Layer 01. I'm even going to double click 'Layer 01',
and be all special... and call this one 'Model'. With it selected, I'm going
to 'Adjustments', going to use 'Levels'. Remember this option here? This says... I want the layers to only affect the layer
just underneath, click on him. It means, when I play around with this,
it only affects that Model Layer. I'm going to now just mess about. I don't want to probably play with it
too much because mine's okay... but I know, in your example you might find
a huge difference in what... the colors from one background
to that model is going to be. So now it is time to go off,
find your own background. Maybe get the perspective right. Copy and paste the girl in with Layer Mask,
I want to see a Layer Mask. You can share it with one of two things. You can just save a JPEG,
and upload it, and share it... or what you can do is,
you can send a screenshot. I'm going to zoom in a little bit. Now if I take a screenshot,
you could show me... your Levels and your Layer Mask,
so I know you're not cheating. On a Mac, it's 'Command-Shift-4'. 'Command-Shift-4' gives you
this little target here... you can just drag a box, ready, ready. That will give you an image
that's on your desktop, that you can share. If you're on a PC, you hit 'Print Screen',
then you do something with it, I think. You might have to look into what
Windows do in terms of screenshots. It's been a little while
since I've been on a Windows machine. Otherwise just do a 'File', 'Save As JPEG',
and I'll take your word for it. Now get creative about where--
I put it on the grass-- that feels like, "That's pretty basic, Dan,
nothing very exciting." It doesn't have to be super realistic,
it's technique, we're learning. You can go crazy, or you can go
super simple like me on some grass. All right, class project over,
let's get into the next video.
35. How to blend fade one image into another in Photoshop CC : Hey there, welcome to this video. I'm going to show you how to do this
where we just kind of paint in an image. So we can do a kind of a cool
before and after. It's pretty simple with a Layer Mask
and a brush. Let's jump in now to find out how. Let's open our two images
that we're going to be blending. Let's to 'File', 'Open',
in your 'Exercise Files'... go to '05 Selections and Masking'. We're going to open up these two,
'Layer Masks 01' and 'Layer Mask 02'. It's a before and after renovation. So first of all let's be on '02',
the finished version. Let’s grab the 'Move Tool', click, hold... drag up to this tab. Wait, trickle down... and line it up. Let's be all serious about this,
and name the layers. I've double clicked the word 'Layer 01',
let's call this one 'New'. Double click the background, call it 'Old'. Let's have the new layer selected. Now for this blend we're
using a Layer Mask... but what we've done in the past is... we've used something like
the Selection Tool. The Rectangle Marquee Tool,
make a selection... or the Quick Mask selection,
or the Quick Selection Tool. We made a selection first,
and then clicked on this button here. That's not always necessary, especially in
this case, let's go to 'File', 'Deselect'. So you don't have to have
anything selected. I'm back on my Move Tool. All I'm going to do is make sure
the new layer is selected... and just click on this
without a selection. Nothing happens, except we've got
this new Layer Mask here. And because it's all white
it does nothing. We need some black bits in it
to start masking. Have a look at some of
the previous examples we've got. This is the project from the last video. You can see the black bits
hide the background. The white bits show it through. Let's not worry too much about that,
but let's get back into here. So we need to do two things,
we need to make sure we're on the Mask. You can be on the actual image or the Mask. I want to work on the Mask. I'm going to grab my Brush Tool. It's this guy here. Click on it, he is that many down. With it selected, I pick a brush size. We're going to use something
quite big in this case. So I've got mine up to about 400... and in this drop down here,
I've got the Hardness down to '0'. Now the two main important things for this,
is we've got our Mask selected... and down here we've got black
as our foreground color. You see, at the moment mine is white. So to switch these two around
you can click on this double arrow. If yours are kind of like shades of gray
and it's not completely black... click on this little option... just kind of like resets it
to full white, full black... and then click the little arrow,
just means my foreground color is black. Because we've got white,
if we paint it with black... we know things that are black
on the mask get hidden. So what I'm going to do is I'm going
to start down the bottom here... click, hold, and start painting. It's this kind of a before and after,
you saw in the intro. How much do I want to go? I always kind of like, I like,
yeah, that looks kind of good... and then I go too far,
and then it's looking a bit weird. The big thing to note is,
can you see down here... the black that I've painted on this Mask... is hiding this current layer,
the white bits are still showing through. So if I want to show things through again
I just switch. White is my foreground, and watch. Watch this, and watch where I'm painting,
can you see if I paint on that... it starts bringing things back through. It's just a really easy way
to kind of decide... on what you want through
and what you don't. I kind of like that. I might switch to black again,
and just paint out that bit there. So that's a really easy way to
blend two images together... make sure they're on top of each other. The top one, add a Layer Mask
with no selection... and just paint on it with black. If you need to bring stuff back,
paint on with white. Now I hope it's not too nerdy for you
this earlier in the course... but it's a really handy thing
just to blend images. One thing that might
catch you out though is... you can see this kind of like white box
around the Mask... now it's on image, now it's on the mask,
now it's on the image. So when I'm working on my Layer Mask
it's going to work perfectly... but when you say, save this document
and reopen it up... it's probably going to be
back over here on the layer. Now if I'm on my layer and
I use my Brush Tool... and I make sure it's on black... well this is going to happen. You're like, "I'm painting out..." It's going to switch it back,
paint it with white. You can see my little layer there... you've actually just painted
black and white on top of it. And you really need to hope
you've got an 'Edit', 'Step Backward'. 'Edit', 'Step Backward'. Maybe you want to make it 'Step Forward'. All right, that is how to blend images
one across the other. Let's get into the next video.
36. How to weave text in and out of a Photoshop image: Hi there, in this video we are
going to get the model here... to interact with a type,
kind of weaving in, front, back. It's super popular at the moment,
let's look how to do it in Photoshop now. Now a little note before we get started,
this builds on the previous video... if you're jumping straight to this video,
I'm going to show you what we've done. Basically what we did was... we took the model, we used
the Quick Selection Tool... just this one here,
to make a selection around the model. Then we copied and pasted
on to its own layer, all by itself. You can see here, on its own layer. Then we put some Type in between,
top layer and the bottom layer... and that's where we get started
in this tutorial. Now we want to do this, and get it
to kind of weave in and out. Let's get started. To get started, open up the file
that you were working on earlier. Remember, we cut this woman out,
and we put text behind her... but if you didn't do it, and you're just
jumping straight at this video... you can open up the exercise file,
it's called 'Layer Mask 03'... and you can just start
with my version here. Like we did in the last tutorial,
where we just painted-- remember we just did the half and half... where it was half a new renovation,
half old. We end with this exact same thing here. So what we're going to do is make sure
you've got the 'Model Layer' selected. If you are just jumping back into this... we've actually cut this woman out,
off the background. She's still there in the background... but we've kind of broken her out
so that there's text in between. So the top layer selected,
just like we did with the last tutorial... got no selection, was going
to hit 'Layer Mask. Remember, our Layer Mask is white... means it's not doing
anything at the moment... until I paint it with my
Paint Brush, using black. If it's not black, hit this little icon. Click this double arrow
to switch it around... to make sure black is at the front. Now in terms of brush sizes,
it doesn't really matter in this case. It's pretty forgiving, so any old size,
anything around 50 or 60. Hardness, it doesn't really matter,
I'm going to have mine up reasonably high. Because what you'll see is, watch this... I'm going to paint across there,
across there, and across there. So what I'm doing though,
it looks perfect... you're like, "Oh, how did that happen?" It's because, once we turn
that bottom layer off, you'll see. And the Text Layer,
basically just cut a big hole in the leg. I didn't really care where the edges was... because the text is there,
and then the background... fills in that last little gap,
it's a neat trick. Now you just got to decide
what you want in there... so make sure you're on the right layer. Make sure you're working on the Mask. So it's got a little line
around the outside... got a black paint brush,
and just paint out some bits. Those two little things work for me. If you're working on
your own bit of text... you might have put your own name,
or used your own font... yours is going to be different from this... so you might have to experiment
with what works and what doesn't. I love that we're getting to
a stage now in the course... where we're starting to kind of... I don't know, double back on some things,
and add a little bit of extra. Don't want to say the word pizzazz-- it came into my head,
let's not go over that. A little bit of magic,
that's called magic. Like always, I'd love to see
what you've done. If you've got different type, I'd like to
see how you've kind of got it interacting. So share it here in the comments,
or in the project section. Or if you're brave enough, send it up
on to Instagram, I am bringyourownlaptop. Tag me in it, I'd love to see
what you've done. Onwards to the next course.
37. How to select hair in Adobe Photoshop CC : Hey there, in this video
we're going to look at... some of the really tough stuff to mask. Like this kind of, out of focus here. Also this white T-shirt, because it's
against the white background... we're going to mask it out,
stick it against this bit... all using Photoshop's new
Select and Mask technique. I love it, it's easy, and I'm going to
show you how to do that now in Photoshop. First up, let's go to 'File', 'Open'. Let's go to 'Select and Mask 1' and '2'. We're going to copy out the model. Mask her, and put her on
to this background here. Now in terms of this image,
I tried to find a tough one. It has two things bad, one thing good. One thing good is
it's a professional photograph... so everything's in relative focus. If you're shooting your own stuff,
and it's kind of out of focus... it can be really tough. Now the cons for this one,
over here, it's not a con... but I guess that's what
we're here for, right? Hard, some tough stuff. The other tough thing is when... say the shirt here matches
the background... it's quite hard to mask... so I'm going to show you tricks
to get around both of these. I was tempted to find an example
that was absolutely easy and perfect... but that'll just make you feel bad
when you're doing yours... and it's not quite working. So this is going to get us... like, it's going to get us
like 85-90 % awesome. It's not absolutely perfect,
because just here is tricky. Especially when it's not
quite in focus like here... and when the model's T-shirt
matches the background... is a little bit tough as well. And it's real world people;
let's let's do some real world stuff. This thing is called Select and Mask. If you're using our earlier version
of Photoshop, maybe 2017 or before... it's not going to be around,
which isn't cool... but if you're like me,
with Photoshop 2018 or 19... it's going to work great. So how this works is,
you need to start with a selection. So the way this thing works,
is you need to start with a selection. We’re going to start with our Quick Select. So you need to start with a selection,
a reasonably good one, and then... the Selector Mask is going to do
the kind of final touch-ups. So I've got my Quick Selection
Tool selected... I've got a brush, it's about 300. I'm going to start painting her in. Really broadly to start with them all... we'll fix it up as we go,
so I'm letting go. I've got Auto Enhance on. Slows your Machine down a little bit... but does make your selection
a little better. Especially when we're getting
to this hair stage, and this... when it's really hard, and not a clear
background foreground definition. I figured, let's turn it on. So this is the big chunk, so now
I'm going to zoom in a bit... and just kind of work our way
around the edge... to make sure I've got everything in there. So when we start over here-- let's leave that to Select and
Mask, the wispy stuff let's leave... but the stuff that's absolutely 100% here,
not mixing with the background... it should be easy enough to grab... or at least make sure
it's in your selection. All there, I have to
remove a little bit there. Remove a little bit there. Auto Enhance is making
this a little slow... so what I might do is
just show you the basics. Click to add, hold down the 'Option' key
on my Mac, or 'Alt' key on a PC... just to tap and remove, and I'll
get the editor to speed this up. All right, you're back. That was probably another
90 seconds to two minutes. Just to kind of get the basics in. So once you've got a selection, then you
add a Layer Mask, like we did before. So just click on the 'Layer Mask' button. You can see, it's okay around places,
and bad at others, I'm going to zoom out. Now here's the magic, it's this thing here
called Select and Mask. You just got to make sure
your mask is selected... not the actual image, the mask. Click on it here, or up here in your
App bar, either one, give it a click... and we get into this view. Now yours by default
is probably set to onion skin. I'm not sure when I've ever used that. What I use is one of two, it's either
against black, and I have the 100%... I have the Opacity at 100%,
gives me a really good contrast. So my great selection, looked okay in the
last view, looks terrible against black. I guess that's just a good way
of looking at it, right? If it was a dark object or a dark image... I could go against white,
and that would give me a better contrast... but against black, it's going
to work for me. Now yours might be all tucked up like this. Now over here, are kind of global changes,
it changes it to all the edges. All the same... and over here kind of
more individual changes. So in this case, if it
was just a T-shirt... like it was a product shot,
I could probably just do it with... playing around with these global changes... but because there's so many different
things happening, like here... and this is light, but then the skin's
got a good contrast... I find that I go, jump straight
to these tools over here. Let me quickly run through these. I never use Edge Detection, it kind
of goes around the whole thing... and tries to fix it all. I haven't found that good in my experience,
you might love it. Under Global Refinements, there's two
I end up using, Smooth and Shift Edge. Watch this, I'm going
to crank up Smoothing. It takes a little while because
it's quite a large image. It's just going to kind of try
and smooth these edges. That's really good when
it's a single object... like if it was just this T-shirt... that would be it, kind of smooth around
the edges, makes everything look nice. This key here is quite handy. Can you see, it says 'Show Original'... or just tap the 'P' key on your keyboard. See, before. You got to give it a sec, stressing out
a little bit, it's a big image. After. Wait for it. Editor will zoom in real close really.
I'm going to turn it off. Wait, wait. There it is. Turn it back on, and that's our smoothing. So that's really good
for a really large object. I'm going to turn it completely off
for the moment because it's too generic. It's working on all the edges, and I want
to just work on them individually. Shift Edge is the other one that I use,
and it just tucks out. Let's show you the opposite,
let's go shifting it out. Just kind of expands the selection
a tiny few fractions of a pixel. Then if I tuck it in,
kind of goes in a little bit. So in, out. I find that's quite handy if there's kind
of Color Bleeding around the outside. I'm going to leave it
at 0 for the moment... and I'm going to work on
this bit individually. So the magic trick really is
this brush here, the second one down. This is going to-- it's called
the Refine Edge Brush Tool... like it says there. It's really good for here. So how big a brush is?
You're going to have to experiment. It really depends on the kind
of overlap you want. For me, this size of the brush,
it's 200 pixels. Watch this. Ready for the magic? Pretty cool, huh. So it's gone through and looked,
and kind of played with the contrast. Just so you know,
this is not going to be... like I said at the beginning... it's not going to give you
100% perfect everything... but it's definitely the best option there
for selecting here. You can see it gets a little bit
foggy around here. So I'm going to undo, and maybe
go to a smaller brush... and just kind of paint in little parts. I'm going to zoom in a little bit. Don't zoom in too much because
it gets a bit messy in here. And there's a bit over here. There it is there. Now the further you go around there... it's quite wispy around here,
so I'm happy to use a bigger brush. The further I go around,
where there's not much here. I'm going to use a smaller brush.. and just straddle the mask and the image. Just kind of run it along
the center there... and it just gives a nice kind
of blend across the two. You can see there, some amazing stuff,
and there's some horrible stuff. So far, pretty amazing.
I love it. I'm just working my way around the edge
and little pieces... only because often I have
to go and undo it... because I might have grabbed
something I didn't want to... or it's just gone a bit yucky. What ends up happening is, if you use
too big a brush, you end up like in here. Ends up getting kind of ghosty in here. So I'm going to undo a couple of times,
'Edit', 'Step Backward'. Back to my brush. Now where you have to be
a bit more precise is where... you go from this kind of wispy
hair stuff to a nice solid edge... because if you don't, watch this,
goes a bit murkier there. So where we get to this part,
we're going to use a different trick. So if I go over here now, good enough. So where it gets to this white edge here,
this is the other tough bit. So using this tool here
is not going to work. We have to be a bit more
brute-force about it... because if we just paint it in... the background's too close
to the color of the T-shirt. If this T-shirt was bright blue
it would work perfect... you could just run the
brush along the edges... maybe make a smaller brush,
and it would work fine... but again I wanted to pick an exercise
that was quite tough... so that you've got the tools you need. So we're going to use this tool here... and it's nothing fancy, it's just
a big kind of like blob brush. You can either add to the selection
or remove from it. So I'm going to add to it.
I'm going to zoom in. Basically we just kind of try and tidy up
this edge by painting it in. It's not very sexy. What I might do as well,
where the brush is concerned... can you see, my brush is quite--
it's got a really strong edge here. I want to drop it down-- I find it's going to
depend on your image... but between 80 and 90 is kind of,
I find gives you a nice crisp edge... but with enough fuzziness to match
the focus of the camera... because it's never going to be 100%. So I'm just going to kind of
work my way along here. Just hiding in things,
this is the painful bit. Like I said, if this was a colored... a really nice strong contrast,
black T-shirt would be perfect. We wouldn't have to do any of this,
but here we are. So there's bit that's poking out. Same like we did with the
Quick Selection Tool. To remove from this mask we hold down... the 'Alt' key on a PC,
or the 'Option' key on a Mac... and just kind, just clicking a few times. How much do I want to
go around and do this? I don't want to do it at all... but what you've got to remember is,
I've spent like hours working on masks... only to find out that--
like where it's going to end up... it's quite a model background,
so you're not going to see any of this. Like, it's kind of in and out a little bit
because of my Quick Selection Tool... but to be honest, I know the
final result is going to look fine... because the background is
quite forgiving, I'd say. So now we're back on
to some high contrast. So let's go back to that lovely tool here. Watch this. Ready, steady. Cool, huh? So I tap my 'P' key, before, after. So with this strong contrast, super easy. Just run along the edge
and it magics it up. The smaller the paint brush, the more
you zoomed in, the better. I'm holding the space bar, clicking,
holding, and dragging with my mouse. So now I'm just going to make my brush
a little smaller and just click, hold. It goes fuzzy, all it's doing is-- a little bit tough to
know where you're going. You can see there, it's not as great. This is because it's quite white
against this edge. Where it's got a really easy contrast,
it does a whole lot better. You can see, it's there. So if she had a really pale skin,
it's going to be super tough... and you have to get in with
a really small paintbrush... and see if you can fix it up. Don't worry if you don't, if it's just
a little tiny inch like this. I'm going to show you a last little trick
we're going to use... to kind of fix it up to them
for the final one. Now I should work around this edge,
I'm not going to... because I know it's going to look good... because remember, unless it's
going against black... which is a terrible idea,
because it really shows the mask. This is looking pretty good. So the last magic you can do
is this one here. I'm going to twirl up Global Refinements,
and go to 'Output Settings'. Let's click on 'Decontaminate Colors'. Ready. steady, be amazed. Cool, huh? It looks for, like the color
creeping around the outside. So you know how, if I put
something in front of our-- like a bright green backdrop... the green kind of leaks around the edges,
this helps to remove that. There's only one drawback with it,
and I'll show you what it is... and it's worth living with, but it's kind
of weird, so I figured I'll show you. You can see, it's gone to 'Output to'
its own layer with a Layer Mask. That's great for me, click 'OK '. What it's done is, can you see,
its own layer and its own Layer Mask. There's the original... and there's the new one. So you've got this one always
because this one here that I've made... because we turn Decontaminate Colors on,
it does this. I'm going to right click the Mask,
and say 'Disable', go away for a second. You see what it did with the edges there? It's really weird, kind of put them
into a super high contrast. For whatever reason, it needs to
do that to get rid of that... kind of color cast creeping
around the outside. I'm not worried about it,
just need to know that that's happened. Don't worry though because on this
original layer he's still fine. If you decide not to use that
Decontaminate Colors, it looks perfect. It doesn't do that weird stuff. I'm going to 'Enable Mask.'. I've got this layer selected,
I'm going to grab my 'Move Tool'. Click, hold, drag to 02,
drag, it's a bit big. Let's scale it down. Remember, it's 'Command T' on a Mac,
'Control T' on a PC. How low do I want it to be? Just getting it to fit in. Hit 'Return'. It's pretty cool, huh. I'm going to zoom in. It's just done a really nice job
of the hair. The bit where I bothered to touch
other T-shirts looking better... and they've been there.
I do have problems with now. So you can go back, select on this,
go back in, and do Select and Mask again. Just use the paint brush to
tidy up those sleeves there. I'm going to click 'OK'. I'm not going to click 'OK' because
it's given me a duplicate... so I'm going to undo because
I didn't do anything. You're back on, buddy. Couple of last things you might do... to just kind of get these things
to work a little nicer is... I often find a Drop Shadow
to the actual subject... it can often help it recall
and settle in the image. So with layers-- I'm going to give it a name,
I'm going to call this one 'Model'. With it selected, we're going to
go to 'fx', and go to 'Drop Shadow.'. Now mine's remembered what I was doing
when I was experimenting with this. What I've done is, instead of
having like, say-- let's have a look, I'm going to
crank it up. Instead of a Drop Shadow,
kind of cast from an angle... let's say that angle there... what I'm going to do is have no distance,
and have the size right up. You can see, just puts kind of
a halo effect around it I probably won't have
the Opacity so high. I'll turn it a little bit more. Watch this, preview on, preview off, just
helps it settle in there a little bit more. You might not like that,
you don't have to do it. Let's click 'OK'. One last thing you might do is the Levels. So this image here, like this one here
is quite rich and quite dark. The Mid Tones are quite dark, whereas
this one, Mid Tones are quite bright. So to kind of get them
to match a little bit... we need to either play with the levels
on the background or the model. It really depends on what
look you're looking for. I'm going to do it for the model. So with the model selected, I'm
going to go to 'Adjustments'... and I'm going to go to 'Levels'. Getting pretty complicated here, I know... but I really wanted to give you
the full thing of how to do it. So on Properties here,
I'm going to make sure... it's only affecting the layer underneath. Remember that little thing there, says,
just affect the layer underneath. You can see that little arrow there, says,
Levels only affecting the model layer. Now I'm going to grab the Mid Tones,
just kind of darken it down a little bit. You can mess around with the
highlights and the shadows... to kind of get it to match your version... or at least the images you're working with. I feel like we're there. In retrospect, I probably would have
painted over this more than once. You can see, it's still leaking
some of the light through. I would probably paint it
in a couple of times... to get it to be a little bit crisper. Probably, a little less of
the fluffy hair through... but probably what I would have done All right friends, so the basic rules are,
if you're writing them down... it is make a basic selection... using the Quick Selection Tool,
with your mask selected... use this, 'Select and Mask',
which should be called super awesomeness. Then, unless it's a really
kind of an even selection... or kind of even edge shape... instead of using this global stuff
on the right... start working around the long way
with the paint brush... but it's not actually that long
because it's pretty amazing. Let's hit 'Cancel', and I will see you
in the next video
38. Class Project - Selecting hair: Hi there, it is class project time. Basically it is practicing what
we learned in the last video tutorial. I've picked an image for you,
this one's by Timothy Paul Smith. It's an Unsplash image,
but you can use your own... but this one here is, really good kind of,
I guess example of something... it's not shot in a studio, the lighting
is a lot more contrasting and natural. A really good image to practice on. So I want you to mask it out,
and put it on to your own background. You can find a background on
either Unsplash, or through Google Images. And here are the tasks,
so I've built a class projects file. It's this Word doc, you can go check it out
if you can't remember what you need to do. It is in your 'Exercise Files',
under 'Projects'... and there it is, 'Class Projects'. If you open that up, you'll get to here. This is what I want you to do,
open this image... make your initial selection
with the Quick Selection Tool. Use that Select & Mask we learnt
in the last video to fix the edges. Add it to another background that you
find intervening on the background. You might leave it as is, but you
might do some Drop Shadow... or play around with the levels
to get them to match... and then, like always,
I'd love to see what you did. So share them on the site,
or share them with me... on Instagram, I am bringyourownlaptop. Tag me in, I'd love to see what you do. So that's it, my Photoshop lovers. I will see you in the next video
right after you do your homework. Go on, go do it, bye now.
39. How to select things with straight edges in Adobe Photoshop CC: Hey there, in this tutorial we're going
to look at the Lasso Tool. It's super quick for doing
little selections like this... with things that have straight edges,
or this little icon here. I just need to quickly grab
a little chunk of it. You can see the selection is not perfect... that's the quick and dirty Selection Tool
that you really need for your tool kit. I use it often enough, that I feel like
I should share it with you guys as well. Let's jump in there and learn
how to use it. Let's get started by going
to 'File', 'Open'. We're on '05 Selection' still,
'Lasso 01', and click 'Open'. I wanted to show you a graphic... like we end up in Photoshop
a lot with images... but I use it for a lot of Web design,
UI App design... Infographics, that type of thing as well,
so I'm using this graphic here because... it kind of best demonstrates
using these Lasso tools. So the Lasso Tool is this third one
down here in my Tool Bar. If you click, hold it down... and we're going to use these top two,
the last one here, the Magnetic Lasso Tool. I would jump straight to the
Quick Selection Tool rather than this one. Some people like it. With the Quick Selection,
we've learnt lots... and it's better in my opinion. So the Lasso Tool is, it's like a Lasso,
it's making a selection, right? So we're going to go click, hold, and drag. Let's say we want to grab this icon
for whatever reason. We want to copy it to another document,
or just move it around in this document... because at the moment all of these things
are fused to the background. So I'm going to click, hold, and drag
my mouse, and I'm being pretty rough. Really rough, and just get all
the way back to roughly the beginning... and then let go of your mouse,
and it's made a selection. I can go to 'Edit', 'Copy',
'Edit', 'Paste'. And now my Move Tool, you'll see,
has been pasted on his own layer. It's just handy for like
moving things around. It's not an absolutely perfect mask,
as you can see, it's really rough... but there are lots of times where I just
need to quickly move something around. I'm not going to spend the time
using the Quick Selection Tool... and select a Mask, I just want
to do a hatchet job. It would be wrong for me to move through
the selections part of this course... without showing you how
to do the hatchet jobs. Let's look at the other tool
that I use reasonably often... the Polygonal Lasso Tool or
Polygonal, or wherever it's called. Click and hold down the 'Lasso Tool',
grab the second option. Now we'll use this in a little bit
more preciseness. Let's zoom in. I'm making up words today. Let's say I want this part,
and go to a different document. Now what happens with this is,
you click once... and then let go of your mouse,
and it's kind of attached. I'm not holding anything down now,
I'm not dragging, or anything... you can just click again, click again. Then we go back to the beginning,
can you see, the icon changes... from the kind of normal little thing... to the one that has a little 0 there,
little O. Say I'm going to close you up. So that's what we're going to do.
Let's go to 'Select', 'Deselect'. I'm going to start here, click once,
click once again... click once again, click once again. You can see, it's just a handy way of-- instead of trying to use the
Quick Selection Tool... when you know it's just some rough shapes. That's a -- missed a
little bit at the top... but you get the idea, right? Now I can go copy, and at the moment
I'm on the wrong layers for copy. It's doing some weird stuff... so make sure you're on your
'Background Layer', hit 'Copy'. 'Edit', 'Copy', 'Edit', 'Paste'. Now your Move Tool, and I've got this
thing now that's been nicely cut out... that I could copy and paste
to a new document. And this is less of a hatchet job,
it's a perfectly sharp edge... so why wouldn't I use the Lasso Tool
to make it a perfectly sharp selection? If this felt like a really
kind of quick tutorial... I guess I only use it for quick things. If it's not going to be a quick job
using these two tools... you're probably going to move to
something like a Quick Selection Tool... and be adding and removing, and then
tidying up with the Selective Mask... but if it's speed you need,
the Lasso Tool could be perfect for you. Let's tuck that way in the
back of your tool kit... and move on to the next video.
40. How to get text to interact with ink & plants in Photoshop CC: Hi there, in this tutorial
we are going to use... all the techniques we've used
so far to create this. It's a little bit of Quick Selection,
a little bit of Select and Mask... a little Clipping Mask... and we should get the text
to interact like this. All right, let's get started. First up, let's go to 'File', 'Open'. In our 'Exercise Files', there's one
called 'Text Interaction 01'. It's in that folder we've been working in,
called '05 Selections', open it up. Now this one is a PSD rather than a JPEG. Why? It's because I wanted
to use a specific font... and for us all to use the same font. And because all machines are different... you're probably not going to have--
this particular font's called Lust. If you want to, you can just obviously
click on this Layer and hit 'Delete'... and type out your own text... but for the moment while you're practicing,
let's just work with this font here. What I did is, you can
right click text here... and say 'Convert to Shape',
it's not appearing there. It just turns this font here into
a shape rather than editable text. So that means it loads on your machine,
but you can't change it, you're stuck. Anyway, what we want to do is--
let's turn the Type on and off... and I'm just kind of looking at parts... mainly this chunk through the middle here. This would be good to kind of overlap,
so I want to select this Mask it, have it on its own layer
above the text. So let's do that. We're using all
the skills we've learnt so far. Just putting it to a practical example. I'm going to turn off the Scott's layer,
and you click on the ink there. Grab my 'Quick Selection Tool',
turns it to brush size. Doesn't really matter. I've got mine at about 50. I'm doing this on and off to see
how far I need to go up and down... so I'm going to grab most of that... and I grab most of this. Can you see, I could go through
and keep selecting this... but I don't need it because
the text is not going to-- maybe I will just for good measure.
Adding to it doesn't really hurt. You're just trying to work out what you
need from this to be above. Perfect. So I've done a selection from it. If I just add a Layer Mask now
it's going to kind of work. It's not what I want, I'm going
to do it one extra step first. I'm going to undo that. I'm going to duplicate this layer,
so I'm going to right click it... save 'Duplicate', and this is
going to be... 'Top Ink 01'. So I've got two of them now. Now when I add that to this layer... I've got this top bit here
that's just got this ink... and the one underneath is this. The one underneath just kind
of fills in the background. So now it's just about Layer order. Like we did earlier on, with the text
and the model, it's very similar. So I'm going to turn the text on,
drag this above. So this is above that. Now it looks okay as is.
I'm going to zoom in. I want to-- there's some bits
I can tidy up. Some of these edges here aren't great. So with the Layer Mask selected,
remember, you have to click on this. Click on 'Select and Mask',
like we did in the previous tutorial. Then, some of these global ones. Definitely these global ones are
going to work better in this case. You can work on them individually
with the paint brush... but because they're all very similar
we can just drag these things around. So Edge Detection, yes, might work. Smoothing, in this case... I really like-- I've just kind
of picked a random number. I'm going to turn this on and off... and I'll get the editor to zoom right in. Can you see, maybe across this area here. So that's the original. That's where the Smoothing turned on,
just kind of makes it nice. Shift Edge can be helpful as well. I increased it, actually I want to
decrease it. So that's it now, that's it before. That's it now. It's a little nicer,
I'm going to click 'OK'. Awesome! So I've got that layer,
the mask is pretty good... and I'm going to work on
a couple of other parts. There is some bits we're going to do
when we start shadowing the background... to kind of make it fit in. So you can skip ahead the next minute
or two while I do the rest of these. So what else do I want?
See this big sticky thing here? I want that to be above the 'S'. So what I'm going to do is, I'm going to
do the same thing as before. I'm going to turn this top one off just
to make things a little easier to look at. I'm going to duplicate the Ink layer. 'Duplicate Layer'. You're going to be called 'Top Ink 02'. Might as well move it to the top. So with this layer selected,
'Quick Mask 02'... I'm going to grab all of that. Turn this on. She'd probably be better underneath
for the moment... so I can turn the text on and off. That's probably what I want. So I'm going to turn them all off
except for this guy here. I'm going to add you to a Layer Mask. He's going to be above my text. Turn the text on, and there he is, there. Now in my haste I took too much
because I didn't want the-- I don't want it above the H. So I'm going to paint out that selection,
and this is going to bring in... some of our techniques
that we learned earlier on. Remember we were able to paint directly
on the mask with black and white... to either show or hide things. So on my mask... I'm going to grab my black paint brush,
there he is there, 'Paint Brush'. Do I want it to be black?
I do, I want it to be black. I'm going to make sure
my Opacity is at 100%. And I'm just going to paint out. Mine's a bit of a fuzzy brush there,
it doesn't really matter in this case. You can see, it kind of starts
bringing through the S. I'm going to undo that a couple
of times, 'Step Backward'. I'm going to go to my brush size... and I'm going to have the
hardness up a lot higher... so that I can paint this out. There you go, H. There's a lot of to-ing and fro-ing. Now with that Mask selected,
I can go to 'Select and Mask'. I'm going to zoom in. Now again, I'm going to
crank up the Smoothing. You can see, it just made it nice. I'm happy with that. 'Shift Edge', in a little bit,
I'm happy with that as well. What we'll do here though is we'll show--
see this one, says Remember Settings... it just means, every time
I load this back in... for the subsequent mask
that I'm going to do... it's going to remember
that kind of Smoothing... and that kind of Shift Edge. Handy. Zoom out. Let's go through and do the last bit. So I'm going to tune both of them on,
looking kind of cool. Now I'm going to turn top,
these two both off. And what am I going to do next? I'm going to do this kind of,
like this bit that blobs out... and this little stalk thing. So duplicate the layer,
right click, duplicate. 'Top'. I called the other one Link,
you noticed, I didn't. 'Top Ink 03'. Now where is it going to go?
It's going to be all of this stuff. So 'Quick Selection Tool'. I'm going to drag across that. Not that, so holding down... the 'Option' key on my Mac,
'Alt' on a PC to paint that stuff out. There's some weird stuff around there. I'm going to turn you on. I see there, that's going to go across
the T that I don't want. So I can either paint it out with
the black paint brush later on... like I kind of did in the last bit I did. Remember, over here, or I just removed it
from the selection here. So with this layer selected
I'm going to turn it into a Layer Mask. I'm going to pop it just
above my Scott Shoes. Instantly I can see there's a
little bit there that I don't like... but that's okay, let's look at
painting it out. So on my Layer Mask... black paintbrush, here you are. I'm going to paint that out. I'm just kind of mocking it up there. With it selected I might tidy it up
with Select and Mask... and hopefully, because it's
remembered my selections... it's done the Smoothing and the Shift Edge. I'm going to turn it on,
can you see it across there? Turn it off, nice and smooth there. Let's click 'OK'. Turn all through them on,
it's kind of a cool way. I like it when there's
this kind of interaction. Looks better from afar. It's the same stuff as we've learned
but in a different practical exercise... because sometimes cutting people out,
and you're like... "Oh, I can't understand that." It's quite simple, there's just one person,
but when there's like an interaction... it's the same principle, but we've had
to do it across three layers... and we didn't even have to do it
across three layers. I just broke it into little sections to
make it little easier for us to understand. You could have just selected
all of these in one big go... but I'm not that clever. The last thing I want to do is, I want to
kind of darken these parts in here. Now the problem with--
we used the technique earlier on... remember when we settled
that model in the grass... we used the Burn Tool. The Burn Tool is amazing... when you're dealing with images... but because I want to darken up the text... watch this, there's a big kind of,
like ghost busters, no go. The Burn Tool can only work on
what's called Raster or Bitmap images. Don't sweat it, all we need to do is
a slightly different technique. So this is new stuff, what we're going
to do is create a new layer. It's this little turned up page here,
we're going to call this one 'Shadows'. I'm going to grab my paint brush. I'm going to pick a color,
so I'm going to click in here. My foreground color,
make sure it's down at black. I'm actually going to maybe pick a
slightly warmer, maybe in the pinky space. Where is my pinky space? Just to match, because it's kind of
pink in the background there. It's still dark black, but it's got
a hint of magenta in there. Now in terms of my paint brush I'm going
to have the hardness down at '0'... so it's nice and fluffy. Looks like that. Undo. I'm going to pick a nice
big brush size, 300. What I'm looking to do is
I want to kind of like-- actually I'm going to undo. I'm going to turn the Opacity down,
at 100% it's coming out a bit strong. So I'm going to lower it down a little bit. And what I want to do now, if I click... I can kind of build it up, you can see... so this is just a nicer way
of building up stuff. So I'm going to go, 'Edit',
'Step Backward' a good few times. I'm using my shortcut so I don't
have to keep clicking on there. So what I'm going to do is, I'm going to-- let's do a really obvious one. Let's do across this H,
so I'm going to do it across there. It works pretty good, except it's coloring
in the background and everything. I'm going to go on full noise. Can you see, it's actually covering-- I've gone way too far
as an example for you... but you can see, it's just coloring in
the background, which is not amazing... but there is a cool little trick... it's combining what we did
a little earlier on. Go to 'Clipping Mask'. So at the moment, the shadow is for it to
only cover the things straight underneath. Remember that little arrow that appears... when we're using some of
the Adjustment Layers? You can do the same thing with layer,
with it selected, go to 'Layer'. Go to this one that says
'Create Clipping Mask'. You can see, now this layer is only
affecting the Scott Shoes layer... and I can paint out here what I like. It's appearing, can you see it
on the little thumbnail there... it's appearing up here... but it's only affecting
the things underneath. So what I'm going to do is 'Select All'. Then I'm going to go 'Edit', 'Clear'. Gets rid of all that junk I've done,
'Select', 'Deselect'. So with the Shadow Layer selected,
it's got a Clipping Mask just above Scott. I'm going to go through here,
my Opacity, what is it at, 38? I'm just going to kind of do some
broad kind of shadow stuff. I'm just clicking a couple of times. Getting the big stuff done first. You might have to be careful because
you don't want to cover this and the S. I'm going to just make it
a little smaller here. Clickety-click. Have I missed anything? Probably. You guys are all watching me. So I'm getting this in,
I'm actually going to go double down. Get a smaller brush, I quite like
the big broad stuff first... and then get in the smaller,
I'm getting a smaller brush.. and just kind of, I like it quite sharp
where it exactly comes out... but then gets more fluffy. Clicking and dragging, clicking,
clicking, clicking and dragging. Holding space bar, then clicking
and dragging the mouse. You can see it's quite handy when
you are doing this type of thing... you want to kind of move around nicely. If you've been avoiding shortcuts so far. I finally get here today. Hold 'space bar', click, hold, and drag. All right, looking kind of cool?
What do you think? I'm liking it, I do realize
you can't read the word shoes... but go for like, abstract cool. It could be like a nice big graphic
for the front cover... and supported with maybe a logo
that kind of helps define the text a lot. You see, there's quite a bit in covers
of magazines, where they have like... the name of the magazine along the top... but that image kind of interacts
with it a little bit... and the brand of the magazine
is strong enough... that you know that the magazine
is GQ or Glamour, or... I don't even know enough
glamorous magazines... but I think you get what I mean. So play along with this tutorial. Give it a go, and in the next video
I'm going to set some homework... where I'm going to give you examples
for you to work on your own. I'll see you there.
41. Class Project - Text & Image Interaction: All right then, it is class exercise time. Now using the techniques we learned
in the previous video to make this... I want you to open up two images
from your exercise files. It's in '05 Selections',
open up 'Text Interaction 02' and '03'. This one from Rodion Kutsaev,
and this one here from Chattersnap. Now you can use either of them,
or do both of them. I want you to get the text interact
with these leaves in some way... and the same with this one. Maybe nestle it in there somewhere. So let's look at the class projects. So it's this one here. Number 38, open up either those images,
create your own text... and then use a mixture of the tools
you've learnt in this class. It's going to be a lot of Quick Selection. Duplicating that Background Layer... adding a Layer Mask,
fixing that Layer Mask... with a Selective Mask if you
need to, you don't have to. Just make sure the layer
ordering is right... make sure that our new
selection is on top... the text is in the middle, and the
original one is at the background... a little sandwich. Now what really sets this off is
making that Shadow Layer. Remember, we made a new layer
just above our text... and we use this thing called
a Layer Clipping Mask to join the two up. So that's the homework. I'd love to see what you do. This one's a real super
exciting one, I feel. It's a point in the class where we finally
go from like passive Photoshop user... adjusting and doing little--... like interacting and calling on more
than just one Photoshop skill at once. I hope you have fun with it. I'd love to see your work, please share it. Either the projects part of this website,
or in the comments. Better yet, share it with me on Instagram,
I am bringyourownlaptop. Go now, do the homework,
I will see you in the next video.
42. How to add filters & effects in Adobe Photoshop: Hi there, in this video we're going
to introduce the Filters in Photoshop. More specifically, this thing here
called the Filter Gallery... and all of its magic inside. Let's get going. Let's get started by going
to 'File', let's go to 'Open'. In your 'Exercise Files', we're going to
a new folder now called '06 Filters'. Open that up. Let's open up 'Filter Gallery 01'. Who is this handsome man, you ask? It's me, looking casual with
my hands in my pockets. So Filters are all in here. Click on 'Filter', now there's
a bunch to go through... so we're not going to
go through them all... but the best way to get started is to use
this thing called the Filter Gallery. Kind of yanks up all of these,
who knows, what Pixelate Mosaic is? So it's best to go into the Filter Gallery,
and it gives you kind of a preview. Now it's set to the last thing we did. Yours is probably going to be set to
Colored Pencil, or Cutout, or Fresno. And the creepiest one of them all,
Plastic Wrap. You can adjust them over here,
often it's just a string. Just kind of different changes... depending on the particular effect
or filter you have selected. Now before we go any further... just so you know, like Colored Pencil
shows it up quite heavily. If we go down to here, to say, not
Brushstroke, Distort, Sketch does. This is black and white one,
you're like, "That's not black and white." What ends up happening--
yours is probably black and white... let's say I'm going to pick charcoal. Let's click 'OK'. Why is it getting this green
and this magenta? If I click 'OK', what it's doing is... it's using your foreground
and background color... and your foreground and background color
is probably like this. I just click this little reset button. It's probably black and white, so that's
where it got those two colors from. So if you're like me,
you want those colors... what you can do before you
go into the filters... I'm going to 'Edit', 'Undo'. Click on the 'black',
and just click in here... drag this 'Hue Slider' up
until I find a color I want. Same with the Background color,
there's white box here, click on that. And instead of white I'm going to pick
another color. Spent ages picking a color, I did. Another thing you need to do
when you're using filters... is what you might have noticed,
if I go redo again... there's an option in here to go--
so I would Step Backward... and there's a way to go Step Forward
to back to where I had it. The problem with it is, down here... I've done what's called
Destructive Editing. It means that layer's changed forever,
if I save over the top of this now... there will never be a colored version
of me again. It will just be this version,
so it's destructive. So what we want to do is
do a little step before we go in. So here we go back to the beginning. So before you go into 'Filter Gallery'... click on this one here,
'Convert for Smart Filters'. Nothing really happens; click 'OK'. Except the icon changes down here... the thumbnail has this
little graphic in the corner. That's just to mean,
it's what's called a Smart Object. We'll go through Smart Objects in a little
bit more detail later on... but for the moment, with it selected... go to the same thing,
'Filter', 'Filter Gallery'. Here's all my awesome colors. Now again, we're not going to go through
them all, there is a-- We'll go through Half Tone Pattern
in a next tutorial... but for the moment, go through... have a little experiment
with the different ones. There's some cool ones in Texture. And remember, you can
adjust them over here. So once you have done something--
I've done my Grain. No, Patchwork, let's click 'OK'. See the difference down here,
it looks kind of complicated... but we've kind of seen
stuff like this before... when we did our Drop Shadows
from down here, right? It means that my layer is fine,
and perfect, and non-destroyed. Means I can turn the Filter Gallery
on and off. It also means I can double click
the word Filter Gallery... to go back in. And you go, actually I liked it,
but the square size needs to be bigger. More pixelated Dan, less pixelated Dan. Click 'OK'. And we've made that amends,
we can always turn it off. Now this is a brief introduction
to the Filter Gallery. We'll, in the next couple of tutorials... show you some actually
specific kind of looks... and show you how to go through
using the Filter Gallery to create them. Until that next video;
I will see you later.
43. How to turn an image into a painting in Adobe Photoshop: Hi there, in this video we're going
to turn this image into an oil painting. It's basically just a click of a button. Thank You, Photoshop. Let's learn how to do it. So let's go to 'File', let's go to 'Open'. You're looking for your exercise files
in '06 Filters'. There's one in there
called 'Oil painting 01'. Hello again, looking very-- I think
this is my smart, but business-like. In a funky corporate backing,
but wearing a T-shirt. So you know, I'm approachable.
Not my favorite shot, but anyway. We want to turn him into that painting. The reason I show you this is,
it's quick and easy. And I get asked for it quite a bit. But also it lets us know that--
in a previous video, we went to 'Filter'... and I showed you that the
Filter Gallery has... like all the kind of
previews you can go through. That's not the case,
it's not all of them in there. They put the ones that
they can work in there. For some reason some of them can't. We're going to go through
the rest of these videos here. I'll show you some of the ones that aren't
as part of the Filter Gallery. Because we saw in, say Pixelate... we saw all those kind of
Crystallized, Mosaic, Half Tone... but this one here, under 'Stylize',
there's one called 'Oil Paint'... that's not a part of it. Now what you might find is, if you're
using an earlier version of Photoshop... I think, it's the 32-bit
Windows versions... I'm not too sure, but some of them
just don't have this option. So if yours is not there,
there's nothing you can do about it. It's not so much the software... it's that the software doesn't work
on your particular machine. If you install that software on
a different or newer computer... this thing will appear.
It happens with this 3D panel as well. So 'Filter', let's go to 'Stylize',
let's go to Oil Paint'. Basically that's it. Now it's kind of working through. Now your Preview's probably turned off... because it is quite stressful
on the machine. If yours is, you can
just drag this around... and work, say on this face here. I like to turn the whole on
so I can see the whole thing. It's just a matter of kind of
playing around and seeing... kind of what you feel like
more like a painting. I think that's terrible. If you need to reset it, you
can either hit 'Cancel'... or, ready for a super nerdy trick? If super nerdy tricks aren't you,
just ignore this bit... but if you hold down the 'Alt' key on
your PC, or 'Option' key on a Mac ... can you see, Cancel changes,
from Cancel to Reset. Happens in pretty much all
the boxes in Photoshop. If you mess things up... hold down the 'Alt' key on a PC,
'Option' key on a Mac... and you can reset, go back to how
it kind of opened up. One thing we forgot to do is -
I'm going to hit 'Cancel'. - is we forgot to convert this
into a Smart Object. So with it selected, go to 'Filter'. There's this one that says
'Convert for Smart Filters'. Smart Filters and Smart Objects
are the same thing. Yes, I'm happy with that. Remember, only thing that changes
is that the icons there... now I can go to 'Filter', go down
to 'Stylize', go to 'Oil Paint'. And there's me, as a painting. Now doing this with a person is--
the face details are quite tough... but I like it for all inanimate objects... or, this down here, this is super cool. I love how it works
with the detail down here. All right, that's going to be us.
Let's click 'OK'. Remember, because we used a Smart Object
or Smart Filters... it means that we can turn this on and off. To get back into it, you can double click
the word 'Oil Paint'... and go in and make adjustments. All right, nice quick one;
I will see you in the next video.
44. Class Project – Oil Painting: Hey there, it is homework time;
it's an easy one. Find an image, your own image. Get something off your phone,
it can be a picture of you... and I want you to convert your Layer
to a 'Smart Filter'... and I want you to convert
your Layer up here... to 'Convert for Smart Filters'. Then go into Stylize,
and go to 'Oil Paint'... and just mess about a little bit. When you finish, share it with me.
A super easy homework job. When you finish, print it out on
a big canvas, to get above the fireplace... where all good paintings should go. All right, see you in the next video.
45. How to create the Dotted Halftone Poster Effect in Photoshop: Hello, Halftone lovers,
it's Halftone dot Poster Effect time... where we take an image like this,
add some cool colors and some dots. We do a similar sort of thing
with some lines. We even add some gradients, and
dots, and terrible gradients. It's a nice simple effect in Photoshop,
let's get going. All right, it is Halftone time,
let's go to 'File', let's go to 'Open'. And in your 'Exercise Files',
in '06 Filters'... there's two files, called
'Halftone 01' and '02'. Thank you, Barret Ward
and Ben O'Sullivan. We're going to start with this one here... and if you're following along
with me, which you should be... just double check that your-- yours is probably set to
black and white as default. If it's not, click this small icon here,
it'll change them back.. I'm on my 'Move tool' for no good reason
really, there's no effect on this tutorial. And what we want to do is go up
to 'Filter', let's go to 'Filter Gallery'. In here, what you're looking for is
the Sketch drop down. Look for Halftone pattern,
and we're nearly there. My pattern type is set to 'Dot'. Size and contrast really depends
on the image, and the look you want. So really depends here,
it's time to kind of mess around. When you finish, click 'OK'. And that is Halftone dots. Now those aren't very
exciting Halftone dots. So what we're going to do is
add a little bit of extra. So I'm going to go
'Edit', 'Step Backward'. There's two things we're going to do. One is, we're not going
to destroy our layer... because we did that before,
on the background layer... which just means that it can
never be changed back. So I went to 'Edit', "Undo'
and before I do it... I'm going to go to 'Filter',
'Convert for Smart Filters'. Click 'OK', and it just means that... it's going to apply like a topical cream
that we can take off... and our image is going to
be perfect underneath. What we're also going to do is
add a couple of colors. You do that by making your foreground
and background color sit as a color. At the moment black and white
is what we got from that first go. So if you click the foreground color once
you can pick a color from in here. I'm going to pick one of my Swatches,
if you can't see your Swatches up there... click 'OK', go to 'Window',
and go to 'Swatches'... or just pick a color, any color. There they are, the Swatches. Now I want my foreground color... so I'm just going to click the white
thing in the background there. I'm going to pick one of my
other colors in here. I used these earlier for Gradient
in one of the other tutorials. Click 'OK'. So now with a foreground and
background color ready to go... go to 'Filter', 'Filter Gallery' again,
and back to our 'Sketch'. 'Halftone Pattern', and you see... we get this kind of a little
bit more exciting view. Now again, you can mess around
with these, if you click 'OK'... the big difference between this
and last time is, it gets colorful. Can you see down here,
this can be turned on and off... plus I can double click on
the 'Filter Gallery'... to go back and make an adjustment to it... crank the size of the dots up,
and the 'Contrast', click 'OK'. That's the better way of working. You can over here as well, this little
arrow, it's switched them around. So what I'm going to do is
click my 'Smart Filters'... and drag them into the trash. With them around the other way,
'Filter', 'Filter Gallery'. You get the inverse,
where the shoes are the magenta... and the background is
more of that yellow color. If you want to apply it just to
the shoes, you'll have to do a Mask first. So you go all the way back to the beginning
and use the Quick Selection Tool. Add a Layer Mask, like we did
in a previous tutorial. Let's go a little bit deeper. So the second example
from Ben O'Sullivan... I'm going to show you how
to add a gradient to it... because I love gradients. I'm going to show you how
to do the lines version of it. So I've clicked this little icon,
makes it black and white again... which is what we need to
get started for the gradient. With the Layer selected,
don't forget to go to... 'Convert to Smart Filters', click 'OK'. Now go to 'Filters',
go to 'Filter Gallery'... and back in here, in 'Sketch,
in 'Halftone'... we're going to change it from the dot to--
I'll show you a circle. I don't really use it, you might
find a good use for it. Line's kind of cool though. Size and Line, Contrast and Line,
all depends on what you are going for. I'm liking that. Let's click 'OK'. So it's black and white, we can turn
it on and off, which is pretty cool... but what I'd like to do is add
a bit of a Gradient effect... but I want to keep the black... whereas in this example here, it was just
one or the other, we had two colors... whereas this one here,
I want a bit of a medley. Basically, we've done Gradients before... so with 'Layer 0' selected,
I'm going to click on 'fx'... and I'm going to go to 'Gradient Overlay'. Mine remembers what I did last. Yours is going to look a little bit
more boring like this. So yours might look like this. What we need to do is, first pick colors,
so click in here. Now just so you know,
there are some pre-determined ones... and I've hated all these for years,
I'm like, "Who needs that color?" But then I was like, "Hey, was that
always in there?... "It's kind of like Instagram." Did Instagram just click the button?
I don't know... but these two are working for me,
that one was so much. If you want to adjust the colors,
you click on them... so click on this color bar here,
and just double click the bottom house. Move the sliders around until
you get a color you like. Not that one, cancel, Dan, cancel.
Then it's all about blending it. We've looked at this before,
it's the way this gradient... blends with the images attached to
with the thing underneath. In this case it's going to be,
no Dissolve, do nothing. We're just going to work our way through,
Darken, pretty cool, all of a sudden... but don't be afraid to kind of
work your way through. Multiply, Color Burn, not very cool,
Linear Burn, one of these is really cool. Now there's no right or wrong... you just work your way through
until you find something... and you're like,
"Man, that's the cool stuff there." If you want to watch me,
I'm just going to click on them all... because we're at the end of the tutorial,
so I am clicking. Maybe save you the clicking experience. You can just decide which one
you want to jump to. Vivid Light, oh, Vivid Light's
kind of cool. It's kind of put it on parts of the black,
but not in the white parts. So many different effects. Wow! That's pretty cool,
it's flipped the inverse. If you were getting bored, like I am now,
you can move on to the next video. The one I liked the most was,
I can't even remember. Not Multiply, but you can play around
with which way this goes. You can inverse it like we did
with the gradients earlier; 'Scale'. You can turn right down. I have totally wrecked mine now,
but you get the idea, right? So that is various uses of
the Halftone effect in Adobe Photoshop. I'll see you in the next video.
46. Class exercise - Halftone: Hi, you're back, you're back
for more homework. I knew you would be. This one's an easy assignment.
I want you to grab your own image. It can be something from the internet... but what about getting your phone out,
and emailing one of your pics to yourself? Go through, add the Half Tone effect,
either this kind of jewel color here... or maybe you look at the Gradient Overlay
if that's something you like. When you finish, share it with me. I'd love to see what you
make, the colors you use. All right, I'll see in the next video.
47. How to fake realistic motion blur in Adobe Photoshop CC : Hi there, in this video we're
going to take the runner here... and make it look like he's moving
nice and fast using Motion Blur. We'll also do it to this taxi here. Not zoom in, zoom in. All right, it's another Photoshop filter. Let's learn how to do it. To get started let's open up
a couple of files. It's 'Motion Blur 01' and 'Motion Blur 02';
Thanks, Hitesh. We're going to work on the runner first. To get started let's create
two backgrounds, So let's right click the word 'Background',
click 'Duplicate Layer'. This one's going to be called 'Runner'. And the bottom one here, double click
the word 'Background', and name it 'Blur'. So add two of them. We need to work on these separately... so let's turn the runner off,
and let's blur the background first. Then we'll mask the runner. It's a nice easy filter
we're going to learn. Let's go to 'Filter', go down to 'Blur',
there's one in there called 'Motion Blur'. If yours doesn't change,
either preview's not on... or you've still got the
runner Eyeball turned on... because if that's on, it's kind of
covering the work we're doing. So pick the direction, our runner's
probably going to be running left to right. He can be running any which way you like. Maybe up, and turn right a little bit. No, he's running across. In terms of the distance,
how streaky it gets... how fast you want this man to be running. It depends if you go in for,
like exaggeration... or if you're going for just subtleness. I'm going for subtle, let's click 'OK'. Let's turn the runner layer back on,
and let's click on it. Now let's mask out the man, we're going to
use the Quick Selection Tool. I'm using a brush of about--
what am I using? I'm going for 50. Clicking, holding and dragging
across all the parts. It's pretty forgiving, because... like in an earlier tutorial... we're kind of replacing him
back on his same background. So we can be pretty lax with the selection. You might disagree. You can get in there nice and zoomed in,
and get it to be perfect. I'm going to zoom in. It's looking okay, looking okay,
looking terrible, I'll grab his head. Grab his hand, the thumb. Bits of hand. It was a bad one, undo. I might have to make
my brush a lot smaller. His skin tone is a lot, the same
as the background. I'm going to hold down the 'Alt' key
to minus from the selection... or 'Option' on a Mac. Same in here, I'm going to hold down the
'Option' key on my Mac, or 'Alt' on a PC. Just get rid of this stuff
in the center here. Really small brush, minus '-' to get out. Hit that a bit back in. I'm just having a quick look.
Now I'm doing the quick version of this. If this is going to be the front cover
of your magazine... you probably want to make
your Layer Mask... then get into that Select and Mask that
we looked in a previous tutorial... to get it all looking perfect. It's not what we're doing today.
Going quick. It's good enough for me.
I'll zoom out. So all we need to do now
is make sure that... runner layer is selected,
click on 'Layer Mask'. And basically we're done. If you had a keen eye, what we should
have done before we blurred this layer... is we should have selected it,
gone to 'Filter'... and gone to 'Convert to Smart Filters'. It was a test, did you notice? I'm pretending it's a test, I just forgot. Let's click 'OK', the damage is done... so I need to go back to the beginning,
but I'm not... but I converted it to a Smart Filter. Now I'm going to go to 'Filter;
and go over the top of it again... with 'Blur', 'Motion Blur',
and crank it up some more. Nice thing about that is, remember,
you can turn that on and off. In your project, what I want you to do is,
here in this '02' from Hitesh... there's a mint looking taxi, I want
you to do the exact same thing. So duplicate the layers,
have the car layer and the blur layer... blur the Background Layer,
mask out the car. Let's see if you can make it
like it's going fast. All right, everybody,
that is a quick Motion Blur. Now we've gone through lots
of different filters here. Eventually got to call quits on it... because we could do 10 hours
of just looking at filters. What I'm hoping you getting out of it... is that you can see how to use
them non destructively... by using our Smart Object. And we can do fun things
like Text and Masks. It's just one more we need to do
before we go. It's a right of passage in Photoshop We'll do it in the next video.
48. The Lens Flare right of passage in Adobe Photoshop: Hey there, this video is more of a right
of passage than it is learning Photoshop. We are going to be learning something. We're going to be learning
the filter called Lens Flare. It's this thing here that I've added,
watch this, turn it off, turn it on. It's the sparkler that comes out
of the lens, turn it off, turn it on. And why do I show you it to you? It's because you need to learn to love it,
and then hate it, like Comic Sans. I'm not saying this is you... but pretty much, well most people that
I show this, and they're kind of like... when they’re beginning in Photoshop
specially students, okay, University... I show them this, and then it doesn't
really matter what the job is... I know, because this is exactly
how I did it. I got shown Lens Flare, and in every single
assignment for my Graphic Design Degree... had a Lens Flare in it,
didn't matter what it was... an image, Lens Flare,
business card, Lens Flare. There were very few times
in that first year of University... that I couldn't put
a Lens Flare on something. And as I transitioned
into teaching students... it didn't even matter if I
showed them this tool or not... they found it, and every second project,
Lens Flare. And I want to give this gift to you,
it's really easy to use... and from now on you'll be able to
throw it into all of your projects... until you learn to hate it. Then you'll be able to spot it
in other people's projects... and tut along with me. Let's get into it,
and learn how to make it work. To create our amazing Lens Flare... open up two files from that same
filters folder we've been working from. It's called 'Lens Flare 01'
and 'Lens Flare 02'. With the layer you want the Lens Flare on,
have it selected in the layers... and go up to 'Filter', go down to 'Render',
and find the magical 'Lens Flare'. And that's it, what you can do is... this little sparkle here,
you can click hold and drag around... to get a sense of kind of
how the Lens Flare works... and I'm going to put them kind of like-- through the trees here. I'm going to-- you can obviously increase
the brightness, or lower the brightness... make it subtle, but remember,
this is Lens Flare time... we want it to be obvious,
so everyone knows. Now this is the traditional Lens Flare. This is the one I see on every first-year
University design student I've ever taught. You're only allowed to use this one,
but then there's these other ones... and they're just different looks... different kinds of lenses
react differently.. Experiment with ones you want,
I'm going for the Classic. The 50-300mm zoom lens. Ah, look at that! Magic. And that my friends is a Lens Flare. Now on this option here, this is the one
I want you to practice on. See if you can find a good spot
for a Lens Flare. What I want you to do is make sure
you find your own pick... and stick like 10 lens flares on it,
and I want to see them... and remember the rule, 50% of all
the work you do for the next year... if you're brand new to Photoshop,
needs to have a Lens Flare put into it. Enough of Lens Flares, that is going to
be the end of Filters. We could go through,
there's just so many in here. I could spend the next 10 hours going
through every single one of them... but now you've got the kind of
understanding of how they work. You can go to the Filter Gallery... to get most of them, and get a cool
little preview, then there's lots in here. Like Render and Tree. It's random, you click on it, it generates
trees, if you're a Landscape Designer... that is an amazing one,
there's just so many in here... that you need a little
bit of experimentation. And what you'll probably find is that... once you've got your core skills
from this course... you'll find tutorials online,
you'll be like... "Oh, I have the skills to
do these tutorials now." And you'll find, to do this X effect... you will need to do filter A, B, and then C
to make that happen. You'll be able to work through different
filters as you get more experienced. Let's get into the next section
of this Photoshop course.
49. What is a smart object in Adobe Photoshop CC: All right, it is time to learn
what a Smart Object is. Basically it is a protective wrapper
you put around images... that you bring into Photoshop... that protects them, keeps them safe
from all your filters... any kind of resizing you do,
like a protective wrapper. Now remember, way back at the beginning
of this course, remember we made this. We copied and pasted all
these different pieces. I'm going to show you what
we did wrong in that one... or at least we're going to
level up a little bit... so that if you do a job like this again,
you'll do it the proper way... or the more professional way.
I'm going to close this one down. What I want to do is, I've got this one,
and I copy these three images in. This one here, 'Move Tool',
click, hold, drag, drag, drag. Holding there. Drag, drag, drag. Cool. So first option.
That's perfectly fine. The number 3, click, hold, drag, drag. Holding the mouse down. Let go, and he's perfect as well... but in the last one he's a lot bigger. Remember this, click, hold, drag. Drag, drag, drag, let go. Too big, this happens all the time. Nothing ever matches up in terms of sizes. So what we did is, we want
'Edit', 'Transform'. 'Edit', 'Transform', 'Scale'... and we scaled it down,
and we kind of got it close. Looks good, we hit 'Return',
and that's perfectly fine. The only trouble with that... is that later on if we make it bigger,
we've lost detail. What I mean by that is... let's go to the extreme,
let's make it super small. So I'm making it really small here,
because I want it as a little icon. Hit 'Return'. It looks fine at that size,
but when I say... on that same layer I'm going
to scale you back up... scale it back up, hit 'Return'. We've all seen images like that,
come through, like email... where it's being resized and then
made larger again... and it just loses all the detail. So that's the bad way of doing it. Even though we only did a small
fraction of that resizing... we still lost detail, and it just means... later on when I'm working on the project,
and I want to resize it... because it needs to be a different,
say social media post... needs to be slightly bigger. I'm doing this to it. Probably not to that extreme,
the way to get round it is... if you go to this one, the same thing,
click, hold, drag, drag, drag. drag, drag, drag,
and before you do anything... right click the word where it says
the name of the layer... and go to this one here that says
'Convert to Smart Object'. Nothing changes except, remember this icon,
we've seen it a few times before. We've done that when we used this one here,
'Filter', 'Convert for Smart Filters'. There is no difference between doing it
that way or the way I just showed you. This method converts it to a Smart Object,
and then we apply a Filter... or you can right click it down here,
and say 'Convert to Smart Object'... and then go and play with the filters.
Same thing. What you'll find is, most people
won't call it Smart Filters... they'll call it Smart Object. The difference is, watch this,
if I scale it down now... down, down, down, you go;
super tiny. Then I scale it back up again... all that detail's still there, and I can go
up to that original kind of size roughly... before I start losing any sort of quality. That's what it is, just a wrapper that goes
around it and holds that quality in there. The only trouble is that,
say you have got this image... and there's like a thousand of them
on this page... this Photoshop file's going to
be super big... because inside of all
those tiny little icons... are going to be their
full high-res versions. So just be aware of that. If you want to remove it, say you're like,
"Man, get rid of that Smart Filter"... right click, it and there's this one
in here called Rasterize Layer. Rasterizing means-- I'm going
to remove the wrapper... and turn it back into
regular old pixels... but I'm going to use this
crazy Rastafarian word. I'm going to use
this crazy word, Rasterize. Now if I scale it back up... it's going to look bad... so I'm going to undo, undo again. I'm using that shortcut, you can go
'Edit', 'Step Backward'. I'm back to where it says Smart Object. A few things to understand
about Smart Objects... is there is a few things... not many, but you can't do with them... but you can do with a Rasterize Layer,
or just the regular layer. So this one here, I've got selected. If I go up to Filters, there's a few,
like Vanishing Point that don't work. And just a few of these, every time I
open up a new version of Photoshop... things like Lens Blur don't work... but I bet you, in a future version, that
you might be using, that actually works. Now every time I open a backup,
like when it first happened... half these things were grayed out,
and you couldn't use them... but there's just more and more
that does become usable. Luckily Lens Flare is still workable. There's one other part to a Smart Object,
so using images... basically anytime you bring in an image
and you need to resize it... bigger or smaller, just convert it
to a Smart Object. The other side of this is,
when we're dealing with Vector objects. Now Vector is, think of
them as like Clip Art. You might know what Vector is already. Generally they're created in
something like Illustrator. I've jumped to Illustrator here. So these are some graphics, they have
a really specific look to them. Often quite flat graphics. The cool thing about them, if I show you
this kind of Wireframe view... it's actually made up of,
like coordinates and points. So if I click on this guy here... it's actually mathematical equations
that make this thing happen. So the cool thing about that
is that it's super scalable. I could scale this up to
the size of a mountain... my poor computer would have
a bit of a trouble with it... but eventually it would render out
this ginomous mountain size. It should, because it's just Math, right? The computer love Math... whereas over here in Photoshop,
it's dealing with pixels. There's no Math going on here,
it's just a collection of cubes. So if I scale that up, it goes
that kind of goofy look. So that's the perks of Vector. It's Math, it's coordinates,
that's super scalable. Great for logos, text, illustrations,
icons, that type of thing. So when you're bringing
them into Photoshop-- we looked at this a little bit before. So I'm going to grab my glasses,
no, I'm going to grab my shoe. I'm going to copy it, just using
'Edit'. 'Copy'. In Photoshop here, I'm going to
go 'Paste', and this option appears. Earlier on in the course I said,
just switch it to Smart Object. What you might do now is turn this off. Libraries are a little bit more complicated
than where we're at right now. Doesn't really matter. What really matters is, we love
Smart Objects. Let's click 'OK'. I'm going to scale it down a little bit and
I'm going to grab anywhere but the edges. I'm going to have this, I'm going
to hit 'Return' on my keyboard... to say, "That's it, that's
the icon that I want"... but later on, I say, "Actually I want
a different version of it"... so I'm going to duplicate it. I should name it, I'm not. So I got two versions of this thing,
but this guy I want to be super big. So because we use the Smart Object
and because it is a Vector file... it can go as big as we like, and you
can see, still got really sharp edges. I'm going to make, I don't know
what I'm doing with this... but it's got a giant shoe end thing.
Hit 'Return'. I'm going to drag the layers down
so it's underneath everything. So I got this giant shoe
for no good reason. That's the cool thing about it,
is that it is Vector, it's scalable... and as long as I use a Smart Object
I can keep making it bigger or smaller. Now if your brain has melted
with the whole Vector thing... switch your brain off now because we're
going to get just a tiny bit more nerdy. Because we copied and pasted this
from Illustrator... and because it's Vector, there is
a nice little trick you can do. So this over here has a little icon
for a Smart Object. If I double click a Vector object... it'll open up in the program that made it,
in this case it's Illustrator. So if I double click the icon.... not the original, it hasn't gone
back to that one I copied from... it opened up a separate file in
Illustrator called Vector Smart Object... and in here is my object,
and I can do some stuff. If you haven't done Illustrator before... I've got an Essentials and an
Advanced course for Illustrator... go check that out... but for now I'm just going
to grab the white arrow... and I click on this blue stuff here,
I'm going to pick a different color. Colors, you, that color... and I'm going to destroy it a little bit. So I'm going to--
not sure what I'm doing. Here you go, I'm going to hit 'Save'... and check it out in Photoshop. You can see the color changed,
and there's the big bump on it. So it's really handy if you are
still kind of working through... you got both programs open, you're copying
and pasting, you need to adjust it... because the nice thing about it is that,
see the big version change... but even the teeny tiny version changed,
they're all connected. So that my friends is a Smart Object. Let me just kind of recap. Basically bring in an image, any image,
convert it to a Smart Object. Continue with life, forget about
all the stuff I've said. It's just going to be better for you... because it's a protective wrapper
that goes around your image... saving all the quality as good as it can. If you start working with something
like Illustrator or Corel Draw... or copying and pasting stuff from
InDesign, does the exact same thing. It will ask you, "Do you
want to be pixels?", "No." "Smart Objects?", "Yes." And that's all you might do. But if you are a person happy
to use Illustrator or InDesign... to kind of do this kind
of Vector illustration... you can double click on the icon
down here, and it opens it up. You can make changes, hit 'Save',
and it updates in Photoshop. All right friends, that is going
to be the end of Smart Objects. On to the next video.
50. How to bend a logo onto an image realistically in Photoshop: Hi there, in this video we
are going to look at... kind of bending, distorting, and skewing. We're going to try and lay
it down on the ground... and then kind of morph it
around the shoe here. So it looks like it's kind of
following the curve. Let's do that now using Adobe Photoshop's
Transform Tools. Let's open up the file we're going
to be working with, 'File', 'Open'. We're working in the 'Exercise Files'
in this folder called '08 Transform'. Open the one called 'Transform 01'. So we want to mock up this logo on this. Let's look at the basics
for transforming first. We'll go and add the logo,
so to bring in the image... I can open it, copy and paste it... which we've been doing for
a lot of this course. I'm going to show you another way. 'File', there's one that
says 'Place Embedded'. Go to that same folder and open up
'Logo.ai', click 'Place'. It's going to put it into the
Smart Object automatically... because it knows it's an ai file... and it goes, "You're vector,
you should be Smart Object." And we're totally down
with Smart Objects now. All we need to do is give it a size,
and then hit 'Return'... because it's kind of stuck
in this kind of limbo mode. Can you see now, these things work. So if I hold down 'Shift',
and we can scale it down. Scale it down to something
appropriate like that, hit 'Enter'. What we're going to do is we'll
start with one copy just up here. We're going to duplicate
the logo, right click. 'Duplicate Layer'. This is going to be called 'Logo 02'. We'll move it down, and let's look
at the basics for transforming. Let's go to 'Edit', 'Transform'. We've dealt with Scale Before
and Rotate Before. And some of the other easy ones
that you might use... is Rotate Clockwise, Counter clockwise. We'll go back the other way. You can flip it 180, which flips it
completely upside down. Another one in there you might use
is Flip Horizontal and Vertical. It's not going to really work
in this case if I go Horizontal. Backwards logo, but it's good to know
where that's kept. I'm going to undo. Next thing I want to do is I want to
kind of bend it down the bottom here... like we saw in the intro on the floor. And under 'Edit', 'Transform', you can see,
a bunch of these are grayed out. Remember in the last video where
we talked about Smart Objects... and most things work with it... except for the very first thing
we're going to do in this course... after we've learned to convert
everything to the Smart Object... because Distort, Perspective,
and Warp don't work. And those are the ones we want to learn. So remembering how to convert it from
a Smart Object back to regular layer... is right click 'Logo', and say, I would
like you to be a 'Rasterized Layer'. Nothing much changes except
that little icon's gone ... and magically, 'Edit', 'Transform',
these things appear. Now I never use Skew, I'll save
you the trouble of testing it... because it just does this. I'm not sure when you'd use that... or at least I don't use it,
so I'm going to hit 'Esc'. Is the kind of "I didn't mean it" button,
'Esc' on my keyboard. The ones that I do use, we're going to use
say, Distort first, I love this one. It's really good for mocking up, like signs
that you've made on to real objects. So this one here, I'm just going to kind
of clicking anywhere about the center... moving it down here. And what you do is grab the corners,
and it's kind of like... in this weird flat plane that
you can start manipulating. Now it's not going to match
the background automatically. So there's a lot of just,
you having a look. I'm doing it right now by-- kind of got... I don't know why I close
one eye when I'm doing it. It seems to help with my perspective. Does that look like it's on the ground?
Ah, that's good enough. When I'm ready, hit 'Enter'. You could fake a sign for
a billboard, or say... you've mocked up a cover of a magazine... you can have a picture of a magazine. Bring in your, say InDesign cover ideas,
and mock it up using that Distort. Now the next one I want is,
I'm going to duplicate Logo again. And we look at Warp,
right clicking it, 'Duplicate Layer'. 'Logo 3'. Remember, right click it, and say... you have to be a Rasterized Layer;
sorry, buddy. I'll move it down to kind of
roughly where I want it. I'm going to get it down to a rough size,
I'm using 'Edit', 'Transform', 'Scale'. Now we're going to use the
'Edit', 'Transform'... and we're going to use
this one called 'Warp'. I'm going to zoom in a bit, and show you
how it works. It's a little weird. Grab one of the corners,
click, hold, and just give it a wiggle. Kind of turns it more like fabric,
whereas the last one made it like a block. Made it like a sheet that you
could kind of manipulate. This one here is a lot more... Warp here is a lot more kind of elastic. It's more like a sheet of paper,
so I can move it around. So there's two parts to it, there's these
corners, they're called Anchor Points. So the edge of this image has to go
to that Anchor Point wherever it is. These other little things here
called handles are... the way that the line gets influenced. You can see, nothing actually has to
pass through this little black dot... but it's kind of like gravity,
kind of like... distorts the line before
it hits the Anchor Point. So just know, every Anchor Point
here has two handles. There's a top one, and the bottom one. Now it's the same principle again. There's a lot of just kind of like
dragging it around, saying okay... I feel like that's the bottom. Trying to get the perspective lining
with the bottom of that shoe there. And then, see these two
little handles here. I'm just trying to disorder it
to make it feel like it was... following the kind of path. I have it up a little bit there. It's up with these little wavy lines
to follow, but same with this one here. You can see, it kind of
doubled back on itself... so I want it about there, but then
I have to adjust these lines. It's a lot of messing around. Just getting a feel for it,
this bottom one here. It's a little hard to see
some of these dots. I shouldn't have picked a stripy shoe. If you're practicing with me,
you're cursing the stripy shoe. You're probably cursing the shoe theme
throughout this whole course. I hope you're not getting
too bored of it... but I went with a shoe theme. So what am I doing now? I'm just kind of messing around,
trying to get it to flow. Can you see, the lines in the center here,
kind of bit weird. You can actually just click and drag these
as well, any of these points in here... because we kind of fixed the outside. Now we just need to kind
of drag the inside... and make it feel like it was part of it. Good. It's okay. All right, I'm going to stop there,
because you're just watching me do this. I could be at it for a while,
hit 'Return' when you're ready. Zoom out, and you've got something
kind of bent around the shape. I haven't done a great job. One of the things that make it
super obvious is that... the colors are just super strong
and don't have any of this kind of-- they're not interacting with
the background very much. So we've looked at this before,
remember, Blending Modes? So on my logo 3, it's this layer here,
turn the Eyeball on and off. Up where it says Normal, remember
we've played around with a few of these. We're going to look at Multiply,
and that kind of works. It's kind of cool, maybe a bit strong. You just work your way
through all these options... to find one that you feel
works good with your shoe... and your image, and your background color. I was playing around with this. What looked good? Linear Light,
I think it did. Kind of like the Linear Light... changed the color quite
a bit of my graphic... so maybe that's not what I want. Maybe that's a bit closer, and I really
want to go back and fix this... because it doesn't look very realistic. So I hope you got an understanding
of some of those Transform Tools. I don't use them all. Some of them are just a bit weird,
like Perspective, just use Distort. Quicker and easier, in my opinion. Last little things I'll throw in
at the end here are Image... and sometimes Image Rotation... instead of doing it per layer
you can do the whole thing. Remember, we looked at rotating it
clockwise, just the particular layer. This does the whole graphic,
same with flipping it. So if you want to flip this across... the whole thing, rather than
just a particular layer. Plus it was rotating there, 'Image'. Image Rotation, and there's a few
little things in there to work with. That's where they're hiding. All right, I will see
you in the next video.
51. How to make a sky peeling like fabric revealing background in Photoshop: Hi there, in this video we're going
to do a cool kind of sky peel back. We're going to start with this image... and this image, and do this to it. It's really easy, let's get started. To make this happen,
let's go to 'File', let's go to 'Open'. Then in our '08 Transform' folder... open up "Warp 01' and 'Warp 02',
and click 'Open'. So we've got a sky that
we're going to reveal... and our kind of cloudy background. It's super easy, the one thing we have
to do is 'Edit'. Can you see, under 'Transform',
not available... it's because this Background Layer
is locked, we looked at this earlier. To get rid of the lock, super easy... double click the background,
give it a name, 'Landscape'. Now with that Layer selected, we can
go to 'Edit', and 'Transform' to life. I'm just going to use Warp,
let's click on 'Warp'... and grab this top left corner, just drag it
so it kind of looks like it overlaps. You can start playing around with
handles depending on... how you want this kind of
fabric or paper to feel. For me, I don't know what I'm doing.
That looks good. Here we go. Pull back to reveal, let's click 'Enter'. Now go to 'Warp'. Now go to 'Warp 02'. With your 'Move Tool', click, hold and
drag the image. Holding it down, dragging to the tab,
then let go down here. Just make sure the layer's underneath. And just move it around until
you feel like you've found... like part of the image that--
I don't know... works for-- that looks kind of good.
Yes, nice. Now the one thing you can do to
kind of make this feel a little... a little bit more real as far as this
can get, is you can use the Burn Tool. So what you might do is,
let's click on the 'Landscape Layer'. We looked at the Burn Tool
when we faked shadows... it's the same thing here,
so click on the 'Burn Tool'. Yours might be set to the Dodge tool... so click and hold it down
until you find the Burn Tool. With the Ranges, let's set it to Mid tones,
and let's be at 50%. Brush size, that's a little big. Maybe something like 200. And I'm just going to kind
of add a bit of... maybe some darkness down here,
so it looks like it's kind of, you know... curling over on itself,
staying away from that edge there... to make it look it's casting a shadow. Kind of want to do it to there as well,
over this edge. Now what you'll find
with the Burn Tool is... we're on Mid Tone, so it's only
dealing with those kind of Mid Tones. So if there's white, like there is here... can you see, doesn't really adjust it,
so I'm going to do it. But it doesn't really get it. So you can switch it between shadows... which is the really dark colors,
and the highlights. In this case, is what I want. Can you see now, it's affecting
the clouds a little better. You might have to switch between these
two to give it a bit of dip thin roll. Same with you guys down here, and I kind of
make it look like it's casting a shadow. So depending on the image you might have
to flick through all three of these... to get it kind of right. So that is a really kind of quick use
of some of those Transform tools. You see it quite a bit. You also see people kind
of getting a model... that's maybe pulling the edge of this
and they cut them out... and set them in the image,
might be a rope connected to this. Maybe just the big hand. All right, so that is going
to be it for this tutorial. Nice quick one, see you in the next video.
52. Class Project - Peeling Sky: All right, it is homework time.
What I'd like you to do is... using the technique we did when we
peeled back the sky in the last video... I want you to open up these two files. We've used the clouds before, but this
new one called '03' by Kea Mowat... open those up, and I'd like
you to do the same thing... but I want to peel back this sky
revealing the clouds. So let's check the Class Projects file,
it's this one here, '49'. Open those two files,
transform them like we did. Remember, we'll have to rename
the background, otherwise it won't work. Bend it away, and yes, use the Burn Tool,
if you want to, you don't have to. It looks pretty good without it,
but bend it around... and maybe add some subtle burning
just to make it look like it's cast. You can go Full Monty, and go
super cast shadow on it, I don't mind. Then share it with me,
I'd love to see what you make. On to the next video.
53. How to shrink body parts in Adobe Photoshop CC using liquify : Hi there, this video is all about
moving body parts around. We are going to move his belly in
and his biceps out. So much easier than the gym, we're going
to use the Liquify Tool in Photoshop. Let's get started, let's go to 'File',
and open up 'Liquify 01'. Whatever you do don't open up 02 yet,
it's a surprise for later. Before we get started it's best
to right click the background... and convert to a Smart Object. Just means that later on we can
turn this Filter on and off... otherwise it's distorted forever. With that Layer selected let's go
to 'Filter', and let's go to 'Liquify'. So before we get started, I love
that this technology, like... I love that it can do it, like it's
amazing that Photoshop can do it. I also acknowledge that I spent a lot
of time teaching people at magazines. How to retouch models,
and how to kind of... remove the folds and
rolls that we all have. I don't know, there's a little bit of
awkwardness around retouching bodies. So what ends up happening is... Liquify is this kind of
separate little window here. So you kind of work within this window
when we're liquefying. The first tool we use is this one here
called Forward Warp. In terms of the brush size
you can drag it over here. I'm just using the same technique we
used earlier on, the square brackets. I'm going to pick a nice big brush,
something like 500. I'm going to click, hold, and slowly drag. It's best to do little bits at a time
so you get a feel for the tool. If you try and drag it all in one go
it ends up looking... a little bit more fake than this does. So we're just kind of clicking, dragging
little steps, little baby steps. Just to tidy in. Now I'm going to make my brush
a little bit smaller... because I want to kind of effect this bit. I'm trying to get it flat. How good is it? Actually we want him
to be-- let's get him right in there. You're welcome, buddy. So turn Preview on and off down here... to kind of see how it was before,
and how it is now. There are going to be
some problems in this one. There's kind of like folds
of the skin here... that we just can't get rid
of with the Liquify Tool. We can get rid of it with
the Healing Brush... which we'll do in an upcoming video. So maybe double back to this guy. And what am I doing with them? I'm just kind of-- I feel like I've
invaded his personal space now. It's fine with the belly... but it's not anymore, anyway. The Ford Warp is a nice easy one.
I'm going back to a big brush. I'm just going to kind of push this bit in. It's better to use a big brush
in just small movements, than... like small brushes that ends up
looking quite obvious what you're up to. So remember, before, and after. Let's look at some of the other tools,
let's look at this one here first. So this is one called Pucker, and Bloat. Pucker makes things smaller,
so I'm going to use a brush size. You can play around with things
like the Density and Rate... just how much it affects, by default. Photoshop have got it pretty good... but you can mess around with that if it's
kind of going too fast or too slow for you. I'm going to click once on his nipple. Click a couple times, can you see,
it does make a little smaller. I'm going to make that bit
a little smaller... and I'll grab the 'Bloat Tool'. What do we want bigger? We're going to give him big
muscles, so a nice big brush... and around the bicep
area, I'm just clicking. Once, you can see, it just
gets fractionally bigger. I'm just double clicking, triple
clicking, trying to give him... some bigger biceps. Same width, I make it slightly smaller
for his triceps, make them bit bulgier. There's a point where it starts
looking really fake. As in this skin, and all of its texture
becomes a bit overdone. So you got to be careful. We're just messing about here,
so we're not too worried. We're going a little bit overboard.
Let's give him some big forearms. Let's pop out his chest just a little bit. I'll show you two other features. There's lots in here, can
get quite complicated... but let's stick to the stuff that's easy,
and that you'll use most of the time. There's these two here
which are quite useful... there's this thing
called Freeze, and Thaw. So hit 'Freeze', pick a brush size... let's say, I'm going to click
on his nipple, make it go red. I've clicked it a couple of times. All that means is that when I start
using other tools, say the Ford Warp... I got a big brush. Watch what happens if I
start dragging, it kind of like-- it's called Freeze, so it freezes. All right, so I pause that.Because I broke down in laughter. All right, we're back though. You get the idea what it does, right? So I'm going to undo using
'Edit', 'Step Backward'. It just freezes particular areas. Say it might be like a
logo that's on a shirt... and you're trying to distort the fabric. So I keep the logo frozen
while you're distorting around it. And when you finish,
see the Thaw button here? You click on that, and just color it out,
and now it's back to normal. Now the last thing I'll show
you is this tool up here. It's called the Reconstruct Tool. Basically it's like an undo brush,
or a history brush. So I'm going to make a bit bigger
all its going to do is-- remember this is my original. This is where it's at now,
if I paint across stuff... you can see, it's going to kind of
put it back to where it was. So it's a brush that allows you
to kind of undo as a brush... rather than going Step Backward. I'm going to Step Backward,
and let's just say-- I was working on about this,
but just looks a bit weird... so I'm going to click and hold
and put it back to where it was. When you are finished, you can click 'OK'. The cool thing about it is that
Liquify is something I can turn on and off. A little bit stressful on
your machine though... but we are professionals now,
we're using Smart Objects... and in turn using Smart Filters
on top of them. Your homework is going to be
opening up 'Liquify 02'. That is my gift to you today,
open it up, and enjoy the experience. I will see you in the next video,
if you come back. Bye now.
54. How to create dripping paint text effect in Photoshop CC: Hi there, this cool
little video is using... the same techniques we learned in the
last video using the Liquify Tool... but we're going to turn it
into drippy text. You can do the same thing with a logo,
or maybe an icon. Let's jump in now and learn how. First up, let's open up our image,
you can use any image. I'm using, from your 'Exercise Files',
'08 Transform'. There's one here called 'Paint Text 01'. Open that one up. I picked this one mainly because I wanted
green as part of that finished example... but you can pick any image you like. What I find though,
is before we get started... it's quite nice to get rid
of some of the detail. It would depend on your image
and the effect you want at the end. For the one you saw at the beginning
I went to 'Filter', 'Noise'. I went to this one called 'Median'. You can see, you can crank it right up,
crank it down. Just get rid of some of the detail... to make it more look a little bit
more painterly, let's click 'OK'. Next thing I want to do is put my--
you could put a logo here... copied and pasted from Illustrator. I'm just going to grab the Type Tool. The font size is going to be quite big,
about 900, maybe even bigger. 1000, and in terms of the font here,
I'm using this one called Remachine. Just because it's a nice kind of script.
I'm going to click once, type a 'G'. Doesn't really matter what color it is. Go to the 'Move Tool', stick in the middle. Now Remachine is a font
that I've included in your exercise files. Here it is here, it's in '08 Transform',
under Font. It's a font by Mans Grayback,
and it's for personal use only. If you want to use this font
for commercial use... read the license, download it,
pay for it, it's a pretty awesome font. I like it because it's got
kind of a swirl to it. So, for this to work we need to clip
the image inside of the text. We did this in an earlier video,
have a little think, wreck your brain... you're like, "How do I crop
the text inside of here?" Away here, you go do it.
If you can't remember let's practice again. So we need the image above the text,
which we can't do because it's locked... but we know we can unlock a background
by double-clicking it. They call it green, give it a name,
and then we can stick it above. And with this top one selected,
go to 'Layer'. I'll go to this one called
'Create Clipping Mask'. Now with your Move Tool
I'm going to move it around because... I want one of the pigeons involved Not really sure why. The last thing we're going to do is
we're going to merge these two here. You should do a 'Save As' now
so you've got a backup copy. So I have two versions, this one before,
we went along and wrecked it... but it's wrecking time. So I'm going to have
both of these selected. I click the top one, hold shift, click the
second one, so they're both selected. And this little flyout menu here,
there's one in there, says 'Merge Layers'. It's going to squish them together,
never to be pulled apart again. But don't worry, you got your backup. One other thing we might do is
a new layer, a little turned up page here. And we're going to go to 'Edit', 'Fill'. We're just going to fill it with black. Click 'OK', and make sure
this layer is at the bottom here. It doesn't matter, you could fill it
with white, or any color. It looked kind of cool on black
when I was working on it. Work on the green layer here.
I'm going to zoom in a little bit. What I want to do now is
I'm going to use the Liquify Tool. So let's go to 'Filter', and come
down here to this, 'Liquify'. Background disappeared, that's okay. I'm going to zoom in a little bit,
and what we want to do is... we're going to use the Forward Warp Tool. We're going to pick a brush size
that kind of fits within... you can see, I'm using the
square brackets to make it go bigger. Or you can drag it up here under Tool Size. And now it's kind of being as careful
or as not careful as you want. I'm just clicking and dragging
like we're smearing the paint. You can see, you can kind of
accidentally go out. We'll do that on purpose in a minute. So it depends on what you're looking for. I'm just kind of doing a little Stroke... so I'm not trying to do the whole
thing in one go, just about. So I'm clicking, dragging,
try not to go off the line too much. Clicking, dragging. I'm okay with a couple of those bends. And then this one here, I want it
to kind of swirl down across that one. There was a bit up here that I missed. I'm going to use a smaller brush size
just to kind of smear him as well. You might go over it a second time
if you're not liking what you've got. I'm happy enough with it,
it's kind of cool, not too smeary. Now I want a couple of little drips
so I'm going to use the exact same tool. I'm just going to use
a really small paintbrush. There's two things you need to do. One is we need to kind of get it going,
by clicking, and I do one there. I'm clicking and dragging across. Maybe a slightly bigger brush. So 45. Strain it up in, Dan.
Wow, it's terrible. I'm going to do one there. I'm just clicking and dragging,
and maybe another one over here. So that gets us kind of path way there... but then we're going to
use these two tools here. Remember from the last video, we're
going to use Bloat and Pucker. So Bloat, pick a brush size,
I'm going to pick... something that size, I'm just kind of
click on these ends here. I'm trying to make it look like
there's a bit of a drip going. Bigger brush size, there we go. That one I don't want one on,
that one I do. I like to use the Pucker Tool as well. Same sort of thing, just kind of
click it in there to make it a bit thinner. Here we go. Same with this one, I'm going to try... and make it a little bit
thinner as it's dripping down. Same with this one here,
a bit too thick there, buddy. That's going to be our paint kind of drips.
I want to like one of these to have a drop. So what I'm going to do is,
I'm going to click 'OK'. So this is going to be it for the
dragging this smearing paint around. We're going to click 'OK'. Looks a whole lot nicer against the black. What I want is like a little drip drop
that you saw at the beginning there. I'm just going to use the
Elliptical Marquee Tool. Select a chunk of it. Maybe this bit there. Copy it, and paste it,
and with my Move Tool... I'm going to position it somewhere there. Maybe shrink it down a little bit,
it's a bit too big... using my transform tool,
'Command T' on a Mac, 'Control T' on a PC. Now I'm going to go in,
and what I could do... I'm actually happy enough with that... but you could go into now, on its
own layer and start distorting it. It's maybe a bit too perfectly round. But you could go to Liquify now
and push it around a little bit. I probably want to fix this bit up,
but I'm not going to. What I'm going to do though
is show you a couple little tricks. One is, if it's on white you might add
a Drop Shadow to it, looks kind of cool. And, I vowed never to use it,
but I want to add a Bevel and Emboss. It might actually work in this case. I'm going to select both
of these two layers... because the drop is on a different
layer from this green thing. And up here again, I'm going to
do the exact same thing, 'Merge Layers'. Now with it selected I'm
going to go down to 'fx'... and I'm going to go to 'Bevel and Emboss'. I've already played with this,
that's why mine kind of came out okay. Preview 'on', Preview 'off'. But follow me, into 'Bevel',
then play around... with things like, how deep
you want it to be. And the size, it will depend on
the size of your image. The size of the text you're using. So it's all going to be
a little different... but mainly Depth Size,
and make sure it's on Inner Bevel. In my case I'm going to make it
come from the top left. I feel like I've gone maybe too far. So I'm going to soften it down a bit,
actually change the size of it. Actually, change the depth of it,
is what I want. It's looking kind of 3D-ish,
let's click 'OK'. That could be it. I'm going to do one last thing,
it's the 'Burn Tool. We'll actually use the Dodge Tool as well. The Burn Tool, remember,
we've used in a couple of tutorials now. On this layer here, as long as it's
not a Smart object, won't work... but with the Burn Tool
I've set it to Mid Tones... and I've got a brush size,
what is that? 125. I'm just going to kind of-- Can you see, I'm just
painting that in there. Just to make it a bit more extreme,
say on some of these parts. It depends on what you want to do, right? I'm going to cast a bit
of a shadow on to that as well... because that G is above it. So I'm just kind of messing around now
with some of those lighter parts. You could do this completely
instead of the Bevel. And what I probably want to do is... definitely on these little
drip symbols here... so you, clicking and dragging. This one as well, you. I made terrible drips,
hope yours is better. So those are them,
let's look at the Dodge Tool. It's the opposite of the Burn Tool. Click and hold it down,
there's the Dodge Tool. I'm going to do the same
thing but on the highlights. You can see, just clicking a few times. Clicking gives highlights. Where else do I want them?
Maybe on this thing here. Make that side shiny. That's just ugly, but we're getting
the idea, right? So that is how to make a
pinky drippy thing. Doesn't really matter what the object is. You could get some clip art,
you could get love heart. It could be some social media icons... but in this case we've done
some scripted text. I like it. All right, on to the next video.
55. Class Project - Drippy Paint Text: It's homework time. Now this one is going to be cool,
it could be a little time consuming. We just did a letter in the last video,
I'd love you to use a full word. Use your name, or just a letter,
or maybe a logo. Anything you like, there is an image
you can use as the background. It's got some really cool shades in it. It's in your exercise files, it's called
Paint Text 02 by Johannes Plenio. Such a cool image. It's in your 'Exercise Files',
'Class Projects', here it is here. Use that image, use your own font,
your own word. And these are the basic things
you'd need to use to get going. You might have to re watch the last video,
and definitely share this one. I'd love to see it, stick it up
on Instagram... tag me, I am @bringyourownlaptop. I'd love to see what you do in this one. Make sure you share it here as well,
in the assignments part or in the comments. All right, I am excited for you. Go out and make super awesome
drippy paint text stuff.
56. How to remove red eye from photographs in Photoshop: Hi there, in this video we are going
to remove that scary red eye... that appears in some photographs. Easy, and quickly in Photoshop. Let's jump in. All right let's open up two files,
let's go to 'File', 'Open'. In your '09 Retouching' folder, there's two
in there called 'Red Eye 01' and '02'. Let's be on Red Eye 01. The two we're looking for is, it would
be hiding under your Spot Healing Brush. It looks like a little Band Aid,
click and hold that down. And it's this last option here,
called the Red Eye Tool. And all you do is click right
in the middle of the red eye. Magic, gets rid of the red eye. There are adjustments up here in terms
of Pupil Size and Darken Amount. I never have that trouble,
it just works every time... but you might have a special image
that needs some adjustment. I want you to, on your own, do Red Eye 02,
just click on the dots in the middle. All right it's a simple tool. Let's get on to the next retouching video.
57. How to retouch skin in Adobe Photoshop CC : Hi there, we're back.
It is time to do some retouching skin. You can see this gentleman here,
we can remove some of the spots and marks. We're going to jump to this other example
where we use the exact same tool... for kind of tidying up
maybe older photographs. We're going to use the Spot Healing Brush. Basically it's really useful for removing
any small parts of a large image. Much the same way we did with
Content Aware Fill earlier on... but this time it's a paint brush,
great for small details. Let's jump in now. Let's open up our file,
let's go to 'File', 'Open'. In your '09 Retouching File'... we're going to open up
'Spot Healing 01' and '02'. Click 'Open'. We're going to start with doing kind
of more traditional retouching with skin. Then look at how we can use it for
really kind of anything you want to remove. As long as they're small
parts of a larger object... this tool works really good. The tool in question is this one here,
it's called the Spot Healing Brush. Looks like a little band-aid. If you've been following along... yours is probably still set to
Red Eye from the last tutorial. Click, holding down, and grab this
top one here, 'Spot Healing Brush'. Make sure it's set to 'Content Aware',
it probably is. If yours doesn't say Content Aware,
there's no option up there... it's probably just a really early version
of Photoshop you're using. Unfortunately it's not going to work,
it's going to work, but not as well. We need a brush size and hardness. Let's go for the hardness down
to '0', so it's nice and fluffy. And in this particular video,
probably about 50, yes, about 50. I'm going to zoom in a little bit... and all we do is, let's
find this little mark here. Click, hold, and paint over it
with black. Let go of your mouse,
and then magic happens. It's such an easy tool to use.
Click and hold, drag. This one here just needs to click once
over the top of it, let go. It's pretty magic. It's a little mark, blemish up here. Gone, and that my friends
is the Spot Healing Brush. Now let's take it a little bit
more advanced, just a little weensy bit. Let's jump to 'Spot Healing Brush 02'. Yours is not going to have
Resample Layers checked on. I left mine on from when I was playing... because this image right here,
we've kind of changed forever, right? We didn't use any sort of Smart Object,
or anything fancy. And it's kind of gone forever. Those little marks. So what we're going to do, before we get
started with the Spot Healing Brush... is we're going to do a little trick. So over here in your Layers Panel... we're going to click on
this new layer here. We're going to double click
the word 'Layer 01'... we're going to call it 'Retouch'. But this layer is selected, and this thing
here, it says, 'Sample all Layers'... it does a clever thing, where it
reaches through to the layer underneath... but paints on to the layer
that we have selected. What I mean by this is, let's say... we're going to remove some
of these dust and scratches. We could be at this forever for this one. It's quite wrecked this image. Watch this, if I click and drag
across this image, see it cleaned it up. And I click across there. Lots of clicking I'm going to be
doing for this video, in this image. I can drag them across these little guys,
I might use a bigger brush. So we're going to work our way
around this image forever. Tidy it up. But the cool thing about
it though is that... say we get to a point where we're like... maybe you've gone a bit too far,
you do end up in kind of retouching land... and just keep going into this thing,
looks absolutely fake. What you can do though is you can-- because it's on its own layer... let's turn off the eyeball on the
background layer to see what... can you see, it's just stuck that stuff
over the top on this retouch layer. So it means that with the 'Retouch Layer'
selected I can lower the opacity. Bring back some of that realness
that was originally there. It works really good when
we've got this particular image. I'm going to redo things in
super fast editing mode. See you in a sec. All right, we're back. Basically I just kind of
kept retouching... and it's kind of funny when
you're retouching, you're like... "Just get rid of this kind of
like main stuff," and then you're like... "Oh, there's another level
of main stuff," and then... you get rid of that, and you're like...
"Just getting rid of this last chunk." And before you realize that you've kind
of removed any personality off the image... and also you end up kind of looking
like a-- looks kind of plastic. You can start to see, especially some
of the stuff I did over the nose... to remove some of the dark pores... it's gone looking a little weird. So, in this case exactly like we did
in the last one, it's on its own layer... which is quite cool... but it means that, let's
say that it's... I want to kind of lower
my work a little bit. So with this Layer selected, the Opacity,
just trigger back a little bit. Can you see, doesn't have
to be all the way back... just enough to kind of maybe
bring back some of that realism. That is going to be it
for the Spot Healing Brush. This is the workhorse for retouching. Especially for kind of skin
and blemishes, spot, Acne. Kind of removed a few of these
straight hairs as well. All right, let's jump into the next video.
58. Class Project - Retouching: All right, it is assignment time. Using the techniques we learned
in the previous video... I want you to open up, from your
'09 Retouching' folder... one called 'Spot Healing 03',
'04', and '05'. Thank you, Brian, Fernando, and Genevieve. With Genevieve's image I want to see
if you can remove the footsteps here. With Brian Beckwith,
I want you to do a Skin Retouch. So just move some of the blemishes... and on Fernando Reyes, I want to see... if you can completely remove
this person out of this image. Now remember, you should be
doing it on its own layer... using this 'Spot Healing Brush', and make
sure you use 'Sample All Layers'. When you're finished, share your handiwork. So once you've finished doing that,
I will see you in the next video. Not before, do the assignments. I have my stern teacher face on. All right, let's get going.
59. Enhancing eyes in Adobe Photoshop CC : Hi there, in this video we are going
to do retouching of the eyes. I'm turning it on and off... to see the before and after.
We're just doing subtle adjustments. We can go the Full Monty,
and kind of go full blown. I've been here in Photoshop
retouching mode, will show you both. You'll also see, we do more than
just the eyes as well. We kind of go off on a bit of a tangent... and show you how to use
the exact same tools... that we use for the eyes to work with,
say like the hair and the jaw line. Let's jump into it now. Let's open up our image,
let's go to 'File', let's go to 'Open'. Then your retouching file,
we're going to use 'Eyes 01'. First thing to do is
we need to duplicate this layer... because we want to be able
to go back to it later on... and see what the original look like. So right click it, say 'Duplicate Layer'.
I'll call this one 'Retouch'. Now we do the whites of the eyes first... and we use it--
I'm zooming a little bit. We're going to use the Dodge Tool,
so the Dodge Tool... depending on what last tool you used ... is in this little group here,
is this little pedal thing here. With it selected, up the top here... we used this a little earlier
when we did our paint drips... and Mid Tones worked great then. In this case, because we're working
on the whites of the eyes... or the highlights in the eyes,
we want to be on Highlights. Now Exposure, we're going to have it 50.
Yours is probably set like that by default. Brush size, something appropriate
in the eye here. I've got 70, and I've made sure my
Brush Hardness is down at 0. Now the Protect Tones is optional. It works fine with it on in this case... but if you're working, you're finding it's
making the eyes kind of really gray... you might try tuning that off. And all we need to do,
make sure we're on 'Retouch Layer'... and click, hold, and kind of drag
over a little bit. Now I've kept mine quite high at 50. So that you can kind of see what I'm doing,
I'm just kind of little bits-- Now that is way too high. What I mean by that is,
it's just kind of coming on real strong. I leave it at 50 just so that
you can see what I'm doing. When I'm actually doing it, I'm undoing,
stepping backwards. I'll often be at something like 20%
and build it up slowly. It's a little hard to see when you
kind of just working it up slowly. So maybe a slightly smaller brush, 60. Clicking, dragging. All the whites of the eyes
or the reflections on the eyes... to be a bit brighter as well. Don't worry if you go a bit too far. I think I've gone a little bit
too far there. A bit too far there, crank that up... because what we'll do is -
let's zoom back a little bit. - is because it's on its own layer... at the end when we finish this, we're
going to turn down the opacity. Watch this, I'll turn it right down. You just find this kind of
happy medium of like... believability versus
overcooked Photoshopped. So it's okay to be a little bit overcooked
because you can just lower this opacity... showing the layer underneath. Now zoom out. I'm going to tap the eyeball on,
eyeball off. So that's a kind of how to
fix the whites of the eyes. I feel like I've gone a
little bit too far over here. So that's the Dodge tool,
lightens things up. I'm going to have the opacity
back at 100% for the moment. Let's grab the Burn Tool,
which darkens things. We've used it for shadows in the past. It's really handy for a couple of
things when you're retouching. One is, fix up eyebrows It's not fixing them up, just kind of like
giving them an extra bit of fullness. You can also use it to
kind of enhance cheek bones. I've got mine on Mid Tones, I've got
the exposure up probably too high... because I'm going to turn it down to
like 20%, you can see up there. I'm just going to kind of tweak in here,
not too much. Just to enhance the kind of jawline. On, off. It's not particularly subtle,
but you get what I mean, right? So dodging kind of lifts the eyes... and a Burn Tool kind of helps you
fill in a bit of the moodiness. We'll lower down the overall opacity
at the end. One last thing I'll do when I'm
doing this type of thing... is to play with the saturation. And it's a mixture of
desaturating and saturating. What I mean by that is, this thing here,
called the Sponge Tool. So we've used Dodge, Burn,
we use the Sponge Tool. By default I think it's set to Desaturate. That can be really handy,
I'm going to go down here. It's probably set a little high at 50%... but I guess I just want to show you
how it's working. There's some colors, kind of yellow.
I can double click that a couple of times. It's a little hard to see,
but it just kind of removes... some of that kind of yellowness
that can come through on the eye. So that's desaturation. What I use that a lot more of
is the saturation. I'm going to pick a
slightly big brush size... and I'm going to saturate
the eyes just a little bit. I'm just clicking once or twice,
four times even. So there's just a little bit more
of the exact same color in there... just that it's a little bit more of it. Same with the hair, I'm going to pick
a nice big paint brush. Way bigger, using my square brackets. And I'm just going to click, hold,
and drag across the hair a little bit. It's hard to know how much it's doing. It's smaller for across here... but bigger in here. So, gone too far, that's okay... because we're going to
lower the opacity... but can you see what I mean by the
hair just getting a little bit richer? I'm also going like, I guess 50% over... because I know I'm going to
tone down the opacity... which was set at thousand times already... but I don't want you judging my retouching,
not yet anyway. Now I'm going to lower this opacity... and just kind of find,
how we've been between 0 and 100. 100, too much, 0, nothing. And just find this kind of realistic
but happy medium. Mine feels about 40%, it really
depends on what you're going for. If you're going full glam then you
might crank it up to like 200%. Start using the Burn Tool to put
in Mascara, really enhance that jawline... but guess I'm just trying to go
for believability. It's hard when you do a retouch... because for you to do
your job really well... people need to not know
that you had anything to do with it. Like there's no job recognition. If people think, "Oh great, that's been
Photoshopped," you've done a bad job. So we used the Dodge tool to lighten parts,
we used the Burn Tool to darken parts... and we used the Sponge Tool
to both desaturate the eyes... and saturate the things we want colored. You could do the same for the lips. You could desaturate
that background there... to kind of enhance the model
to bring the model forward. What I want you to do is to practice
your skills, so go to 'File', 'Open'. There's one in here called Eyes 02. I want you to do the same thing here... dodging, burning, and
using the Sponge Tool... but don't forget, before you get started,
just duplicating that layer... so that you can turn it back later on. Here might also be a good
time to just touch up. There's a couple of spots on the skin. Using the Spot Healing Brush
that we learned earlier on. Let's get into the next video where
we look at teeth in particular. If you are working on this one,
you start working on the teeth... and it does something
weird, goes gray or yellow. I'm going to show you some tricks for that
in the next video. See you over there.
60. How to fix teeth in Adobe Photoshop CC: Hi there, this video is all about
tidying up teeth. There's nothing wrong with these teeth... but we're just going to enhance
them a little bit like that. So off, on, trying to do it subtly-ish. Let's look at how to do that now. To get started go to your '09' folder... and in there there's one called
'Teeth 01' from freestocks.org Thanks, freestocks. Like we did in the last tutorial,
we need to duplicate this layer. Just so that we can turn back
any work that we've done... just lower the opacity of it a little bit. I'll call this one 'Retouch'. On this Retouch Layer,
if you've worked on it before... I'm going to zoom in on my teeth here. If you've done it before, and you just
went straight to the Dodge Tool... you're probably fine,
Protect Tones 'on', and it does this. Kind of goes this weird red color,
not good, so I'm going to undo. Before you go into the Dodge Tool... what you want to do is you
use the Desaturation Tool. So 'Sponge Tool', set to 'Desaturate'. You desaturate them first,
then you dodge them. Now the Flow in this case,
50% is going to be nice. Brush size, something that fits in here,
I'm going to zoom in. What am I at? I'm at a brush
size at 50, click, hold. We're trying to make the teeth gray. If you're like, "Oh, they're going gray,"
it's what we want to do. We want to get them gray to pull the color
at them, and then we'll dodge them. They won't go that kind of
sparkling red and yellow color. What you don't want to do is like,
if you can see gums, I can't in this one... but if you see gums,
don't make those gray. The person starts looking a little bit
sick if you make their gums go gray... because everybody’s gums are pink. So great teeth to start with... then click, hold down the Sponge
Tool and grab the Dodge Tool. Remember, the Dodge Tool
makes things lighter. For this to work you need to work
on Highlights. And the Exposure, I'm going to lower
it down to something like 20%. Over here, where it says Protect Tones,
let's turn that 'off'. Protect Tones just try
and looks after skin tones... which are in that kind of yellowy zone. It's actually what we
don't want to protect. We want to get rid of that kind
of skin tan yellowy teeth color. So I got it quite low,
so watch, I'm going to click once. Now my brush size here
is kind of filling like the gap here. I find with a bigger brush... it's less obvious that
you've been in there. So I'm going to click a couple times. Now because you're new,
you're going to click away at this... until I go, absolutely go crazy white. That's fine, you'll get the hang
of it after a while. You can see, I know I've probably gone
a little too far now. We can turn it down a little bit later on. So if you feel like you've
gone too far stop there. Now these ones in the background
shouldn't be white. That's just light,
it's just dark back there. They don't have to be perfectly white,
you can lighten them up a little bit. So I'm just kind of clicking,
maybe a bigger brush. I'm going to go into the gum here. Now don't worry if yours
has gone way overboard. Happens every single time
I teach this class. We're just going to keep them like that.
Now I've gone overboard as well... but what we can do now is... on this Retouch Layer,
we can lower down the opacity. Completely off. Completely back on. Too white. Just kind of find that,
where you feel it looks naturally okay. So on this layer here I feel
like 80% is kind of there. Zooming out a little bit. Maybe a little bit lower. So remember, when you're
working on teeth... lower the saturation first
using this Sponge Tool. Set to 'Desaturate',
then go in with your Dodge Tool. Make sure when you're using the
Dodge Tool though, to untick Protect Tones. Knowing that, I'd like you
to open up the second example. It's in your 'Exercise Files',
'09 Retouch'. It's called 'Teeth 02'.
Thank you, Roksolona. Let's click 'Open'. Now this one here is,
I guess not as clear for the teeth... but that's cool, we want
different examples. So make sure you duplicate the layer,
desaturate the teeth first... then look at dodging it, and then look
potentially at lowering it down... using the opacity on that Retouch Layer. Once you've done that as well... to practice your other skills, do the
same thing to the eyes with the Dodge Tool. Then maybe use the Sponge
Tool to enhance... the saturation, or the colors
of the eyes and the hair. You might even look to do Levels
for this particular image... just to kind of bring
out the strong blacks. If you don't like this kind of flat back,
kind of Instagram style. It's up to you, when you're finished
I love you to share what you've done. So save it here as a project,
stick it in the comments... or send it to me on social media. Instagram's the best place,
I am bringyourownlaptop. All right, next video.
61. How to instantly remove the white background of a logo in Photoshop: Hi there, in this video we're going to dive
into Blending Modes a little bit more. Basically it's how a layer
interacts with the background. This particular use case is really
great when you've got an image... like this hand drawing I've done... or this logo, it's kind of
stuck to the white background. Watch this, ready, steady. Just magically disappears
in the background. It takes one click to do it,
same thing we've got that same logo... it was black, now it's white
on a dark background. They're called Blending Modes,
they can really save you some time. Let's get into them now. To get started, let's go to 'File', 'Open'. We're in a new folder now
called '10 Blending Modes'. Open up 'Blending 01',
'02', '03', and '04'. We're going to start with 01 and 02. So we've looked at Blending Modes before
in this course. We just kind of ignored them really. I just told you to do them,
and they did some magic. Now it's time to understand them
a little bit more. And one of the kind of main uses for it... when you want to remove
the white background of something. So in this case, I've got this logo here,
it is not on its own layer. It is smushed into the white background
here, and I want to remove the white. So what I do is, with my Move Tool
selection, click, hold, drag. Under 'Blending Mode 01', let go. Now before we move on,
this works amazingly... for black on to a light background. If you need it to be white
on a dark background... we'll do it in a sec, it's not as good,
just so you know... but in this case it's pretty magic. So what I'm going to do is... I'm going to get it down here,
and resize it a little bit so it fits... but before I do that I'm going to
convert it into a Smart Object... because that's what we're doing,
we're doing everything Pro now. Go to 'Smart Object'. Now I'm going to shrink it down,
so that quality is still there. Hit 'Return'. So I've got the logo, but it's got this
dreaded white border around it. What we're going to do is,
with this top layer selected... I'm going to change it from 'Normal'... and this one here is going to be
the magic one, 'Multiply'. Now we did it with a logo, let's say
we've done it with this hand drawing... we're looking at Blending 04. So I'm going to click, hold, drag
with my Move Tool. Drag, drag, drag, let go,
same thing, it's a bit big. I drew this in my notebook... I've scanned it in, and I want
to see if I can lay it out... but it has the white background... so instead of doing a Mask,
which can be tough... we're going to convert it
to a Smart Object... which is not particularly necessary... other than we want to keep all
that good quality in there. I'm going to drag it, and because it
needs to go onto a white background... it's going to work perfect. I've made a lightish background
so you can see it a little nicer. So you can kind of see it through. I've got my little drawing here... and I'm going to change it
from Normal to 'Multiply'. So dark on light is perfect, you can
move it around and you can see it. There's lots of things you can't do,
it's kind of quite a really specific use. You need to just chop out
the white background. If I'm trying Color Burst
with say, Color Overlay... it's just not going to work, watch. So if you want to get into
kind of recoloring it... you're going to have to look
at masking out the black... or maybe vectorizing it in
something like Illustrator. There's something called Live Trace... which can really save the day... but if you've got a logo and you've
copied it off somebody's website... and you need to use it, and you need to
chop out the white background, good to go. Now there is a case where you
want it on a dark background. So the black's not going to work. So I'm going to do the same thing,
'Blending 02'. Grab him, drag him. We've got him here. We'll do Smart Object, I was giving
that step because I'm going fast. You'll notice that Multiply works... but just not the way I want,
I want it to be white. So what you're going to
do is you're going to... work your way through
these Blending Modes... and you'll eventually get to... where is he? Divide. And it's going to kind of work. It's working good because it's kind
of monochromatic in the background. There's no real color going on. Watch what happens when
it goes over color. So really that's a kind
of a small use case... where it's monochromatic in the
background, you need it to be white. I show you this because surprisingly
enough I use it enough when I'm doing... kind of design work, and you just
can't find the logo of someone. Now if you are doing this type
of layout in something... like InDesign or Illustrator
instead of Photoshop... you will be able to find Blending Modes
in all of those programs as well. You can check out my courses on
both those bits of software. I covered it in those too. So getting into Blending Modes,
we've covered it a little bit. This one particular cool little usage,
great when you've got a logo or drawing... and you need to remove the background. All right, next video.
62. Using blending modes as color accents in Photoshop: Hi there, this video is
about Blending Modes... and using it to make these
kind of colored box accents. See the logo down the bottom there,
and this big kind of... I'm going to say Fuchsia box,
at the top there. Super easy to do, let's learn how to
do it now in Adobe Photoshop. First up, let's open the image
we're going to work with. You can use any JPEG. If you want to follow exactly... we'll use '10 Blending Modes',
and go to 'Color Accent.psd'. Now this is something we worked on earlier. If you can't remember,
or you didn't do that earlier tutorial... there's three layers. I'm going to turn the top two off
so it's just the background. What we did is we copied the
model out on to her own layer. There she's at the top there... and in between we put this text. So that when they're all piled
on top of each other... we've got this cool layered effect... but you can do this just
with a plain old JPEG. You just won't get to
tuck it behind the model. So first up let's grab
the 'Rectangle Tool'. You might have had something else selected,
let's grab the 'Rectangle Tool'. Up here where it says Stroke,
I'm going to have 'no' Stroke. Where it says Fill, I'm
going to pick a color. I'm going to use this little Hue Slider. The Swatches are cool, but I'm
going to use the Hue Slider... just pick something like-- What I actually want is... can you see, I just use
the Eyedropper Tool. If you got this Hue Picker open... you can just click in here,
I want kind of that dark green... so I want to maybe darken
it down a little bit. Once you found a color, click 'OK'. Now what we're going to do is
click, hold, and drag out a rectangle. I kind of wanted it
something like that, right? Let's fancy it up a little bit,
I'm going to-- if yours is locked like this,
I'm going to break the link. Then click, hold, and drag that to
the right, you can see over there. We're going to get one rounded corner. And the magic really happens, is with this
layer selected, like in the last one... we're going to look at
these different options. Now in our case Dissolve never
seems to do anything... but let's start to Darken, nothing. Multiply, pretty good. You're just going to kind of work
your way through this list... until you find something you like. Now because we're working with Color Modes
for the next little bit... or Blending Color Modes,
this clicking, clicking... clicking, clicking, clicking... will drive you mad. So there is a shortcut,
it's pretty advanced... but it might be worth it, you might
be going, "Man, this is going to kill me." So if that is you,
what you need to do is... first you need to be on the 'Move Tool'
for some reason, I'm not sure why. Then hold down the 'Shift' key
on your keyboard... and then tap the '+' key. That's the one up at the top... right next to all your numbers,
above all your keys. For some reason that's the shortcut,
it's a weird one. You can see, by tapping that
I'm just toggling all the way through. It's the same for a Mac and a PC. I'm just going to find the one
that works, that's kind of cool, like-- I like that kind of a thick Color Burn. It's kind of this overexposed
grainy kind of thing. That's always kind of worked for me. Now the rest of it is just
picking different colors... and we're going to add some text
like you saw at the beginning. You can skip on, otherwise follow me,
and we'll do a little bit more. It's a Rectangle Tool again, I'm going
to pick a different Fill Color. I'm going to go in here and pick... kind of a ready-- I want to say Fuchsia, I'm not
even sure what to call this color. I should know, you're a designer, Dan. That works for me. Don't have that layer selected
otherwise it changes that one. I'll leave that in there in case
you make that same mistake. So I'm going to go to 'Edit', 'Undo'. 'Edit', it can't do anything.
Go back to my 'Move Tool'. It was halfway through picking a color,
with that little box up. Now I can go 'Edit', 'Step Backward'. I'll leave all that in there,
it's good stuff. So instead of changing that color
what we're going to do is... you can click on any of these other layers. It will work fine,
or have nothing selected. See this kind of gray area down the bottom?
It means I don't want any layers selected. Now if I go to my Rectangle
Tool, and click up here... it's not going to change that layer. Back to my Fuschia. You're allowed to correct me if I'm wrong. Pinky red, nuclear red, anyway. So I've got my Rectangle Tool, I've got
no Stroke, I'm just drawing that big box. Off the page and down to the floor line,
just because it looks kind of cool. Now I'm going to use my shortcut, remember,
on to the 'Move Tool'. Then hold down 'Shift', and tap '+',
if you tap '-' it goes backwards. Even that, that's just cool like that. We're going to do Dual Tones
in an upcoming video... and it's going to use a
similar sort of effect. First thing I want to do is... I want to drag this rectangle to be
just behind the text here. So there's this kind of like,
levelled interaction going. What's that one? Linear Burn.
Looks kind of cool. Really depends on what
you're looking for here. We're using Blending Modes now
just for visual effects... not anything super serious... but it's super easy to do, and quite fun. That's going to work for me. I'm using Multiply, this one
down here is using Color Burn. Now just going to add some text.
I'm going to grab my Type Tool. Now remember, from our Type Tool exercise,
don't click inside this box... because it will try and turn that box into
a text box, that's not what I want to do. So 'Undo Typing', go away. 'Undo Typing'. 'Esc' key is the "I didn't mean it" key. Then you can go to 'Edit', 'Step Backward',
and it should do that whole chunk undone. So when you are drawing out a text box... remember, the square box
around the outside is good. If I try and do it inside this
rectangle here, or along the side here... I can get into trouble
by linking the two together. So I'm just going to drag my text box,
kind of out over here. I'm going to go to 'Type',
and I'm going to... before you go and fill with Lorem Ipsum... you can pick a font size
that's more appropriate. Font size, mine's at '10pt',
and my Leading, let's set it to 'Auto'. So that when I go to 'Type', and say
paste Lorem Ipsum, just placeholder text... it's not going to paste like giant text... that we might have done
in the last tutorial. So it's going to be my bit of text.
I'll grab my 'Type Tool'. Again, you can skip on now. I'm just messing about,
making it look cool. Mainly looking cool for the intro... so that it's sexy when it makes
you want to do this one. Really we just changed
the Blending Mode on a colored box. I tricked you in here. Bring in the logo as well. Let's go to file 'Open', there's a
logo in that same '10 Blending Modes'. 'Logo.ai'. I'm going to click 'OK'. Select all, 'copy'. In here, 'paste',
'Convert to Smart Object'... because we're super serious
about this Photoshop stuff. Shrinking it down, moving it
to where I want it to be. Maybe a bit bigger. Hit 'return'. All right, that is going to be it. I am liking this rectangle
less as a Color Burn. What you might notice is, that layer there
is actually underneath all of this. I'm going to bring it to the top. It's not making much
of a difference now... but it might do when we change the
Blending Mode of this green rectangle. I'm just going to click on 'Multiply',
everyone uses Multiply. Actually I don't like Multiply now. Man, you can seriously skip on. I'm happy with that,
settled on Linear Light. All right friends, that is
how to use Blending Modes... to do kind of color accents
in Adobe Photoshop. See you in the next video.
63. How to put images inside a bottle using Photoshop : First up, let's open up the files
that we're going to be using. Let's go to 'File', 'Open'. In your 'Exercise Files',
under '10 Blending Modes'... we'll open up all these ones
that say Bottle Island. So there's 1, 2, 3, 4, and 5. The 4th one's by Tim Marshall; thanks, Tim. We're going to start with
this glass bottle here. We're going to put in '02', so we're going
to grab this island and stick it in. We're going to use
the Quick Selection Tool. In terms of the brush... something about 50.
50 is always a good number. Click, hold, and drag across our island. It's up to you whether
you want the sand or not. In terms of how hard core
we're going with this... we're not going very hard core at all. All these selections around here,
we could use the Select and Mask... but in this particular case,
like the first one... the thing you saw at
the beginning there... it's quite forgiving with Layer Masks. So we could double back
and fix up the layer... if you find we got a little too fast here. I'm going to grab the sand , just because. I'll get a really small paintbrush
and go into these corners. I'll get the editor to speed this bit up. So got my selection, if I wanted
to do better what I could do is... I could go to my Layer Mask button here. Then go to Select and Mask,
and try and work it out a bit better. Looks pretty good, and because it's
the blue showing through the trees... it's going to look fine because we've
got a blue sky to go behind it anyway. So with our Move Tool,
click, hold, drag, drag, drag... to 'Bottle 01', and down here. It's the wrong size, so to be fancy... we're going to right click 'Layer 01'
and say, you need to be a Smart Object. Then I'm going to use my Transform Tool... using 'Command T', or 'Control T' on a PC. I'm going to get it till it fits in here. Hit 'return'. So there's my Island.
Next bit is the sky. I'm just going to close down Island 02,
not so good... just to make things tidy
along the top here. So we're going to use Bottle Island 03. We used this image earlier on
in a different project. So what we're going to do is grab
the 'Move Tool'. Click, hold, drag. The first tab, holding down, and let go. I'm going to kind of drag it up
and have it just behind the island there. Now what you'll notice is I'm missing
a chunk here, just not quite big enough. If I could just transform,
I'm pretty sure... nobody would know that I
stretched a little bit... but what I'm going to do is --
I'm going to show you... We're going to double back on some of
the skills we've learned so far... just to compound those. So I want a bit more sky. So remember, I can use the Crop Tool,
it's quite a cool way of doing that. The Crop Tool, make sure that
along here, Content Aware is turned on. I'm just going to drag a little bit
that way and a little bit that way. Then hit 'return', and hope Photoshop
doesn't make a mess of the sky. It's pretty good with clouds. It's pretty good, I think that's
pretty awesome. Nice work, Photoshop. It's kind of weird down here.
I'm happy with it. So back to my Move Tool,
click, hold drag, back into here. What I might do is, that first layer here
I'm going to just click on the trash can. So this guy now is in the
reasonable right place. Just using my arrow keys
just to tap it around. So now what I need to do is
mask it inside the bottle. Like I do in lots of things, we need to
mask all sorts of stuff inside the bottle. So what we're going to do is create
a Selection and reuse it a few times. It's a bit of a new skill. First up, be on the Background Layer,
let's grab our Quick Selection Tool. I'm going to turn Auto Enhance off... only because I need to be
really rough in this case... and it slows down my computer
while I'm recording. Brush size, I'm going to increase up. I'm using my square
brackets next to my P key. I'm grabbing everything,
I don't want the lid. I'm going to get close to the lid,
so I want the lid to shine through, right? I just want select the glass
parts of this bottle. Trying to get it all. It's hard to know sometimes
if you got at all. A nice little trick is, you can just
click on this gently. See this little icon here,
it's called Quick Mask. We're not going to use Quick Mask... it's just an oldest technique
for doing masking... but what's really cool is it's quite
obvious where I haven't selected. Don't double click it fast,
it loads up the settings. Just toggle it once, gentle. Just the nice way of going,
I've missed you. Toggle it once again, on. I feel I can see two more parts. That's good enough for me. If you see some bits that are missing,
you could spend a lot more time here... and you should. So I got the bottle selected, but I
want to use this a couple of times... because we're going to use
this to trim the sky... but we're also going to
use it to trim the water. So there's a cooler option here, it says,
'Select', 'Save Selection'. I'm going to give this a name,
I'm going to call this 'Bottle Selection'. Just means, later on whenever needed... I can go back to 'Selection', and say... actually load that
selection I made earlier. So I've got it up once, I'm
going to click on my Sky Layer. I'm going to actually start naming
layers in here to help you guys. Just to make it easier to follow,
so there's the sky, and this is the island. The background is going
to be named 'Bottle'. Awesome! So Sky Layer selected, got my selection,
I'm going to click on 'Layer Mask'. You can see, it's a bit
rough along the top there. I'm not worried because we're
going to use our Blending Modes. Now with Blending Modes we've got
two things over here, we've got the Mask... and we've got the actual image itself. So a Blending Mode on this is different
from a Blending Mode on my actual image... and that's what I want. I want my sky selected because that's what
I want to blend underneath with my bottle. I was going to kind of work away through,
and Dissolve may work. Darken's pretty cool, you can start to see
that kind of nice interaction with glass. Blending Modes are perfect for glass,
anything that's transparent. You just kind of work your
way through until you're... "I quite like that Linear Burn." I'm just toggling down now. If you've forgotten the shortcut... you probably have because
that's a tough one. If you are sick of doing this,
clickety click. So what you can do is
click on one of them... make sure you're on your Move Tool... hold down your 'Shift' key,
then tap the '+' key on your keyboard. You can see, it just
keeps toggling through. I'm going to use Linear Burn
because I like it... and I practiced already. I've got it written right here,
use Linear Burn. It will depend on your sky and the bottle. Next bit is the water. I'm going to close down my clouds,
bye bye, don't save. In here there's my water,
I'm going to grab-- I'm going to grab Rectangle Marquee Tool,
I'm just going to grab... I don't want the whole thing,
I just want a chunk of it. I don't want all this stuff at the top.
I grab my 'Move Tool', drag it across. In there, and it's not quite big enough. Now this is where I'm going to cheat... I should go and use the Content Aware
cropping like we did with the sky. It's going to be so forgiving, nobody's
going to notice it went that big. I share that secret with you,
you should properly go back and do it... but just a little bit of a transform
that size, nobody's going to notice. Here's my Move Tool to kind of drag-- I like the bubbles, someone kind
of peeps at the bubbles in there. Now I want to use the same
Mask Edit for the sky. This is where this awesome thing comes in. 'Select', 'Load Selection'. Which one? I want from... where it says 'Channel',
say 'Bottle Selection'... that's the one I want. Thank you very much. Now I can hit 'Layer Mask'. Now I'm on my Move Tool
and I'm playing with the Blending Modes. Just kind of toggling through
to see which one I like. I know exactly which one I like
because I've got it written down. I'm going to start with Multiply. The thing is, it's going to
be like the under island... like you saw at the beginning there. So I might have to change
as we go along. Multiply looks average now... but I feel like it looks better later on
when we get our under island bit in. But know, if you've picked different water
it's going to be a different Blending Mode. So we've done him, thank you very much. And the last one, 'Island 05'. I just went through stock library sites... and tried to find something that looked
like the underneath of an island. Looks pretty good. Well, I've tested it, and
it works pretty well. I'm using my Quick Selection Tool. I'm getting really rough
with this because... who knows what this is,
like it doesn't have to be perfect. It's going underwater. Looks good to me. I love it because it's
got this kind of like... this colored where it's against
the waterline, that's going to look cool. So same thing, make a selection,
'Layer Mask', grab my 'Move Tool'. Drag it in over here. I have to scale it, so before I scale it
I'm going to right click it... and say, you are a Smart
Object, my friend. I'm going to double click him,
we're going to call him 'Lower Island'. Not sure what to call that. You can give this guy the name 'Water'. So Lower Island, let's rotate you
and scale you. I'm using 'Command T' on a Mac,
'Control T' on a PC. You can see I'm holding 'Shift'
while I'm dragging the edges here. Far out it was rotation,
and click on this dot here... to get Transform. Bit further out, rotation,
right on the dots, Transform. You really need that Cool! Awesome! Then it comes down
to the Blending Mode again. So back to my 'Move Tool',
and just cycle through until... just cycle through until
you find something you like. That looks cool. That's not even
what I had in my little list here. This off light's going to work. So we could be there, I'm going to
share with you one more little trick. I find that when you're
dealing with glass... you can often get the darks and shadows
working well with the Blending Mode. Or you can get that kind of highlights
from the glass working well. But never on the same Blending Modes.
What I find cool is... this last layer here, we're going to
right click it and duplicate it. This is going to be 'Bottle Highlights'. All I'm going to do is drag it to the top. I'm going to move this up so
you can see in my layers. So I've got the bottle at the bottom,
he's kind of filling in the back there... and I've got this guy
I'm adding to the top. What happens is I can use the
Blending Mode on this... to try and find something that's
going to help with the highlights. I think, let's turn it off and on. I'm on Darken, that's not
doing anything, right? Another Multiply is not what I want. I want to find something that's
kind of helping with the lights. Doing nothing. Let's find one. Too much, too much. It's kind of cool, Overlay. Probably a little bit-- I might use Overlay and
just lower down the Opacity. Soft Light, similar, but don't have to
lower the Opacity down. You can see it's changed the water
quite a bit. You can cycle through, I know that
Soft Light works for me in this case. Brings just some of the highlights back
in the glass here. Now it's looking good. I should have spent
a little bit more time on my Mask... when I said, "Don't worry about it." I lied. There's quite a clear contrast
between these two. Now that could be it for us. If you’re happy with that, we're done. It's reasonably complex,
we've thrown in... a few of the tricks we've
learned throughout this course. Got masking, we learned how to save
a selection using Blending Modes... which you're using more and more, right? Let's do kind of two last little things
that you might use to tidy it up... that I really want to do,
I hope it doesn't get too advanced Next one is, we've got this
kind of Bottles Highlight layer... and it's doing some cool stuff... but it doesn't just have to be one
on the top and one on the bottom. Often, depending on the image
I'll make a couple on the top here... and mix Blending Modes. There's no absolute rule how many
you should have and what they should be... but I'm going to duplicate this one... and we're going to put in
the darker tones again... which I'll call the 'Shadows'. On the top here I'm going to cycle back
through it again... just to find something that has Fills-- I feel like that soft light kind
of lightened it up too much. That back over the top again. I think gives it a bit more fullness. So you can kind of see that's how
he had it when we started. It looks quite obvious now,
it's quite weak with the highlights. I added this one here as a Soft Light,
and I kind of filled it out... but a little bit too much. Then I put another one on top,
back to being, it's this Multiply. It just kind of fills it in again. It gives that a little bit more substance,
and the edges a bit more substance... and hide some of my bad selections. The last little touch-ups
are going to be the Dodge and Burn Tool. Pretty much just going to use
the Burn Tool to darken edges. So with a Burn Tool I'm going
to work on the sky first. So I've got the Sky Layer selected. If you converted it to a Smart Object,
like I said, because that's really good... you need to right click it and say,
'Rasterize Layer'... but our sky doesn't have a Smart Object.
I'm going to grab my Burn Tool. It's this guy here,
under Dodge, grab 'Burn'. Now up here, I'm going to make
sure it's on highlights... because I want to try and darken
the highlights, which is the sky here. Exposure is probably
a little high on 100%... but it will give you an example
of what I want to do. You probably do yours,
and build those up a little slower. Change the brush size,
got a really big brush. 800, I'm just making sure it's
got a nice fluffy edge... but the Hardness down at the 0. I'm just trying to do that, trying to
darken those edges so it's not so... crisp on the edge. Same with the water,
kind of go and darken the edges up. Now because these aren't
particularly highlights... I'm going to try the Mid Tones
or Shadows to darken the edges. And Mid Tones work. I want the depths to be a little darker
down the bottom here as well. Looks quite cool. Darker, anyway. That is going to be it,
probably needs a Lens Flare. You're more than welcome
to add a Lens Flare to your version. What we'll do in the next video though
is we'll set a proper class exercise. So work your way through this one. Actually, last thing before I go. The island here is really sharp,
and that's fine... but with the Island Layer selected... I'm going to play with a
Blending Mode of this as well. Just, I don't know, I feel
like it needs to be... blending with the background
a little better. Yes, last little bit. Maybe super high contrast,
like Linear Light. I like that, Multiply, it
will depend on your island... and how good your selections are. I think that looks kind of cool. Before. After. It's so subjective. That is going to be the end
of putting an island in a bottle. Really loved making this course. It's not often I get to
put stuff in a bottle. I'll see you in the next video.
64. Class Project - Boat in a bottle: Hi there, it is class project time. Now using the skills we
learned in the last video... where we put the island in a bottle,
you're going to put a boat in a bottle... or anything in a bottle, it's up to you... but I've given you some class files
so you got some stuff to work with. So in your 'Exercise Files',
under '10 Blending Modes'... there's a folder called 'Class Project'. See if you can find that,
then pick one of the bottles. There's A, B, C, and D. Pick one of the two boats, do a selection,
copy and paste them into the bottle. Then start working the same way
we did before, where there is a sky. You're going to have to trim it up. You might have to extend it
depending on your bottle. We've got the water, it's the
same one as the last one. You can go off and find your own water if
you like, from something like Unsplash. Then run through the techniques
we did in the last video. So there was a Quick Selection Tool... then we saved that selection,
so we can use it again later on. We made sure everything had Layer Masks,
we had to do some Rotation and Scale. The main chunk of it
is our Blending Modes... where it starts interacting
with a glass... and you can tidy it up at the end with
the Dodge Tool and the Burn Tool. Now a couple of things
you might want to do... is that the selection for the boat... this one here could be quite tricky
because there's so many gaps in between. Remember the last thing I did in the
last video where we had our island? Often you can just do a real quick Mask,
not worry about all the gaps... and then just use a Blending Mode to
kind of smoosh it to the background. Something like Multiply. Or you might spend a bit longer
in getting all these gaps... and use the Select and Mask,
and try and party it up that way. One other thing you might do is,
when you open up one of these bottles... let's say it is this one here,
and you want it the other way around... so here you might go 'Image',
'Image Rotation', and go 'Clockwise First'. That will just get you started like this... because I don't know why, a boat in
a bottle it needs to go that way. You get it upside down, I don't mind. Once you do get it done,
I'd love you to share it. Share it with me, on Instagram
I am bringyourownlaptop. Try and tag me in there,
and also upload it here... in either the comments or
the assignments section. Also show some love for the other people
that are uploading theirs as well. When people are new,
it's lovely to get good feedback. Drop a few comments to other people's
work as well. High fives all around. All right, lovely student,
that is going to be your homework. I will see you once you're finished. All right, lovely student,
that is your homework. I will see you in the next video
once you are done.
65. How to create the spotify Duotone effect in adobe Photoshop: Welcome to this video
about Duotone effects. It's really easy to do, it's the layer
that goes over the top of any image. Converts it into this cool
two spot colored look. You have to do the whole thing,
you can do 50:50, you can move it around. It's loads of fun, it's easy to do,
let's get started. Let's open up the images, 'File', 'Open'. In your 'Exercise Files'
there's a new folder called '11'. I'm going to open up
'DuoTone 01' and 'DuoTone 02'. Now you can do this with any image,
but it does come out nicer... if there's a clear contrast between
your subject matter and the background. So you might have to do some masking... or some sort of way to kind
of dull the background. Like this one here is being
dodged in the background... so there's really strong difference between
the model here and the background. It's really easy to do, with the
layer selected, go to 'Adjustments Panel'. You're looking for this one
here called Gradient Map. It's the last one on the
last row, give him a click. Instantly that's working,
just the wrong colors, that's all. So click anywhere in this colored bar here. You double click this house and this house
to change the colors. You can start with one of
the default ones up here. This one here is particularly good. It's almost kind of knocked
out that Spotify look... that we're doing for a long time. There's some terrible ones in here as well.
Let's click on this first one. I'm going to leave the
purple because I like it... I'm going to double click the orange... and move to that more Spotify color. Just drag the Hue Slider up and down
to find where you want it to go. Maybe I want it to be kind of minty green. That's going to work for me. Now in this side here, I feel like it was
a little bit more on the purples. Let's click 'OK'. Now if you're finding you
got the wrong colors... you can just come out of that color. So if you're like,
"Oh, got the wrong way around"... you can click 'OK' and
just click 'Reverse'. Just kind of switches those two colors out. Let's go a little bit further. So let's open up 'DuoTone
02'; thank you, Anthony. The first one was Drew Graham. This one here, I'm going to do
the exact same thing. So we're going to go down to
'Adjustments', and get over here. Pick our colors, click in here. It looks pretty cool already. What I'm going to do though is
I'm going to use some more specific colors. I'm going to use,
remember this from earlier? 'Window', 'Extensions',
'Adobe Color Themes'. If your internet's not super slow
this thing all load up. You want to click 'Explore'. Then I'm just going to work with
kind of most popular colors. What I'm going to do? I like this one here,
fine, click on the dotted lines. I'm going to say 'Add to Swatches'. It just means that now--
close down the libraries if they open up... but if you go to 'Window',
and go to Swatches'... you'll see this, little color box up here. I'm going to close that down. Now when I go into my Gradient Map,
I can click on this white house. Actually double click
on the white house... then I can just come up here
and pick one of these colors. So those are the colors that came through
from Adobe Color Themes. I'm liking that one. I'm going to double click this one. Now I'm just going to cycle through
what I want it to be. Pick that one. So that's how to pick specific colors. A couple other things you can do to
enhance your Duo Toneness... is to grab this midpoint. It just decides what becomes what color. So you might find that your image is-- Let's click on this guy,
there is a midpoint here. Just needs a bit of
sliding left and right... to get the right colors
in the right place. Now what you would have noticed
there is, I got little bit lost. If you click anywhere but there... it adds another Swatch, and you can go
for a third color, go for a tri color. It might be-- I double click this one,
I'm going to go and pick that one there. I made mine horrible,
you too can make yours horrible. If you want to get rid of colors, say you
just got lost, and you're like me... you clicked on it by accident,
now those colors are everywhere. Click, hold, and just drag
them off into no-man's land. So I'm clicking, holding, and
dragging off, and they disappear. Let's go a little bit further.
Let's click 'OK'. Duo Tones can look quite cool if they're
kind of like, maybe half and half. So what I'm going to do is
I'm going to use my Rectangle Tool... and just draw a box
kind of halfway down there. So it is the Rectangle Marquee Tool. What I'm going to do is,
you can see, my Gradient Map over here... it's an Adjustment Layer, and by default
it gets given a Layer Mask... but the Layer Mask isn't doing anything
because it's completely white. What we can do is, we can right click it
and say delete that Layer Mask. Just like we did for any other... remember, we did selections in the
last one with our boat and our island... with that selection here, with our
layer selected I can click 'Layer Mask'. I can do just half of it... so the black stuff gets hidden and
the white stuff shows through. It doesn't have to be
straight up and down... you can do a selection with the Polygonal
Lasso Tool, so I'm going to undo... and I'm going to go from
this one over here. So I'm doing a really quick selection
around kind of halfway through. Then hit 'Layer Mask', you might do
something more like that. I'm going to undo again. I've seen them quite cool
where it's just like ... kind of like, I don't know,
a box, I must do that. The cool thing about it is,
because it's on its own layer... with my Move Tool I can just
kind of move it around... to kind of best get where I want it to be. No way is good. I can transform it. So I transform, I use 'Command T',
or 'Control T' on a PC... then go back to my 50:50. Hit 'return'. I like that. So that is our Duo Tone effect. That's going to be us in this video. Let's get on to the next one
where we set a couple of projects.
66. Class Project - Duotones: All right, it is project time. It's a quick and easy one. In your 'Exercise Files',
under '11 Visual Styles'... I want you to work on
'Dualtone 03' and '04'. And yes, play around with the Gradient Map. Pick your own colors,
and then send them to me. I'd love to see what you've made. All right, on to the next video.
67. How to create the 3D glasses Anaglyph effect in Adobe Photoshop: Hi there, it's this effect,
it's actually called Anaglyph. Nobody can remember, or at least I can't. Whenever I Google it I always have
to type in '3D glasses effect'. You can see, there's a mixture of
this red and cyan side by side... making it give it that 3D look. We'll do it with images, we'll also
show you how to do it with type. I say this in lots of videos,
but it is super easy, it's a cool effect. Let's jump in now
and learn how to make it. Let's open up our images, 'File', 'Open'. In '11 Visual Styles',
open up 'Anaglyph 01' and '02'. This is the second one, we're going
to work on this one first. For this to work we need
to unlock the background... and we do that, we know, by just double
clicking the word 'background'... and giving it a name. We're going to call it 'Red',
we're going to right click 'Red'... duplicate that layer, and call it 'Cyan'. So the way for this to work, is you select
on 'Red', and you come down to this 'fx'... and go to 'Blending Options'. What we do is, under 'Advanced Blending',
there's this one called 'Channels'. For the red one, turn off green and blue,
we're just leaving the red channel on. Channels can be complicated,
but for this effect... we don't need to know anything about them. Similar process for cyan. Click on it, go down to
'Effects', 'Blending Options'... and in here we want to turn
just red 'off'. That leaves us with the cyan color,
mixing green and blue. Click 'OK'. Now we just need to offset them. Basically we need to move one one way,
and one the other way. It really depends on how
advanced you want this effect. I'm going to undo, put it back. You can just be super subtle. And with the Move Tool... it's easier with your keyboard,
just use your right arrow. So I've got cyan selected,
use your right arrow. I'm just kind of tapping it to the right. Now that's kind of like a subtle effect.
Can you see, it's kind of... you see it all in there, right? Or you can go a bit further,
and just kind of really drag it out there. Now it is subtle,
move it across a little bit. Tappy tappy tap. Now one thing you might notice is--
see this red band that appears? It depends on which way you went
with it, left or right. Or you might end up with a cyan band. You have to just trim that up
using the Crop Tool. So make sure you go a
little bit of extra space. I'm just going to trim that up. Using my Crop Tool, hit 'return',
you're away. Let's go a little bit further,
let's go to 'Anaglyph 02'. Now we could just do this image. You don't have to but I quite
like it when it gets... either black and white,
or quite low colors. It really accentuates
the cyan and the red. You could go to 'Adjustments',
and do 'Black and white'. There's a little option here. We did have it a million years ago,
way back at this course. I'm going to go to 'Edit, 'Step Backwards'. What I often like doing is
under 'Adjustments' using 'Vibrance'. And just lowering the
vibrance rather than... like making it completely black and white. I like to have there a little bit
of subtle colors still in there. Now the one thing we need to do is... we've got this, like very
non-destructive vibrance layer... that we can turn on and off,
and that's very good... but doesn't work for this effect. So what I have to do is click 'Vibrance',
hold 'Shift', click 'Background'. Right click the two of them,
and say 'Merge Layers'. It's bad and destructive, but we
just need it for this effect to work. Just double click this first layer,
let's call it 'Red'. Let's right click him, duplicate him,
and let's go to 'Cyan'. The same principle's here. 'Cyan' layer selected,
I'm going to go to 'fx'. I'm going to go to 'Blending Options',
and I want red 'off', gives me cyan... and the red layer, everything but-- so I just want everything but red,
not everything but, just want red. So cyan is red off, and red is just red on. That's not helping you at all, is it? So I'm just going to move it left
and right, just kind of see where we get. Now in this case you can kind of see,
the cropping are going on over to here. So 'Crop Tool', tidy it in,
it should snap to the edge nicely. Let's look at doing text,
it has the same principle. So let's grab my 'Type Tool',
I'm going to click once. Well, it's a big font. I'm going to go down to,
I don't know, maybe 500. Let's type in-- still too big. Find an appropriate Font Size,
not 500, not even 200. I think mine's dealing with--
because I transformed it last time. I'm just going to scale it down
using 'Command T' or 'Control T'. I'm going to pick a font color
that's not red. You can see it's actually white. It's because I'm in
between these two layers. So the text has to be
on top for this to work. And I know, there's my Scott Shoes. Scott Shoes. To your horror I'm going
and picking fonts now... instead of just getting on with it. Just getting it down again. So I've got, I don't even know
where this is going to go... there it's going to go. Hit 'return'. So it's the same principle from now on. We just duplicate it and then play
with those advanced Blending Modes. So right click it, I'm going to
duplicate this layer. This one's going to be 'Shoes Red'. This is going to be-- I double click
the word 'Shoes'... and this one's going to be 'Shoes Cyan'. So this one here, I click on 'fx',
'Blending modes', cyan is red off. The red one, is just red on. Go away, go away. Then we can just offset it again
using my arrows. Again, depends on how-- I'm going
to stick both of them together... so I can move them around. And that is the Anaglyphic effect. If you're like me, you'll never
remember the word Anaglyphic. I always have to Google,
"What is the 3D glasses effect?" 1980s, generally something
will pop up called Anaglyph. If you do have some of those glasses... nobody does, I couldn't
find any to make it work... but apparently this actually works. Get some 3D glasses, order them
from eBay or Amazon. Put them on, and apparently
it's all ready for 3D. I'm watching Ghostbusters in 3D,
super cool, and frightening. I still get nightmares from one of
those early Ghostbusters movies. The one with the painting,
and it came out. I was young. I'm babbling now let's get
on to the next video.
68. Class Project - Anaglyph Effect: Hi there, it's your class project. This one is 'Anaglyph 03', open it up from
your '11 Visuals Styles' folder. And do the same thing, duplicate the layer,
make one red, make one cyan. You might have to rewatch the last video. In your notes here, so use
the file that I gave you... but also do another one
with your own image. I'd love to see your own image being used. Practice on this one,
use your own image. Look to use some text as well,
using that same Anaglyphic effect. And then go and share it with me. All right, I will see
you in the next video. Have fun with Anaglyphs.
69. How to create a vintage instagram Matte Photo in Photoshop: Hi there, in this video we are going
to make some vintage style... Instagram, filter looking images. So this is before. And that's after. We'll do another example here. Before. After. Let's jump in now
and work out how to do it. Let's open up our file; 'File', 'Open'. We're going to be using 'Vintage 01'.
Thank you, Frankie Cordoba. I picked this image because
it's kind of retro already. It's got some sweet 90s kicks on... and it's not like a
professional photograph. It doesn't matter, the photograph you pick. Now I'm going to show you my
techniques, but just know that... everyone has their own kind of opinion... on what an old vintage
photograph looks like. You saw mine at the beginning,
so if you like that, follow along... but you might find steps
that you can cut out or enhance. It depends on your image,
and how kind of retro you want it. I was born in the 80s, so retro for me
might be different from you. First thing, let's do that
kind of Instagram look... where we get the Matte Black. So with 'Background Layer' selected... go to 'Adjustments',
and let's go to 'Levels'. And before, what we were
doing with levels... is we spent time trying to make it
really sharp black and sharp white... but the vintage look, really the opposite. We're going to use these two little sliders
down there we haven't used before. You grab this one and yank-- I'm going to go way too far, can you see,
it just yanks out some of the black. So I'm yanking out the black,
turn those levels on and off. Get it to a level where you like it,
maybe the same with the whites. Just means older cameras
just didn't have good white balance... and photographs had a tendency
to be a bit washed out. We kind of want to recreate that now,
cameras have got to good. The other thing is, I want to get
this kind of like over crazy sharp look. So what I'm going to do is, I'm
going to duplicate background. I'm right-clicking it. Duplicate, this is going to be
my Sharp Layer. There's a couple of ways
of getting the sharpness. You can use, under 'Sharpen',
there's a bunch of stuff. I like this one here, under 'Other'. We're going to 'High Pass'.
I'm only showing you this one now... it's because we're further on
in the course... and we were getting
a little bit more extreme. So what we're looking for is,
we don't want to go too far... where you can start seeing it,
you want this kind of like... this bit, where you can see the edges
are kind of overdone. Click 'OK'. So this High Pass Filter,
doesn't really work at the moment... but with Sharp Layers selected... we're going to play around with
one of these Blending Modes. I want to scroll through in terms-- You can start to see some of them. It really depends on what
you want to do, right? I am zooming in. If you want this kind of Color Burn look,
it's cool. It's not what I want in this case... I'm looking for Hard Light,
already practiced... but you can see what I'm doing. I'm just kind of like
accentuating all the... kind of removes all of the Gray Tones. There's a lot more strong blacks
and strong whites... without any of the Gray Tones; I like it. Gives that kind of ghosty effect
around some of the sharper edges. Kind of bleeds out. Again, you can turn that one on or off
depending on what you want to do. The next one that I like
is giving it that kind of-- it's more fashioned, but it looks
really good with these images. Under 'Adjustments', we're going to go to
'Curves', which we haven't used before. Don't worry, looks scary. All I want you to do is switch it to blue. See, there's like a dot in the top right
and the bottom left.. It's going to lift it up,
and lift this one down. And it gives it that kind of orangey teal
kind of fashion look. Turn it on, turn it off.
Can you see what I mean? It's got a kind of a sun-bleached
fashion look. I like it.
Last thing we're going to do is a Vignette. Vignette is just the kind of
frosting around the outside... that happens on older photographs. Even earlier than the 80s. It's a cool effect, what I'm going to do
is I'm going to make a new layer. I'm going to stick it all the way
at the top. I'm going to call this one 'Vignette',
which I can never spell. That's close enough. To do a Vignette, easiest way
is grab your 'Gradient Tool'. Let's switch it from Linear to 'Radial'. What it's doing is, up the top here
I'm going to pick the second option. That's going to make my foreground color
blend out to invisible. So pop that back in. So now you need to make sure
your foreground color-- at the moment mine is white... yours might be black,
so it might look like that. I just want to make sure
this foreground color... whatever it is, double click it... and pick kind of mud brown. So drag my hue slider there. I clicked in here until I found
something muddy and murky. I'm going to click, hold, and drag
from the center, out. Yours is probably not doing that,
yours is probably doing this. So what you need to do is tick
on 'Reverse', then click and drag out. You should get something like this.
It's not exactly what I want... but with the Vignette Layer
selected I'm back at my Move Tool... and I'm going to start
messing around with these. Remember the shortcut?
Hold 'Shift', hit '+'. You find something you like,
you might have to tone it down. I think I like Overlay.
I'm just going to tone down the Opacity. So it's not as extreme,
see on/off, on/off. I want it a little bit more. That is my flavor of an old Vignette image. We'll go a little bit further
in the next video... but I want to show you how you
can kind of maybe do this... because there's quite a
few little steps, right? I'm going to show you how to do
the next image a lot quicker. So let's go and open up, 'File', 'Open',
there's one called 'Vintage 02'. Sharon Garcia, thank you very much. Awesome image, I love it.
I think the neighbors even had that car. So instead of having to go through
that whole process again... we can kind of cheat, right? What I'm going to do is
I want that layer, I want that layer. Now I'm holding down my 'Shift' key
to click the Vignette. Holding 'Shift' and grabbing. I don't need this layer,
I'd like to bring the sharp layer... but that's specifically for this particular
image, just want these top three. You three, grab 'Move Tool',
click, hold, drag. Drag it to this one,
wait, wait, come down. Cool, huh? Gives me my curves, my levels,
the vignette doesn't quite match. So what I'm going to do is, I'm going
to click off, grab the 'Vignette'... and try and line it up,
if it doesn't fit-- hey mine does. Yours is never going to fit,
if it doesn't, just Transform it. So 'Command T' on a Mac,
'Control T' on a PC. Just kind of scale it round,
yours might be Landscape this time. I'm never that fast, like this doesn't
have to be a perfect vignette. Anyway, to get the really
cool sharpened thing... we'll practice that, right click. Background, duplicate the layer,
I'm going to call this one 'Sharp'. And we're going to go to 'Filter'. A cool thing about Photoshop is that... you can go back into here,
and go to High Pass again. Can you see, it's up the top now. This is like a redo button,
it says, Photoshop is-- We did this a second ago,
do you want to redo this? And I'm like, "Yes, give it a go." That worked, but then I
want to blend it again. I can't even remember which
one we ended up using. Sharp, where's Hard Light. Over here, it's got a Hard Light. So does make it a little bit easier... to kind of know when you can
copy and paste these over... from document to document. Let's zoom in a little bit,
let's look at before and after. You might be less impressed
with how vintage this is looking. Again, this is what I feel like is vintage. You will find a ton of
other videos on YouTube... for different ways of doing vintage... and you might find those
work better for you. One thing we might do to kind of... make this look a little
bit more legit vintage... is to add some dust and scratches,
so let's go to 'File', Open'. What I've done for you is I've found
this one here called 'dust.png'. If you Google 'dust and scratches ',
there's all sorts of stuff online. I liked this one here, so what I'm
going to do is grab my 'Move Tool'. Drag it on to this guy. You might have to Scale it, Transform it... to get it how you want it to be,
how big or large you think this should be. Get your mind just over laying. This is sitting on the top of everything,
I'm going to call it 'Dust'. Then I'm going to find a
Blending Mode that works. Man, we do lots of Blending Modes, right? It's the real secret super power
of Photoshop. Now I think the only one that
kind of works in this one is Divide. I'm going to lower the Opacity,
so I've picked 'Divide' here. The Opacity, I'm going to lower right down. Turn it on, turn off, let's zoom in. Depends on what you want to do, right? That's pretty heavy going
with the dust and scratches. You might find another one online
that's just a little less over the top. I might now drag this back to my original
or the first one we worked on. Sometimes you can't even tell where it is,
so I like to hit 'Transform'. 'Command T' on a Mac,
'Control T' on a PC. You can see the edges. Even though I'm not resizing,
it's just a nice way to see the edges. How vintage do we look?
Let's have a look. We'll completely see them all. Let's move it up a little bit, my layers. After. Before. After. I like it. That is going to be the end
of making vintage images. Let's get into the next video.
70. Class Project - Vintage Matte Photo: Hi there this project is going to
be making your own vintage image. I found this sweet picture
of a bike from Corey Motta. It's in your 'Exercise Files',
it's called 'Vintage 03'... in the folder called '11 Visual Styles'. Now run through the process
from the last video. You can use, or ignore, or add to... any of those techniques you liked. And when you're finished,
go ahead and share it with me. Then go ahead and do your own versions. So in your Word doc, which is
in the 'Exercise Files'... called 'Class Projects'... here it is, it's this one called '69'.
Open up the image, use your own techniques. Do your own version,
and then share with me. Instagram, I am bringyourownlaptop. And also put it here in the comments,
or in the assignments section. All right, I'm looking forward to
how you interpret vintage.. and I'd love to see it.
Next video, please.
71. How to create the paper cut effect in Adobe Photoshop CC: Hi there, this video is all about
this Paper Cut effect. Super cool, super fun,
the text is still editable. So we can type in anything we like here. You can move the Paper Cut effect
around as well. It's all still kind of editable in there,
along with the colors. If you hate my color choices like I do... you can go through and pick
other more horrible ones. Let's jump in now
and figure out how to do it. This is one of the few times
when I'm actually opening a file. Photoshop is such the 'File', 'Open',
and then start working on an image. We're going to start from
'File', 'New' document. I'm going to switch mine to inches,
I'm going to use 10 x 10. If you're on centimeters,
it's about that much, 25. Click to 'Inches'. We'll use a resolution of '300',
and make sure it's set to 'RGB'. Let's click 'OK'. 'Create' even. So we need some colors to start with,
you can just make them up as you go along. I'm going to go to 'Window', 'Extensions'.
'Adobe Color Themes'. Once it eventually loads
I'm going to click on 'Explore'. And I'm going to pick this one. If you want to follow exactly like mine... you can type 'kopia av cool one'
into search. It's one of the most popular this month. I'm going to click on this,
and then click 'Add you Swatches'. Libraries' going to pop in, go away. Pop that back in there. Now down the bottom here
of my Swatches Panel... which you might not be able to see yet,
go to 'Window', turn 'on' Swatches. In the bottom are those five colors there. First up we need to create a new layer. I'm going to put this little
turned up page here. Double click it, I'm going to call
this one 'Color 1'. Just make sure you double click
the actual word 'Layer 1' to rename it. I want the blob that runs
around the outside. There's a couple of ways of doing it. If you already know how to use
the Pen Tool go ahead and use that. If you have no idea what any of these
tools do use the Curvature Tool. Even if you are a hard core
Pen Tool user... Curvature Tool might be
the new best thing for you. I've totally converted over to it.
I'm going to select on it. You need to make sure, at the top here
you are set to 'Path'. I'm on this Color Layer here... and the Curvature Tool works like this.
This is just a basic rundown. If you want to go through some more
hard core Pen Tool and Curvature Tool... it's really the home of Adobe Illustrator. I've got a course on that, go check
that one out, both in Advanced and Intro. So the Curvature Tool works like this,
click once, nothing happens. Click again, nothing really happens,
the third time though... it tries to join all three up
with a nice curve. It just draws really pretty curves. So I'm going to click lots of times
to draw a random shape. You might have to play around with this
a couple of times to get the... I guess the feeling of how
this thing works. I'm going to keep clicking, you can see.
Clearly, that's what I'll do. At least it's curved, it's not great. Wiggle, wiggle, wiggle. So once you get around and
you've done your first wiggle... you can go through
and click on these dots... and just kind of move them around a
little bit to kind of, like-- it wasn't looking good. I'm not going to do that because
you would be forever watching me... jiggle this around... but I like it, it's working for me. What we need to do now is do this option
up here that says 'Make a Selection'. Click 'OK'. It turns that path we made
into a selection. We're done with the Curvature Tool. Let's go back to the Move Tool... for no reason, just to finish using
the Curvature Tool for the moment. At the moment if I fill this,
it's going to fill the center. So it's not what I want,
so I'm going to go back... and before I fill it I want
to invert the selection. So go to 'Select', go to 'Inverse'. Now I have this outside bit selected. On my Color 1 layer I'm going
to make sure... over here I pick my first color
that I'm going to use. Now nothing really happens
if I clicked on it. What it's done is it's loaded it over here
in my foreground color. So that when I go to 'Edit, 'Fill'-- Yours is going to default to Content Aware. Just switch it up to Foreground Color. Click 'OK', and there you go. Let's go to 'Select', 'Deselect'. I'm going to turn the
background layer on or off. So you can see there's a big
hole in the middle here. Once we add some Drop Shadows and a bunch
of other layers, it can look quite cool. So there is a lot of, kind of
just going through. I'll do the next one with you,
and then I'll speed it up. You can totally speed it up, all these
videos here down the bottom right... you can either speed me up, or because
I talk real fast you can slow me down. Hit that little cog in the bottom of the
window, that you're watching right now. Speed or slow me down. So 'New Layer', this one is going
to be called 'Color 2'. Grab back to my Curvature Tool... and now I'm going to go through and make
a curve just on the inside of this. So you, you. I'm going to kind of follow it... kind of duck in and out,
looks kind of cool doing it that way. Sometimes you love a few of these off,
make their own little gang. I'll try and do it fast so you're
not watching this forever. You should go around and adjust it now
by just clicking and dragging on these... but I'm not going to. I'm going to load as a
'Selection', click 'OK'. I invert that selection. Pick my new color, it's the
second one from the end... and then I go to 'Edit', 'Fill'. With Foreground color, click 'OK',
and that's the next one. The only trouble is it's on the top,
so I'm going to go to 'Select', 'Deselect'. I want Color 1 to be at
the top, and Color 2. I'm going to keep building this up. What I'm going to do now is get the
editor to speed this up a bit... because it's the same thing again... and we'll jump in when we start
adding the Drop Shadows. You are back, and you're like... "So he's only done four colors,
why hasn't he done five colors?" Because the background will actually-- see this last color which
just fills the holes... we don't need to do a drawing for this. You can have twenty colors,
you can just have two, I'm using five. So Background here,
I'm going to pick the last color. Going to go to 'Edit', 'Fill'... and I'm going to fill my
background with that green. So it's looking okay,
you might like it just here. It's not the Paper Cut effect
but it's still kind of cool, right? So now we need to do two last things. We need to add the Drop Shadows and we
need to get it inside a bit of text. So we'll work on this Color 1 first. So with 'Color 1' selected,
let's go down to 'fx'... and go to 'Drop Shadow.'. I like using two Drop Shadows. I'm getting a bit hard core... but one drop shadow is going to fill in
this kind of first bit, so I'm using-- I want the Opacity up quite a bit. Distance is how far out it is. I'm going to have a nice small one here,
this size, how fuzzy that is. I want to be quite thin for the first one. And then what you can do is... can you see this little + button here?
I can make a second one. So there's two on top of each other
that are exactly the same. So one of these, don't mind which one,
I'm going to use the bottom one. I'm going to, instead of
being quite shallow... I'm going to make the
distance a bit bigger... but mainly the size a lot broader. And maybe I need to lower down
the Opacity of the other one. It's going to kind of, I guess fill
it out, want it to be a bit darker. So this top one here is maybe a bit
too dark so I'm going to lower it down. Let's have a little look.
This one here is the kind of hard shadow... and then this one here is the
kind of filling it out one. Click 'OK'. You do not want to do that
for every layer, I know. So what we're going to do is... we're going to right click
the word 'Color 1'... and we're going to go 'Copy Layer Style'. See this little arrow here,
just kind of tucks it in, it's still there. Just a nice tidy way of keeping it. Then I can click on 'Color 2',
I can hold 'Shift', grab 'Color 4'. And you're like, "Yep, it's that easy." Right click any one of them
and say 'Paste Layer Style'. There's my cool little effect. Am I happy with the colors?
I'm not anymore. Next thing, I'm just going to click
all these, tidy and then click off. Now I need to put them inside
a bit of text. So it's two things I need to do,
one, I need to group all of these together. Because it's easier to
put them all together... if they're all kind of smushed together. So with them all selected
I've clicked on the top one. Hold down 'Shift' and grab the last one. I can right click them and be bad,
and say 'Merge Layers'... but we're going to be
super non-destructive and go 'Convert to Smart Object'. It's going to take a little bit of time. Now they're all in one layer. And if you've watched these Smart Objects
video earlier in the tutorial... you can double click on this
to open them up in their own tab. To mess around with them later on again,
so they're still in there, hiding away. What I want to do now is grab
my Type Tool, I'm going to click once... and I'm going to type in 'X'. Now I'm using Museo Slab. You might find Roboto Slab... it's an easy one to find online,
Google Fonts have them... Museo Slab, you can go to google.com/fonts
and you'll find Museo Slab in there. It's not thick enough for me, so I'm
going to go the super Museo Slab 1000. You can use any font,
I'm using my 'Command T'... and holding 'Shift' to make it bigger. Get into position,
and we did this earlier on. We had an image and we clipped it
inside of an X. Do you remember how we did it?
I bet you, you don't. So long into the tutorial,
if you do, you get a big high five from me. I've taught this class loads, and by the
end of this stage people are like-- So the rules are... to recap, the X needs to be
underneath the image. You need to have the top image selected... and you go to 'Layer',
'Create Clipping Mask'. And they all get jammed inside. I'm liking the colors more now.
Now they're all kind of clipped. What you can do is you can
individually move these two layers... so 'Color Layer' selected, my 'Move Tool'. Just move them around
to kind of get it how I want. That's kind of cool. You can also move the X around,
selecting the 'X Layer'. What you'll notice is we don't
have a background anymore. So I'm going to create a new layer. Put it all the way to the back,
I'm going to call it 'Background'. Even though we spent the whole class
removing that name. And we're going to go to 'Edit', 'Fill'. And you, my friend are going to be
black, white, black. Let's go black. Looks better on black. And that my friends
is the Paper Cut effect. We've done it with blobs,
you can do it with spikes. We used the Curvature Tool,
you could use the Pen Tool... you could use the Lasso Tool
to get your selection. Real pointy edges, like that. Start with that kind of selection. I'll show the colors, I promised to
show you the colors that I did before. I liked this one better, you might not. A little bit carried away
with the blobs here... and the colors just aren't
sitting right for me. Before we go, I know this is a long
video already, I might just do-- just show you what I do if
I don't like the colors. I got 'Color' selected,
go to 'Adjustments'. I'm going to go to 'Hue and Saturation'. And I'm going to drag this left to right
until I find a group of colors. I don't, actually. I might have to go back. These gala combinations aren't
sitting well with me. I'm giving up, but you shouldn't. Pick any colors to start with. Don't end up here with pinks,
and greens, and peaches. Let's get on to the next video.
72. Class Project - Paper Cut Effect: You are not going to be surprised
what this class assignment is. I want you to take the effects
that we learned in the last video... and use your own text, your own colors,
better than mine, and your own fonts. You can do that just one straight name... or like I did, I kind of had them all on
their own layer with different ones... because I was practicing,
and all the different colors. When you're finished, please
share them with me... either on Instagram, I
am bringyourownlaptop... or here on the assignments,
or in the comments. Take a screenshot, show me what you did,
show me what colors you picked. On to the next video.
73. How to use an Artboard in Adobe Photoshop CC: Hi there, welcome to the video
about Artboards in Photoshop. A quick little run through
of what they are. Basically they are just different pages
within a Photoshop document. Up until now in this course... we've just been working on one image at
a time in its own Photoshop document... but there are times where
it's handy to have... multiple pages within
one Photoshop document. This is the example we're going to build. It's an Ad banner that I have to make
for Google Ads. And the first one is the square shape,
they're tile. They also need a leader board version
and a skyscraper version. So it makes sense to have different
pages within this one document. It's handy for us because we get to see
kind of unity between all three... plus we get to copy and paste
between these Artboards really easily. Photoshop's handy because
what it does is... it will export these as three
separate files for us. Another good use case is,
say for Web design or UI design. Now we're not covering Web and UI design
a lot in this course. There is another Photoshop course
for Web that I've made. You can go check that
out if you want to... kind of move on to that kind
of use case for Photoshop. But let's say, in this case
I've designed a website for desktop. I haven't finished the tablet version
but there's one for mobile. You can see they have
consistencies across the two. They're slightly different for
the different screen sizes... but allows me to just copy and paste
graphics between the two. And when I'm finished,
exporting them separately. Another good use case is, I do this
when I'm making my video courses... you're watching my video course. So my promotional images... they have to go in a bunch of different
places and a bunch of different sizes. You can see, all very similar kind
of graphics but there's... there's more of a letter box design... there is this kind of just
standard kind of video shape. There is an overview version... that has this grayed out bit
where I put some text on. And a website, there's
some small versions... there's a small version with a green
banner saying, "Coming soon." Now these are just a couple
of my use cases. You might be doing just,
it might just be concepts. You might have concept A, B and C. They might be the same size,
they don't have to be different sizes... but you can see them all side-by-side. So that's the super long intro
for what an Artboard is. Let's go through, create them, use them... and find out some of their
quirks now; let's get started. To create Artboard, let's go to 'File',
I'm going to make new document. We are going to work over here, we're
going to be working in pixels... because we're going to be making that
banner ad like we saw at the beginning. It's going to be three sizes,
often it's 7, 10. Depends on what ad network you're going to. I have to do these kinds of jobs
all the time, so Artboards' amazing. So they're kind of standard tile,
for Google ads, are 250 x 250 pixels. 72 is the resolution, and it's this little
check box here that's not normally on. That's the magic one that's going to
create Artboards, let's click 'Create'. Awesome! So I've got a tiny square,
that's my kind of Google tile. And the big difference is,
can you see my layer structure? This is what's a bit different
from using Artboards. Basically they're groups. Everything inside of this little drop
down here, that says Artboard... is associated with this panel here. Double click this to give it a name. And this one's going to be my
Scott Shoes. And this is going to be 250 x 250 pixels. This is just a name,
doesn't actually do anything... but if we name these now, it's going to
make it easier when we export later on. You'll notice it changes
up the top here as well. Great, so that's one page,
I want to make another one.. I'll show you both ways
because they're both useful. Let's go to 'Layer', New',
and let's go to 'Artboard'. It's the super long but
super clear way of doing it. I'm going to call this one 'Scott Shoes'. And this one is going to be the other,
kind of common leader board size... which is a terrible size,
it's that long thin one. They call it leader boards, and I'm going
to change it down here to match. So the top bit along the top
is just me writing it... just so I know what size it is... but this is the actual dimensions.
Click 'OK'. Ended up in a strange place. This happens with Artboards, they're
kind of new for Photoshop... so there's a few bugs. So to move Artboards around... it's hiding underneath your Move Tool,
there's like an Artboard Move Tool. Click on him, and grab the name. And just kind of drag it out
so it's in a nicer place. Now they are on this tool,
you'll see that... because we're on the Artboard
Tool we get a few extra features. This is one of them, click on that,
and we get a duplicate. So that's really handy if you were
just making, say it's just-- you just want to make concepts... so you're doing a design for a website,
or for a brochure, or a flyer... you just want to make a bunch
of different options... you can make them within here. And we'll show you how to export them
at the end, so I'm going to go back. So this guy here,
I am going to select him. And what you'll notice is,
can you see up the top here? This is where I can adjust my size. I can go back to any of these ones... so I can click on him to see the
names, it's Scott Shoes 250 x 250. They're out there. That's how I make my amendments,
I'm going to click on 'Artboard 1'. So you can either click on the layer name
over here or just the word over here. And I'm going to change this one
to the other kind of common size. Just as ugly, it is 120 x 600. Super tough, this is the skyscraper,
super tough kind of dimensions. Let's double click it over here,
and let's call this one 'Scott Shoes'. This was 120 x 600. So that's how you make your Artboards. Let's work through a little project... so that you can see kind of
pros and cons for using it. So I'm going to bring in my graphic,
I'm going to 'File', 'Open'. I've got a file ready for you
in your 'Exercise Files' under 'Artboards'. So '12 Artboards', we're going
to bring in 'Shoe.jpg'. Awesome! So I've got this guy here, I'm going to
go back to my 'Move Tool'. Click, hold, drag, drag, drag. Where are you going to drag it?
Which Artboard? We're going to try for this one,
but it really is up to Photoshop. It decides where it's going. So this is one of the fun
things about using Artboards. Where did it go? I can see it there,
I can tell what layer it is on. Often just kind of clicking and dragging
to see where it is. And then try dragging it on
the right Artboard, let go. So that's a fun game;
it tries to automatically do it. And sometimes it doesn't. Sometimes you just need to
say, "Actually, friend... I'm going to double click him,
he is called 'Shoe'. And I want you to be on this
first tile here, which is going to be... that far, which is my 250 x 250. What you also might do to keep things
a little bit easier to work with... is use your Artboard Tool,
and just keep these guys separate. I'm not going to, but when
you're new it's easy... just to keep these guys far apart so they
don't end up dragging into the wrong parts. But I keep them tight
so that you can see what I'm doing. So back to my 'Move Tool'. I've got my giant shoe. I'm going to convert it into a Smart
Object because we are professionals. Then I'm going to transform it. And I'm going to put my shoe in here,
just because that's the-- Some of the graphics we've been
working on, I want to add it in here. I want to have a copy
on this version as well. So what we'll do is we'll right click
it here and we'll duplicate it. Shoe, just going to keep calling it Shoe,
Shoe copy, even. And I'm going to drag it to--
what's the name of this one? Drag it into this guy. You end up over there. I'm going to transform it again.
I'm going to rotate it around. Now this isn't the best ad I've ever made. I'm going to duplicate it,
right click, duplicate. I wanted to cheat, I've been trying
not to use too many shortcuts... but hey, it's hard. If you want to duplicate this... Shoe Copy, just drag it down
to the new little tab there... and it makes a copy, it's a little
automatic one, it's on the top. So I'm going to Transform, move it around. Come on, we're 70 videos in,
shortcuts are not that bad. We get to the Advanced Course,
we'll go super shortcuts... but for this one, Essentials,
we'll try and keep it good. So I've got a couple of versions
of it there. I want another one down here,
so which one do I want to duplicate? I'll use this one here, which is on the--
it's right here. 'Duplicate', put it on to-- If you're like me,
can't see that top layer... I kind of dragged and held... you might actually have to
close some of these down... or just move this up a little bit so
you've got more room for your layers. I'm just dragging in
between these layers... eventually you'll see
that little double arrow. Cool, there's that fellow, and you,
my friend are going to go down here. So we're part of the way there,
and before we go on too much further... I want to show you the perks
of using Artboards and Smart Objects. Now these two things tie together
and make for a productivity amazingness. So when we first brought in this guy... we convert him to a Smart Object
because we are professionals. Why is that so good? In an earlier tutorial we
looked at Smart Objects... and we looked at this little icon here. To indicate that they're a Smart Object... but what happens when you
duplicate a Smart Object... is that there are actually copies of each
other so they're all linked in a fashion. We were able to rotate and scale them. And the resolution's
still locked in there... the perk of a Smart Object,
but they are all connected. So watch this, if I double
click any of these guys... double click the little icon here. We did this with Vector Art. What ends up happening is... there's that shoe, I'm
going to close that down. So this is the one I'm working on. And I'll close this down again... just so you can see, so just the
guy I've got open, unsaved. If I double click on this little icon... it opens up this weird file. It's the same name, it's called Shoe,
it's the name of the layer... but it's called as PSD. Don't worry about the name,
what it is... it's the Smart Object, so we kind of
like dived inside of this guy here... and he's opened in another tab. What I can do in here now though... is I can make adjustments to one,
that adjusts them all. So Shoe layer selected,
'Adjustments Panel'... I'm just going to grab the
'Hue & Saturation' slider... and just drag this hue around
to pick a different color shoe. Say that I want this color shoe. I go 'File', I go to 'Save'. Then jump back into this first tab, and... cool, huh? So that's the real big perk
of using Smart Object. Especially when you start
using Artboards... because we've done three sizes here... I've got jobs that do have
10 or 15 different sizes. Especially for things like these ads,
it might be print ads, it might be web ads. It might be just concepts,
lots of different concepts. But when you can update one,
and they all update, man, it's a lifesaver. So I can go back into here again now
and make another adjustment. Hit 'Save', then back into here,
and it adjusts. When you finish-- this thing here is... not really a file you want to save,
it's just kind of-- you can just close it down, it's done. To get back in there again just double
click the icon and it opens back up. You can see there, my layer structure's
still there, all very non destructive. Let's look at a couple of other things,
let's bring in a logo. So when you're bringing in a logo,
especially if it's vector... something is being made in something
like Adobe Illustrator. You either copy and paste it from
Illustrator like we did earlier on... or go 'File', 'Place Embedded'. It's instead of going 'File', 'Open logo'. If I open it in Photoshop it loses... some of its Adobe Illustrator magic,
the vectorness of it. If that's really kind of unclear for you,
you're not sure what vector is... whenever it's a .ai or .eps
instead of something like a JPEG... just go to the File,
and go to Place Embedded. Retains a little bit of quality. 'File, 'Place', love it all,
click 'OK', get it to a right size. And when you do it this way
it will automatically be-- Hit 'return' to kind of confirm it
to say, yes that's the size I want to be. And you'll see, it's automatically
a Smart Object. So I'm going to make a duplicate. Drag it to this one. You'll notice, before,
when I did a duplicate... so I duplicated here, I was
dragging it to this specific layer. Whichever way works well for you,
so I can drag it to here. And I know it's on this layer... or this duplicate here, I'm going to drag
him over here and pop him in there. Either way works. Sometimes when you're dragging it
like that second way I did... Photoshop has a bit of breakdown. So if you do find like, Artboards are like,
man, they're crazy sometimes. They're new and they do go
a little bit crazy. You also notice that the quality's
not super amazing. It's mainly because I'm working with such
small sizes, they should be about there. That's how we're going out to Google
for our Ad banners. Basically we're just going to look
at the same principles as before. So we went through and double
clicked the icon for the shoe... we're going to do the same thing for the
logo, you can do any of these guys here. The difference is, if I double click on it
you need to have Illustrator installed. It's going to slowly open up in the
background, there it is there. We'll speed it up. If this appears, just click 'OK',
and here we are in Illustrator. If you are not good at Illustrator,
and you want to... I've got a course on it, an Essentials
and an Advanced Illustrator course. But what we're going to do is
we are going to grab the 'White Arrow'. We're going to click on one of
these little corners here... and just click and drag it
around, so click at it once. Then click and drag it, we are
totally wrecking this by the way. It's not looking good... but I guess what I want to do is
show you that you can distort this... and if I hit save, 'File. 'Save',
so I'm inside Illustrator... and I jump back to Photoshop,
you notice they all update. So using Artboards and Smart Objects,
you can see, it's updated across them all. Back to illustrator,
and I'm going to say I want-- using my 'White Arrow' I'm
selecting all of these guys... and I want to change the Fill color
to dark gray. Hit 'Save', now I'm going to close it down,
back to Photoshop. Magic. I want to go and create the buttons
and stuff but that’s kind of not-- I'm just going to draw a
rectangle and put text on it. What I'll do now though
is I'll show you... how to export these guys
as separate layers... so that you can send them
off to whoever needs them. So we're going to do
exporting in a greater detail... but I don't want to kind
of leave this video... without showing you how to get these out. So this is the short version,
you go to 'File', you go to 'Export'. And you go to this one
that says 'Export As'. The cool thing about it is
because we name them... you see here I've got one, two,
three images, ready to go... I can decide on this first one here... actually I want you to be a JPEG, and
I can play with the quality slider. You can see how big it's going to be.
Same with you. Actually I might select both
of these at the same time... and say, I want you both to be JPEGs. And both, I want you to be about 60. You can see, nice small file sizes.
Let's hit 'Export All'. And where am I going to stick them? I'm going to stick them on my Desktop,
I'm just going to click 'Open'. And off they go.
Let's check my Desktop. Here we are, there's my
three little images... ready to go, all kind of cropped out,
the right sizes with the right names. So make sure you name your Artboards,
just saves you time here... because especially if you have
to do an update... so I'm back in Photoshop and I decide,
actually this shoe was the wrong color. I'm going to go to a blue, hit 'Save'. Come back into here,
you can see all updated. You can see now we're getting our
flow on, 'Export', 'Export As'. It remembers all my settings,
it's got all my names... and this is where we become a super Pro. Back to the 'Desktop', and voilà,
that new kind of file format... at their new image but the same-- with that new kind of color, but they all
have the new colored shoe. All the new names. So we're starting to get nice
and streamlined and work flow. I'm going to go through now and
finish off my ad with some buttons... for no good reason. Just, I feel like they need buttons. So you can skip on, but to wrap up... it doesn't really matter what you're doing,
banner ads are a great example. Social media posts, there might be
an Instagram, Facebook, Twitter... using all the different
shapes and sizes... you could create graphic doing
that with different Artboards. If Artboards are freaking you out
because there's Smart Objects... and naming them, and exporting
those, a bit hard... just have separate documents,
there's no problem with that. 'File', 'New', make one that's 250 x 250. Save it as a JPEG and then close it down,
open up the next one and do the same thing. And do the different size,
I'm not going to know. And maybe whereas your skills develop in
Photoshop, you might revisit this video... to get a better understanding of Artboards,
but know they are a little tricky. You can see them over here, you can tidy
them all up by closing them down. How tidy that is for the Artboards. So I'm going to draw my button now,
you can go, I'm going to pick a color. So I've picked my Rectangle Tool
and I've picked this guy here. I'm going to zoom in.
I'm going to hit my button. Buy Now button. I'm going to put little
rounded corners on the edges. Can't really see right now, here we go. So how many pixels? Two pixels. So there's my little button.
I'm going to add a tiny Drop Shadow to it. Now probably we mentioned this already. If you want to get into like full
UI and Web design at a Photoshop... we're going to use a lot of the same
skills we learned in this course... but we'll use them specifically for that. I've got a course, like 100% dedicated
to App and Web design. So we're not going to cover that all
in this course. Click 'OK', 'Type Tool'. 'Type Tool', and if you end up clicking on
here, we've handled this problem before... it tries to join these two
up which is problematic. So I'm going to 'Esc',
and I'm just going to click over here. And not use my ginormous font. 10 pts, I'm going to make the color white. And I'm going to type... 'Buy Now'. 'Buy Now'. You've probably noticed already... but I often don't use the font sizes,
I'll just use the Transform Tool. Unless I know it has to be a perfect size,
but-- my Buy Now button is a bit big. The Buy Now button's never big enough. So what I'm going to do is I'm going to--
where are we? Working on this one here. What is that layer? I'm going to delete that. Some random text that I made. I took on my Rectangle Tool by now,
so I'm going to select both of these. So I click on the top one. Hold 'Shift', click the second one. And I drag them both down
to my little turned up page. Then I grab both these guys
and move them over here. You'll work there for me. Same with you too, make a new one. Drag it over here. I'm going to transform
both of these guys. If you've got them both selected,
they'll transform together. I'm going to try and stick you
in the middle. Now finally save this document. I'll stick it on my Desktop as Banner Ads,
this is for Scott Shoes. 'Banner Ad'. Often I'll put the version number just so--
there's going to be lots. Lots of dates from the client
especially because the ad's not very good. Need some more graphics, and going on... but I'm trying to keep it
simple for this tutorial. Last thing we'll do as well,
is I've added some adjustments... I'm going to go 'File',
'Export' again, 'Export As'. I don't have to do anything,
just click on 'Export All'. 'Open', and hopefully we'll be able
to go check my desktop. You know they all are with
my Buy Now buttons. Awesome, huh?
All right, that is the end of this video. Well let's move into the next one.
74. What is the difference between RGB and CMYK in Adobe Photoshop CC: Hi there, this video is all about
the differences between CMYK and RGB. So why do we need two of them,
and what are they? Basically there is a way of mixing colors
that your computer can do... using red, green, and blue,
that's why it's called RGB. And it can mix those three colors
together to make... all of the colors you can
see in front of us... in this kind of like color explosion. The trouble is your commercial printer
or your printer sitting on your desk. You pop it open and have a look,
it uses a different group of colors... to try and mimic what we've
got here on the screen. It uses CMYK, which is cyan, magenta,
yellow, and black. You've probably bought
lots of those cartridges in your life. The big difference is that
RGB has a secret ingredient. It has light, so your computer screen,
looking in front of you... has light shining out of it; luminance. So it's able to achieve
different colors or more colors... whereas CMYK has to deal with
a bit of plain old white paper. So there's no light coming out of it
so the colors can't be achieved. You've probably seen it before,
looks good on screen, hit print. Your poor printer turns it to mud... because it just doesn't have
light coming out of it. So it can't achieve some of
those really strong rich colors. Let's have a look at the difference
between the two, so I've opened up... 'File', 'Open', and in your
'Exercise Files' called '13'... there's one called 'RGB vs CMYK'. This one's an RGB. How do I know? You can see
in the tab here, it is RGB. And that's how most things are going
to come to you in the world. Digital cameras, RGB, downloading
something from the internet, RGB. Let's have a look at it in CMYK.
Let's go to 'Image', 'Mode... and switch it to 'CMYK'. Ready, steady, go. I'm not sure how much of a change
you can see in this video... but I'm going to go undo. RGB, CMYK, RGB, CMYK. Great, not great, great, not great. So why would you end up in CMYK
when it doesn't look as good? It's when you're going out too often
to a commercial printer. So you've been asked to do a print,
say it's one of your amazing photographs... that you're getting printed commercially... or you're working more as a designer... and you're getting an image
ready for a magazine. They're going to say, we want CMYK, please. So what you're going to have to do is
open up your image and switch it to CMYK. And now save out a JPEG and give them that. So it has kind of a really specific
use case, it's physical printing. You might be sending it to a sign writer. As part of their specifications
they might say... it has to be this big,
this much resolution... and it has to be CMYK. So that's how to convert it. The trouble is there's not as many colors,
so often I'll have two versions... because so much of things we do
today have dual use... especially for me, maybe as a designer... I'm doing stuff that's going to print... but it's also going to be
downloaded from a website... or uploaded to the website,
or going to social media... banner ads, all sorts of stuff. So if I'm going to convert this one
to CMYK to send it to print... it's a one-way street, right? So if I go to 'Image',
'Mode', and I go 'CMYK'... and then I go back to 'Mode',
and go to 'RGB', watch. The colors just don't come back,
it's a one-way street. So once you've gone to CMYK,
you can't, like... convert it back to RGB,
it's still going to look flat. It is RGB technically,
but you've lost all those colors. So you might want to do a 'Save As',
so you've got two versions. I'm going to go to 'Edit', 'Step backward'
until it was legitimately RGB still. Nice and colorful. So I'll just go to 'File', 'Save As',
and I'll add the words CMYK. So I know it's a slightly more
washed out version. It's, I guess a funny one to understand... but I guess I don't want you
leaving this course... because it's only a matter of time
before it pops up... that you need to understand what
RGB versus CMYK is. Let's talk about two use cases,
and then we'll move out of this video. Let's talk about the first use case. Let's say I'm a photographer... I'm working on this photograph
that I've filmed... that I've shot of the color splash here. Done my tweaks, done my levels,
done my masking, all looks great... and now I've been asked for it,
from my designer, they want in CMYK... or from a print shop,
they want it in CMYK. So what I'm going to do... first of all I'm going to make
sure I've got a RGB version... because remember, it's a one-way street.
So I'm going to save it as... I'm going to put this onto my desktop. This one's going to be called
'Color Splash RGB'. So now I've got that one, right? Now I'm going to go down
the one-way street... for the one that Bob,
the graphic designer needs. Lost all my colors,
there's just no way of getting them... because paper just doesn't
have that illuminance. So now we'll go 'File', 'Save As' again,
and this one's going to be my CMYK. So I've got two versions of it, right? One of them is the one
with a fuller color... and one of them without it. So I'm going to send this one to Bob
because that's what he asked for. And the other use case,
and the more typical one is... let's say I am this photographer
or graphic designer, and I've got this... however we got this image,
this is my original... no, I want the original a RGB one. So one with all the colors. So I've just got the RGB one open... and now I need to put this in to... say it's going to go into some
social media, I just use this RGB version. Copy and paste it into the
file I'm working with... but let's say we're doing
something different. Let's say we're going to physical print
and digital. So I'm going to load this into InDesign
to make our little brochure. It's going to be printed off, and it's
going to be both in the reception. So physically, so I need CMYK version... but also it's going to be downloaded
from the website... emailed around, it's going to be
used as a PDF. What to do then?
Do you have two versions? A print version of a magazine
and a digital version. No. What tends to happen these days... there will be purists out there
who don't like this method... but for me, in my experience... what you end up doing is, just use
the RGB document wherever it is... it doesn't matter if it's InDesign,
and it's going to print... just leave it as RGB... and let the printer change it
on their side. So that you've got one copy,
one PDF that you've made... that's got all the great colors in it,
it makes life easier for you. And what ends up happening is,
modern printers... so the ones that are going to
physically print and bind your magazine... they have some pretty cool rip software
and kind of pre-processing software. It actually extracts
probably more color from your RGB... and they have a really good
conversion process to CMYK. Better than what just Photoshop's
going to do here. A lot of printers will use more than just
cyan, magenta, yellow, and black. They'll have a bunch of extra colors
and try and match RGB a little bit more. So I just grab this image... dump it into InDesign or
Illustrator, into my graphics... and just leave it as RGB, send it
to the printer, make sure they know. Say, "Hey, I'm just leaving as RGB,
can you convert it for me?" They might come back and say... "No, you need to go the
traditional route... and make sure it's CMYK
before it's all in InDesign"... but most of the people
would just take your RGB, print it off... and it's pretty amazing
what they can come up with. Some pretty good matches to this RGB. Are you a little bored of RGB and CMYK? If you've made it this far
you'll get a gold star. Go draw one on your hand,
that is you for the day. You hung out and watched this whole video. As a little surprise, well it's not
much of a surprise. 'File', 'New'. One thing to note is,
when you're making a new document... see down here, Color Mode? You can pick RGB and CMYK
before you get started... but if you pick CMYK now
it will always default to CMYK. So just make sure
color mode's RGB to get started. Pretty much everything,
unless you're going to print. And then they ask for it. Enough Dan. Let's get into the next
very exciting video about resolution. Super important, just as nerdy.
75. How do you change the resolution to 300dpi in Photoshop CC: Hi there, it's real me back again
for a little bit. This particular video is about
resolution in Photoshop. What I'm going to do is jump between... this live head shot stuff
and the screen there... because it's a little easier to explain
when I wave my hands around. Let's get started, we'll get started with
the screen stuff and then we'll come back. Let's go do that. So let's open up two files,
let's go to 'File', 'Open'. In your 'Exercise Files' there's one
called 'Color modes & Resolution'. I want you to open up these two,
'Resolution 01' and '02' by Hunter Johnson. Let's click open. So one is a teeny tiny version
and one is a nice big version. So resolution is just another
word for quality. Good quality, bad quality,
high resolution, low resolution. Another word for resolution is
pixels per inch or dots per inch, dpi, ppi. I'm blowing your mind with different words.
Let's stick to resolution. High and low quality. So this one here,
I'm looking at 02, is low quality. It's because when I zoom in,
this actually-- you'll actually start to see, look, it's
actually made up of little squares. So an image is just a collection
of colored dots... but from a distance,
if I zoom out far enough... it looks like a proper legit image. And that's true of both
good and bad quality. So I can see the dots quite easily in
this low resolution, low quality version... but now, it looks like a proper legit
real life from front of the image... But that's because my brain
can't see when I zoom in. If I zoom in far enough, can you see... it's actually, this one here is
just made up of more dots... and my little brain can't tell
the difference between real life and... like lots of little cubes joined
together at a certain resolution. So let's jump out to live head Dan now... and let's talk about two
kind of example projects. So what we'll do is talk about two
kind of common projects or uses... for resolution in Photoshop. We'll do a kind of
a web job and a print job. We'll start with the web one... because it's probably what you're
going to do most often, I'm guessing. So let's say that we've been given
a specific size we need for a website. Let's say it's to our WordPress blog... and it has to have a maximum size
of 1200 pixels wide. Or it's some sort of social media. So Instagram has a maximum
image size of 1600 pixels wide. Or your Twitter Bio needs to be-- you see those requirements that
says cannot be larger than XYZ. 2,000 pixels, so we're going
to go and do that now... and look at how to force our image to
be a specific size for a web project. Let's jump in. So I want to go to 'Image',
and adjust my 'Image Size'. Now they may or may not ask for it,
but the resolution needs to be at 72. And this little check, Resample Image
needs to be turned 'on'. Over here, depending on that-- they might have asked for centimeters,
you can adjust it just as easily in here. I'm using pixels because that's
what my Twitter Bio asked for... and let's say it's 1600 across. So it's 1600, was the largest size. It's adjusted the height for
me proportionately. Awesome. It's 72 dots per inch,
I'm clicking 'OK', it's a lot smaller. Do a 'File', 'Save As JPEG'... and upload that to Twitter,
or Instagram, or Reddit... or whatever the site is
that needs a specific size. So 72 is a really common resolution. Let's talk about the slightly more
complicated print version. Let's jump back out to real Dan. All right, it's time for a print job,
so we've been asked to... say we're photographer and we're working
in Photoshop, getting our image right... but then somebody's asked us for a
version of our image for a print job. And they've asked for a couple of things. You might be given a spec sheet... or they might have emailed it
to you, and they've said... "We need your image to be in CMYK,"
which we looked in the last video. And we need it to be, let's say 300 dpi. Or they might say ppi. dpi and ppi are interchangeable terms,
remember, dots per inch, pixels per inch. Old school, new school, 300 dpi,
they're the same. I say dpi because that's what I learned
but Photoshop calls it ppi. You'll find a bit of both around. So it's 300 dpi, and they
haven't asked for... they just asked for as big as it can be,
at 300 dpi. Let's say that's one of our project. The next project is CMYK, but
we need it at a specific size. So it needs to be 18 inches across
at 300 dpi, so it's really specific. So let's look at both of those
scenarios now in the screencast. So we're back in here, I'm going to undo
to go back to my original image. So I've worked on this image,
I've photographed it, it's great. I need to get it to CMYK, which we know
how to do in the last video. Great. CMYK, perfect, and now
I need it to be 300 dpi or ppi. So go to 'Image', let's go to 'Image Size'. And what we want to do in this case
is we want to turn Resample 'off'. Because what ends up happening is,
watch this, if I change this 72... so let's say, we work in inches,
so there's 68 inches. So what I need to do is change this from
72 which is the really common web size... to the really common print size,
which is 300. Watch what happens to the width
and height. '300'. You got a whole lot smaller,
it went from 68 down to 16, oh no. Let's jump to real Dan to explain. So now it's time I get to wave my arms... and I find this is the best way to explain
that kind of weird resizing going on. So for a screen or for a website,
they want 72 dots per inch. And we look at it on a screen,
and it looks great... that's all you need, 72 dots in an inch. Let's say I've got an inch, here it is,
there's 72 little cubes in there. All colored dots, and that is my-- my little human brain goes,
"That looks perfect." But when it gets to print, they need
a lot more dots for a realistic print. If you print stuff at 72
you start to see the dots... just the techniques that you
used to go through printing. It just looks bad, so to get past that... to get to that really good quality, they
pick it up and go, "That's a photograph." You need 300 little dots in that same inch. So 72 dots per inch means I've got an inch,
there's 72 little dots. If I want 300 in there
what we have to do is... it's the same inch, right,
but we have to say... "Well I want some more pixels to fit
in there," where do we get them from? So we go... Well there's all these other pixels around,
so let's start dragging them. Paul, you come in here,
you come in here... you keep jamming them in there,
there's a hundred in there now. Now there's 200, you keep pulling them,
juggling them in. And then eventually
you cram 300 into that same inch. The trouble is, you have to pull all those
pixels out from the rest of the image. The whole image has to resize to come down. So basically you're
grabbing all those cubes... just crushing them so they're more dense. Does that help?
That's the best way I can explain it. So that's the trade-off, right?
Is that... 72, great for screen. Print, it needs to be about the
third of the original size. It's not perfect but it's about
the right kind of ratio. So that's why the physical size
gets smaller. So, full stop, that's that done. Let's say you-- remember our second step,
where we said-- So the first step was, put it at 300... and just give it to us at
whatever size it ends up being. But let's say that we
want it to be an exact size. So you want to be 300 dots per inch,
but we need it to be 20 inches across. And we saw before that it can't be 20,
it's 16, 19? It's not that big. So let's go and work out
how to force Photoshop... to kind of make it the size we need... and they're kind of trade-offs
for that, so back to screen. So before, remember, was 72, really big,
we changed it to 300 and you're like... "Oh no, it's heaps smaller." That's just the size it is, that's
the best quality it can be. 300 dpi, it's only going
to be 16 inches across. Let's say I'm just going to turn this on,
we did this before, so 300, and it's a 68. What's going to end up happening, can you
see over here, it gives you a preview. See the goop that appears. Photoshop says, "Well, I'm just going to
generate all these extra pixels." And it tries its best, but there's
just too much to do... and you end up with
this kind of goopiness. You've probably seen it in images before. It's Photoshop, it does,
it's the best thing to try and do it.. but the images are not there... so it just starts duplicating
pixels willy-nilly and... you end up with this kind
of interpolation stuff. So huge jumps like that just don't work. What you can do though
is-- let's turn that off. So remember, 16 is the
largest it can be... but let's say we just needed
to be 18, or let's say 17... we just need to be a little bit bigger. Nobody's going to notice.
Turn Resample 'on', change it to '17'. You see here, it's no better no worse
than it was before, in my opinion. Can I go up to 18? Probably I'd still do it. Put an update, if they say it needs to be
18 at 300, I'll probably do it... because it was close enough to it. So when you start getting over this... like when you get past the
10 to 15% increase... you start to see pixels,
and it starts to look a little bit bad. The further you get over that,
the worse it gets, like we saw before. So this little resample image here,
with it off it will be exactly 72. It's going to expand out
to the nice big size... because that's all the internet needs... but when I get to 300, shrinks down. I can turn this on to force
it to be a physical size. Making it smaller, it's perfect. Say they need it to be 10 inches.
That's great. There's plenty of pixels
to go for smaller... but to get bigger you can go a little
bit bigger but not too much. All right, back to our other Dan. I hope that was helpful. If you are like, "Man, that was
really hard," it was really hard. So resolution can be tough. Take aways, I hope, are web stuff is at
72 dots per inch, you can have it larger. Anything that goes to print is going
to be about a third of the size. You just go to 'Image', 'Image Size'. Make sure Resample is 'off',
type in '300' pixels per inch. And that will give you the print size
at its very best quality. If you need to force it to be a size... doesn't really matter if
it's for web or print... just turn the Resample 'on'. And with that on it will force it to be
whatever you tell it to be. And if you're going smaller, perfect. If you're going bigger, it's going to
start inventing pixels and start... you know you can go a little bit,
but if you go too far... you start seeing all that
yucky goopy pixelation stuff. That's enough for resolution. Let's get into some super exciting
Photoshop stuff again.
76. Basic introduction to using a wacom tablet with Photoshop: Hi there, this section of the course
is all about brushes. It would be rude of me
not to mention a Tablet... when we're working with brushes,
and we'll do that for this video... but then after that don't worry, if you
don't have a Tablet like this thing here... it's called a Tablet,
it comes with a little pen. Basically it's a replacement
for the mouse... but it allows you to kind
of hand gesture draw. So if you don't have
one of these, it's fine. Just this video, we're
going to cover this... in case you do have one
or want to get one. But then after that we'll just
get into using the mouse... for some of the more special effect
Ink Splat type kind of cool brushes. So what is this? It's just the mouse,
but obviously I can draw on it... instead of using the kind of normal mouse. And what you are looking for is-- say you don't have one
and you're looking to buy one... my advice is I've had a few
of these over the time... Wacom is the name of the brand,
most popular with it. So a Wacom Tablet,
they have a few different brands. This one here is called the Intuos Pro. Depends on your budget, right? This one here is expensive
enough, US dollars. Can't do conversions, born in New Zealand,
live in Europe, US dollars. It's probably about $300,
so it's not cheap... but if you're going to invest in one... don't get an eBay cheap knockoff brand
I've never heard, just don't work. Because you need something called a--
not even sure if you saw it. It's a 6D Pen, that's what Wacom call it. Basically what it does, is it knows
the angle your pen is at, which is cool. When you're using, like you
tell it to be a crayon... and it knows which edge
of the crayon it's on. Also it knows the pressure. Also, if you flip it around
you can turn some drawing... and then flip it around, and the
back part of it is the eraser. There's just some cool stuff. Also, which you're not going to be able
to see probably, is there's some buttons. Those come pre-set for Photoshop. Like you can wave your finger around
that one, and it does the brush size. Undo is my top key. There's some cool shortcuts
you can do with these Wacom Tablets. So if you want one, you don't need one
to be a Photoshop designer... but if you're going to be
doing digital illustration... Man, you'll see the difference
in the next little section... about me drawing with my mouse,
and drawing with this; I love it. Do I use it every day? I put
it out here on my desk... especially in these videos to make it look
like I'm like hard core digital designer... but I find them-- I don't like them
for normal mouse operations. I use just my regular mouse
or the track pad... but for when I'm doing retouching
or if I'm doing some drawings... I definitely use that. You can just have both
of them on your desk. That one's wireless, which
is really cool as well. It's one of the perks for that one. So you can kind of have it up
on your knee, sketching away... and see it on the screens,
a little bit of a weird disconnect. But yeah, super cool. The Bamboos are the
cheaper versions of these. They are cool, they just don't come
with all the extra buttons and stuff. So definitely, Bamboo would be the
entry level, then you get the Intuos Pro. Then you get to the Cintiq. The Cintiq, you need to sell one of
your kidneys to get one. So they're expensive, they're in the like
two grand kind of thing. Because basically they’re screen drawn,
so you can actually see what you're doing. So if you're super keen,
and you've got the cash, do that. I probably still wouldn't want one. I like that one, I like the way-- I'm okay
with the disconnect between the screen. I'm now rambling, let's go actually see
what it does and why it's so awesome... and why you may or may not need
a Wacom Tablet. Let's jump in. One more thing, this is just an
introduction to the Wacom Tablet. It's not going to be like a hard core,
how to get the best out of it. It's just going to be giving you
the basics in case you do have one... but not like every single thing,
advanced feature of the Wacom Tablet. It's my asterix.
All right, now let's jump in. First up let's go to 'File', 'Open'. In '14 Brushes', open up 'Brush 01'. Obviously you can use any image you like... but if you are using any image -
I'm going to zoom a little bit - just make sure you're
working on its own layer. We don't want to destroy the background. I'm going to name it,
I'm calling it 'Drawing'. So to get started we
need a couple of things. We need the Brush Tool, which is this guy
here, underneath the Spot Healing Brush. We need to pick a foreground color,
so click on this color here. Slide through this, decide on the color
that you want to use. Click 'OK', and at the top here,
drop this down. So depending on the version
of Photoshop you're using... if it's like 2017 or before... you probably just got a bunch
of icons you can click through. You'll be able to work out which is which. It shouldn't be a hard change. What they've done in 2018 and 19, they've
created these awesome little groups. General Brushes, Dry media, Wet Brushes. We're going to start with
just these first two... and we'll get into some other videos where
we look at more special effect brushes. So to start with, under
'General Brushes'... I'm going to pick this one
here called 'Hard and Round'. We'll show you the difference between
that Wacom Tablet and a regular mouse. So on the side here I am going to
click, hold, and draw D, my name, Dan. I'll just undo that,
that was exceptionally bad. I'm bad with my mouse,
it's not getting any better. You can play around with smoothing to try
help make your mouse feel a bit better... but I guess I just want to
show you the difference... between my drawing when I'm
working with my mouse. I'm pretty good with my mouse,
and that's as good as it got. Let's switch to my Wacom Tablet... and all I'm doing is picking up the Pen,
you don't need to switch them... you just start using the Wacom Tablet
and they start working. So I'm going to draw with a Wacom,
but what we're going to use is... we're going to use one of
the special Wacom brushes. Basically anything that says Pressure,
see that? You can kind of tell,
they have like pointy ends... so it has a variable pressure rating. That's what gives the Wacom Tablet
its magic. So I'm going to draw an A. You can see, instantly
things are smoother... because I'm just better
at drawing with a pencil. And you can start to see, see the
ends here, they're just nicer... there's like pressure sensitivity,
so there's an end and a beginning. It's really sensitive, watch this,
I'll just kind of lightly touch it... but really hard, and get a big blob,
or just touchy touch. They get nice a little bit. Cool. Pressure sensitivity is the big thing
with a Wacom Tablet... but when you tie it together with
some of the other brushes... especially the new versions... so General brushes, pretty basic, it's the
Dry Media brushes we're going to use. Like these ones here,
Kyle Webster was like--. What was? He's still, he still exists. He was like a freelance-- He was the man to go to
buy brushes from Photoshop. Like if you wanted brushes, the builds
ones weren't very good. The ones he made were amazing,
and now he works for Adobe. So he's now bundled them, or at least
Adobe and him have bundled them in here... for us to use straight out of the box,
that's so good. We're not going to go through
them all obviously... but let's just start with one of them. And let's draw my N. Actually I'm going to make
the brush size a lot bigger. Just out of the box,
they just look very realistic. Not sure what I'm drawing,
I'm drawing an N... that's what I'm trying to draw. But they are pressure sensitive
so I can push hard... and they get thicker and fill out more. Then I can push really lightly and they
can taper off, they're just amazing. I love them. So I'm undoing,
going step backwards. So before we go any further I
do want to mention the undos. By default yours is set to 50 undos. And when you're drawing, hand drawing... you can bend through a hundred
little brush strokes quite quickly. So you can go and change it. On a Mac you go down to
'Photoshop CC', 'Preferences'. We're going to go to this one
called 'Performance'. On a PC it's in a
slightly different place. It's under 'Edit', all the way down
the bottom here is 'Preferences'. And you're going to end
up at the same place... we want to go to 'Performance'. I've already cranked mine up to 100,
by default it's 50. If you're using a really earlier version,
it's lower, 25 or something. I like 100, gives me a little bit
of undos to go backwards. But know that the higher this is... the potentially more stressed
out your computer can be. I've got a pretty new MacBook Pro,
you might be using a really fancy PC. So you can go a little higher,
but no, if you go up to 1000... it's going to eventually die because
it's trying to remember too many things. Let's crank it up to 100. So that's going to be it for the basics. Looking for pressure sensitivity,
changing brush size. What I'm going to do is I'm
going to kind of sketch... that thing like you saw at the beginning. I'm going to use-- I like this one here. Pastel Palooza; such a good name. In terms of the size,
that's probably too thick. I go down to something smaller. I'm just going to sketch out my little N. You can hang around with me,
I'm just going to start it... and then just building
it up, building it up. Pushing harder, pushing not as hard. You can skip on now. What I'll do
is I'll get the editor to speed this up. So it's not as painful, you can watch it
in fast forward mode. All right, go. Before you go, I was just like-- Wacom Tablet's cool because you can kind
of move it around at different angles. I'm not finished, I'm not even
sure what I'm going to be doing... just drawing now... but I wanted to show you one little tip. Like, I can draw up and down... for some reason that line,
the arc of my hand... I can do that line really
nicely up and down. But trying to draw up in this way,
it's pretty kind of-- I find it really difficult. So you can either turn
your Wacom upside down. You can't see this but I'm just
moving my Wacom upside down... so you can kind of change the angle. What's really handy though as well is... if you're kind of on a fixed desk, I'm
in a kind of a small desk here... so what you can do is,
there's this little trick. Click and hold down the Hand Tool... there's a Rotate View tool,
a little bit advanced... but if you click, hold, and drag it around
you can see I can drag this... get it into the right position,
go back to my 'Brush Tool'... and remember, I'm a lot better at
that kind of motion, the down to up... the up to down... I can toggle around again and just
kind of work my way around this line. Make sure I switch to the Brush Tool. I haven't changed that kind of
permanent rotation. It's just so I can kind of move it around. When you are finished... just hit 'Esc' on your keyboard, kind of
flicks it back around to its original. Kind of direction, and you can keep
toggling between those two things. If you're fancy you can set that up
as a shortcut on your Wacom Tablet... but that's kind of out of the
scope of this class, which I do. I've got a little dial here
on this Tablet... and I can set the shortcuts on it
using the Wacom software... that I downloaded for my Mac
from the Wacom website. You can start matching shortcuts
with keys on your Wacom Tablet. I'm just putting a double line around.
All right, let's speed-- there's no speeding it up because I'm done,
because I don't even know what I'm doing. Just drawing up, in with a double line. One thing you might do before you go,
I keep adding little maybes at the end. We've worked on this drawing layer,
and it's just normal, sitting over the top. What you might find, for a bit of realism,
Blending Modes, we've used them loads. Multiply, in this case is probably
going to work. Starts interacting with the
background a little better... especially here, looks like
somebody choked on the wall. Terrible drawing.
I'm embarrassed; look at that. Can I draw better? A little bit. You guys can't be watching, and I need
to have like a hundred goes at it. That's the introduction
to the Wacom Tablet. We'll jump into the next
video where we look at... some more of that special
effects with brushes... the smoke stuff and ink splats, that type
of thing rather than just hand drawing. All right, on to the next video.
77. How to create splatter paint effects in Adobe Photoshop CC: Hi there, this video we're
going to explore brushes. We're going to look at this Drip Brush... plus this kind of like scratching
one in the background. We're going to take this image and
add all these kind of effects to it. Let's get in there and learn how
to do this now in Photoshop. First things first,
let's go to 'File', 'Open'. And in your "Exercise Files',
under '14 Brushes'... we're going to use 'Brush 02'.
Thank you, Hunter Johnson. Let's click 'OK'. Next thing to do is, I want
to draw that kind of splat... that comes out of the shoes... so I'm going to make sure
it's on its own layer... and this is going to be my 'Red Splat 1'. I need to pick the brush that
I want to use, so under my 'Brushes'... I'm going to go up the top here... and we're going to start looking
at these special effects brushes. You might have to twirl that up
and find the special effects. I'm going to use, I've experimented
with them all, they're all real cool. I'm going to use this first one here,
'Spatter Bot Tilt'. In terms of the size, hovering out here.
You can kind of see a preview of it. Make sure caps lock is on,
caps lock will be target. Turn your caps lock off on your keyboard
and it goes back to the splat. Brush size, I'm going to get it
down quite small. '70'. In terms of the color, what I'd like to do
is match the same color as the shoe. So depending on-- you might be
a black and white like this... what you can do is, you can
grab the 'Eyedropper Tool' and say-- See this little bottom left of it? It's a little tippy top of it,
well tippy bottom left. Click on that and you can see... it's changed my foreground color
to match this shoe. Back to my Brush Tool. Now what I'm going to do is click,
hold, and kind of drag it off... to make it look like it's
spraying out, looks quite gore. It's kind of cool, I like it. So I'm clicking and dragging,
you can click a few times... in a little bit of a circle to
kind of try and get it there. Change the brush size, gone smaller. I can go bigger. It's like really big,
I like to just have one or two. That's probably enough. And you get what I'm trying to do. So we've got our kind of ink
coming out of there. Let's go a little bit further. And what we're going to do is do
some type exploding, like you saw. So I am going to click 'OK'. Going back to my 'Move Tool', it's freaking
out. I'm going to go to my 'Type Tool'. I'm going to click once,
and I'm going to type in 'Remix'. That font is teeny tiny,
I'm going to grab it, drag it up. Clicking, holding that icon, and dragging. That's the easiest way,
well one of the easy ways. Now I'm going to use Remachine. Remember we used this earlier on,
we installed it in a previous video. You can download it free online
for personal use. If you want to use it commercially,
Remachine, you got to go and pay for it. So I'm going to drag it, make it bigger. I'm going to make the font
over here white . Nothing special. What I'm not going to do is I'm not
going to actually explode it on this layer. I'm just going to have another layer
just above it. So a new layer, this one here is going
to be 'White Slap'. We'll go a little bit further
with this one. So we'll do exactly what we did before,
I'm going to grab my 'Brush Tool.'. I'm going to make sure-- I could use my Eyedropper Tool
to pick the white. We could just click on this thing,
toggle between these two, it depends. Whatever you do, we want white
as the foreground, grab the 'Brush Tool'. And in terms of the size I'm going
to practice, it's probably a little big. So we're on our own layer,
so we can turn it off later on. I'm going to try and kind of get
this to look like it's spraying out. That's my goal anyway. Loop at the end there, try and get it all. I'm going to play with the Brush Size now,
make it a little bit bigger. Undo. Man, it's hard to do random.
Luckily this brush is amazing, right? Thank you, Carl Webster; you are awesome. We're going to do a couple of big ones... and I'll show you a couple
little tricks that I like to do. So maybe too big. So what I'm going to do is
I'm going to make another layer. And this is going to be
'White out of focus'. Kind of faking depth of the field. So I'm going to make a nice
big brush, and have one... maybe two of them. Just a couple of them around. What I'd like to do is
just blur this layer. So with that layer selected
go to 'Filter', 'Blur', 'Gaussian Blur'. And just, maybe lower it down a little bit. Can you see what I mean? They're just a little bit out of focus.
Preview on. They're kind of stuck against the glass... whereas that looks like they're
kind of coming right at you. You might like them. I'm going to do the same for the red stuff. So I'm going to make a red splat,
that is 'Red out of focus'. If you're asking whether I name my layers
this well all the time, I do not. I normally have layer 1-10,
it's bad practice. So my brush, nice big brush.
I'm going to have a-- Because it's random, no two brushes
are the same, which is really cool. So I'm going to go to that.
Maybe one more, there we go. And I want it above the text... but I also want to go to
'Filter', 'Blur', 'Gaussian Blur'. Find a blur that works for me, click 'OK'. And now we're getting that stuff where it
feels like it's in front of the text... it's exploding out, I can still move it... because it's on its own layer. So that's the Splatter Brush,
I love the Splatter Brush. We're going to look at one more brush
before we go. We can go through every single brush,
I guess... it's going to be some experimentation
you need to do. I'm going to show you one more brush
because it's a little bit fancy... and it works a little bit differently than
just regular paint brushes like these. So for this to work we are going
to create a new layer. We're going to call this one 'Scratch'. And we're going to find,
we're going to go to the 'Brush Tool'... we're going to drop this down. I'm going to go into this one here
called Concept Brushes. Scratch Blend. So the difference is, can you see,
that's a brush, that's a brush. See these ones here,
they have the little finger. That's actually using something
called the Smudge Tool. They're in the brushes,
because they make sense in here... but they're actually a
completely separate tool. So if I click back out here, you can see
we're not on my paintbrush anymore. We're on this Smudge Brush. Same as Smudge Brush,
it's called this Smudge Tool. And I show you that because there's
a few brushes like the Mixer Brush... and there's a bunch of other ones,
it doesn't really matter. Find them in their drop down,
it will switch to them. You might have to play
around with the effect... but what we want to do is,
I'm going to turn all these layers off. I'm clicking, holding, and
dragging across the eyes. Not sure if you know you can do that,
you can do one individually... or just click, hold, and drag them. Because what I want to do is-- I'm going to maybe have it just,
my Scratch Layer, just left background... but for this to work you got to turn
all the other layers off. And Brush Size, mine's at 175. I'm going to click once to
show you kind of what it does. I's a little hard to see, I guess. It's a little hard to see
because it's not working at all. I pretend I knew I was doing there. It's this one here, needs to be on,
'Sample all Layers'. So it's going to go through my empty layer
and see the stuff in the background. Now watch, if I click... it's kind of this way, that kind of... just kind of moves things around,
smudges them. It's a really quite cool effect. Don't be tempted to click, hold, and drag
because it-- it works, you can see that,
it's kind of smudged it but it's-- can freak your machine out. So I like to do it in smaller bits,
and turn the strength down a little bit. I'm clicking in little pieces. There we go, clicking once, clicking twice. Clicking little drags. It's a little bit hard for
the computer to catch up. It will depend on the
quality of your image... but you can quite see,
it's quite cool, right? It looks like it's been
on a sheet of glass... or something has been upside down
jiggling in the car. Or the front of your cell phone
if you don't look after it. It's just cool effects that I want to use. I'm going to turn all these
guys back on afterwards. It's this kind of grungy remix thing
that I thought might look cool. It's okay. But there are lots of brushes
to play around with. What I'll do in the next video is
I'll show you how to find brushes online. And how to install them, and we'll do
some cool stuff with drips. I will see you in the next video.
78. Class Project - Ink Splats : Hi there, this class project
is more of an experiment. I'm not looking for amazing final
finish to something or the other. I want you to just explore
the different brushes. Drop questions if you got
questions about the brushes... because there are so many in there. I guess I could make a hundred videos
on the different brushes... but for this Essentials Course
we're going to let you experiment. Now in your 'Exercise Files'
there's one called '03'. That will be your experiment file;
thank You, Florian. In your Class Projects file there is... you don't have to use that image,
you could use your own... but I want you to just play around. Make sure you're doing
everything on its own layers... so you can turn it back, turn it off. Not destroying the bottom layer. Experiment with the different brushes
and potentially Type as well... and yes,then share with me. I'd love to see what you do here,
in the assignments, or on social media. Instagram is probably best,
and I am bringyourownlaptop. You know that already though. All right, next video, once you've
done your homework. I'll wait.
79. How to create dripping paint ink effect in Photoshop: Hi there, this video is
all about drippy brushes. We're going to show you
how to download them... install them and getting them working. Then we're going to take our name
and group it. Let's go and work out how
to do that now in Photoshop. So first thing is we're going to make
a new document, let's go to 'File', 'New'. I'm going to make mine
2000 pixels across and 1500 high. If you've been following
along in this tutorial... you probably want to
turn Artboards off now. We don't need them for
this particular exercise. They just add a little extra
complexity that we don't need. So to install other brushes there's-- The drips aren't built-in
so we're going to learn two things. We're going to show you how
to use the Drip Brush... but also how to go and find,
and install brushes. So to do it you need to open
up the 'Brushes Panel'. It's under 'Window', go to 'Brushes'. So these are the ones that are installed
in this particular version of Photoshop. Yours might be slightly different,
you might have a future version... but we've gone through the brushes
and we haven't found the one we want. So there are two places to go. Photoshop themselves
or Adobe themselves... have an amazing amount of
brushes you can install. So you go to this little flyout menu here,
click on that. Go to the one that says
'Get more brushes'... and this website will open. If you're like me, your internet's
running super slow... so only half the images have loaded. But you get an idea
of the different kinds of brushes. Some amazing ones, these are Kyle's ones,
again, Kyle Webster. Such cool brushes. Ad you can download them. So this mega pack here is-- think all of them, it's like
400 megabytes, that's really big. So you could just decide on the ones
you want, and download them individually. Now it doesn't matter whether
you get them from here... or you do a search through
Google and say... 'Photoshop brushes', and go through
the million and one blog posts... showing you where to get them. Most of them are free, the
really good ones aren't. And if you were like me,
what you did is... you used to go to Kyle's
website and buy them. Now they're free as part of your
Creative Cloud membership... which is super cool. Anyway you get them, they'll download. I've given you some in '14 Brushes' folder. Just a couple that I've downloaded,
they were free ones. You can see, they've got
the extension 'abr', Adobe brush. Now the easiest way to install them... is just to have Photoshop open
and double click on them. So I'll show you what happens in Photoshop,
so there's these four groups here. You can go the long way
and go to this option... and say 'Import Brushes', doesn't matter I just prefer to double click on them. So let's double click on the 'Drip Brush'. And magically they appear in here,
and you can see there's a bunch of drips. Now by default, yours are
probably very small. and they're probably just long streaks. Those streaks are really hard to see
what kind of brush they are. So you can change it
in this little flyout menu here. Yours is probably set to Brush Stroke,
which shows this kind of like line here. What I like to do is turn the
Stroke 'off', and the Brush Tip 'on'. So that you can see them
just as little brushes. I'm going to raise this little icon up
so I can see them nice and big. And that's how to install the brush. First of all I'm going to
color the background. So 'Background color', I'm going
to use that... peach that I've been using. I'm going to go to-- So I picked it as my foreground color,
I'm going to 'Edit', 'Fill'. I'm going to fill with my foreground color. So my background is this. I'm going to make a new layer
for that big green drip that we had. And I'm going to double click
my foreground color... and find that kind of smitty,
greeny colour, a bit warmer. A bit warmer. That's kind of close, we might have
to adjust that afterwards. So now I'm going to grab my 'Brush Tool'. Then I open up my Brushes panel. You can actually do it from up here now. You will see, there's the Special brushes
and the Drips brush. You can either use this or this one
over here, doesn't matter. I'm going to use the Drips brush
and I'm going to pick on... not sure, scroll down. Can't remember
which one I picked when I was doing it. That one there. Sample Brush 5. I've got my opacity and flow up to 100%.
I'm going to click once. And there we got my Drip Brush. I'm going to undo, I'm going to
make it a bit bigger. By a bit bigger, I mean colossal... because I want to color
the whole background. I'm going to zoom out a little bit. Sometimes you just need to
be back a bit further... to see how big the brush is getting. That's good for me. You find some of these brushes aren't-- this one's quite opaque so you
can see all the way through it. Let's try one of the other brushes
in this one. See these ones are quite translucent,
if I click once they're quite faded out. So you might have to click
to build it up to the level that you want. I just keep clicking the mouse. So I'm going to go undo... because I want that one back. Brush size is going again,
can't remember how big I had it. Very big, 2,400. It will depend on the image that you--
the original size you made the document. And that's how to use Drip brushes. What I'm going to do now is add
some text and mix it with some type. Nothing exciting is going
to happen, I promise. So I'm going to type my name,
Dan, it's on its own layer. I'm going to pick a font color. I'm just going to zoom now because
I'm not doing anything exciting. Change the font size, 'Command T' on a Mac,
'Control T' on a PC. I want the drip kind of hanging over the D
like you saw at the beginning. We'll do on its own layer. Should name it, but I'm
being a rebel today. I'm going to grab my 'Brush Tool'. I'm going to find a brush that works. Now don't think all Drip
brushes are created equal. I found this one after a
little bit of searching... but you might find a bunch of other ones
that are just as good or better. I'm going to use this one here,
it's quite cool. I'm going to pick an
appropriate brush size. Get rid of him. Got my green. You can see--
I'll zoom in for you. So you can see I'm just
kind of lining that up... so it looks like it's kind of
coming over the edge there. Now this one here needs like a couple
of clicks to fill it up. Depending on the look. I'm going for this kind of very GIF style,
super hard contrast colors thing. And that's it, you can
keep adding drips to bits. You might add masks to certain parts
to get rid of chunks you don't like. And what I'm going to do is, on my
name I'm going to add a Drop Shadow. I don't know I feel like it needs it. It's probably a little bit too much,
back it off, back you down. Kind of cool, click 'OK'. Drop Shadow's really done it, Dan. And that's going to be us. Let's get into the next video
where I set a little bit of a project. I'll see you there.
80. Class Project - Dripping Paint Brush: How are you doing?
It is assignment time. I do wonder who watches these videos
all the way through, you're one of them. I promise you, you're one of the few... and you're going to be the one of the
people who get really good at Photoshop. So this class assignment is going to
practice our skills. I want you to take the skills
we learnt in the last video... and just switch it out for your own colors
and your own name. It's a nice simple one. You can see the difference between
this one and the last one. I added some more goop on top
of my name, you don't have to... but I added some kind of like... there was some behind, there,
and a little bit in front as well. There's something you might
take into consideration. It is in your class projects,
Word document. That's in your exercise files if
you want a bit more detail... but create your own document,
and just go to town with the drips. Pick a font and pick colors,
and share with me. Let's get on to the next video,
it's pretty exciting. We're going to do some cool Smoke Brushes,
and Masks, and things. It's pretty cool, I'll see you there.
81. How to create smoke with an image inside it using Photoshop CC: Hi there, this video is
going to take brushes... just that little bit further along... and we're going to use brushes as
an actual mask to mask through this galaxy. Well, a little bit of realism
with some black smoke. We're going to use cool
Smoke Brushes like that. Let's learn how to install them
and use them as a Mask in Photoshop. Let's open up our files,
let's go to 'File', 'Open'. Let's go to our 'Exercise Files'
in 'Brushes'. There's going to be two, there's going
to be 'Brush 04' and 'Brush 05'. Open up both of those for me. So we've got our galaxy, and we've got
our man sitting on the bench. So the difference between
this one and the last one is... we're going to be using masks
as well as the brushes. So first up we need to install our brushes. So with Photoshop open,
go to your "Exercise Files'. In here there's one called 'Smoke Brush.'. You can see it's a lot bigger in terms
of file size. I'll double click it. Hopefully now, in your 'Window',
under 'Brushes'... you've got - I'm going to
scroll up, twirl up... - Drips, and there's Smoke
Brush, twirl them down. So those are the ones
we're going to be using. So the way this works is,
we're going to grab all of this. So 'Brush 05', grab our 'Move Tool.'. Click, hold, drag, drag.
Holding down, let go. It's roughly the right size already
so I don't need to transform it. That's going to work for me. What we want to do is,
we're going to add a Layer Mask. We did this earlier on in the course. I'll show you kind of the basics first
before we do the smoke. So I'm going to add a Layer Mask to it,
and nothing happens. White shows everything through,
so if I grab my 'Brush Tool'... and I pick not the drippy brush,
just the regular general brushes... I'll use this first one here. Remember we did the before and after,
so black's my foreground color... and we kind of did that, we painted
half of it in, and half of it out. So remember, black, when I'm painting
on the Mask, hides things. I'm going to keep going until
I've covered the whole thing. To bring it back I use the White Brush. So I can toggle these, and instead of
using this big ugly brush... I'm going to use the Smoke Brush
to bring it back, and that's the trick. So we're using the brush to paint on
the Mask to show the galaxy through. I'm going to go to my Brushes Panel
and I'm going to find my Smoke Brushes... and pick a starting one. This one here is probably the
best one to get started with, '07'. The brushes will--
probably way too big. Click, click. It's way too big for what I want
so I'm going to lower the size. Using white I'm making sure
I'm working on my mask... not the image, working on this mask. And I'm just going to have a-- Click once, it's not
a very sophisticated tool. So if you do it twice they're going
to start looking like they repeat. What I like to do is, under 'Brushes',
there's 'Brush Settings'. It's just the icon above it. You can start messing around
with the rotation. It just means, when you do it again
it looks a little bit more random. If you've bought a brush or found
a little bit more sophisticated one... you might find something a little bit
better than the one that I found for free. Go back to 'Brushes',
I'm going to find something else. I'll try this one here.
It's going the wrong way. So in 'Brush Settings' again
you can go through... and say 'Flip X' or 'Y', so
it's coming out the other way. Now if it's got the target as well,
it means that the brush is way too big... and you can't see it, so I'm going to use
my square brackets to make it smaller. And there we go, wanted to kind of
look like it's coming out of its head. That's kind of cool. My brushes, that one as well, too big. Use my square brackets next to my P key. I want a bit more of a filler
in the middle here. So what I might do is actually
just go back to a regular brush. So 'General', 'Soft Round'. Still using white, but I'm just going to
fill in some of this kind of middle part... just to give it a bit of guts. Now it looks okay. What I want to do though is get a bit of
an effect so it looks like-- That interaction here through his head
is not great, just appears. So what I'm going to do
is create a new layer... and just use a straight out black brush. Because it's a silhouette
it's going to work. So 'Brush Tool', I'm going to go
to my brushes. Not these general ones, my Smoke Brush. And just like before
I'm going to find one that I like. Something a little bit different that
I haven't used yet, I guess that one. And I'm not working on a mask this time. I'm actually just going to
use a straight out black. So pick black for your foreground color. Pick an appropriate brush size. You'll see what I mean in a minute.
I'm going to click on his head. I might turn down the opacity
a little bit as well. Maybe coming out through a little strong. The brush there, I'm going to use
a different one. Maybe this one. Yes, that's cool. 'Brush Settings', play with the 'Rotation'. Now I'm just messing about because
that's the thing I wanted to do, right? I'm just now going to go through and
see if I can make it look a little... realistic, as the galaxy coming out
of somebody's head would be. That's kind of what I was
looking for, kind of. So we use the brush as a mask. We also used it just as
a straight out brush. And because they're on their own lands,
we can go through... and kind of either delete
the mask and start again... or build it up or lower the opacity. And that is how to do the
kind of smoke galaxy... coming out of my brain
effect in Adobe Photoshop. Let's get into the next video.
82. Class Project - Smoke effect: Hi there, this class project I've given
you a couple of example files... just to practice what we
learned in the last video. So we're using the exact same techniques. You open up, in your 'Exercise Files',
'14 Brushes', open up '05' and '06'. Just copy what we did in
that first tutorial... where we dragged the galaxy on. Masked it out and then masked it back in
using some of those Smoke Brushes. You don't have to use Smoke Brushes... you might go and find
your own brushes to use. I'm sure there's some better
Smoke Brushes there somewhere. Once you're finished I'd love for you
to share what you did. I haven't done this one myself
so I'd like to see what you end up doing. She looks like a very empowered woman
doing some empowering galaxy style stuff. You don't even have to use the galaxy,
or this particular image. It works easy with the silhouette though
if you can find another silhouette image. Does make life a lot easier
for this tutorial. But, if you're like me, you go
and find your own silhouette... you have to spend the first two minutes
trying to work out how to spell silhouette. Even Google "did you mean"
couldn't help me with this one. Enough about my spelling,
let's get on to the homework. Then once you're finished,
share it with me. And I will see you in the next video.
83. How to make a Long vector hard shadow in Photoshop: Hi there, this video we're going to create
the cast, kind of long shadow that we see. Very popular in UI design at the moment.
Google used it for a long time. Normally this is where I say
it's super easy, but it's not. It's super manual labor,
I'll show you why now. To get started we're going to use
just a new document, 'File', 'New'. We're going to make this one smallish.
We're going to make it 1000 x 1000 pixels. And we're going to click 'Create'. I'm going to pick a background color
just from my Swatches up here. You can mix any color you like. So I've picked it, and I'm going to go
to 'Edit', I'm going to go to 'Fill'. And because I got my background layer,
and I've got a foreground color selected... let's click 'OK'. So we're going to bring in some--
we've used it earlier on... we're going to go 'File', 'Place Embedded'
because it's Vector stuff from Illustrator. Anything from Illustrator use
the 'File', 'Place Embedded'. Retains all its coordinates,
and Math, and vectorness. You can just open it,
copy, and paste it. But that's not true Smart Object goodness. So in your 'Exercise Files',
there's one in here called '15 Shadows'. Open that up. We're going to use 'Shoe.ai',
that's Adobe Illustrator. You can do with anything,
we're going to do it with this image. I'm going to click 'OK'. You could do with anything,
it doesn't have to be shoe, it can be text. I shrink it down a little and hit 'return',
I'm a little higher there. So first up we need to select the shoe. We use our Quick Selection Tool. I'm just going to kind of drag around,
grab all the stuff. You could select the background,
and invert it, that would be faster... but there we go. It's a nice easy selection because
it is such a clean and crisp image. Now it's time for the confession. Now I can't find or think
of a better way than doing this. This is a little bit manual labor,
a little bit. If though you're watching
this, and you're like... "Hey, why doesn't he just do it
this way?" I'd love to know. I can't find it, I can't figure it out. This way it works, it's fine... but it's just, there's a little bit
of mashing of keys, which is fine. So we're going to create a new layer,
we're going to call it 'Shadow'. 'Shadow'. I'm going to fill it with black. So I'm going to go to 'Edit',
let's fill it with black. For contents I'm going
to pick black. Click 'OK'. I'm going to go to 'Select', 'Deselect'. So this is phase one. I'm going to put it just
underneath my shoe... and I'm going to now start
the button mashing. So on a PC, hold down your
'Alt' key on your keyboard. If you're on a Mac, look down
and grab your 'Option' key. Just make sure you're on the Move Tool,
won't work otherwise. So you're ready for keyboard mashing?
Down arrow, right arrow. Down arrow, right arrow. It's hard to see, it's coming out
like a Drop Shadow. What it's really doing is actually
just duplicating the layer... that we had selected every time because
we're holding down that special key... which is 'Option' on a Mac, 'Alt' on a PC. Don't worry, we're going to have... like one billion layers
when we're finished. So clearing the key down. Can't remember what was
the last thing I did. Was it down or across? Probably across, so down, across,
down, across... Yes, you're going to go mad, so what
I'll do is I'll get us to speed it up... and I'm going to go down across, down
across, loads of times. Ready? Go. I'm back. Did I get bored of that? I'm going to show you a
little trick to speed it up. So what I'm going to do is
I'm going to select this top one. I'm going to scroll all the
way down to the bottom... to my first shadow, there he is there. Hold 'Shift', and click this last one. Then I'm going to right click any of them
and say, 'Merge Layers', please. So now they are at least one chunk.
So now what I can do is I can duplicate it. Not worried about the layer names. I got two of them, and I can drag it out,
and kind of use my arrow keys... to tap it into position so I'm-- I'm kind of cheating if you know,
I'm double down, doubling down. So I'm going to select both of these now. 'Merge Layers'. Same thing again, I'm going to duplicate,
I'm using my little shortcut. Drag it down to my
little turned up page. Then get my arrow keys and line it up. I probably just need,
I need a couple more. I'll certainly use shortcuts now. The shortcut to merge layers is,
I will tell you in a second. Got lined up. Select both of them, it is
'Command E' on a Mac, 'Control E' on a PC. Should be the last one. Duplicate it. You're like, "This is painful, Dan,
there's got to be a better way." I wish. There probably is, I just
can't work it out... and I can't find anybody else that knows. You could be my savior,
and I could rerecord this video. So now I've joined them all up,
I got this long shadow. I'm just going to lower
the opacity of it down... to look more like that kind of
Vector stretched out logo. You're like, why didn't I just draw lines
off it and fill it with the Pen Tool. I guess pencil's bit out of the scope
of this intro course... but if you are a Pen Tool master
you can do it. The only trouble with it, is when you
have like internal compound shapes... it's hard to know what to do there. I find this technique just
works good every time... for that kind of long cast Google shadow. That is it for downing
and writing one zillion times. Sorry for that, let's get on to the
next video, it is less manual labor.
84. How to cast a realistic shadow on the ground in Photoshop : Hi there, this video we're going
to revisit this girl here... where we did the terrible Drop Shadow... and we're going to do a slightly less
terrible Drop Shadow in the grass. Same with this text here,
we're going to type it out... and can you see the Drop Shadow
cast in the bottom here? There's a cool little trick
for creating shadows like this. Let's learn how to do it now in Photoshop. First things first, we're
to go back in time. We're going to go to 'File', 'Open'. We're going to go to our '15 Shadows'... and we're going to open
up 'Cast shadows 01.psd'. Remember this, we did way back when. And we faked the shadow,
and it was okay using the Burn Tool. I'm going to show you a different,
probably more realistic way. So what we're going to do first up... is we're going to click on the
'Shadow Layer', and delete it; goodbye. With the Model Layer selected,
we're going to add a Drop Shadow to him. So we're going to go to 'fx',
I'm going to go to 'Drop Shadow'. And we're going to add a Drop Shadow.
What kind? I'm just kind of guessing here.
I'm getting the Opacity up a little higher. Distance, not too worried
about that, size wise. How blurry? Blurry enough for me. So you can copy my
settings or just adjust. You'll see we can mess around with
this quite a bit afterwards. So we're not particularly worried
about the exact settings here. We're going to click 'OK'. And this is the bit that people
don't know you can do. You can actually right click
the word 'Drop Shadow'... and you can go to this one
that says 'Create Layer'. The reason you don't know is because... that's a ridiculous name
for it, 'Create Layer'. What it does is, says, there's a warning. And what it does is it
separates that Drop Shadow. Nothing's changed here except
the Drop Shadow's now on its own layer. The cool thing about that
is I can move it around. I could kind of do that with the effect... but what I can do now is we
can start to pull together... some of the effects that
we learned earlier. So I'm going to put it just
underneath here. Then I'm going to go
to 'Edit', 'Transform'. And I'm going to use this one
that says 'Distort'. I'm going to grab the top one,
and flip it upside down. So there's the top meadow,
just kind of flip it over. Grab anywhere but the cross hairs
in the middle. I'm just going to drag it up
so it looks like she's underneath. Now depending on what you want
to do with a Drop Shadow... it's a little hard to see on the screen
because there's grass in the background. So what I'll do is I'll just
disable the background. I can't do it at the moment. So I hit 'return' on my keyboard
so that you can see it. Hit 'return', I'm going to turn
the background off. I've still got the Shadow Layer selected,
I'm going to go back to that tool. 'Transform', so that you can see
a little bit better. Go to 'Distort'. What I'm going to do is grab the top one
and maybe tuck it in there. So it looks like-- it depends on where
your shadow's being cast from. I can kind of drag these out,
often there's a kind of a spread. Grab this middle one as well. And it's up to you, kind of
how deep you want it to be. It will depend on the image underneath... but that's going to work for me.
Turn it on. And because it's automatically using
Multiply, it's going to work okay. I'm going to turn the Opacity down
a little bit to make it more believable. And we'll double back to this once
we've learned a few other extra skills. Maybe fade out some of this top stuff. So what we're going to do now is... we're going to do that Type
exercise you saw at the front. Let's go to 'File', 'Open'. We're going to open up 'Cast shadows 02',
click 'Open'. I'm going to grab my 'Type Tool'. I'm going to click once.
I've got a giant text, you type your name. I'll type mine, well I'm using Scott... because that's the fake brand
that we've been making.. 'Font Type'. Using my favorite Museo Sans... and I'm going to make the
font size not so ginomous. 50. I'm going to even spell the name right,
it's my last name. I'm going to grab my 'Move Tool'... and instead of trying to guess
font sizes I like to use... 'Command T' on a Mac,
'Control T' on a PC. Hold 'Shift' on the corners to get
kind of the right size that I want. Hit 'Return'. The font color, it's going to be white. And it's the exact same
principles we just did... but we'll add a little bit of extra. So with 'Scott' selected, I'm going
to grab my 'fx', grab 'Drop Shadow.'. Not too worried about it, I'm just
going to leave it like it was before. Click 'OK'. Because what I want to do, remember,
right click 'Drop Shadow'. Hit the cryptic name... 'Create Layer', don't worry
about the error. And make sure I'm working
on this bottom layer here. Called Drop Shadow. Move it around so it's just underneath,
then go to 'Edit'. 'Transform', and 'Distort' again. I'm going to drag it down. I want it to be like sitting right there... and I want it to flare out... because I've picked an image
that had a really clear Sun in it... whereas the last image doesn't,
so it still looks a little fake. This one here I'm trying to mimic
the sun rays that are streaming out of it. I'm going to nestle in there nicely,
and hit 'Return'. So I could play around with the Opacity
to try and make it sit in a bit nicer. And what I might do is, Multiply works... but let's try some of the other ones
just to see what it looks like. So remember the shortcut,
I have to be on my 'Move Tool'. I have to hold down 'Shift'
and tap the '+' key on my keyboard. The + that's up the top there
next to the numbers. And we're just going to cycle through
until I find something that I like. So I'm making something like this... like Overlay is working a little bit
nicer than Multiply, quite like it. And just to add a little bit more to it
I'm going to add a Layer Mask. We've done this a few times now,
we're kind of doubling down and practicing. And because it's white, it's not
doing anything, I'll grab my brush. I'm not going to use one
of my Smoke Brushes. I'm going to go to 'General'... and I'm going to use
just the soft round one. Size wise, it's really big. What is it? It's going to be
something appropriate. Actually that was a perfect size,
my caps lock was on. And if I use black-- So remember, white shows
everything through... but if I paint with black on it
I can start removing parts. So I clicked once on there,
clicked once there, clicked once on there. What I might do is turn
the Opacity down a little bit. So I'm going to undo those guys.
Undo, undo, undo. And just turn the Opacity down
to something quite light. Just build it up slowly, 30%. Clicking and dragging across the bottom,
clicking and dragging. See it's just kind of starting to nestle
in there a little bit better. Is it believable? It's text on grass. It's probably more believable
than that one. We can do the same thing though... with this 'Drop Shadow' selected,
I'm going to go to... my 'Move Tool', and play around with
my Layer Modes until I find something... more believable. So Overlay worked in the last one.
I'm going to crank up the Opacity. And with the Layer selected,
'Layer Mode', 'Brush Tool'. Slightly smaller brush. And I'm just going to work out
so it's not so clear. Just a little bit less hard core.
Is it better? It's definitely better. Is it photo realistic? It is not... but we've learned some cool
new tricks, the Drop Shadow... where we can disconnect the Drop Shadow... and then start messing about with it,
with different Layer Modes. We can transform it, and that will
lead us into the next video... where we start bending it. All right, thanks for playing along. I'll see you in the next video.
85. Bending or curved shadow under an image in Photoshop: Hi there, this video is all
about Bendy Shadows. Can you see underneath the image here,
I'm turning it on and off. It's this kind of bent paper look. The actual image itself
is actually perfectly square. It's just the shadow that you bend. It's a neat little trick you can do
when you're presenting your work... or uploading it to, say a web gallery
to kind of give it a bit of depth. Learning takes us a couple of minutes,
let's learn how to do it now in Photoshop. To put the bendy shadow underneath,
let's go to 'File', 'Open'. In your 'Exercise Files', under 'Shadows',
there's one called 'Curved Shadow.jpeg'. Open that one up. Now this is just a flattened JPEG
of something we made earlier in the course. Basically we have all the tools
and techniques already... for this one to work. We just need to combine them
in a special way. First thing we need to do is generate
a little bit more of a white background. So what we're going to do is we're
going to grab our 'Crop Tool'. It's this one here, fifth tool down. It's going to make sure
Content Aware is off... because I don't want to actually
extend the background... I want a bit of a white background. What we can do, in the top right,
just click, hold, and drag. Click, hold, and drag down
the bottom left here. Just giving myself a
little bit of extra space. Drag it so it's in the middle. Hit 'Return' on my keyboard. Now what I'd like to do is I'd like
to fill the background with white. So I'm going to make a new layer,
I'm going to put it at the bottom. I should call it 'Background'. Not going to lie to you, I wouldn't,
but you should. I'm going to go to 'Edit',
and I'm going to go to 'Fill'. Now I'm going to say,
fill with white. Click 'OK'. It's got a white background now. So with 'Layer 0' selected,
I'm going to add my 'Drop Shadow'. Just like we did in the previous tutorial.
There's only a slight change in this one. I've got a Drop Shadow, it depends on
how much of a bendy shadow. One thing that you might do
to save yourself some time... is get the angle to be
straight up and down. It's at 90, it's really
hard to drag to 90. If you hold down 'Shift' while
you're dragging it though... it does lock it into like 5° increments,
or just type it in, that's heaps easier. I'm happy with mine at 31 and 24. That was just what was left over
from the last tutorial. You can mess about with yours.
Let's click 'OK'. The magic happens here, you can
right click the 'Drop Shadow'... and say 'Create Layer'. Warning; you'll click
that 'Don't show again'. I'm a trainer so I need
to keep all stuff on. It's annoying, but it needs to be there
every time I teach somebody that's new. And it's only annoying for me. So with the layer selected,
the Drop Shadow selected... make sure you've got this one selected. Instead of going to 'Edit',
'Transform; we used 'Distort'... we're going to use 'Warp'. Remember, Warp's more like fabric. Distort's more like playing with angles,
Warp's more like turning it into fabric. What we're going to do is,
these two little dots here... are going to control the bend. So I'm kind of showing you what they do. I'm going to undo that,
I want them back to the bottom. And I'm just going to drag this one up
to about there. The same with this one. It really depends on how much of
a bend you want at the bottom... so I want mine just a little bit more. It will depend on where you started
with your Drop Shadow as well. When you're all finished,
click 'return' on your keyboard... and there's that kind of like-- makes the image look like
it's sitting on the ground. It looks like it's a little bit more bent. You might lower the opacity
of this layer here... just to kind of knock it back a little
bit depending on what you want. I'm happy with it, it's a cool effect. It's really quite nice when
you're uploading these things... to say a web gallery... and you want to kind of make your images
stand out when you're presenting them. We'll do a full section,
like a full category... on presenting work in the
advanced Photoshop course. So you want to go into like full mock-ups,
we'll do that in the advanced one... but for now it is Bendy Shadows. I love it. All right, I will see
you in the next video.
86. How to export images from Photoshop for print web & social media: Hi there, this video we're going to look
at exporting a few different ways. We're going to look at print, then we're
going to look at social and web... And then we'll look at exporting
for other Adobe products. You're sharing it between
your Photoshop document... between say Illustrator,
InDesign, After Effects. Let's start with Print. We made this earlier in the course. We want to get this out to our printer. Best way to give it to them... instead of a JPEG,
there's something called a PDF. I don't have to explain,
you probably know what a PDF is... but to get it out of Photoshop,
go to 'File', and we go to 'Save As'. It's a weird kind of place for it. And down here, we want
to find 'Photoshop PDF'. I'm going to stick it on to my 'Desktop'. I'm going to give it a name,
this is my 'All Stars'. I put the date backwards often
when I'm sending things out. So if there's any amends it's got
some sort of kind of code on it... so I know which version is what... and which version the amends were made to. The nice thing about this -
I'm going to click on 'Save' - it's going to freak out a little bit,
it's going to open up a PDF document. All you need to do is set it
to 'High Quality Print'... and turn Preserve Photoshop
Capabilities 'off'. You turn this off because,
basically with this on... it's just a Photoshop document,
it's not really ready for print. File size is huge,
and it keeps in the PDF... lots of detail that the
printer just doesn't need. So let's turn it off.
Let's click 'Save PDF'... and that now, on my desktop should be... on my desktop, 'All Stars. pdf',
it's small enough. You can see it's only 1.7 Megabytes,
and that can be sent to a printer. Now let's say I want to send
something else to print... but I just want, instead of a PDF,
they've asked for a JPEG. This is pretty easy, I'm going to do it
to this option we've got here. Made it, I want to send it out to
my printer, and they just want a JPEG. When you go for a Print JPEG,
it's different from a Web JPEG. They have slight variances,
they look the same... but one has a lot more data... like this one here is going to have
a lot more as a print document. So to do it let's go to 'File', 'Save As'. And in here let's pick 'JPEG'. Just the JPEG one, not any of the other
fancy ones, just want the plain old JPEG. Let's stick it on my "Desktop',
I'm going to call this one 'Bottle Island'. And if you don't like the dates backwards,
just a v1, v2 works just as good. Now if this is going to a printer... say I'm a photographer, I've
got this looking perfect... I probably want to crank this up
to it as largest file as I can. It's going to make the file size bigger... but it's going to retain
a lot of the quality... that I've done and put into
my Photoshop document. So a PDF is the all round-- just send a PDF, it's easy, it's emailable,
the file sizes are small. And what you don't know is that it
still retains a lot of the vector... that's in some of, say the logos and text. So will print nicer, but if
you just have images.... a JPEG will print just as good... because there is no vector, there is no
logos and text to keep that crisp edge on. As long as when you're saving that JPEG,
you use the 'File', 'Save As'. Not the 'File', 'Export', 'Save for Web',
or 'Export As', which we'll do in a second. Just make sure that quality slider
is dragged to the top. So that's the Print, let's look at
going out for Social or Web. So we've got this object here, and we
want to send this out to a website. And they've given us a specific size
we need to use. We looked at this before, we're going to
go to 'Image', 'Image Size'. At the moment it's way too big,
it's becoming quite a big file... and it doesn't need to be this big,
it's just way too big. So I'm going to make it-- they've asked
for it to be no more than 1500 pixels wide. So I've switched to 'Pixels',
put in this width, clicked 'OK'. Now I want to save it as
one of two options. If I want this background in,
it's going to work best as a JPEG. JPEGs are great for quality, and they
keep the file size really small. The one thing they don't do though
is transparency. If I want this background
off and I want... just the model on a
transparent background... this only happens generally when you're
going to a website and they want... they want to be able to see through
to other parts of the website... this kind of part to be invisible. So let's look at both, so with it on,
let's go to 'File', 'Export'. We’re going to send a JPEG, but we're going
to do it the proper way for Web. We're going to use the Export As,
doesn't seem as exciting as, Save for Web. But Export As has some nicer features,
let's go to 'Export As'. The cool thing about Export As is that-- You know how we went to
image size and adjusted it... we could do it in here on the fly... we don't have to do it that
way I just showed you. That was a waste of time,
we can do it here. Keep the original at the big size and just
adjust the size on the way through. We can pick a JPEG. Nice thing about this JPEG is that
it's different from a print one. Mainly because it excludes some of
the data that is only needed... for a printing document,
not for going online. So the file size is going to be smaller. Then it's up to this slider here,
on your quality. Whereas it went to print, we're not too
worried so much about file size... because we're probably emailing it
or sticking out on a USB stick. So we can keep it quite high. But we're going to a website,
they want it as low as you can go. So what you want to do is,
down here be at 100%. And then just go as low as
you were wanting to go. Watch this, I'll get down to like 2%. You might zoom in one more... because you can see it's starting
to do all that yucky noisy stuff. So how high do I need to go?
It's up to you, I'm like-- Some images will go quite low. And some images will have to be quite high
before they start looking bad. This one here, it's a professional
photograph, both of them. So I can go quite low,
so I'm going to go out to 100%. It looks pretty good at 40%. The file size over here is tiny,
it's 0.1 Megabytes. So I'm happy with all of that. You don't need to worry about anything
else here, click 'Export All'. Give it a name, I've gone to my 'Desktop'. This is going to be my 'Hair 01'. And it's going to be my 'JPEG',
click 'Save'. And that's the JPEG version. Let's say that I want to do
the transparent version. So JPEGs just don't allow transparency,
we go to the same place to export a PNG. 'File', 'Export', 'Export As'. And in here you can see
it's defaulted to JPEG. You see, it just fills in
the background with white. And it's not what we want,
we want this one here called PNG. And as long as Transparency is ticked... you can see, you get that kind of
invisible check board looking thing. Same thing, it's remembered the width,
I've got it down to 100 pixels. I'm going to click 'Export'. 'Desktop', this one's going
to be called 'Hair 02'. Click 'Save'. Jump to my 'Desktop',
and I'll show you those two files. On my Desktop, there's Hair01 and Hair 02,
can you see, the file size is different. The PNG is about twice the size,
a little bit more. Not a big deal unless
you're running a website... and if you were putting
that on my website... I wouldn't be happy because that's
nearly half a Megabyte, it's ginormous. But if I wanted the transparency,
and I needed it 1000 pixels... this is something I'd had to live with... but JPEGs are smaller, but don't have
transparency, so you might have to decide. Most of the time you're probably just
kind of using JPEGs... but there will be the occasion
that you'll need a PNG. Another thing you can do,
is straight out of Photoshop. There's this option at the top here
called Share. So I've got my image here--
see this little option here? You might not have it if you've got
an earlier version of Photoshop. Click on 'Share the Image'. If it's really big you'll have the option
of getting down to small. And you'll have to log in
to these different accounts. For me, I love Instagram for
this type of sharing... but for some reason it's not there. I bet you, by the time you're watching
this video it'll be in there... but you can do cool things,
like I can share with my email... I can share it with Twitter and Facebook
straight out of Photoshop. Basically it knows what to do. Gets the very best out of it
for those different platforms. There's a little sneaky trick. Let's look at the last option here
where we're-- We've made this, it's got different layers,
we've got the girl on the front there. Got a text behind it. And I want this now to go
into an InDesign document. So instead of saving out a PDF,
or a JPEG, or a PNG... it's best just to save it as a PSD. You don't have to save it at all. I'm going to save it to
put it on my desktop. So 'Save As', onto my 'Desktop'. Still going to be a Photoshop document
it's going to be called 'Soul v1'. Hit 'Save'. 'Maximize Compatibility', perfect. I don't actually do anything, just leave
it as the working Photoshop document. Then in InDesign, let's say it's this
cover that I want to replace. Doesn't make a whole lot of sense,
this is from the InDesign course. I've got an InDesign course if you
want to jump in and do that as well. What I'm going to do is go to 'File',
'Place', which is InDesign's Import. I'm going to find my Desktop... and I'm just going to use that PSD
that I was working on, 'Soul v1'. Click 'Open'. I'm going to click, hold, and drag it out. It's totally not appropriate
from this cover. Mainly because it's to
do with gardening... and now I have kind of a landscape
image to go into my cover here. Let's say that I decide that
that's perfect for me. So exactly what I needed. I'm going to right click it,
'Arrange' it, 'Send to Back'. I'll delete this original one
I had in here. Let's say I've got my image in, we've been
working on a Photoshop for the cover... but now I need to put it
into this longer document. You can see, InDesign has a
few different pages here. The reason why you just keep it as a PSD... is that InDesign will keep that link... and then when you do
adjustments in Photoshop... so let's open up Photoshop... and let's decide we're not using the
text now, we're going to hit 'Save'. Back into InDesign, and in InDesign,
under the Links Panel... there's this little
asterisk here that says... "Caution: Double click to update." Double click, and it updates. Jump back into Photoshop, we want the text
but we're going to change the wording. We got Dan because I like writing
my name all the way through this course. And I 'Save' it, back into InDesign. And this one here, double click to update. And there's giant Dan in the background. It works the same for most
other Adobe products. Illustrator, you can go to 'File', 'Place',
and put in the same PSD. AfterEffects, you can bring in. Illustrator, ready, set,
Illustrator, Premiere Pro. Adobe XD, Muse, rest in peace. Just use the PSD, is the easiest
kind of inter application format. So that's kind of a brief roundup of
the ways of exporting out of Photoshop. You and me are getting close to the end,
there's a few more videos, hang in there. Just a couple more, then green tea time.
87. BONUS: Software Updates: Hey there, this is a bonus video that I've made to share with you all the latest updates in Photoshop since the original recording of this course. Adobe are constantly updating the software so I thought it would be a handy way to keep you super up-to-date. I go through all the features here and I've put them all and what I think is the most important new features through to the more obscure ones towards the end of the video. Stop talking Dan and show me the updates. The best feature in Photoshop 2019 is something called Content Aware fill. You might have heard of that before but the workspace they've created is really cool. If you're following along, go to file open and open up these three, content aware workspace 1, 2, and 3. We'll start with one, the old version of content aware. I'm using the lasso tool here. I'm going to go around the outside. This has been around a while, you went to edit, you went to fill and you left everything by default, you clicked "Okay", and it was magic. So is really good at getting small parts of a larger image, especially nature, it's really easy. Where it gets tough is when you've got there's a larger object this part. It's proportionally quite big compared to the rest of the image. I've selected it all, use the same technique and hopefully it's going to break. You can see it's done an okay job, but you can see over here it's actually started grabbing the out-of-focus land here, and it's like, I wish you'd just grab this over here, and that's where the magic happens. I'm going to undo to activate this new feature, go to Edit and it's this one here called Content Aware fill. You might be like ''Hasn't it always been there?'' Nope, it's new. What happens in this case, is that you end up with this new workspace. This new work area. On the left is what we want Photoshop to sample and on the right here is your dynamically updated result. So its worse than it was. What we're going to do is we need to do is nothing actually. You should have these all by default, these tools and just point out the things you don't want included. So I want to say Photoshop, don't include any of this please, and your computer's going to stress out little bit because on the right-hand side there, as I'm painting this out, it's trying to dynamically update, spinning away this. Wait for this thing to be done, that's a whole lot better. If you're like me and use content aware fill to remove this little thing and then it removed it but replaced it with something worse, this is just a really nice little extra feature. Try edit fill first using content aware. If that doesn't work or you get a bad result, jump into here, go to Edit and in the content aware fill option. Other things you should know here on the right under fill settings, you've got this thing called color adaption. What I've found is, don't worry too much about the word color adaption. It's more like I will try using option A or B, and watch this update. It'll try again with different color blending modes, and you can just see whether you like it better or worse. They look much the same. Very high. See that, did a whole different job. So you get like a couple of go's at it and then yo can go back. None, worse. So I think our original default one was great. One of the other perks for this method here is you can see it says Output Settings, so it's going to output to a new layer by default, you can jam it into the current layer, and that's what the old version did. That was destructive editing. It's a new layer, I'll show you. Click "Okay". I'm going to deselect, and you can see here. It's actually on its own layer so you might actually run that a couple of times. You've got a couple of different options to start blending through. That's the new content away fill workspace. One thing I wanted to show you though, is content aware feels amazing, but there's a little tool that gets used in the really same purpose. You want to, say, remove these posted notes. Let's give it a go using our method from before, content aware fill. If we go to Edit, content aware fill. Use the workspace method. It's going to go through and you can start deleting lots of things. So I'm going to say no to the laptop. Goodbye. Watching it update over here. Got a bit of wood. So now the woods please, Can you can chase this forever and still get a bit of a murky result. Man it's getting more wood not less wood. There are just times where this magical little option is. Same Lasso tool selection and grab the patch tool. The patch tool is hiding underneath the spot healing brush. You just drag it. This one here is using the same technology but you're saying "replace it with this exact bit please", and then blend it in. Hit deselect. I find that gives you really good results. So it's the same thing. It's like using content aware fill. But you were saying right from this area, please. Both methods have their place. One is, you let the computer do the work, and with the patch tool, I find that sometimes it's really specific. Actually just use this bit. All right, onto the next new feature. The next feature is not really a feature, but it's something new and that they've updated and it's a little bit painful and we need to address it before we move on. Open up transform, I've got my logo layer selected. We use edit, free transform. Everyone does it. It's command T on a Mac, control T on a PC. We hold down shift to make sure all the proportions are fine. But it's the opposite now. If you hold down shift, it squishes it around, so I'm going to hit escape. What we need to do now is Command T or control T and just grab one of the corners and you don't hold anything down now. It's one of those weird changes that's a little bit hard to get used to. I've been using it for maybe about two weeks now and it's totally good, and I've totally got used to it now, and I can see why. Remember if you hold down shift you can break it, but in old versions of Photoshop, you saw people who did that with logos and images and because they're newbies, they're like "what? It's fine" and you're like "No, you've destroyed the logo". So by default they shouldn't be able to break it. But for you hold down shift, if you do want to distort it. It's the same here for this underneath layer if I'm using edit. Anything that has their transform bounds now has changed. Content aware scale, I love this feature, it's been around a while though, if we don't hold anything down, it scales it proportionally. So I want to actually just drag it this way. So I'm going to hold shift and use this right-hand side. Magic new background. Love it. If you hate it, you can go into preferences and turn it off. One tiny little update as well is the undo, the undo used to toggle. You hit Command Z or Control Z on a PC, and you hit it a couple of times, and it did this and went forward, backwards, forward, backwards. Then you had to held down like a zillion keys on your keyboard and hit the Z key to get it to do this one, the one that everyone wants. You wanted the one that said step backwards. That's changed by default. Command Z would just keep going backwards and undo right to the beginning. It used to be called step backwards. That's more in line with other Adobe products and just products in general. Let's get on to something more sexy like the frame tool. Open up from your the exercise files, frame tool 1. Really this is the second most favorite tool. Transform and undo options are just necessary things to address. Well, this is really cool. I've got this web UI mockup thing. Doesn't really matter what you're doing it with. Think of a frame as a mask. If you've used InDesign or illustrator, they use this technique all the time when you're doing clipping masks. So the frame tool is this one here. Now if these tooltips are driving you mad, they drive me mad. On a Mac, Photoshop CC, preferences tools on a PC, it's edit, preferences, tools and rich tool tips gone. The frame tool, I'm going to pick a square one and I'm going to drag from here to here. What you'll notice is the layers panel has this new set up here. That's what our frame looks like. What I'm going to do is grab my move tool, I'm going to duplicate to have a couple of versions of my little mock-up here. They're empty frames at the moment. To add things to this frame, you can drag them from your library. Got an image here, just drag them in. The cool thing about them is they load them proportionately, so a fill the frame. It's really nice. So you can drag them from your library, you can click on them and go to your Properties panel, it is there. You can say inset image from, you can get from Adobe stock or I'm going to use this from my local disk and I'm going to embed one. So I'll use frame Tool 3. You end up at the same position or, I'm not sure why I do this all the time, I like to see the finder window. Just drag from this straight into it. Anyway, there's lots of ways of dragging it. You can see how much nicer the layers panel is. There's lots of other ways of doing this. I actually use clipping layers, but I'm totally switching to frames now, let's have a look at another way of using it. Let's open up frame tool 5. Zoom in. We created the frame and then dragged in the image. You can do it the other way around. So I'm going to go to file, place embedded. I'm going to grab frame tool 6. A little bit big. Get it to roughly the right size. I've got an image and a want to drag a frame around it. So at the layer selected, I'm going to go to my frame tool, I'm going to grab the ellipse version and I'm just going to drag it across holding shift so it's perfectly heightened width. You can see there it just converted it into a frame. Now when you are working with frames, I'm going to go to the move tool, there's a way of working with it on the screen, you can double-click it. You can see it pulls apart, and I can see the two rectangles. This is my outer one as the image and I can work on it separately from my frame. If I grab the edge of the frame though, I can drag it around, I can resize it. Now there's shortcuts. I've used them. I find it's easier. Just over here you can see the white liner on the outside, so I can click on the mask or i can click on the image. I find that's just a little easier. With the image selected, I can transform it and scale it over. But not holding shift. If you want to move both of them, you can hold shift and click both of the things, just move them around, move backwards. What you'll also notice is that in here my layers panel, you can see it converted that image into a smart object if it's not already. You can also add a stroke to the frame, which is handy. So with the frame selected here, in my Properties panel, I'm going to double-click this to shrink it up. My Properties panel, I've got the stroke and I can decide on what color I want. I don't even know. Pick one Dan come on. You can pick a size and you can see I can decide whether I want it at the inside center or the outside. Surprisingly handy. Instead having like two layers with stroke effects applied to the top one or a separate circle image. Let's look at another way of using it. So go to file open and open up frame tool 7. It's not just rectangles and circles. You can use text, pretty much any vector path in Photoshop can be converted. So we're going to use the type tool and type in Daniel because it's my name and nice big font. Drag This. Okay. Once you've drawn the text, you need to convert it into a frame. It's no longer going to be editable text. Okay, so just right-click the word Daniel and go to this one here it says convert to frame. That works for me. Click okay, now you can use any of those techniques from earlier. I'm going to use this one. I'm going to use frame tool eight, get in there. Now you can see my image just happens to be not as big as the text that I had. Remember, it's easy to click on this Command T or control T on a PC. Don't hold down shift. You can hold down the option key on a Mac or alt key on a PC to drag from the center. It's kind of handy. Hit "Enter." Now you can't do some things with these frames yet. I mentioned though add them all. It looks like you can add a drop shadow, but it doesn't seem to apply. It's there, just doesn't work. There's ways around it, okay. You can just create a group, stick that layer in that group and that group can get a drop shadow. It's a workaround for the moment. I'm sure it'll get updated to be able to show these things. Click "Okay." Now if I'm destroying these things with a fix, I'm going to select them all I'm going to make them all a smart object and the worlds best filter and all the lanes, you know what it is, lens flare goodness. Job done. Anything can be a frame we've used circles, text, rectangles. I'll show you a couple more before we move on. I'm going to open up Frame Tool 9. Forget about the pen tool. When living life with the new curvature pin tool it's new from the last version, if you haven't started using it, it's amazing. Double-click for corner, click once for a curve, Double-click for corner, click once for a curve. Another curve. Double-click for a corner. Click once for a curve, double-click for a corner, once for a curve. Never sure what to do in the last one. I'm converted man from the pin tool to the curvature tool but draw anything doesn't really matter what you've drawn it with, the free form, the Pin tool. What you need to do to convert it to a frame is I want this frame to wrap around and mask at this background, It won't work if the background is locked. Just double-click the background. Layer zero, I should name it, never do. Click this top lay here and because it's just above it, if I right-click the word shape one, can say convert to frame. Click again. Magic. I'm going to jump to illustrate. I've got a shape I've drawn in here, okay, going to a select my little whale. Note that I've done an upgrade course, note that I've done upgrade 2019 features for Illustrator as well. I copy it from here, paste it into Photoshop, make sure it is a shape layer. Click "Okay" so that's big, transform him down. Here we go, click "Okay" same as before. Copy a locked background, double-click it, click this top one and right-click it convert to frame. Because it is right above it, it should mask it all in there. Remember I can work on the frame, move it around. All right we're going to image on the inside by clicking on this one, you can see the little white dots around it. Transform it, there is there, I can move it around. One thing you'll notice in this version, as well is when I transform pieces missing that target in the middle, click "Okay." I'll go back to the old version of Photoshop, maybe this you see that target there. It's perfect, okay, but I'm a teacher, like I say, "Transform something and move it." They all try and move this and they're like, "It's not moving". Okay, so they've got rid of that target. You can turn it back on in the preferences if you loved that little target, but it's gone in the latest version. See, gone. Now little notes about this, really it's only for images. The frame can evict some stuff and text in a list sort of stuff but you can't put editable text inside them at the moment. Shape players and text can't be the thing that's on the inside of the frame. It can be the frame, which is mainly images on the inside, images and the smart objects. The other thing to note is if you want to get rid of a frame says accidentally happened, you can right-click the layer any in this text here. There's an option that says, "Remove frame from layer" and it's gone. All right, let's get onto the next feature. All right the very next best feature number three, in my humble opinion, is live blending modes. This is a simple one. I'll show you what it does. For no good reason, we're putting an island in a bottle. Live blending modes two I'm going to drag it into live blending modes one, I'm going to rotate it around, not holding shift. I'm going to try and scale it into getting into position. A little bit too small. There we go now. Return and I want it to blend with the background. I want a land mode and if you've done it before you're in normal. Dissolve. Dissolve never works. Then you went darken and then you went multiply and you clicked on all of these and went bananas. But now I don't actually have to click on them. Look at this, I can just kind of scrub through and find one that works. Look at that. Which one do I want? Soft light, you'll do. Looks like it's under water now. That shortcut still works if you're using the crazy way of move tool, hold shift, hit plus on your keyboard, that still works but, don't need it now, it took me ages to learn that shortcut. Now, all you need to do is hover. Thank you, Debbie. Next feature, please. Now this next feature is called select subject. This would have been totally number one if it had come out in 2019 release, but they snuck it in halfway through 2018. If you're like a lot of people you didn't even check what the new updates were you just went, yes update. If that sounds like you, this might change your life. I've got slick subject one open, I'm going to go to select and this thing here should have an exclamation mark or super fantastic afterwards, but it doesn't, but just click select, click subject. Stand back. How good was that? Now been using it for a while now. It gets you 90 percent there. Sometimes closer and depends on how picky you are. But let's add a mask by clicking this little icon down the bottom here, Layer Mask. Look at that. Don't look too closely at the details but if you just need a rough cut, actually this is bigger than a rough cut it's, I'd say, 95 percent there. Now the select subject two option has a couple little issues that we want to show you how to really perfect the select subject. It's going to do a pretty amazing job getting the edges. We're going to add a layer mask and you can see the beard here needs some work and there's a chunk here missing. What we can do is use it in combination with the select and mask. Make sure the mask is selected not the image. Mask, click on Select and mask. Now what I've done is I've switched mine to be on black. Maybe it's a bit dark. Just to see a bit of a contrast. Now with this here, along here, okay, this tool here is the best. It's one nothing. Selected by default pick a size, this one here, you can see from the icon, it's really good for here. Basically what this says is go and do this again, please. Look at that. It's really good for edges of here, things that are moving for larger chunks like this person down the bottom here, this person that gap grab this top option, the Quick Selection Tool, set it to minus. Pick a size that fits. This gets rid of that. There is some bits in here probably just need a little touch up. Seated one and did them all. So good. You can see it though there's a bit of an orange hue around the outside of his arm here it's around the hat a little bit. There is a bunch of options in here and you can play around with them, they're great. I find the magic bullet though is this last option. You might have to twill down Output Settings and there's one here decontaminate colors. It's like this magic thing that happens watch click once. You also notice that more in the bead here, watch this. Orangey beard, not orangey beard. Orangey beard, not orangey beard. I get a bit close with my redefine edge for his face. Be a little bit more careful than me. Let's crank this up to 100 percent. Redefine, on, off. That looks more exciting. Let's click open and other than I selected a bit too much of his cheek, it's pretty amazing mask. It came out earlier in the year. It's select subject. It doesn't have to be people. It's just like a main object in it, so if you're doing product photography, it works great. I jumped out of the video and found this just to show you it doesn't have to be people. It can be bears. Stuffed bears. Select subject refer to this thing, hit the button and it's not perfect, but it's pretty amazing. Again, if you find the edges aren't perfect for you, click on the mask select range, grab this little feathery guy here and just paint the edges and somehow it just magically finds the edges of the bear. All right, now we'll finished with this tool. It came out earlier in the year, but I bet you you missed it. It's a brilliant tool, especially if you combine it with select and mask. All right, onto the next feature. All right the next feature is something called Quilt warp. From your exercise files, open up these three warp files, one, two and three. When we've done warps in the past, I'm going to combine these two. I want to mock up this magazine cover on this background and we just get it, edit, transform we've got to Warp. All right and it's pretty easy the old way, as long as there is a single plane. Now I'm going to spend like a couple of minutes doing this, just getting it looking nice, so I'll get it to speed up zoom time. All right, so not my best work, but it was quite easy as long as it's on single plane, it's nice. If you've used it much before, you know that if I want more control, I can add a bit more of a grid. Edit, the same thing, edit transform warp, I can jump to this kind of like three-by-three grid. That's cool, as long as it's everything's uniform, so my next example is going to require a little bit more customization and that's where this quilt warp option works in. In warp three, I want to get the vine to wrap around the text a bit. I need to move it up. First of all, I'm going to mask this background, probably in this one because it's one simple color. Let's select on the vine and use the handy dandy select color range. It's not a pretty good job straight up. You can click in here with the eye dropper and say I want that color. Then rise the fuzziness to say, pick his buddies pick the other bits of green and you can add the plus button to say and this and probably not as fuzzy anymore. Eventually you'll get something pretty good. Let's click "Okay." Not a bad selection. Let's add a mask. But now what I want to do is turn DAN on and get it to wrap up the top here. If you're doing this along with me, you don't have to use Dan you can use your own name. With the image selected, I'm going to use that same thing, edit, transform, warp and these are the new features they call it quilt warp. Well, they've told me that's what they've called it. But really it's this split along the top here allows you add your own custom ones. So you can either do it both horizontal and vertical, okay, and add a custom point which is cool, if you want to do that or you can just do a horizontal or a vertical and just get real, just simple controls. It's up to you. I'm in this case going to use the split one and I'm going to hopefully, I practiced this beforehand. Well, in all honesty, I try to make it look cool. I'm going to add two there. I don't have to use that grid, which can be really, even though it's only three by three, it can be really complicated. I'm going to raise these two up here because I want it to come up and look like it's over there and just a bit of messing around to try and get it to look real. As real as something like that can. You can tell the cool thing about it is that I can do a custom. You can do exactly how you want by adding as many points or as little as points as you want. Enter the confermate, that's the new feature. The new addition to the Warp Tool is adding custom points that call it quote warp. Before we move on, I want to quickly show you a cool little trick to really easy way to get the vine to look like it's going in and out of the text, that interaction that looks really cool. You need two versions, so I'm going to duplicate this guy. Two DANs. You have one above the vine, one below it. With this top one selected, add a Layer Mask, grab your paintbrush. Make sure black is your foreground color, pick a size. Just paint the bits in you want. It's quite cool. It's going to be behind that part and then in front of that parts. You can just decide how much peaks through. Look at this. I'm painting it white to get rid of stuff. Now I'm mofling. If you do to your vision, show me your example, use your own name. You can use my name. You might not have such a stretched vine, give it a background color, that was my white one there, and share it with me on social media. Instagram is the best one. I'm bring your own laptop or if you're on Twitter, I'm Dan loves Adobe. Take a screenshot and show me what you did and let's get on to the next feature. The next feature is something called Distribute Spacing. Up until this version, or you could do is select all of these people and say I want to horizontal, that's what no vertical. I always get that wrong. Line them up, but then I want to skip them out in individual spaces and up until recently, all you had was this. Distributes centers. That would work. But you can tell like this, it's using this enter of every object and because this one is small, this one is big, they don't have the same internal spacing. This is quite cool. I feel like this could be earlier in the tutorial now. I feel like it's always been a problem here, but now this thing is new. That don't look very fancy, but they distribute the gaps, which is very cool. Click on horizontal or vertical if you can work it out. That's why they've got icons for people like me. Now the spacing is even rather than the centers being even. It's a simple addition. It's been in things like illustrated for a long time, but we welcome you here to Photoshop. Thanks to you. Next feature. For this next feature, it's called symmetry painting. You might have bumped into it in the last version, it was hidden under some special features you had to turn on. It was a bit of a secret handshake to make it work, but now it's just built straight in and if you didn't lose the last version, there was some updates to it. The way it works is, I've got symmetry painting open, basically just an empty layer is all I really need. I'm going to grab any of the brush or a eraser tools or any other things you draw with. The pencil tool. We're going to pick up brush. Now, the sweet new brushes. They came out a while ago in Photoshop, not that long ago but you'll notice that the brushes panels being cleaned up nicely and under Dry Media and Special Brushes, Kyle Whips has joined Adobe and all those brushes came along with it and they are amazing. I'm going to use not the dry ones, I'm going to use wet, this one here. Ultimate inking thinking thin. The way this works is you pick a brush size and this is the new little feature here, this little butterfly. Basically you pop it down and you pick one of these. We'll start with just a vertical one. It's nice and easy. You get to transform it first. You really got to decide, do I want it to be this way or this way? I'm just going to leave it as it was. Strap it down and into. Now, I've got a foreground color and I'm just going to click hold and give you a sense of it. Use a general brush. But you get the idea. You don't need to see me draw. Not even sure what I'm drawing. There is a cool little mix here of both the symmetry which is cool, but also the brush and also the white com tablet all coming together to become a draws an artist best friend. I'm not sure what I'm doing now. That's just flipping across either side one. You can just turn it off when you're finished. You can actually just change to something else. If you finished that and you like actually I want to see what the radial one does. That's a new one. I'm going to have a segment count of what missing about. Hit "Enter" and you can draw around, and it draws ready one and got exsense for wrong and turn went off and say the last one, my favorite one. Instead of working on radial, I'm going to look at this Mandela, bring up to five, enter the size. Now if you don't have awaken tablet, a way to fake it and nothing to this I'm just changing the size this thing over here, this smoothing. If you lift up the smoothing to 100 percent, it's going to smooth at your lines and look a whole lot more natural and a little bit more hand-drawn than the jittery stuff you might get. You can also mess about with some of these ketchup stroke is cool and ketchup the indoor stroke can be fun. Same with pulled string, give them a go. You find what you feel is natural. Maybe with that and I'm just going to draw for no good reason. Now I'll speed this up because I'm just going to play around with it for a little bit. You're back. I didn't even know what it's doing, but if it's fun. But I got my little pen to some as you brush, you can see there's a bunch of different options in there. One thing you might find is like mine, and it runs a little bit slow if you picked some really hardcore brushes in some of these other ones that Kyles designed. It's just this whole symmetry things a little stressful on my machine. I really hope to have again [inaudible]. I'm going to do something amazing and like we did here and looks like a pie or ran over pizza. Let's open the glory. I even go my way comb out of the cupboard full. Yeah, you're welcome. I got this solution. Select them all, let's smash them down and you know what's coming. The world is a better place. Onto the next feature, right. We're getting close to the end. I'm going to throw these last three into this one amazing image. It's my favorite dog image. I'm going to dog image. Is one shared by the photographer, Charles Deluvio, sorry dude, on unslash, go check out him out and then we'll do a bit of a wrap up afterwards, nick steps thing. This one here, I'm going to use the pen tool. I've got a stroke, I've got a fill. I'm just going to draw a set of red glasses on him for no reason other than to show you this feature. If we worked on a document where, this is not too bad because the default is blue in the background is bluey, but it's quite thin and a little bit hard to see. You can now in Photoshop go to this little cog. I'm working my pen tool, you can say actually I want to see it a little thicker. I'm going to go to giant size. You can see it nice and easy and also pick a different color. A less high contrast one, rubber bands quite cool as well. If I start another shape over here, can you see it's actually connected to it. Illustrate it does that by default now. You can decide whether you like that thing because without it, if you forget, it's that like hoping, guess what it's going to do. If you're okay with the pen tool, then it's fine. If you're a newbie, tune that rubber banding on, it'll give you a hint. Back to this guy. I love him him so much. Three more simple things. I'm going to grab the brush tool, where is it there, and make a new layer and under colors here, this is the cube. We've been using this forever and it's handy, but I've made a handy here one. It's called color wheel. It just means you've got the hue all the way around and the loops back on itself, rather than that, we'd slider that stops it written in, goes back to read. This one here is just nice, easy way to pick the hue. Within that hue you've got the option of fully saturated and you can start washing it out all the way to white or darkening up to black and anywhere in between. It's common in some other fields. Make some of the video work and premium and it is just quite handy, especially I love the hue saturation and brightness. RGB is weird, especially when it's a slider but this here is quite nice. We're not doing it for anything else other than to add this man a little, it's going to be a mustache. Here a mustache on a dog there. That's one feature, the colorway. The other one is Window Workspace, lock the workspace already just turned it on. What it means is you can't move these or break them. Why would you do that? You might just like it. You might have got assorted, but really it's for people working on computers that actually are touch screens like the Microsoft Surface or the Surface Studio or the Wacom Cintiq. I'll show you one of them. This is the new one from Microsoft. I think it already got released or talked about yesterday. That's why all these images a day ago. We can actually work on these. It's a full operating system and you can actually start drawing on top of it and that can be problematic when panels stop moving around. That option is for you. Our last one before we wrap up and talk about next steps is view and this one here horizontal, this one here flip horizontal. Just flips it over just temporarily. It's not like done. It's not like edit transform, flip horizontal. It's just there to do quick checks. That was the end. I can't work out reason for this if I am honest. Adobe told me it's because out of slight to check symmetry and you might leave a comment if you like. Yeah, totally I love that idea. It's not finished, it's just like temporary flipping. You can work on it, but it is just a view change. Let's jump to real Dan to wrap things up. Say goodbye to the PAG.
88. Adobe Photoshop CC 2021 New Features & Updates part 1: Hi, everyone. My name is Daniel Walter Scott and I am a designer and an Adobe certified instructor for Photoshop. Today you and me, are going to go through all the exciting new features in Photoshop 2021 that just being released. I'm going to put them in order that I think are most important or exciting through to the, not the worst, but the most obscure of the new updates. We are going to have exercise files. You can actually play along with this. So you can watch it now and then download the exercise files to do some of these projects yourself. There'll be a link below for that. Let's open up the new version of Photoshop and jump in. All right, open up Photoshop and then go to file open, and we're going to be working with the file called Sky Replacement 01. You'll notice that a few of the files have these names afterwards. That's because Samuel Ferreira decided to share his image with the world under a creative commons license means we get to use it without having to pay for it and without a watermark. Thank you, Samuel, Dan Ethan, Tobias. You'll see a few of those through the course. All right, and the first thing we need to do, just make sure everyone's looks like mine in terms of the workspace, go to window, go to workspace. Click on essentials, then come back in here and go to recent essentials. Just so that yours looks like mine, and now we're going to look at the very best, most exciting, according to Dan, 2021 Photoshop feature and it is under edit, and is this one, sky replacement. Yes way. Click it. Kick back, relax watch the sky. Watching, it just removed it. Look at the mask, so good to the preview on and off, it will depend on, this remembers the last sky you've picked. So on the top here where it says sky, drop that down, and you can work your way through. There's a bunch of preset ones. So blue skies, you can click on any of these and watch, watching. Good. There is all sorts of amazing ones and they're spectacular, let's go for the spectacular. They've got to suit your image. One thing to note there is that you can click on these and actually drag them here so if they're not quite lining up, you can move them around. Okay, so that's going to be good for my one. Look at that. So good. Let's click OK. I want you to notice the layers over here. It's pretty non-destructive. You can turn that group off and it's all back to normal. But there's all these non-destructive masks, the backgrounds there. Lots of things you can mess around with afterwards. Let's have a look at the second version file open and get a sky replacements 02, Dan Freedman, this is Oakland, Harbor, in New Zealand. You'll notice a lot of New Zealandy beaches because that's where I'm from. But let's look at taking this sky replacement a little bit more detail. Lets go to edit, content no, let's go to sky replacement and BMA watch this guy. It is good. Let's have a little look. Let's pick one of the sunset ones because I want to show you something. Pick anything you like, move it around as you wish. But I want to show you this foreground adjustments that's happening here. If I click okay, you'll notice here we'll get our layer built up. But these two bottom ones here are actually doing a pretty amazing job. At the background if it was just cut out, would look okay, but unrealistic. These foreground colors, tinting them on, turn them off. They're actually taking the color from the background in our case from the sunsets and it's actually influencing this foreground. It's actually changing our foreground image to make it believable. The stuff that we'd have to do as professionals to try and get it to blend, but they're doing it automatically for us. Again, there is adjustments, so there is lots of masks. You can actually click on here, this little icon there, and actually work through the curves that Dove adjusted, each fine tune as you like, but it's pretty good out of the box for me. Let's opened up the third one, file open, let's go to sky replacement 03. Now I'm showing you this one because it doesn't work very well, or at least it needs a little bit of modification afterwards. Sometimes I see these tutorials online and they show me the only ones that were perfectly, but I want to share with you what you can do if it doesn't quite work. It's this over exposed sunset over here. Let's click sky replacement. Still does a pretty good job. I lift it up, try and match it up. You can see what's happening over here. So to get around that, you can play around with shift edge and fade edge. If it's consistent background, it's not going to work for us and I'll click OK. But because photoshop was clever enough to give us all these kind of layers that we can work with. See the sky here, you can see in the thumb now it dips down into this too far. What I want to do is work on the mask and grab my brush tool. This one here will be on your keyboard and in terms of the color, I want to make sure my foreground color is black. So over here, if it's white at the front, click on this little arrow here. In terms of brush sizes, little handy trick for you is, I'm going to scale it up. You can use your square brackets, it's up to you, but what I want to do is, if you're on a Mac, hold down control and option on your keyboard, both of those down, and then click hold the mouse down, left and right as the size and up and down as hardness. That's a sweet trick. If you're on a PC, you hold down the Alt key and you use your right-click weirdly. Click your right-click down, hold it down, and move left and right, up and down. I've got something about that sort of size, blacks my foreground color, and I'm just setting the opacity to about 50. Another little trick is on your keyboard, type two, can you see it changed the opacity to 25. These are the numbers that are just above your letters. Click on the zero is 100 percent, weirdly. Seven, going to go down to about 50 and then just brush this out. There's back and forth trying to match the rest of it. I might actually creep up into this area here, go a bit bigger, do the same on the foreground lighting color just to try and bring that back in. There's never going to be perfect on everything, but hopefully will give you some tools to make it extend through some of the more challenging backgrounds. Let's open number four. This one here Sky replacement 04, click Open. Want to show you a couple more things you can do so edit Sky replacement, let's have a little look, pick something different this time. It's cool. Already some mountains. Double mountains. All right. What you can do is shift edge. It's going to play with around with the connection between the foreground and background. It's new sky here so you can't play around with shift edge will let more of the background and what the original image in. You can go the other way where it gets really tight and starts overlapping. It would depend on your image. The automatic features, I don't know. It seems to do a pretty good job like for such a new feature. Good work Photoshop, any fade edge as well. Like how much of a transition is it pretty abrupt, or is there a nice big fade. Everything else, you can play around with the brightness of the sky, the temperature of the sky. Anything else? You can bring in your own skies. In this little drop down here, you can click on plus and bring in something that you have got, something of your own or something from a stock library site. You can build your own groups. You can do all sorts of cool things in here. That's cool. One last thing I want to show you is this tool here, the, I don't know what's it's called. Sky Brush. Click on that, and what you can do is these are very generic controls for the entire image. With the brush you can actually just like mess around with part of the image. Say this is one part giving you trouble, you can paint it on or off using plus or minus and it just messes with the edge. I'm going to crank it right up to show you what it's doing. I don't need to fix this one. I did find it hard to find an image that was broken. I guess it's credit to Photoshop that. This thing worked pretty good. I'm just wrecking it now. Hold plus or hold minus to decide which way it moves the foreground and the background color in. Again, I couldn't find an example that was broken enough for me to go and use a Sky brush. It's therefore like little touch ups. All right. I'm going to click okay, sky on, sky off. Well, good. Actually before we move on, I want to get you to do some homework. Think of it as fun practice. I want you to find a photograph of your town, your village, your city, your state, your country, whatever it is, and I want you to send me a before and after. You can find images from Adobe stock if you have a license for that. Unsplash or Pixels are great places for free images, or take one yourself, and I want to see it before and after you've replaced the sky. Can share it with me on Twitter, I'm danlovesadobe, Instagram I am, bringyourownlaptop, on Facebook, check out the group Bring Your Own Laptop Online. Join that group and make sure you share a before and after. I'd love to see what you do. All right, let's move on. The next feature is an addition to sky replacement. Sky Replacement is pretty abrupt. Maybe it's another word, but it just replaces the sky. Maybe what we want to do is just enhance the sky, adjust it. What they've done is they've given us a cool feature. let's go to file open. Let's go one called Sky Select 01, Jeremy Bishop. Open this one up. Let's say we don't want to replace this sky, but we do want to adjust it, maybe in our case we're going to add a bit of vibrance to it, lign it up. What we can do is, we can go to select and they've given us this handy selection. Click on that. Does a pretty amazing job. Look at that. I tested on a bunch of different images and it works really well. What are we going to do with that selection, we can go to adjustments and we can say, I'm going to use this last one here called vibrance. I'm going to increase the vibrance or saturation. It's up to you what you want to do. Given that selection, we can use curves, levels, whatever you want to do. It's probably a bit extreme. You can see down here because we had a selection, it's a layer mask is all very non-destructive on, off, on, off. We can use that exact same technique to do the inverse as well. We can go to select sky, and let's say we want to mess around with the foreground. We've got the sky selected. What we can do is, we can go to select, go to inverse and look, we've got the foreground selected. Go on. Will do the same thing, let's go to adjustments. Let's click on, let's use curves and do what you want. I make mine better or worse? Everybody's yelling at home, "worse. " It was pretty good to start with. There we go. Foreground, sky, all with the new fancy Sky Select. Next new feature. I want to close all these down, you can save yours, I'm not going to save mine. File, a handy trick for people that don't know, Close All, and you're like, "Can that be that handy?" Close All means you can do this. Apply All, don't save or click "Save", up to you. But I'm going to don't save them all, goodbye people. They all go at once. Anybody done the File, Close, Don't Save, File, Close, Don't Save, File, Close, Don't Save. Anyway, let's look at the next one, it's called Content Aware Trace. Now, for this to work, depending on when you're watching this, it's in something called the Technology Previews. It means that you can turn it on if you want to use it. I think you should because it's cool, but it's maybe not ready for the big time just yet. If you go to, on Mac, Photoshop, Preferences, and go to Technology Previews. If you're on a PC, go to Edit, you'll have Preferences down the bottom, and find Technology Previews. Yours might be on by default. If you can't see it in here, you see mine, it says, "Enable content-aware tracing tool." Turn that on if you can see it. If it's not there, it's probably just on by default now, because you're in the future and have just turned it on, its no longer a secret thing you need to turn on. Make sure it's on and go to File, Open. Let's go to the one called Content Aware 01, Jude Beck. Now, who is this good for? It's for people who use the Pen tool in Photoshop to either cut things out or make vectors. It's best to just show you what it does. It is hidden. Wow, it's not hidden. see Content-Aware Tracing Tool, it's mixed in with the Pen tool. Click, hold, hold, hold on this for a little while, go to Content-Aware Tracing Tool. Up here, I've picked, you might be using a path. It depends on how you're using this. I'm going to build the shape so you can see it on the video easily. I'm going to have a fill with no fill, and I'm going to having a stroke that is bright green and it's 10 pixels just so that you can see what I'm doing. What we're going to do is, already, if I hover above it, and I know Jason and Taylor, the editors, will zoom in so you can see because this is like thin dotted line around the outside. What you can do is look at this really, click once, it drew a line around the outside. Look how good it is. I'm good with the Pen tool, but I'm definitely not that quick or that good. What you want to do is, say, I want to add to it. You're going to switch to the next tool, and what it'll do is it'll say, I want to join it with this one, and then join this one, and back to this one, or back to that one even. Look at that. Look at what it did. So good with the Pen tool. Even if you are good with the Pen tool and you enjoy a good going around the outside and adjusting curves and handles, you've got to be a little bit impressed. I am, at least. Let's look at another option because I found an option that was on a nice clear back ground. If you're doing product photography, you can make those simple backgrounds happen to make your cutting out easy. But let's look at something slightly more complicated. Let's go to File, Open, let's go to Content Aware 02. This one here has a few compound shapes. We're going to use the same tool, and we are going to turn this on, Auto Trim. It's off by default, but mine will be off on default, depending on what Photoshop decide to do in the final versions. But this thing here, I find just turn it on and leave it on. Because what it will do is, watch this. I'm going to zoom in here. Can you see this fist shape? If I click on here, great and I go to this, and I go to this. Can you see it's going in, it's following that curve in there? It's being too clever for its own self. You click on that and you're like, "Oh no, what do I do?" If you go over here, you see the power of zooming in, can you see that line? What's that line there? Because this is like a little [inaudible] with that red line going [inaudible] I don't even know it's red, it's tiny. That's the auto trim feature, means, "You're going this way I'm going to delete all that stuff." You can go around, make sure auto trim is on, and just make sure it'll double back and delete anything. Now, remember, I'm on this plus, so I'm adding to it every single time and that's what I'm on by default. Now, you can see across here, it's giving up. It's like, "There's not enough contrast," it doesn't know what to do. What you can do, this is where this detail option is. Set to one percent. Watch this, I click, hold it, hold it, hold it with your mouse, click it down, and then drag it to the right. Can you start to see all those lines appearing? If you go too far, it's going to try and draw every single turn or change there. You want to find on your image, we had the happy medium of most of it is visible. Can you see all those blue lines appearing? It's somewhere in there. It's just being a bit more detailed with its look. You can see there now, it's got that piece. You might have to turn it up and down as you go around depending on how detailed it is. Mine is doing amazingly. Look, it just did [inaudible] Now, I'm going to be honest, it works amazingly well with this high contrast back and forth images. If you're trying to pick here out of hey, it's not going to work. At this stage, at least, and it's a pre-release version, it needs a really high, simple contrast. Another thing I want to show you is, we've been hitting plus to keep adding to it. It depends on what you want to do. I don't have to finish this off, I want to get close to here to make it a complete solid because then, I could go through and fill it if I wanted to. It's not what I wanted to, just to prove that you can. What I want is these shapes in here, I need to cut these out as well. I want to go back to this first tool and that'll just mean that it'll think that I am creating a new shape, which is what I want to do. I don't want it to try and join up with the old one. I'm going to go in here, try that one. Now, it started another shape, I have to go back to the plus. Otherwise, it'll keep creating new shapes. Yeah, that's something you have to do. You have to wiggle around a bit to find it, command, zoom in a bit. [inaudible] I'm going to have to fix that with a pen tool because it is very blurry. I don't blame you, Photoshop, that's a tough one. Any other ones? I should do the same thing in here. That was a one-click. Let me show you in the next one how to tie some of this stuff up. But you can see here, three separate shapes, I could be copying and pasting these into Illustrator, XD, I could be using the paths for doing masks. Amazing new feature for those people who use Pen tool in Photoshop. Let's open up the third one, Content Aware 3. This one, what you need to remember is that the detail is set to whatever it was the last time you used it. Mine got up quite high, I'm going to go back down to one percent to see how well it does, and I'm just going to give it a go. Often go as low as you can and raise it up if you need to. I leave Auto Trim on, I often just start with plus and leave it on plus, and I'm going to just work my way around. Wow, look at that. Nice. Anyway, excited. Let's go on. Let's click on this one here. It didn't quite grab in there, so I need that. No, there it was. This is a lot trickier one so there is going to be a few problems in here. Let's have a little look down here, still pretty good. This is going to be tidied up, regardless. Those first ones I gave you were really exciting and I made sure they were pretty good for the demo to get everyone hyped up and excited, but there is going to be tidy up to be done. Things like this, it's easy enough to go through and go to Pen tool and the Direct Selection tool. These are the two that you'll use, you can go in here and P for Pen tool. No one there, I do not need you. I don't have to hold anything down, turn it off. Same with that one, don't need you. But that one there didn't quite work. I'm going to grab my Direct Selection tool, drag it up this way. I'd argue that it's a pretty amazing starting point for this particular one, depends on how fast you are with the Pen tool. Anyway, that is Content-Aware Trace Tool, under technology previews for the moment but if you're watching this in the long future, it's probably just a tool in there ready to go. Next feature. I'm going to do my File, Close All, tick, Don't Save, and then go to File, Open. I want you to go to Daniel Walter Scott 01. It's me. Hello, me. I can be very neutral. I'm normally smiling, that's not my natural face, but I had to for this particular new feature. Let's check it out, called Filter, Neural Filters. These are scary good. Let's click on them. Let's click "Okay". It's using things like, they call it Adobe Sensei, think machine learning, artificial intelligence stuff. Now, yours will look different from mine, probably. I've got our pre-release version. You've got this featured filters which only has a couple. These are the ones that Adobe say, "These are ready and a pretty good." These ones down here which we'll look at in the Beta filters are all things that are really good but they're getting out early to us to have a look through, but there are some artifacts and some small issues with them. But as they get better, they will be moving into here. So you might have to look between these two to find the ones. The one I'm going to turn on first is skin smoothing. Click on that one, whoa, look at that. Now, this little option down the bottom is Preview on, off, on, off. Look at me, like 10 years younger. I look very soft. You can play around with the smoothness and how blurry it is to get something that works with your model. Your model might not be as handsome as this model is so you might have to crank up blur and smoothness. But for me, because I know myself too much, I know that that is a nice version of me, but you can crank it up as well and go full on fake skin. I'm going to turn skin smoothing off. Let's have a look at probably the first feature that I erased in to go and find under Beta Filters, turn on Smart Portrait. You might have to download some stuff for this, there might be a button here that says Download. Then you went straight down here, you went Hair Thickness, give me lots of it. Then kick back, relax. What's it up here? It's actually doing the work in the Cloud. Come on, I'll speed it up. I was hoping more here, more fancy, but it's pretty good. Preview on, preview off. It's pretty realistic though and it's actually gone back, safe to say probably about 10 years. Let's go maximum here. Now, you can see up here. Look at that, that's me with lots of more hair. It's pretty good. It's giving me more hair on my sideburns as well. This is in Beta so there are some glitches to it, but it's pretty amazing. Again, it processes a lot of it in the Cloud so that's getting faster and faster. Mine didn't take very long at all, but you might have to wait. If you've got a really bad Internet connection, it might take a little while for the Adobe servers to process what you're doing, but yeah, that's pretty cool. Stand here, thickness off. We'll go through all of them, we'll go through the ones that I thought were interesting and it's going to be happy and crank that up. That's why I've got a neutral face there. Look. Preview on, preview off. Holy smokes, it's me smiling and somehow I got nicer teeth than I normally do, I got pretty bad teeth. Have a look through those, they are getting better. I know that there's another release coming in the next couple of days which is going to fix the teeth to be little less out of facial. Facial age is probably the one. This is the biggest one. Look, it's me when I'm old. Totally is, that's going to be me when I'm older. On, off, on, off. Let's go the other way around. I'm not going to to spend too long on this. Do I look younger? I do. We're getting a facial age up. Let's go for gaze. Did it freak me out or did it get me excited by technology? Watch this, look to the right. Oh, I looked to the right. Now, I want to go through and just play with them all and have you along for the ride but we'll move along. The things I want to show you though is this little blue dot here. It shows you what filters you've actually applied so you can actually go through and apply more than one at a time, and this will tell you the ones you've got applied. Let's make sure my hair thickness is cranked up again, and then we'll click. One thing I want you look at down here is where do I output it to. Sometimes you want to output it to a new layer; could be a Smart filter, Duplicate layer, just know that that option is down here. I'm going to put mine on a Duplicate layer. Let's click "Okay". I think the gaze, it's done something with my eyes because I did my original image right, I'm using a ring light, and you can see that ring light in here, it's done a little bit weird there. It's totally me with more hair-ish. Let's move on. Actually, what I've done for you is I've given you more versions of me to mess around with in your exercise files. You have permission to make me old, mess around. This just a couple of other images you can play around with. Be respectful, but I'm totally happy and not offended and can take a joke, but just be respectful in terms of controversial topics, keep me out of those. Those are there for you to play around with and I'd really like to see what you do. I want to see some ridiculousness or subtlety, up to you, but have a play around with those other versions, and like before, send me what you do. We're at Twitter, @danlovesadobe, Instagram, @bringyourownlatop, and on our Facebook Group, join that, Bring Your Own Laptop Online, check out that group, I'd love to see what you do. While we're here, let's move on to the next one. So let's go to Makeup Transfer 01 and click "Open". I'm not sure what I was doing, but let's have a look at one of the other Neural filters. Let's go to Filter, and let's go Neural Filters. This is a few good things in here so it's worth spending a little bit of time in here to show you the best ones that I think. Let's go to this one here, let's going to Makeup Transfer. Actually, this is not a good one, this is just funny and it only takes a second. Turn it on, find your reference image. I've given you one in your files called Makeup Transfer 2. Open that one and give it a second. Oh, that is handsome. You can transfer makeup from one photograph, you can see here, to another one. Again, I'd love for you to go through, find your own images, references when you can use me as the model and put on different makeup. Let's click "Okay". I want to show you some of the other more practical ones. Look at the layers, it's left out there so you can do some other blending later on. Probably not the best image, my screwed-up face there, but anyway, it worked it out. Let's look at another actually practically useful Neural filter. Let's go to one called Style Transfer. So Style Transfer. Yes, I knew I can find it. Style. There it is, open. So Style Transfer is in here as well. Let's got to Filter. Let's go down to Neural Filters, let's go to the featured section, go to Style Transfer, turn the little tick on. You might have to download some stuff that might take a little while, and look at that, it matches the style over here. You can just work your way through, and it does a pretty amazing job at matching some of these styles over here. Some of them good, some of them bad. Look at that one, has a really good picture more. You can just click your way through. Let's do some Van Gogh. It's pretty cool. You can down the bottom here, do a couple of things for the one thing that I did quite a bit is preserved color so it actually preserves the original color and just picks the texture from it. It's pretty awesome. Let's have a look at another one. Let's click and so that one. So File Open. Let's look at one of the earlier images, it's called Sky Replacement. Where is it, Sky Replacement. We'll do Sky Replacement 01 and go to the same thing filter. It looks really amazing with landscapes. Style Transfer, click it on, try a few of them. Man, I love that combination, that image there. That's a Neil's beach, just waste of Oakland. Look at that, so good. Some of them are average, some are really good. Works really good with natural images. Wow, look at that connection of that and that. You can play around with style strength and brush size and all sorts of other things afterwards. Style Transfer, make a wave. I've used it a bit for making images just look old. I found one that works, I preserved the color and I was playing around with some of these ones to make it look vintage. It's a cool painterly teaks tree thing going on. There was another one that I liked, which one was it? Anyway, that's Style Transfer. I can click "Okay" and I'm going to look at opening up the next image. Let's got to File Open. This one's called Colorize 01, open that one up. This new feature is tied up in the neural filters again, but they should all be separate. No, they shouldn't, but I want to identify them as like different use cases. There's a coloring black and white images. You can do some amazing work under Filter, and the Neural Filters again, jumped down to Beta and click on this "Colorize" and just wait for a second. Look at that, I didn't do anything. Somehow, Adobe sensor went, "That's grass, those are people," it's pretty amazing. You can play around with things afterwards, but for that first one, it did an amazing job. Let's have a look at another one. File Open, let's go to Colorize 02, and let's look at something that's maybe a little bit more not problematic but I'll show you, get a bit more detail in there. Let's get a Filter, Neural Filters, go to Beta. Again, yours might be under this featured because I like it. I'm not sure what the problems are with it and it's still in Beta. Wow, look at that. One thing you might do is you might go, "I like that, but I want a bit different color over here." What you can do is a little bit strange now use, you click in here and you pick a color. They need to be very neutral. File on green, green for the grass. I want a yellowy green. I can go and use this because it looks terrible. Go way, way, way down here. I'm just clicking and dragging it here to get a kinder color, click "Okay". Then what you do is you click once on the thumbnail here. Can you see, it changed it over here. Look at that. You can add more than one color. Let's say that you want to make the sea here. Click it first, then go and change the color. You can see it selected, it's got a blue ring around it. I don't want a green sea, I want a turquoise-y color. Remember, subtle colors tend to work better. That is pretty amazing, let's click "Okay". Now, if you've downloaded the exercise files, I've given you a couple more that you can play around with, 03 and 04, have a play with those that's pretty amazing. Let's move on. We're going to leave the Neural Filters there for the moment. There are other ones to go play around with. Under Beta Filters, there's a few other ones that Super Zoom, zooms in and makes tries to clean it up. There's just ones that I haven't been able to find a good use for. Some of the ones down here are teases. If you click on dust and scratches, at the moment, what they're doing is they are deciding that which one do we make first for our happy Photoshop users. You click on this one and you tell them why you're interested, they'll stop building the ones that people are most interested in first. It's a pretty cool way of doing it. Have a look through these. Face to Caricature. Have a look through them, and again, maybe this will move around as they become a bit more finished and they'll end up a new featured option. So let's hit "Cancel" and let's move on.
89. Adobe Photoshop CC 2021 New Features & Updates part 2: I'm going to File, Close All. You've seen this before, Don't Save. Let's open up File Open and let's go to one called Pattern 1. The tools I want to show you, we're going to do four different selections here. A couple of them are from older updates for Photoshop that not a lot of people know about, and some of them are the newest features. Probably the biggest one from last year was this. It's double-clicked the word Background because it doesn't work if it's called Background and locked. Call it a name, I'm going to call mine humming bird, funny enough. You'll probably spin along. I'm going to double-click color just to close it down so it got a bit more space. You can see this one, look at him. As long as background's gone, the word background at least, click on this Remove Background. Look at that, I love the feature. You can see down here it said Layer Mask and I removed it. I'm going to go into my Libraries. I'm going to Create a New Library for us now. This is going to be Photoshop 2021 release. I'm going to grab my move tool, and I'm going to click Hold and drag my little humming bird in. That's one of them. Let's open up a couple of other files. File, Open. Before I move on, how was that? Was that good? Yeah. Move background, man, that's a cool one. Let's have a look at a couple other ones. We've got pattern one already opened, let's open up 2, 3, and 4. You can click the first one, hold shift, and click the last one to open up more than one document. You can hit Control+Tab on a Mac. I think it's on both actually, Control on your keyboard and hit Tab key. You can toggle through the open tabs, let's go to pattern 2. Already backgrounds is good. I want to show you another one, that is Select Subject. That came out recently as well. That's just a great way it goes through in length, it does a great selection. It's got a little bit of a problem here, I want to show you how to tidy it up. Let's first on the background layer, let's add a layer mask. It's got us there close. We need to remove these bits. With the mask selected, we're going to go to Properties, and go to Select and Mask. We enter this new world of select and mask, that toolbar changed in bits. The one I want is this third one down here, actually no, we use the first one. The quick selection option up here we're going to add minus to it because we want to get rid of stuff, and brush size. Who remembers what our shortcut was? You didn't write it down, did you? Hold down control option on a Mac, and then click Hold and drag left and right, up and down, or just left and right for this case there's no blurriness for this tool. If you're on a PC you hold down the Alt key and then click and hold the right, click on your mouse. Weird. I'm going to click once in there. It's their to do the job. I've painted that out, I'm going to go back to plus and pick a more appropriate brush size and just paint this in. I find it pretty amazing the way it can go through. I'm being very generic and vague with it and it's doing a pretty good selection. So I'm done here. There's a bit in here so you can just toggle the plus and minus. Leave it a plus, holding the option key on a Mac changes it from a plus to a minus. Can you see that? It's Option on a PC. Shrink it down, click once. Too good. Shrink it down, click once. check can drag that one. That first tool there is a really good way of once you've done a mask and it's good, like our select subject, but you need to touch it up, that first tool is a good starting point. Click Okay. Same thing with this one. You can name it afterwards, it's up to you. Move tool into the library, and I'm going to call this one, is it a pelican? I don't even know. Pink bird. I should have checked. We look at the next one, and another selection technique for you. This gets into some of the new 2021 features. Let's do the same thing again, let's go to Select Subject. Add a layer mask. You can see it's got some stuff around here. That one there is pretty amazing, the feet, but this wing needs some work. Remember, click on the Mask, go to Properties, click on Select a Mask. Up until this version, there was only the content aware refine. In here, they've added this next one called object aware. What it does is, can you see this tool up here, the here looking one? It's called the refine edge brush tool. What happens in this first version is you can click it and it works. I've just found an example with this is it proves it's very good, I'm going to undo that. It's this option here, object aware. Don't think this is better or worse, just try this one, if it doesn't work use object aware. I'm going to click Okay. The same thing using the same brush and I'm going to drag along the edge here. This is going to give me a way better results in this particular case. It's really good with here or things like grass, or in this case it's something moving. That's one of the new features here, you'll see object aware. Try color aware, and if that doesn't work move over to this other option. Let's click Okay and same thing with this one. What bird is this? I didn't check, so you are now a blue bird regardless of what you actually are. Let's get him in there. Let's open, remember our sweet shortcut, Control+Tab? Let's have a look at this one. This one here is another new feature, newish. If you are still using the quick selection tool, if you're still using the magic wand tool, you need to start using the quick selection tool. If you're using that but not objects selection tool, this is pretty sweet. Click on Object Aware. Actually, let's do the Select Subject because Select Object works and you're like it's not what I want. That's a too big a mask because it's quite detailed. But the object selection tool, watch this. I can draw a box around this guy and look. Give it a sec. Give it a second, come on. Look at that, it's done a pretty amazing job even got the foot okay. You can add to it. Let's say it's missed out a little bit of the head there. Actually, first we'll hit the mask to see what it did, it did chop a little bit of his head out. You can add to it by holding the shift key down so I actually add to that part there. Pretty amazing. Let's turn that into a mask, and let's grab him, drag him in. I want to say two cans, but I don't think he is. He is going to be two cans. There you go. I've got my birds and now I can show you another 2021 feature called Pattern Preview. To do it, let's go to File, New. Over here, let's type in, I want to be on pixels. So save yours to pixels if you want to follow along. I want it to be 500 by 500. Let's be 72 GPI, let's be RGB. I don't want art board on for this particular one. This feature, at least in my pre-release version doesn't like art boards boards. Let's click Create. Little white square. Before I explain the tool, let's actually just drag something in. Let's grab Mr. Two Cans and get him to our appropriate size, up at 10. I want to make this a repeating pattern because I want it for a fabric or background desktop wallpaper or something. Have you done it before? I've done it where you had to chop the top of his head off and stick it down here or export to some other program to do tiling. Look, you can go to Pattern Preview. He's our little two cans. I can move him around still. I can grab another one, get the right size. Pretty amazing now. If you've ever tried to do it, you are jumping around for joy, because this is a super cool. If you don't do repeating wallpaper pens, it's still pretty awesome. I'm just getting our friends in here, blue nilly. Who else is missing? Humming bird. Buddy, you don't fit. A little bit of overlapping is going to be necessary. All right, that'll do. This is just a view, it's not actually doing anything. It hasn't made a pattern for us. We still need to do that. It's just a way of viewing it. With it off, you can't see the overlap. To make it a pattern, we definitely need it on, pattern preview. You can see that two can poking out the top. Then we'll go to our pattern's panel. If you don't have that, go to Window and open up Patterns. I'm going to turn my background color off, so it's white. I'm going to just bend it. What I want to do is nothing, just click on this little plus. Give it a name, mine is Birds, hardly named birds. You can see there are repeating patterns swatch. Now you can go out to something like spoon flour or whatever you can. I've got wallpaper printed as repeating patterns. I've got wrapping paper patterns onto fabric, made cushions, that sort of thing. We can do it for some mockups here. Let's go to file, open. Let's go mockup. We'll open up mockup one and two if I can find it. There it is. Mockup one and two. These won't be in your exercise files because I don't have rights to give you these ones. But you can find a lot of Photoshop templates. You're looking for the word Photoshop templates. These are both from, I can't remember, I think they're from Envato Elements or Photoshop's Adobe stock. But what ends up happening if you find Photoshop templates or mockups? Let's look at this first one. Is that some a designer has gone through and mocked this up for you and all you need to do is adjust the smart object. It edit a smart object, this little icon there, it double-click it. It opens up in this new tab up here. I'm going to get rid of all of this. I'm just going to go, select all, and I'm going to go edit. I wanted to have a white background. Let me go to edit, fill even. Can't do it on the background. Have your layer selected in, here you go, edit, then get a fill. I'm just going to fill it with the foreground color. No, I'm just going to fill it with white. Then I want to apply my pattern to it. De-select it, I'm just going to click once. Look at that. Look at my repeating pattern. Set save then jump back to mockup one. Give it a second and it'll update. Takes a little second. Look at that. It's already bent around the sheets and it's all being faded in nicely. Some of the benefits of using those templates and a friend of practical use for a repeating pattern. Let's have a look at another one. The same with this one somebody has gone through and added the graphics and blended them nicely already. All we need to do is update the smart objects. Let's do this part of the hoodie here. Everyone does a little bit differently. I'm going to double-click it. They've added a safe zone so you can see where it all goes. I'm just going to create its going to go over the top of that layer again. We edit fill because I want it to be white background. Grab that and hit save and watch my design hopefully, update. Look birds. Let's do one more. We'll click on sleeve. I'm going to fill it again with whites, add the birds. What you can do is you can scale them. Can you see down here? It's an effect that's applied to it. You can double-click on the little icon here and say actually I want the angle would be different. You can move them around. I want to change this scale around so that they're are not so big and click okay, save. Watch my mock-up number two. It's already updated, look at that. There are lots of mock-ups around and templates around for things like stationery and websites and UI mockups for phones, they're pretty handy. The one thing that I did when I was messing around with this is when I did my graphic, is when I was trying to make my patterns, I turned off pattern preview and then made it and it doesn't, watch this, if I add it, it doesn't make it the same way. It's not repeating, so that needs to be on. When you're finished, you can turn it off. Let's look at the next feature. Let's go to File Open and one over one called Website should be at the bottom. This feature is one of those useful but not very exciting. It's not going to give me my hair back or maybe lose it less. Over here, look at that. There's a Triangle Tool. Me like, there's always been a Triangle Tool then. No, its new and exciting. It's just new. But have you ever tried to go and you're like why is there no Triangle Tool? You grab the Pen Tool and you drew a rough shaped triangle and it's not quite symmetrical and yeah, just live with it. Look at that, Triangle Tool. Fill in a stroke. I was going to leave it as is, look, we got a triangle, hold Shift, get like a constraint equal sides triangle. Not exciting, but things like arrowheads and triangles, it is, if you are into that thing. One thing you'll notice as well is that's new. You're like, that, what's that do? If you are from Illustrator, you'd be like, I know what that does, I can click it and drag it. Look at that, live edges, or at least live shapes. All the tools do that now. Draw a rectangle and you now have the option to go through on the object and drag it out. If it does disappear and you're like you've got to move tool and you're like, how do I get this back? You can either go back to the rectangle tool and make sure you have your rectangle layer selected. Or you can go into this Path Selection Tool and click on these guys and these guys. Let's switch to the Direct Selection Tool. Make sure in your Path Selection Tool where is my triangle? There it is there. We can adjust that afterwards. That wasn't possible before. You drew it and it was fixed there forever. Now, all these shapes are all updateable. Another new one in there, as well as the triangle is the Polygon Tool. You can drag him out, or at least I can drag him out now and change him because he's a live shape. You see, I'm scrolling down my properties. I'm going to double-click "Patterns". As you can see, I can crank up the sides to make it other shaped sizes. There you go. Octagon. Another one. Rounded corners. How much star happens? Oh, Star based. This is new for 2021. What was I doing in here? I was not meant to be drawing those two. I was meant to be showing you something good-looking, rotating it. I'm going to show you another thing. Let me get that in here. A triangle isn't here for no reason. Same reason the dots are here. But let's give it a fill of, I'm sure it's given no stroke in terms of fill. It was actually last year they built in a bunch of gradients that are actually good. If you dived into the gradients. I don't know, not in the last year, there's actually some good ones in here. Look at these. Go on. There's actually some decent ones in there. What I'm I going to be using? I don't know. That'll do. There you go. What we can also do as well is I'm going to duplicate them so we've got a couple. Look we're a visionary company. I'm going to select all three of them. Another update for last year's Photoshop that not a lot of people know is if you click on normal, you can actually just hover above them and they will actually show you the preview now of what they're going to be. Whereas before you had to do some secret crazy shortcuts, or just click one and go back to them all. These overlay, look at us, visionary. One of the new upgrades, which are weird upgrades but really useful is the Line Tool. You are like, that line tool's been there, you can't trick me. What it used to be though is it actually used to be a small rectangle, that's how Photoshopped out with lines. Now though it's an actual line that can be copied and pasted out into something like Illustrator or XD. It's like a proper one pixel line rather than just a skinny rectangle. That meant something especially when you are trying to output this to vector drawing programs and wind. Just the skinny rectangle and you can't change the stroke. Now, it's a legitimate stroke, but you have to take my word for it. Another thing you can do is you can reset the live shapes and these shapes. Let's look at our rectangle here. Let's say that you have played around with it and you want to set it back to normal, you can reset the transforms. Watch this. If I reset it, it goes back to its original size and its original rotation. That is new not very exciting but useful to know. It gets a little bit more useful when you're doing something like, where is our mockup? There's one here. Let's grab library. Let's grab, well, a hummingbird. Let's say we want to mark this out. It comes in at this size. I want to transform it down. But I wanted to mention the fabric, it's been around a little while now that you can use warps on smart objects, which is cool. But you get in here, like actually I want to try and bend it so it matches the fabric and bins around and does all cool stuff. If you haven't done this before, it's a great way to try and get your artwork to match your fabric. You can click and drag these and then play with these handles. Another trick that not all people know is you got to be very exact. Is I can go up here and say actually I want to add an up and down horizontal line. Watch this, let's say there's that fold there. I want to try and bend it so that piece there looks like it's oops, grabbed the handle. This is painful to watch. For some reason, my little touch pad here is not playing ball today. Anyway. Let's go to this one. You can start matching the fabric and you can add all these extra grid points as you need them to try and walk things to make it feel like it's going around the fabric. Alright, I lose points for that one, because this is a terrible warp. I hope you got the idea of what I was trying to do. The reason I'm showing you this is because, look, you can go to Properties, and get a Reset, and it resets the warp, as well as the size, as well as the rotation. You can undo all that stuff. Well, that wasn't possible before. It's terrible. I totally demoed that before I did my recording and it came out pretty good. Not that one. Well, the next feature I want to show you is it's one of these weird ones where it probably should be closer to the beginning because it is quite special, but it's not very exciting. I want this video to be exciting, to keep you watching. It's more administrative but really cool. I'm going to this website. It doesn't matter which one you're going to. Let's go to File and let's to Save As, and I'm going to save mine to the Cloud documents. This moves around a little bit. Sometimes it's there, sometimes it isn't there. Click on save to Cloud. If you've been ignoring saving to Cloud for a long time, you say like, oh, this is not how I'm used to working, I'm going to show you one of the perks of why you should be doing it. I'm going to clone. I'm going to call mine website V1. Click "Save". What ends up happening is, it's saving a version, well, the version onto your creative Cloud documents. It's saving it up there. There's always a local version that works fast, but the actual real version is in the Cloud. There's perks for that, because let's say that I make some changes and come along here and go, color, the background and let's change the background gradient to purple, looks good and we change some type then we working on it. Ready for this? No. It was a quick mock-up. Let's save it, and let's close it, and you're like, "Oh my goodness, I need to open it up again because I didn't mean to commit those changes." Have you ever done it? You're like, maybe if I open it up quickly, all the history will still be there. You're like, quick opened it up. You know that if you go to Window and go to History after you've closed something, that history is MP and you're like, oh, a sad face. But because it's a Cloud document and you will have noticed my actual working myself, there's not much different because it load real quick, didn't downloaded every time. There's some clever stuff going on in the background, but watch this. Different from history is Version History. Watch this. Look at this. It's a Cloud docs version, showing me all the changes that I made after it was saved to the Cloud. Back here before I change the color, this version when I change the text. How good is that? It's just like there's backup. Now what ends up happening is can you see version, I think if you're on a, I'm on a enterprise version of the software. I've got 60 days. I think, for everyone else, it's 30 days. Anyway, it's long. What ends up happening is let's say that you are getting to this point and you're actually like, actually, I want to mock this. What endlessly is background color change? It depends on what you're doing. It might be you've got, mock-up back from your creative director and, you've wanted to save it where it is before you move on. You don't have to do a File, Save As. Instead of V1, V2, V50, you can just add these little mock-ups. These ones here will delete these old versions, will disappear. You can go back to them after, in my case 60 days. These ones that I've marked by hitting this little bookmark, will never go away. They will be attached to the document and I can always go back. It's pretty amazing. I can go back to here and actually say revert to this version and we'll jump back. I go back to that version was there before, that is another option. This is the purple background. Nothing is gone. After 60 days, it'll all be gone, but if you mark a couple of them, you can always revert back to them. It's pretty impressive. Now, some of the hang ups that I know, at least, I had when I was starting with Cloud documents and, oh, bandwidth, slow Internet, I live in a rural area with terrible Internet, what they've done is, let's say that I do make a change for this. I add a type layer. What's happening is, I can't hit Save, but what it's doing is automatically saving it every, I think, it's five or 10 minutes covering for exactly, but it's always backing it up to the Cloud. If my laptop catches fire, there's always a Cloud version which is an amazing feature in itself. But what it's not trying to do is upload the whole PSD every time. I've added this ticks layer, just the ticks layer is being updated upon the Cloud version. There's just a little bit of bandwidth chugging through. Updating, if you haven't tried it now, my advice would be to give it a go now. It feels like a mature way of working and it means I can jump to things like my iPad, which has got Photoshop on it. Actually, let me jump to that real quick. This is my iPad. I even clean the screen for you guys. Face ID, well, I can't do my password because you're watching. Come on face ID. You got to see the back of my head ID. Let's go to document Clouds. What you'll notice is that, there it is there. It's already showing me a little thumbnail. When you click it, it downloads. Yeah. That was pretty quick. Now, that's the one of the big perks for using Cloud docs, especially jumping out to other devices, might be a different computer, home laptop, work laptop, and this case out to an iPad. In Photoshop, iPad is pretty cool. Now, I'm not going to go through this little bar button and click some buttons. But you've got layers, you've got your tools, not all of them, but it's pretty amazing what you can do in here. Let's change something obvious. Let's got to properties panel. Let's pick a font. Let's pick terrible fonts so that we can see the change. The Cs, the Cs are always bad. Korean new, Chalk Duster, Color plate, all bad, so bad. Let's go to font-size just so that we can actually see it really clearly. I'll show you how it updates on the desktop version. Yeah, let's over do it, just back out by hitting the home button. It'll start sinking. You can see that little blue thing there maybe. Yeah, give it a second, and there it is. It's done. Let's jump into the desktop version and I'll show you. Back at my laptop, you can see there it is there. Just because it was last used, it's just there and I can open it up. Yeah, I don't know what's happening, but it opened really fast. It must be syncing without me doing anything or it's just a really small change that it's quick anyway. It's fast, seamless, you would say. Remember that perk from before, Window, remember Version History, you can say, "Gulp." I want to go back to another version, but a version there. I'm going to restore, revert to this version please. There you go. My all big, ugly font is gone. Yeah, so that's the update for document Cloud for 2021 in Photoshop. Yeah, nice little process. Let's look at the next feature, which is actual pixels. So to test this, we need to open up a file. As the file open, so be in your Exercise Files, go to Actual Size. You open it up. There might be some warnings about fonts, just ignore all those. We're just after mainly the size. So in terms of the size, if I go to View and go to Actual Size, this is meant to be actual real-life, like legit real-life if to was to print it and hold it in front of my face. We're going to test it. I'm going to switch to the camera now and show you. This is a four. So if you're in the United States, you are going to take my word for it in terms of the measurements. I have already tested this on my screen and it totally works. I'd be interested for you to create like a new document, make it US letter, and measure it yourself. Let me jump out to the camera and let's prove its size. So what is Dan going on about? This. Have you ever printed something off and realized the font-size was too big or too small? So you need to do those soft proofs just to check fonts, whereas now, Adobe says if I go to View and I go to Actual Size, it's actually going to be a four. Little shortcut, if you tap F once and twice, goes to full-screen mode. I should be able to measure this now. Because it's a four, it should be 210 millimeters. It is I'd say a millimeter off, but I can live with that when I'm doing a soft proof this way, says the paper for printing. Actually, let me check it with an actual A4 sheet. You can see it there. I'm not sure you can see what onscreen, but it is about a millimeter off. I'll be interested to see how accurate yours is, so leave a note in the comments. If you're in the US, make a new document that is US letter or whatever you are used to and know the measurements of. Just let me know how close it is. Mine's pretty close, not exact, but close enough. Let's jump back into the computer. To get out of full-screen, just tap F again, so F once, twice, three times. There is a little loop. The next thing I want to show you is plugins. I was going to have to demo this because go to Plugins, Plugins panel. In my case, because I've got a pre-release version, there's nothing in here yet. Open it up yourself now that the software is out and just see what you'll find in here. Click on "Discover Plugins" and the Creative Cloud app will open and will hopefully give you some exciting new plugins for Photoshop. Plugins had been around a while. If you go to "All Plugins." There's been lots of Photoshop plugins for a while. But what Adobe are doing now and generally across all apps is they're trying to support plugins a lot better. Have a look in here see if there's anything exciting, but that is new, but even too new for me, so have a look at them. Let's turn back to the camera and discuss the next steps. That is going to be it everyone. I hope you enjoyed the Photoshop 2021 updates. Let me know if you enjoyed the video, if you liked the upgrades that Adobe have done. Let me know as well in the comments what you're, let's say your top three in order of best to third in terms of features. I'd be interested to know to see how it compared to how I ordered them in this video. I put the first one that I thought was best-first and worked my way through. I also know that I've done updates for the other Adobe products as well, so go check those out; Illustrator, InDesign, XD, Premiere Pro, After Effects. That is it. I will see you again in another video very soon. Bye now.
90. Adobe Photoshop CC 2022 New Features & Updates: Next up is the updates for Adobe Photoshop 2022. Hooray. The first new feature I want to show you is the Object Selection tool. This one here. It's been here a little while. It's amazing if you haven't used it, but they've supercharged it. If I click on it, can you see these little arrows moving around? That'll happen automatically. Watch what happens. Look, it's isolating it. You have to click and drag randomly. Now though, it gives you a little preview. I can click once and it made a selection. I can add a mask and some reason, we don't need to turn that into, maybe you have renamed the background layer to unlock it. That doesn't need to happen anymore. I'm not even sure when that happened. But regardless, we can make a sweet mask. It's going to undo, de-select, just click on this one. If I need to add to the selection, I can hold down my shift key on my keyboard and just click the second one here. There you go for those two. Now I'm going to add a mask. I'm going to undo, de-select. Let's say that I want this. This one here's not highlighting, but I can still hold down my shift key to add and just drag a box around the thing. There you go. Cool. Almost got it. It's got this little tab there that I want to get rid of. To remove from the selection, "Shift" is "Add" hold on the "Option" key on a Mac or "Alt" key on a PC to remove from the selection. Just drag a box around the thing you don't want. It can be pretty vague. It's pretty amazing. There you go. That is the upgrade to the Object Selection tool. If you haven't used the Objects Selection tool already, that's even more exciting. Next feature. The next feature is called Illustrator Interop. That's what they're calling it. Anyway, it's the way of working between Illustrator and Photoshop. Let's switch to Illustrator. We're going to use this polygon tool. It illustrates this function pretty well. I'm going to click, hold, and drag out a shape. Now, before you let go, you can use your up and down arrows to add or remove sides to our polygon. That's not the shortcut, it's just a handy trick. I'm going to get down to triangle. I'm going to let go. I'm going to copy it and I'm going to paste it into Photoshop. Up until now, if you've done it in my classes, you were like, "Oh, I know." Smart Object is the correct answer." Not anymore. Layers is often better at the moment. Layers is going to give us this little bit of extra stuff. Let me show you. Because there's nothing wrong with Smart Objects, but if you've used them before, you have to jump back to Illustrator to adjust them, and then back in the InDesign. That is going to be solved by Layers. I brought it in. Where is it? There it is. I bring it to the top. The difference now is, it's still vector, which is one of the perks of the Smart Objects. But if I go to properties panel, can you see all of the goodness has come through? Look, how many sides? How many sides are? I can still adjust the fill or the stroke. I can remove. It's giving me all that control that I used to have back and forth between Illustrator 4. Now we can do it straight in Photoshop. Let me make mine this right height, 300 by 300. Look, we can change the star inside as well. There very easy. How many sides do I want? Fifty? Star best. I can switch my libraries, pick one of my colors. Man, easy. That is Interop with Illustrator. I am going to put in a position so just goes. Now it works great for these simple shapes. I'll show you one other simple shape. Let's say that I draw a rectangle and that I play with the rounded corners or just click on one of them and adjust one of them. If I copy and paste this ugly shape into Photoshop, the rounded corners come as long as I use that Layers option. I can start going. These are ugly, but let's have a look under properties all those rounded corners I'm hoping under appearance guide, mostly here. I can adjust them all together, I can unlink them. Here we go. Some of those primitive shapes have all the controls. But what I've been using this for as I want to show you. Actually, there's no connection between these now so I can delete them. I don't need them. It's a one-way street. What I'm going to do now is I'm going to grab my pin tool. I'm going to have a streak or fill. I'm just going to draw a little squiggle that I want to use. Here we go. I'm going to use my width tool just to get some squiggly thing. Now, I'm going to outline this. I'm going to go to object, I'm going to go to path, and I'm going to outline the streak because what I want to do is I'm going to copy it and bring it over into Photoshop. Actually, what I might do before I do it is, can you see when I outlined it? It's got lots of curves or anchor points. These are fine. I really love this tool in Illustrator. This is not new for just came out last year. They upgraded this, but you go to simplify. Look what happens. Look at that. It's only a couple of paths. You can decide on how simple you want it. Let me go to Automatic. It smooths it all out and gives you just enough handles to control this quite large shape. Anyway, I'm going to copy and paste it into Photoshop. Make sure it is that new Layers. The cool thing about this is I'm going to switch to my direct selection tool. It's this one here or the A key. Can you see all the anchor points come along if they're right? Again, I can still color. I can go to my libraries. I can pick any of the colors from in here. I'm just going to jam it into the bottom here. You wait there. I've got it in. I've got it where I want it. But you can still see it's poking out there. But remember because I've brought it through is this Illustrator Interop or that Layers. I can select on it here, grab my direct selection tool or the A key and watch this. I can click on this endpoint and look, fully editable. Beautiful. That is Illustrator Interop with Photoshop. The next feature is an upgrade to gradients. How do you upgrade a gradient? Well, it's when it stands off looking like that. Green at one side, red at the other. Terrible gradients I know. But look at this mud in the middle. Up until a few hours ago when they release wind, that's what you had to do. If you're like me and you've got gradients that you need to fix, you end up adding noise and blurring and all sorts of fun stuff. But they've done it. That's the scientific way of doing a gradient. But you end up with this non-beautiful stuff in the middle. What they've done is, when you're using the rectangle tool, I'm going to make a new layer here, so our rectangle tool, the Gradient tool. You can go up here and the method now, you can use perpetual or linear, I don't know. They are some algorithmic creation thing for gradients. Either of them seem to work beautifully but watch this. Ready? Same gradient. But look in the middle there. It's not mud brown. It is beautiful orange-green. I used this green and the red one because it's the most obvious one. But if you've ever done gradients in Photoshop and had some undesirable results when they mix, just go and pick different methods, either linear or perceptual. If you're working on a company that uses green and red as its colors, well, that's a real shame. But now you get to do better gradients. Not good gradients, better gradients. Next feature. The next feature is called harmonization. I want to combine two images. I'm going to grab bits of this disk and put it into this table here. The coloring is so different. Let's grab something from here using our sweet new object selection tool. I'm holding "Shift" remember, grabbing a couple of those and I drag around all of these, simple as easier. Just to drag a box around a bunch of stuff. Let's get going. It's not a pretty good job. I'm going to mask it and then I'm going to, it's missing a bit. Back here, hold shift, grab that chunk too. It's getting there. Add a mask and I'm going to bring it to this other document here, dump it on. It's the wrong size. I'm going to shrink it down. I'm going to hold "Shift." Getting it. I don't know, proportionately, okay. You'll be able to see what I'm doing. There you go. It is on the desk, but it's the wrong colors, you can tell. It's just this slight blue tinge here and it's got this warm, cocky thing going on over here. What you can do is with your objects selected, not the mask, the thing you want colorized. You need to have another layer that you're trying to match to. Then you go to filter and it's under these sweet new neural filters. They came out in the last version and this bunch of cool stuff in here. The next few features are upgrades to this. It's this one here called harmonization. You might have to click on it and you might have to click "Download". But once it's downloaded, you can turn it on. To get it going, you need to say you, the layer that I've got selected, I would like to match the background point. Give it a second. Wait for it. Wait for it. Wait for it. Look at that. It started pulling colors from all in here and matching it up. Look at that. You can turn it on and off. You can decide on the strength. You can make adjustments here as well. Do you want the saturation up, down, left, right or leave it up? It's just a really great way of trying to match background with foreground. That is harmonization. It's given me a separate layer here, I can turn on and off. The little hole in my mouse there I need to fix and the shedders really need fixing as well. Let me quickly do that. All right. That my friends is how to over use the burn tool. If you haven't done burn tools, I use the burn tool for shadows. It's generally the most believable way if you take your time and not rush through it. There you go. Before color, after color. It's called harmonization and it's one of the new neural filters. Another new but similar neural filter is being able to switch color from one to the other because out of these two images, I'm going to use them in a series and they're just two distinctly different color. I want to get them to match. Before we do anything, I'm going to go to Window Arrange and just sit them up too vertically, just if you haven't done that just handy. Two separate documents open that have to be in the same layers stack. I'm going to be working on this image here. It's got selected. Go back to our same neural filters. Filter, neural filters. You'll have to turn it on. It is called color transfer, turn the little button on and there's some presets and you can say, I want to make it look like this one and it's pretty cool and it does a good job matching it, but what I want to use my own customer because I want these to be clearly together. I can say you, I can pick from this other image that happens to be open. Give it a sec and be ready for greatness. Ready? The colors of the air, the brightness is a bit weird. I'm going to say preserved the luminance scale, the light of the original one and ready, gets even better, so good, look at preview on, preview off. You can see how now I could use this in a consistent series of images. Color change's better. Next picture, but before we go on, you might be stuck with two windows up and you're like, help it's too open. Go back to Window Arrange and let's go to consolidate old tabs. We're going to be working on this one here. I'm going to show you this other last neural filter upgrade, so filter neural, filters. You don't need anything open or you can, but in this case I want to go to landscape mixer. You may have to download it. It takes a little while to download, then you can turn it on and then you can just change the season. Watch this. Oh my goodness. It's winter time. Watch this; on, off. Wow. It is crazy good. Let's look through a few of them. Oh my goodness. After, it's fantastic. I can't believe it. I'm just going to switch to custom and instead of selecting an image like we did before, let's make it more wintery. Before, after, it is wintery, full-blown winter. Wow. On, off. Let's do one more. It's now spring, summer, spring, spring with a sunset, one more, last one. It is too good. I love it. There's the landscape mixer, let's get onto something else. It has been far too long in here. This next feature is probably it's isn't the best. It's not the sexiest of updates, but it's probably the best for me as a practical professional designer. What you're looking at here is the web version of my Photoshop document. Hey, I'm pretending to be the client. The client can add a pen and say, here's some useful feedback, they can submit it, it's pinned to the document, which is nice, but for me as a designer, look what I get. Oh my goodness. It's in here and it's marked up in the right place with some great feedback. Adobe is calling it Share for Commenting, which makes sense and I don't know, It's amazing. Let me show you how it works. To make it work you need to, the important part, it needs to be a Cloud Document, the PSDC. If you've been avoiding using Cloud Documents now might be a good chance to move over. Let's say you have got just a normal Photoshop document on your hard drive, you need to go save as and you need to save it as a Cloud Document. If you've already said, "Hey, I don't want to do that." Save on your computer. What you can do is you can see this little option here, you can click "Save Cloud Documents" and it will get it going again. It needs to be saved in the Cloud, already done mine. Then up the top here, you can go to this option that says, "Share document." You can decide in here. When I'm sharing it, I can invite people, we're using the email address or I can just create a link and copy the link. Just make sure when you are creating the link, in this case, I want commenting, it's the exciting thing that I like about this. You can either copy it or email it to them or send it via socials or slack using the link, either way. This is where that link goes. This is what your client or stakeholder sees and they can comment in here. They'll need to sign in with an Adobe ID, they can use like Gmail or Facebook, whatever. They don't need a paid account. But I can grab a pen. I'm pretending to be my own boss. I can go in here and say something really useful. Here we go. I can pick my pen color because it's super important. I can submit and now back in Photoshop, fact being then the designer, you're like wow, edited up here. Watch this, it's got a window and got a comments. This is new. Click on that and give it a second and there it is, making more sushi stuff. I can do the regular commenting stuff or I can say actually I've resolved this or maybe I can reply and say, no problem. More solution is coming up. Here we can resolve it to get rid of them. There is some more filtering down here. We can hide the annotations on the document so we can just read them and over here under filter comments, we can decide who from, at what time, the different statuses. Very exciting. I don't know. Maybe it's just me, but you probably, hopefully there'll be a bunch of you out there as well. They worked in larger teams that were like this, it is brilliant. Instead of doing put, I don't know, I just put A B C's in the corner, you're like, okay. I like the top one and you've seen a bunch of attachments and you don't know which one's tough. This one is a lot more direct and I don't know, clear for me is the designer and both the other person. Let's make this little change and the cool thing about it is let's make it more sushi like there. Anyway, I've done it and I can save this. Because it saved in the Cloud, what will happen and the link version, they're you go, the little communists being resolved and look more sushi. It's got the blobby, but you get the idea. You're not working from these like string of emails where people are like, "Hey you haven't done it," and you're like, "Have you checked your updates? Have you checked the latest email that I sent you with the cryptic subject line? " We've all done that. We're just working from one source of truth, let's call it, because your Photoshop document is saved in the Cloud, this thing updates and now we've got commenting and it's in illustrator as well, looks the exact same way, window comments and we had the same interaction. All right. That is it for 2022 updates for Photoshop. I hope you enjoyed the video and all the new updates, some exciting things in there. All right. That is it. Onto the next video.
91. What next after your Photoshop Essentials class: Hi there, you made it to the end.
I am very proud of you; it's a long course. In this video we're going to talk
about what to do next. So you finished the Photoshop Essentials. The easiest step might be going
to the Photoshop Advanced Course. So yes, you could do this one,
and that one next. Let's also talk about, like maybe
industry specific next steps. So if you are a photographer... you might find that the next step for you
might be something like Lightroom. So Adobe Lightroom is very-- it has a lot of similar
features to Photoshop. It's not as broad in terms
of its manipulation... but it's twice as good at the organization. So when you're filming as a photographer,
or shooting as a photographer... you end up with like
hundreds of photographs... and that kind of managing
and organizing... is where Lightroom really shines. Plus dealing with Camera Raw. So that might be your next step, Lightroom. If you're in the
more graphic design space... you might go to Illustrator or InDesign. I've got both courses for both of those
in the Essentials and the Advanced. If you're more in the digital web,
UI app space... you might go on to-- I've got a Photoshop specifically for
using it for web and UI app design. I throw in all of those,
because they're interchangeable... not interchangeable, but they're
in the similar sort of zone. So if you're going to be using
it to make websites or apps... then you might check out that
Photoshop for Web course. You also might look at my Adobe XD course,
and that is experienced designer. And that's for people who, say you
manipulate your photographs... get them ready in Photoshop... and then you lay them out in a website
or an app using Adobe XD. The perks of that is that... XD takes a lot of the work of all stitching
it together into a working model. We saw in an earlier video,
I showed you my mock up of a website. XD can actually add the buttons,
and actually make it work for a prototype. It's not a full website,
but it's a prototype. Also if you're in that web space... I've got Illustrator for
UI and Web Design as well. A lot of people use that instead
of Photoshop or XD... it's up to you in your skill base. That is the end of this course. It was a good one, right?
It was a long one. And congratulations to make it to the end. I know from the stats
that not many people make it here. You've made it, we're here at the end. I'm afraid nobody makes it to the end,
but if you ever do it, thank you. So I'm going to wave for a while... and I hope to see you in
another one of my courses. haere rā
 Daniel Scott, Designer & Teacher