Stained Glass Butterfly & Pet Portrait
This was a great beginners class to stained glass! I used smaller pieces of scrap glass that I bought from a local glass shop.
Gluing the pattern piece to the glass didn't work well for me. When I took the piece to the grinder to smooth the edges, the water soaked through the paper making it soggy/disintegrate, and then started washing away the glue and made the piece really slippery. I used printer paper, so maybe that wasn't the right material - but it's what I had available.
Here is the butterfly all cut out and foiled, ready for soldering. I really love the iridescent sheen on the body!
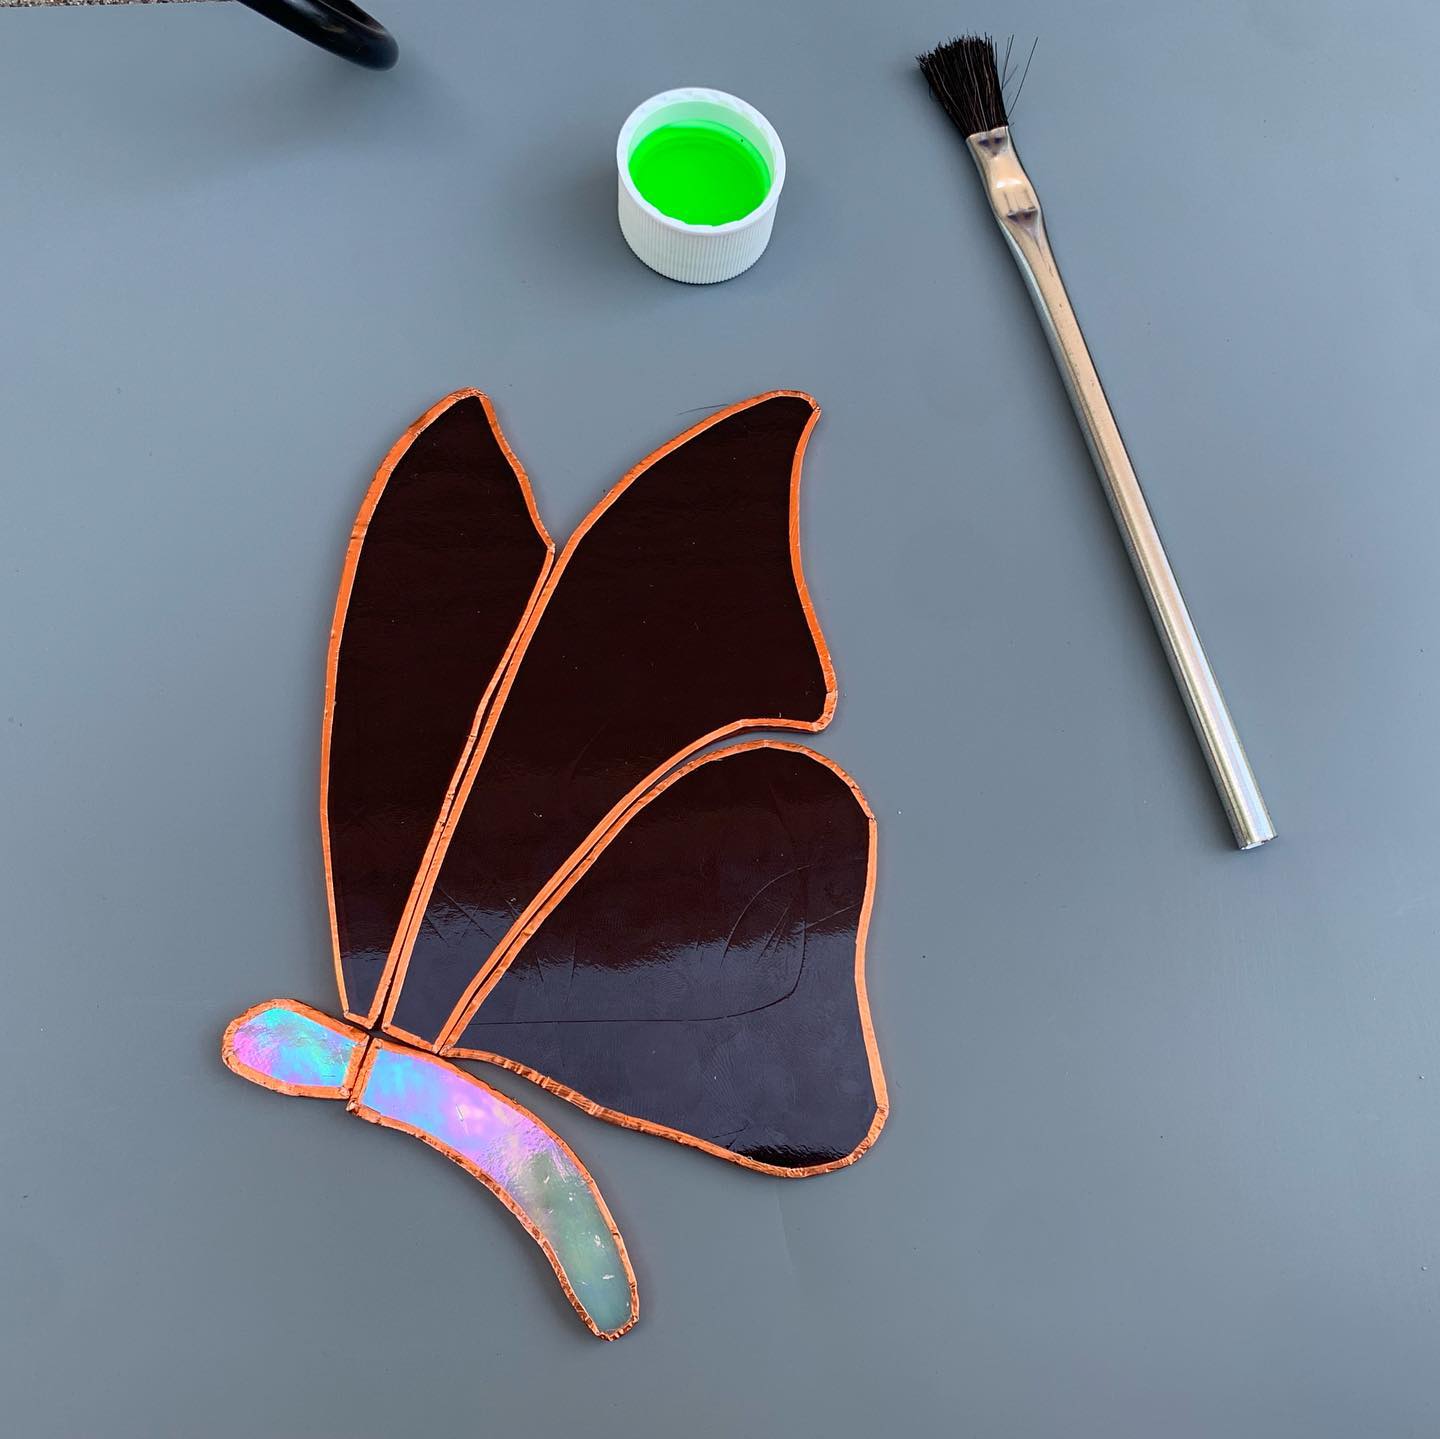
When soldering, I tried to get a thick smooth bead. Getting a nice bead along the outside edges was difficult. Overall, I think it turned out pretty good for my first try at soldering!
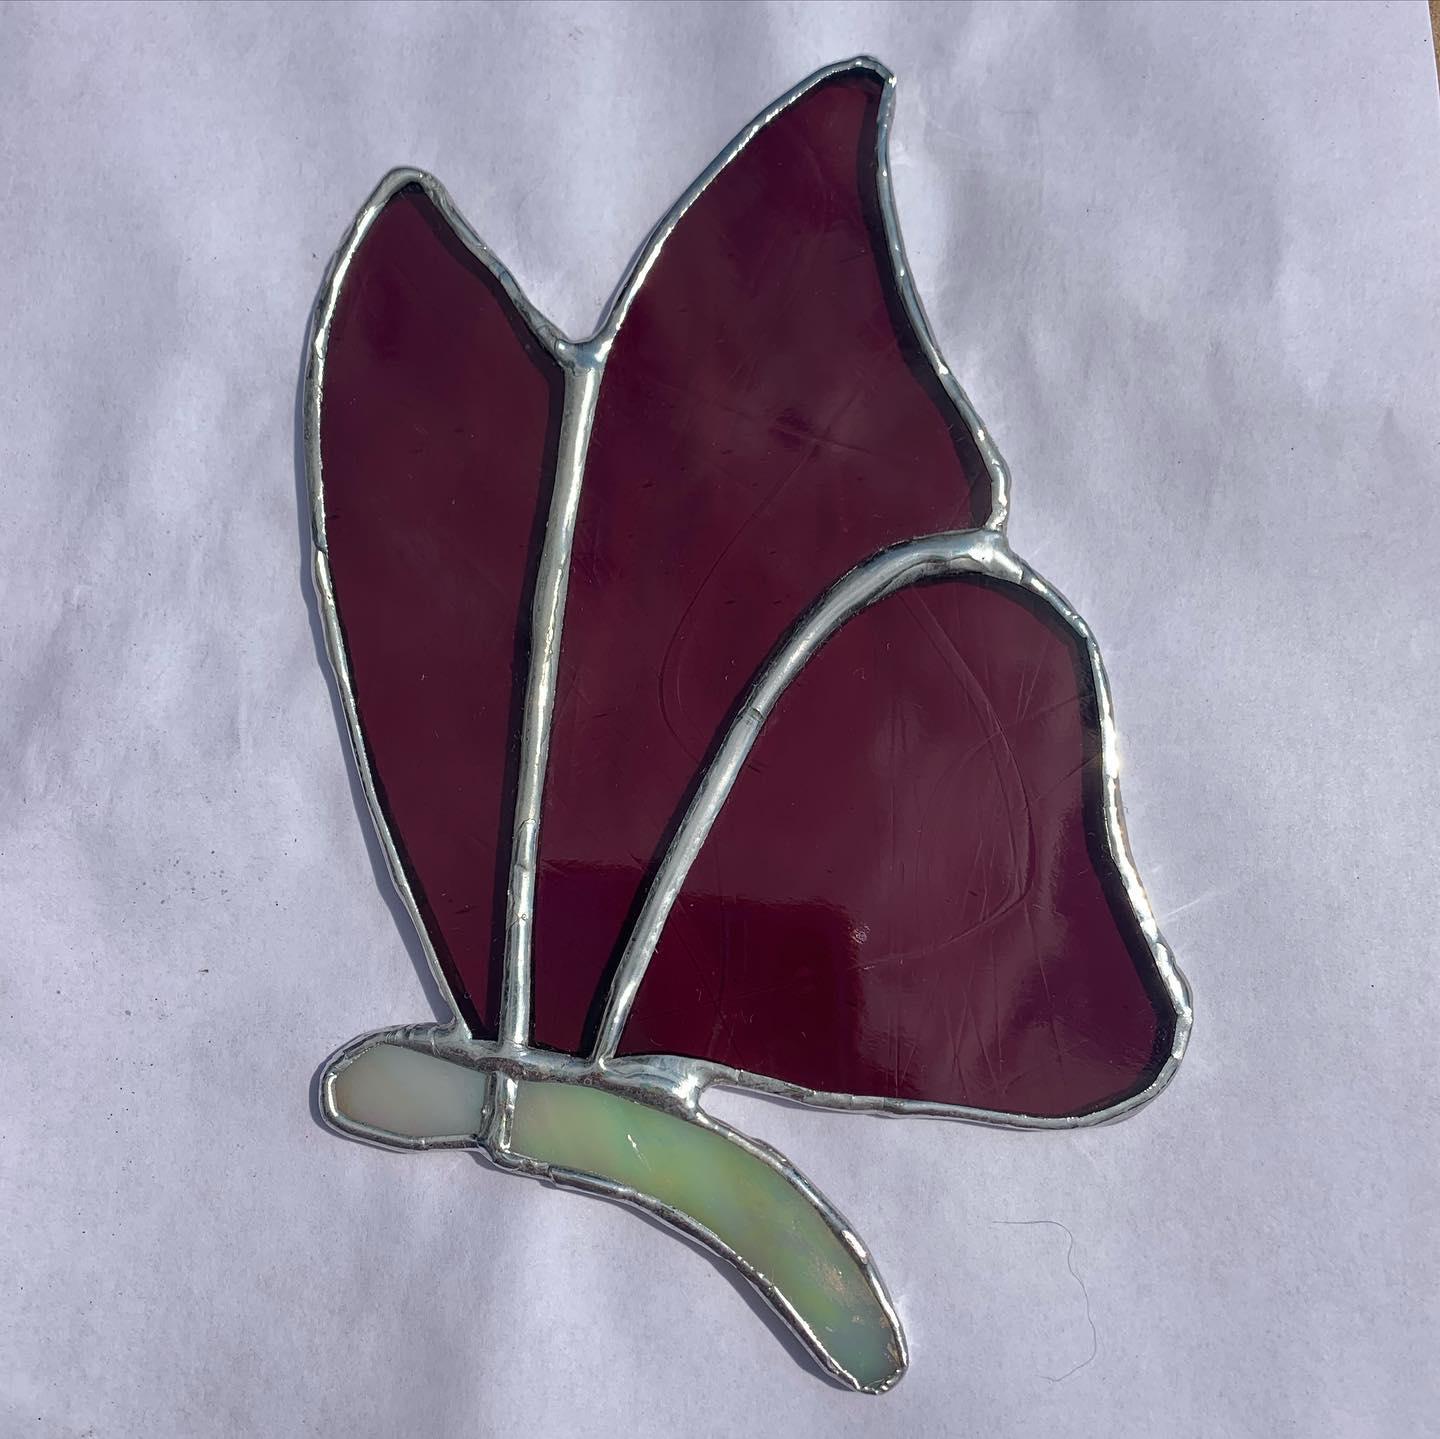
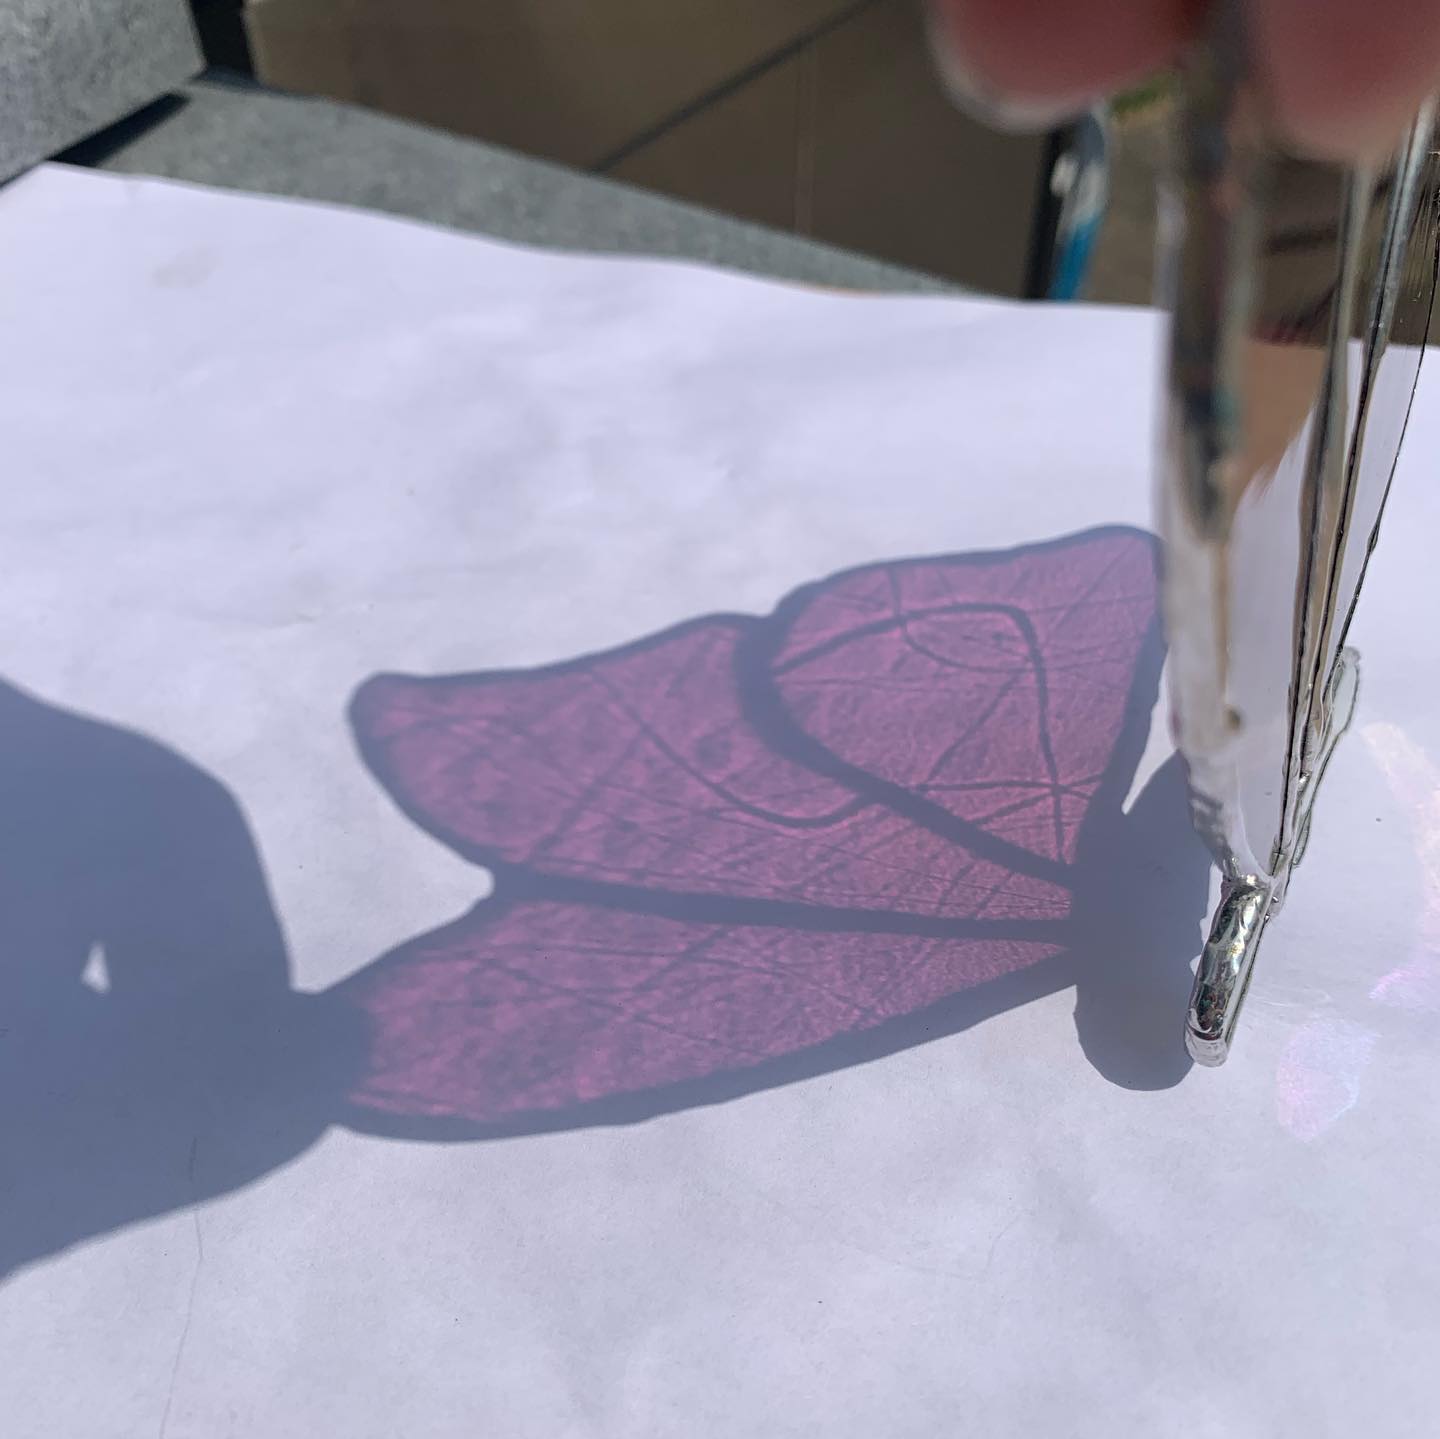
Here is the butterfly with the light shining through it. I love how the subtle texture/pattern in the glass really shows through.
- - - - -
I took everything I learned from this course and basic butterfly project, and went on to create a second project - a custom pet portrait.
I designed this custom pet portrait based on a photo of my family's dog. It ended up being ~35 pieces total.
I used Pebeo Vitrea 160 glass paint to add some extra details to the eyes and paint the name on the bone. This project used 8 types of glass:
- Clear water glass with a rainbow iridescent sheen
- Red glass with little bubbles in it for the heart
- Solid Black for the cheeks/face/nostrils
- Dark gray streaky glass for the nose
- Tan glass glass for the outer cheeks and body
- Dark streaky brown for the ears and top of the head
- Rich brown glass for the eyes
- Streaky white glass for the bone
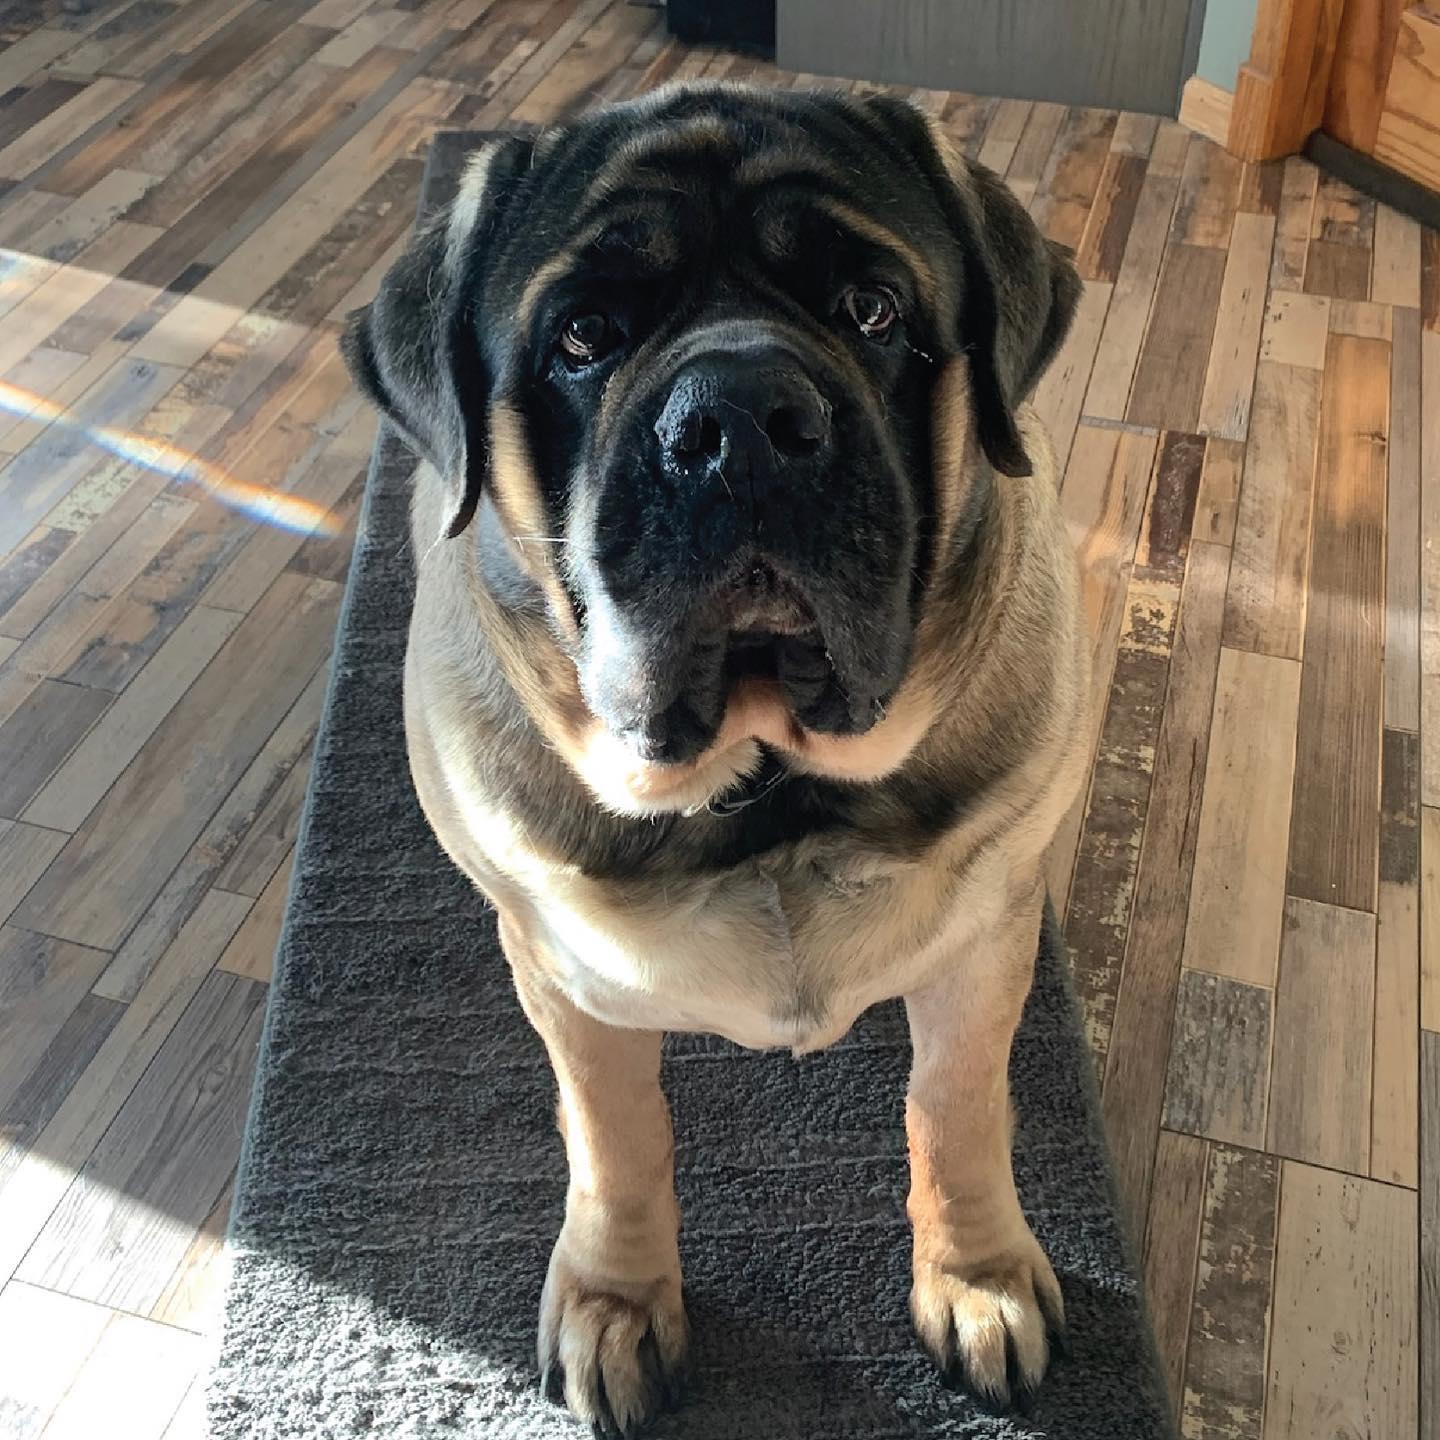
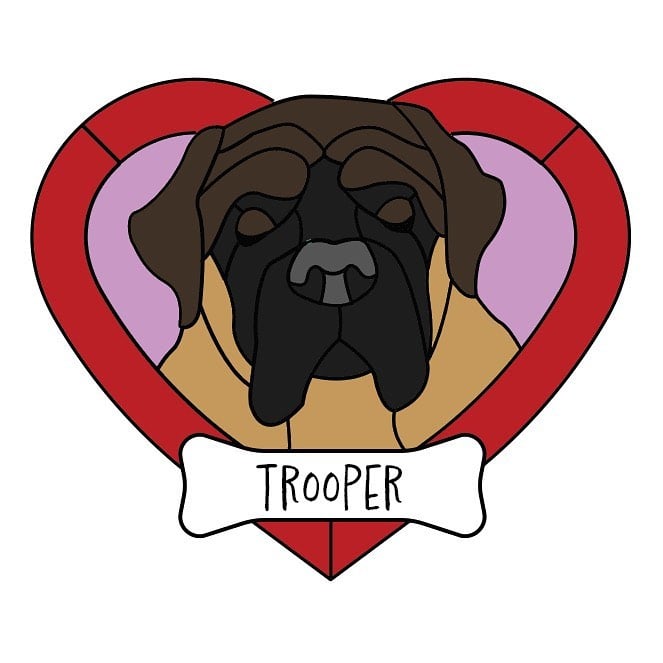
Here is the inspiration for this project: Trooper, an English Mastiff
Using this photo, I created this design in Adobe Illustrator. I added in some color to help determine what colors/styles of glass I wanted to use. I also wanted the piece to have some dimension, so the bone will actually be soldered on top of everything else.
Here is the cutting/grinding in progress and trying to make all of the pieces fit together. In the butterfly project, I struggled when grinding because the glued pieces disintegrated in water. For this project, I instead traced all of the pattern pieces onto the glass with Sharpie markers.
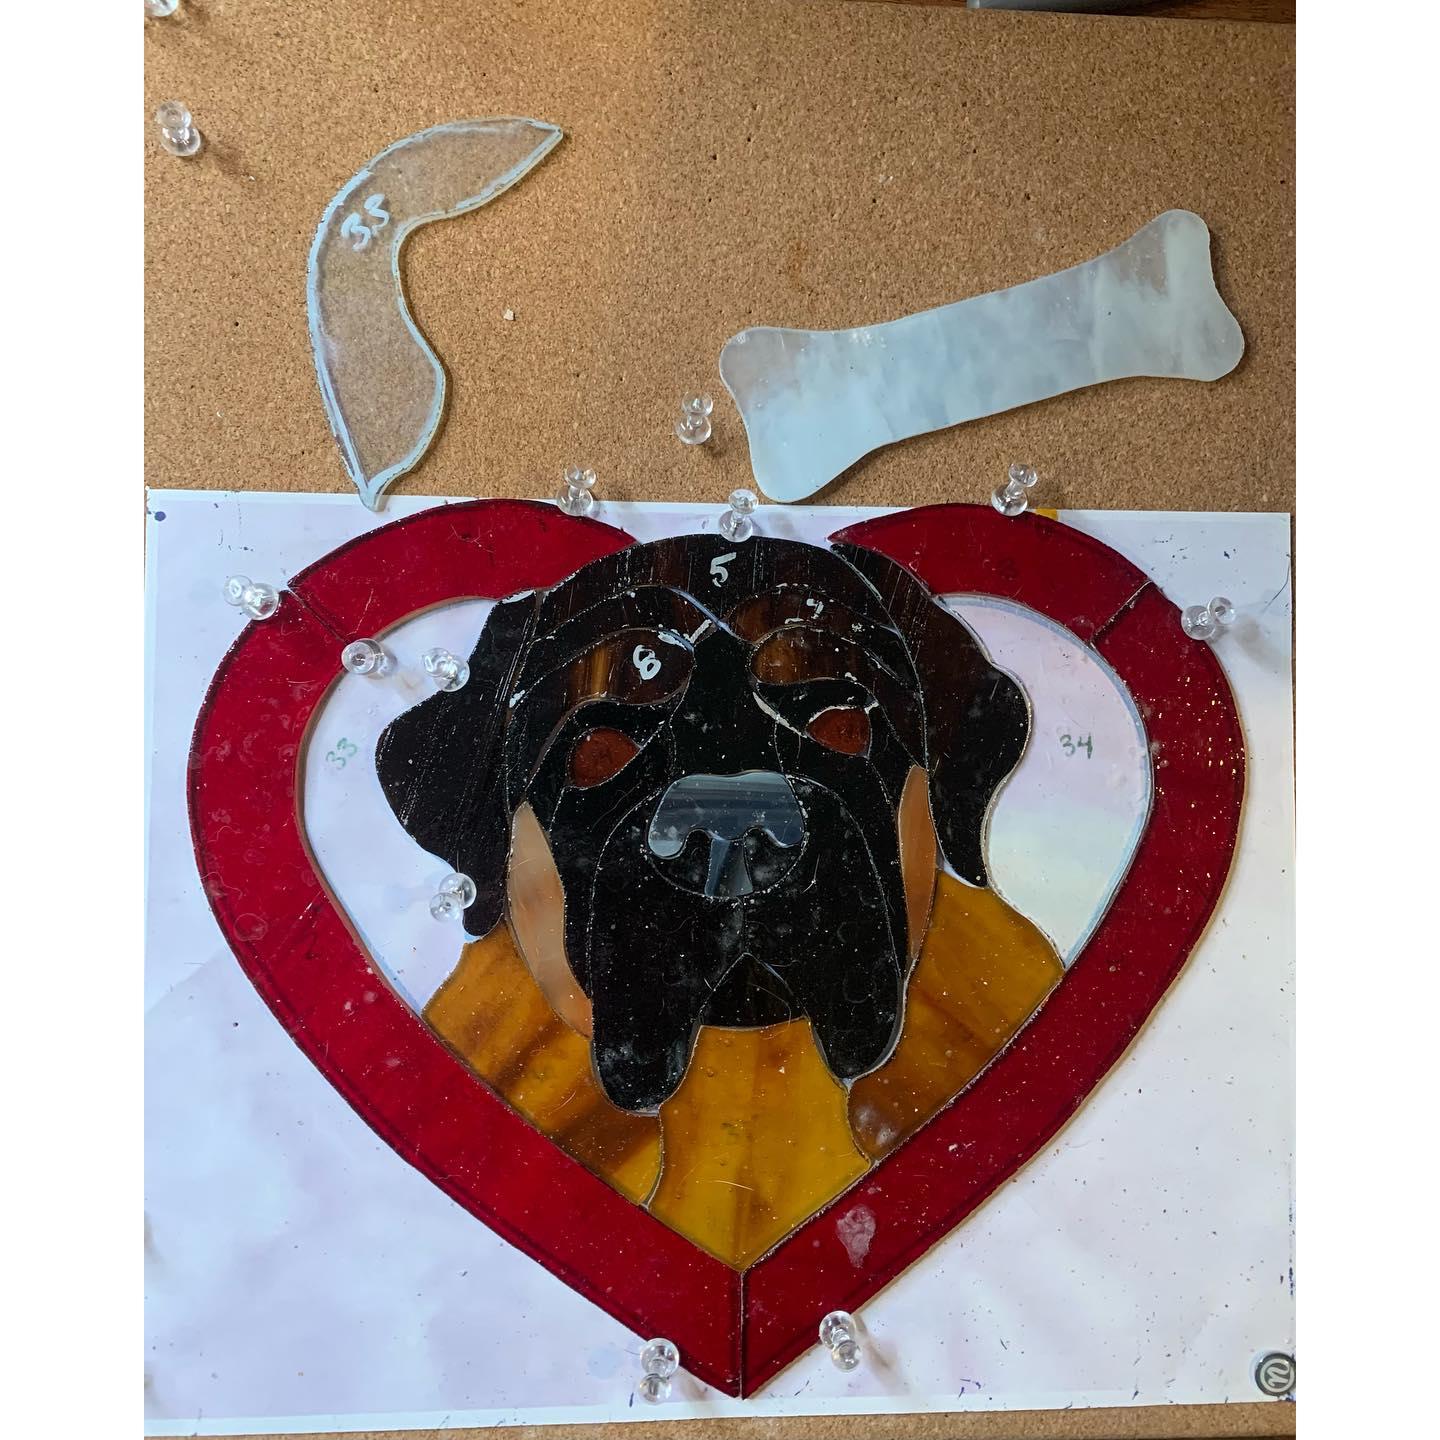
One BIG lesson I learned is that if I trace them onto glass, I need to cut on the INSIDE of the traced lines. I cut on the outside of the traced lines and spent hours at the grinder trying to make all of the pieces fit together. Some fit really nicely, some I accidentally over-grinded and caused some gaps. I outlined where some of the larger gaps are from over-grinding:
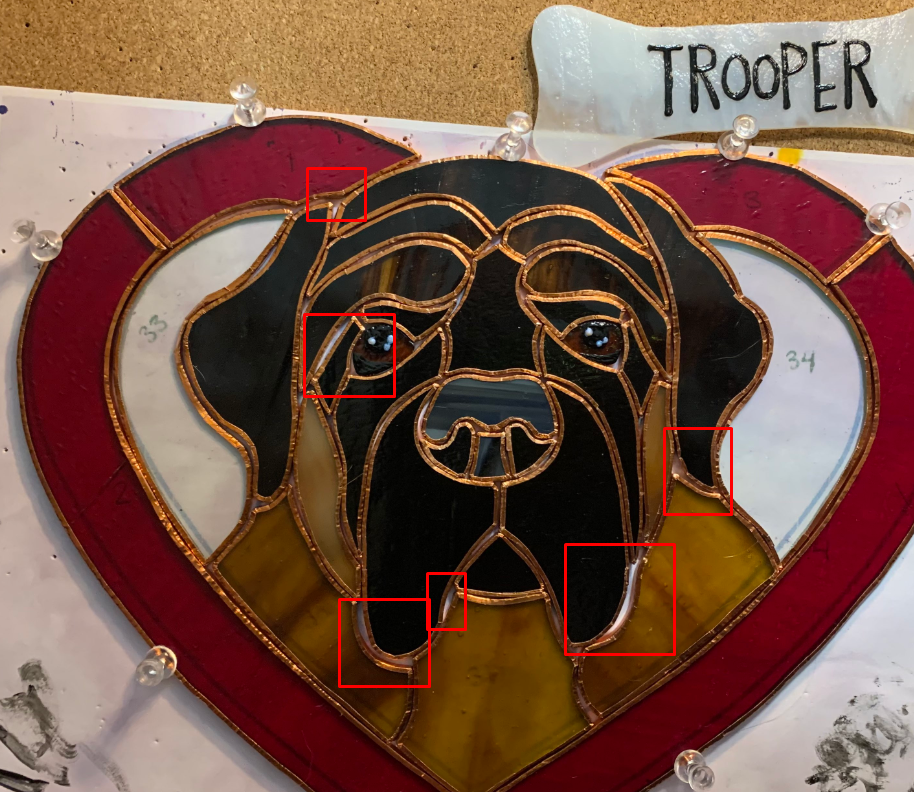
Despite the gaps, the piece looks pretty good and is ready for soldering!
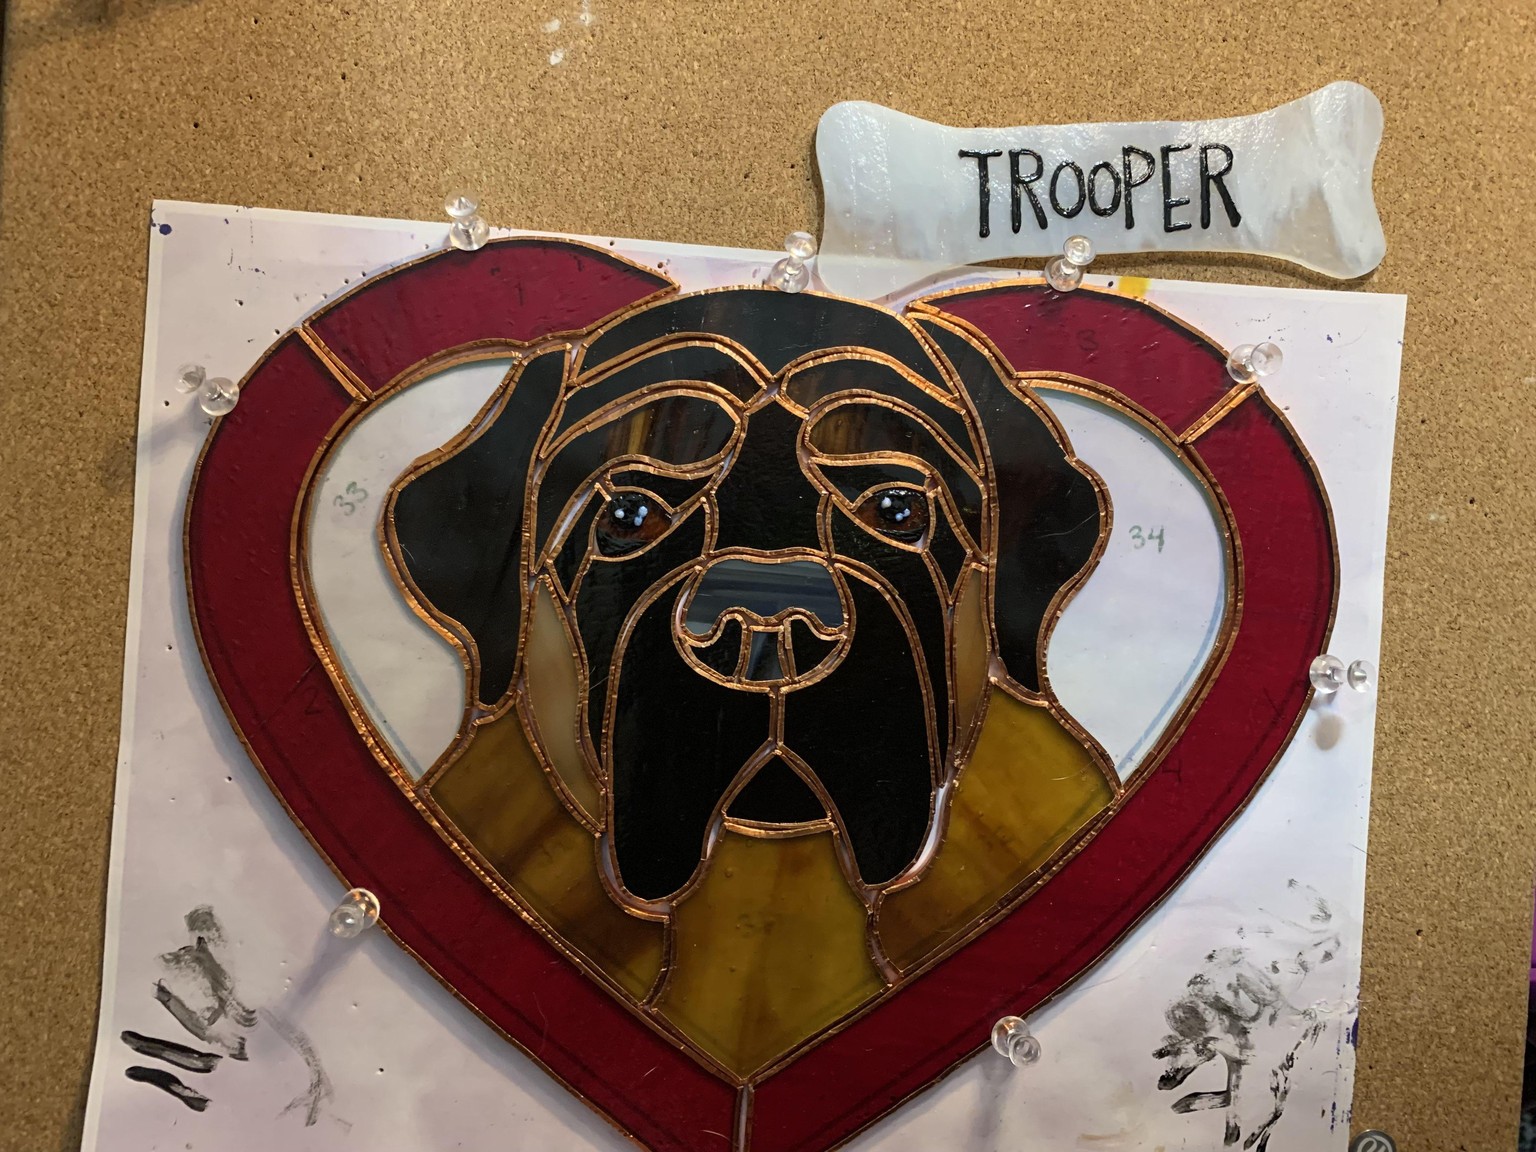
All soldered up and ready to be hung! Or maybe I will add black patina and polish it.
