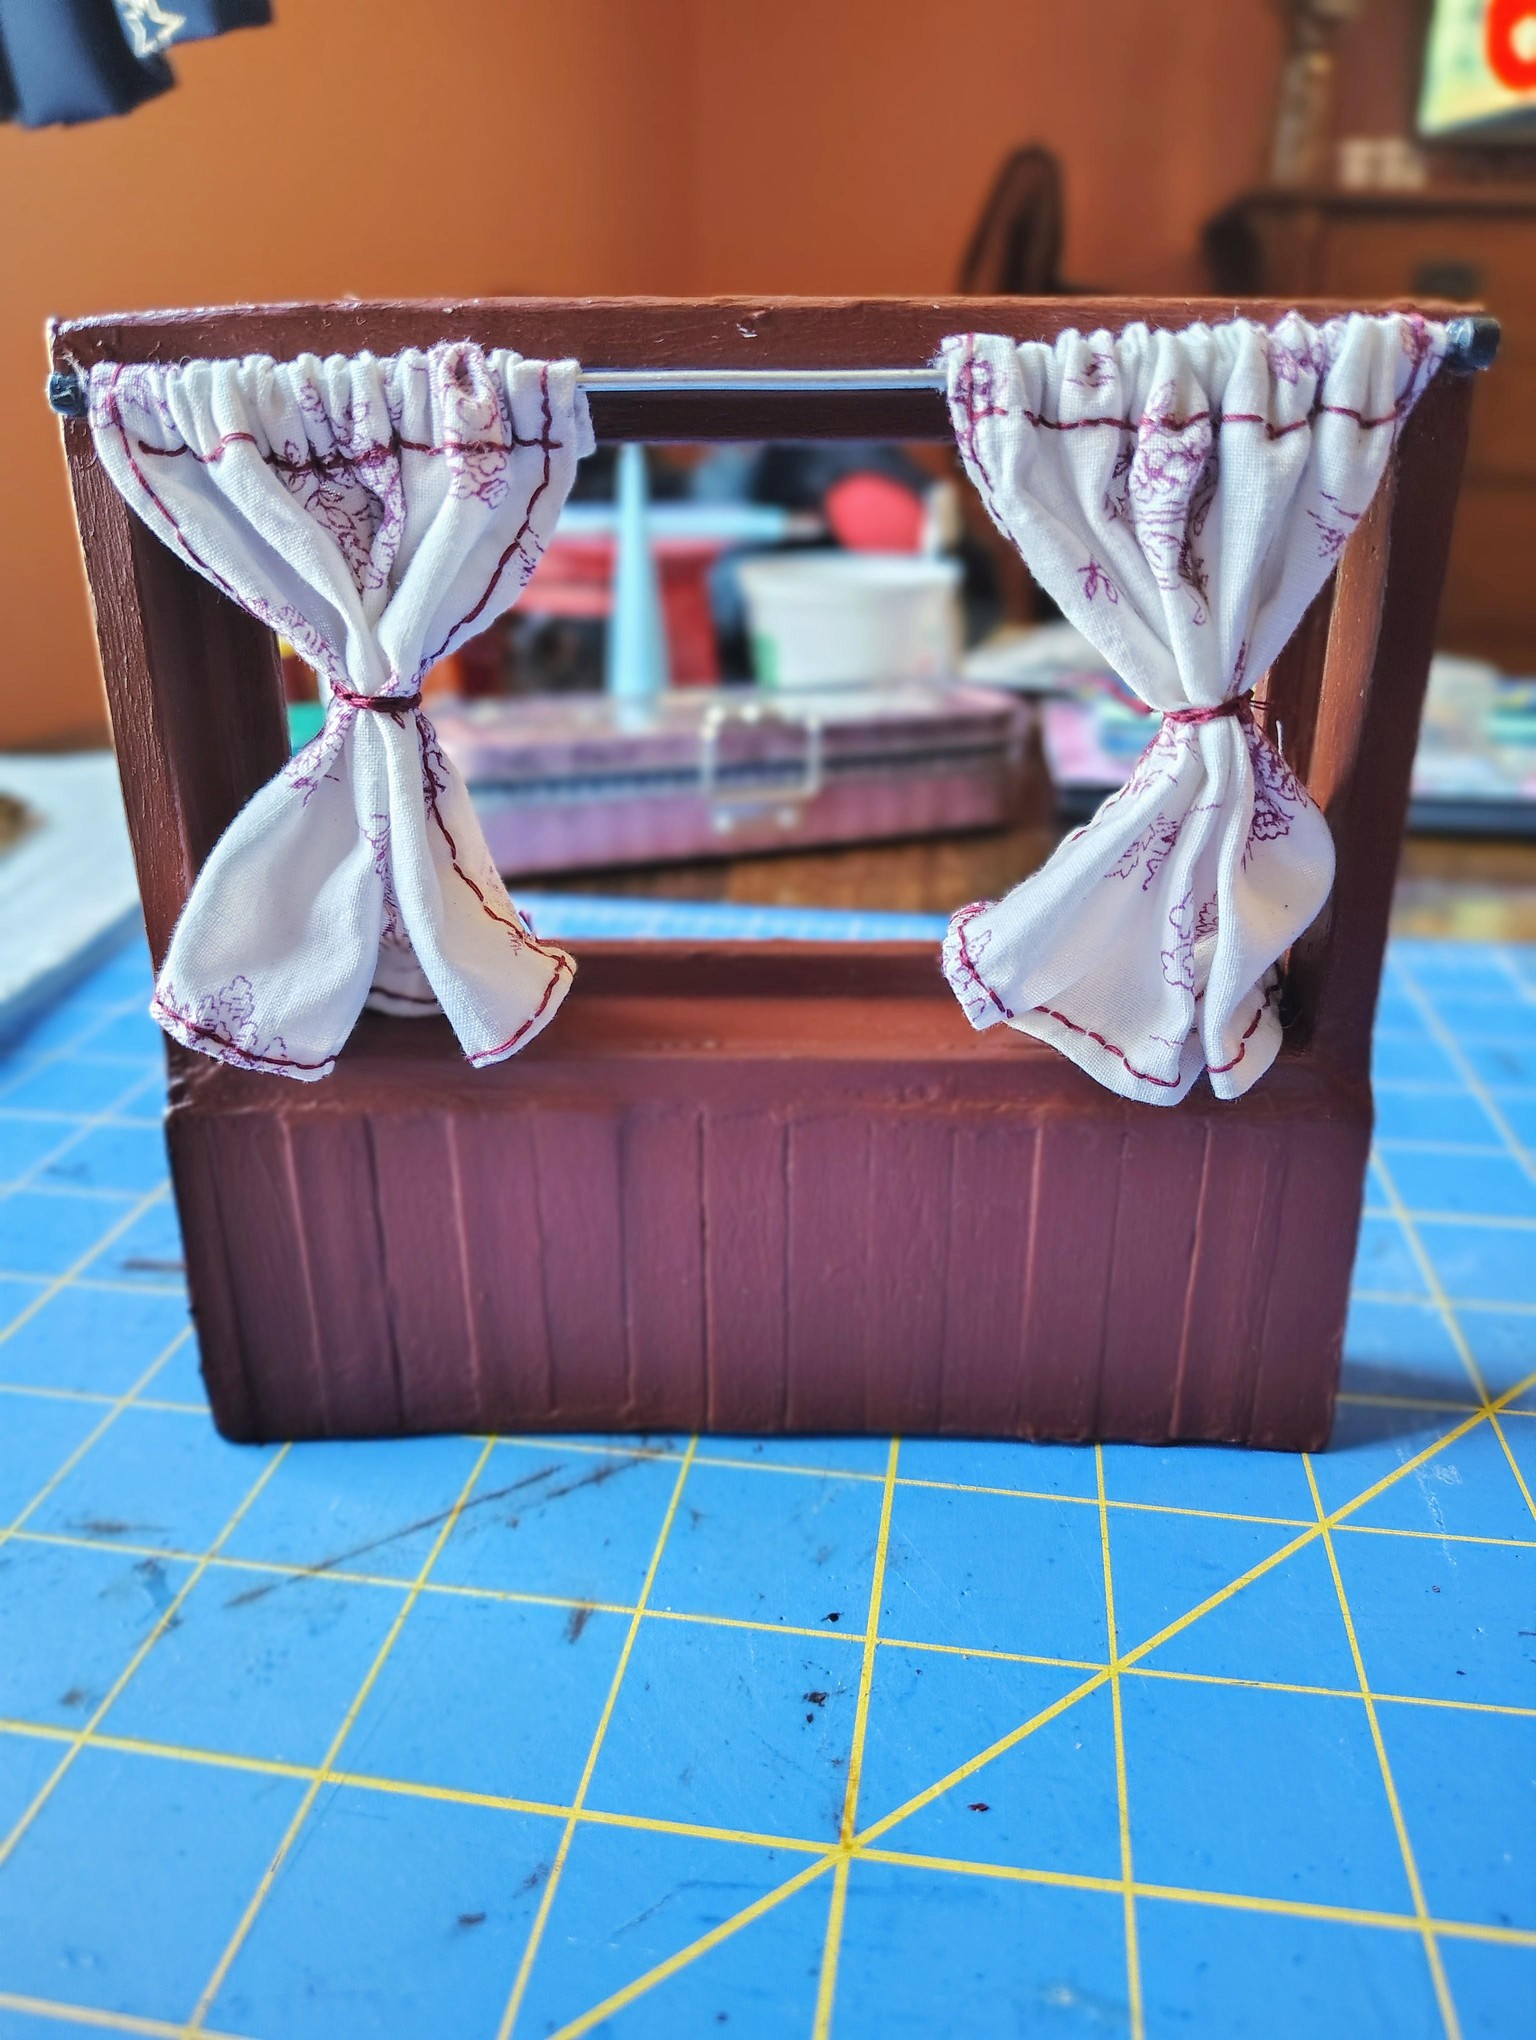
Mid Century Window
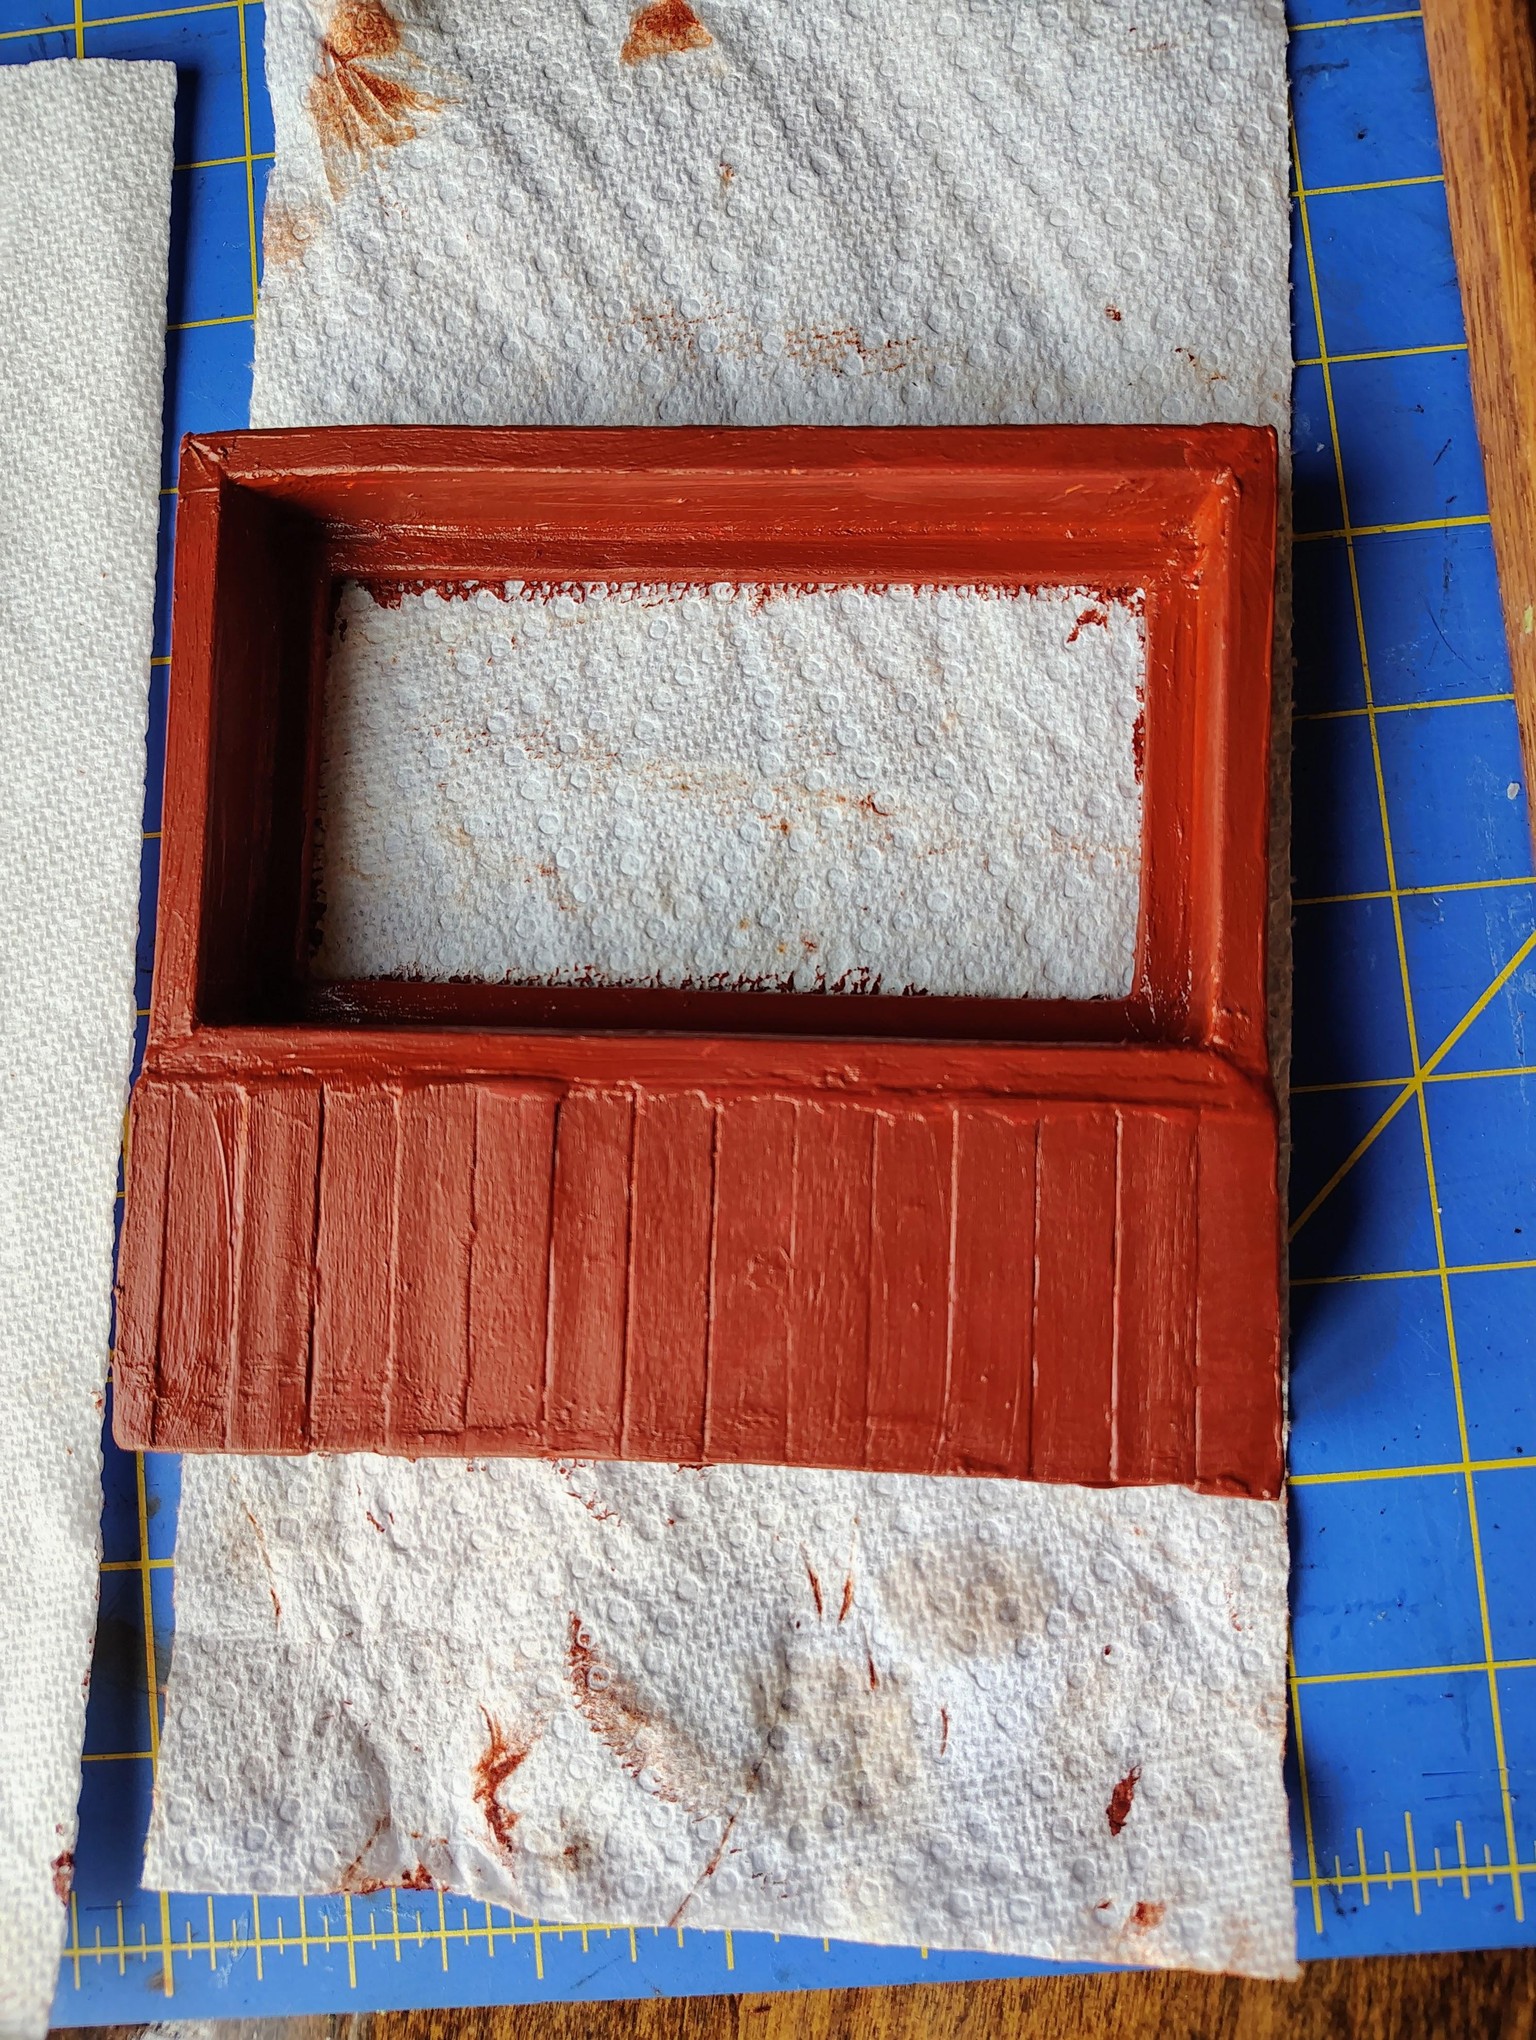
I made a window. I opted for a mid century style because I didn't have small dowels to do window details. But I added in some structural details for realism. Like, in the back I tried to make it look like an actual structure that was framed and finished. I added two rows of the inner trim because that is where I'd have put the plastic for the window if I had that.
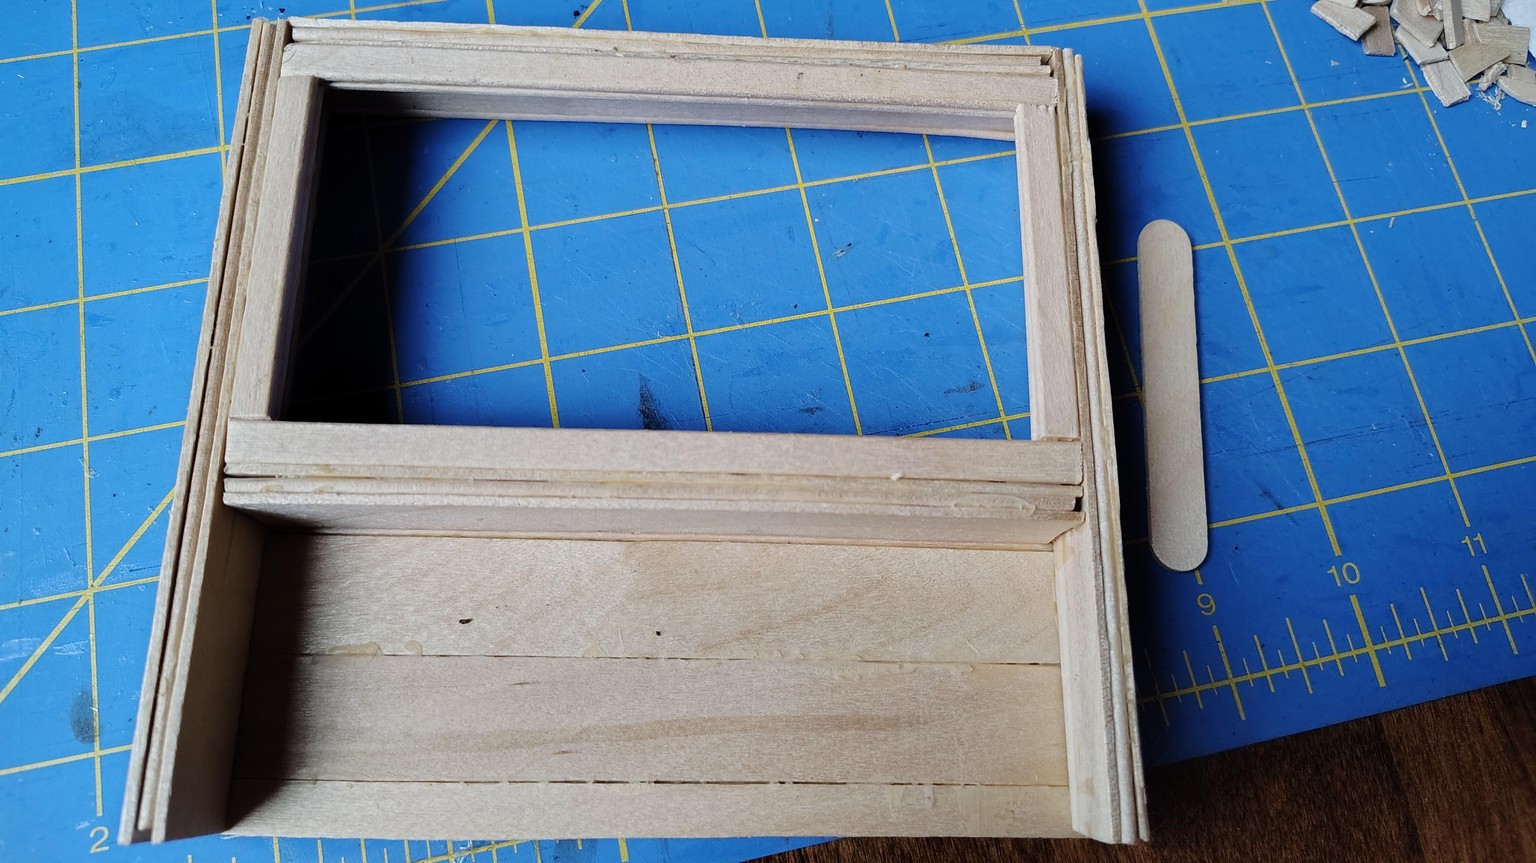
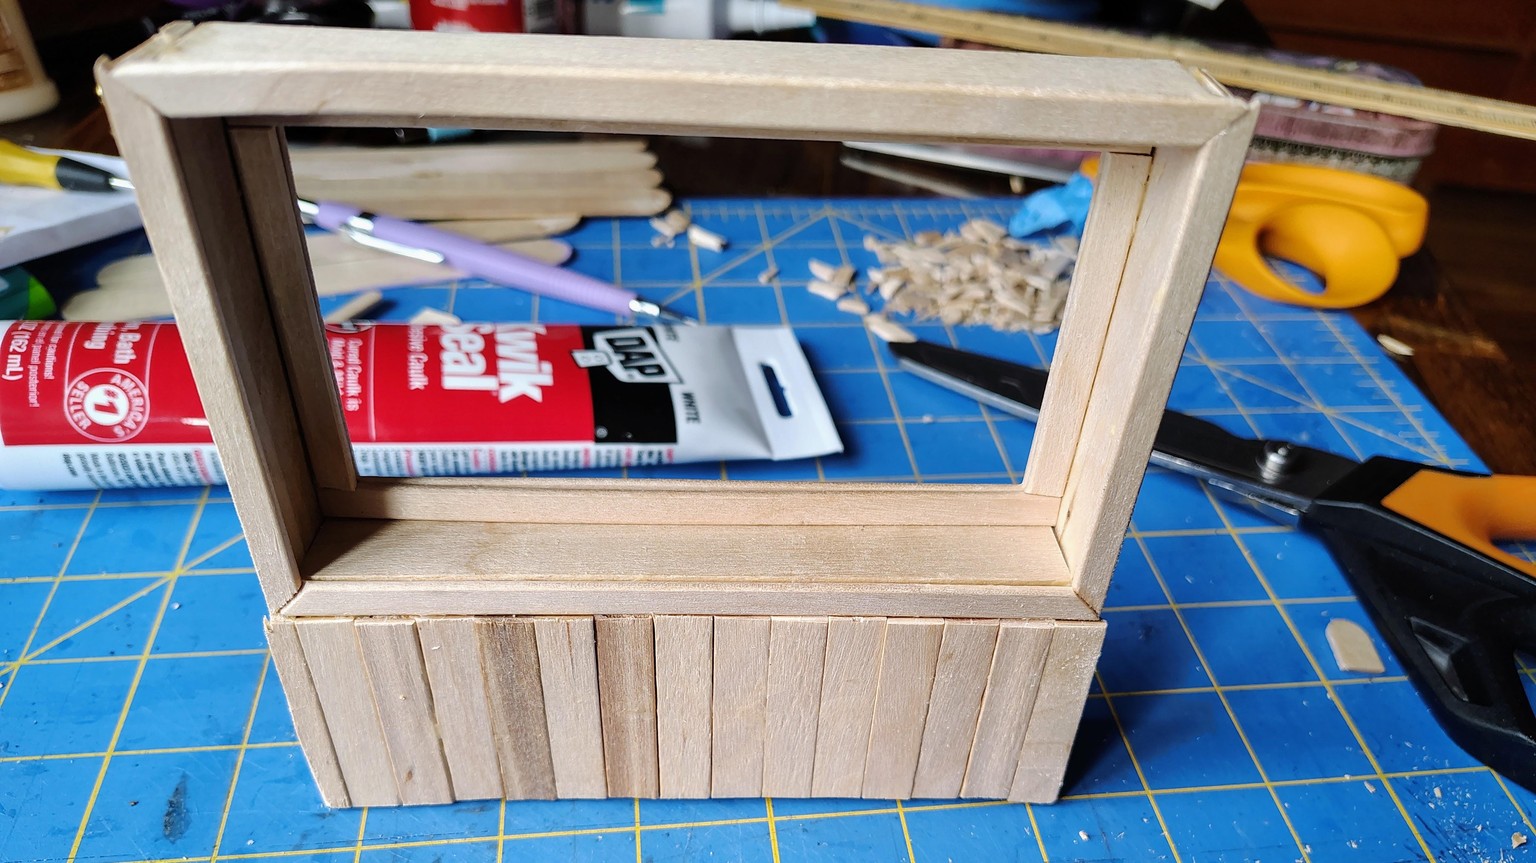
Once I had the structure built, I painted it brown using acrylic paints. I wanted to paint it a little differently, but I goofed almost immediately, so the whole thing got painted a burnt sienna. Oh, and I used kwik seal. I started around the paneling below the window frame, so that part is a bit messy. By the time I was doing inside the frame I'd figured it out a bit more. So that part is tidier.
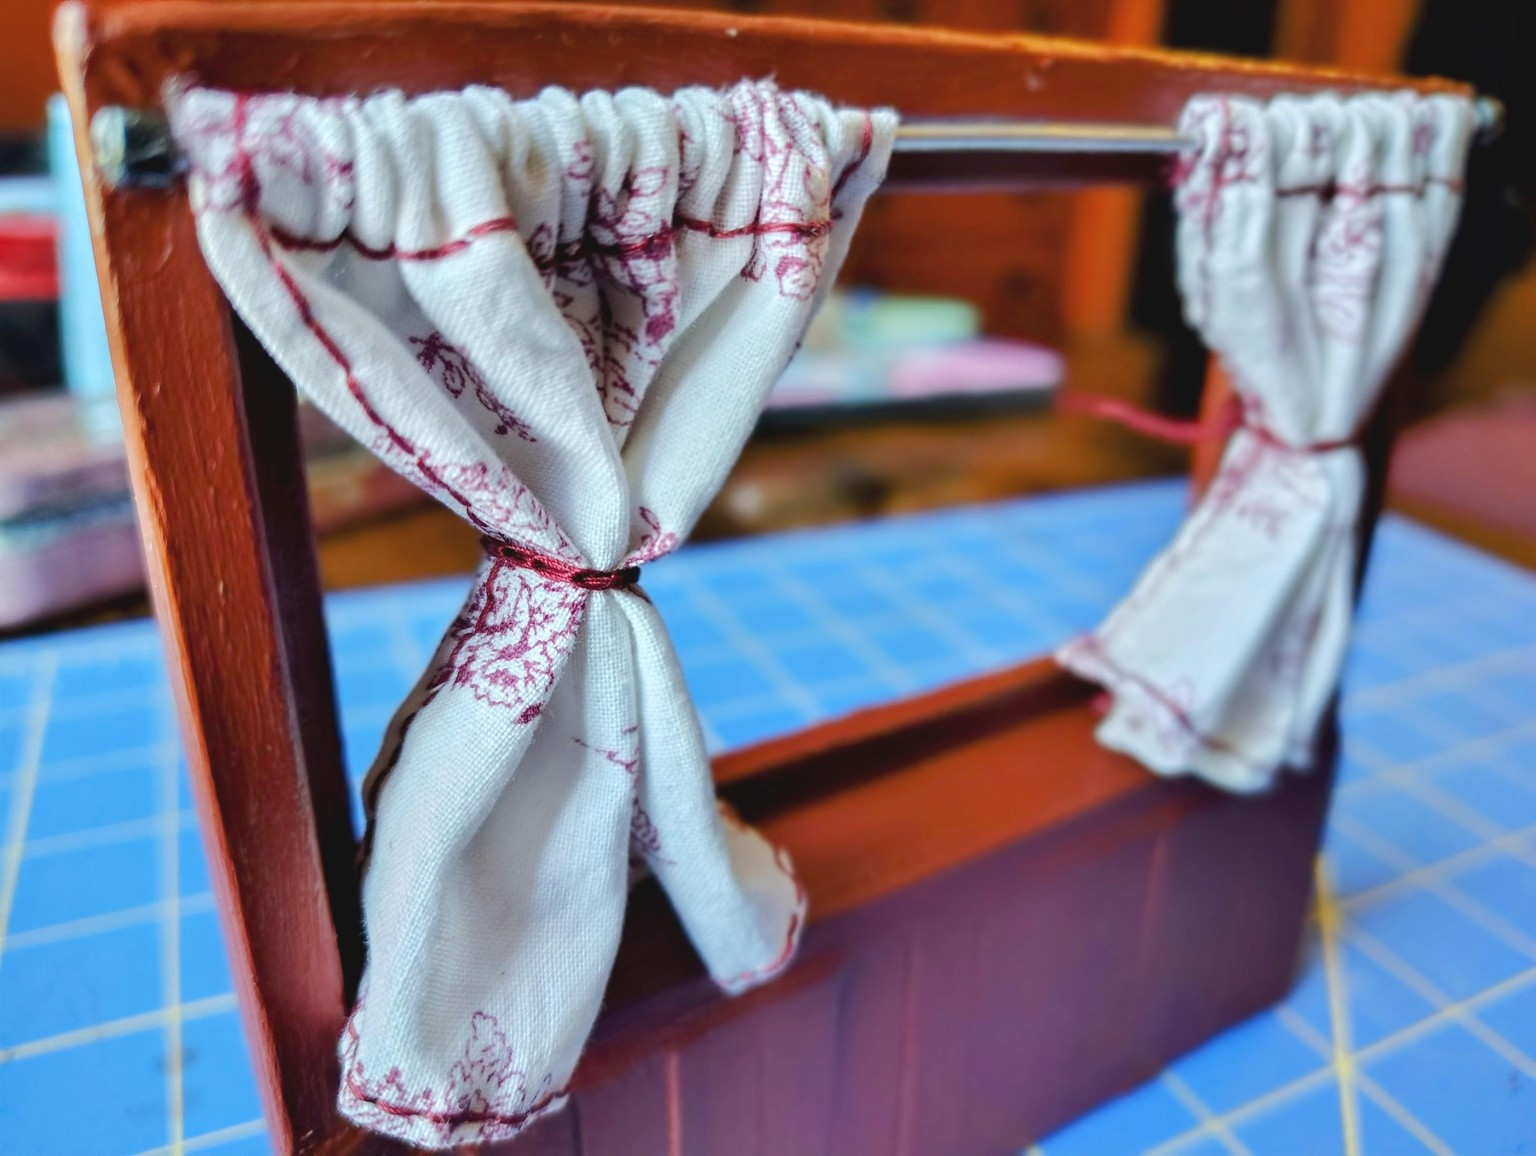
Last, I used an old pillowcase and made some curtains. I hand stitched them instead of gluing them because the maroon went so well with the brown paint. Next time, I'd make them a little smaller so there isn't as much bulk in the finished product. For the curtain rod, I used a stiff wire and some beads. Next time, I'd like to use a tiny dowel and try to make it look more finished, but these were the materials I had at the time. It's honestly really fun to look at this stuff and ask what I'd do differently and then how I'd get that done.

There's room to grow, but I am super happy with the results this time. So many lessons learned! This took about 3 weeks to complete and I'm very excited to keep building and learning. Thanks for the class!