Pond with Waterlily Flowers
To start my class project, I sampled colors directly from the Waterlily Pond reference image and used them as inspiration. Instead of copying the colors exactly, I adjusted them to make them feel more vibrant and expressive. For example, I might take an orange from a leaf and make it more saturated, or shift a brown into a warmer pink. Small changes like these can completely transform the mood and energy of your illustration.
STEP 01 Colors

STEP 02 Background and Sketch
I’m a huge fan of COLORS, so my go-to way to begin my project was to fill up the empty canvas! Instead of worrying about details, we start with loose, abstract shapes and just two colors to create the feeling of the waterlily pond. This approach warms the hand and places us in a creative mindset. Once the background is done, we loosely sketch the elements of the composition.
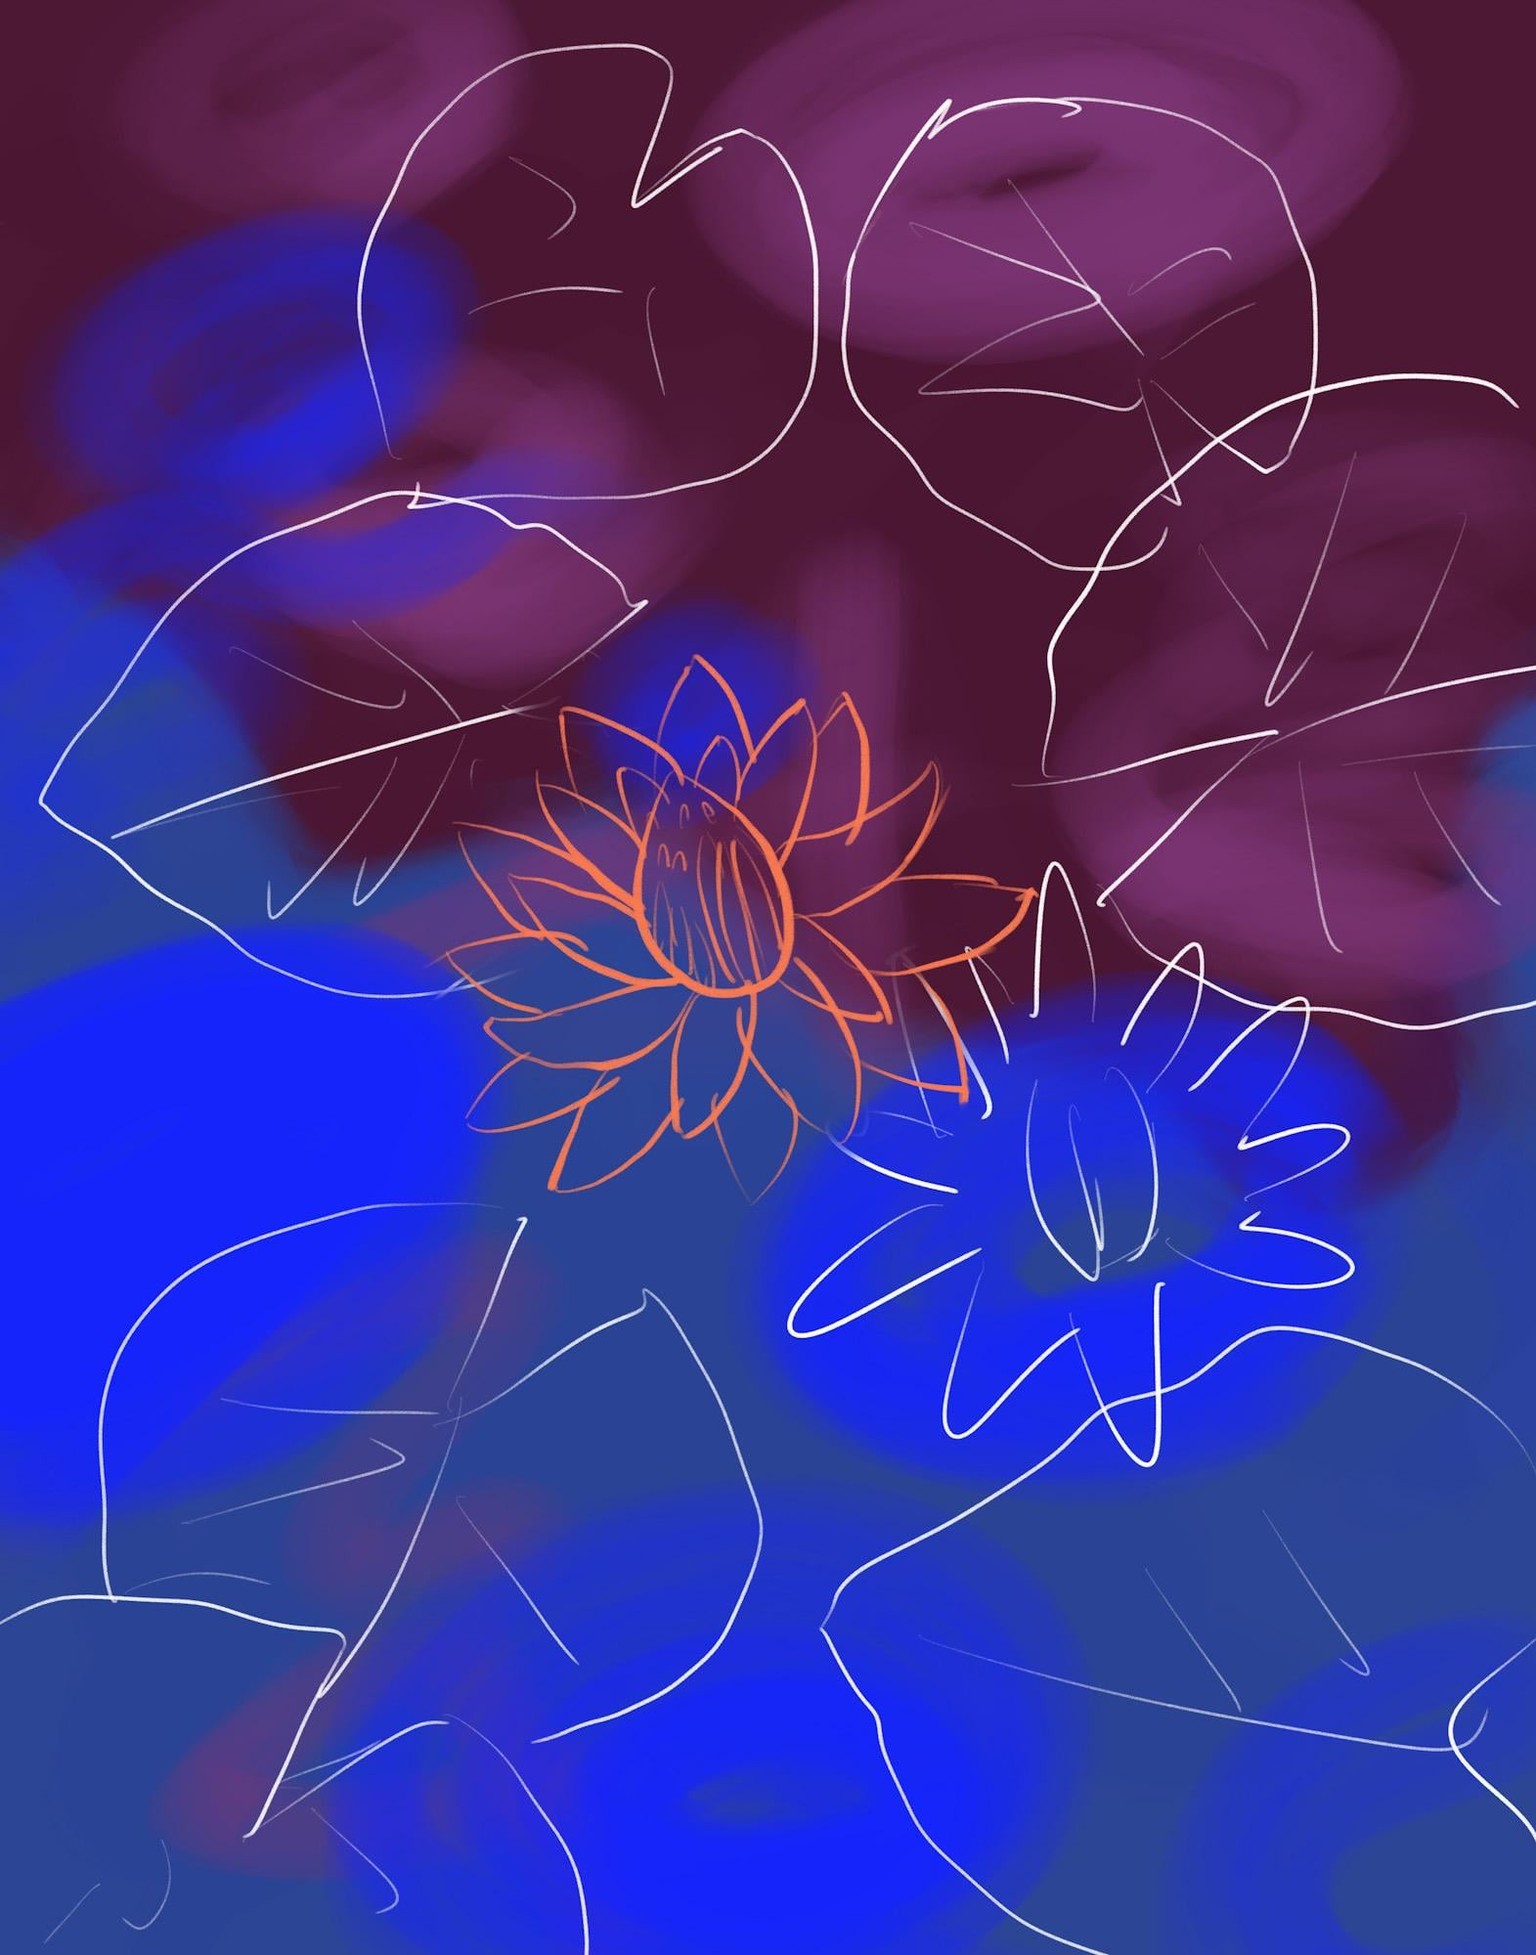
STEP 03 Drawing Leaves and Layering colors
I created my leaf shapes and placed them throughout the composition, facing in different directions and varying in size. Then started layering colors over the leaves.

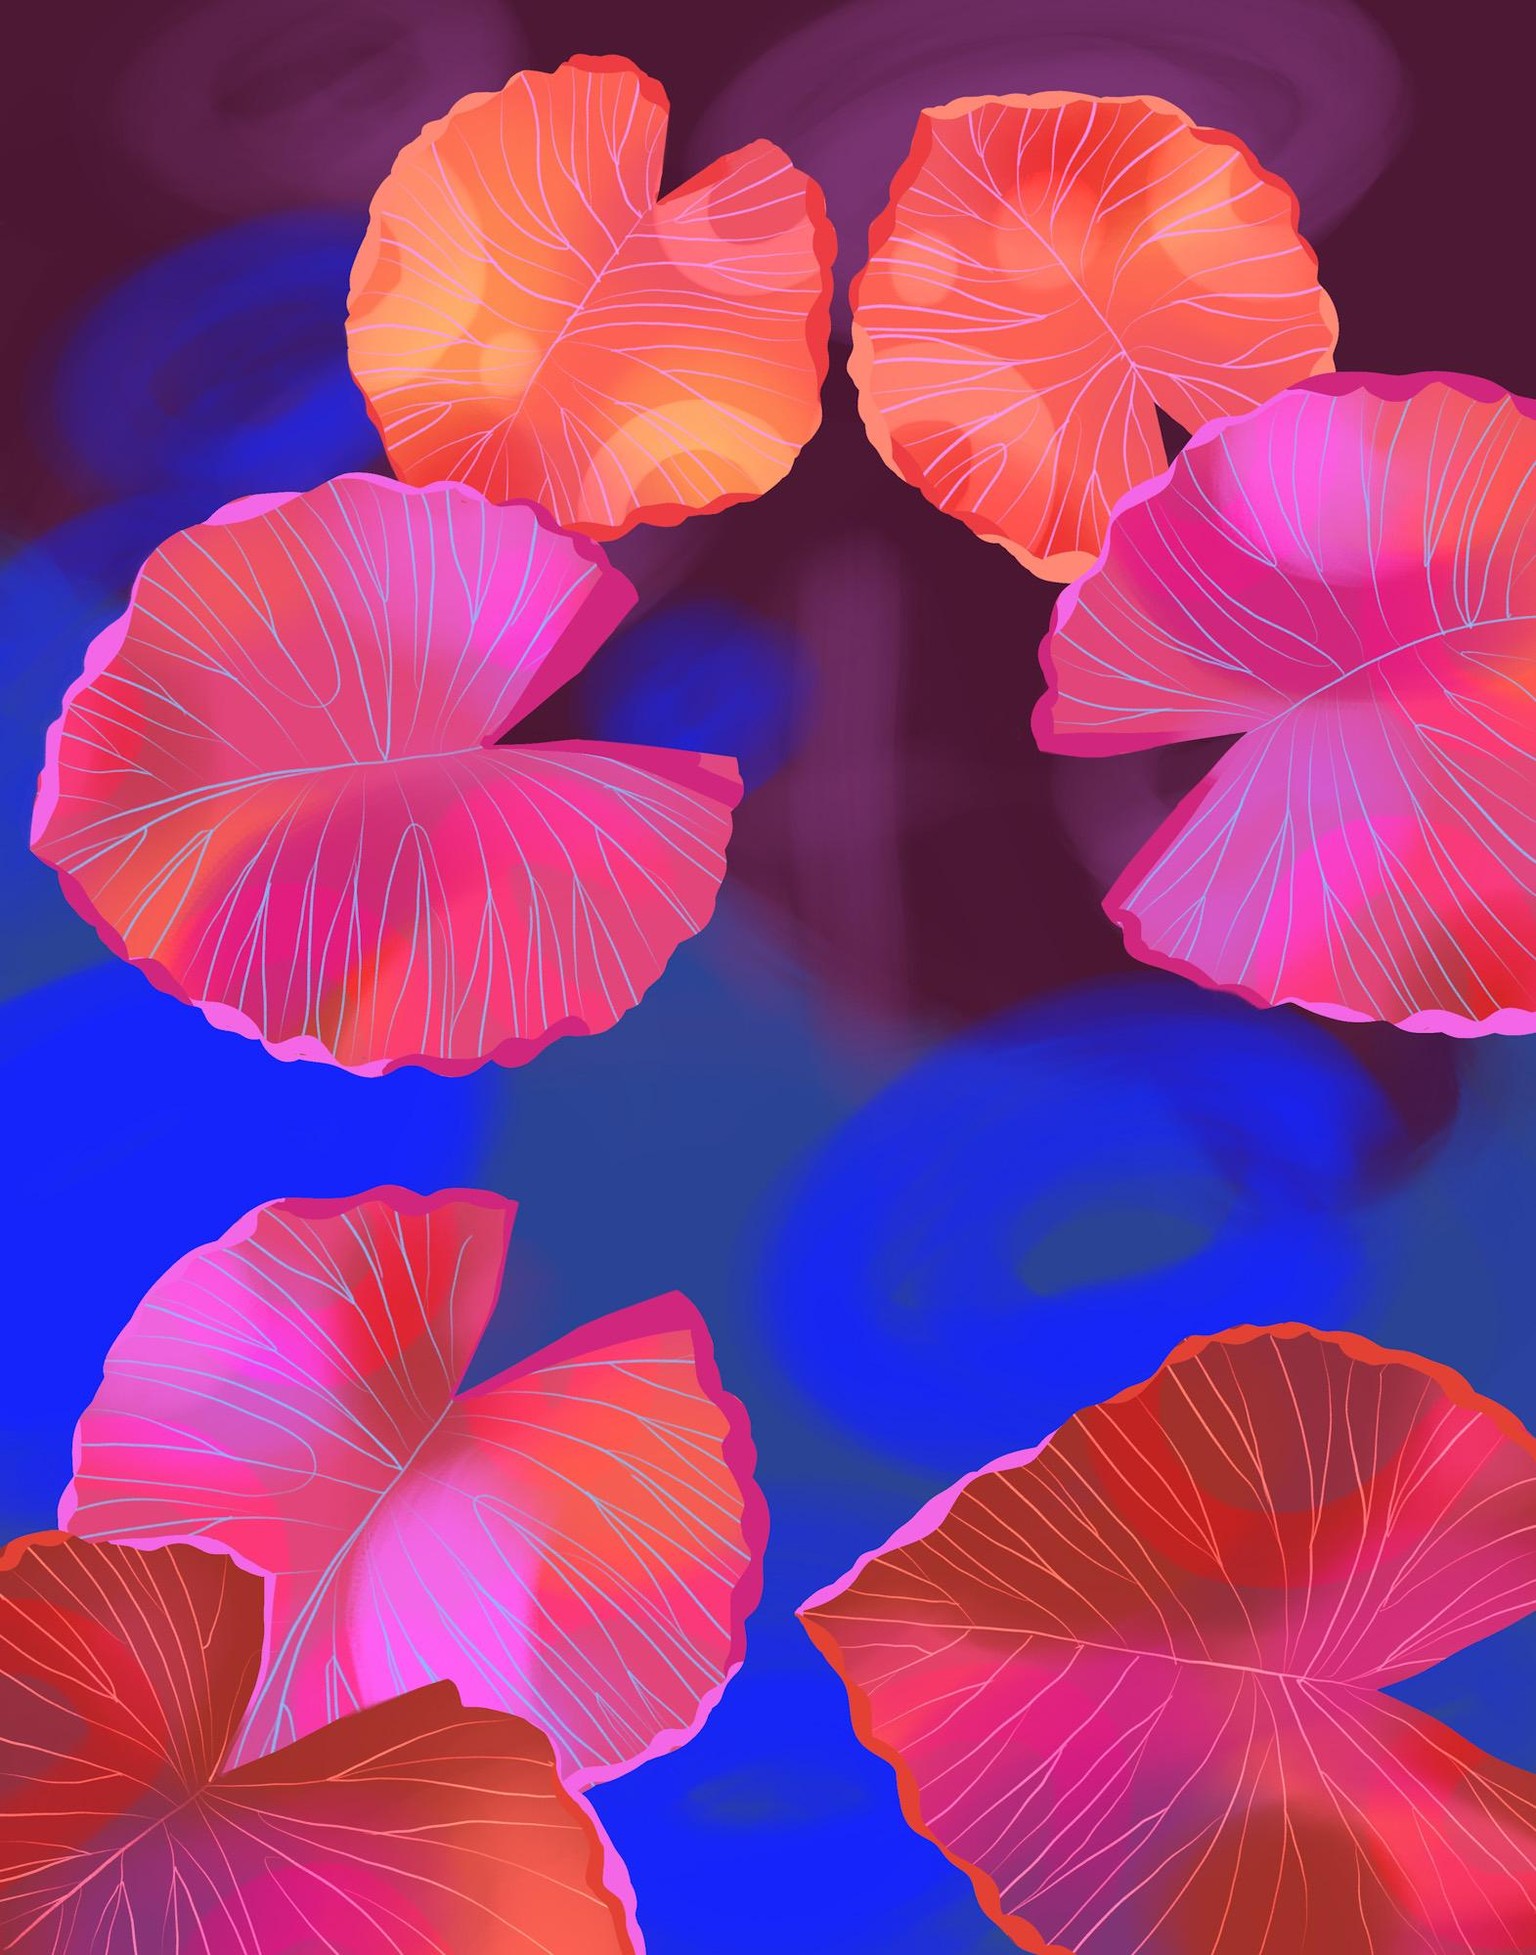
STEP 04 Leaves Textures and Details
I continued painting in textures with soft brushwork, adding highlights, details, and organic lines to create depth and visual interest.
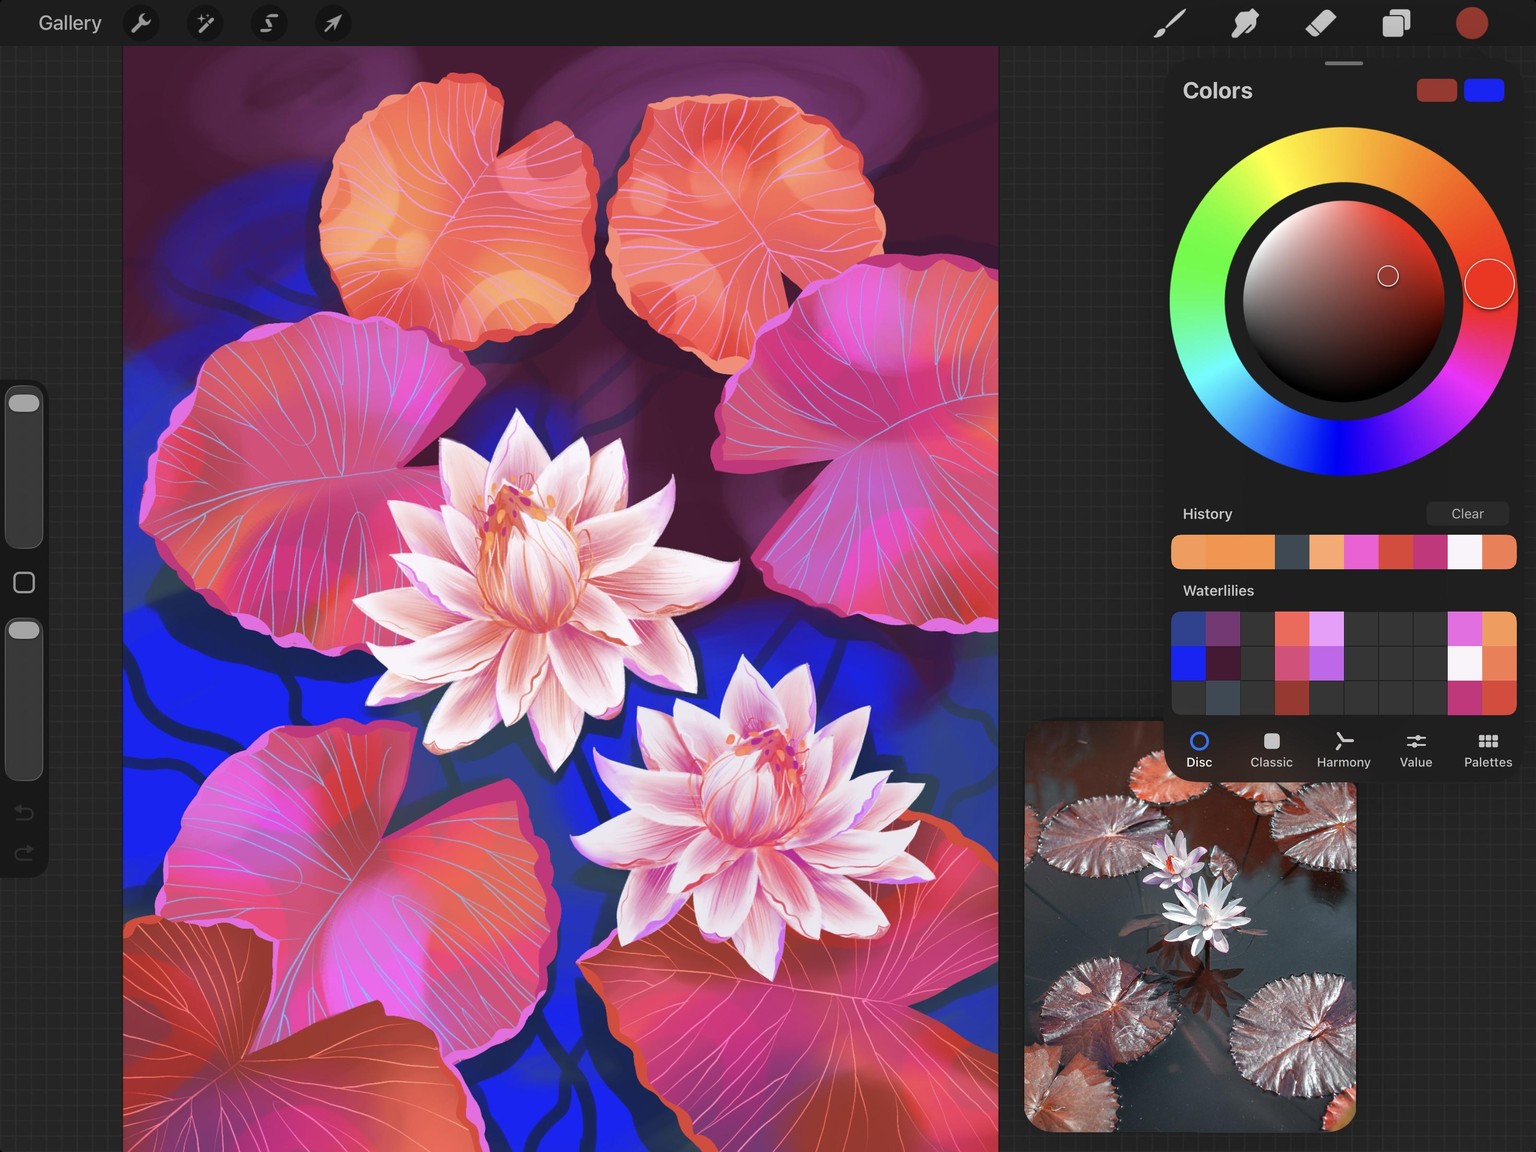
STEP 05 Drawing the Waterlily Flower
I started with drawing the flower in layers, creating the white petal shapes first. Next, I added color, textures, and gentle brushstrokes to bring the flower to life, creating depth and definition in the petals and flower center.

STEP 06 More Flowers and Finishing Touches
Finally, I duplicated my flower and made gentle color variations. Next, I created depth and definition to the water pond layer. This step helps separate the plants from the water and creates a sense of movement and dimension throughout the composition.
Thanks for watching!