"Liquid Glitch" Project in Photoshop
Have you seen this effect before? If yes the you probably wondered how was this created....
In this project I am going to show you detailed steps I took to create this project.
IMPORTANT - I have a class explaining how to create this project and effect in details.
Lets start
1. Place the image in Photoshop

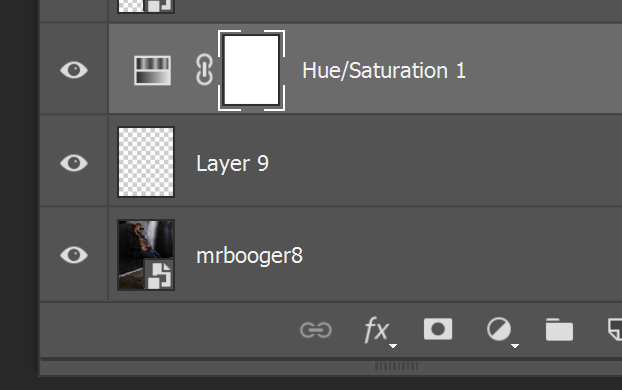
2. Create and empty layer and a Hue/Saturation adjustment layer and make sure the structure is like on the image below
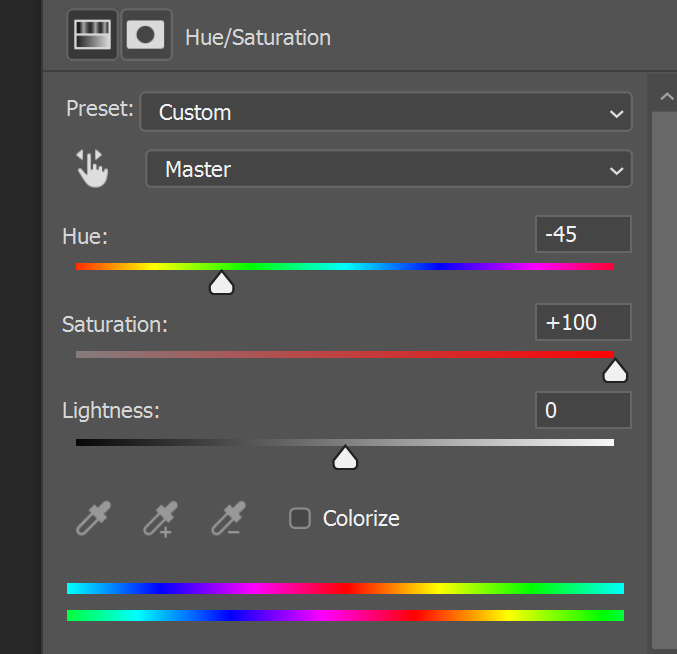
3. Change the Hue/Saturation parameters. Bring the saturation to the max. The hue doesn't really matter.
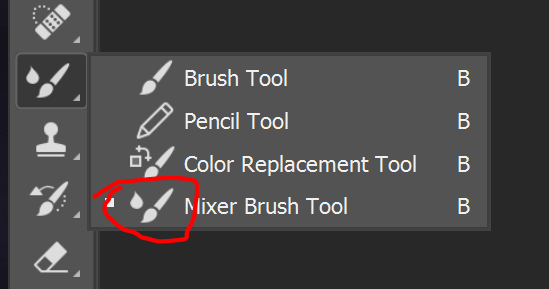
4. Choose the mixer brush tool
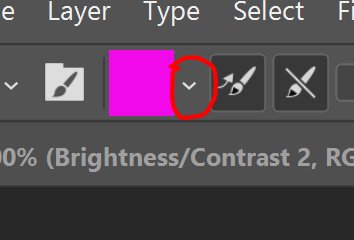
5. Make sure the parameters of the Mixer Brush tool are exactly the same as mine
If this looks too difficult just open the class and watch videos

6. Press this button and make sure "Load solid colors only" option is unchecked
7. Now select the empty layer and start drawing on it with the Mixer Brush tool. You will see this colors appear. Depending on what brush tip you are using the effect will look different.
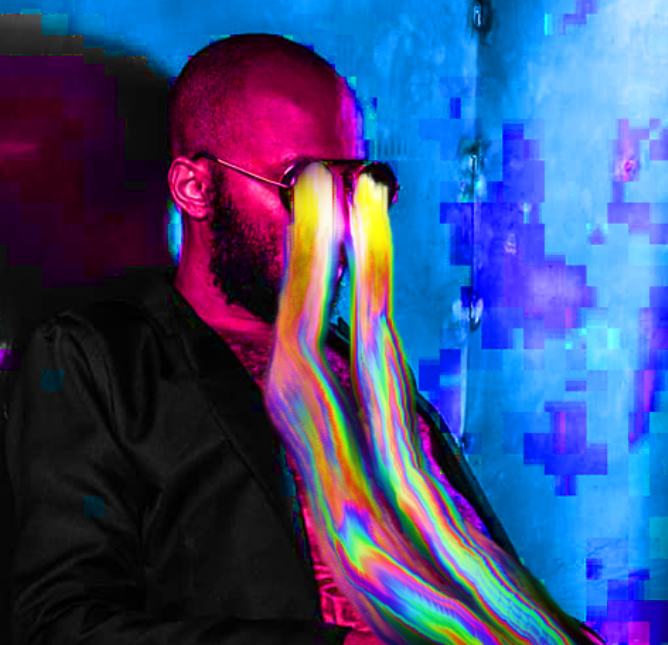
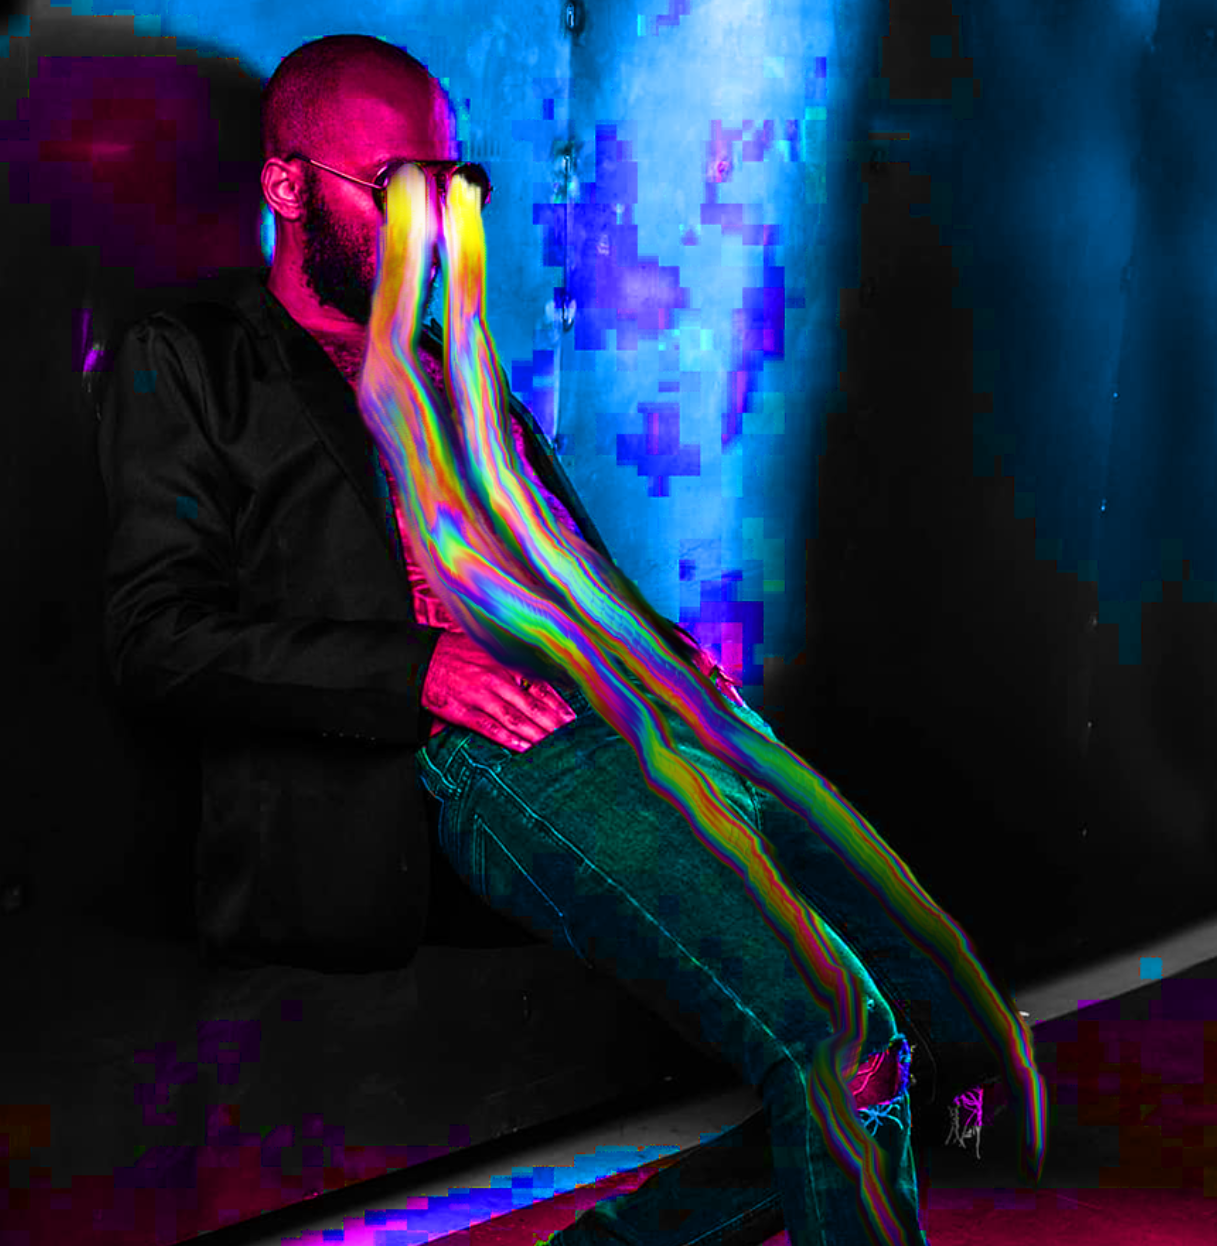
8. Try to draw something similar
9. Turn off Hue/Saturation layer. Add the brightness adjustment layer, bring the brightness to the maximum. Use mask to make sure the adjustment layer is visible only on the selected area.
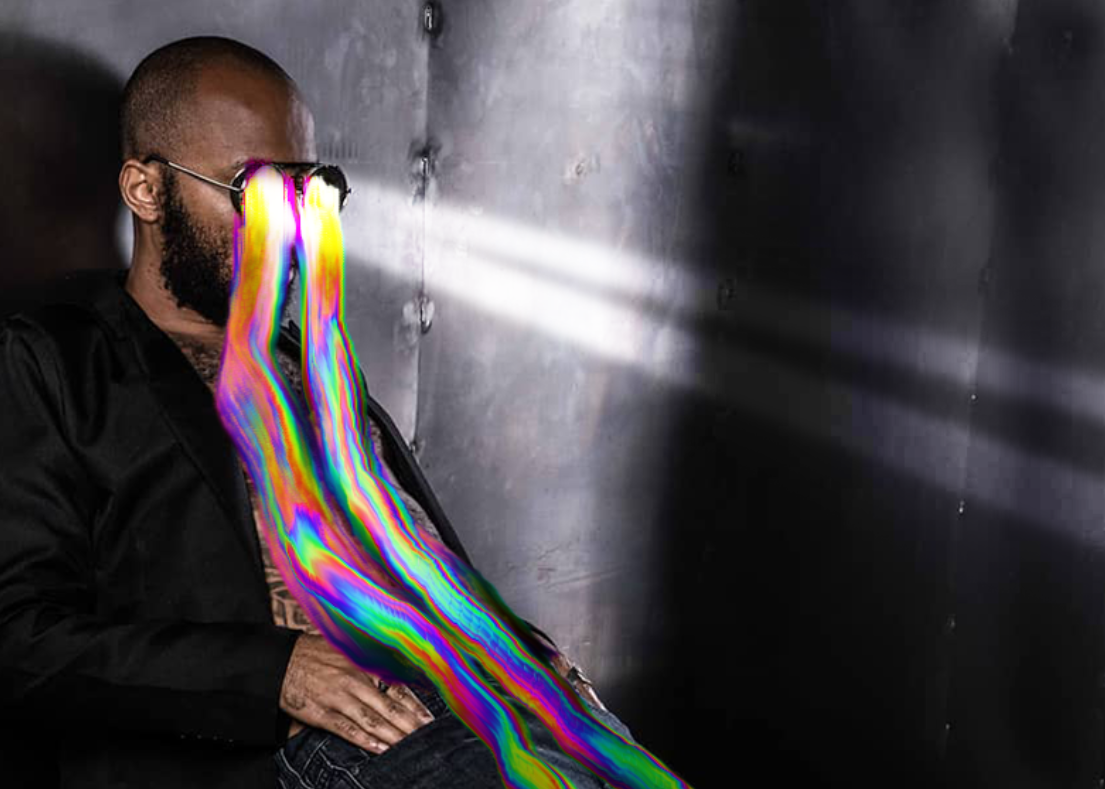
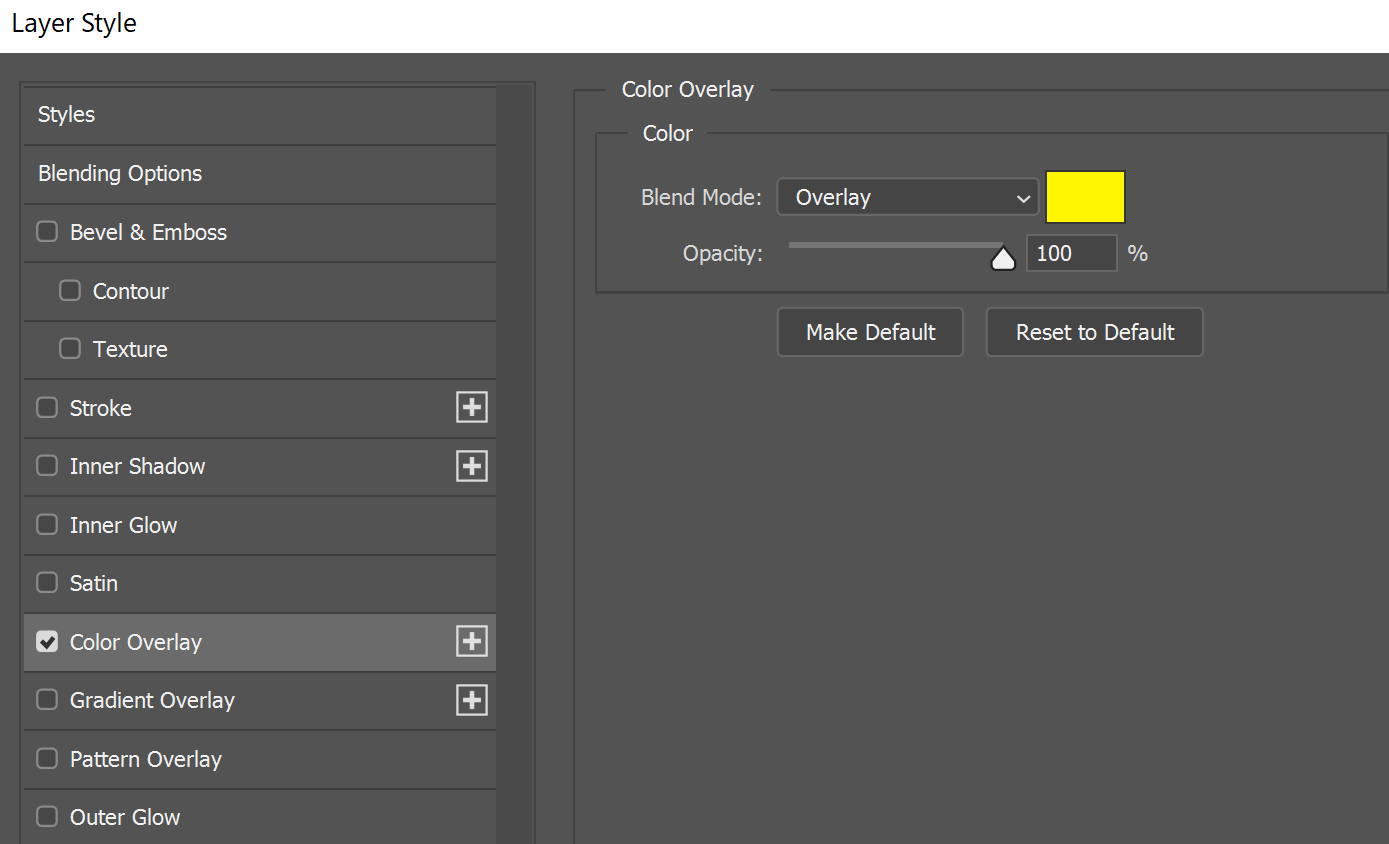
10. Open layer styles and add color overlay to the brightness adjustment layer. The blending option of the color overlay should be "screen" and color yellow.
11. Now it should look like this

12. Select all the layers and convert them to smart object. Now you just need to add Camera Raw and Noise filters to the smart object. If you don't know them just watch my class.
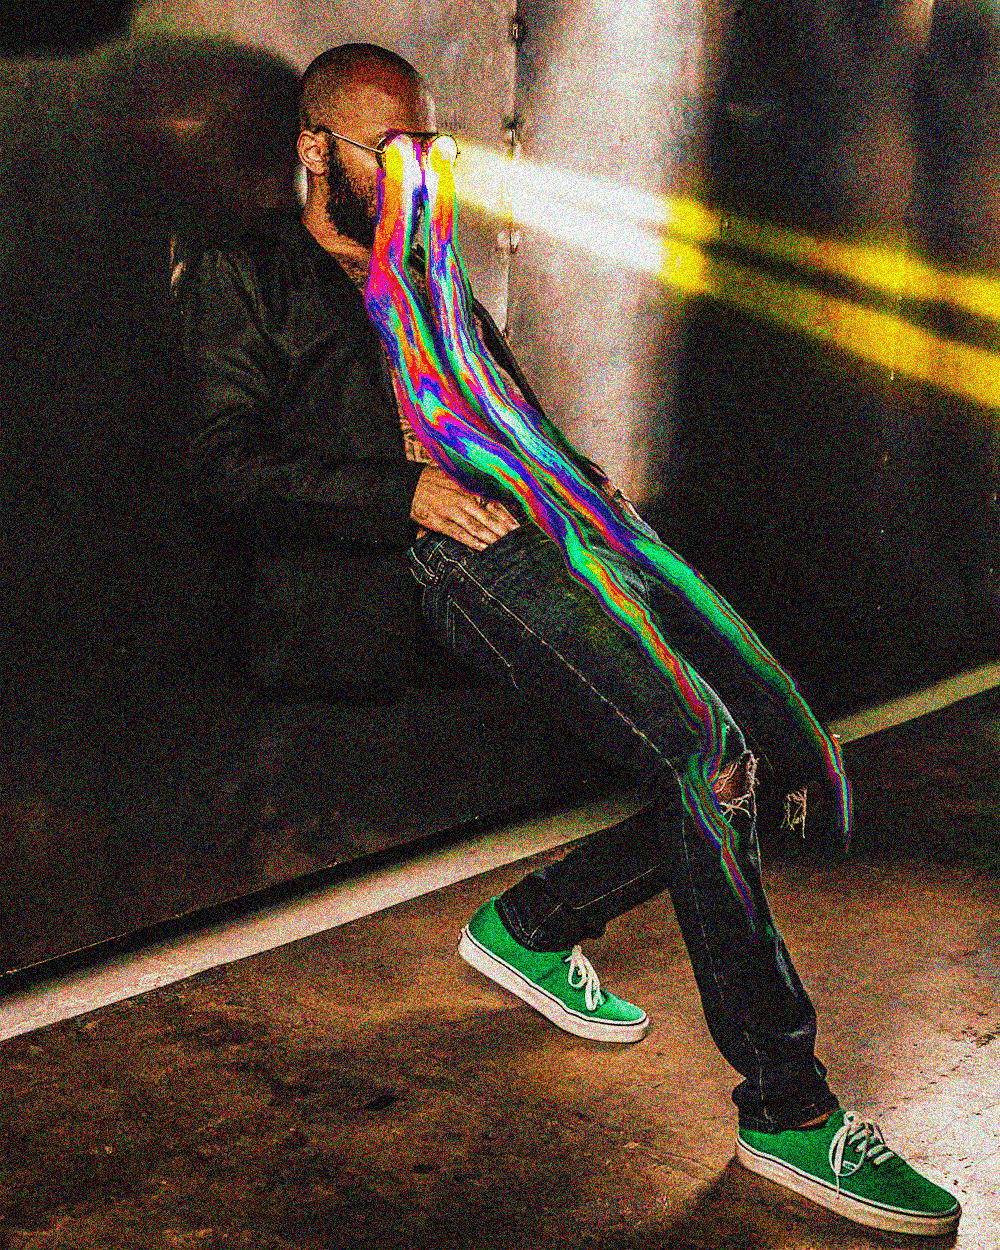
That is it guys. I hope you liked it.
Don't forget to check my profile for more cool projects and classes like this
Other projects I created using this technique. I don't have a class for them yet, but will create soon. Follow me on Skillshare if you don't want to miss them.