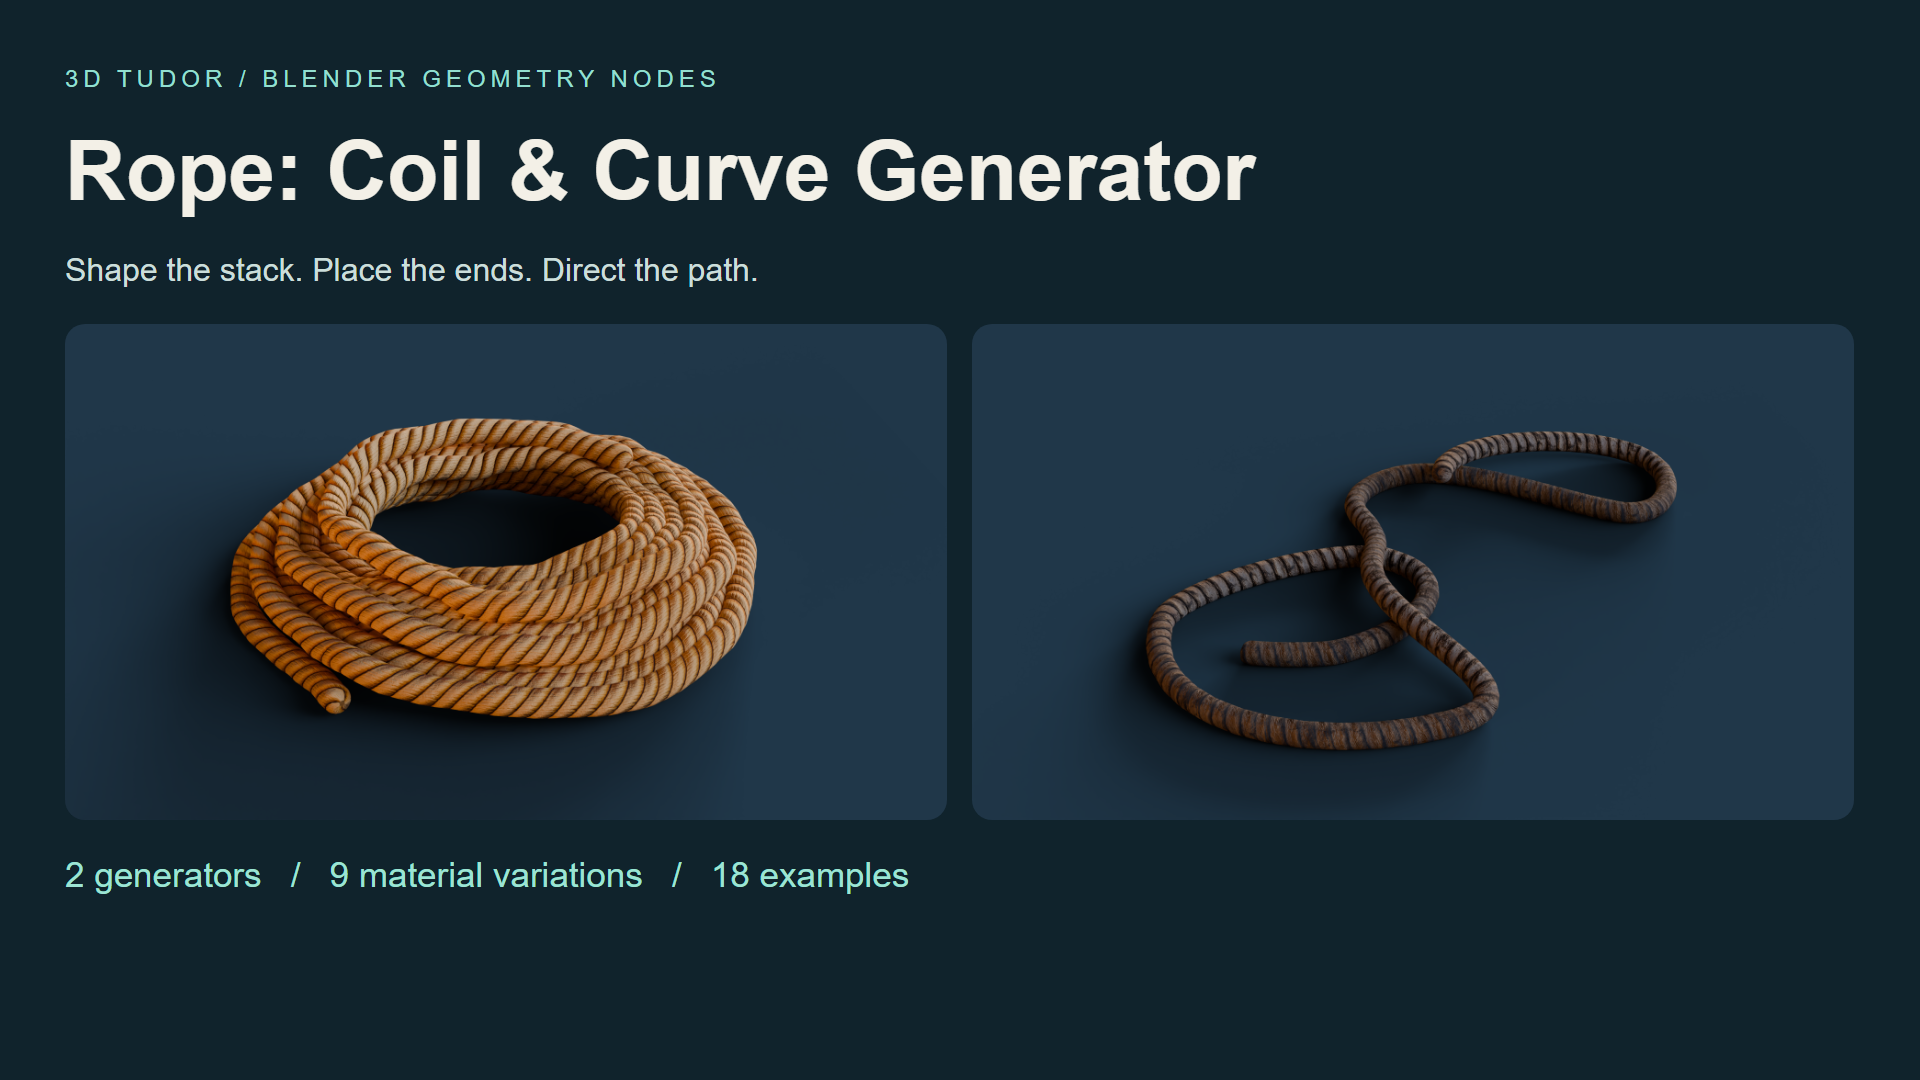
Rope Geometry Nodes: Coil & Curve for Blender
1 mois de Skillshare
Disponible avec l'achatGratuit
Tous les abonnements seront facturés automatiquement de manière récurrente jusqu'à leur résiliation. Si vous pouvez profiter d'un essai gratuit, résiliez avant la fin de l'essai pour éviter une facturation. Offre valable uniquement pour les nouveaux abonnés payants. Consultez l'intégralité des conditions d'utilisation ici.
À propos de ce produit

3D Tudor
Bestselling Blender Author & 3D Educator
Watch Rope Geometry Nodes in action: 3D Tudor’s Blender rope and coil video overview on YouTube.
A rope prop that fits your composition
A coil may look right on its own and still feel wrong beside a crate. The stack is too regular, the opening is too large, or a loose end points away from the scene. Rope Geometry Nodes gives you two Blender workflows for making those choices: shape a coil, or guide rope along an editable curve.
Start from eighteen prepared examples with nine material variations. Keep the supplied objects as references, duplicate one, and adjust the form through its Geometry Nodes modifier.

Build the coil from the outside in
Use Rope Coil to establish layers, thickness and spacing, then refine taper, top inset, variation, seed and organic shape. Compare the outline from your intended camera before working on smaller details.
The upper and lower tails each have visibility, length, angle and tuck settings. Extend one tail towards another prop while keeping the other close. Inner Fill, Inner Wraps and Inner Spacing change the centre arrangement, letting you decide how much ground shows through the coil.

Give loose rope a direction
Rope Along Curve follows an editable Blender curve. Shape a winding length or a series of loose loops, then adjust thickness, end treatment and resolution. The drawing recording shows freehand curve input, giving you another way to establish the route.
Best for: Blender artists arranging workshop, warehouse, dockside or environment props, and anyone who wants an editable starting point for a coil or loose rope in a still scene.

Make the surface suit the shape
The prepared examples include golden, tan, striped, weathered and dark material looks. Choose the finish that fits the scene, then compare Texture Repeat and Texture Rotation before refining seam, around and length offsets. End controls help you adjust the exposed tips.
Keep shape and surface decisions separate: curve and profile resolution affect the geometry; texture controls change how the pattern follows it. Check the result from the working camera before increasing resolution.

Your download includes
Two Geometry Nodes generators in one .blend file; eighteen example objects, split between nine coils and nine curve ropes; nine material variations with packed textures; a getting-started text guide; and three MP4 controls demonstrations.
Rope Coil exposes 32 parameter inputs and Rope Along Curve exposes 13. Some controls are shared between the generators. The recordings cover coil controls, curve controls and curve drawing; they are demonstrations of the setup, not a narrated course.

Before you start
Open the .blend file and duplicate a prepared example. Establish the main coil dimensions or curve path first, refine the tails and centre where relevant, then finish with the material and texture alignment. No add-on installation is required.
The file was opened and its exposed controls inspected in Blender 5.1.2. Cycles is the saved scene engine. Other Blender versions and render engines have not been separately tested. Image textures are packed at 512 × 2048 and 1024 × 512.

What is not included
This is a standalone paid digital product, separate from Skillshare classes. It includes no Unreal Engine or Unity project. Rope paths are arranged manually: there is no gravity or collision simulation, or automatic knot generation. Geometry counts depend on your generator settings.
Until next time, happy modelling, everyone!
Neil - 3D Tudor
FAQ
Qu'est-ce que les produits numériques ?
Les produits numériques de Skillshare sont des outils, des ressources et des modèles développés par des pros de la création et mis à votre disposition à l'achat. Avec un large éventail de ressources répondant à tous les besoins créatifs, ils sont exploitables, rendant votre expérience d'apprentissage concrète et inoubliable.
Comment puis-je acheter un produit numérique ?
Tout le monde peut acheter un produit numérique sur Skillshare. Cliquez sur Acheter maintenant pour saisir vos informations de paiement et finaliser votre achat. Une fois le paiement effectué, tous les fichiers pourront être téléchargés instantanément à partir de cette page. Vous recevrez également un e-mail contenant un lien pour télécharger votre produit numérique après l'achat.
Y a-t-il une limite au nombre de fois que je peux télécharger un produit numérique ?
Non, il n'y a pas de limite au nombre de fois que vous pouvez télécharger un produit numérique. Même si un produit est supprimé par la personne qui l'a créé, vous pouvez toujours accéder à la page de téléchargement dans la plupart des cas en vous connectant à votre compte Skillshare.
Puis-je obtenir un remboursement ou annuler l'achat de mon produit numérique ?
Les produits numériques ne sont pas remboursables et ne peuvent être ni retournés ni annulés. Pour en savoir plus, consultez notre politique de remboursement dans le centre d'aide Skillshare.
Puis-je créer et vendre mes propres produits numériques ?
Absolument ! Consultez l'article Comment puis-je vendre un produit numérique sur Skillshare ? pour découvrir comment créer, proposer et vendre vos propres produits numériques sur Skillshare.