Master Masking Fluid
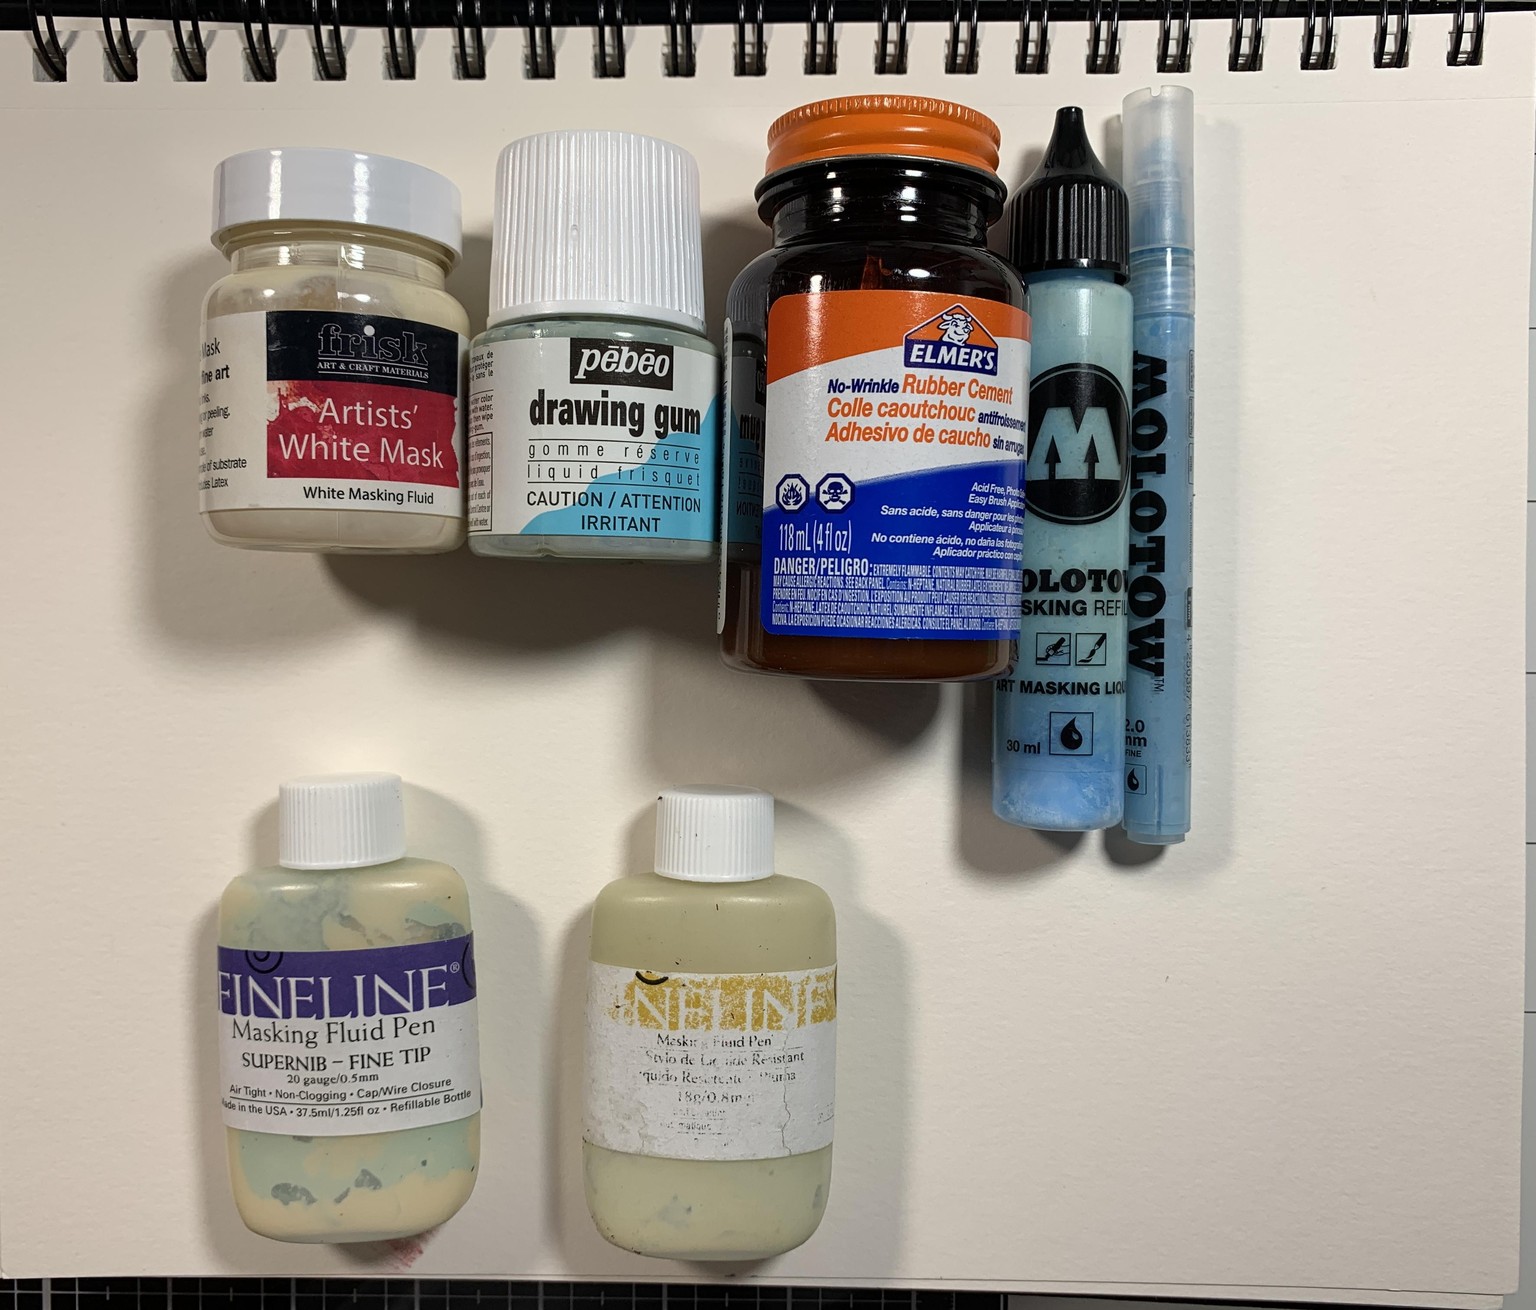
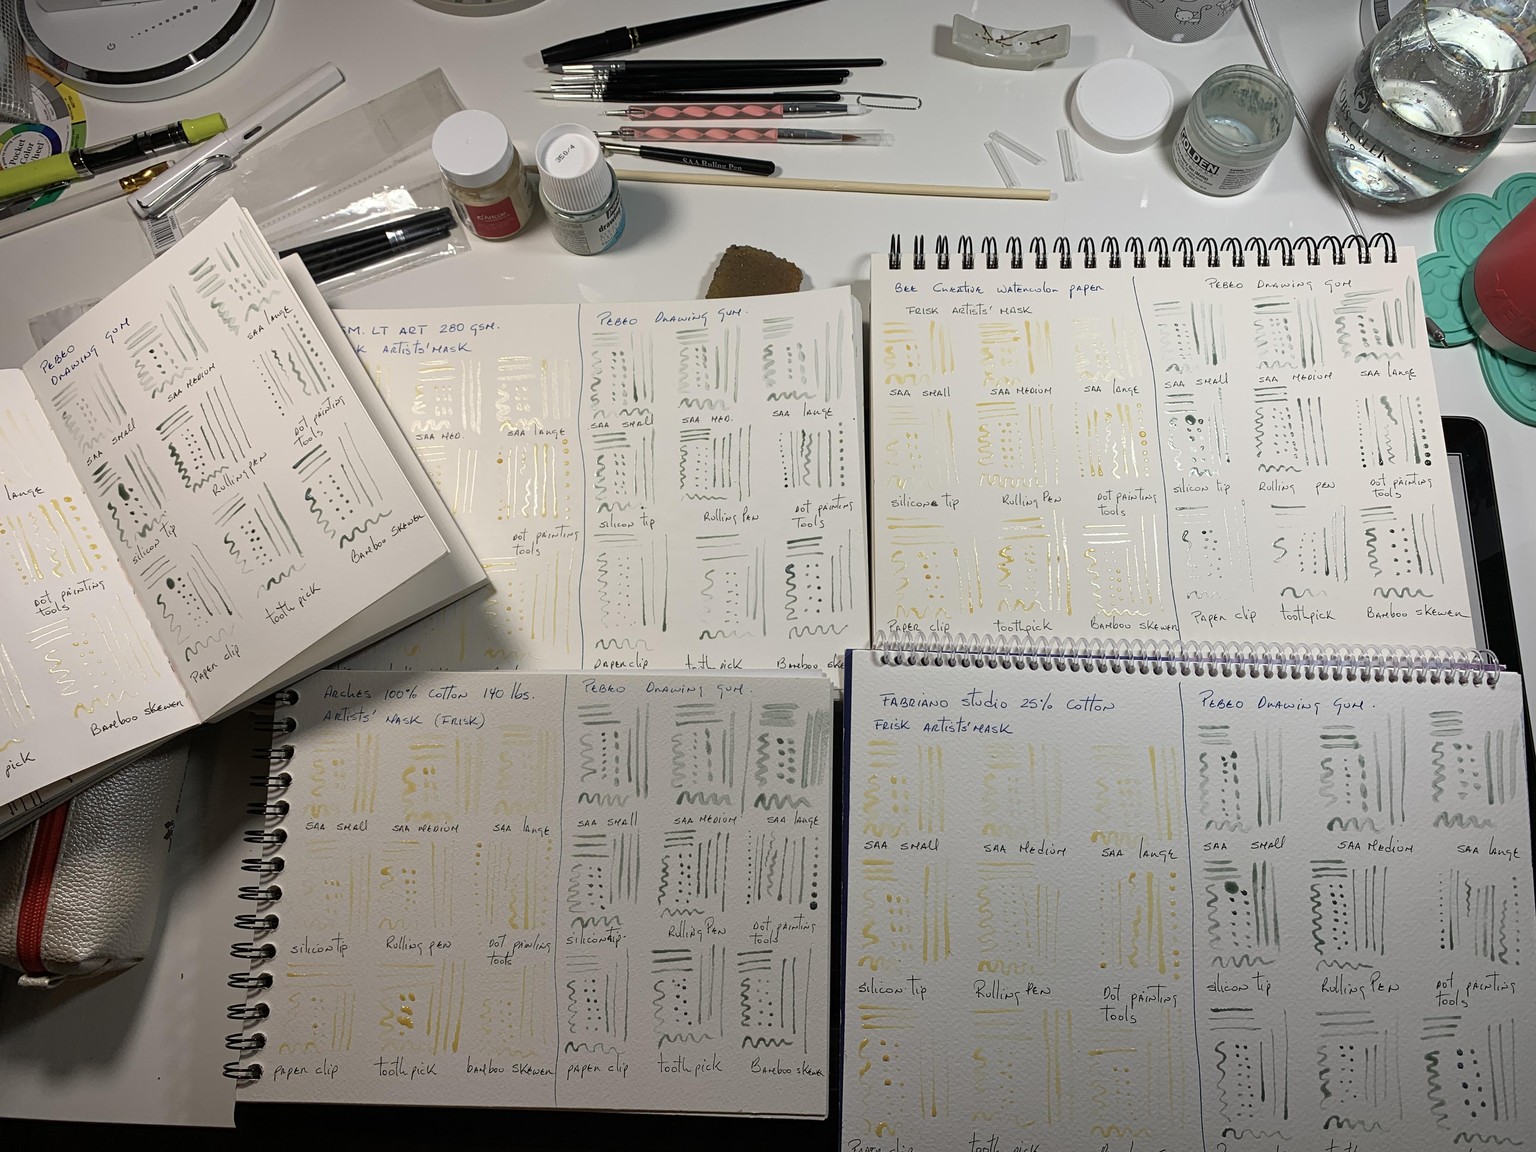
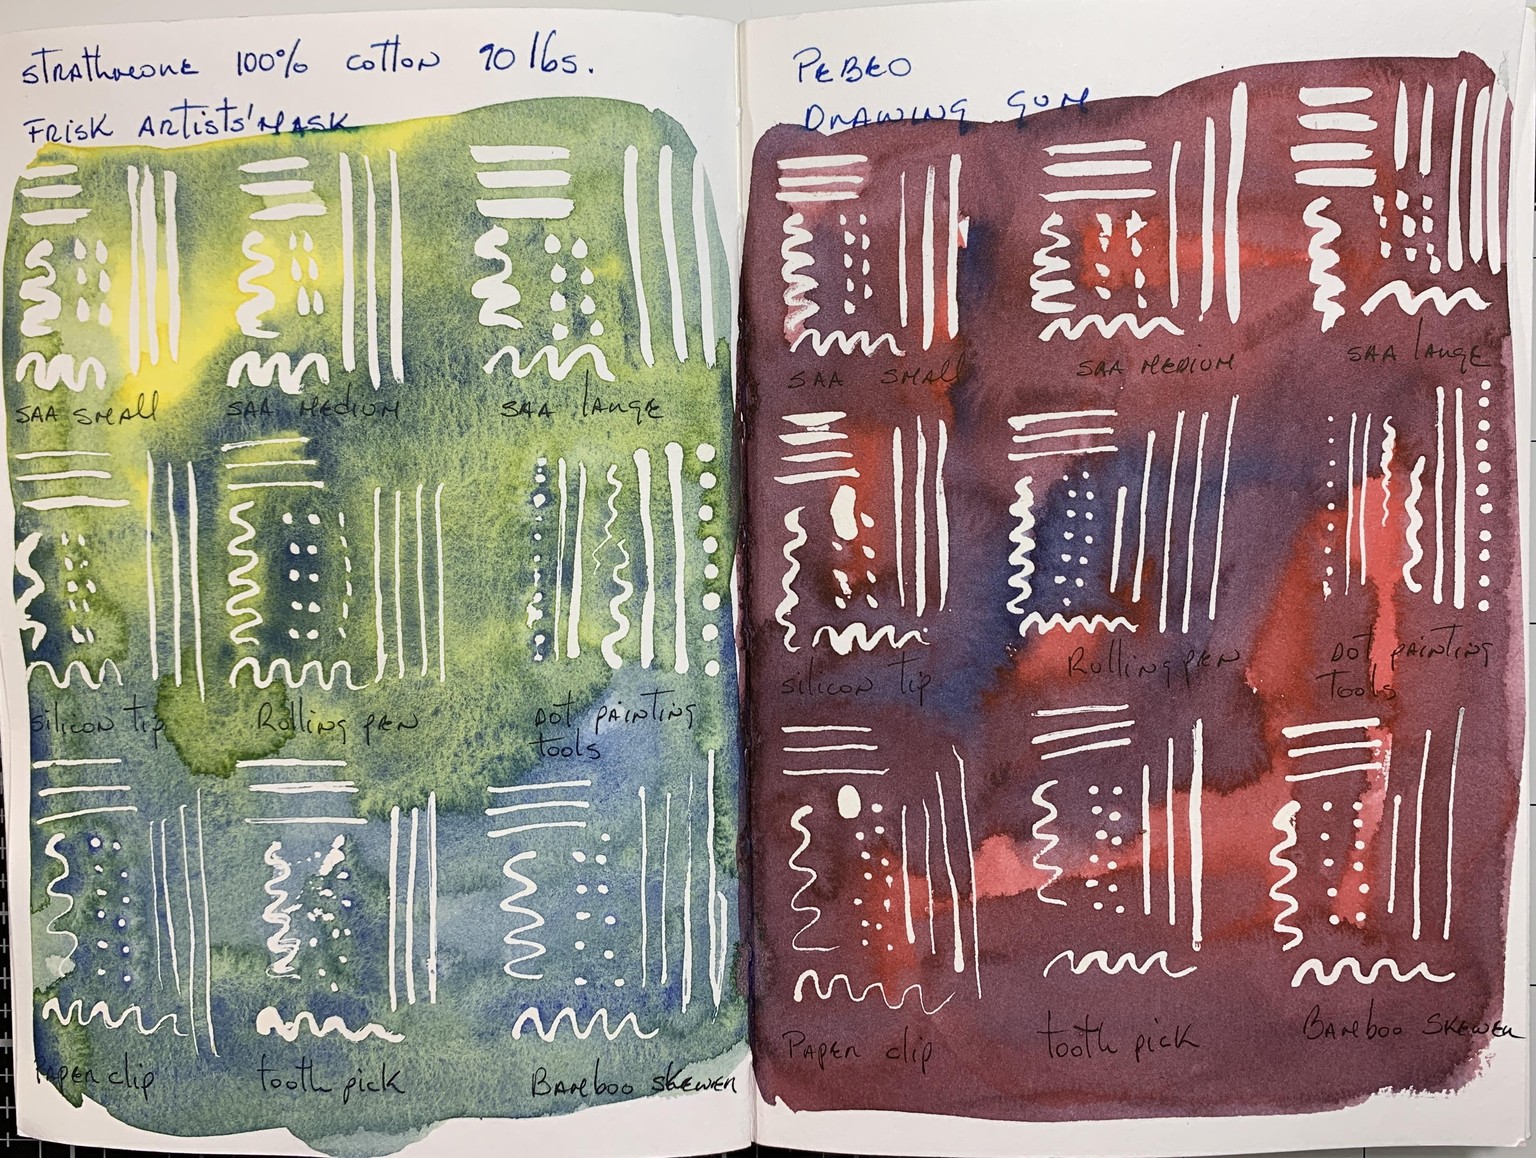
Materials.
This was a great learning experience. I have used masking fluid in the past, but it never occurred to me to do such an extensive test of masking fluids, tools and papers. Happy I did it, now I have a library of marks to compare when it comes to doing projects using masking fluid.
I have several brands of masking fluid that I had bought many years ago, as expected some of them dried out and were unusable. From the lot, the only ones I used were Frisk Artists’ Mask and Pebeo Drawing Gum.
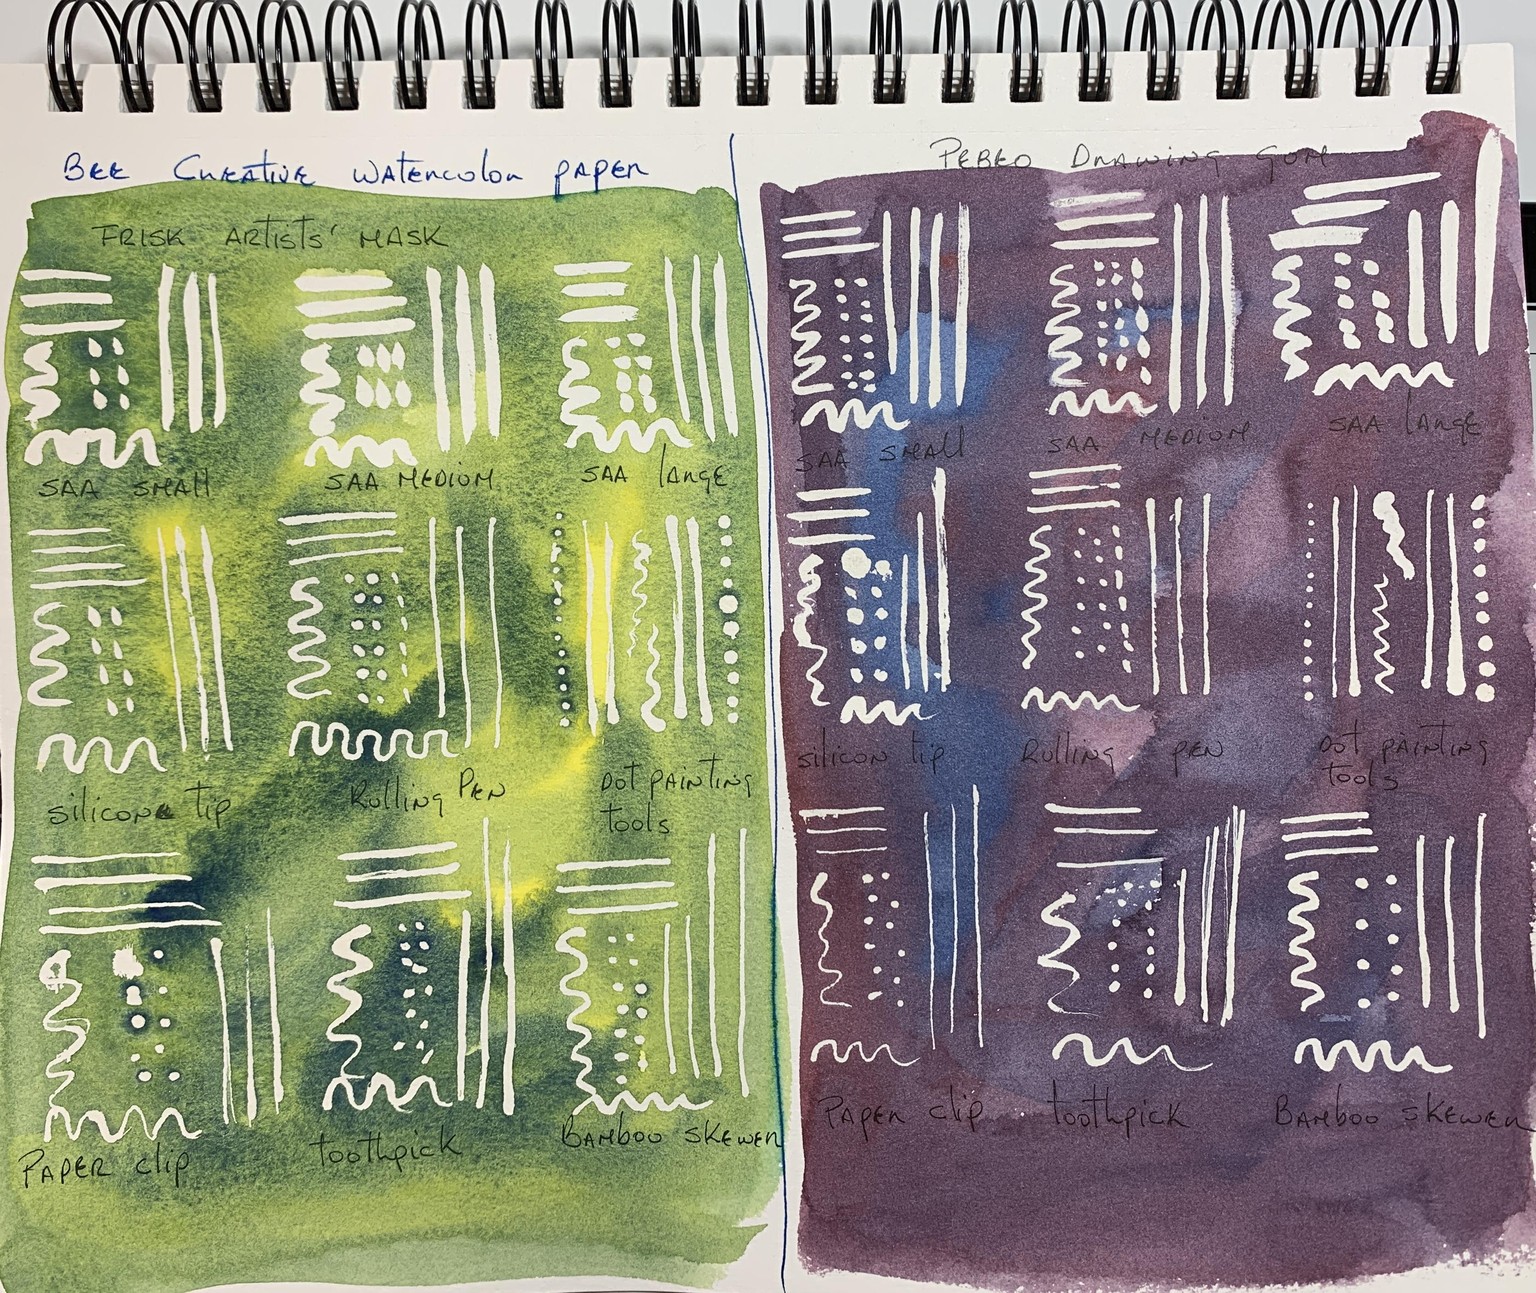
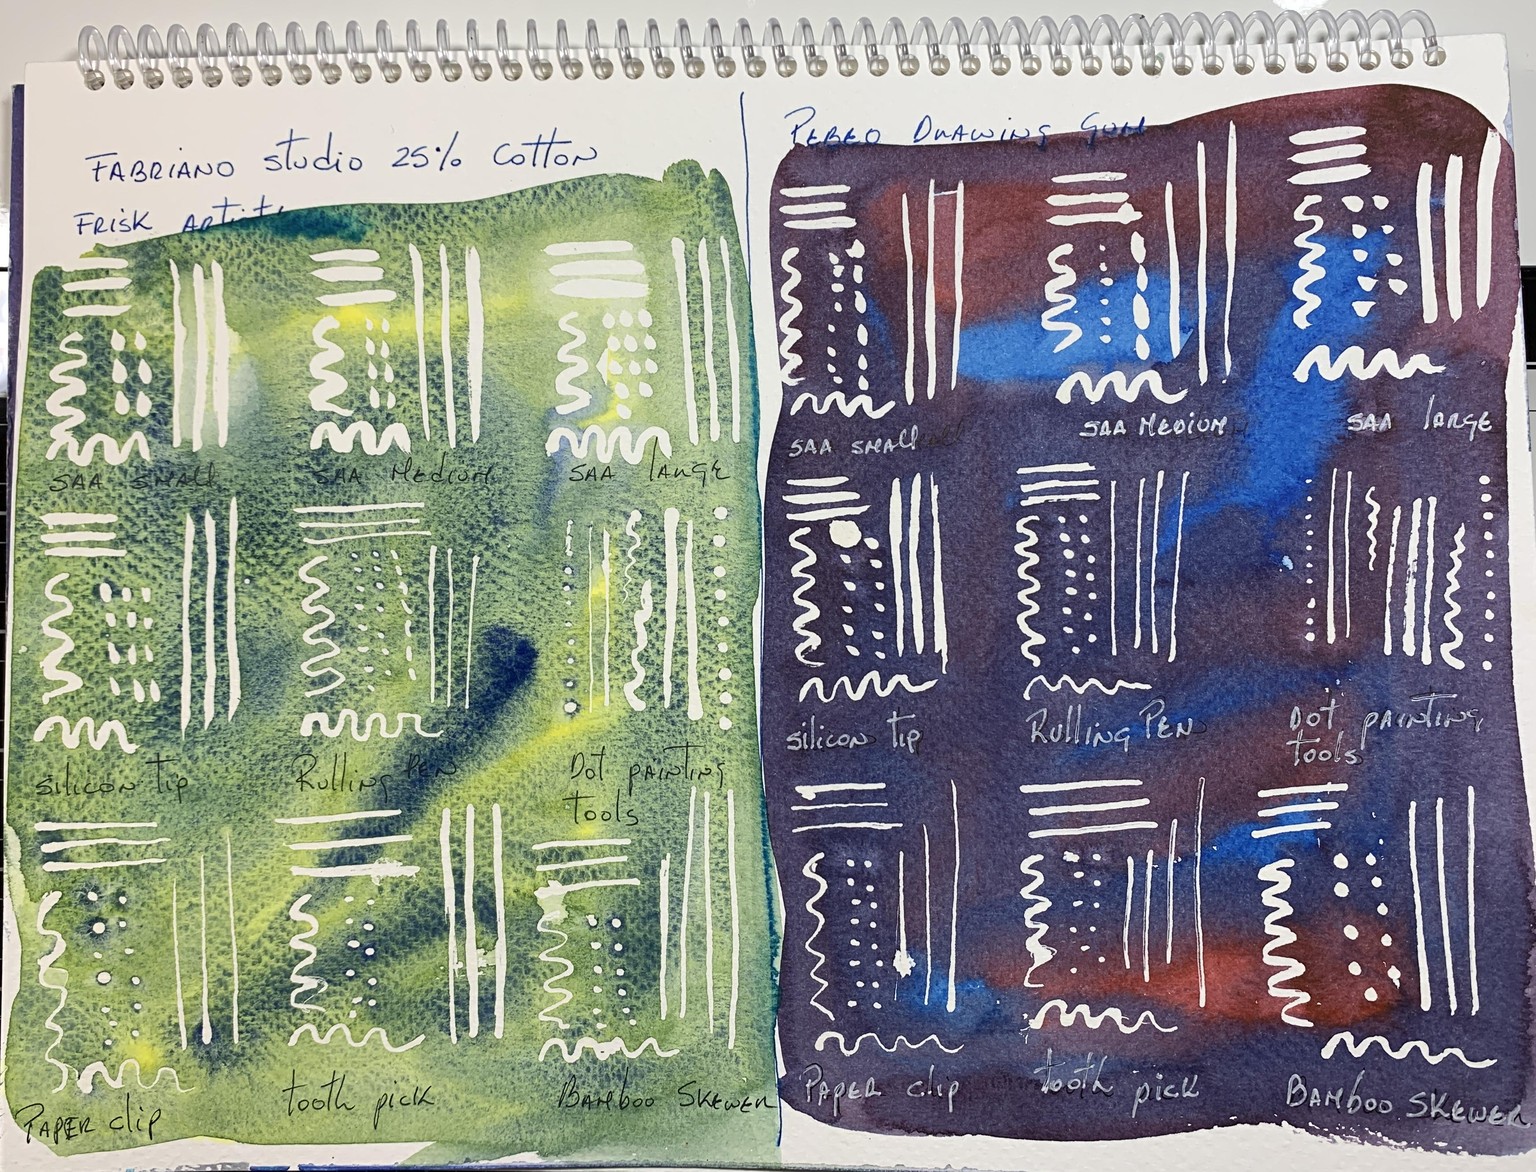
I used five different types of papers (names are on the sheets) and several tools to apply the masking fluid. I made the same marks with the same tools on all the various papers with the two brands of masking fluids, so I can compare apples to apples. I also wanted to try how the colour will mix on the various papers.
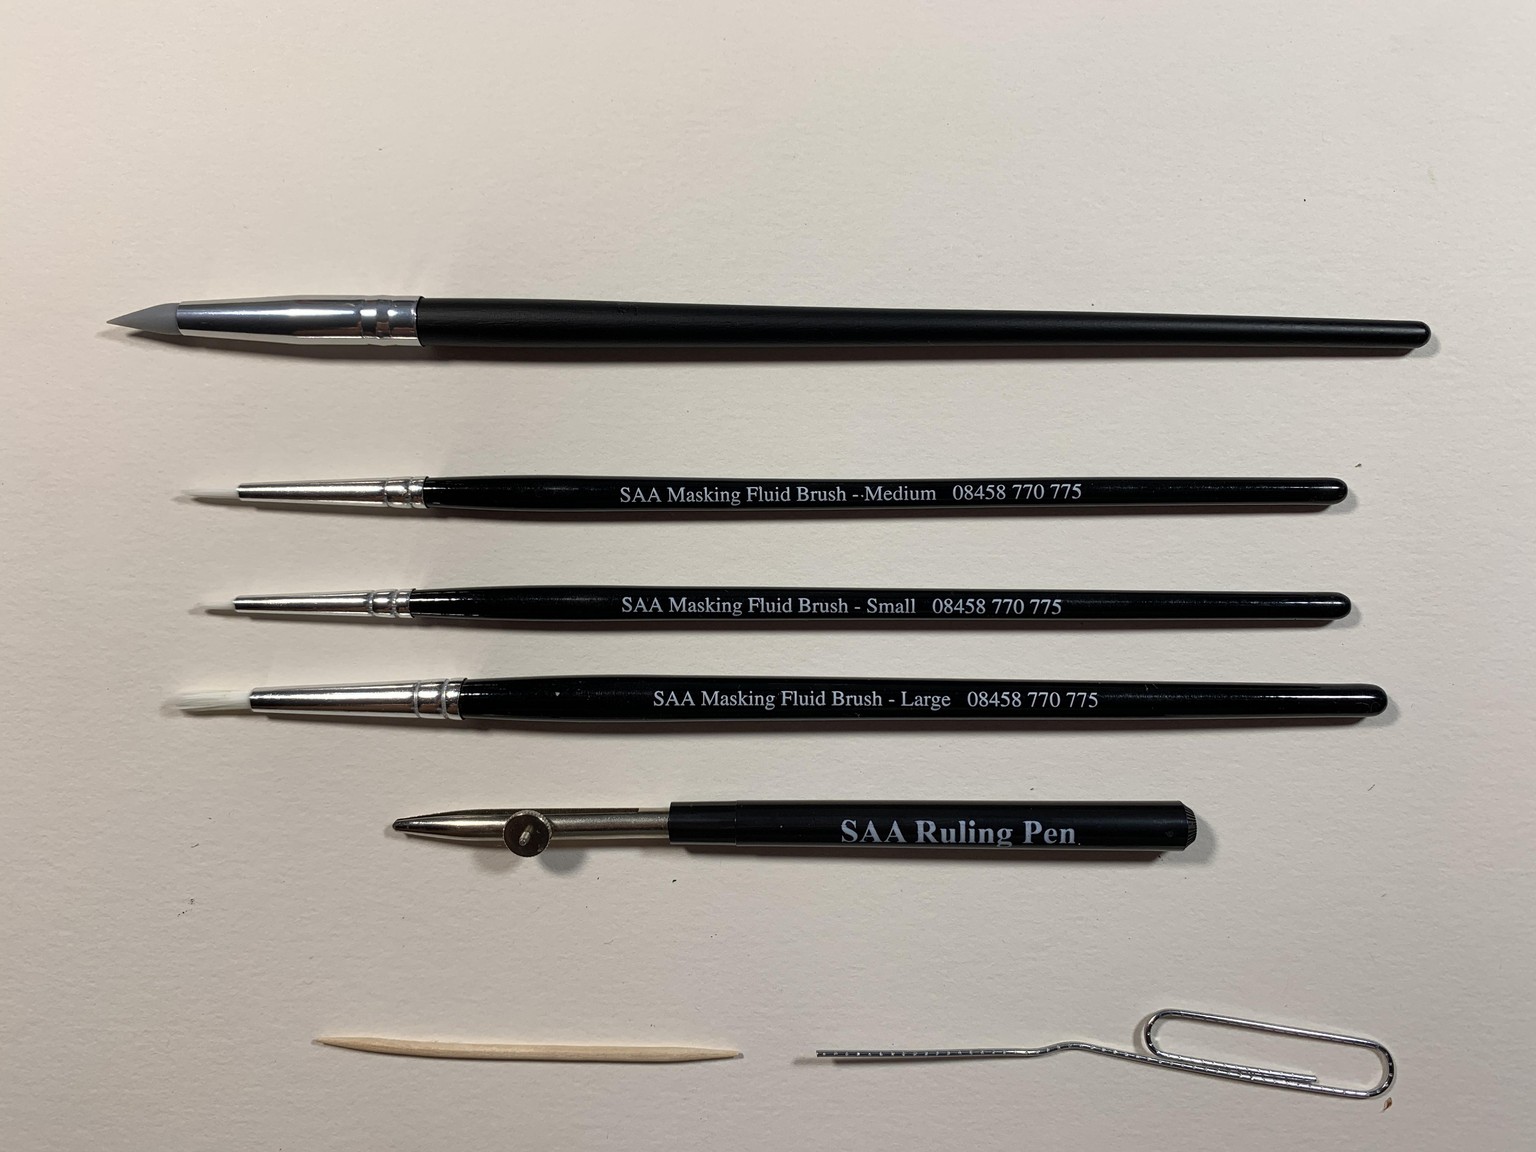
I used several tools to apply the masking fluid. The SAA brushes are meant for masking fluids and the work really well. After watching a review on YouTube, I decided to apply a bit of dish soap before applying the masking fluid, rinse them with water right after I finished and they came clean. I also used a bamboo skewer, but forgot to add it in the picture.
Day 1. Test Sheets.
I was a bit apprehensive about the results since the masking fluids were old and I did the test in two seatings. I wanted to make sure that the masking fluid will not stay on the page more than 24 hours.
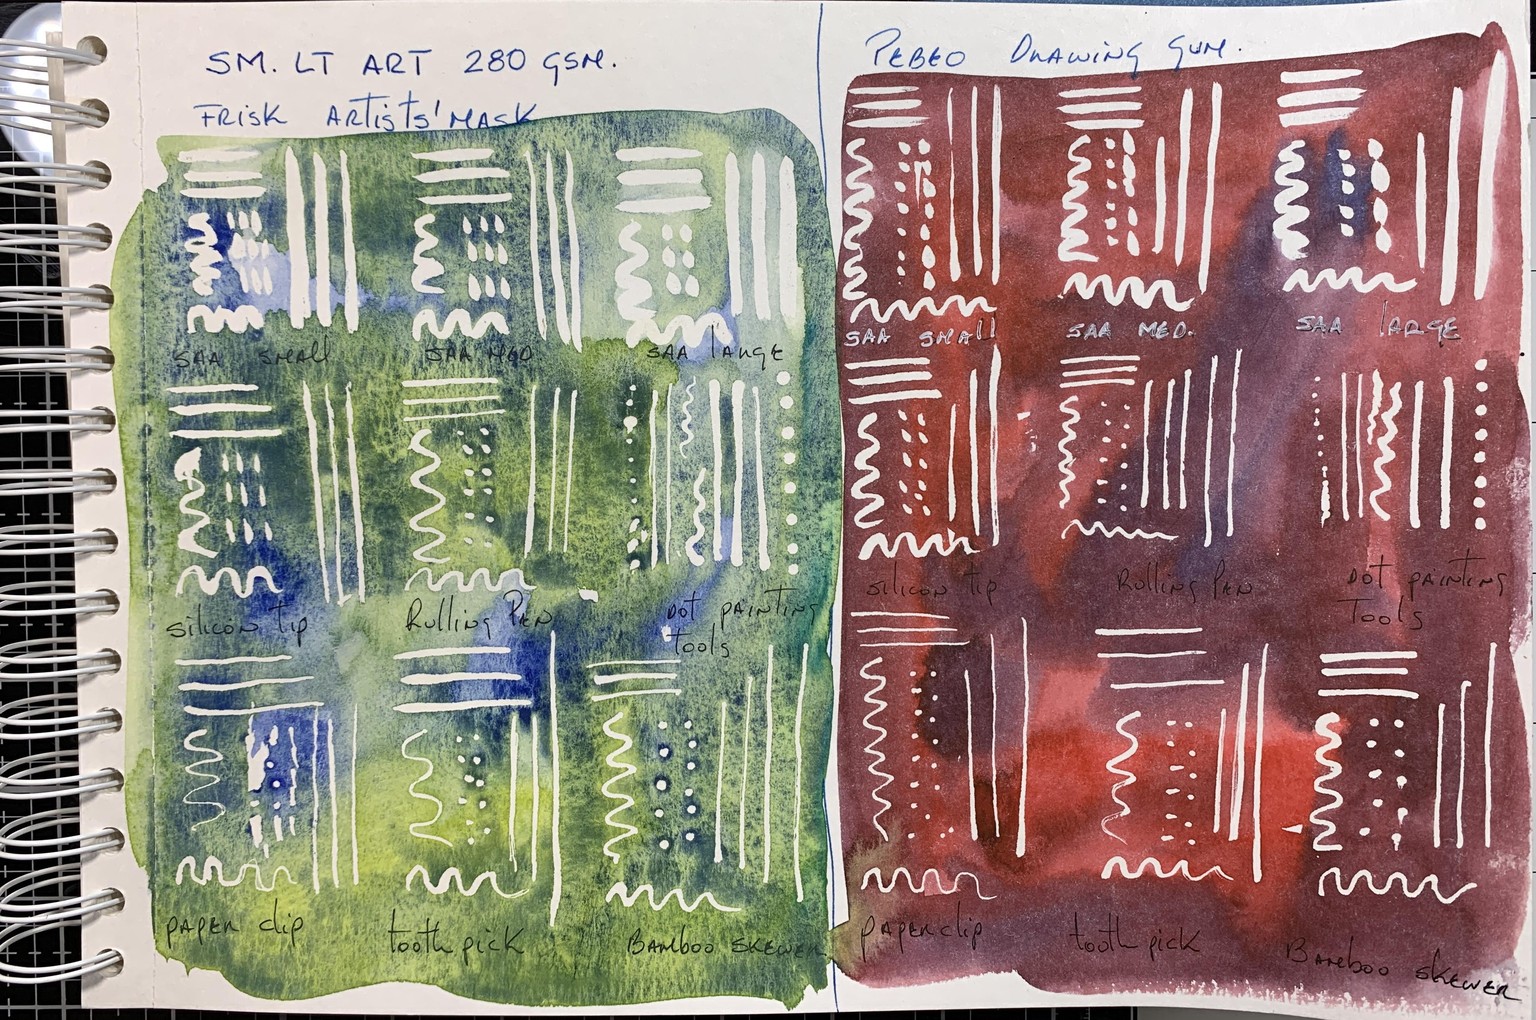
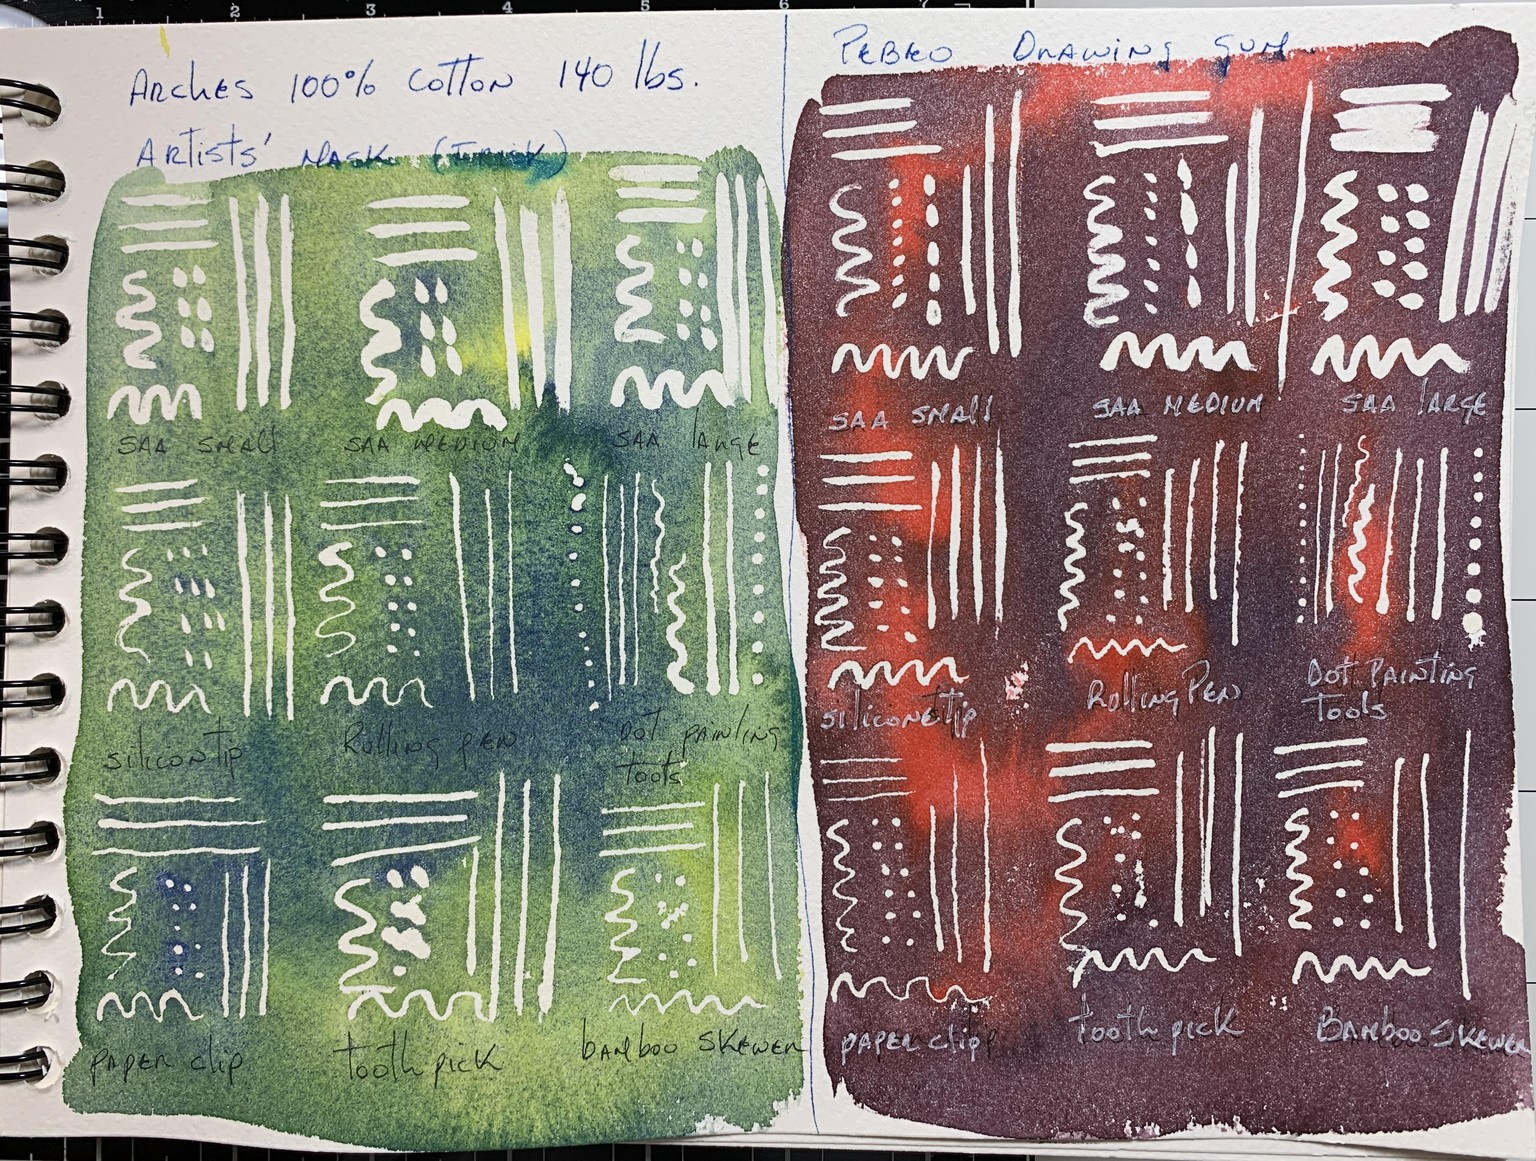
Testing sheets with watercolor, masking fluid still on.
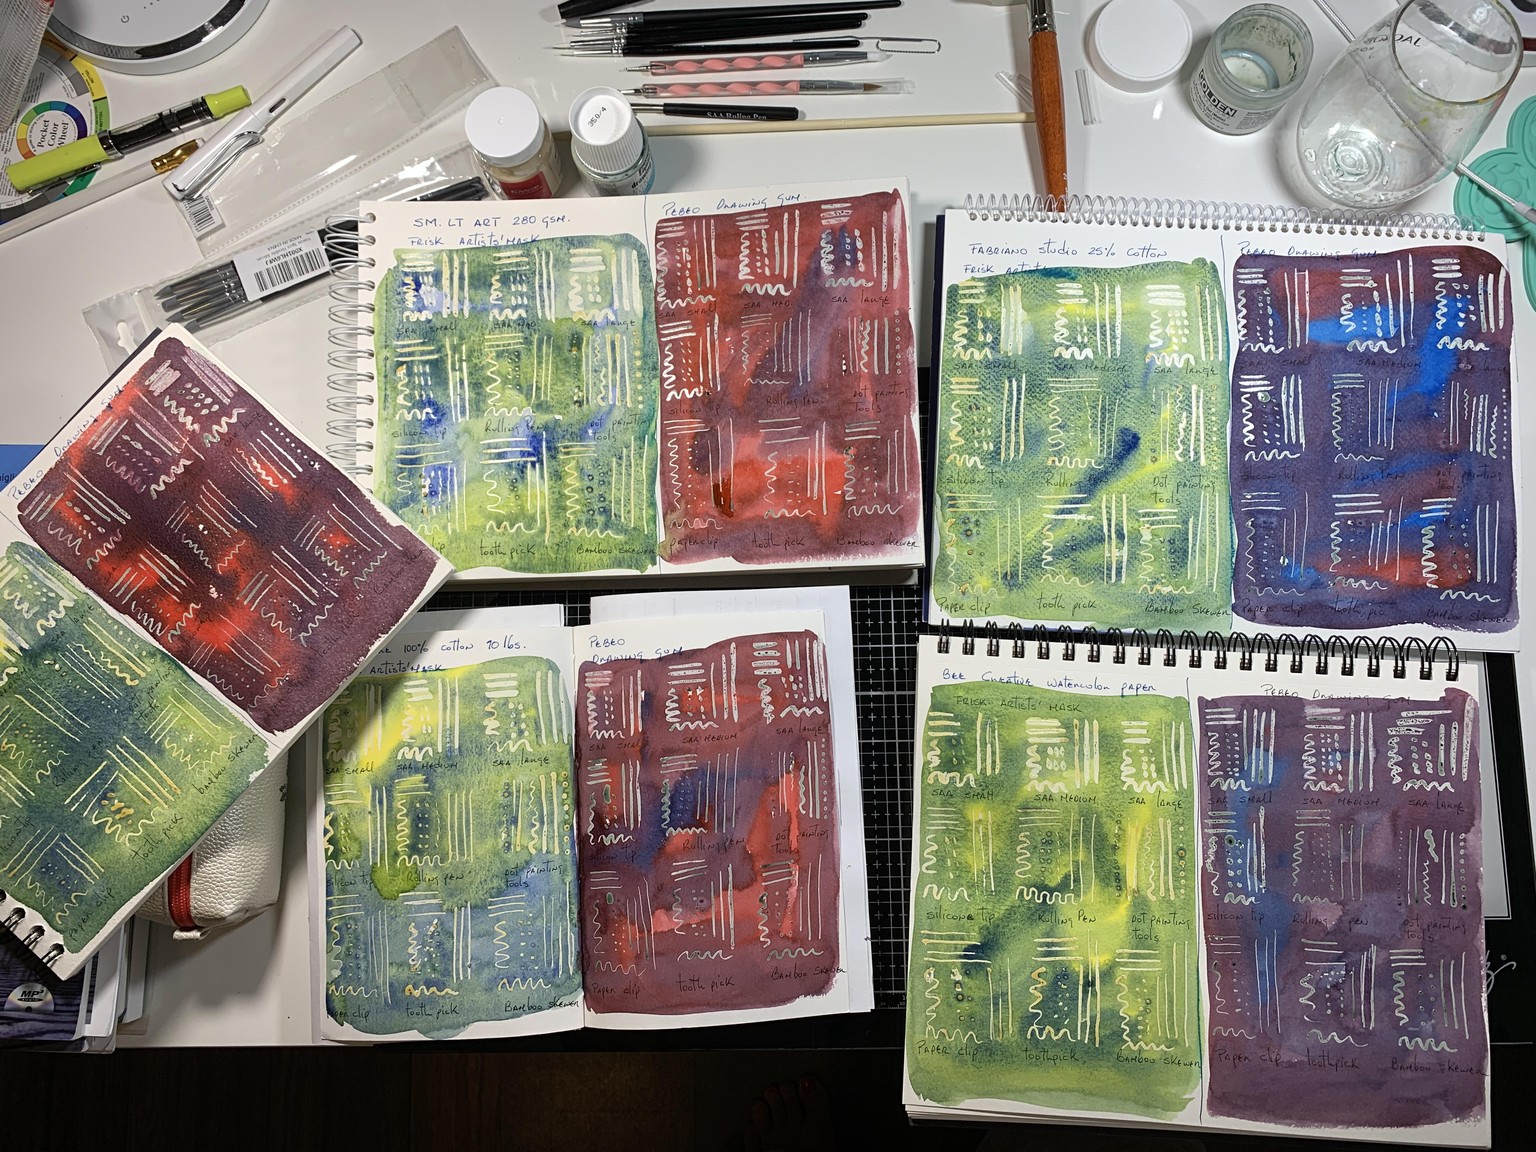
I did not have any problem removing the masking fluid from any of the papers. It came off easy from all of them without tearing.
My takeaways.
. Like with any job, use the tools that suit the job. Circles or dots are best done with a round object. The exception to this was the ruling pen, it made good dots. I was surprise about that. This is probably my favorite tool to apply masking fluid. It is versatile and I can get thin and thick lines depending how big is the separation of the tip.
. I found that the more textured the paper, the easier was to apply the masking fluid. Any tool would work well and the thinnest of lines will show up.
. The mark that you see on the page after applying the masking fluid is what you are going to get after you remove it. In other words if the masking fluid goes patchy, you will get a patchy drawing.
. I was surprise how the thinnest lines will provide a good coverage. At first, I wasn’t sure that it would cover so I applied a second thicker line over the first one. I prefer the one pass lines.
. My least favourite tool was the toothpick, it worn out quickly and absorbed a lot of the masking fluid so I had to dip it in the masking fluid more often. It was difficult to control.
. Another surprise was the bamboo skewer. It was very versatile. I was able to do nice straight and fine lines, squiggles and dots.
. When it came to the brushes, the bigger the brush the easier it was to apply the masking fluid. The small brush will not hold enough masking fluid so I ended up dipping it often and lines were coming really thick and wobbly. Perhaps for tiny details will work, but not for these test sheets.
. When it came to the dotting tools and the silicon tip brush, I have to rinse them a couple of times while doing the pages since the masking fluid sticks on easily creating thicker and gummy lines.
For my projects, I will be using the Strathmore 100% cotton 90 lbs sketchbook and the Pebeo drawing gum. I like to keep my work inside a sketchbook that way I can go back to it for inspiration and ideas. I also want to do some of the projects on Arches. This paper is a bit thirsty and rougher than all the other papers I tried, so it would be a good experiment for me.
Day 2. Abstract Warm Up.
I really liked this exercise. I had to remind myself that it didn’t need to be perfect, so I went for it.
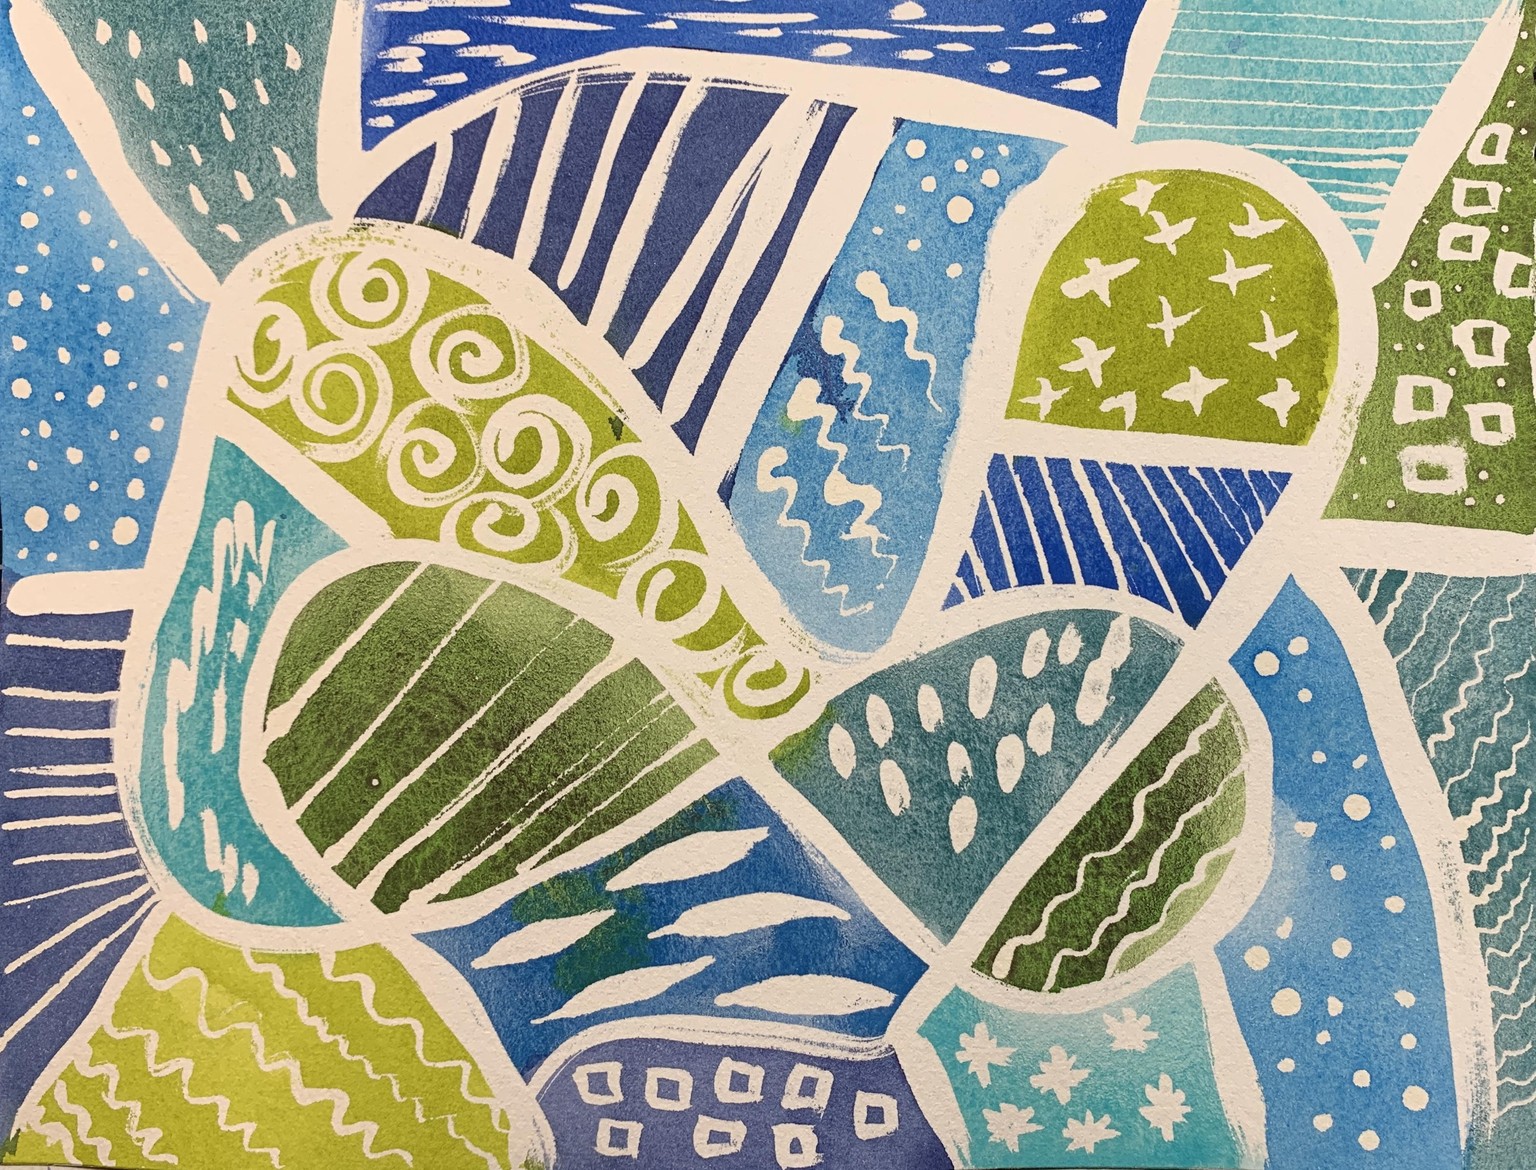
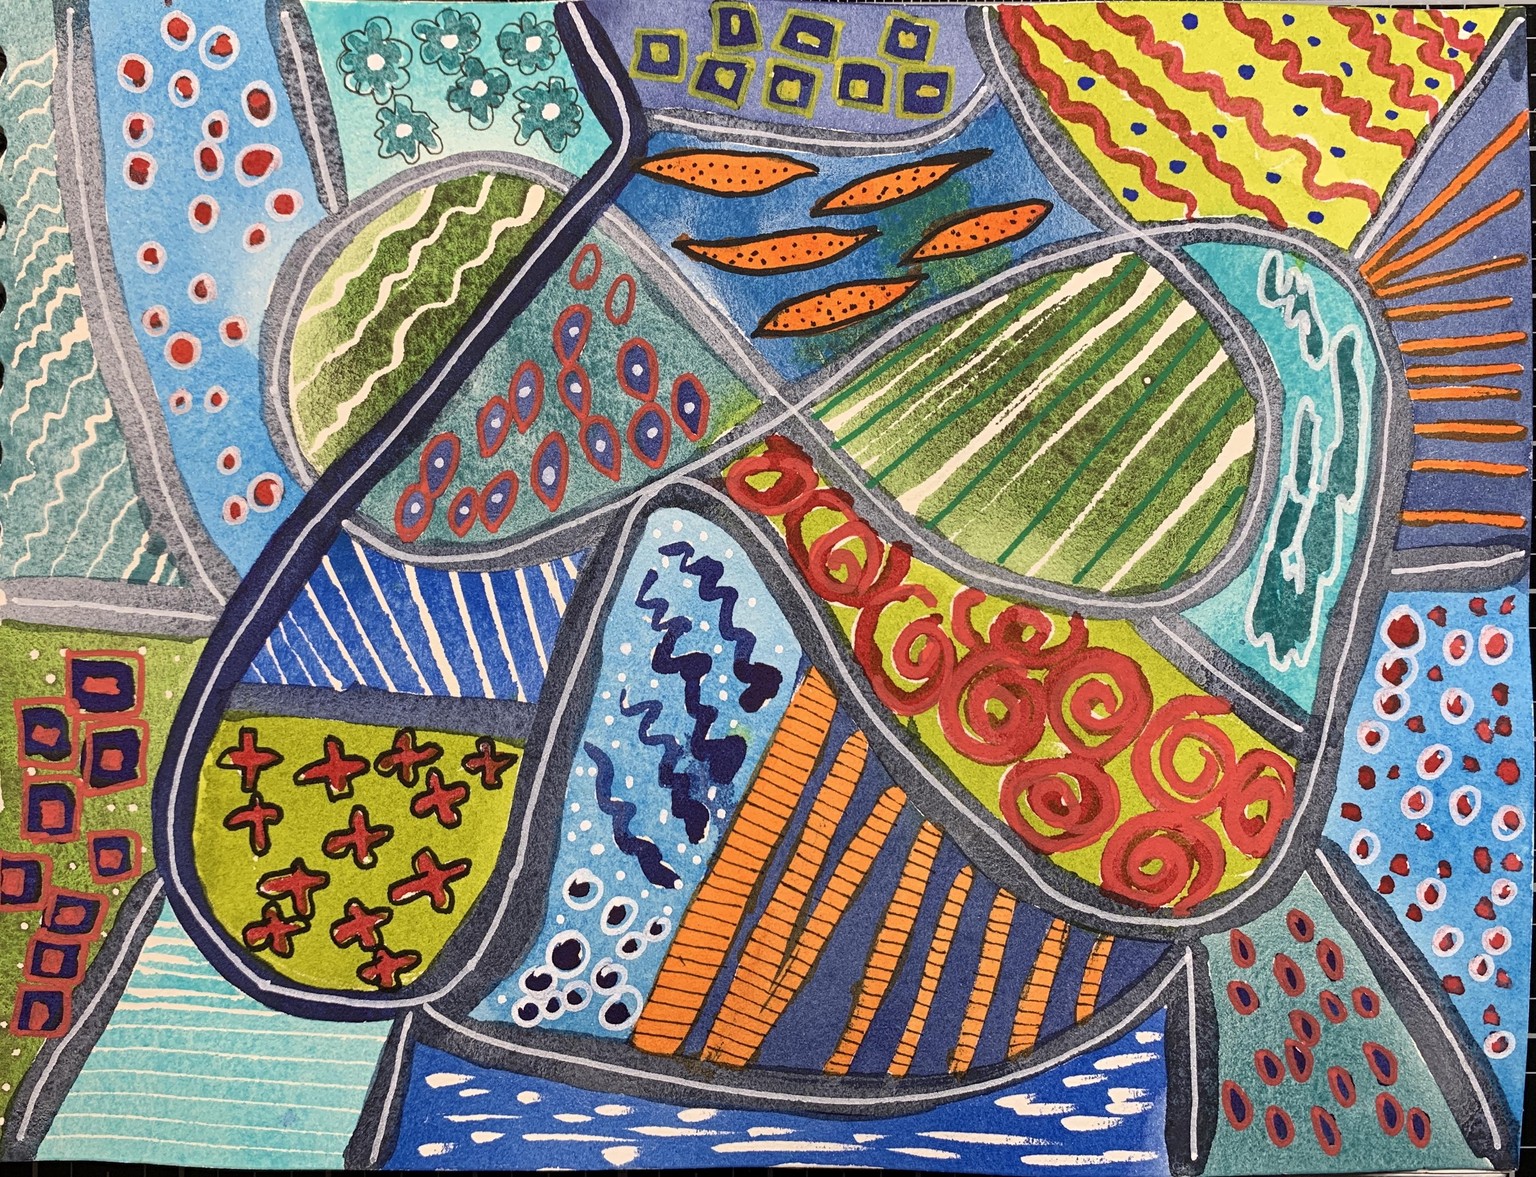
In the spirit of experimentation, I decided went to color the white areas and made a mixed media piece.
Day 3. Tea cups.
I did two versions of this exercise. One on Arches paper 100% cotton 140 lbs (below) and the other inside my sketchbook. I wanted to see how this particular paint behave on two different surfaces.
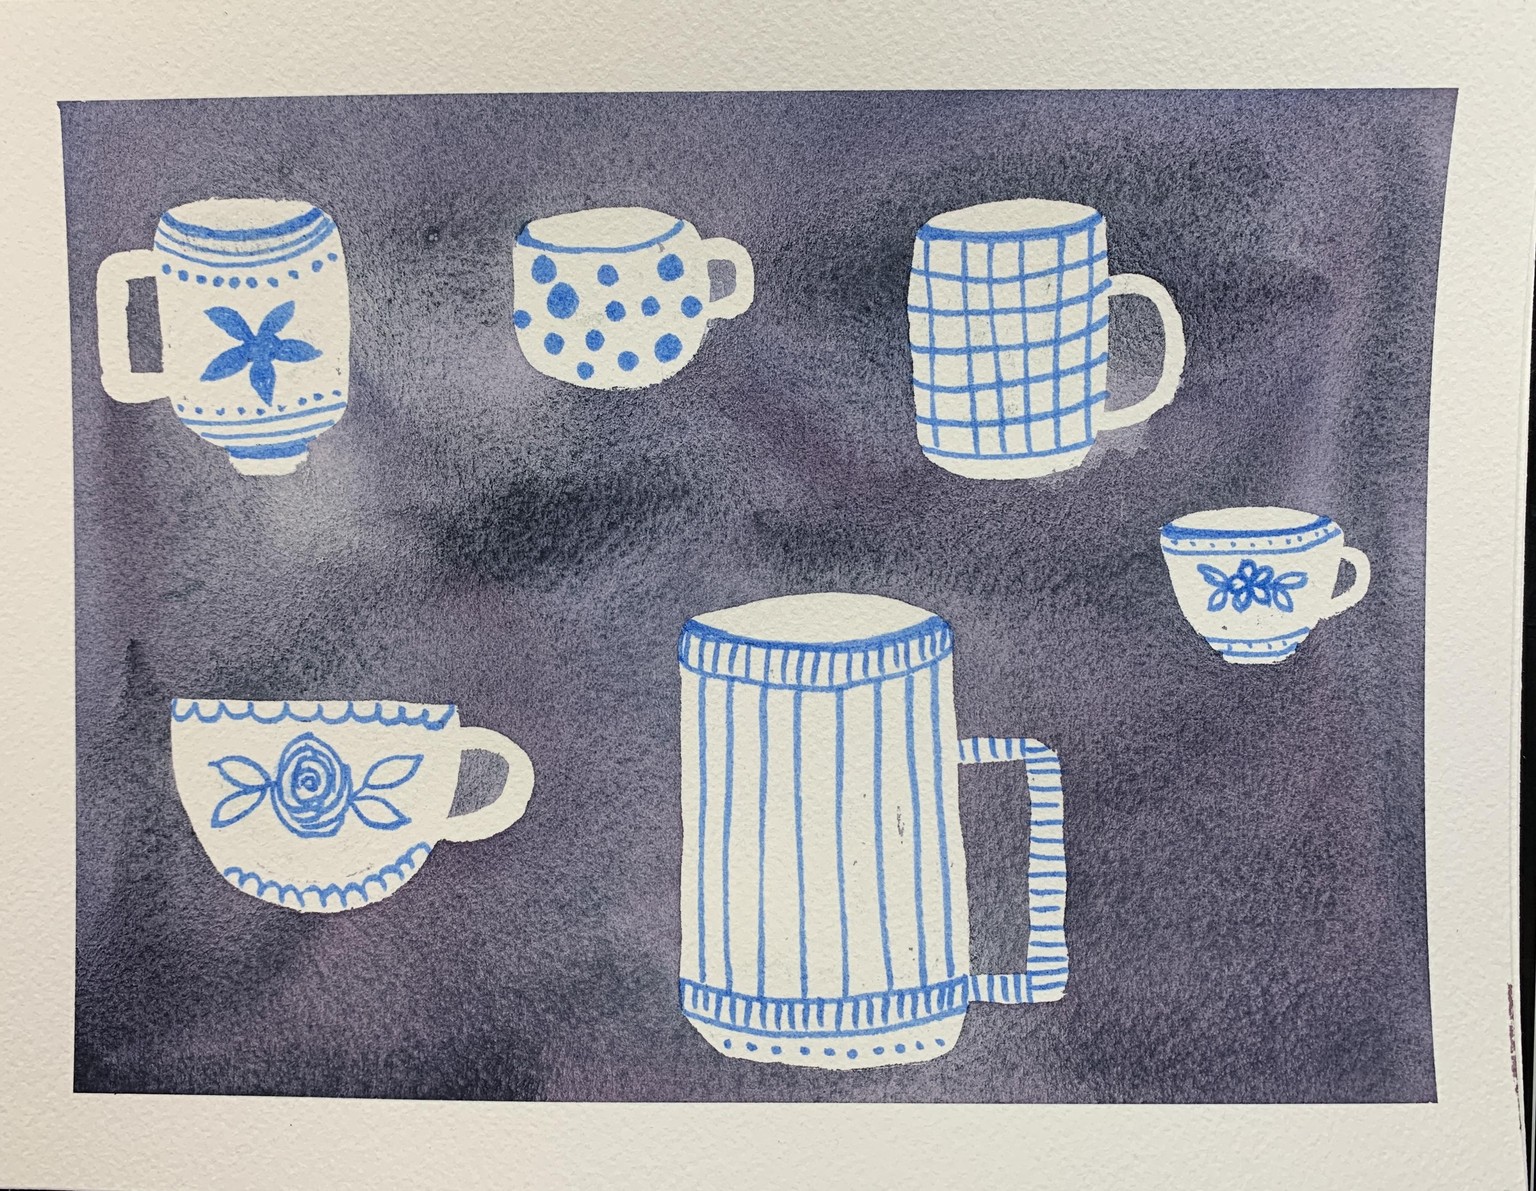
Here is the other version on Strathmore 100% 90lbs sketchbook. 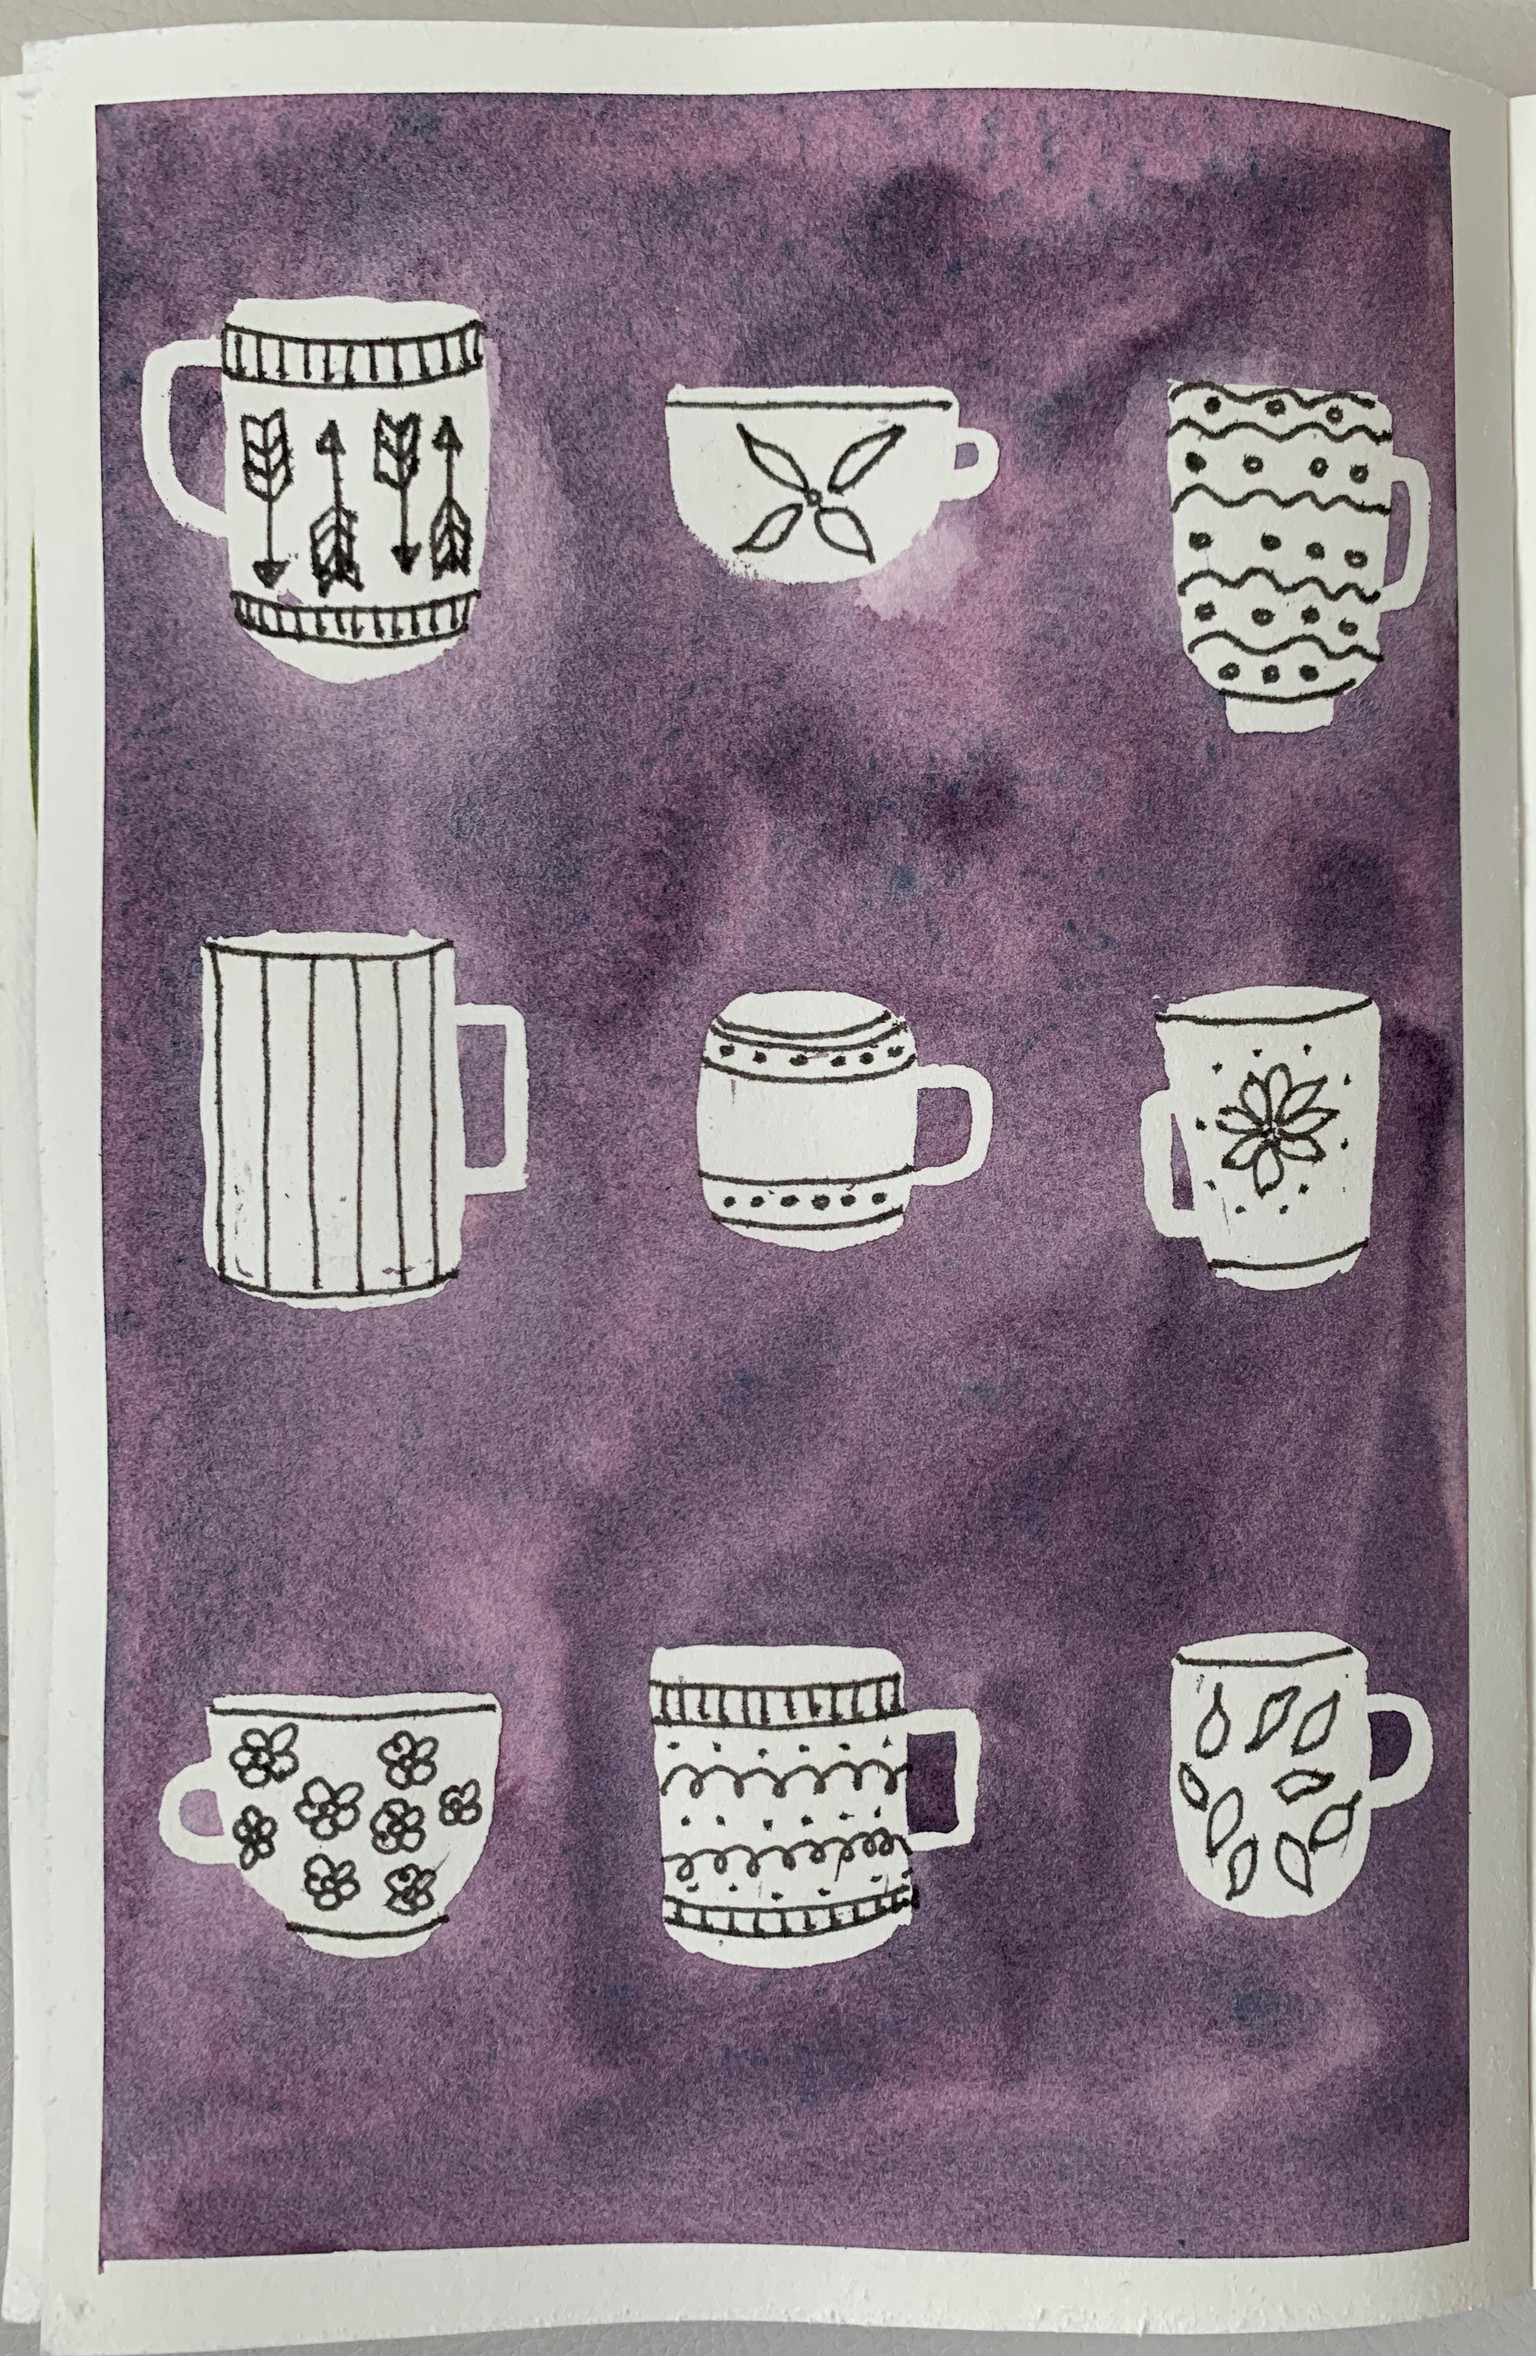
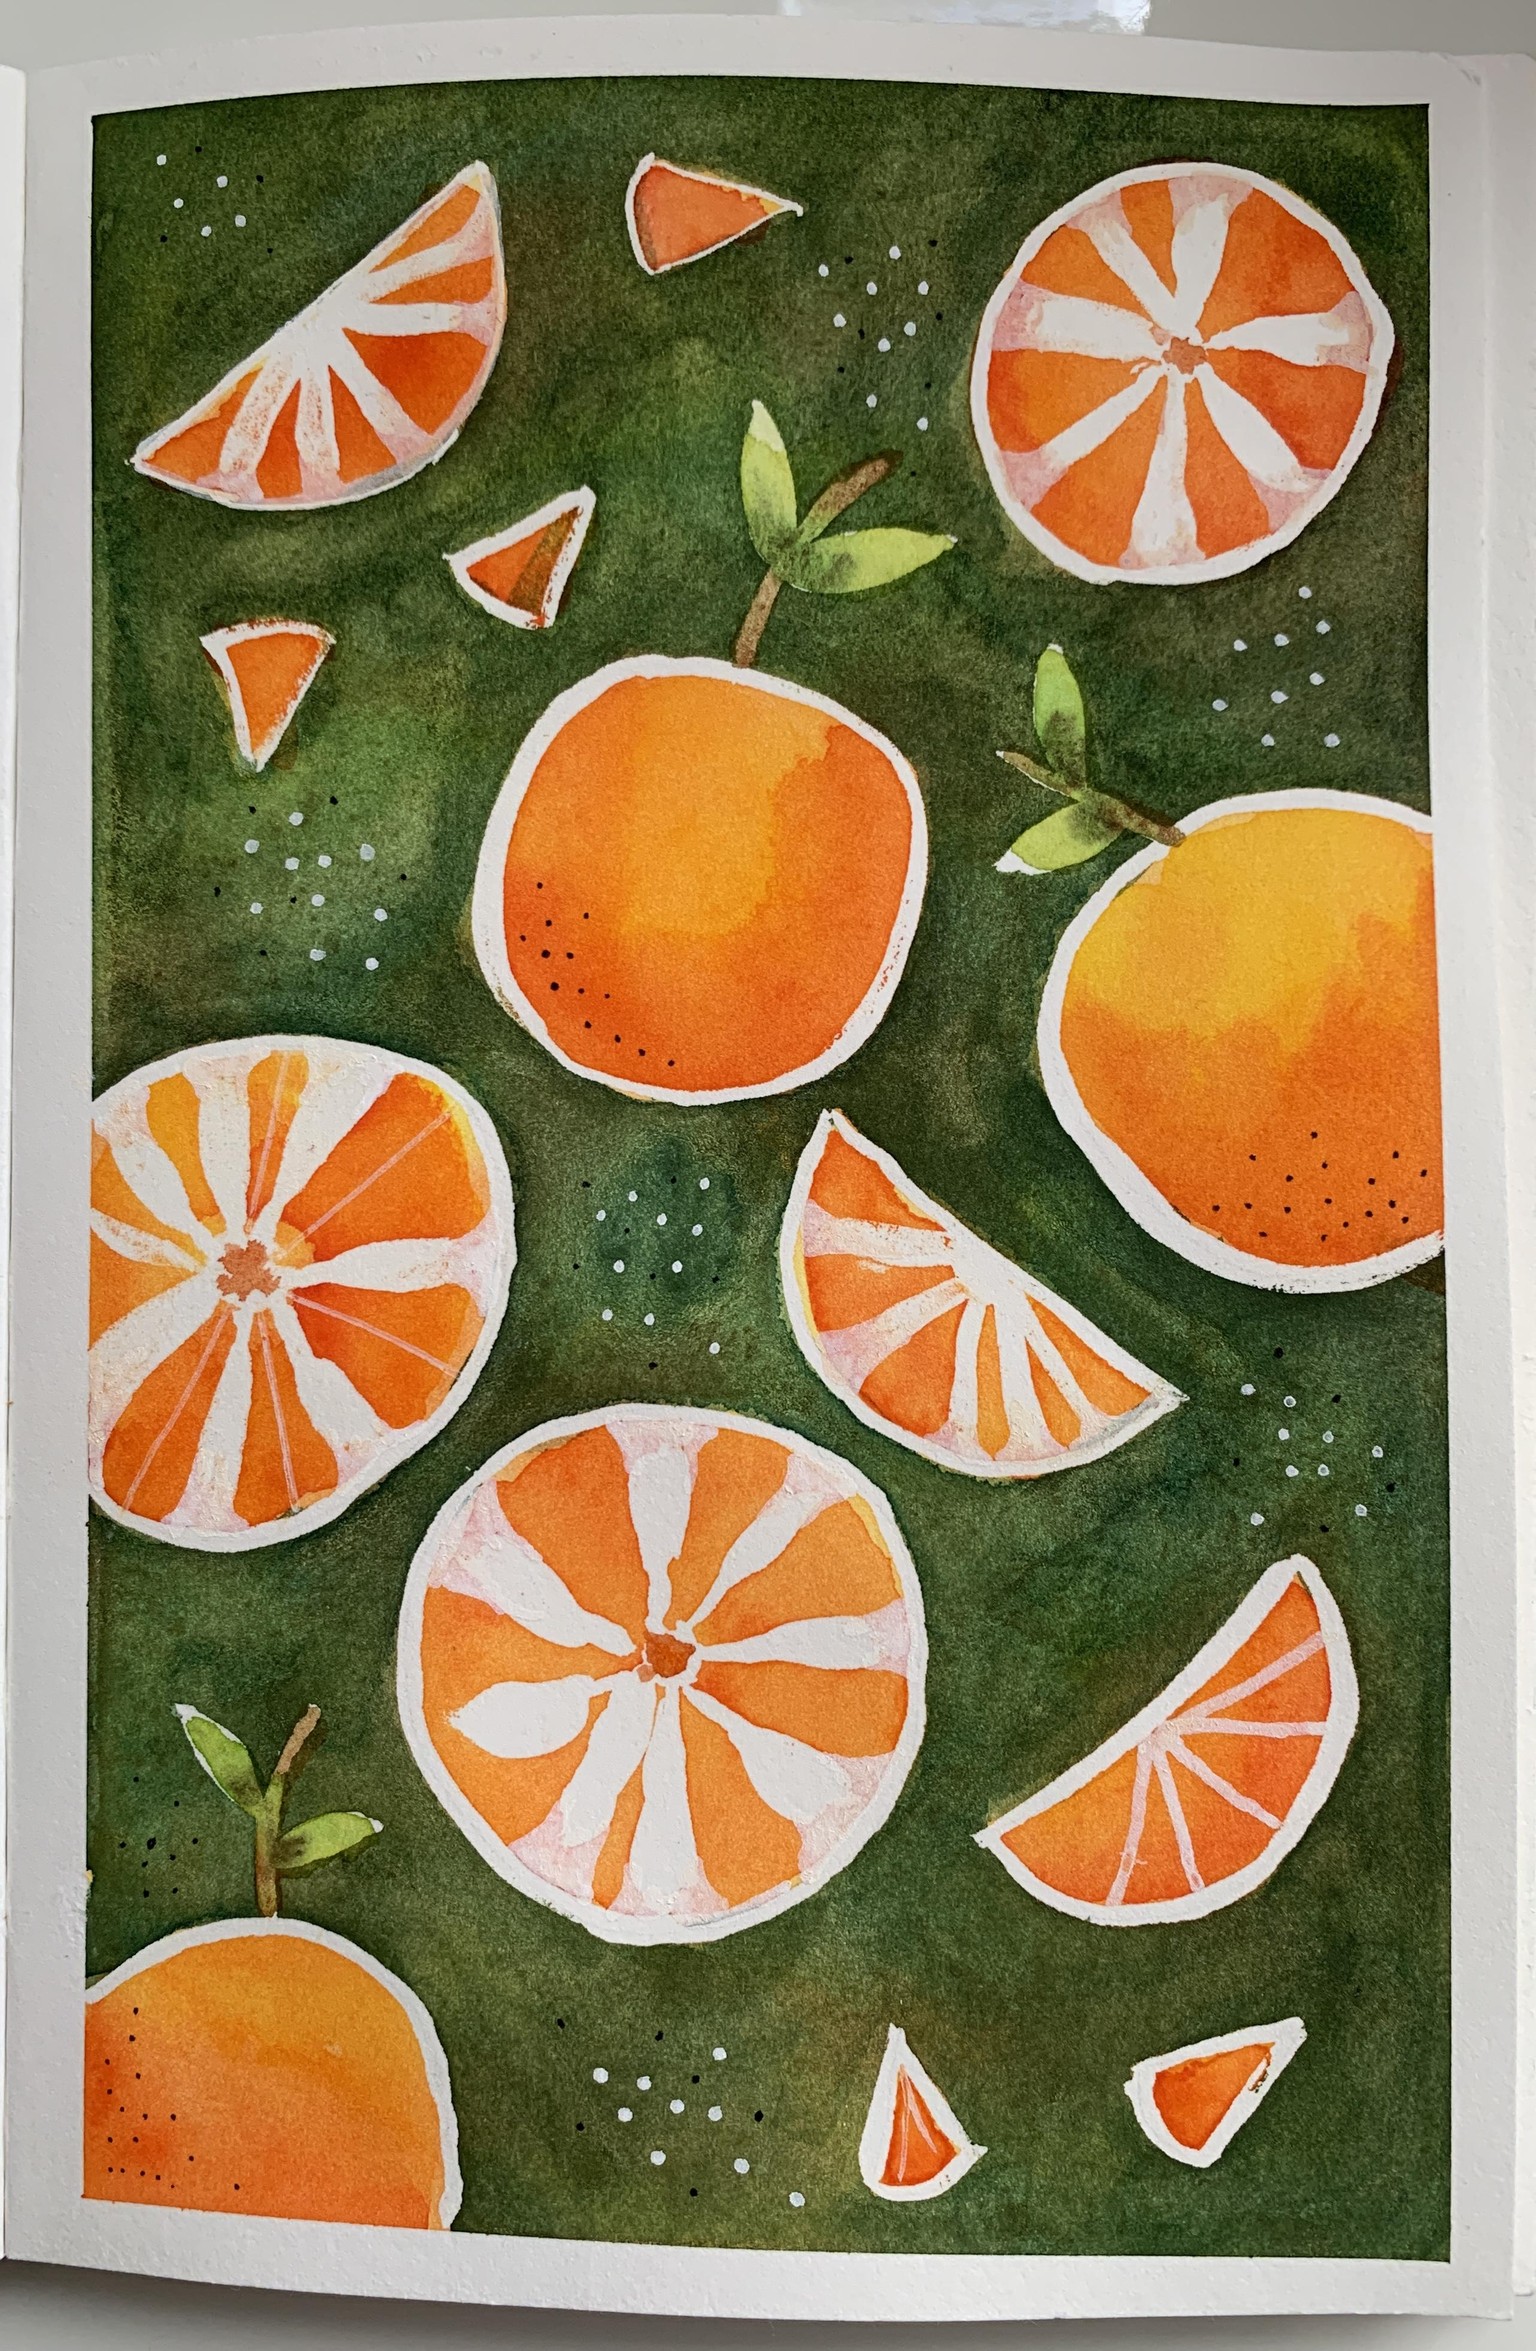
Day 4. Oranges.
This exercise was a bit challenge only due to the speed in which you have to do the green background in order to look uniform without any marks as the paint dries.
The next time I try something like this, I will cover the entire shape, as with the tea cups, and then paint the background. Once dried, I will remove the masking of the entire shape and proceed to apply the masking fluid to make the orange details. This will allow for better control of the pigment on the places I want. I had to go back and add more paint to the oranges since they looked too pail after applying the dark background.

And here is the same exercise after I embellished it using Posca markers
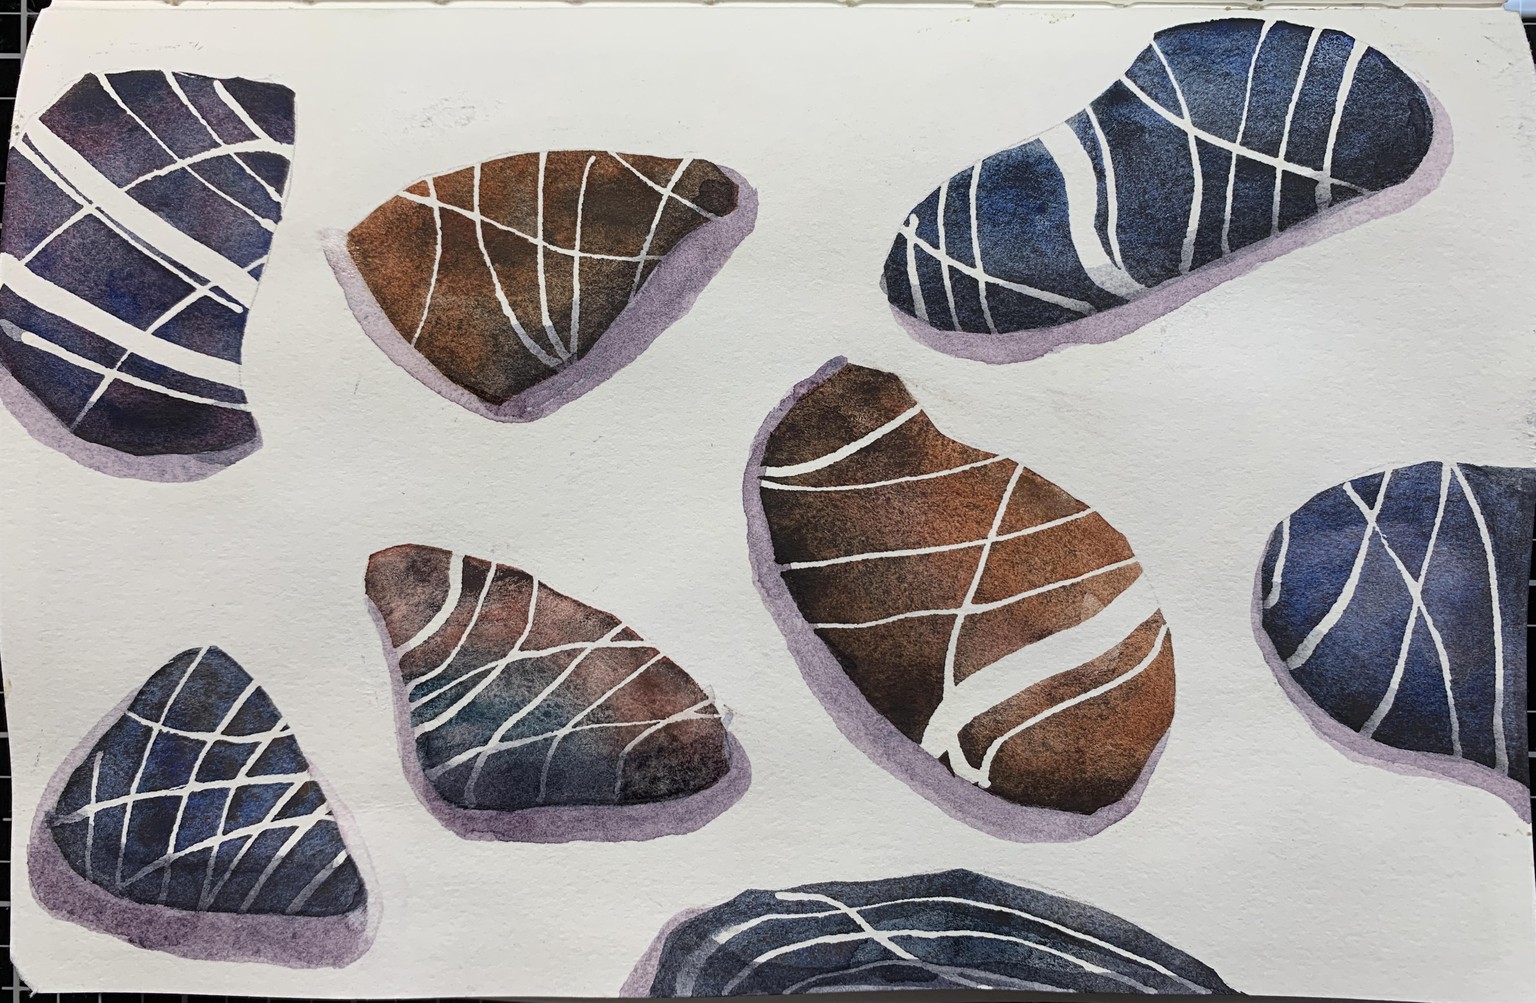
Day 5. Pebbles.
Really enjoyed doing this exercise. I did not cover all the page with masking fluid, but I applied a wide line around each pebble. I had to be careful when applying the paint though, so for peace of mind it would be a good idea to cover everything around the pebbles.
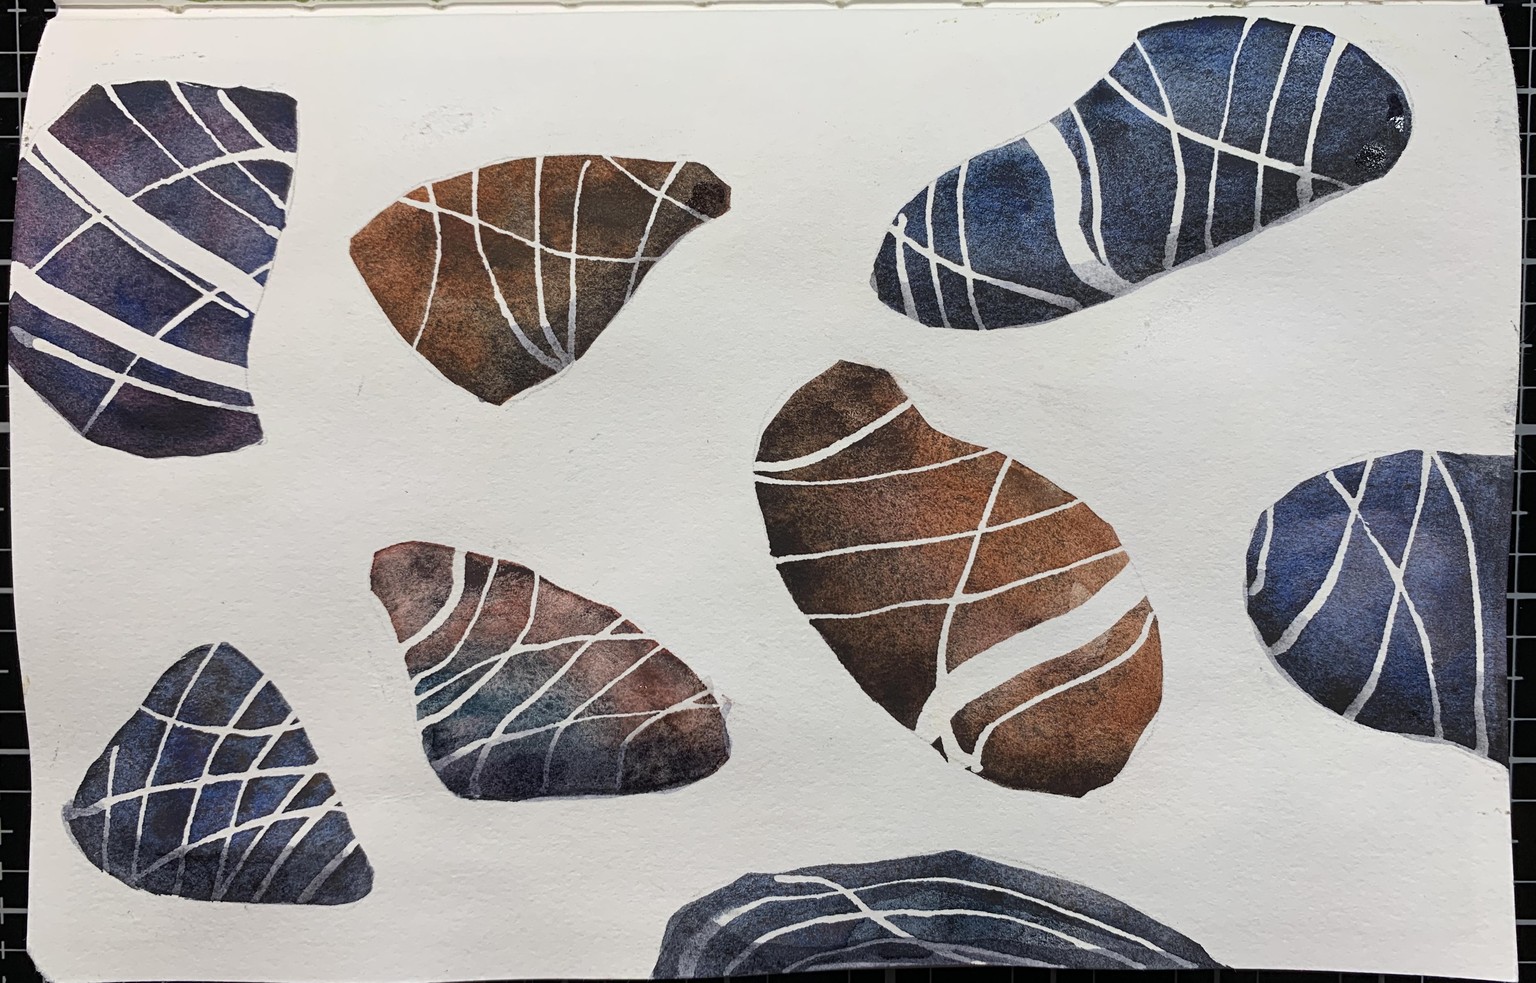
I decided to add some shadows to anchor the pebbles and give them a bit of dimension. I overworked some of the shadows, it’s hard to paint shadows when you’re not seeing them.
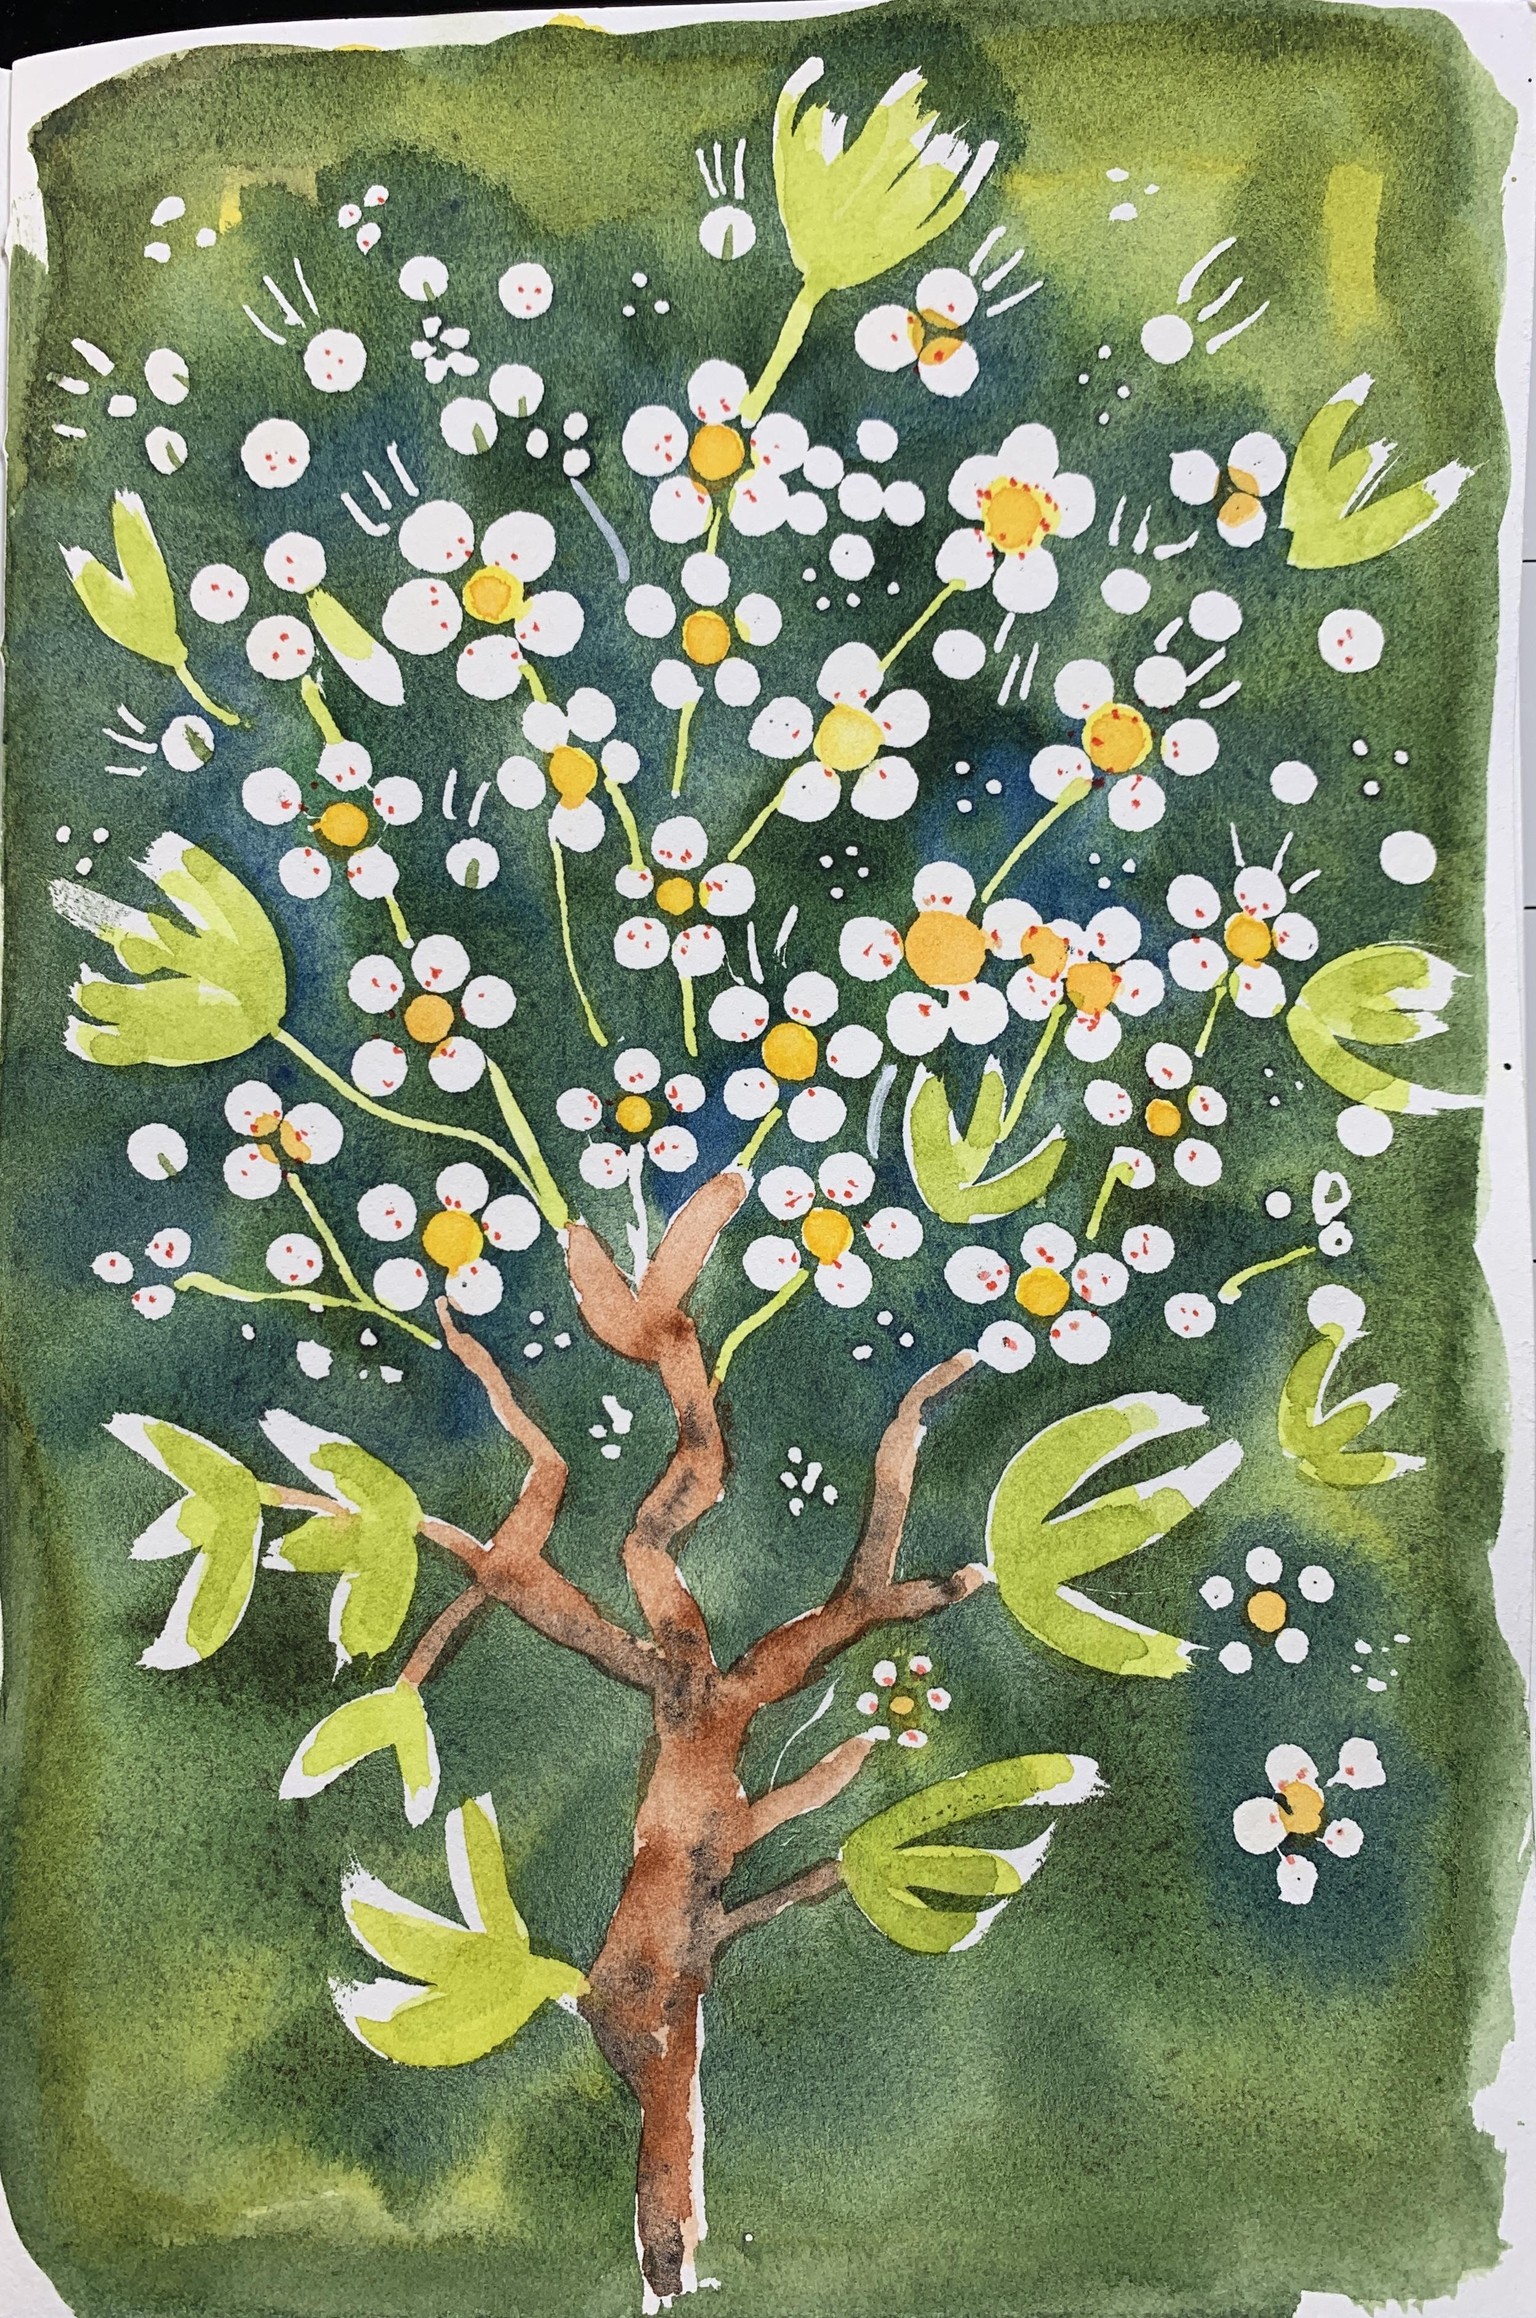
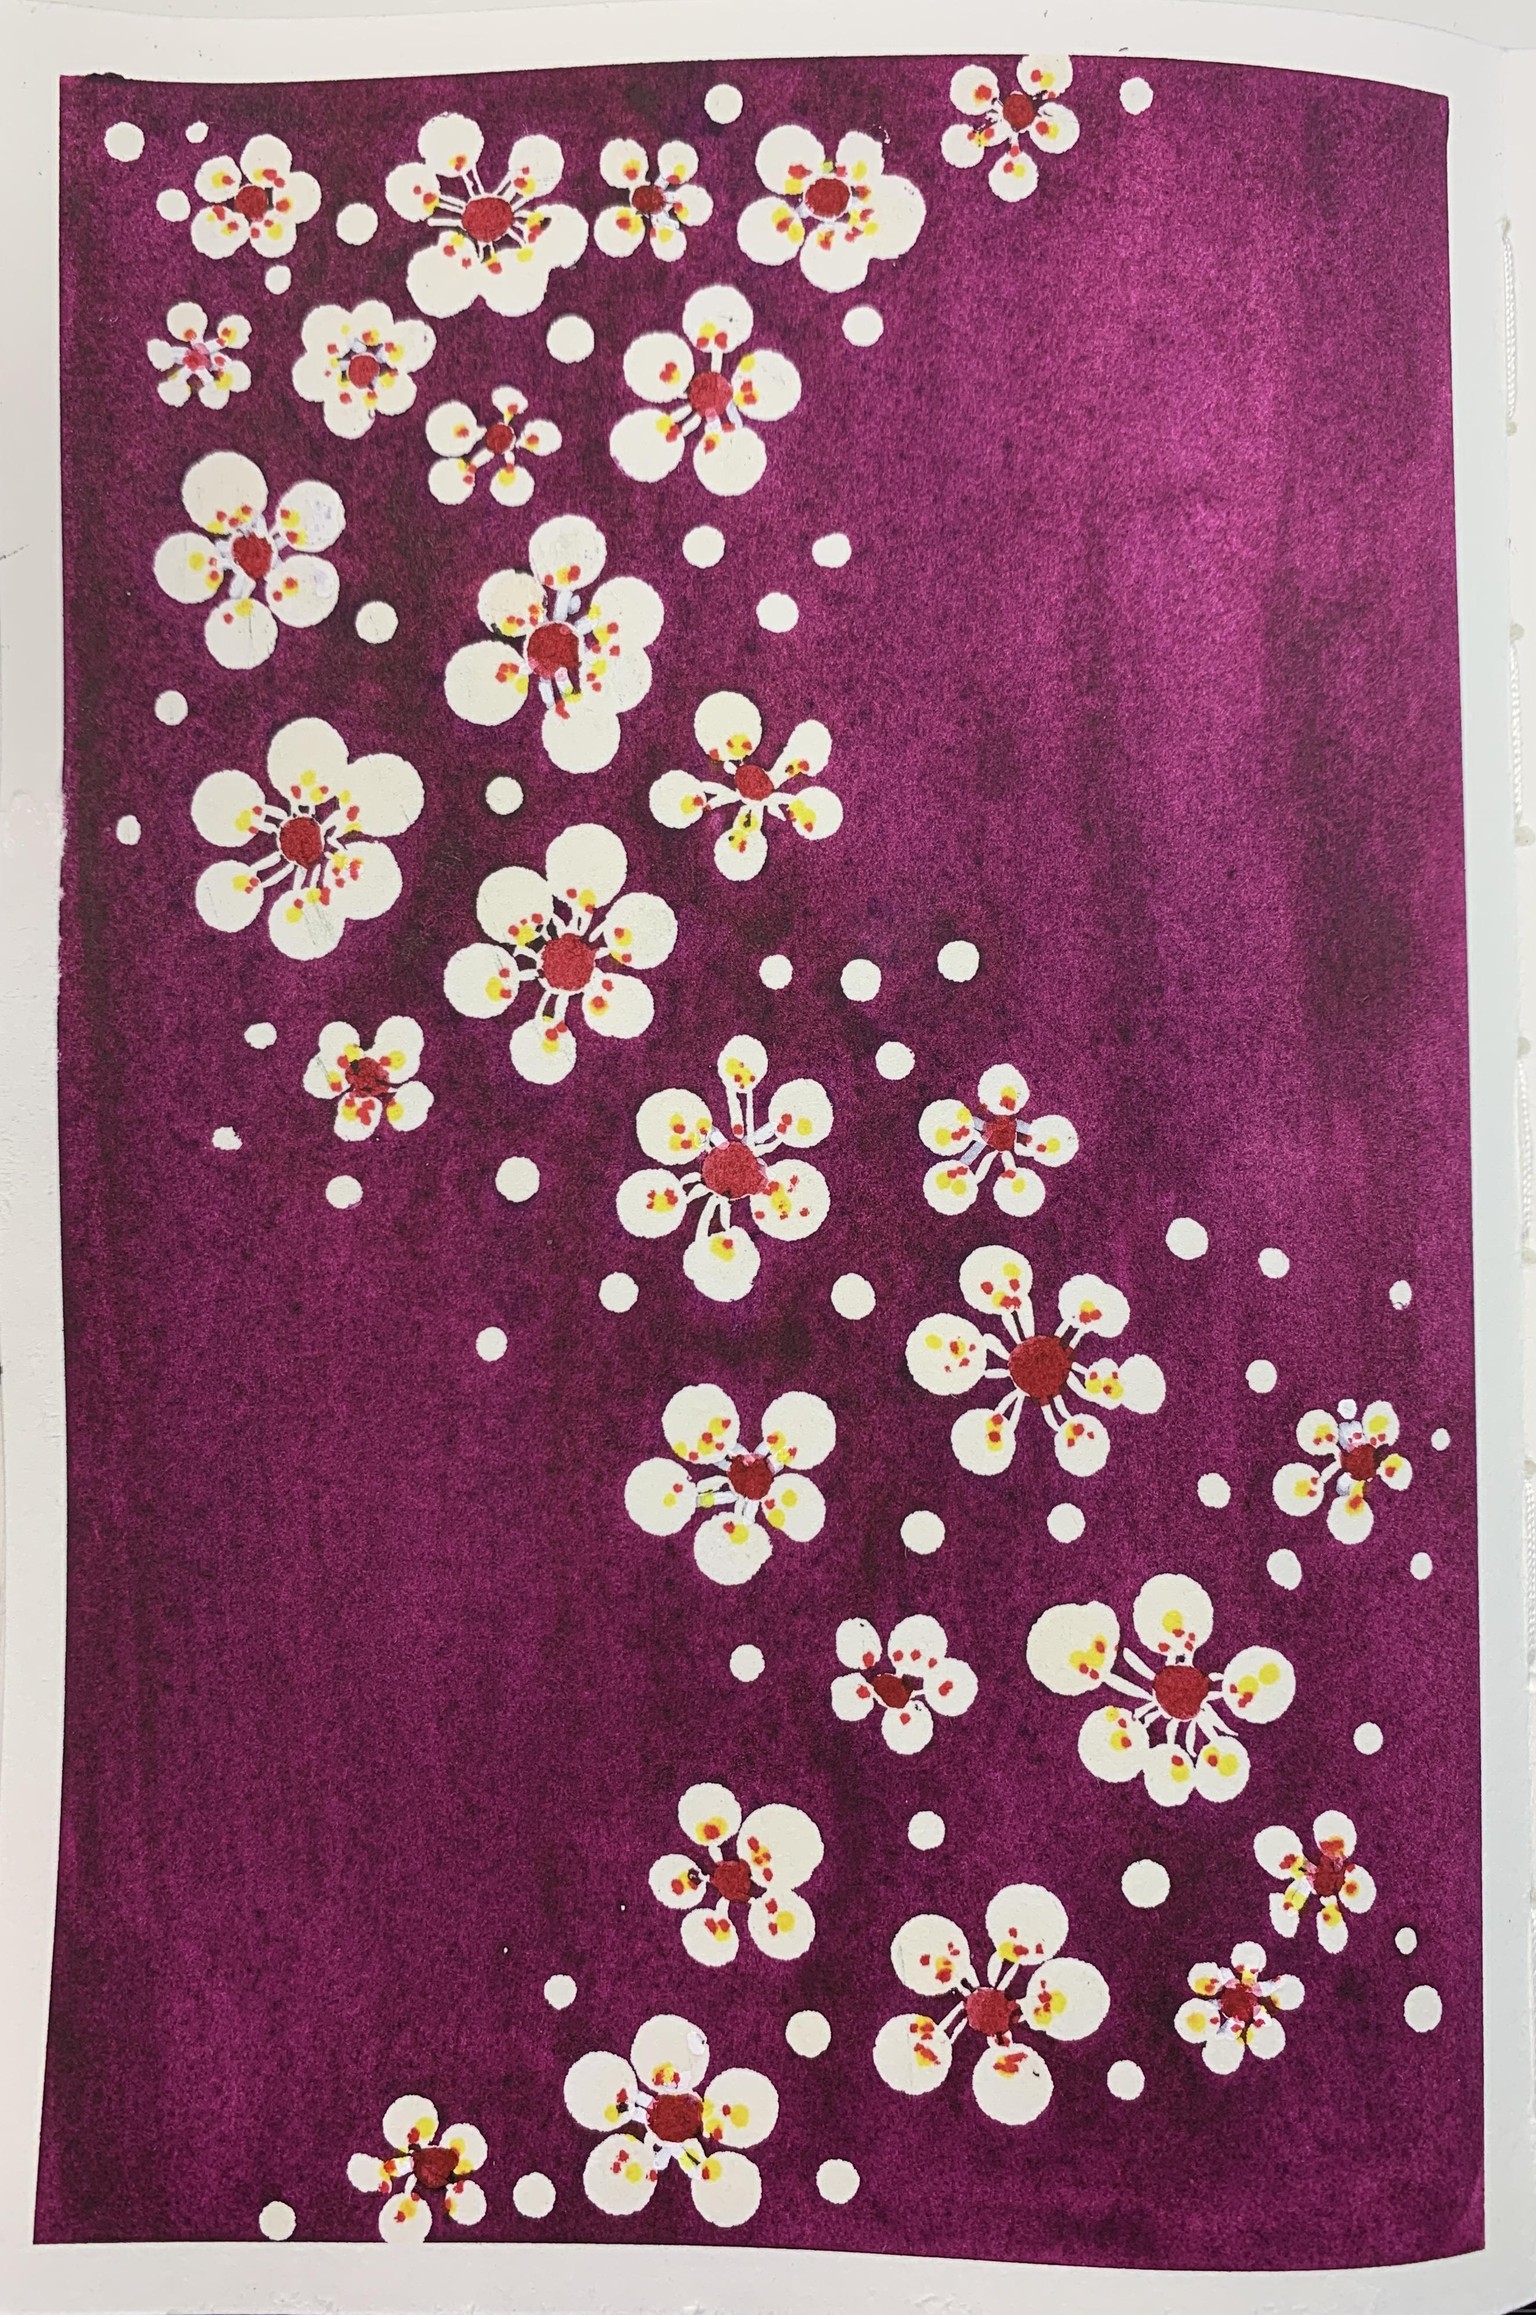
Day 6. Hawthorn Blossom.
For the blossoms, I should have placed the dots close together so it will look more organic. Nonetheless, I like the end result.
Day 7. Shark Whale
For this exercise I used a couple of my dot painting tools. I really liked how it turned out.

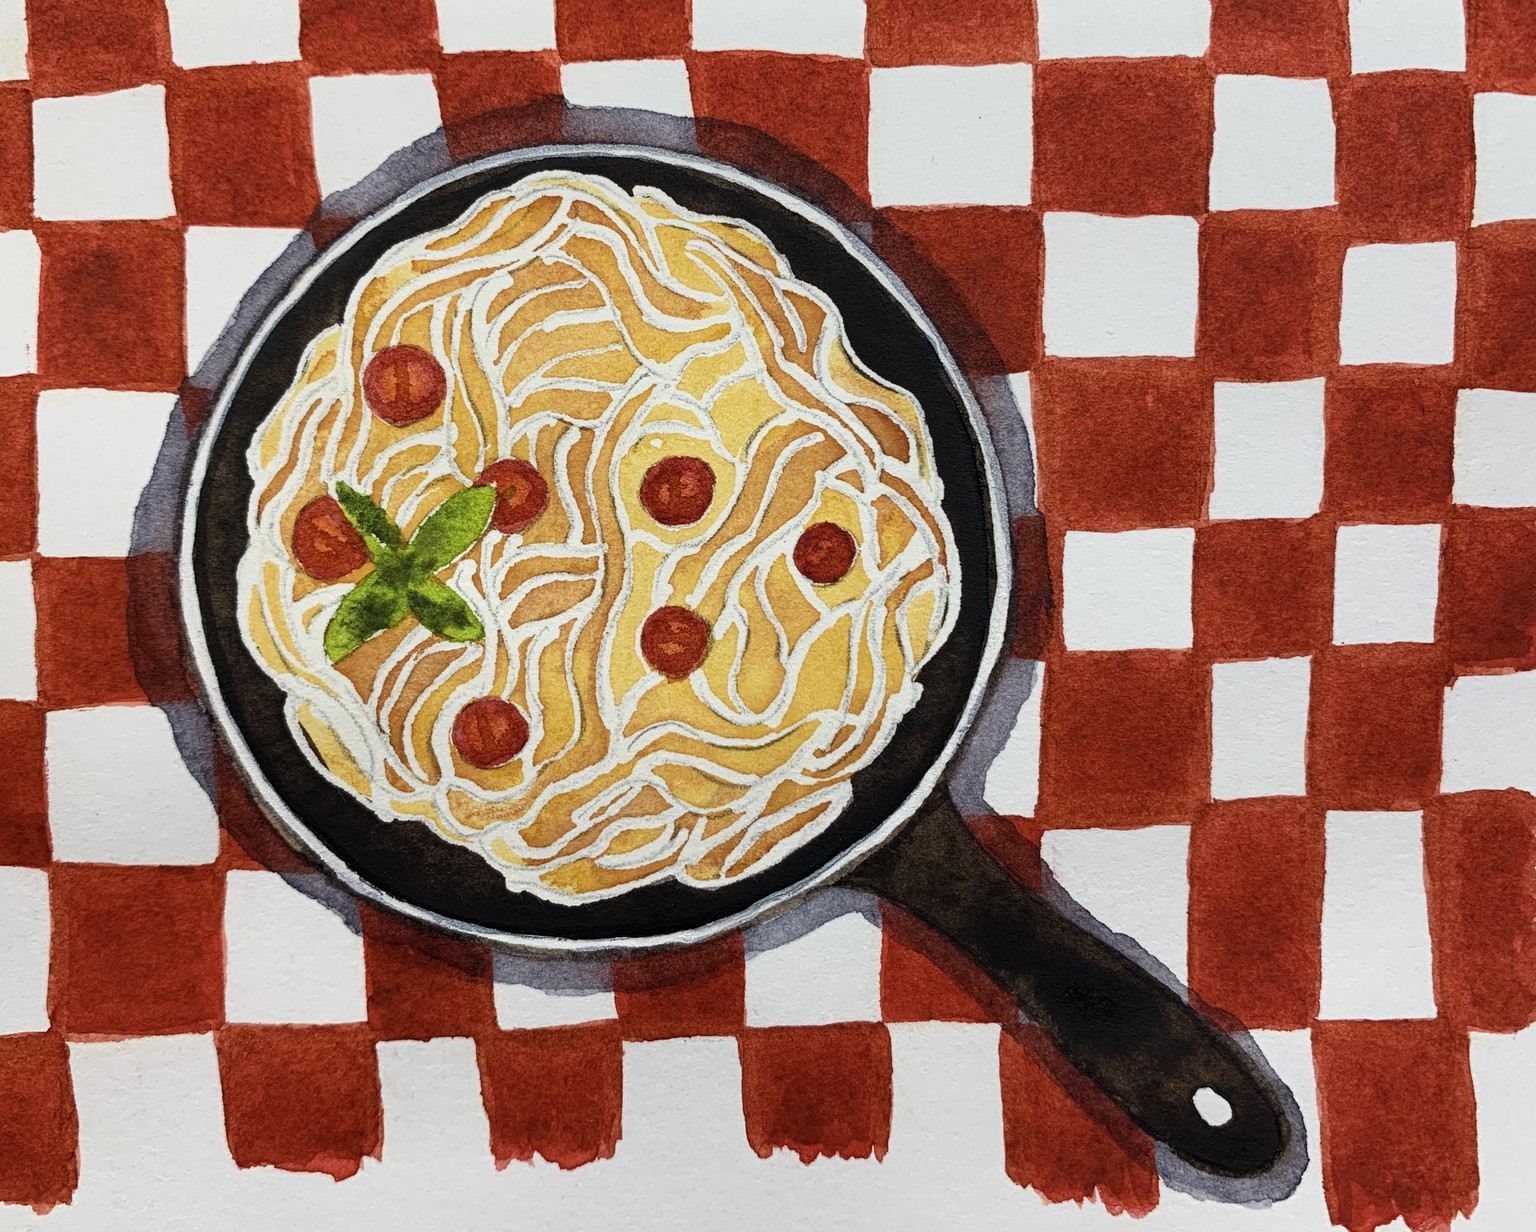
Day 8. Spaghetti.
This was a super fun exercise. I enjoyed making the noodles. I used the masking fluid to create a checkered table cloth, this was an afterthought. In hindsight, I should have penciled the pattern prior applying the masking fluid, although I don’t mind the wonkiness result.
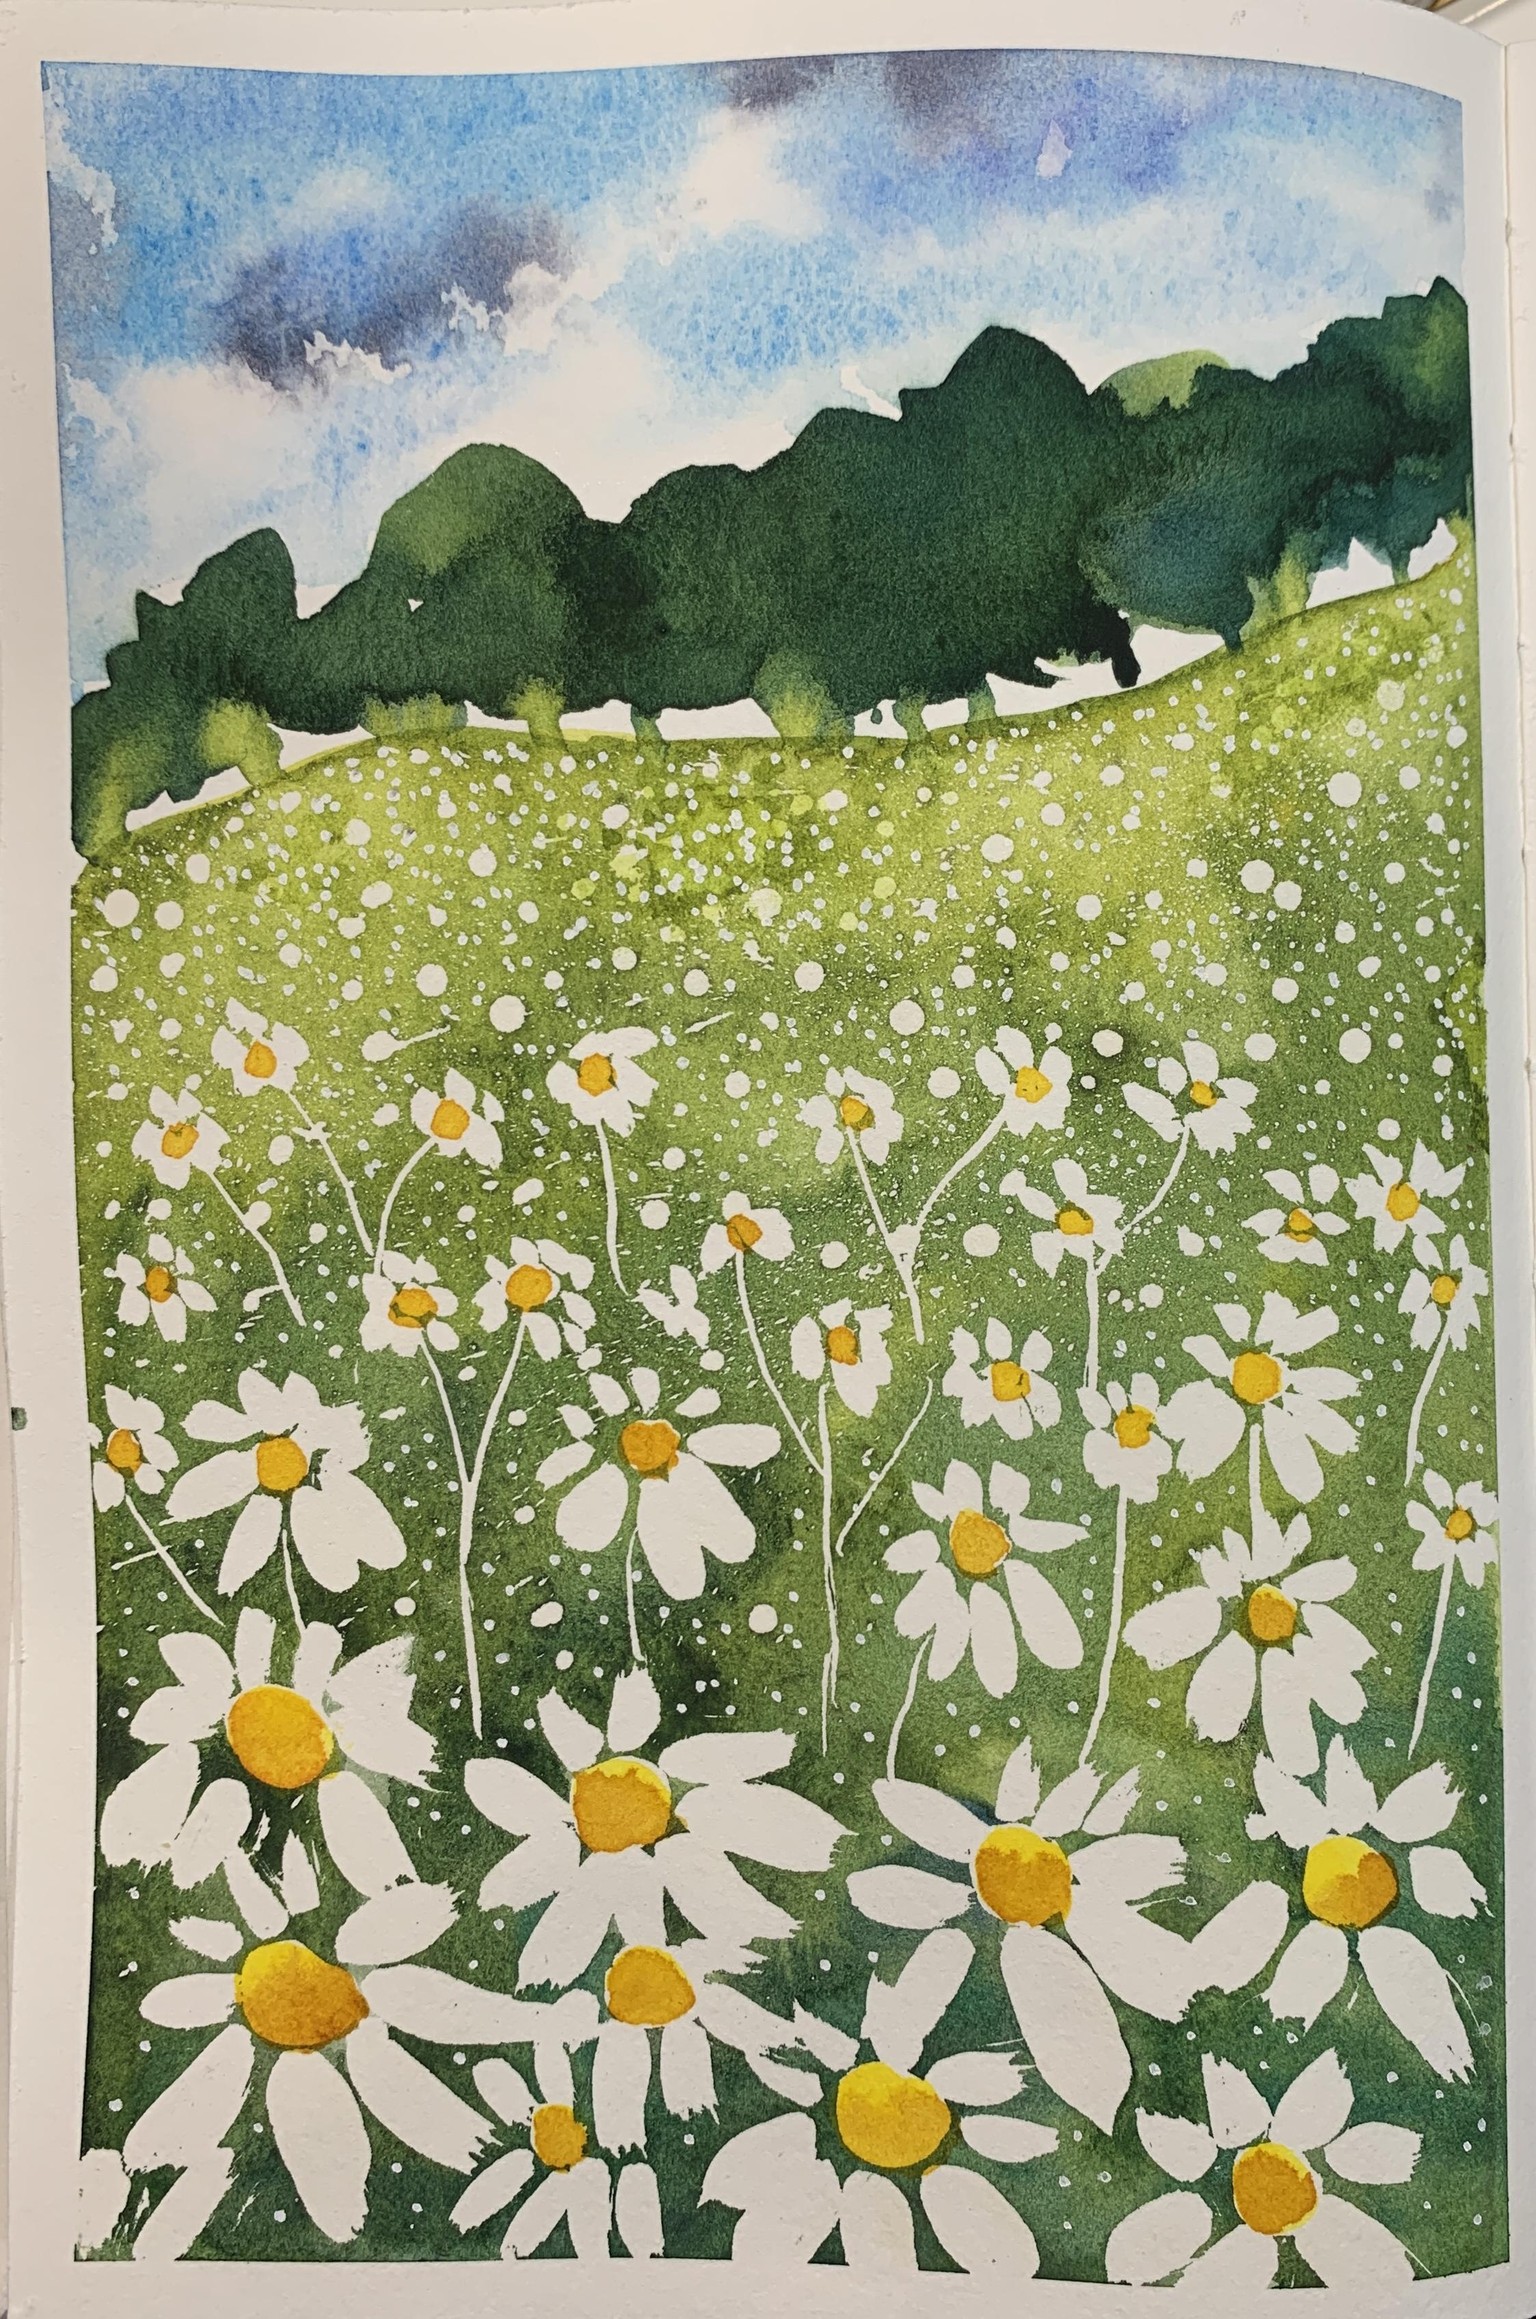
Day 9. Daisy Meadow.
I tried to use the tooth brush to apply the smallest bits with masking fluid and it was a total flop. I had blobs of masking all over the place. Had to wait until it dried to rub them off. Probably need to experiment with other brushes. I found it messy as well. I did like the end result.
Day 10. Fruits and vegetables in a mesh bag.
I had used this method in the past in which the painted shapes are masked to paint the background. Unfortunately, I became impatient and I applied the masking fluid over the fruits while they were a bit damp which caused a bit of tear on the orange.
In addition, I wanted the background to be really dark, so I applied a second coat of paint. I should have let this dry for a few hours, but I started to remove the masking too soon and some of the background paint rubbed off onto the vegetables while I was removing the masking fluid. Patience is the key here.
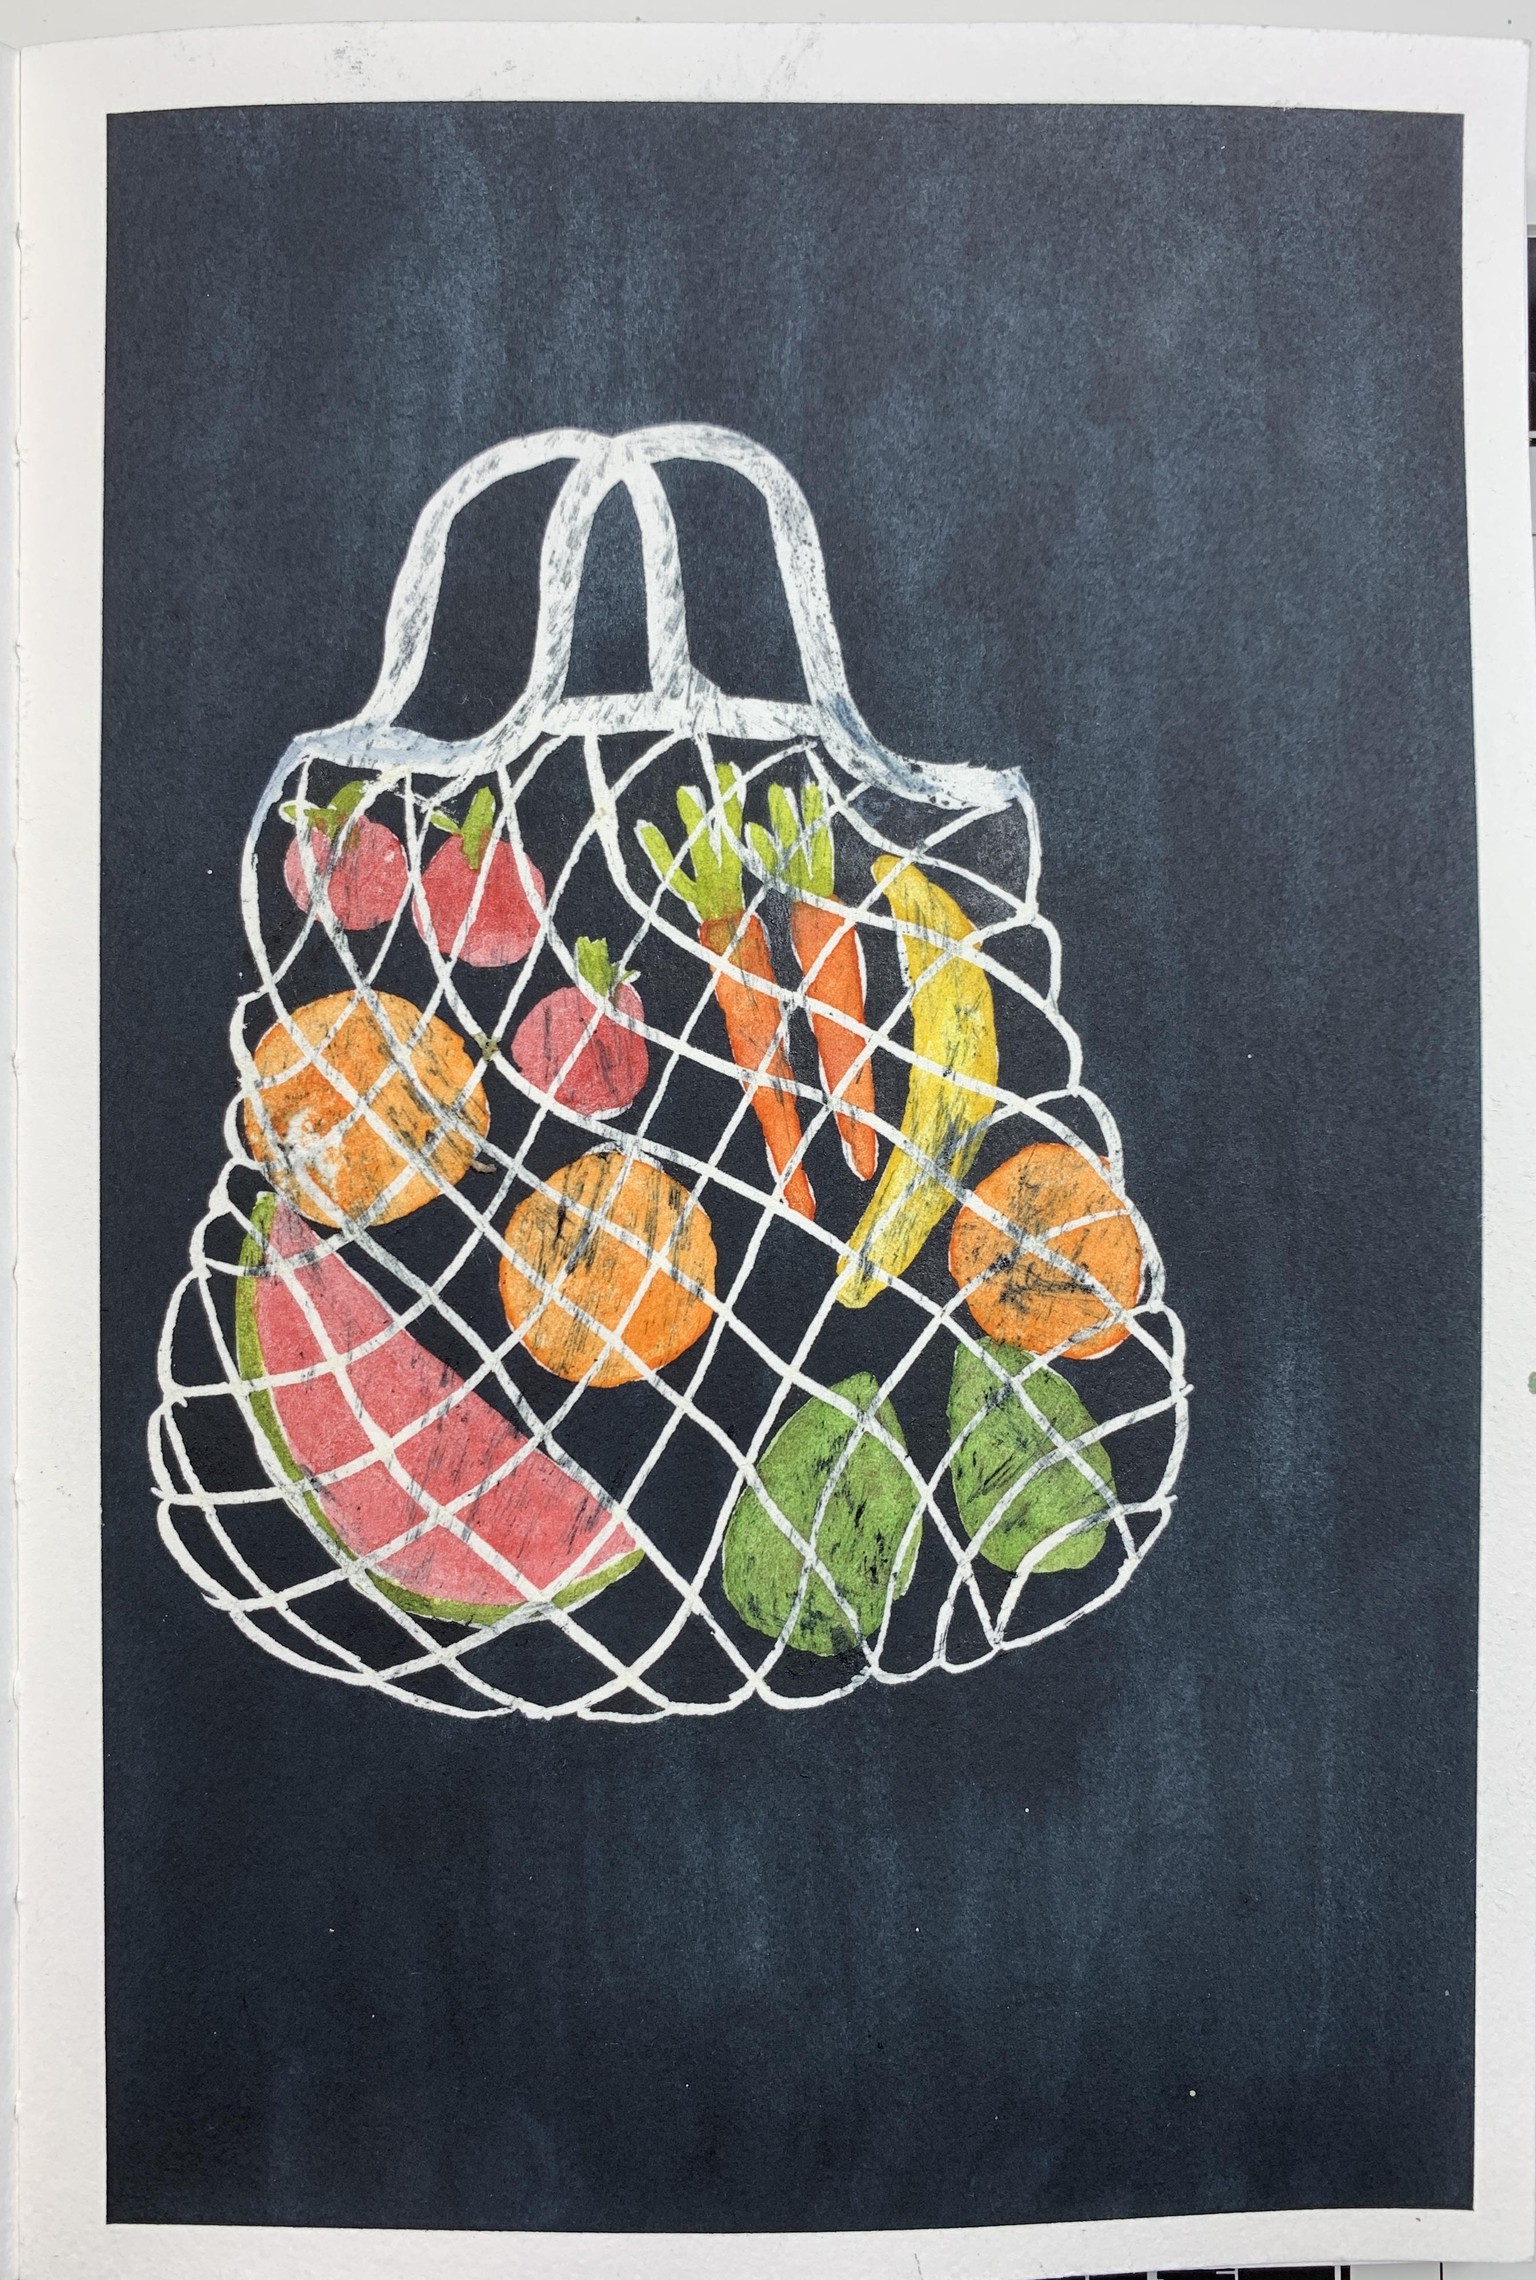
With patience the result is always better.
Loved all the exercises. Great class.
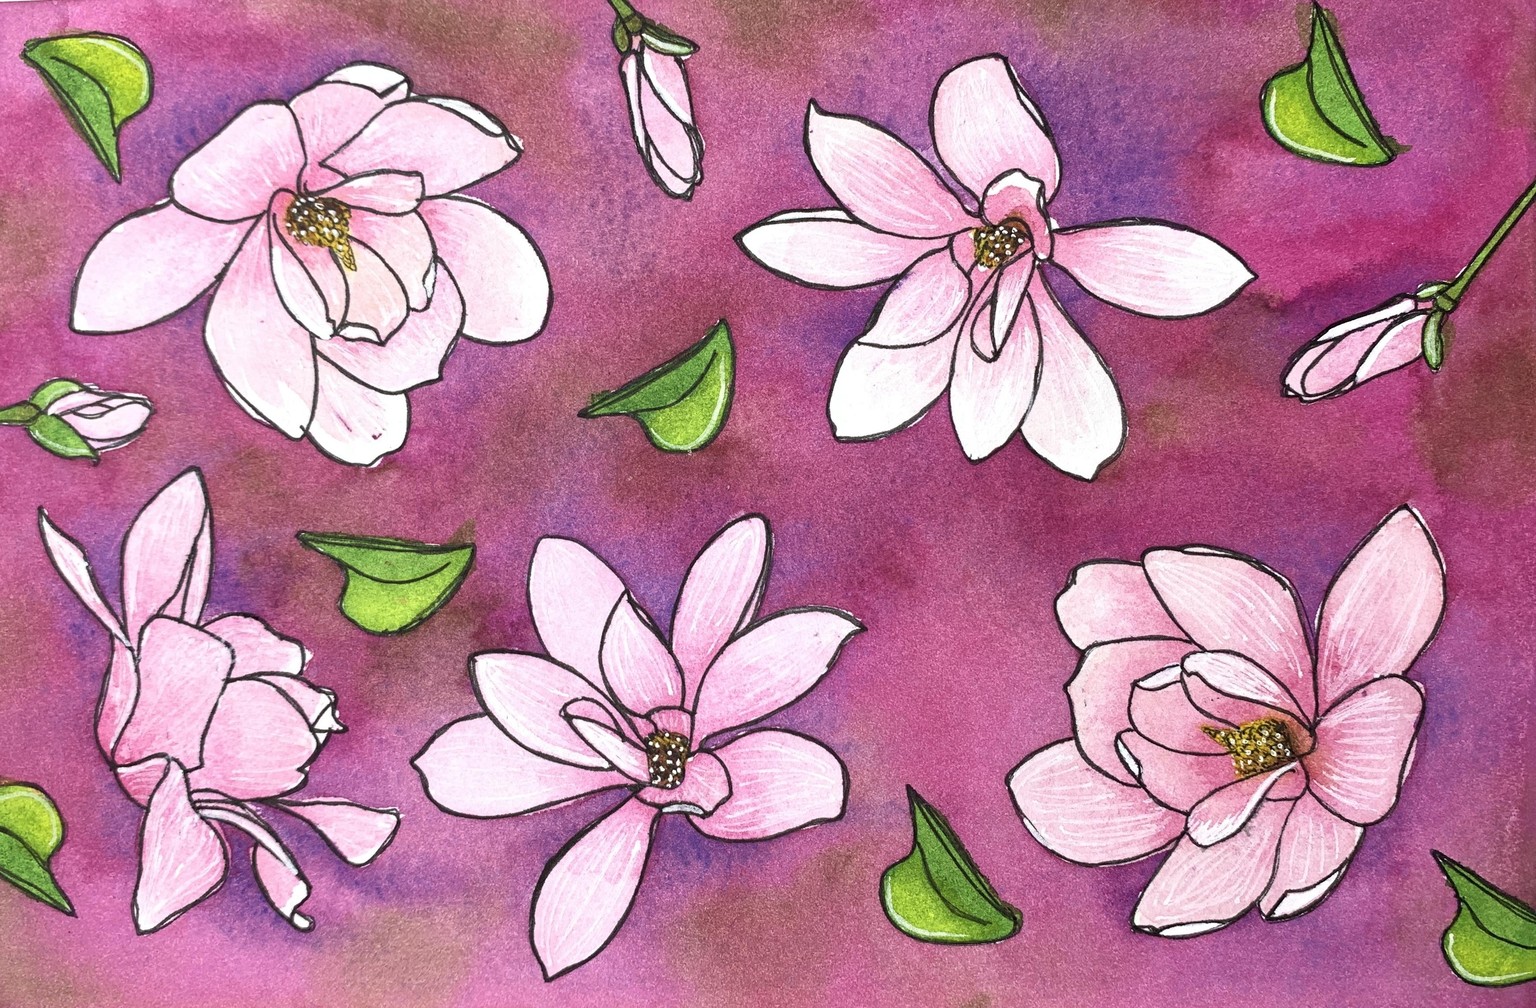
After participating in the live masking fluid workshop with Ohn Mar this week, I felt motivated to do one more exercise. This time I stamped the images first using a waterproof dye ink and then applied masking fluid to the entire image making sure I did not go outside the outline. Once dried, I painted the background and let it dry completely before removing the masking fluid. After, I painted the flowers and leaves and added some highlights using Posca markers and a white gel pen.