Watercolor Portrait Challenge: 4 of 5 Faces
Love this class so much! Weeks One through Four of the Watercolor Portrait Challenge have taught me so much about technique, patience, and trusting the process. Working with Jane‑Beata has shown me how much warm‑ups, prototypes, a small palette, careful sketching, and layering the shadows can transform the portrait experience. Each week built on the last, and I can feel my confidence and understanding growing with every portrait.
In Week One, the technique practice finally clicked—I understood the what, when, and how behind each step. My sketchbook prototype helped me spot proportion issues like oversized eyes and lips, a thin neck, and shadows that made the face look older. Using Snapseed to compare my sketch to the reference helped me correct the nose, forehead, and eyebrow placement before painting. Taking my time between layers kept me from overworking the portrait, and I ended up genuinely happy with the result.
Week Two introduced a fifth color and a 3/4 view from below, which pushed me in a new direction. Starting with warm‑ups on a separate sheet helped me loosen up, and the prototype sketch and quick painting made it easier to catch mistakes early. For the final portrait, I took long breaks and followed along with the video step by step. Slowing down helped me feel more confident as I built up the layers.
Week Three was more complex, and turquoise was added as the sixth color. The prototype sketches took less time, though I still ran into a few issues. For the final portrait, I used Jane’s reference, and this time I felt surprisingly relaxed. I trusted that the result would turn out well because I’ve learned how to taper out, lift, and avoid blotches. That confidence made the whole process feel smoother and more enjoyable.
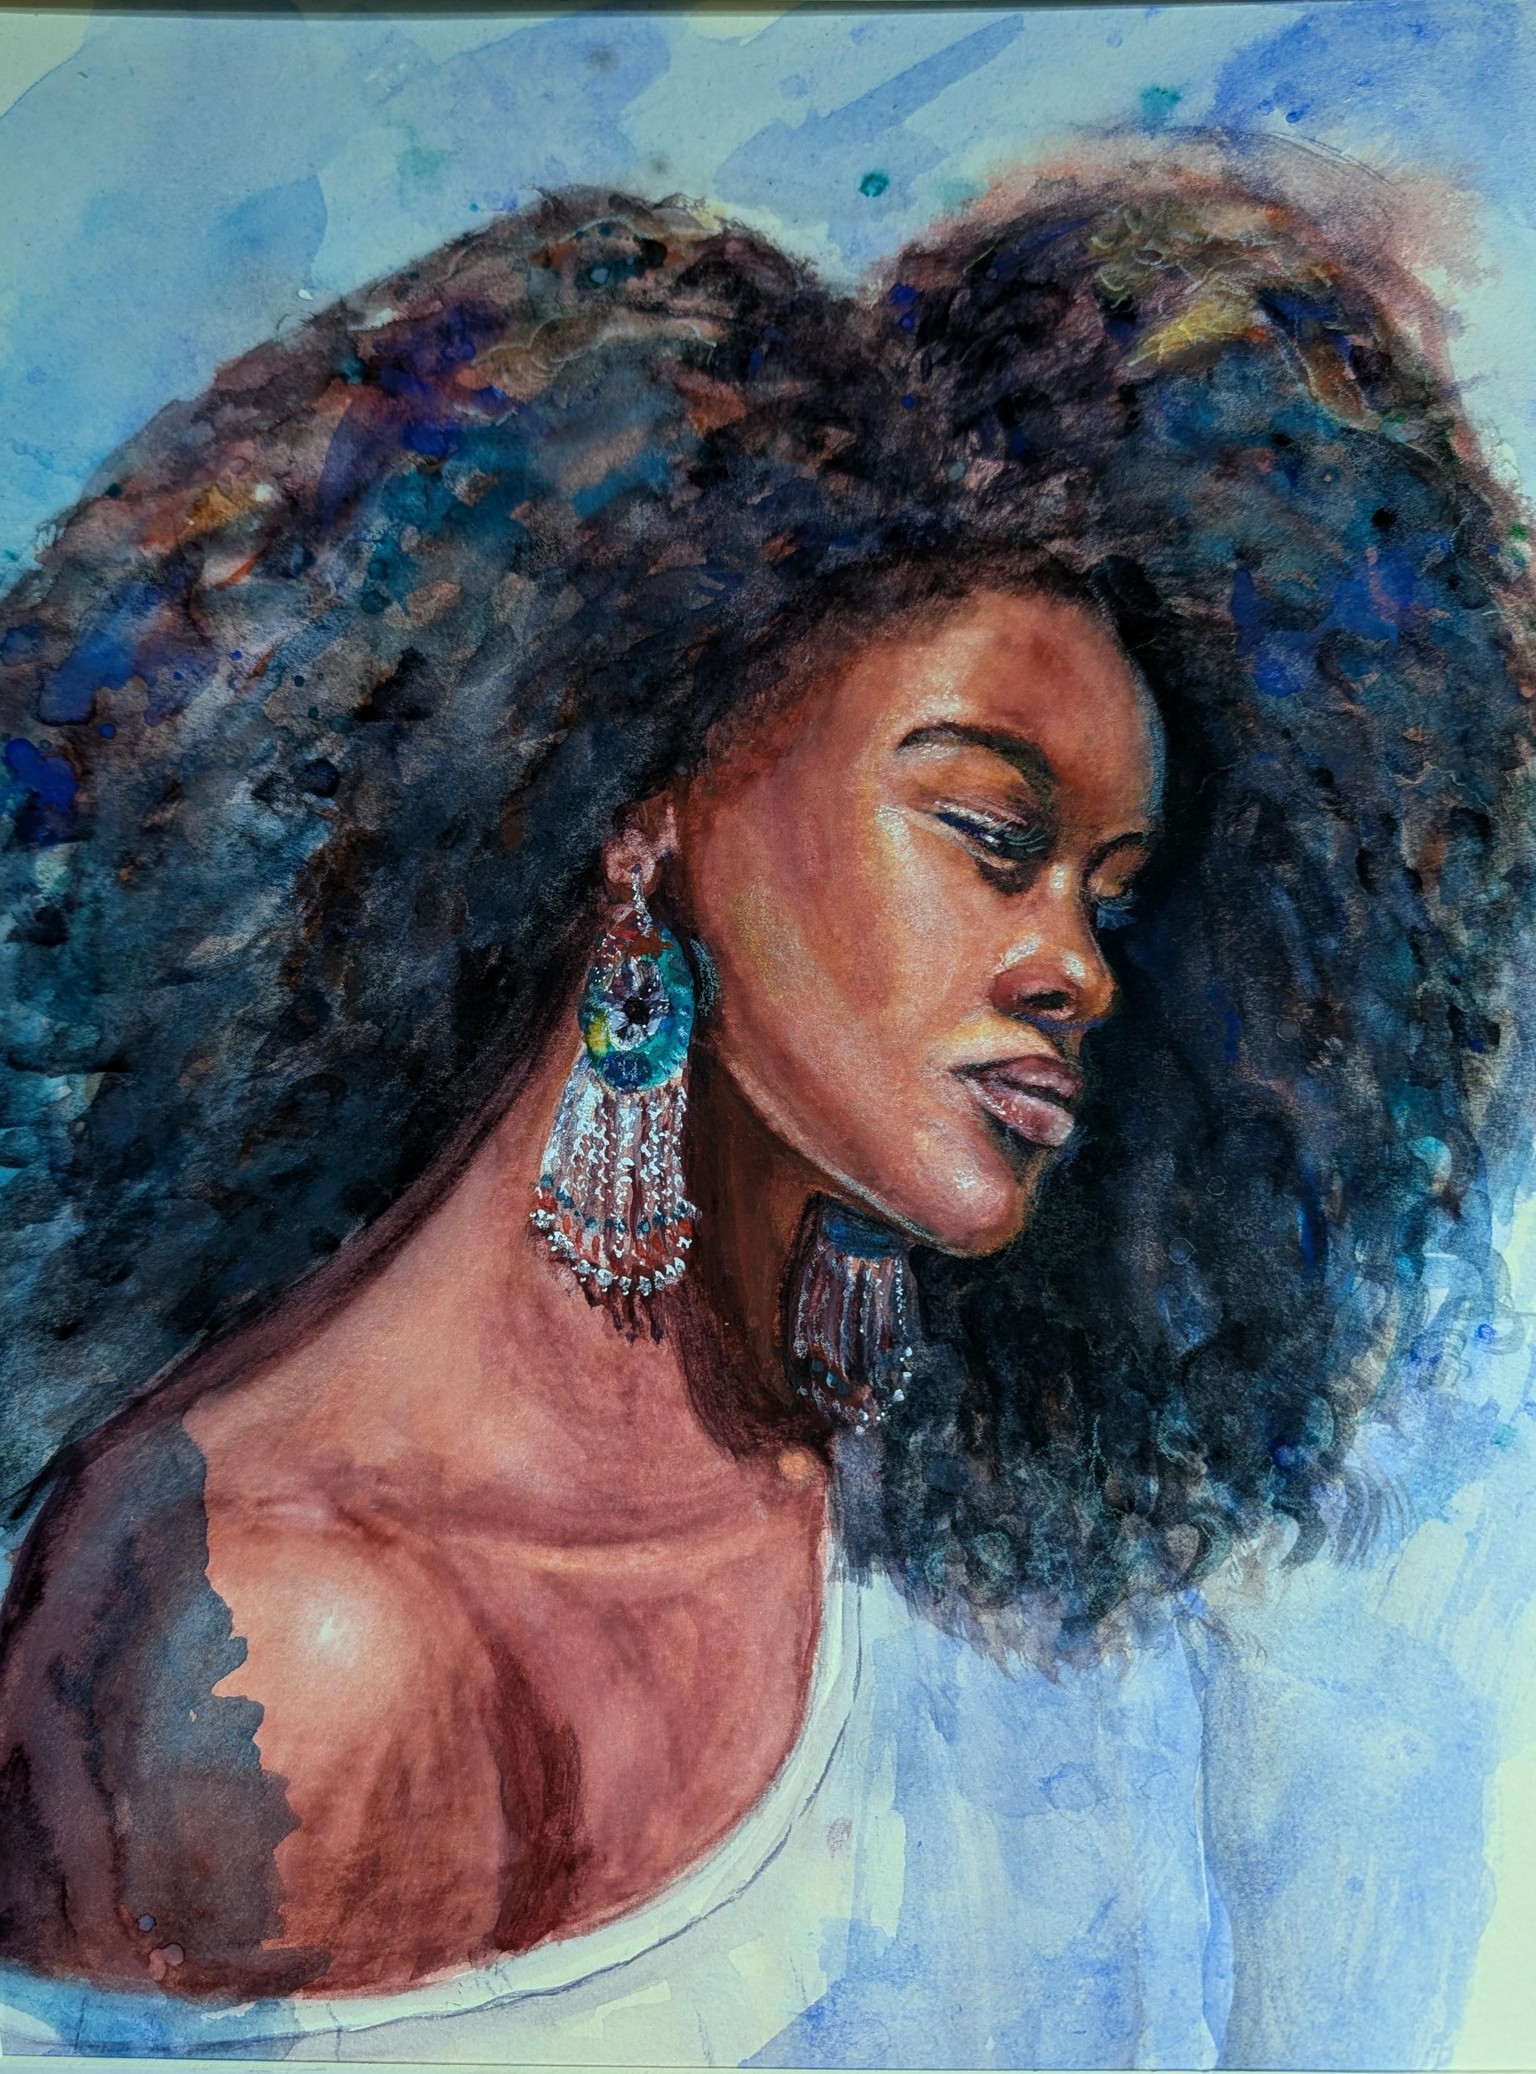
Week Four expanded the palette again, adding a deeper sixth color that allowed us to paint darker skin tones and a beautiful afro. This lesson encouraged more freedom—less focus on tiny details and more attention to color harmony. I went into it with confidence, and the prototype went well. I did run into some issues in the final piece, but by following the steps carefully, I was able to recover. I used watercolor pencils in the last layer to avoid overworking the portrait, and taking the time to let areas dry, rewet, and reapply shadows and lights made a big difference.
Week 1 - Practice prototype and final drawing and portrait painting
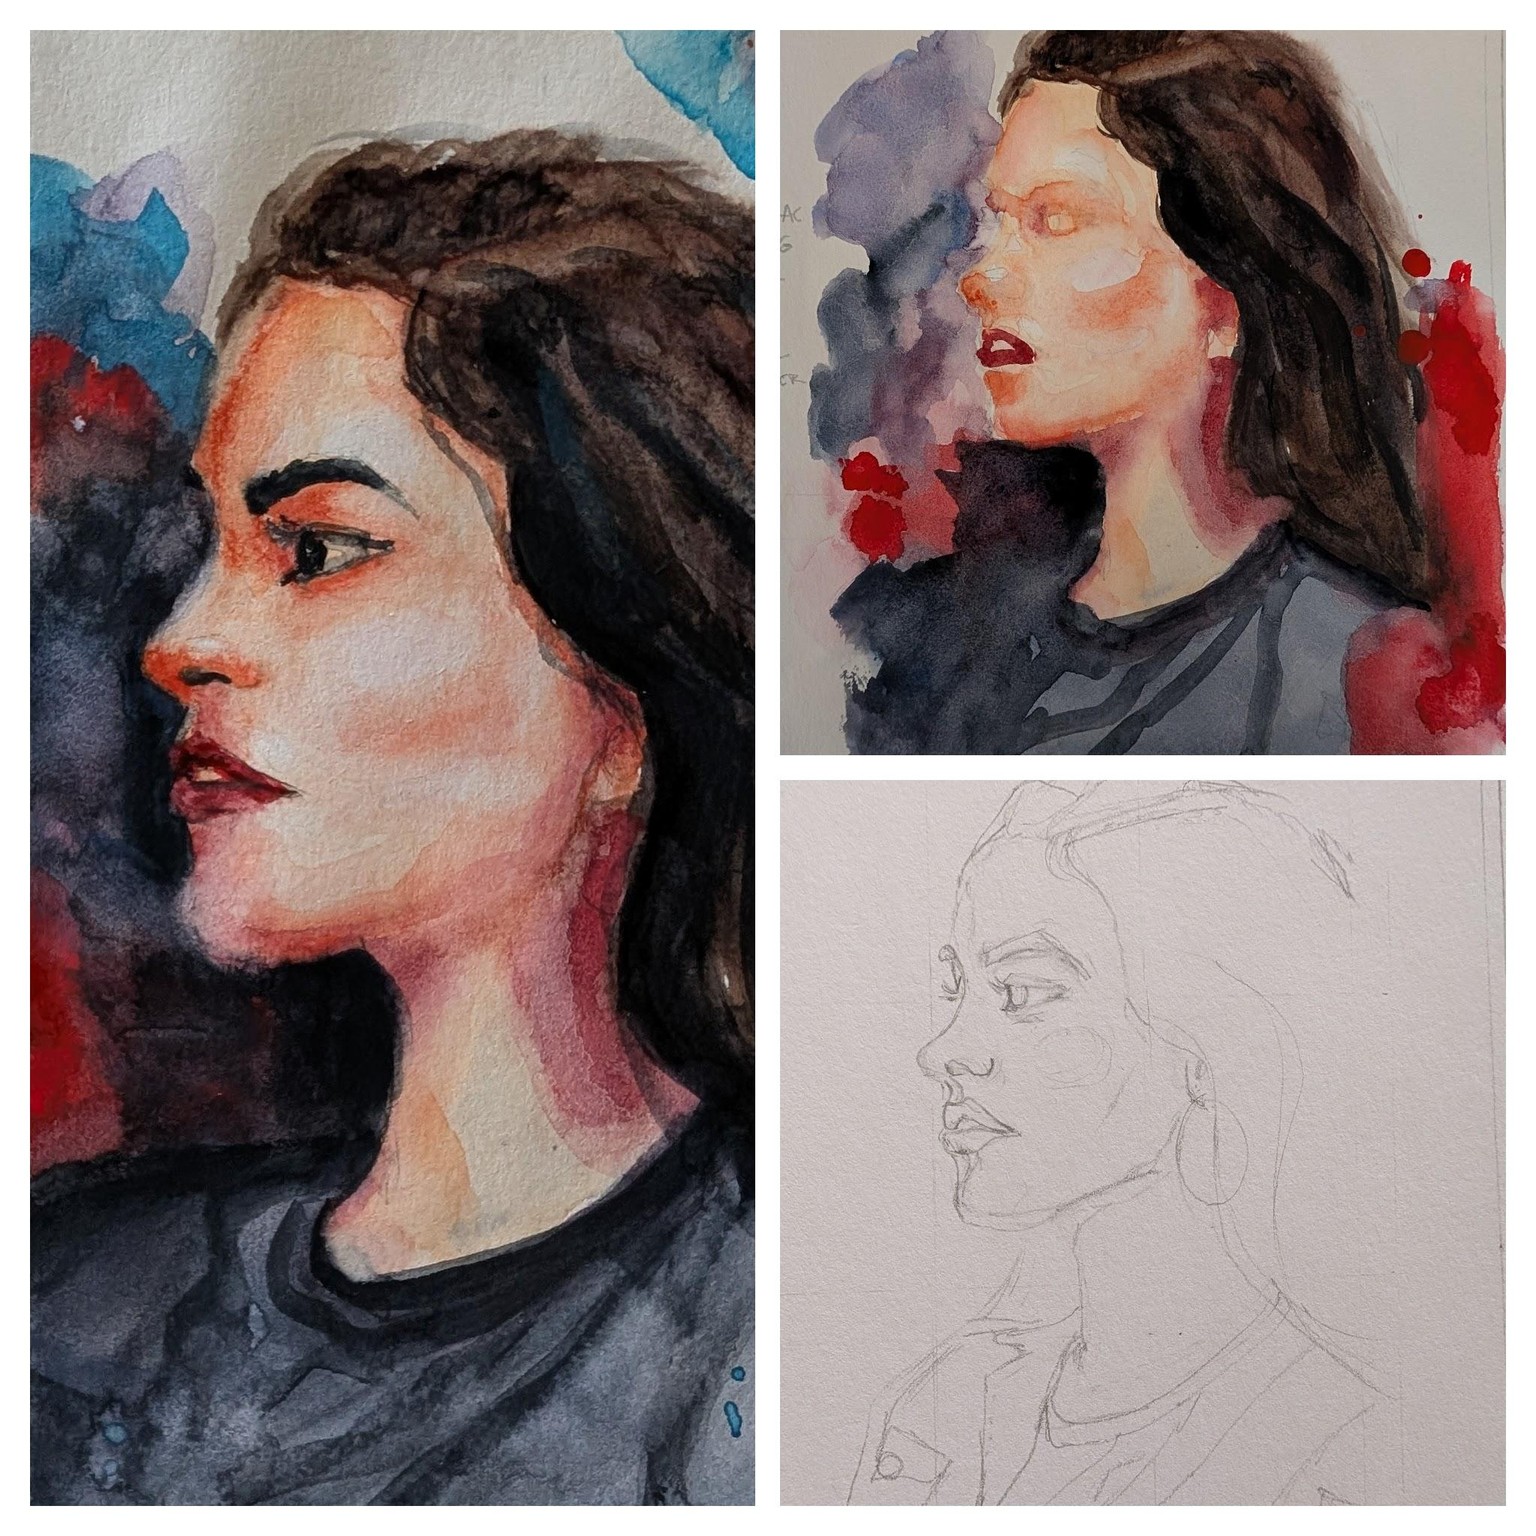
Final portrait
Week 2 Practice prototype and final sketch/portrait
Final sketch and portrait pianting
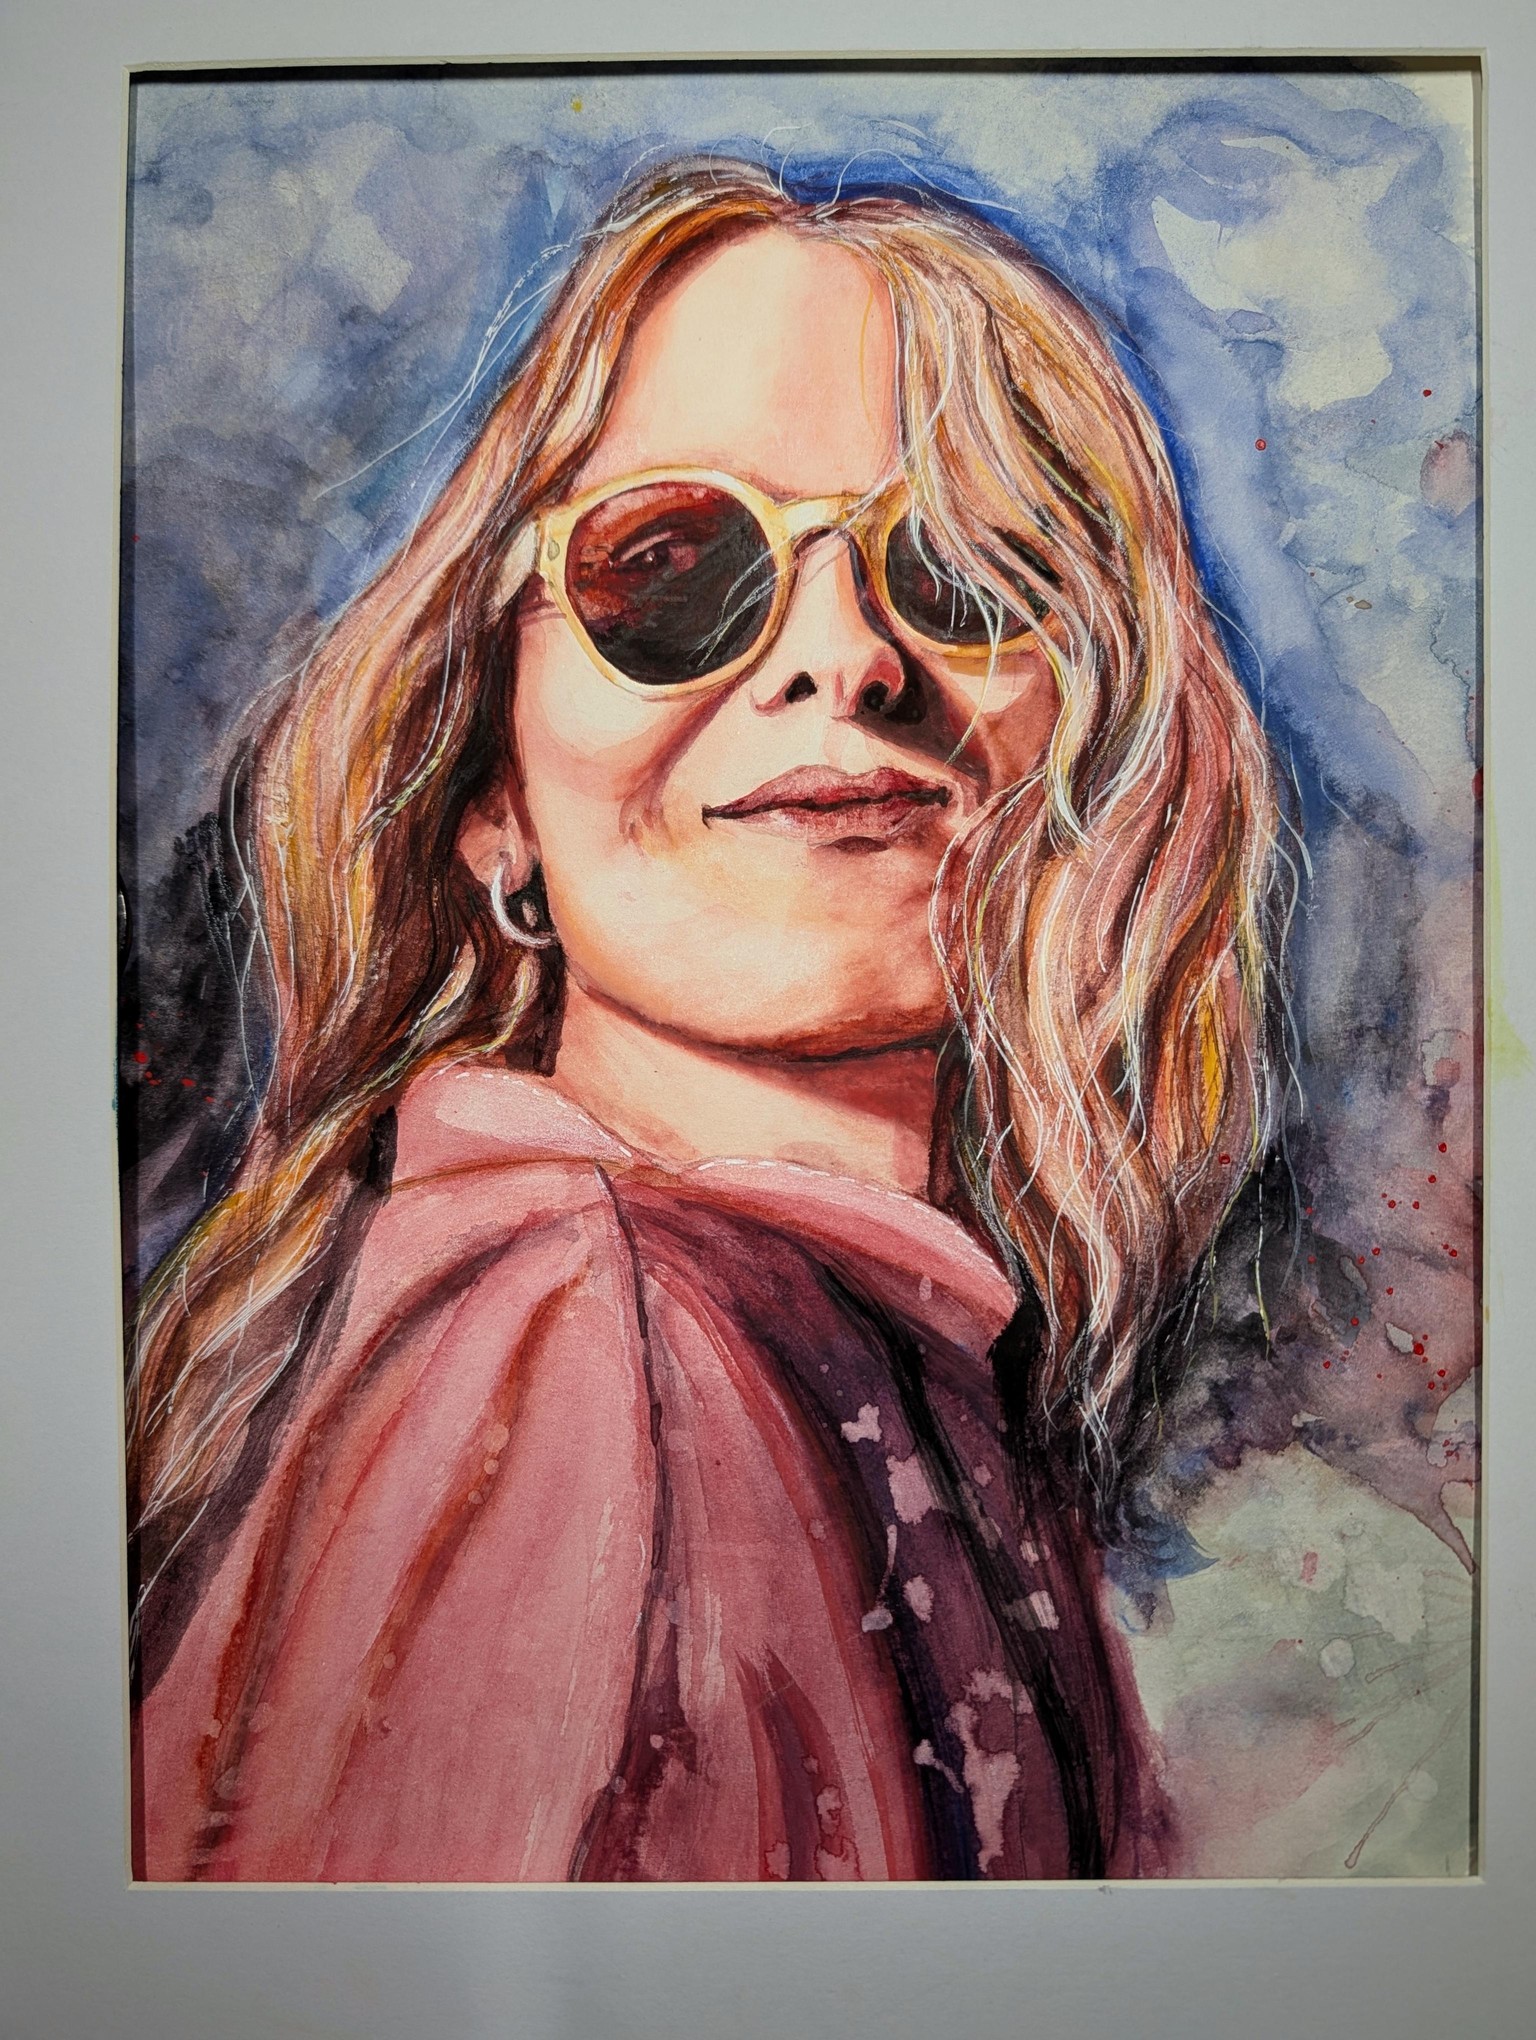
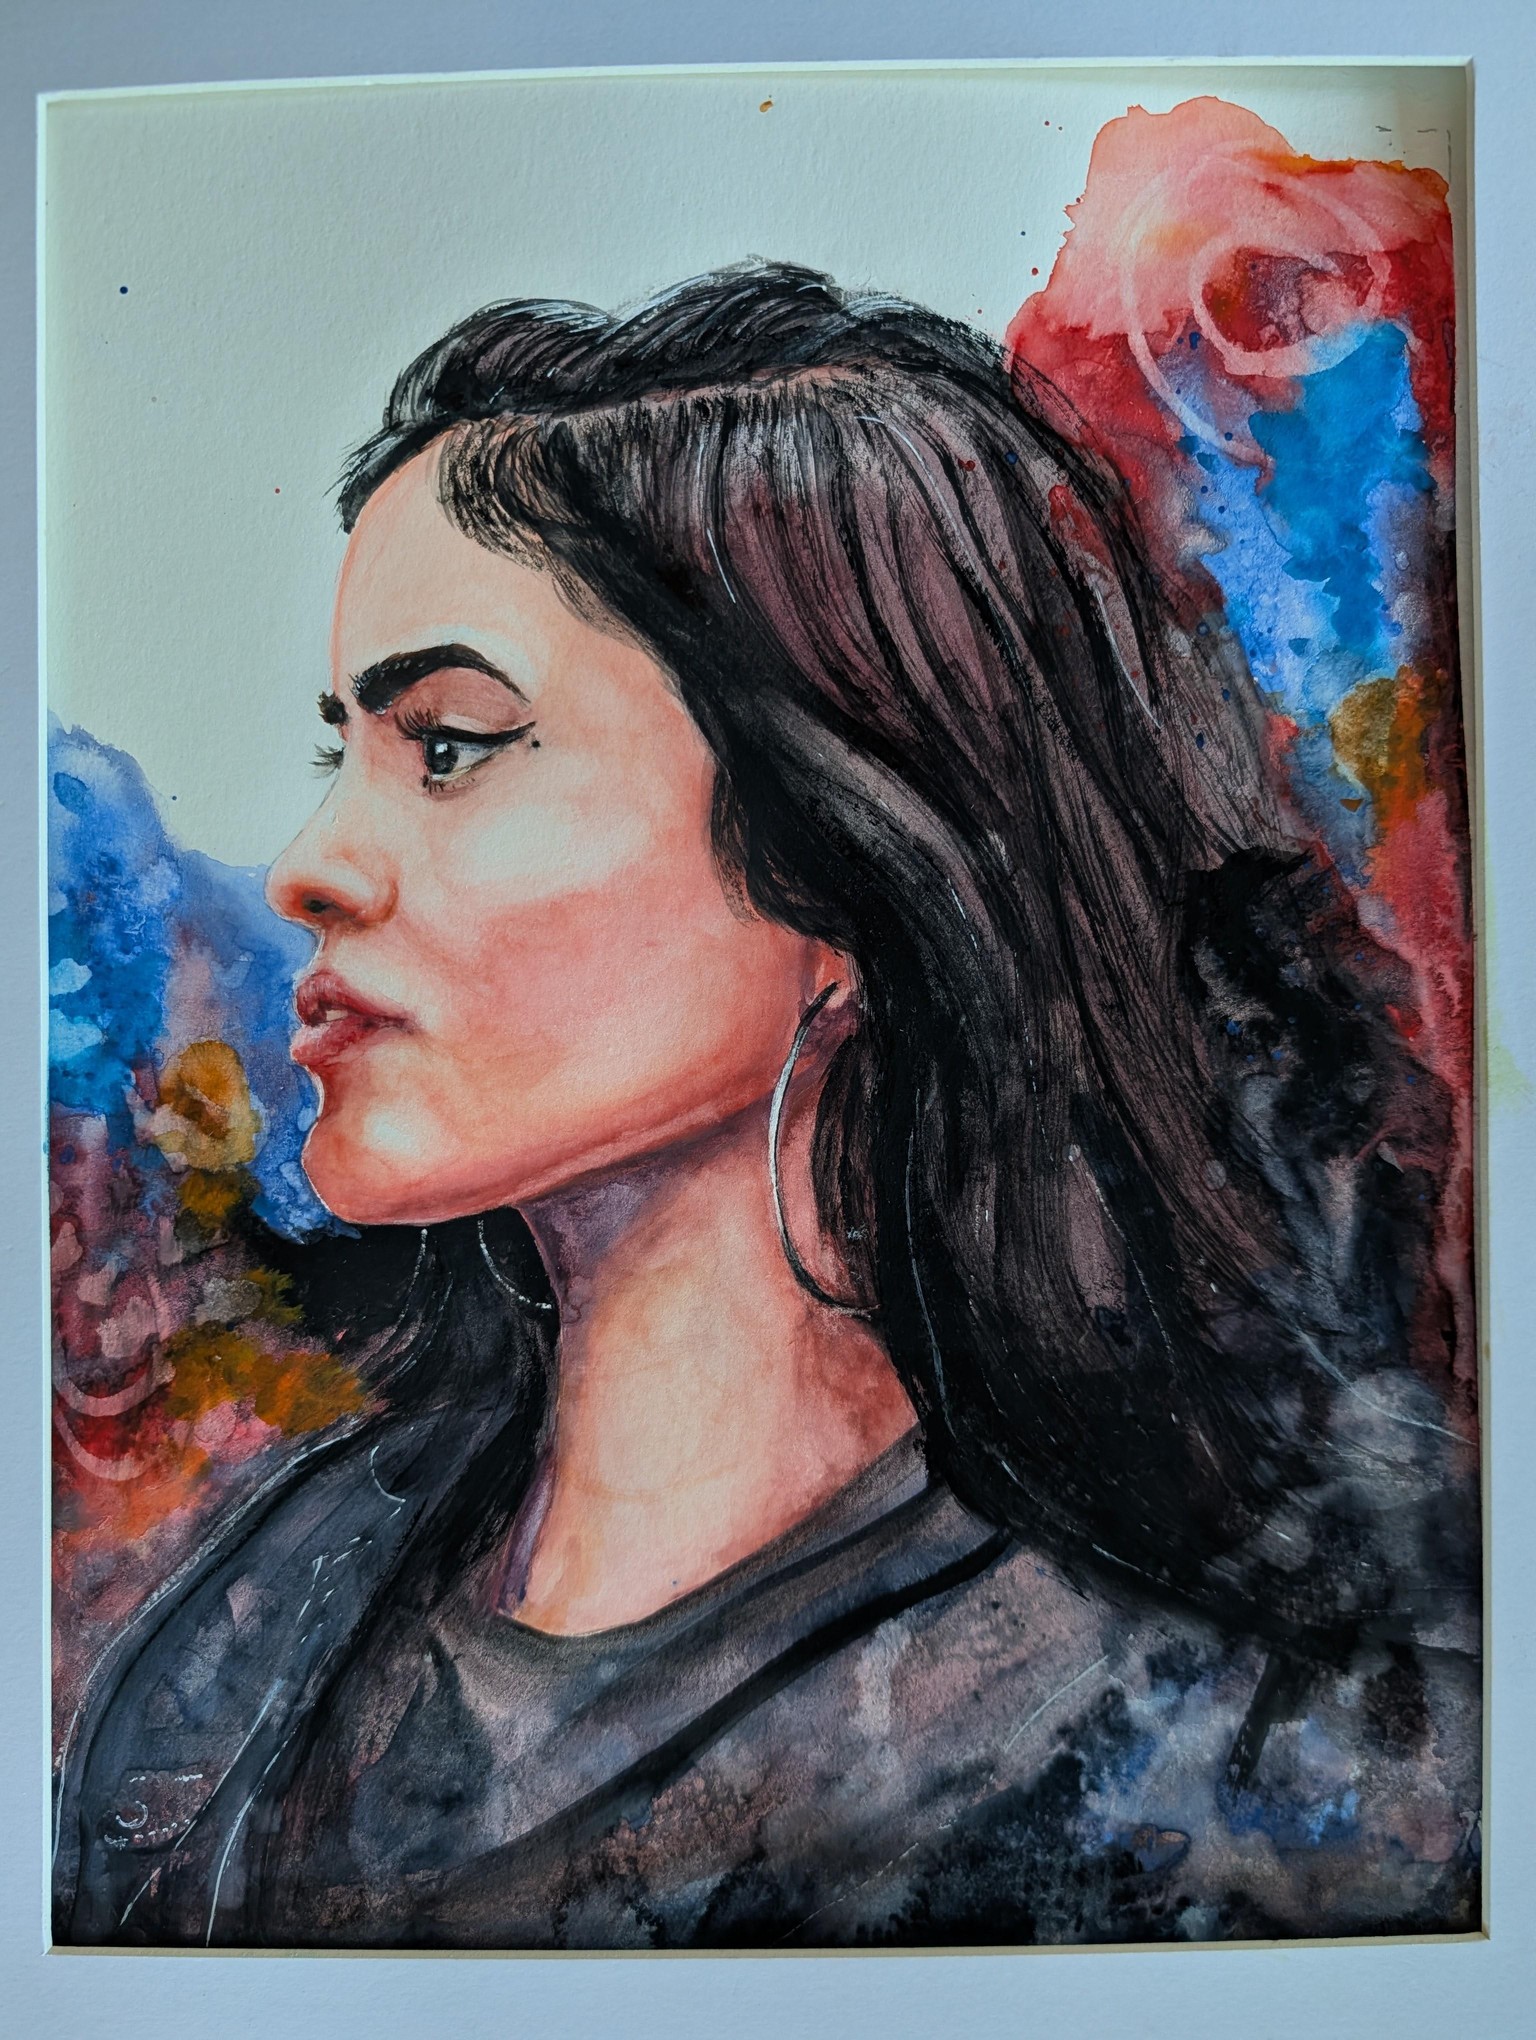
Week 3 Practice prototype and final portrait painting. Highlights for the hair were done with white watercolor pencil, Guage and gel pen.
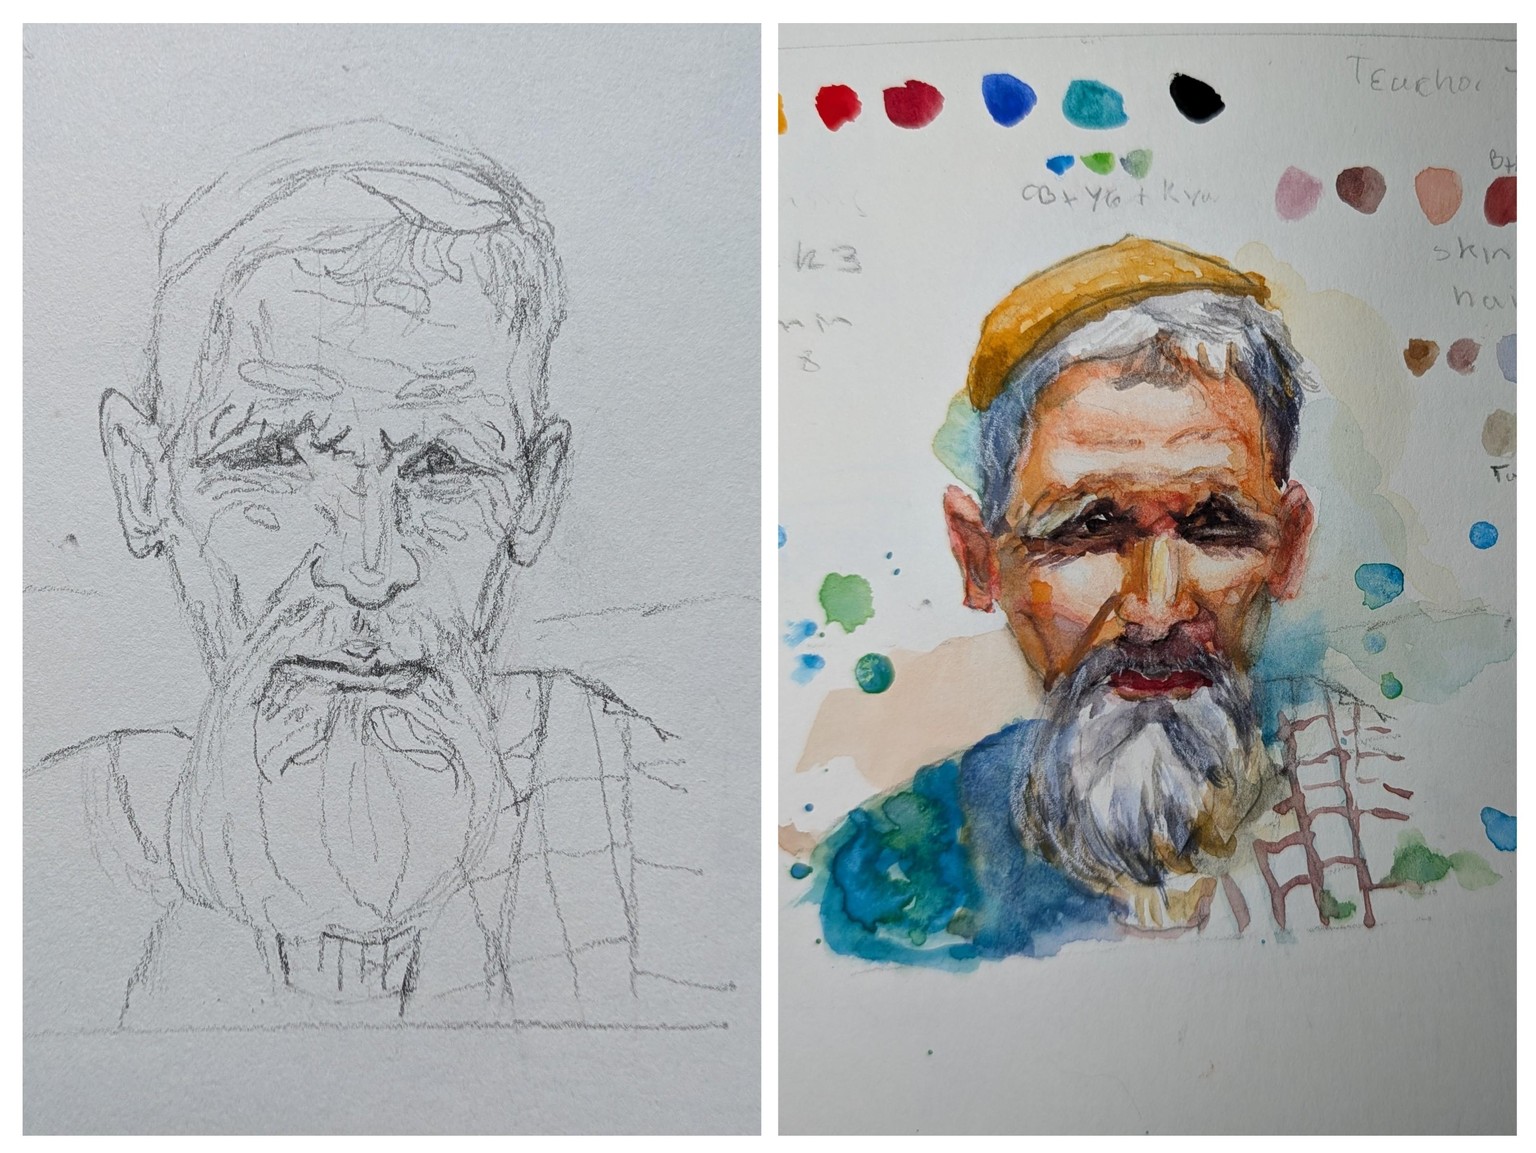
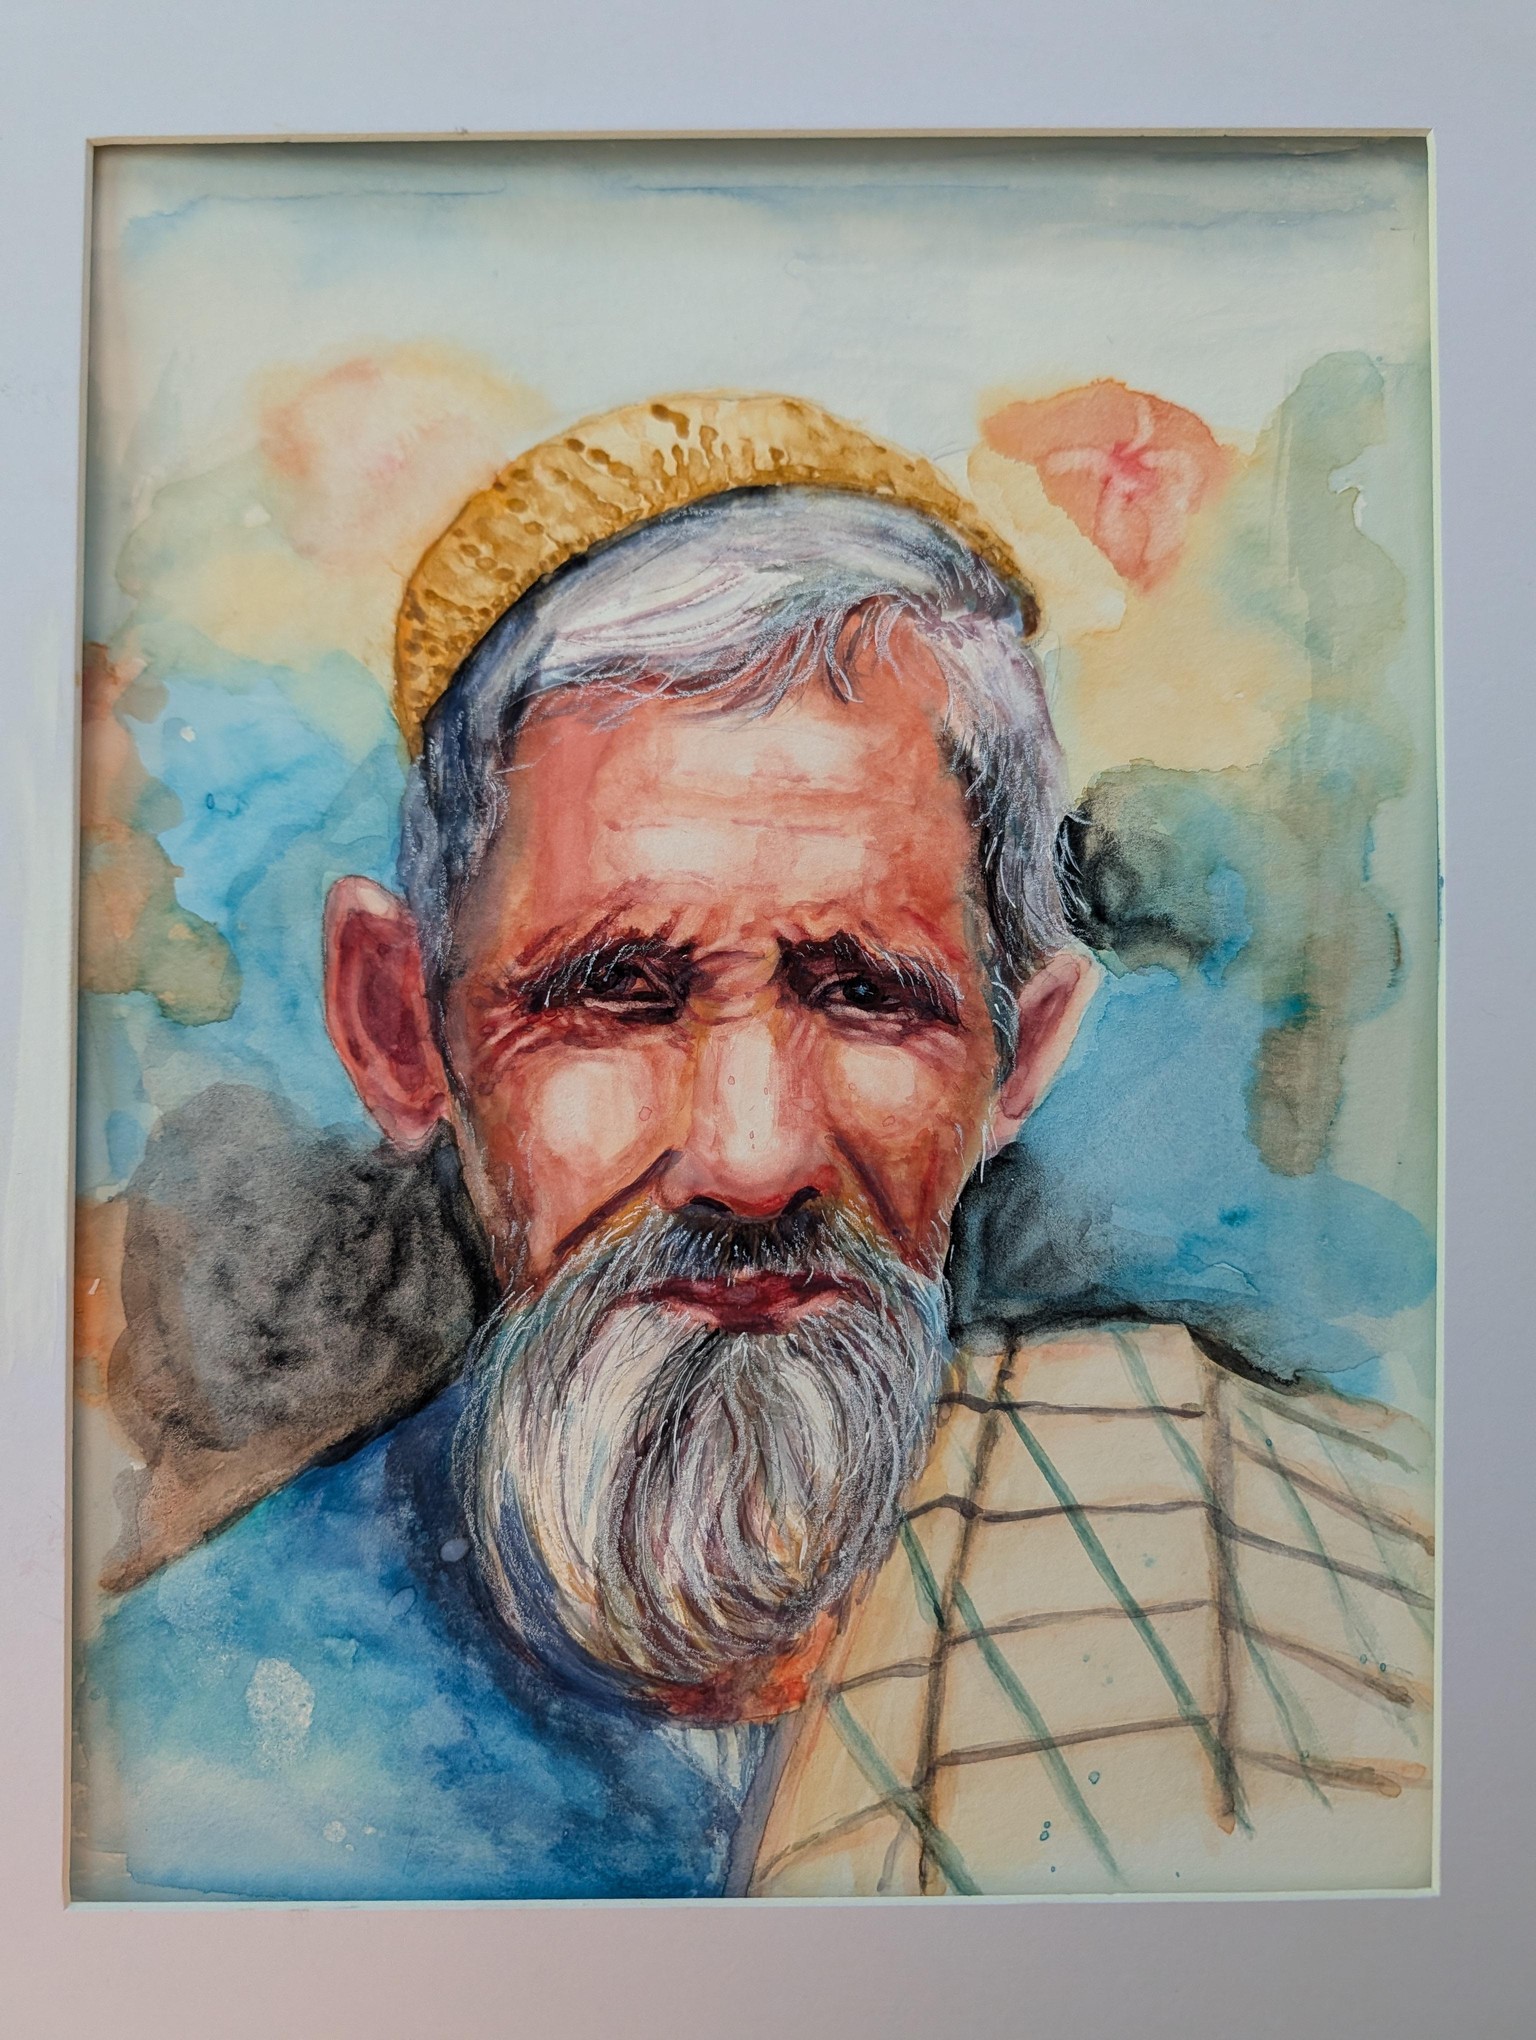
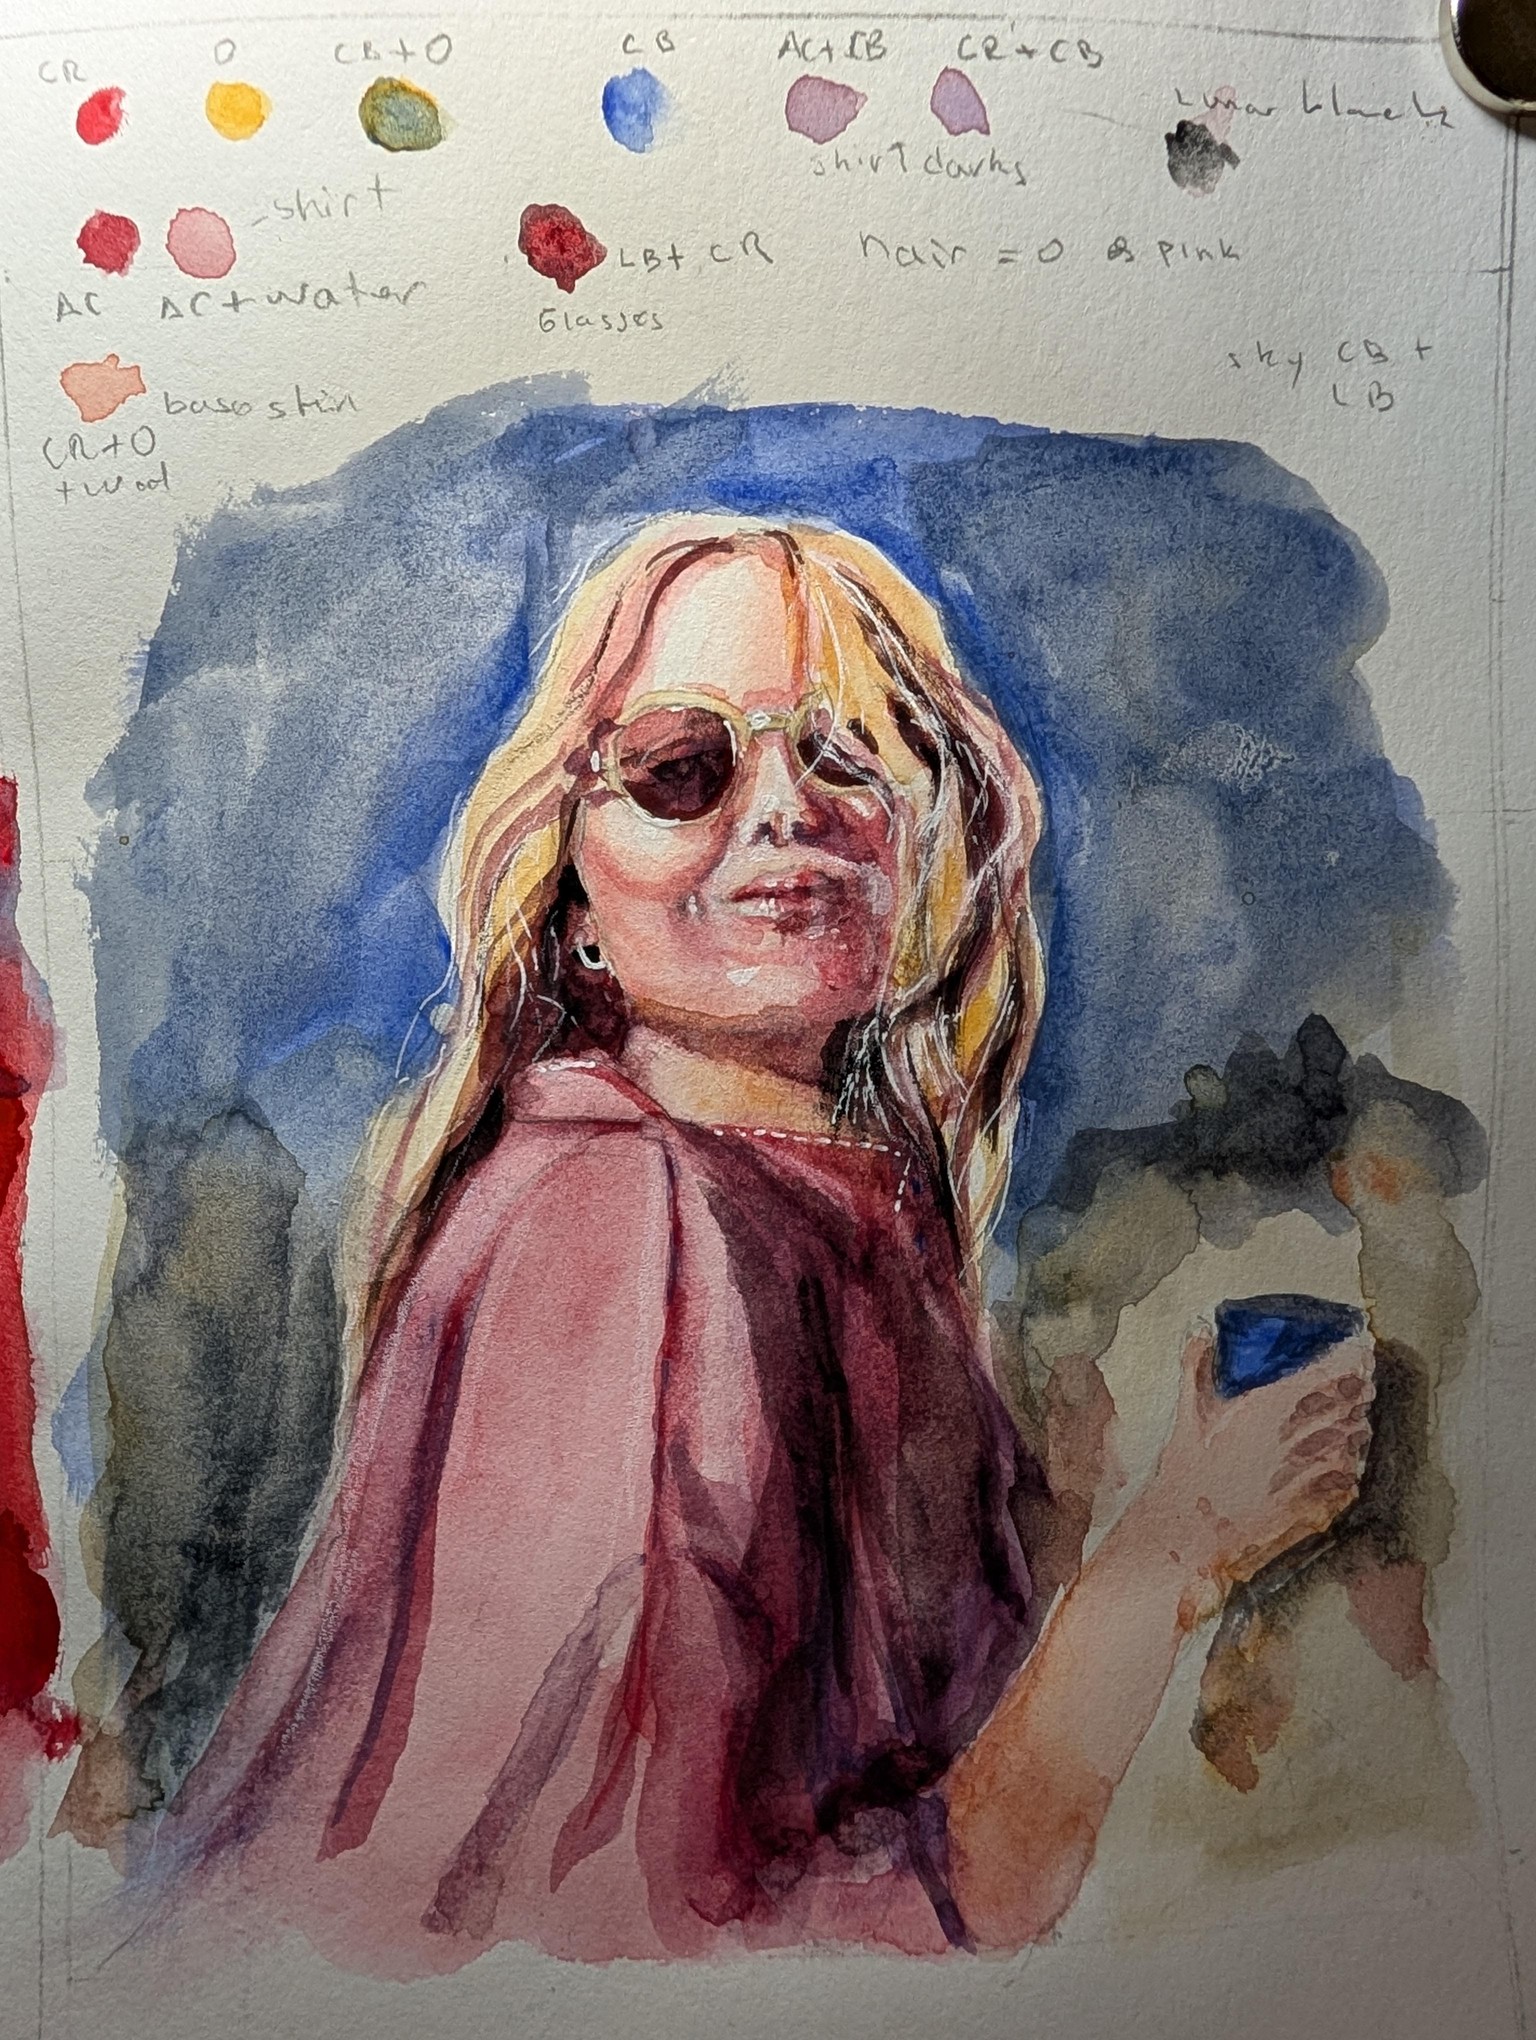
Week 4 prototype, sketch and final portrait
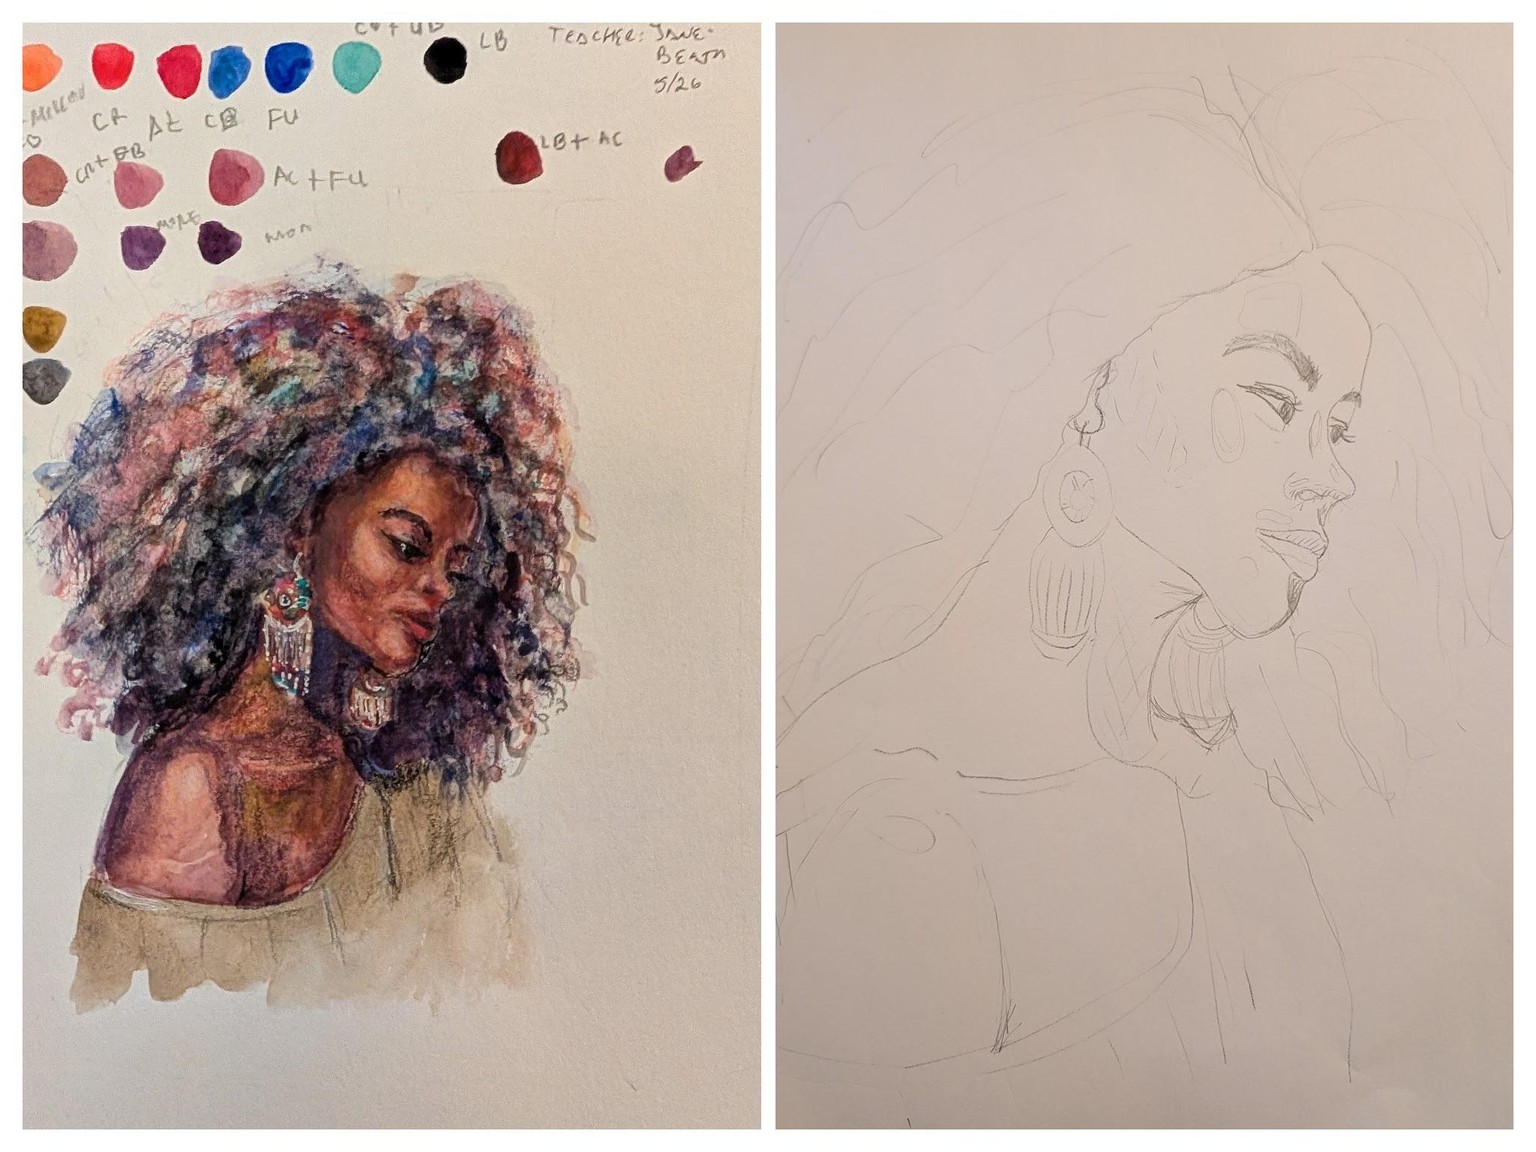
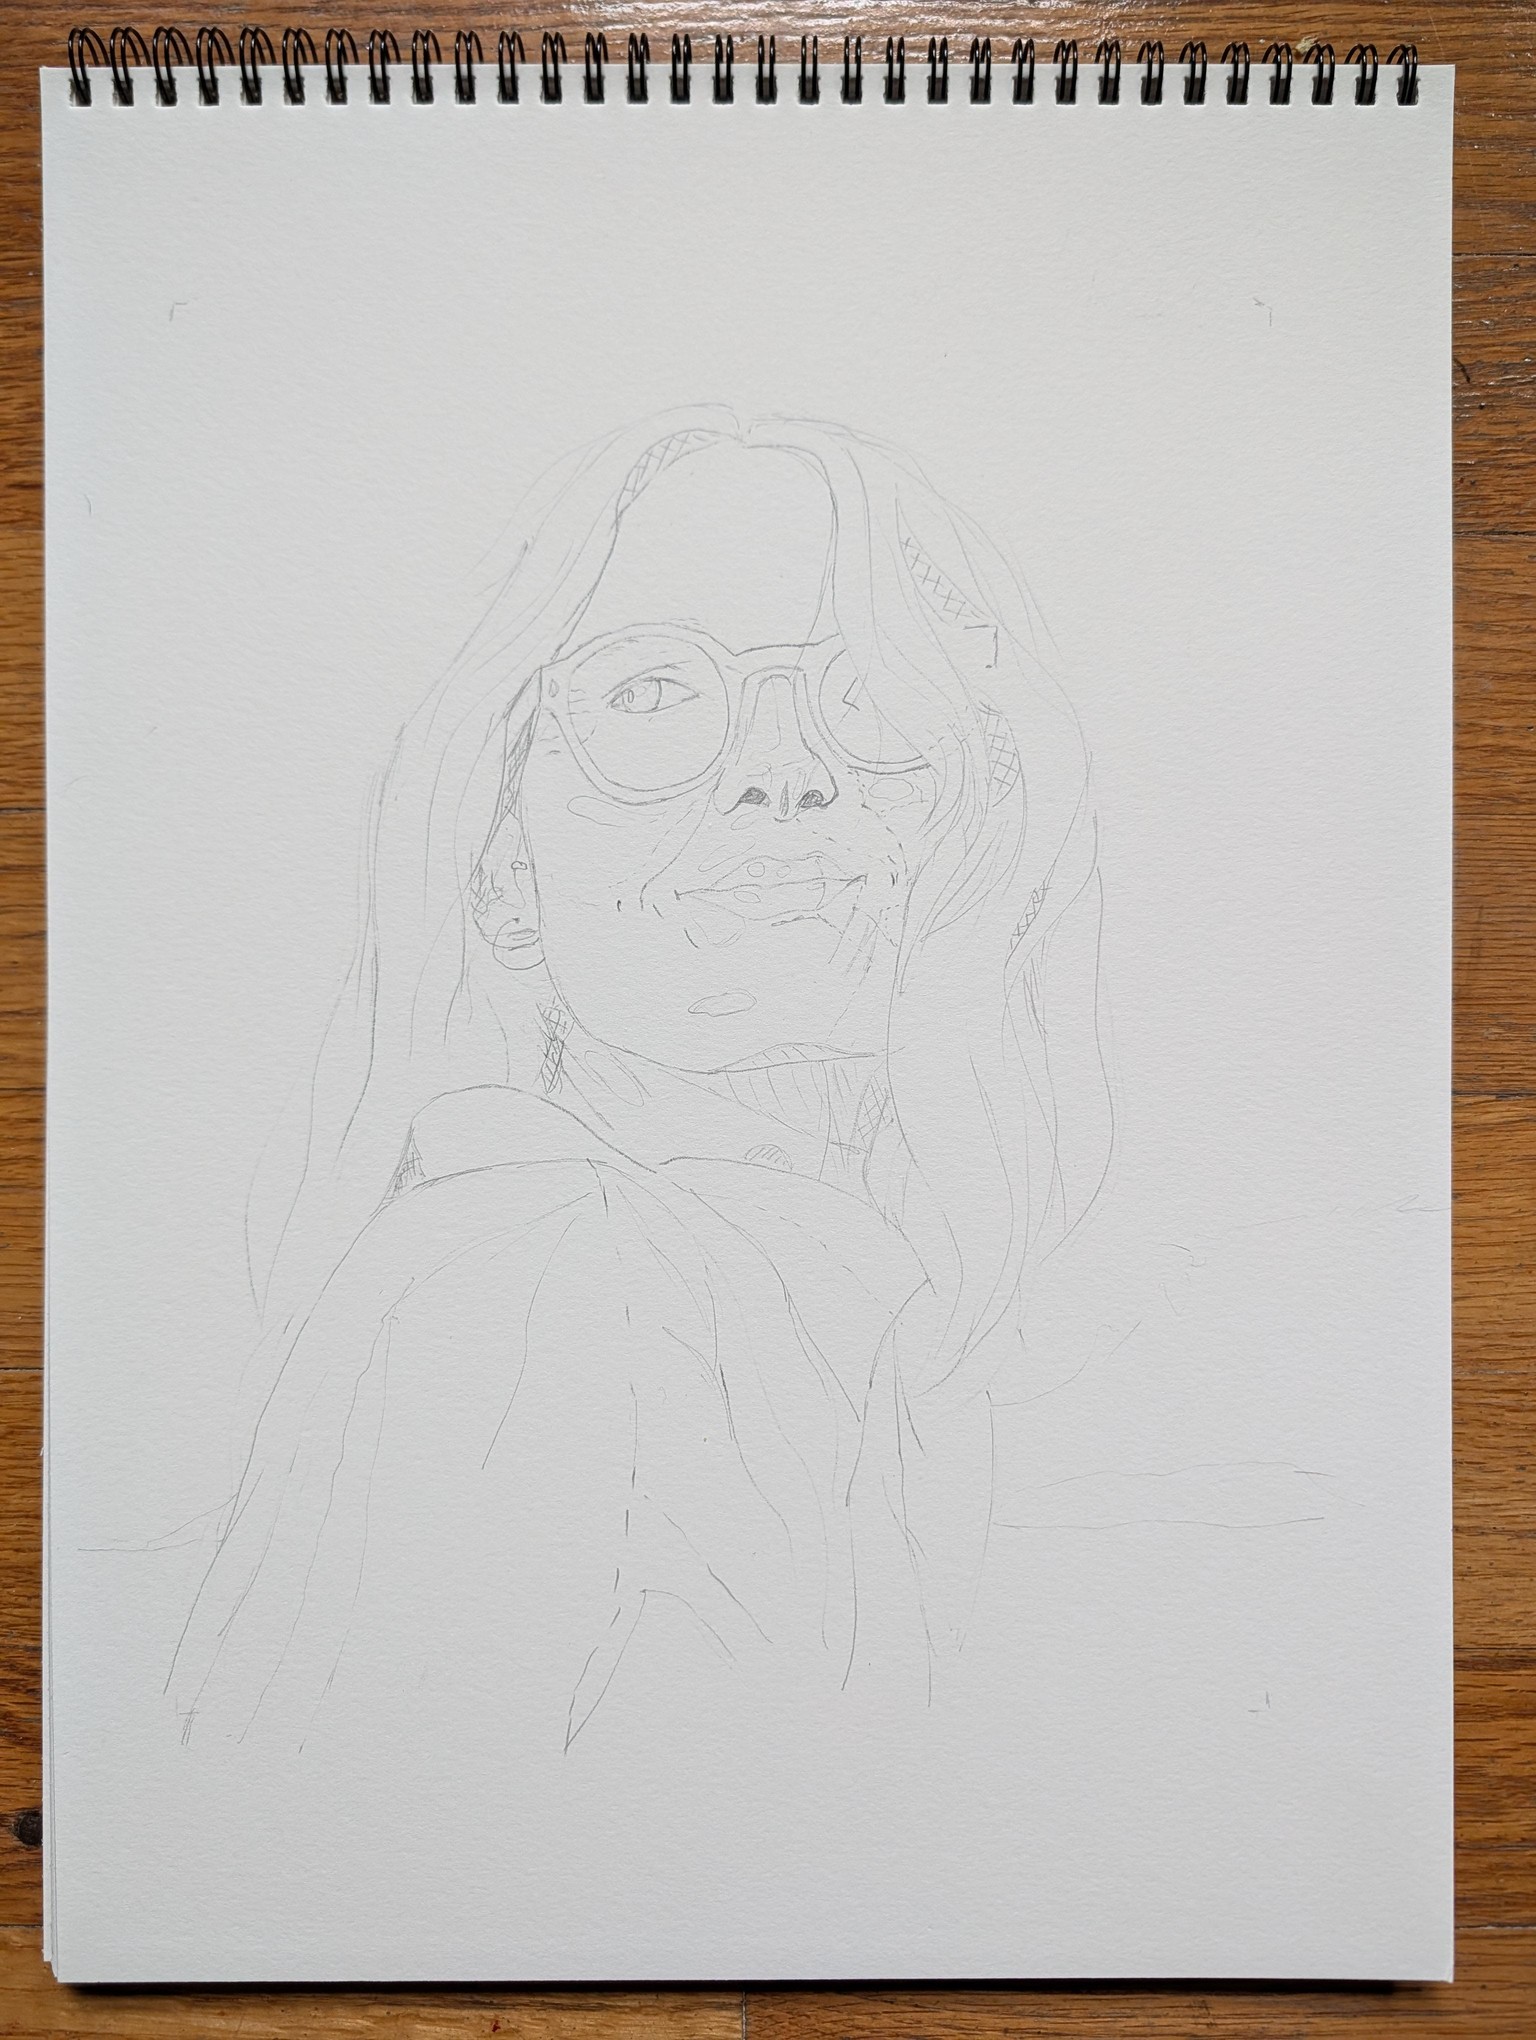
Week 5 Practice prototype and sketch
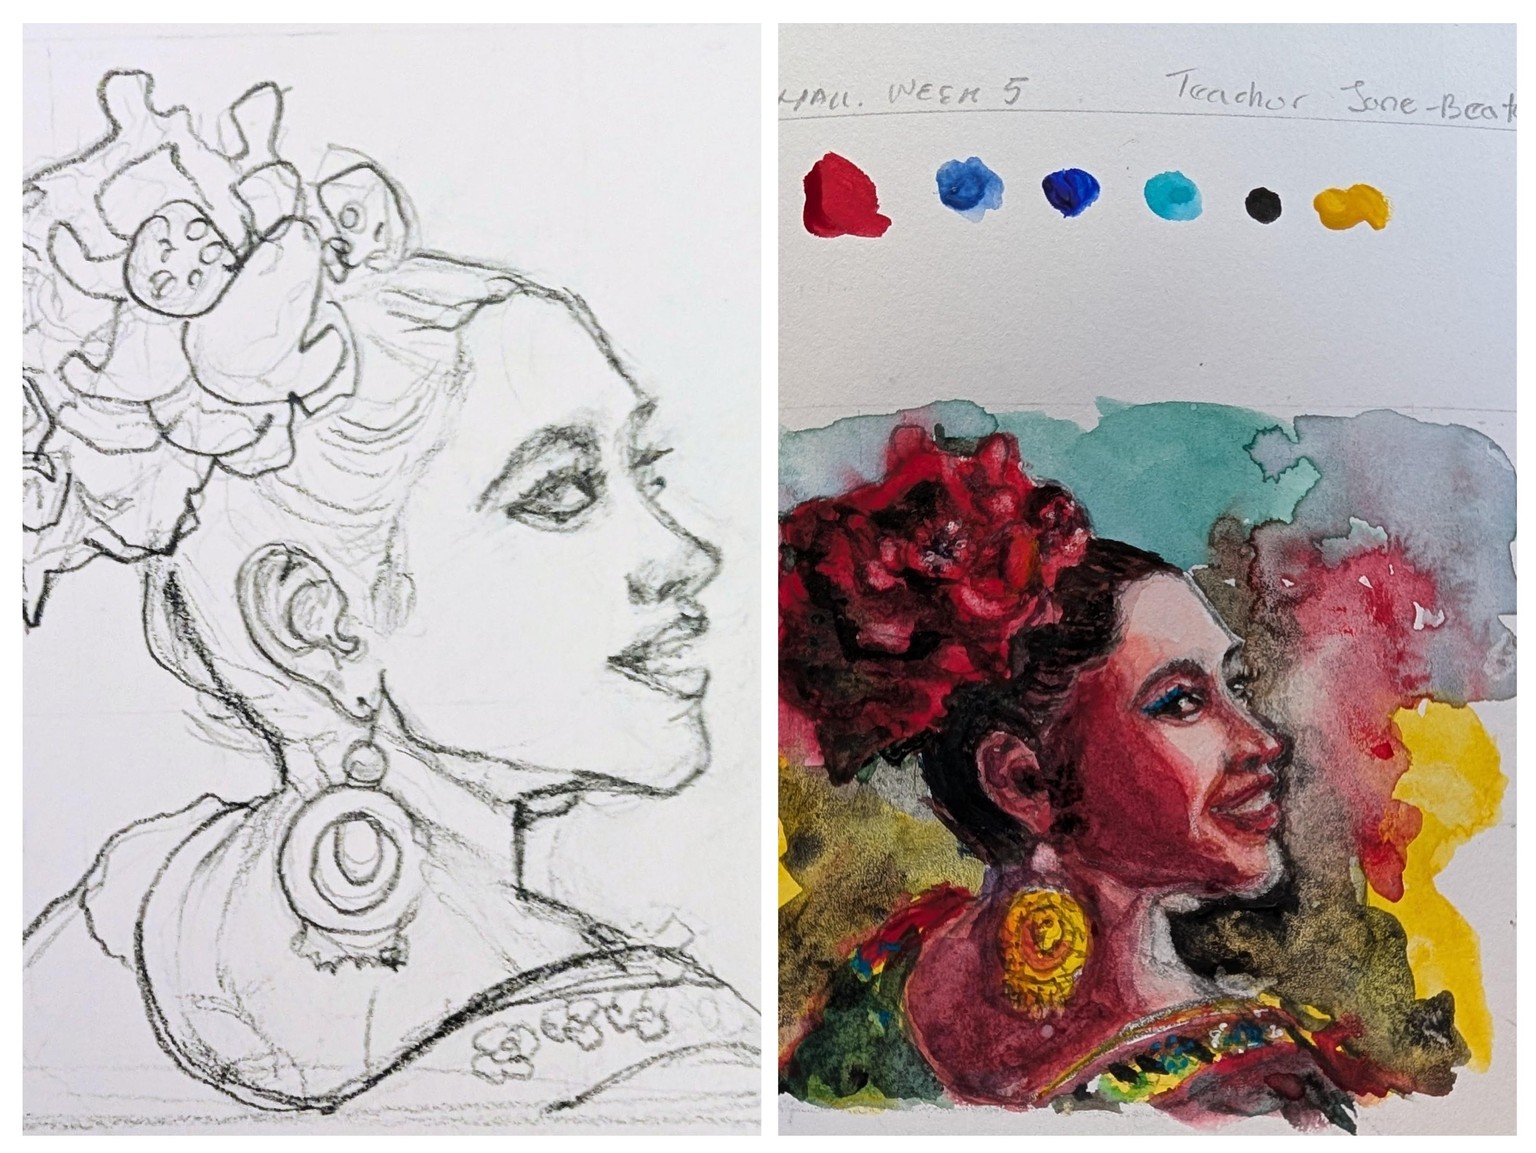
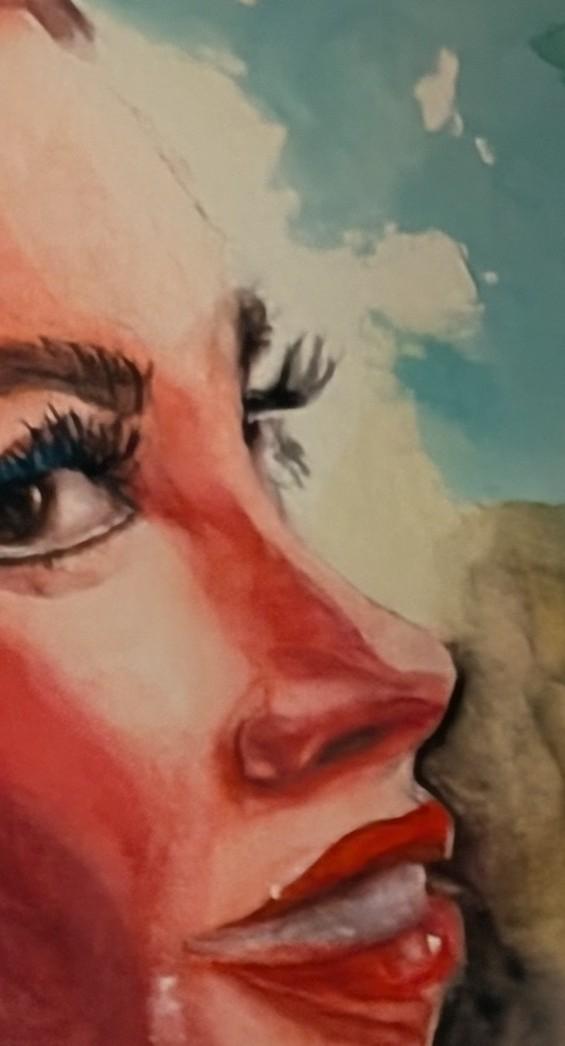
Final portrait in progress.. so far I likevthis part of the face:
To be continued