PHX --> SD
Last December, my friend and I decided to drive from Phoenix to San Diego for some much needed ocean air. At the time, I'd been taking pictures for a couple of years, but he had just purchased his first 35mm film camera and was beginning to develop a love for photography. The best of both worlds! I think I almost love showing people what I've learned in my photography journey more than just taking photos all the time. Anyway, the following three pictures are from our road trip across the desert.
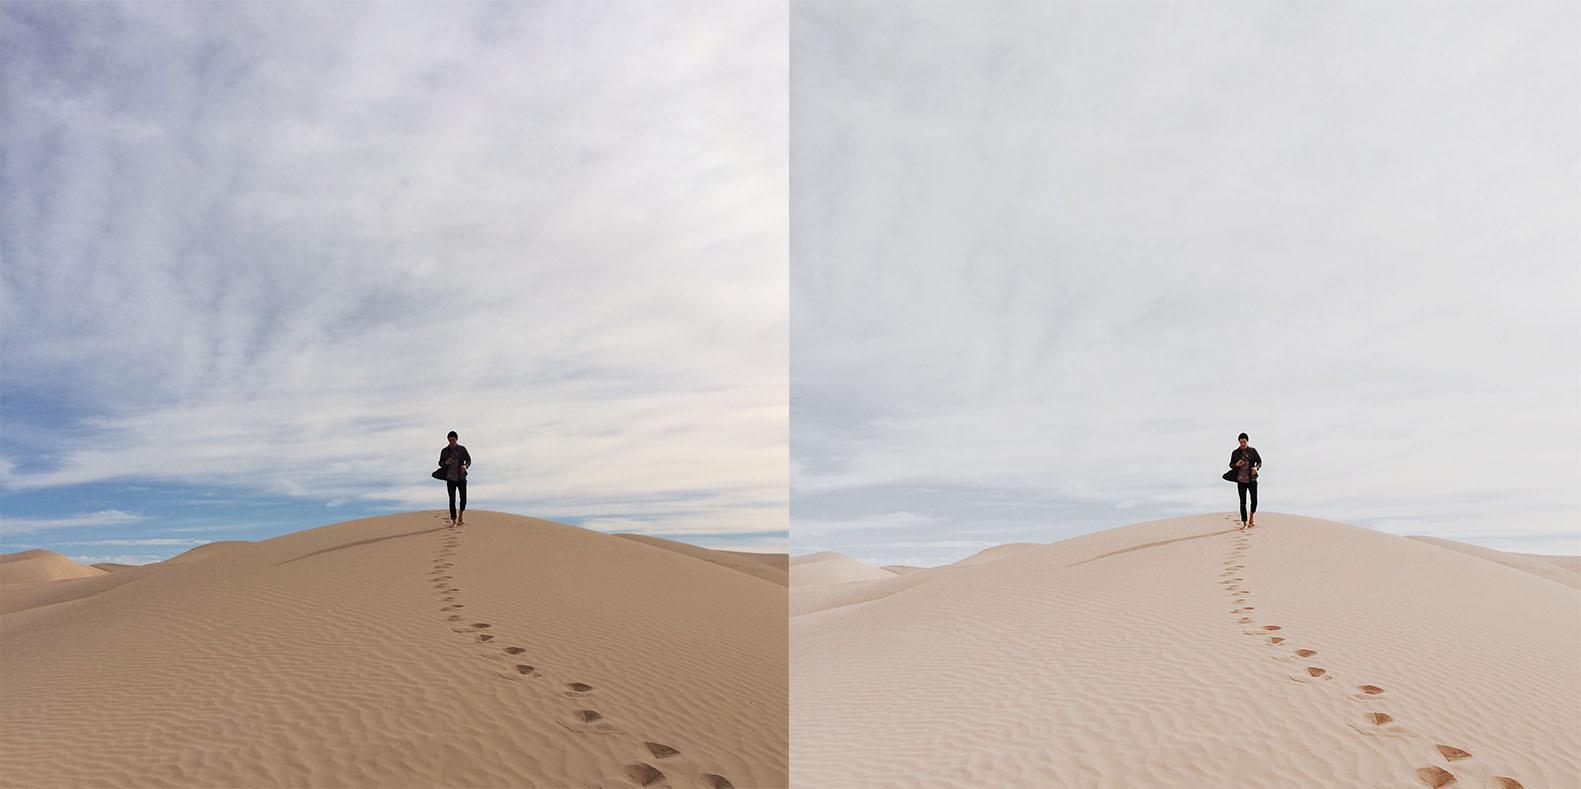
First I'll show you what they looked like straight out of my iPhone 5S.
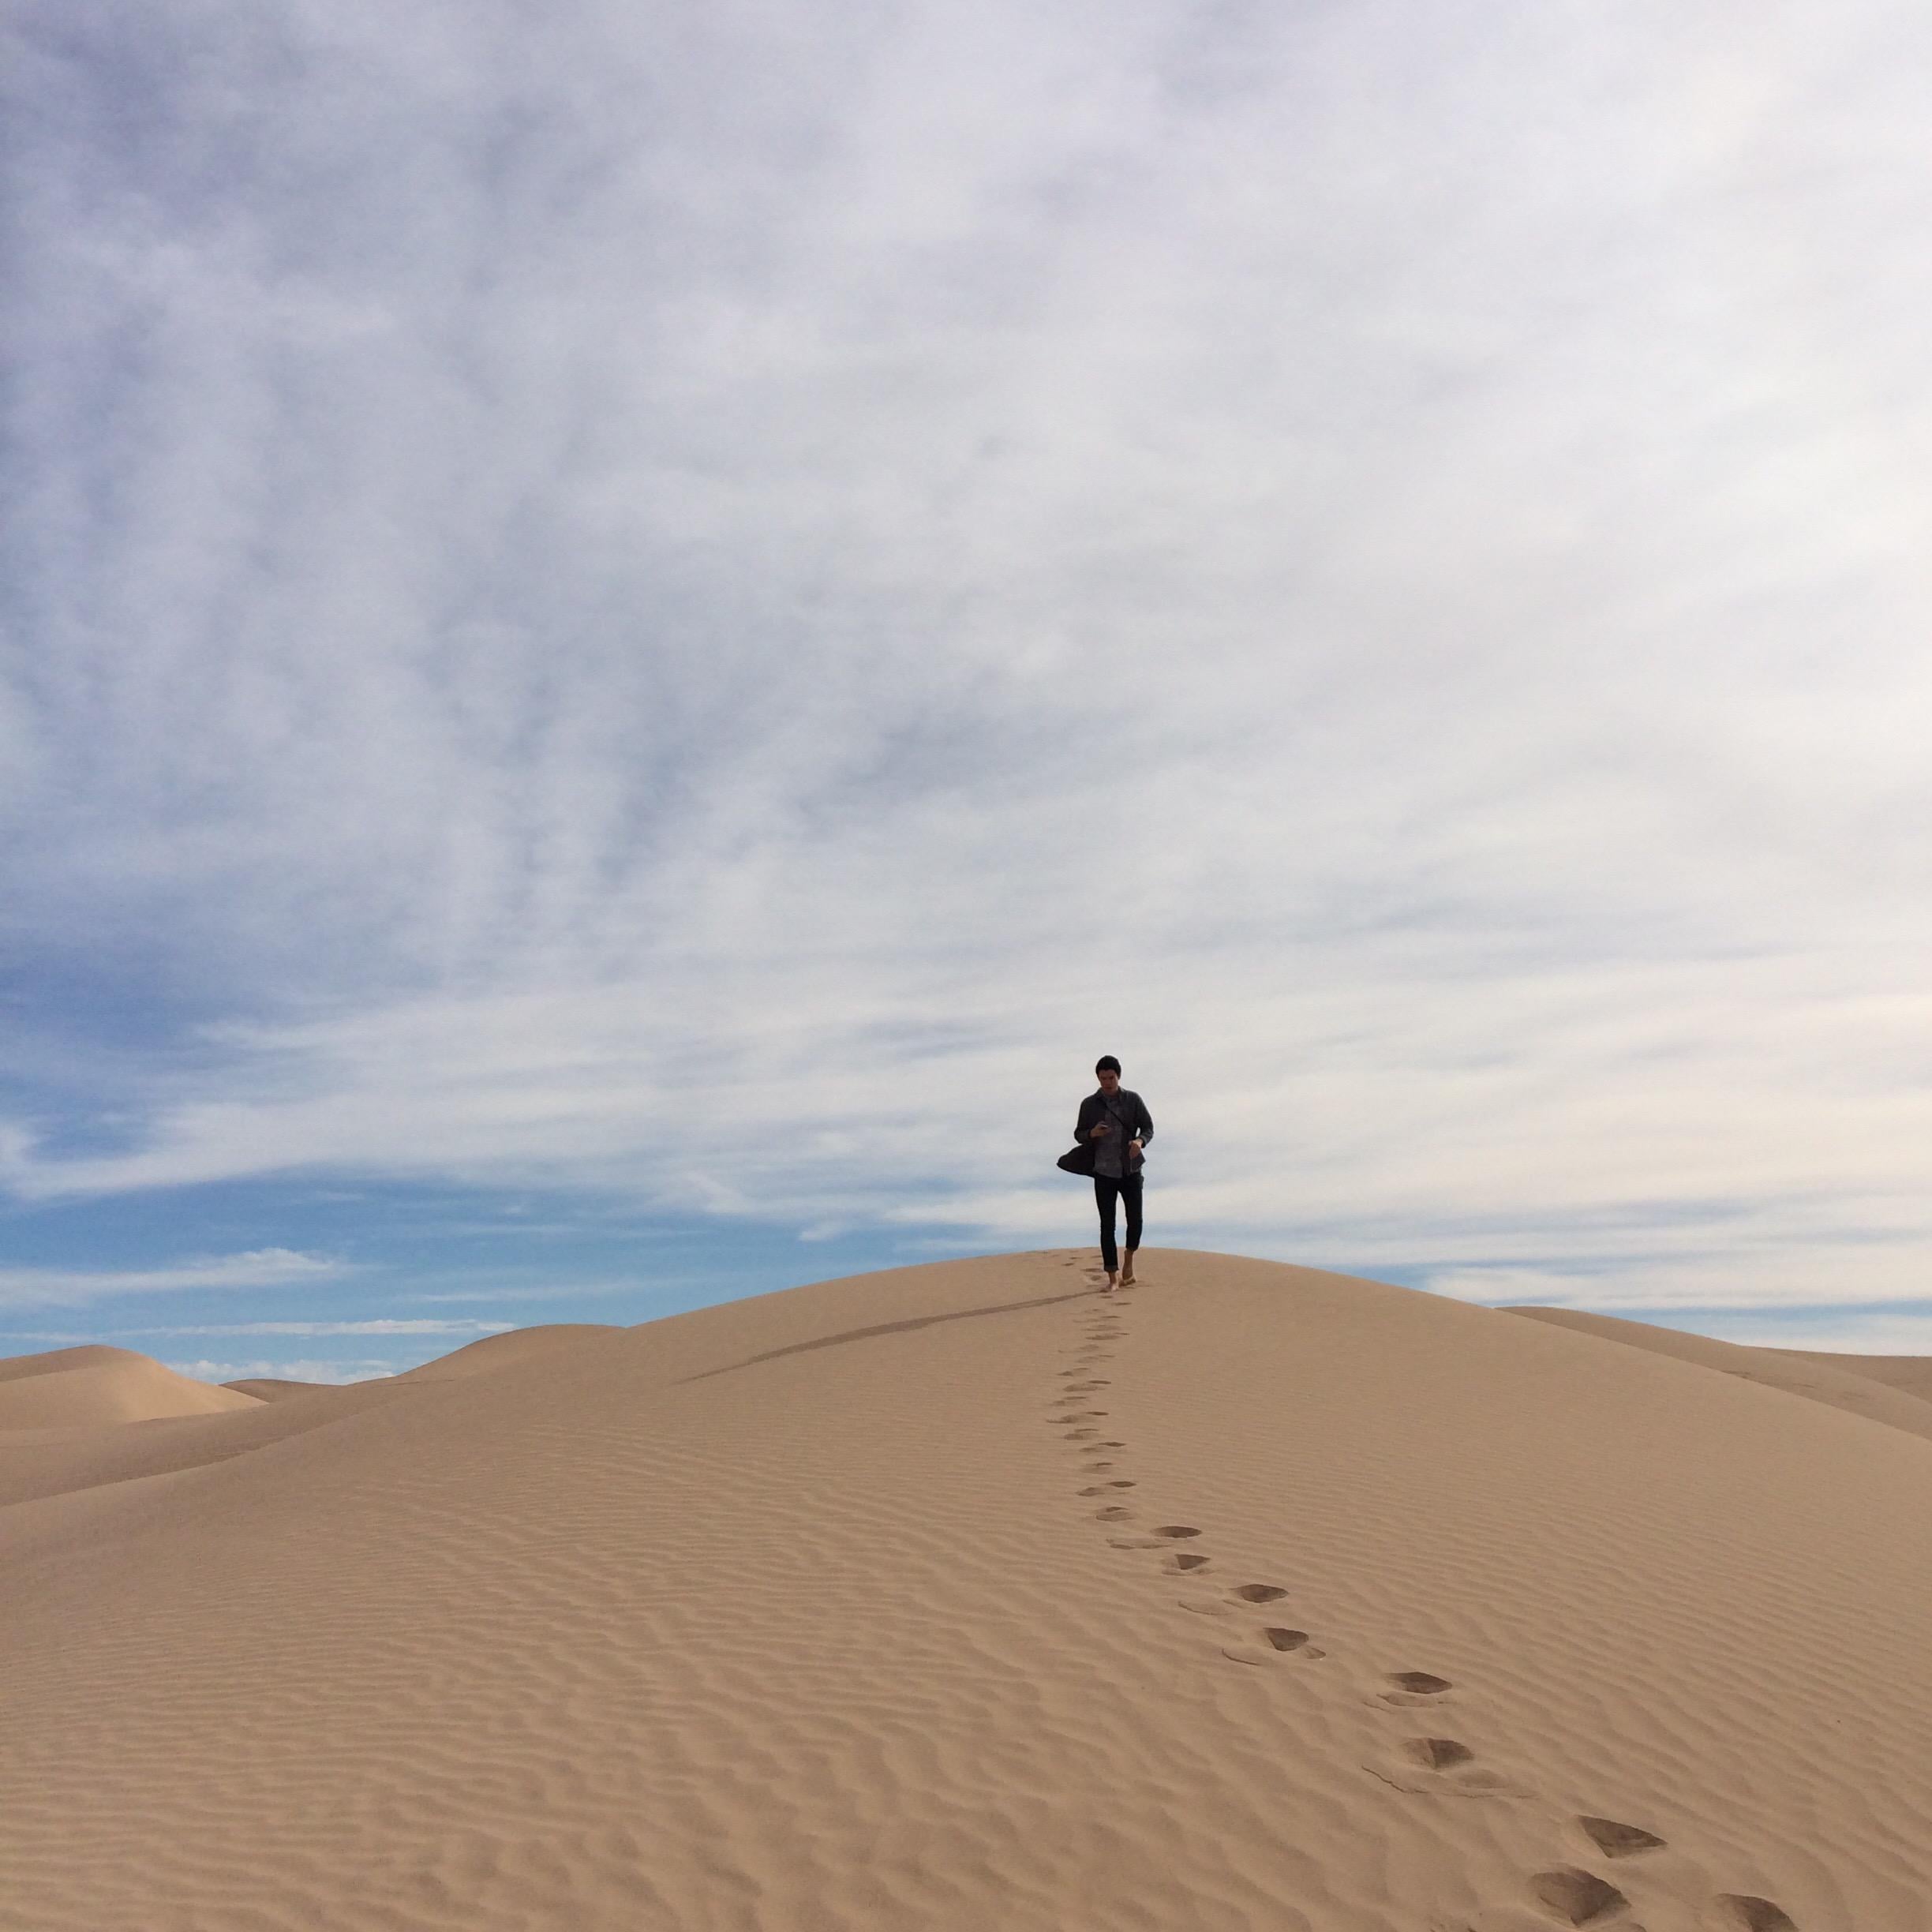
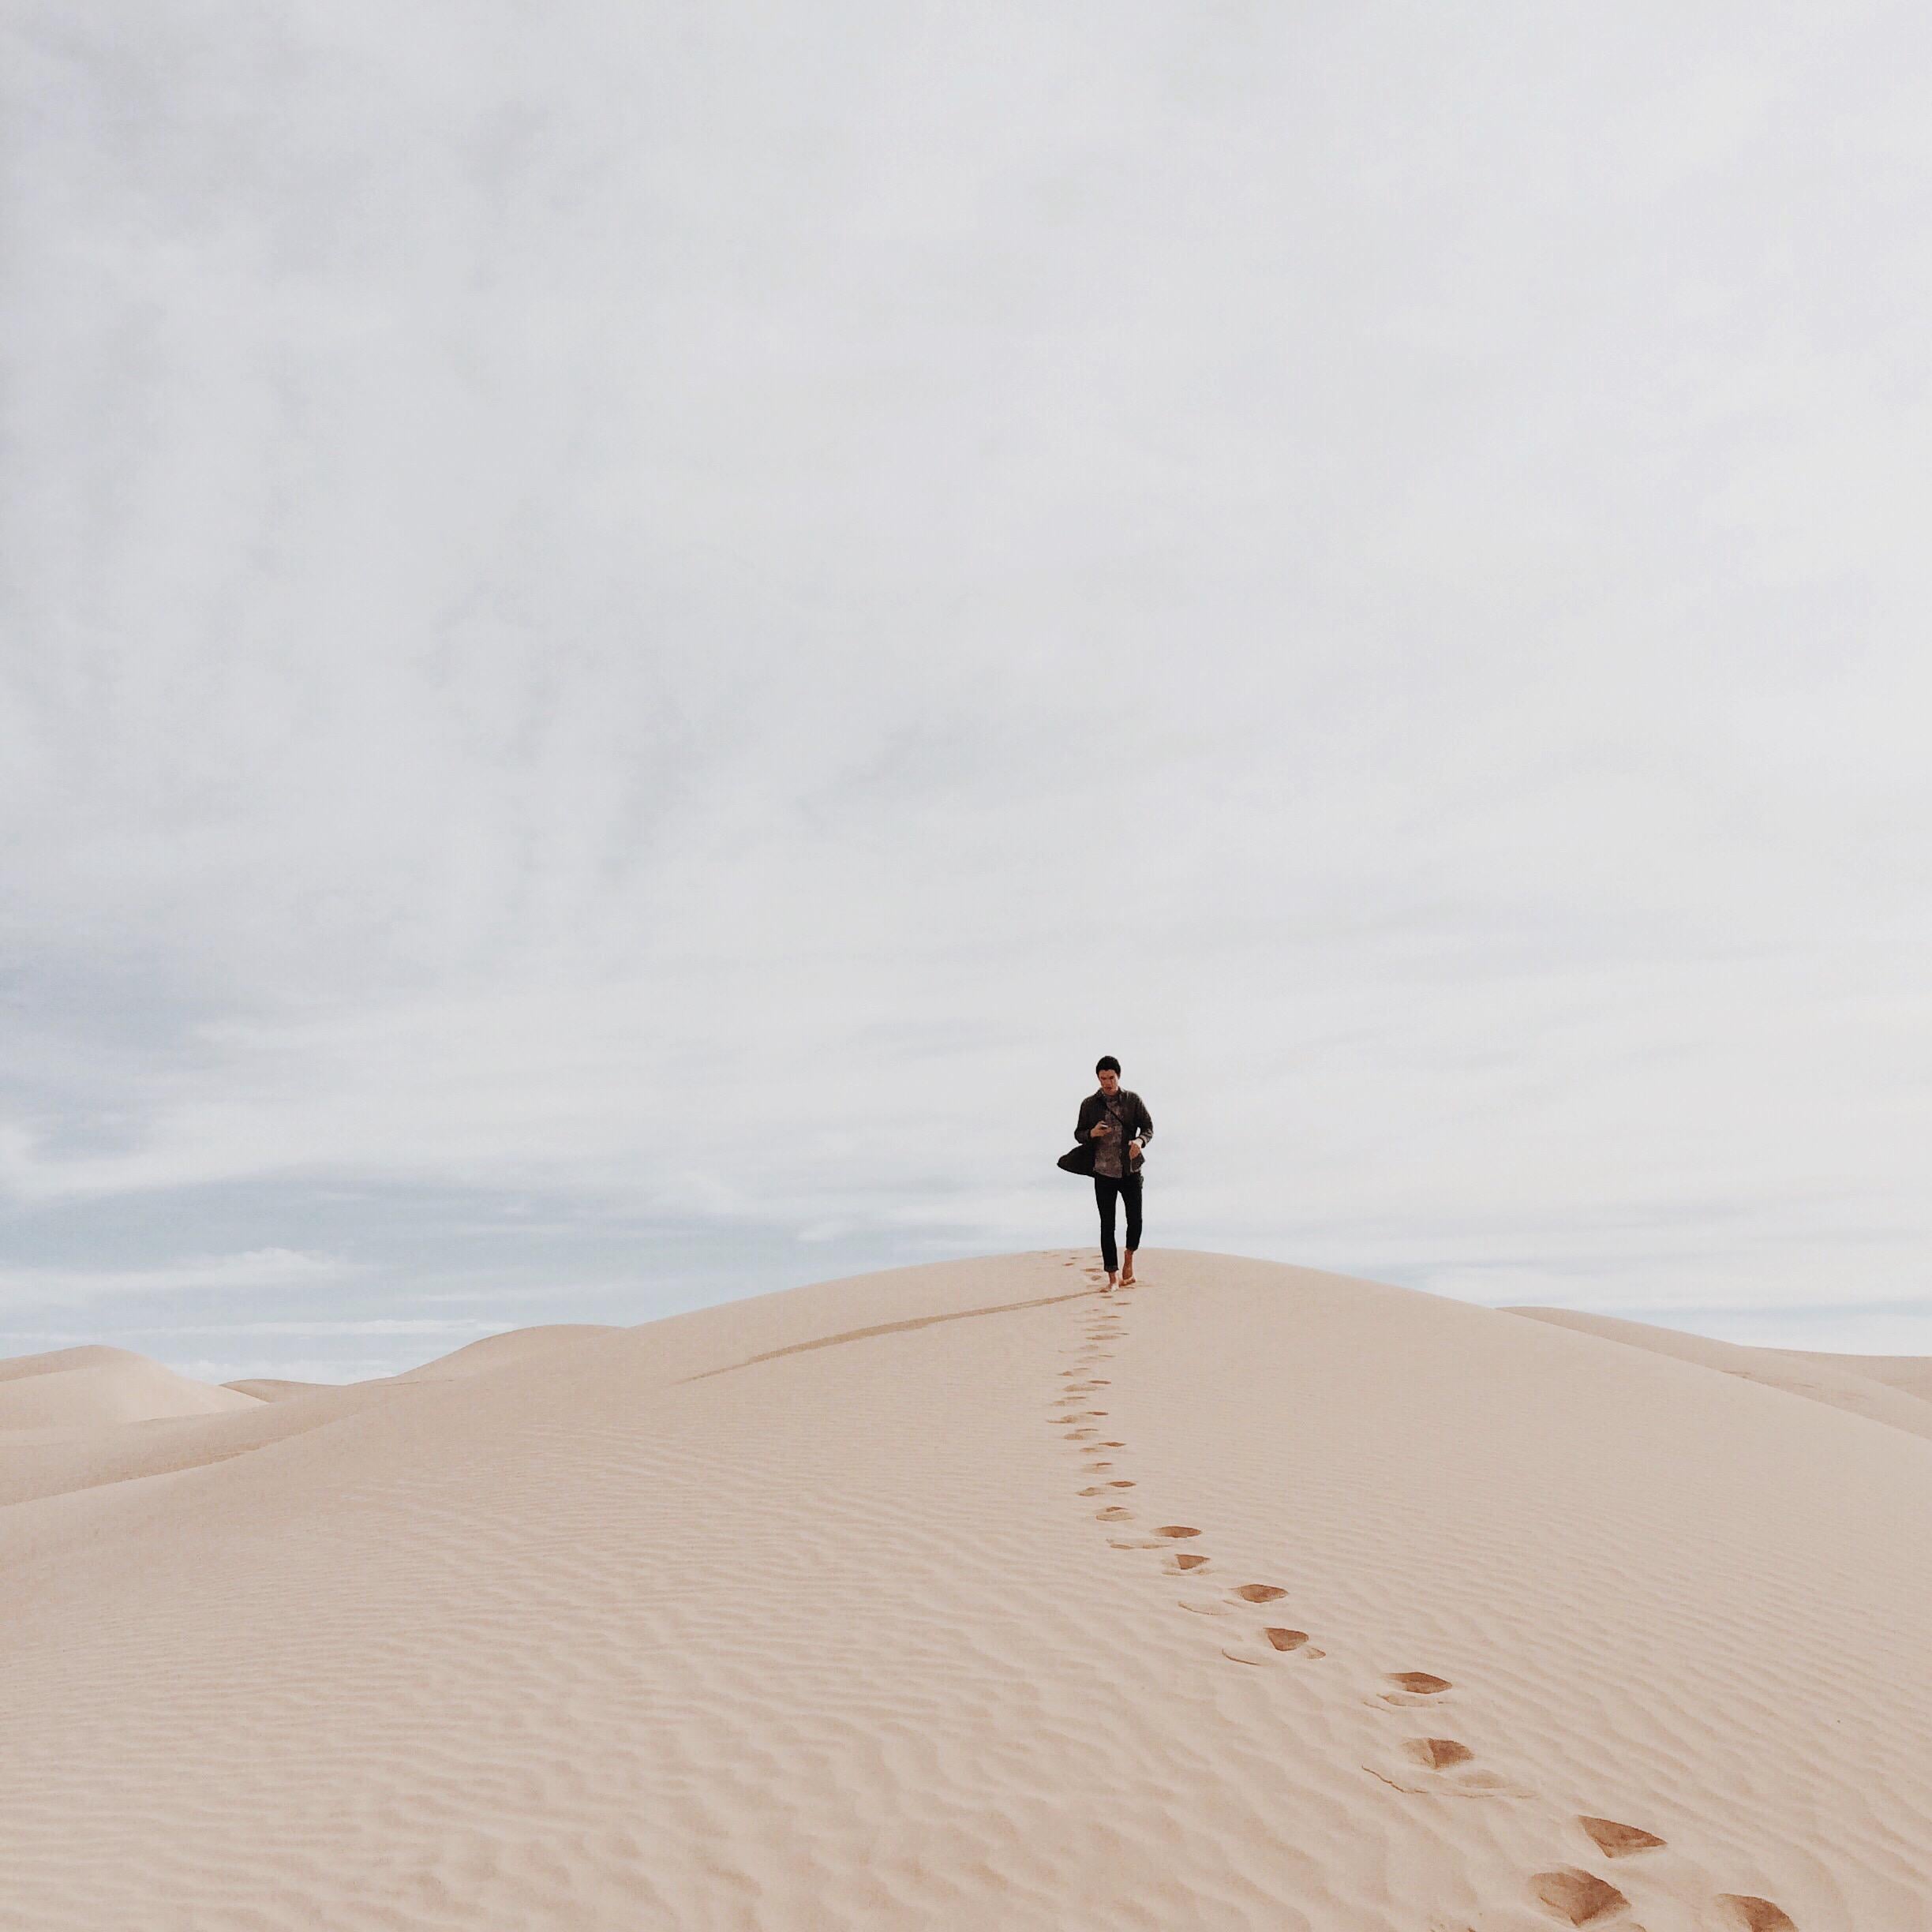
This is my friend Taylor at the Imperial Sand Dunes just outside of Yuma, AZ. If I could go back, I would have pointed my phone just a smidge more to the left to really nail the rule of thirds. I do, however, like the leading lines of his footprints through the sand. If you've ever thought about going to these dunes (also known as the Glamis or Algodones Dunes), let me help you make the decision. Go!
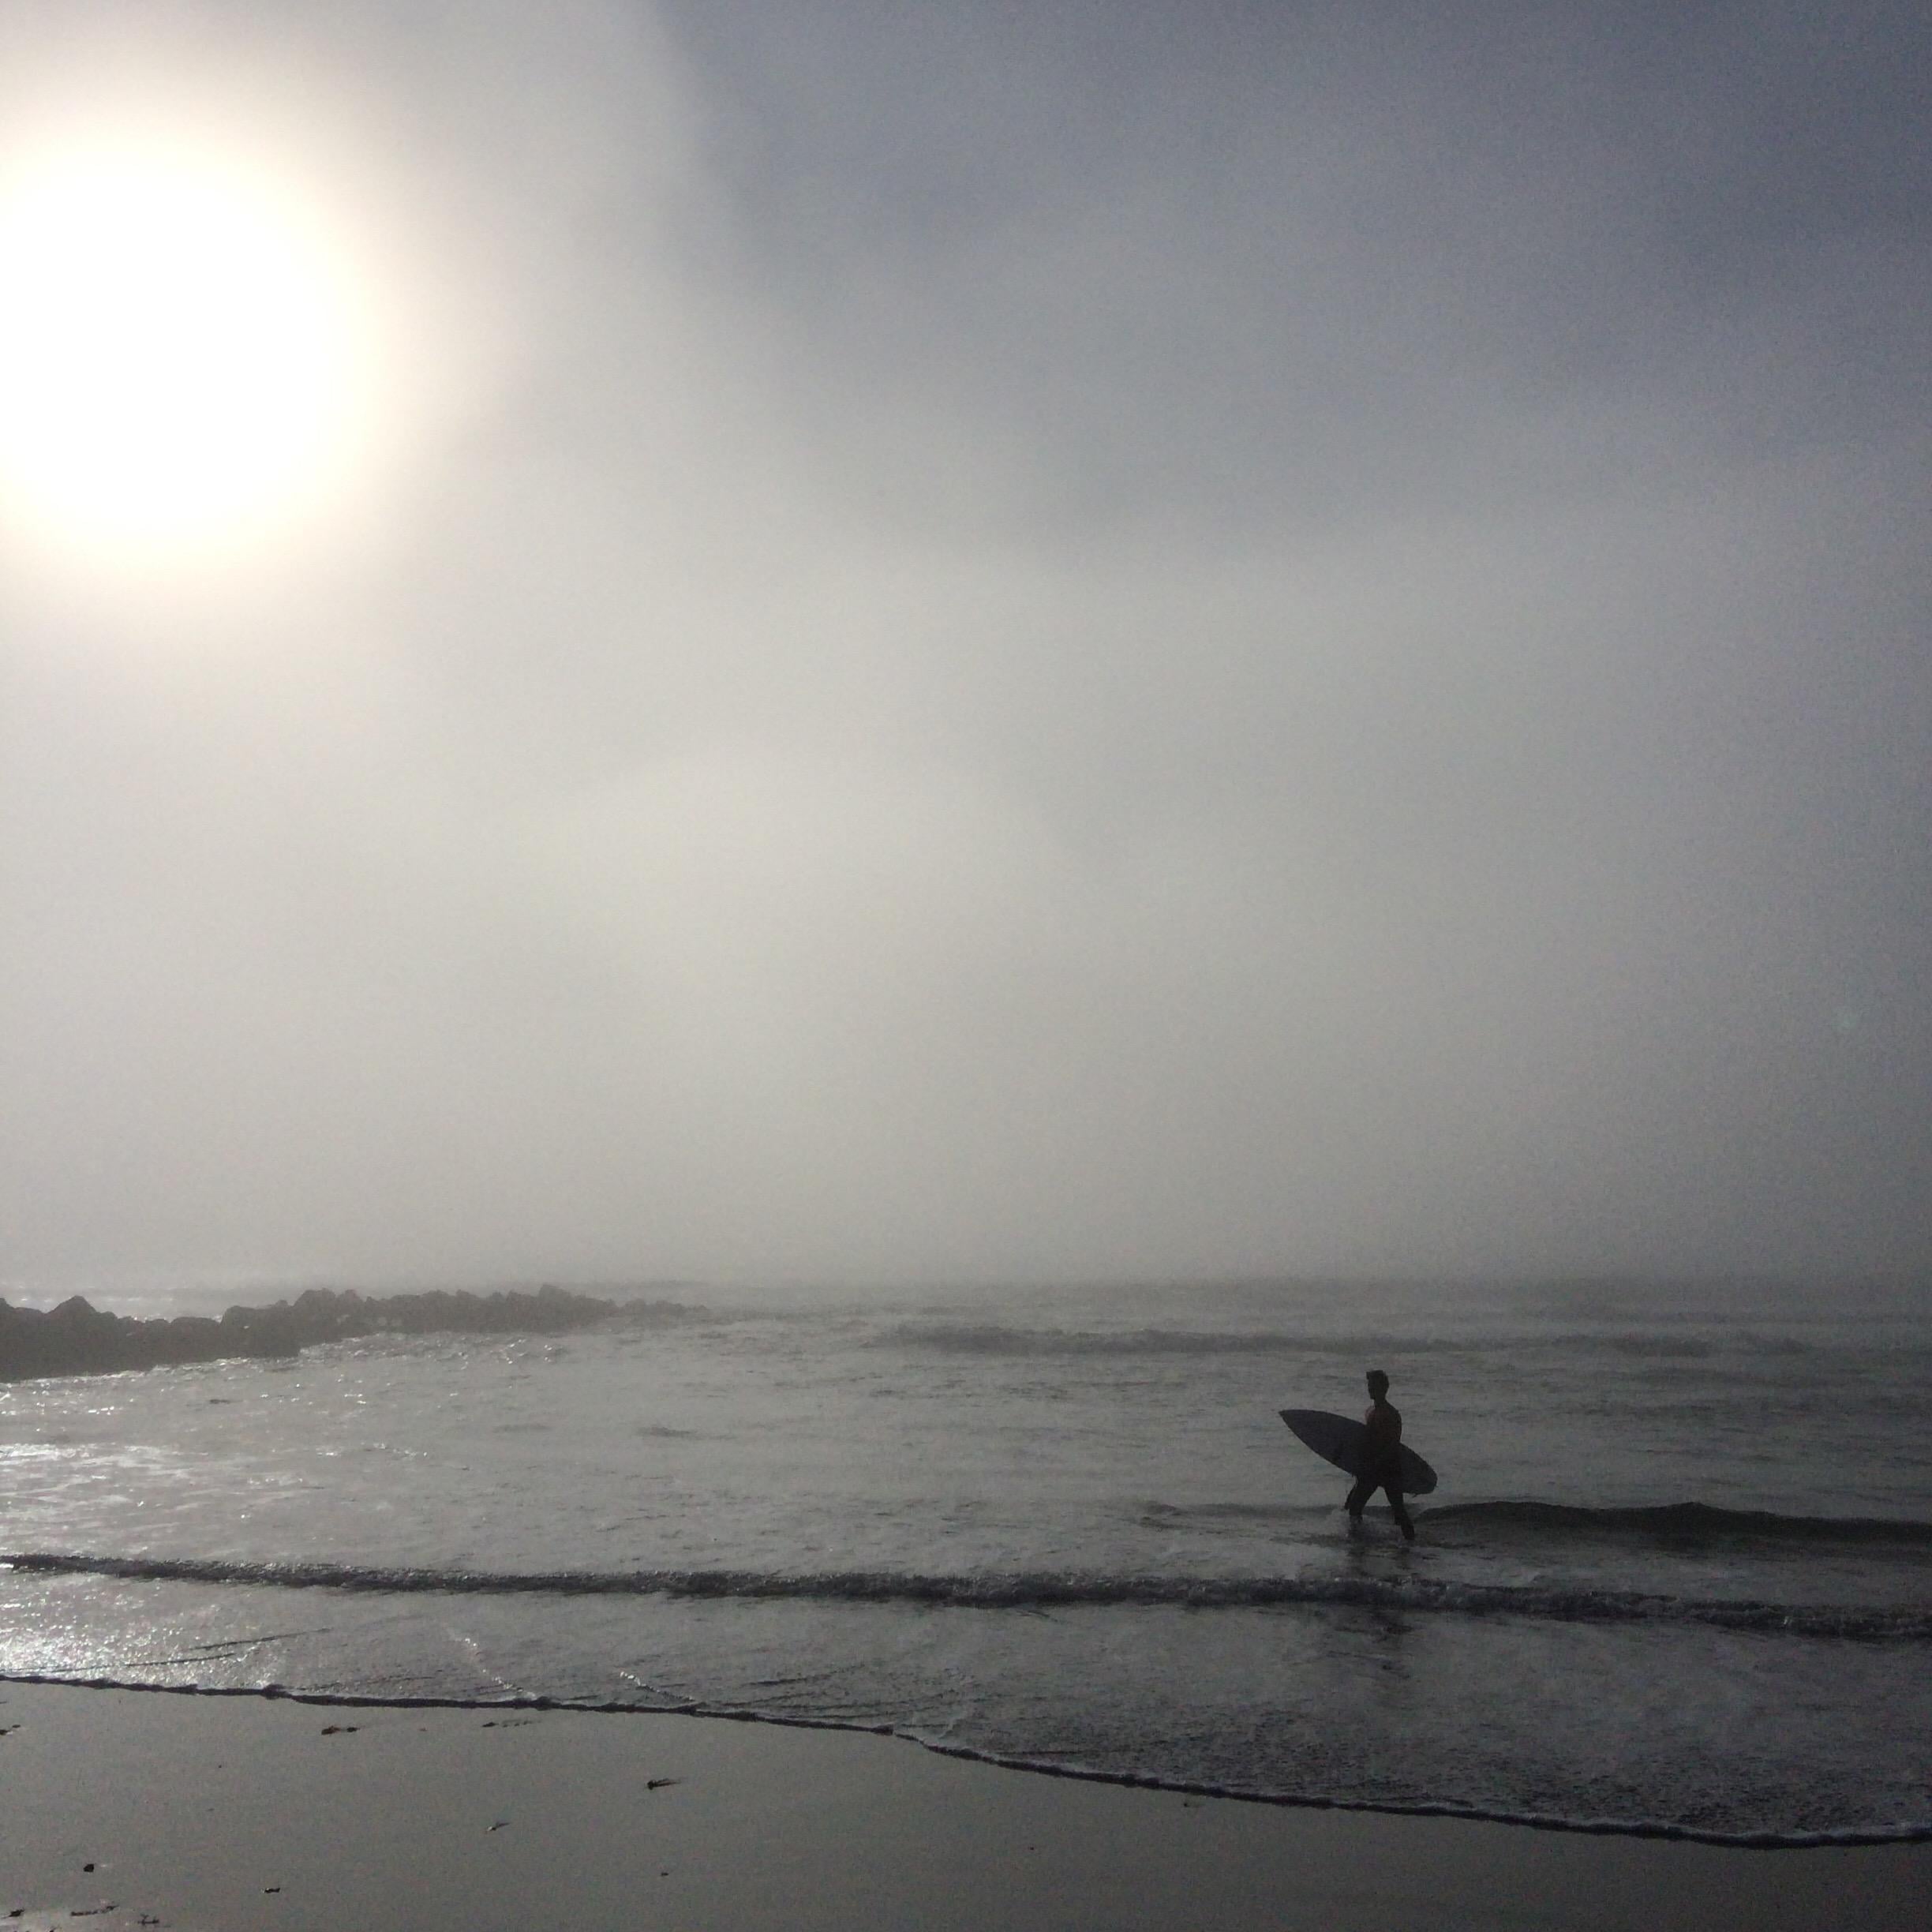
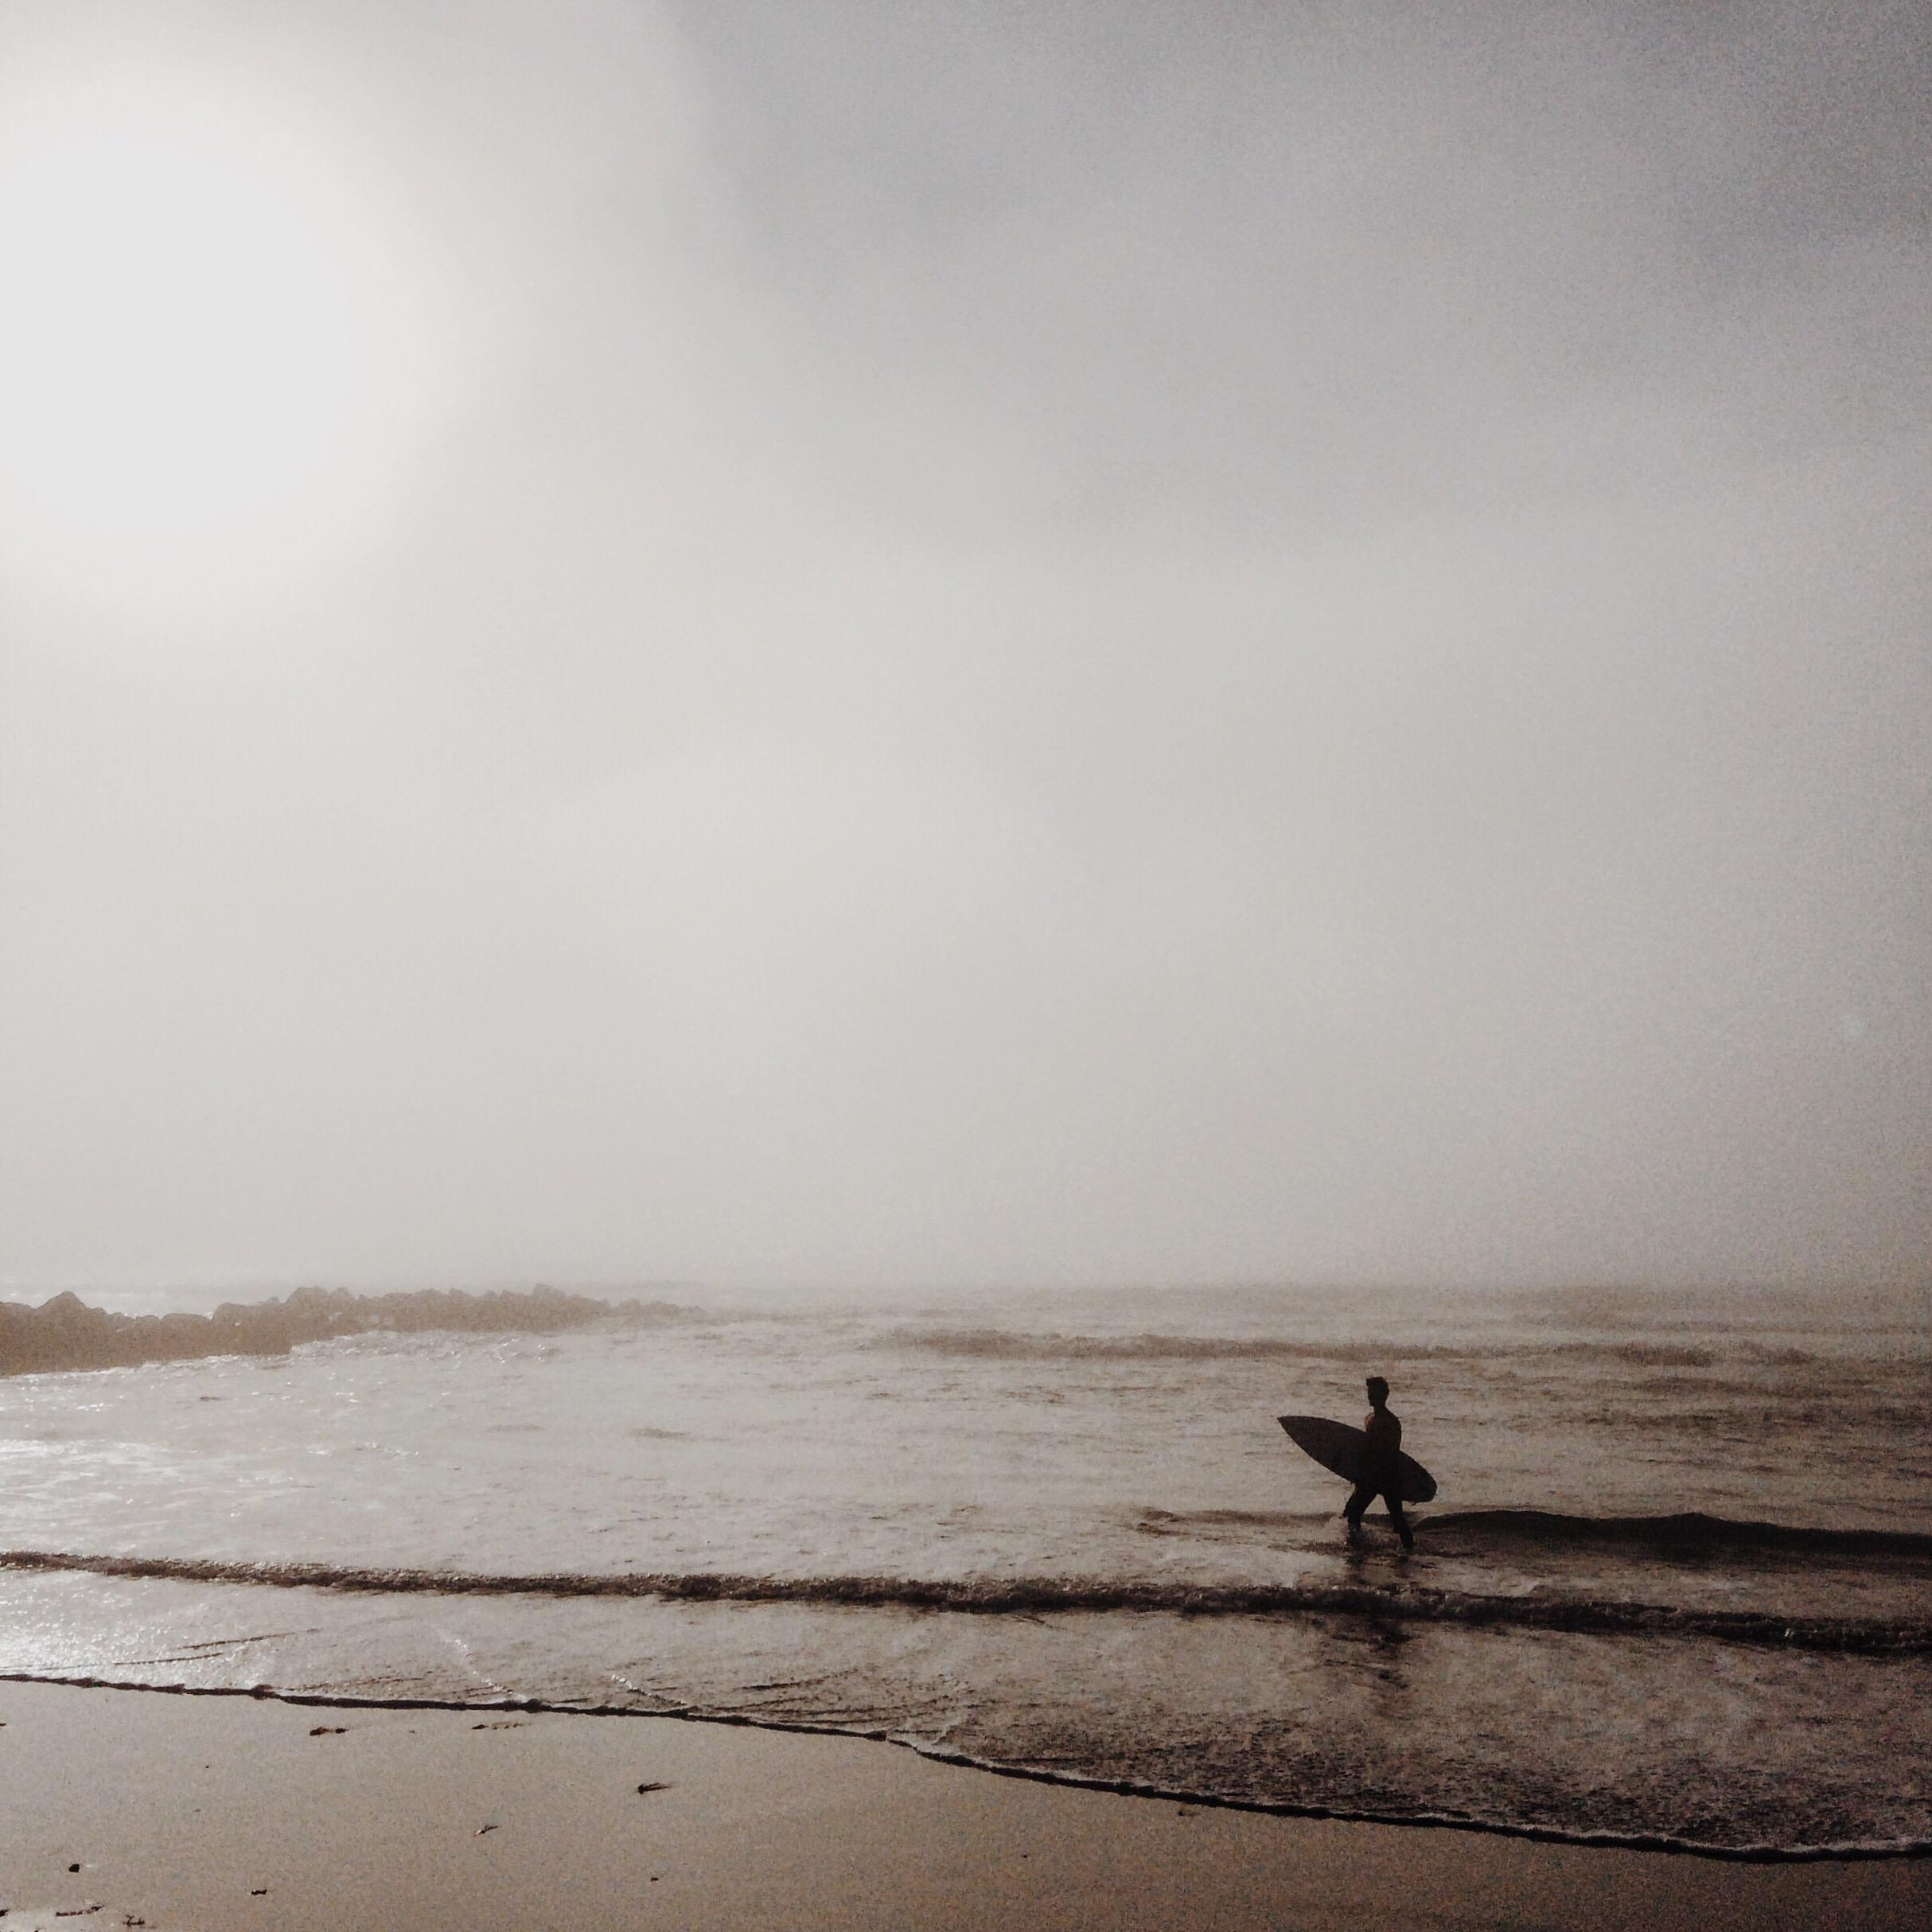
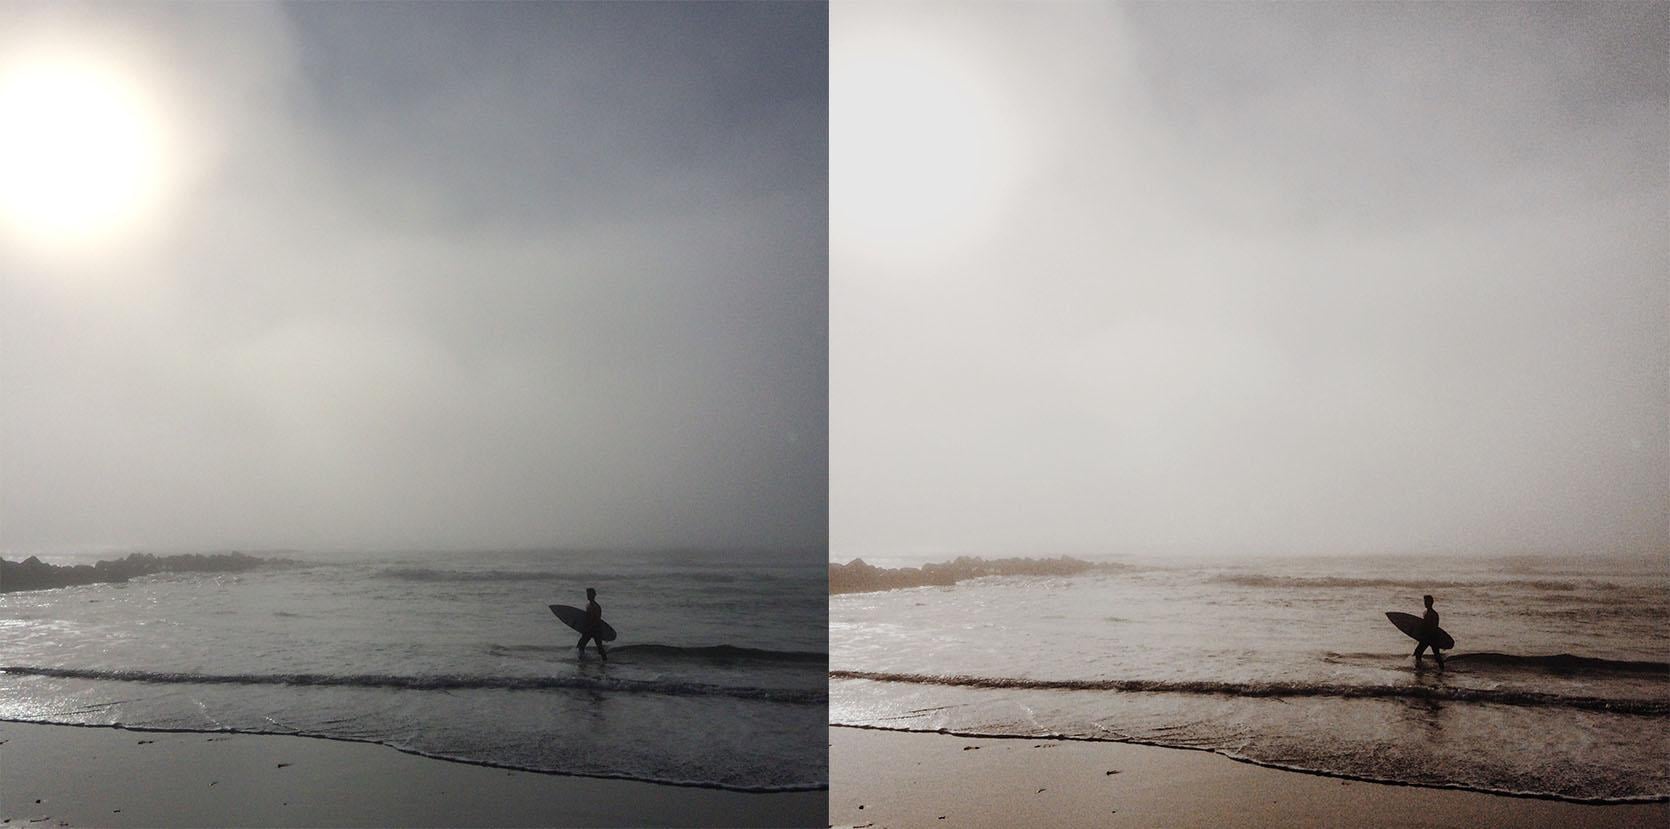
Once we arrived in San Diego, we went straight to the beach. After a few hours, we noticed a weird mist moving toward us on the horizon. I swear, it was like we were in that movie The Fog. Eventually it reached us and set the stage for this really moody and eerie photo.
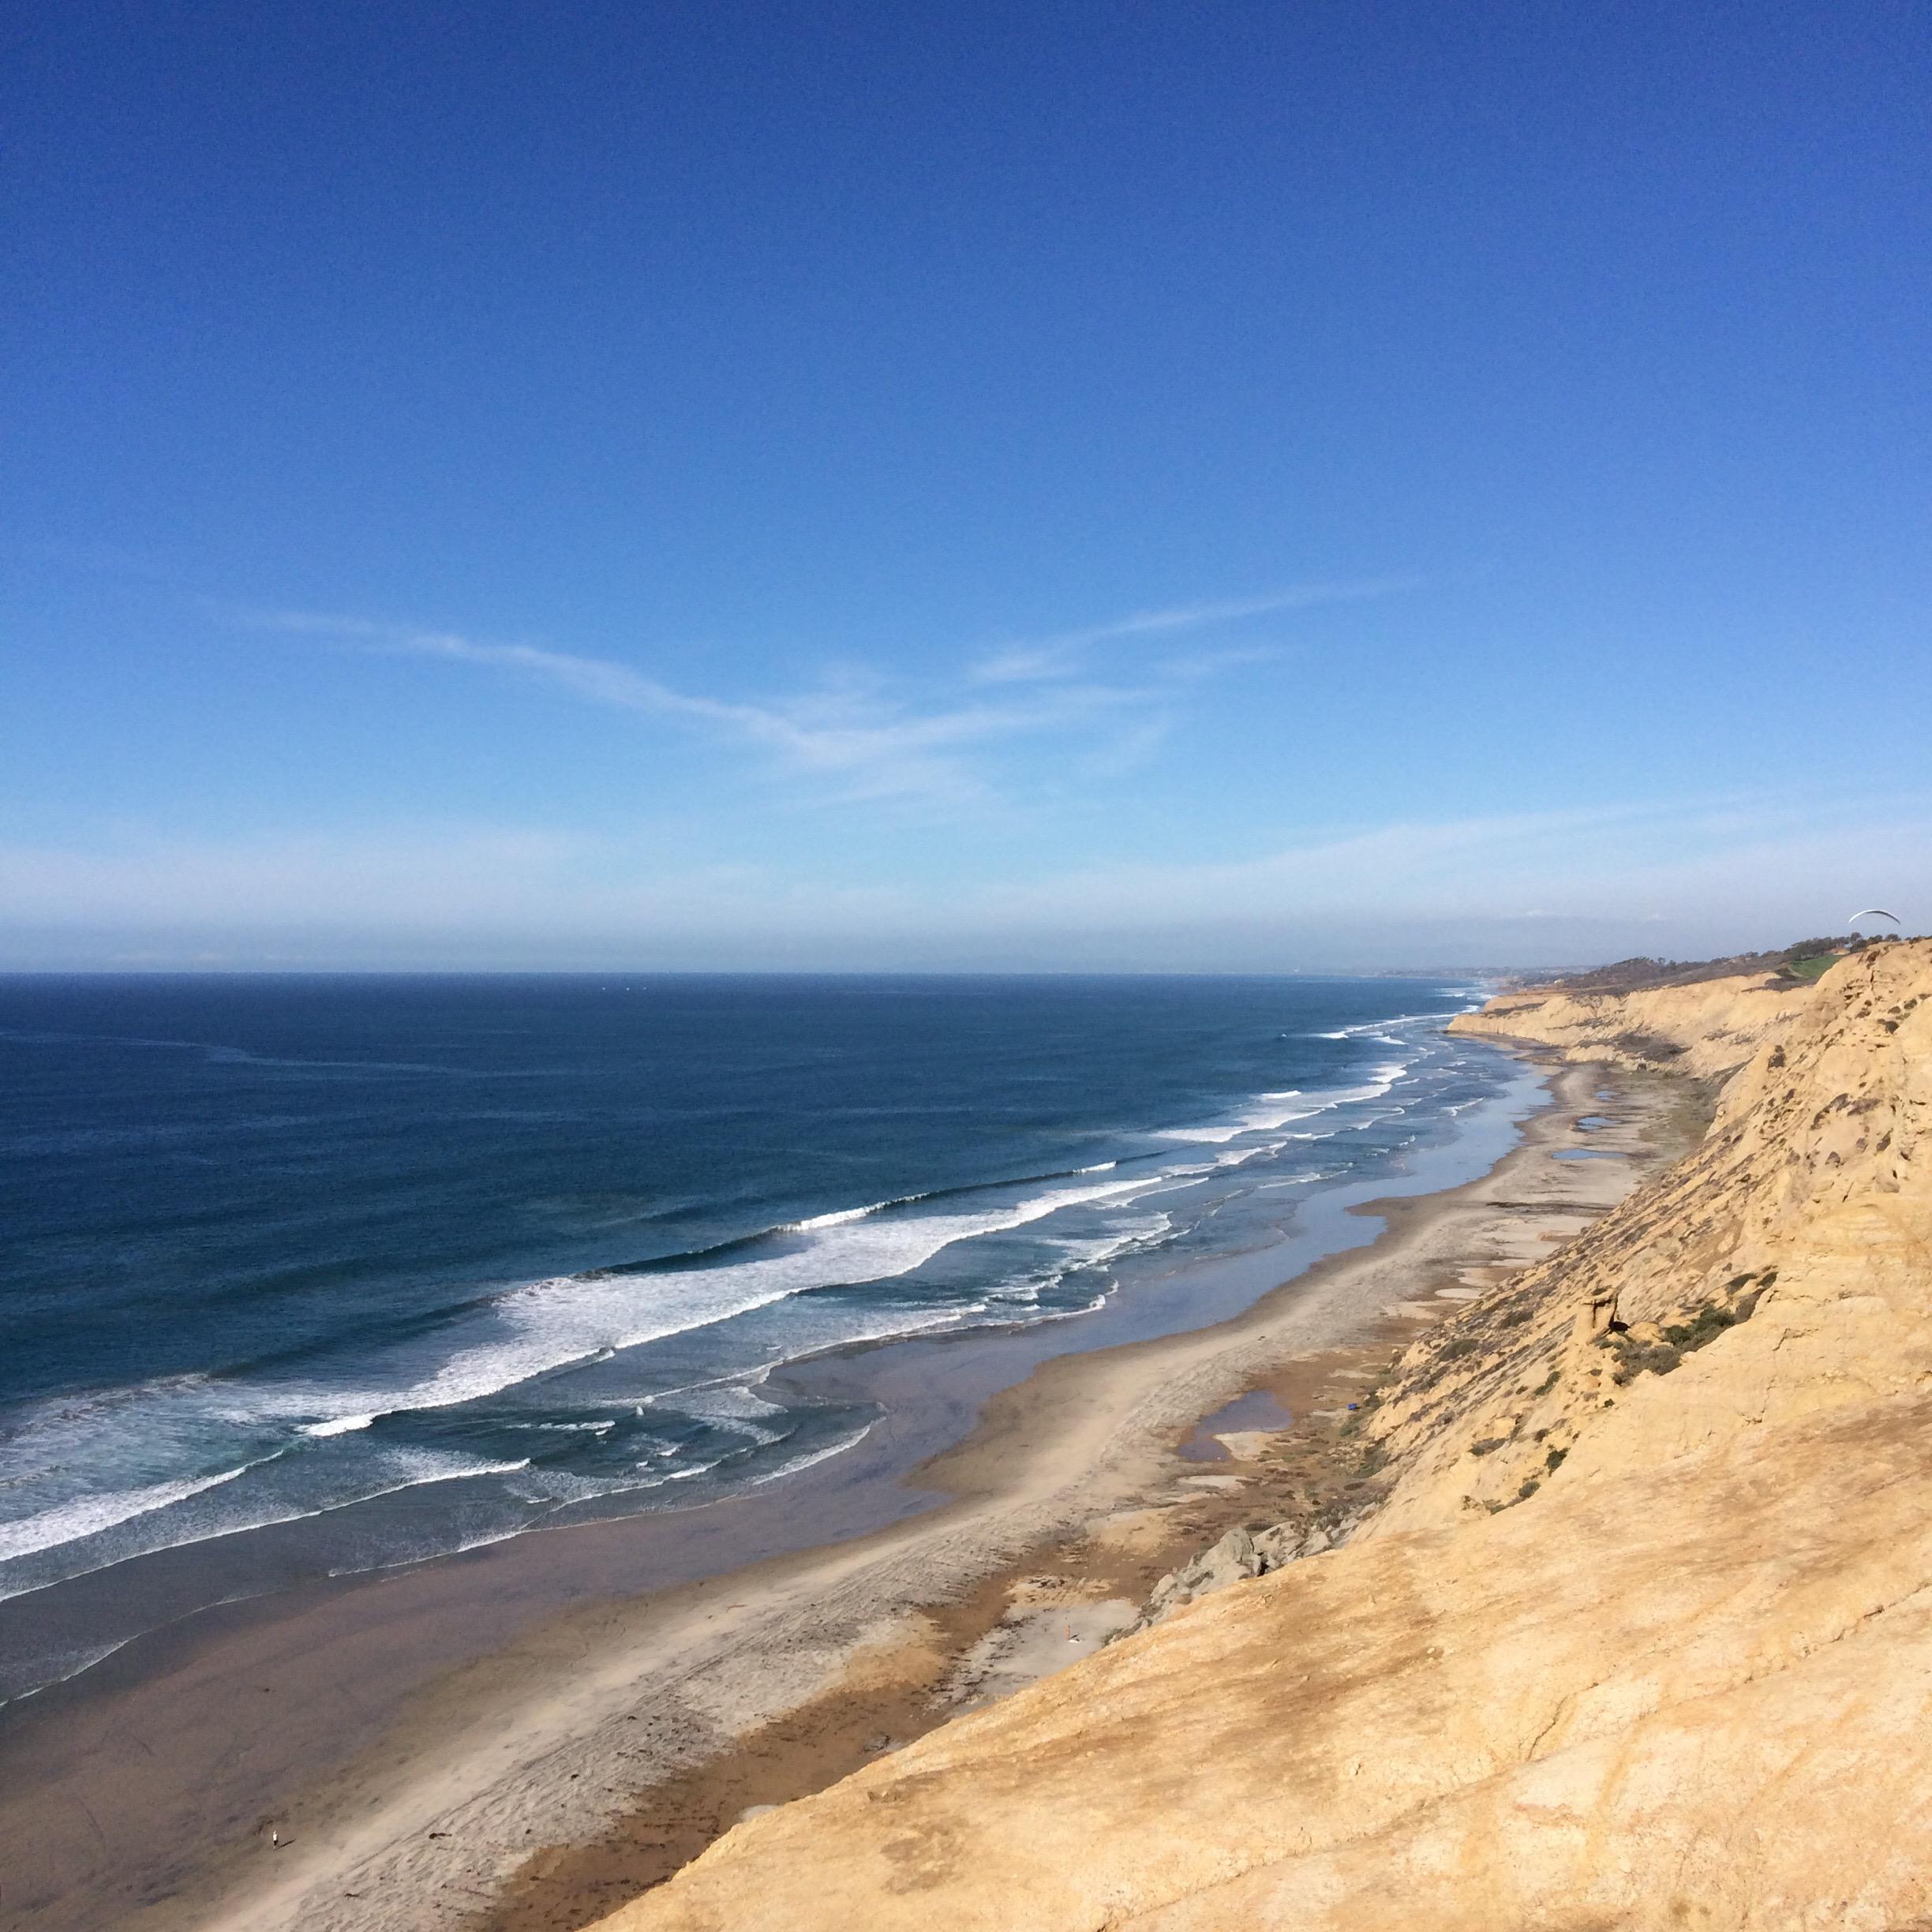
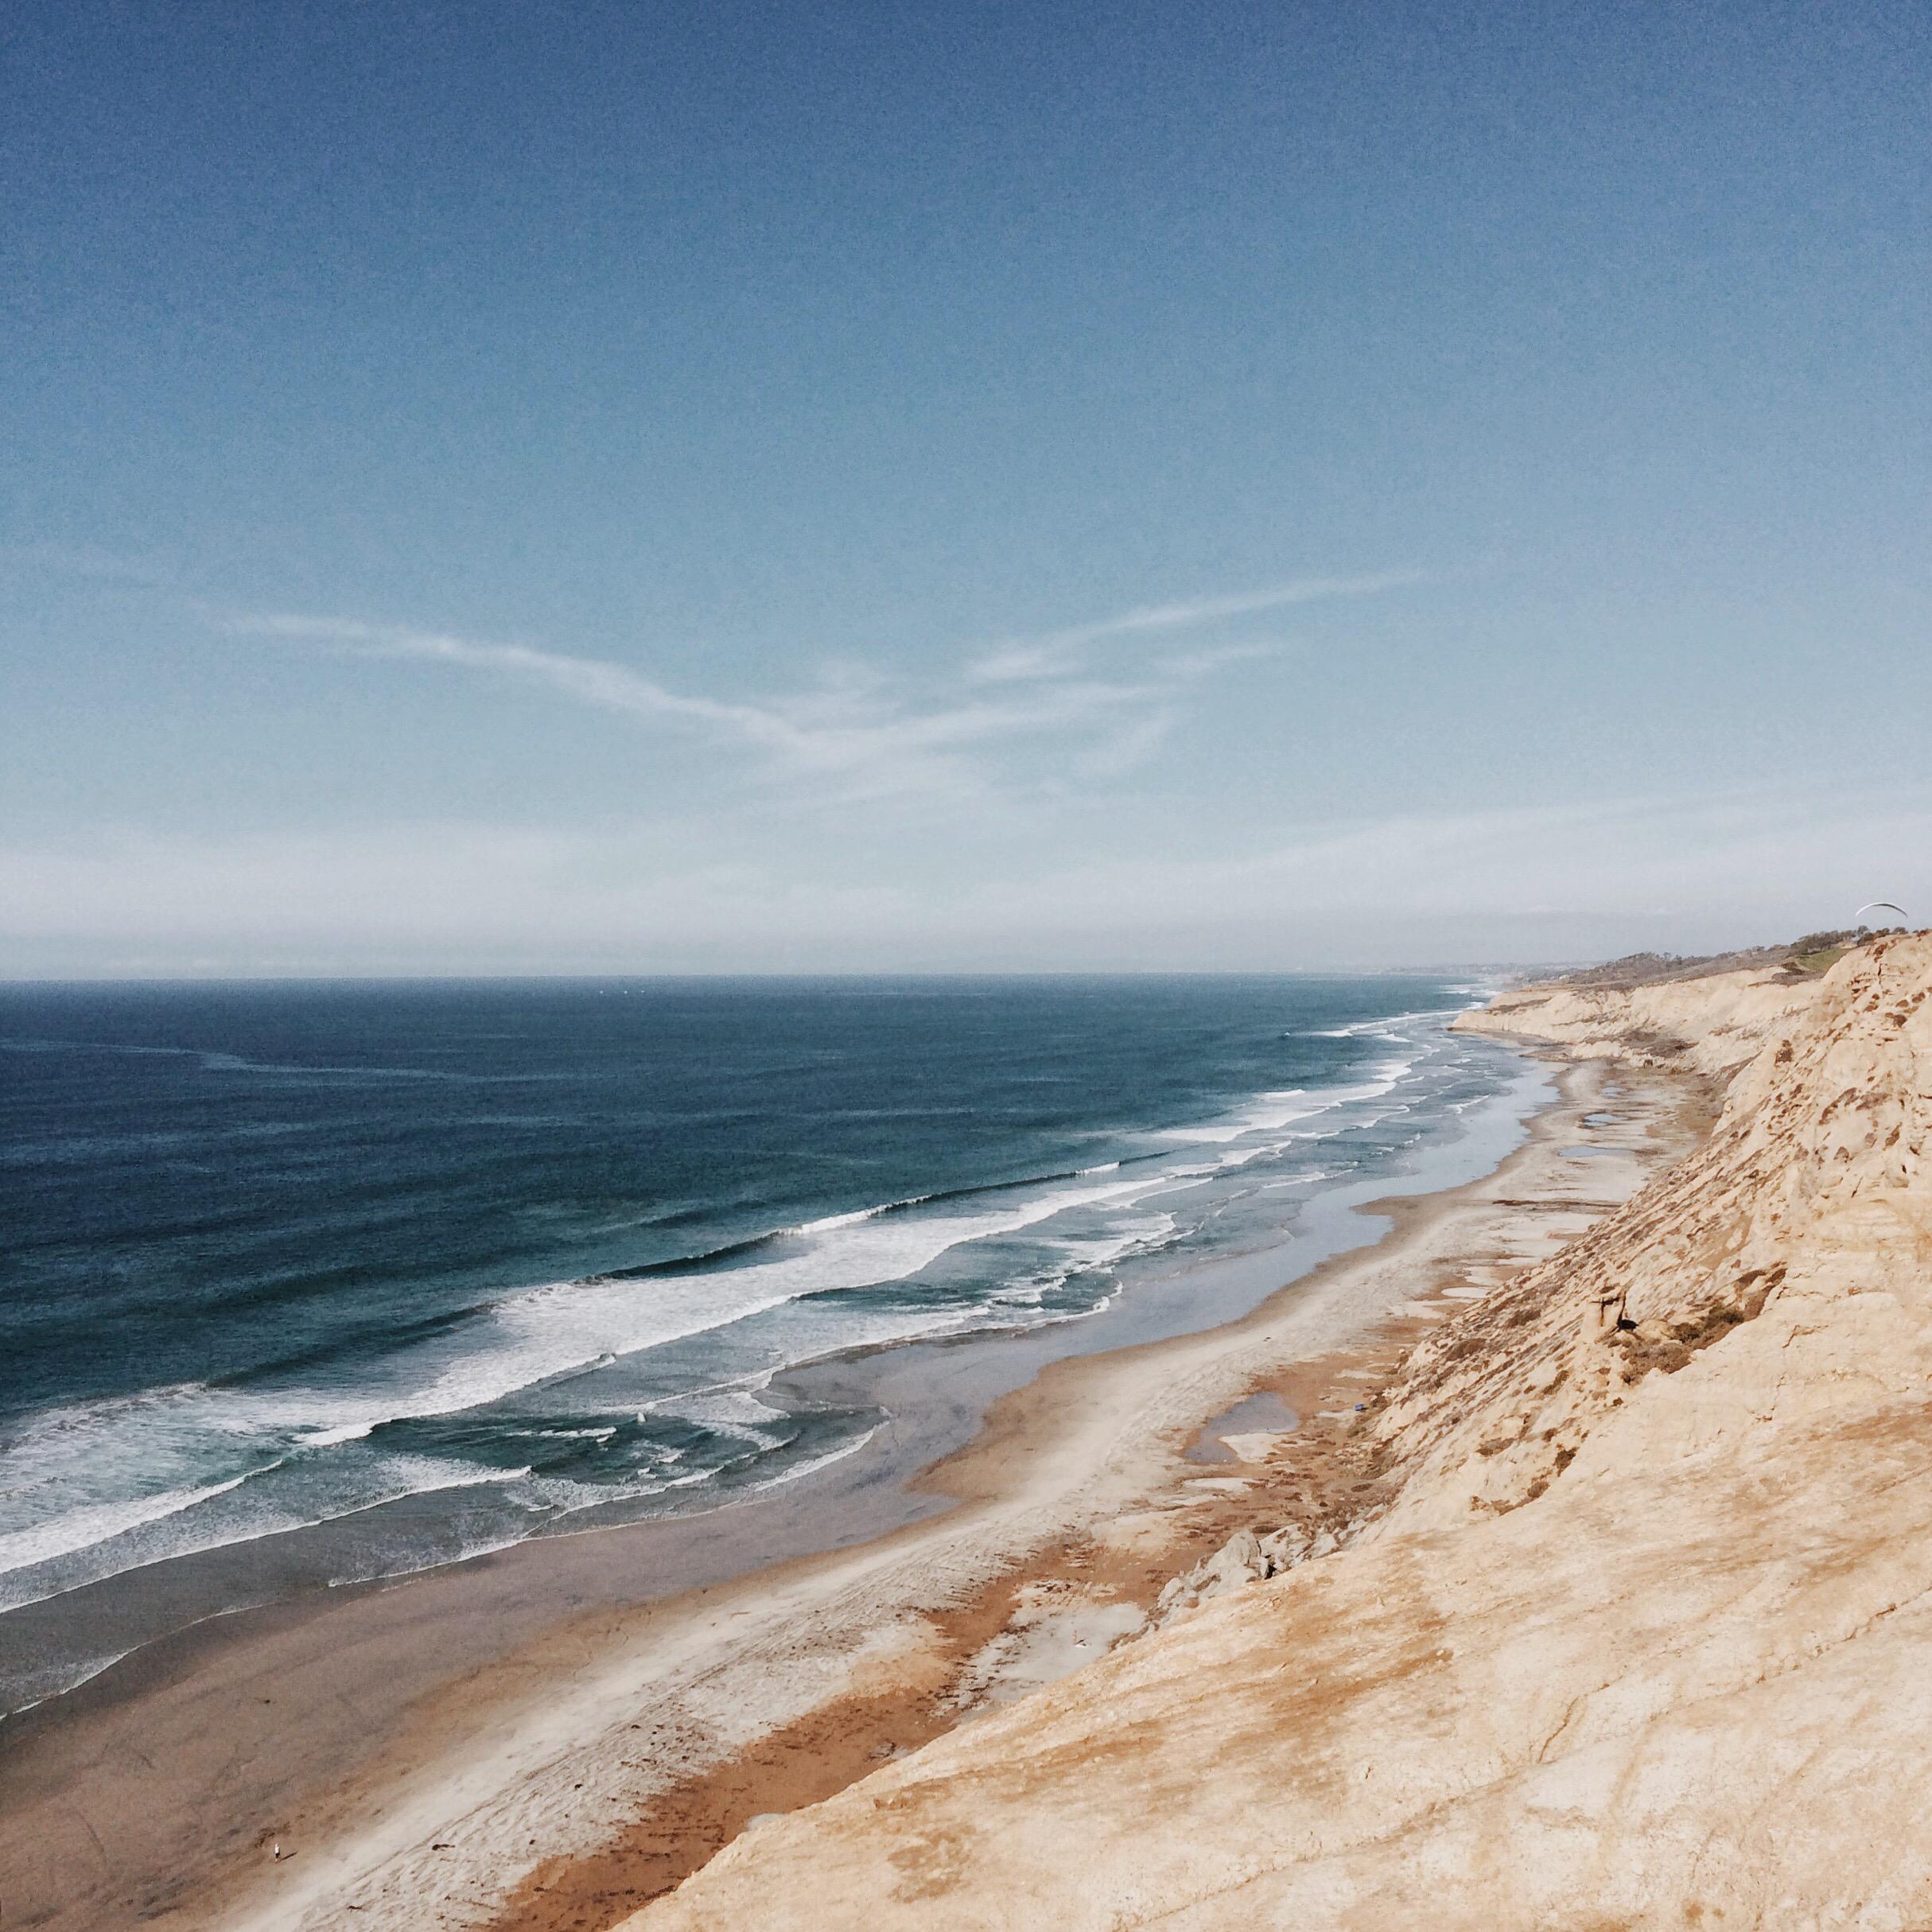
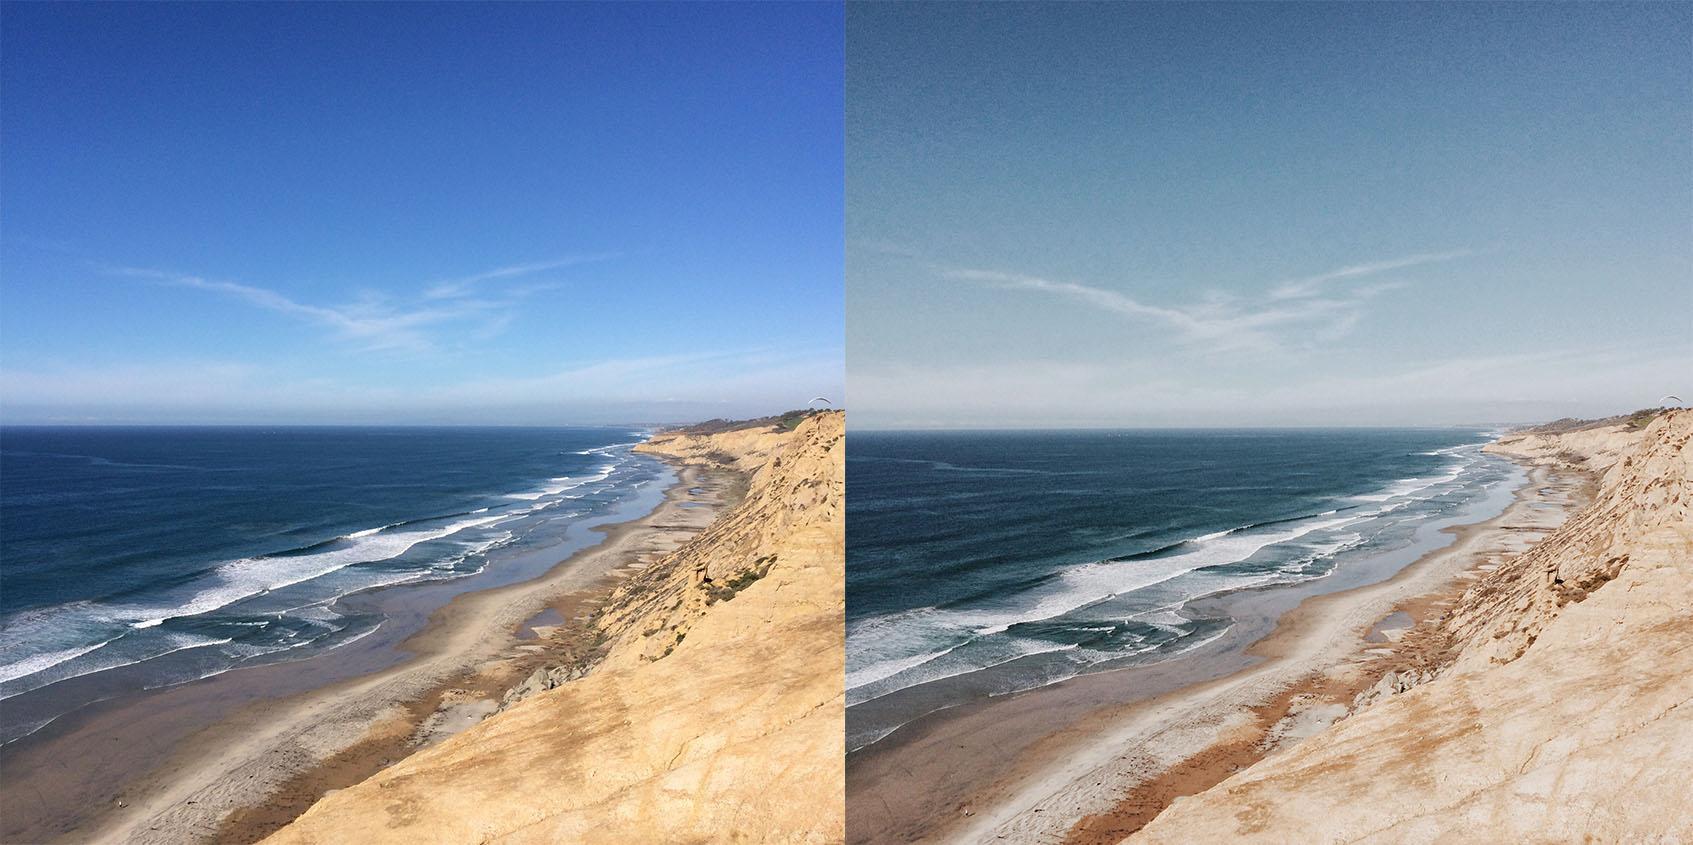
This shot was taken at Torrey Pines City Beach. I love how the water line and cliffs lead the eye through the photo. Unfortunately, there weren't very many paragliders the day we were there, but they make excellent scale subjects. There is a tiny guy in the bottom left corner for scale, though.
Ok, onto the editing. Like Joe, I am a huge fan of M5.
In VSCO, I added the M5 filter, and then I made some smaller adjustments in Snapseed. I imported it back into VSCO and added the A6 filter but reduced it to only a +5.
Another M5 edit, but this time I added a second M5 layer (+4) after making some subtle Snapseed adjustments.
I loved the tones of this photo right from the beginning. VSCO's M5 cooled down (-2) was almost spot on, but I layered it with J6 for a little bit more warmth.
I've been following Joe for a couple of years, and he's been a big time inspiration. I couldn't pass up the opportunity to get a behind the scenes look at his mobile photography process. Before taking the class, I hadn't experimented much with layering in VSCO. Needless to say, I'm a new fan, and I'm so thankful for Joe's willingness to share this gift with us. For more you can find me on Instagram @n8bow.
Thank you so much, Joe. Some of the highlights I pulled from this class were emotion and movement. When you said to take a look behind the camera at who's shooting, I realized how little I let my emotions dictate my photographic style. I also notice how the movement in your photos can drastically improve the story, feeling, and emotion in the photo. Thanks a million!