My Personalized DaVinci Resolve Study Plan
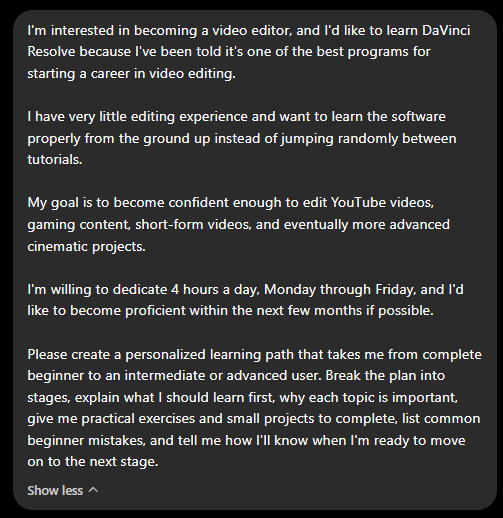
Yes — with 4 hours a day, Monday–Friday, you have enough time to make substantial progress fairly quickly. That gives you about 20 hours per week, or roughly 240 hours over 12 weeks.
A realistic target is:
-
3 months: solid intermediate editor capable of independently editing YouTube, gaming and short-form content.
-
4 months: beginning to work at an advanced level in selected areas such as color, Fusion, sound design and more cinematic editing.
-
Beyond that: developing professional speed, judgment, storytelling instincts and a portfolio strong enough to pursue paid work.
DaVinci Resolve 20 is the current version, and Blackmagic provides an excellent free Beginner's Guide, Editor's Guide, training videos and downloadable practice footage. I'll incorporate those rather than having you hunt randomly around YouTube. (Blackmagic Design)
Your DaVinci Resolve roadmap Phase 1 — FundamentalsWeeks 1–2 | ~40 hours
Your objective isn't to make impressive edits yet. It's to become comfortable enough in Resolve that the program stops feeling intimidating.
Learn:
-
Project Manager
-
Media Pool
-
Edit Page
-
Viewer and timeline
-
Inspector
-
Media import
-
Bins and folder organization
-
Timelines
-
Video and audio tracks
-
Resolution and frame rate
-
Saving and project backups
-
In/out points
-
Insert/overwrite edits
-
Selection and blade tools
-
Basic trimming
-
Ripple edits
-
Snapping
-
Undo/history
-
Basic keyboard shortcuts
-
Basic exporting
Spend most of your time on the Edit Page. You don't need to master every Resolve page immediately.
Why this matters: Professional editing is largely about making hundreds of small decisions quickly. If you're fighting the interface every time you want to cut something, you can't concentrate on the actual edit.
Practice project: Download 10–20 random clips. Create a 30–60 second montage with a beginning, middle and end.
Don't worry about effects.
Just make clean cuts.
Then export it.
Common mistakes:
-
Trying to learn Fusion immediately.
-
Watching hours of tutorials without actually editing.
-
Using the Blade tool for absolutely everything.
-
Ignoring file organization.
-
Constantly reaching for the mouse instead of gradually learning shortcuts.
-
Obsessing over transitions before understanding cuts.
You're ready to move on when: you can create a project, import footage, organize it, make a timeline, trim clips, rearrange shots and export a video without needing a tutorial beside you.
Phase 2 — Learn to actually edit Weeks 3–4 | ~40 hoursThis is probably the most important phase of your entire training.
Resolve is just the tool. Editing itself is the skill.
Learn:
-
Ripple, roll, slip and slide edits
-
J-cuts
-
L-cuts
-
Match cuts
-
Cutting on action
-
Cutting to music
-
Pacing
-
Reaction shots
-
B-roll
-
Removing pauses and dead space
-
Punch-ins
-
Reframing
-
Keyframes
-
Basic speed changes
-
Retiming
-
Markers
-
Compound clips
-
Adjustment clips
-
Basic multicam concepts
Blackmagic's official editing training covers rough cuts, trimming, replacing shots, titles, effects and audio, while its Editor's Guide progresses into interviews, dramatic material, documentaries and music videos. (Blackmagic Design)
Project 1 — YouTube talking-head editFind or record roughly 5–10 minutes of someone speaking.
Turn it into a polished 2–4 minute video.
Add:
-
Clean cuts
-
B-roll
-
Punch-ins
-
Music
-
Simple titles
-
J/L cuts
Your goal should be:
Make me forget I'm watching an edit.
Project 2 — Gaming highlightRecord some gameplay.
Create a 60–90 second highlight video.
Practice:
-
Cutting dead time
-
Emphasizing reactions
-
Zooms
-
Sound effects
-
Music synchronization
-
Speed ramps
-
Text
But don't turn every five seconds into an effect.
Biggest beginner mistakeThinking:
"More editing = better editing."
It doesn't.
Sometimes the professional choice is doing absolutely nothing and letting the shot breathe.
Move on whenGive yourself raw footage you've never edited before and see whether you can turn it into something reasonably entertaining without following step-by-step instructions.
Phase 3 — Audio and Fairlight Week 5 | ~20 hoursA mediocre-looking video with excellent audio can still feel professional.
A beautiful video with terrible audio immediately feels amateur.
Learn:
-
Dialogue levels
-
Music levels
-
Sound effects
-
Audio fades
-
Crossfades
-
EQ
-
Compression
-
Limiting
-
Noise reduction
-
Track organization
-
Keyframing volume
-
Voice-over
-
Basic audio buses
-
Fairlight mixer
-
Loudness meters
Blackmagic has dedicated Fairlight training covering audio editing, dialogue repair, sound design, EQ, dynamics, buses and mixing. (Blackmagic Design)
Practice projectTake one of your previous edits.
Mute everything.
Rebuild the sound completely.
Use:
-
Dialogue
-
Ambient sound
-
Music
-
Foley
-
Impact sounds
-
Whooshes where appropriate
Then compare the before and after.
You'll probably be surprised by how much better the exact same visuals feel.
Move on whenYou can listen to your finished video through headphones and speakers without constantly reaching for the volume control.
Phase 4 — Titles, transitions and visual effects Week 6 | ~20 hoursNow you're allowed to start making things flashy.
Learn:
-
Text
-
Text+
-
Lower thirds
-
Transform controls
-
Keyframes
-
Ease in/ease out
-
Dynamic Zoom
-
Adjustment clips
-
Masks
-
Tracking
-
Basic green-screen work
-
Blur
-
Glow
-
Simple transitions
-
Motion blur
-
Speed ramps
Before downloading transition packs, learn how to create simple animations yourself.
Understanding position + scale + rotation + opacity + keyframes will teach you considerably more than installing 500 presets.
ProjectCreate a 30-second vertical short.
Include:
-
Animated captions
-
Music
-
Sound effects
-
Punch-ins
-
B-roll
-
One custom transition
-
One tracked element
This starts developing exactly the skills you'd use editing Shorts, TikTok or Reels.
Move on whenYou can see a fairly simple effect in another video and think:
"I have a pretty good idea how they did that."
Phase 5 — Color correction Week 7 | ~20 hoursResolve originally became famous for color grading, so this is an area worth learning properly.
Start with correction, not cinematic grading.
Learn:
-
Scopes
-
Waveform
-
Parade
-
Vectorscope
-
Exposure
-
Contrast
-
White balance
-
Saturation
-
Lift
-
Gamma
-
Gain
-
Primaries
-
Nodes
-
Matching cameras/shots
-
Skin tones
-
Secondary corrections
-
Power windows
-
Tracking
-
Basic color management
Blackmagic's official training starts with primary/secondary grading, scopes and shot balancing before moving into nodes, RAW footage, tracking and advanced color management. (Blackmagic Design)
PracticeFind five clips shot under different conditions.
Your first goal:
Make all five look like they belong in the same video.
Only after that should you try making them look "cinematic."
ProjectTake a one-minute scene and create three versions:
Natural
Dark/dramatic
Warm/nostalgic
Same footage. Three completely different feelings.
Beginner mistakeSlapping a LUT onto badly exposed footage and calling it color grading.
Think:
Correct → Match → Grade.
Move on whenYou can look at an image and identify why something looks wrong instead of randomly moving controls around.
Phase 6 — Editing specifically for YouTube and gaming Week 8 | ~20 hoursNow we're getting particularly relevant to the kind of editing you want to do.
Study:
-
Hooks
-
Retention
-
Cutting dead air
-
B-roll
-
Pattern interruption
-
Comedic timing
-
Music selection
-
Sound-effect timing
-
Gameplay pacing
-
Commentary
-
Highlight selection
-
Visual emphasis
-
Memes used sparingly
-
On-screen graphics
-
Chapter/segment structure
Create a 5–8 minute gaming video.
For example:
"My First Hours in [Game]"
or
"5 Things I Learned Playing [Game]"
Use:
-
Gameplay
-
Voice-over
-
Music
-
Sound effects
-
Titles
-
B-roll
-
Zooms
-
Graphics
-
Basic color correction
This will expose weaknesses in your workflow much faster than tiny tutorial exercises.
And that's useful.
Phase 7 — Short-form editing Week 9 | ~20 hoursShort-form editing has its own rhythm.
Learn:
-
9:16 timelines
-
Reframing horizontal footage
-
Caption design
-
Fast hooks
-
Music synchronization
-
Punch-ins
-
Speed ramps
-
Mask transitions
-
Sound design
-
Retention editing
-
Cutting aggressively
Create five 20–45 second videos.
Give yourself progressively shorter deadlines:
First edit — take your time.
Second — slightly faster.
Third — faster again.
Eventually you want to learn to edit efficiently rather than endlessly polishing.
That speed matters if you eventually freelance.
Phase 8 — Fusion Weeks 10–11 | ~40 hoursOnly now would I seriously introduce Fusion.
Blackmagic describes Fusion as Resolve's node-based environment for compositing, tracking, keying, motion graphics and visual effects. (Blackmagic Design)
Learn:
-
Nodes
-
MediaIn / MediaOut
-
Merge
-
Transform
-
Background
-
Text+
-
Masks
-
Tracking
-
Planar tracking
-
Keyframes
-
Spline editor
-
Green-screen keying
-
Rotoscoping basics
-
Motion graphics
-
Screen replacements
-
Compositing
Complex 3D environments, particle simulations and elaborate Hollywood VFX yet.
You don't need them.
ProjectCreate a 20–30 second sequence containing:
-
Tracked text
-
Object mask
-
Screen replacement
-
Animated title
-
Basic composite
Then recreate an effect you've seen in a YouTube video without following the original tutorial.
That last part is important.
It forces you to problem-solve.
Phase 9 — Professional workflow Week 12 | ~20 hoursAt this point, switch from:
"How do I use Resolve?"
to:
"How do editors work?"
Learn:
-
Proxy workflows
-
Optimized media
-
Cache management
-
Relinking
-
Project archives
-
Media management
-
Timeline organization
-
Naming conventions
-
Versions
-
Client revisions
-
Export presets
-
H.264/H.265
-
Frame rates
-
Bitrates
-
Resolution
-
YouTube delivery
-
Vertical delivery
-
Audio export
-
Rendering queues
Blackmagic also provides dedicated training for online delivery and render workflows. (Blackmagic Design)
Simulated client assignmentPretend I hired you.
You receive:
-
30 minutes gameplay
-
10 minutes commentary
-
Music
-
Logo
-
Some B-roll
Your instructions:
Create a polished five-minute YouTube video and a 30-second vertical promotional short.
Give yourself a deadline.
Then pretend the client requests:
"Make the intro shorter, change the music, remove this section and change the title style."
Modify the project without destroying your original version.
That's professional workflow training.
Your 12-week milestoneBy approximately late October 2026, after around 240 hours of practice, I would want you capable of sitting down with a folder of completely unfamiliar footage and independently turning it into a finished video.
You should understand:
Editing → Audio → Color → Graphics → Basic Fusion → Export
without needing someone to walk you through every button.
At that point I would consider you a genuine intermediate Resolve editor, rather than a beginner who knows a lot of tutorials.
That's an important distinction.
Weeks 13–16 — Start becoming advancedOnce your fundamentals are solid, spend another month specializing.
Week 13 — Advanced editingStudy:
-
Multicam
-
Transcription workflows
-
Advanced trimming
-
Nested/compound workflows
-
Variable speed
-
Advanced keyframing
-
Editing interviews
-
Documentary structure
-
Music editing
-
Narrative editing
Blackmagic's current Editor's Guide specifically covers interviews, dramatic scenes, documentaries, music videos, transcription tools, variable-speed effects and more advanced audio workflows. (Blackmagic Design)
Week 14 — Cinematic editingTake an actual scene.
Study:
-
Shot selection
-
Emotional continuity
-
Motivated cuts
-
Eyelines
-
Cutting on movement
-
Reaction shots
-
Sound bridges
-
Music cues
-
Pacing tension
Then edit a 2–3 minute cinematic sequence.
This is where editing starts becoming storytelling rather than software operation.
Week 15 — Advanced color + FusionPick whichever interests you more.
You don't need to become a professional colorist and professional VFX artist simultaneously.
For color, study more advanced nodes, qualifiers, tracking, color management and look development.
For Fusion, study more advanced compositing, rotoscoping, tracking and motion graphics.
Week 16 — PortfolioCreate your first proper portfolio pieces.
I'd aim for four pieces rather than twenty mediocre ones:
-
5–8 minute YouTube/gaming edit
-
30–60 second short-form edit
-
60–90 second cinematic montage/trailer
-
Motion-graphics/Fusion showcase
Those four pieces demonstrate considerably more than saying "I know Resolve."
How I'd structure your 4-hour dayI would not spend four hours watching courses.
Use roughly:
Time Activity 45 min Structured lesson/tutorial 75 min Recreate what you learned 15 min Break 60 min Personal editing project 15 min Break 45 min Experiment/problem solving 30 min Review, organize and note shortcutsThat's roughly a 30% learning / 70% doing split.
As you improve, I'd push it even further toward actual editing.
Your most important ruleAvoid what I call tutorial dependency.
There are three levels of learning:
Level 1
Watch someone create an effect.
Level 2
Follow them and create the effect yourself.
Level 3
Close the tutorial and recreate it from memory.
And eventually:
Level 4
Decide you want something you've never made before and figure out how to make it.
Level 4 is where you start becoming an editor rather than someone who's good at following Resolve tutorials.
The training resources I'd actually useRather than endlessly searching YouTube, I'd make Blackmagic's official material your backbone. Their current Resolve 20 training includes the Beginner's Guide, Editor's Guide, Colorist Guide, Fairlight Audio Guide, Visual Effects Guide, videos and downloadable practice projects. (Blackmagic Design)
Blackmagic Design — Official DaVinci Resolve Training
Then use YouTube surgically:
"How do I create this effect?"
rather than:
"What 47 DaVinci Resolve tutorials should I watch?"
That approach will save you a huge amount of tutorial wandering.
Your progressionMonth 1 — I can use Resolve.
Interface → media → cutting → pacing → audio.
Month 2 — I can make good videos.
Color → effects → YouTube → gaming → short-form.
Month 3 — I can solve editing problems.
Fusion → advanced editing → workflow → substantial projects.
Month 4 — I can start presenting myself as an editor.
Specialization → cinematic work → speed → portfolio.
And one thing I'd emphasize given your career goal: don't wait until you're "advanced" before making real videos. Starting around Week 3, practically everything you learn should end up inside an actual project. That's what will make these ~240–320 hours count.