Chintz Delight
I'm still woking on these-- adding the details in the margins, but this is what I've done so far:
I found some reference photos of vintage florals and which were public domain to create the outline.
I combined three "wolf" public domain pictures to create the silhouette I wanted.
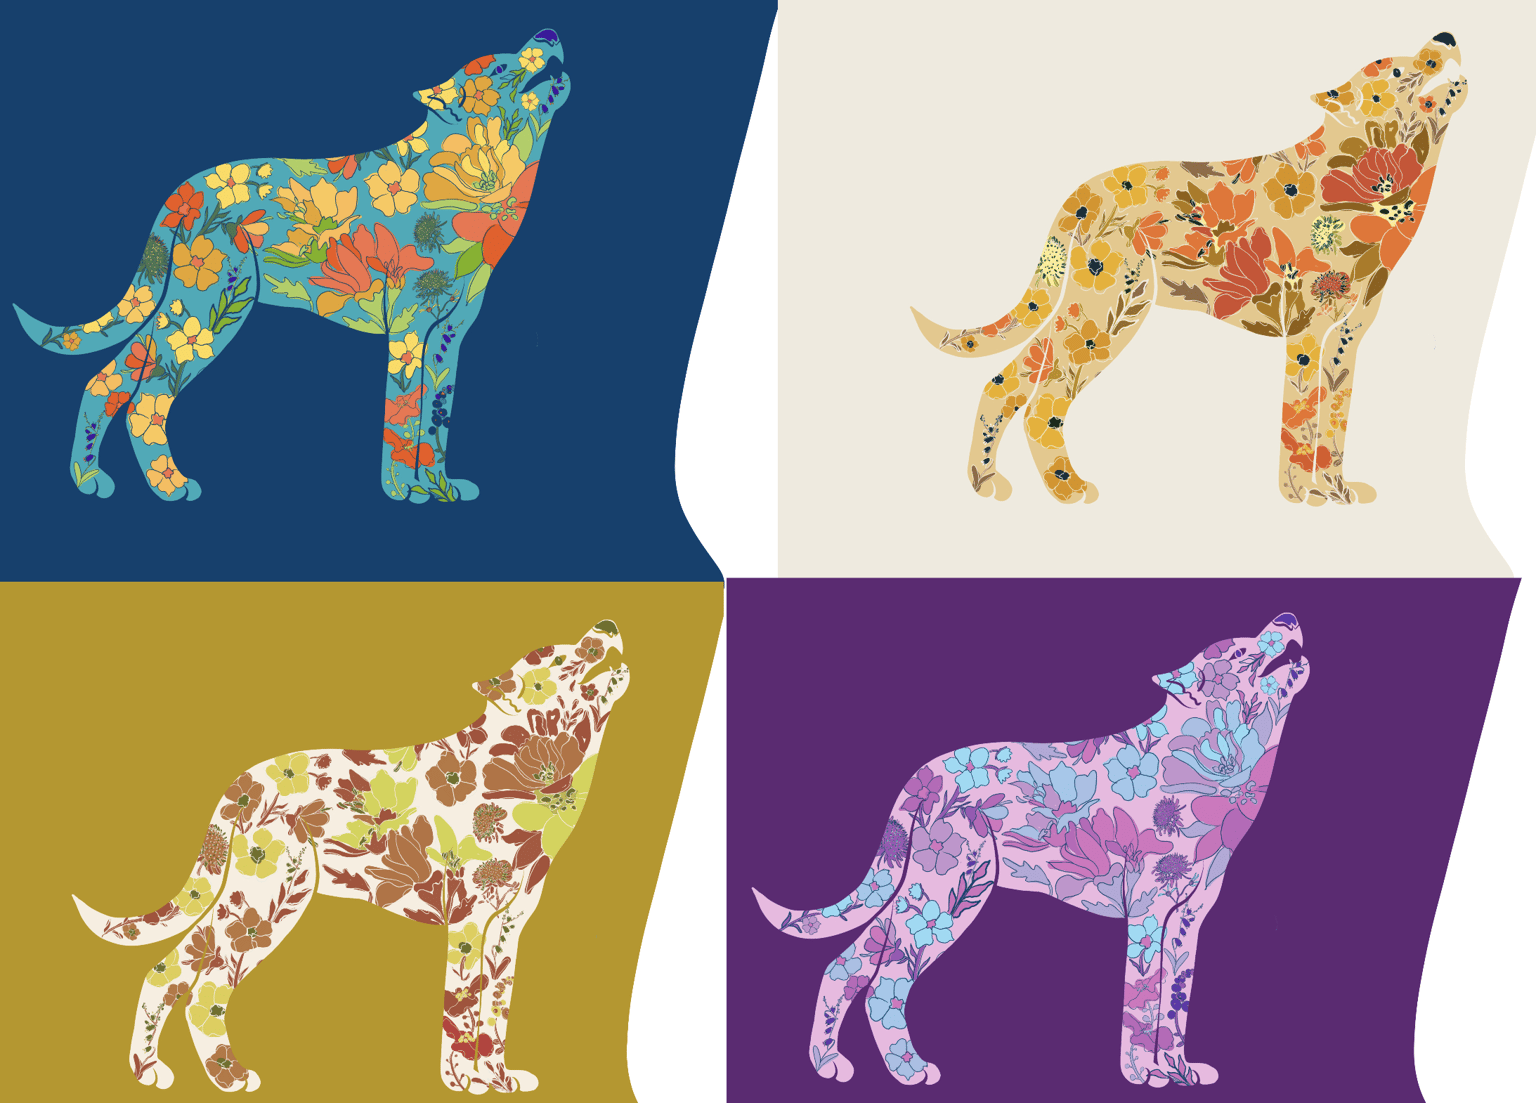
I did some color exploration:
I took this class to make a wolf birthday card and wasn't able to finish the class before the birthday, so I did a "rough" version, which she and several others in my family LOVED! This is what that looked like, without the birthday greeting:
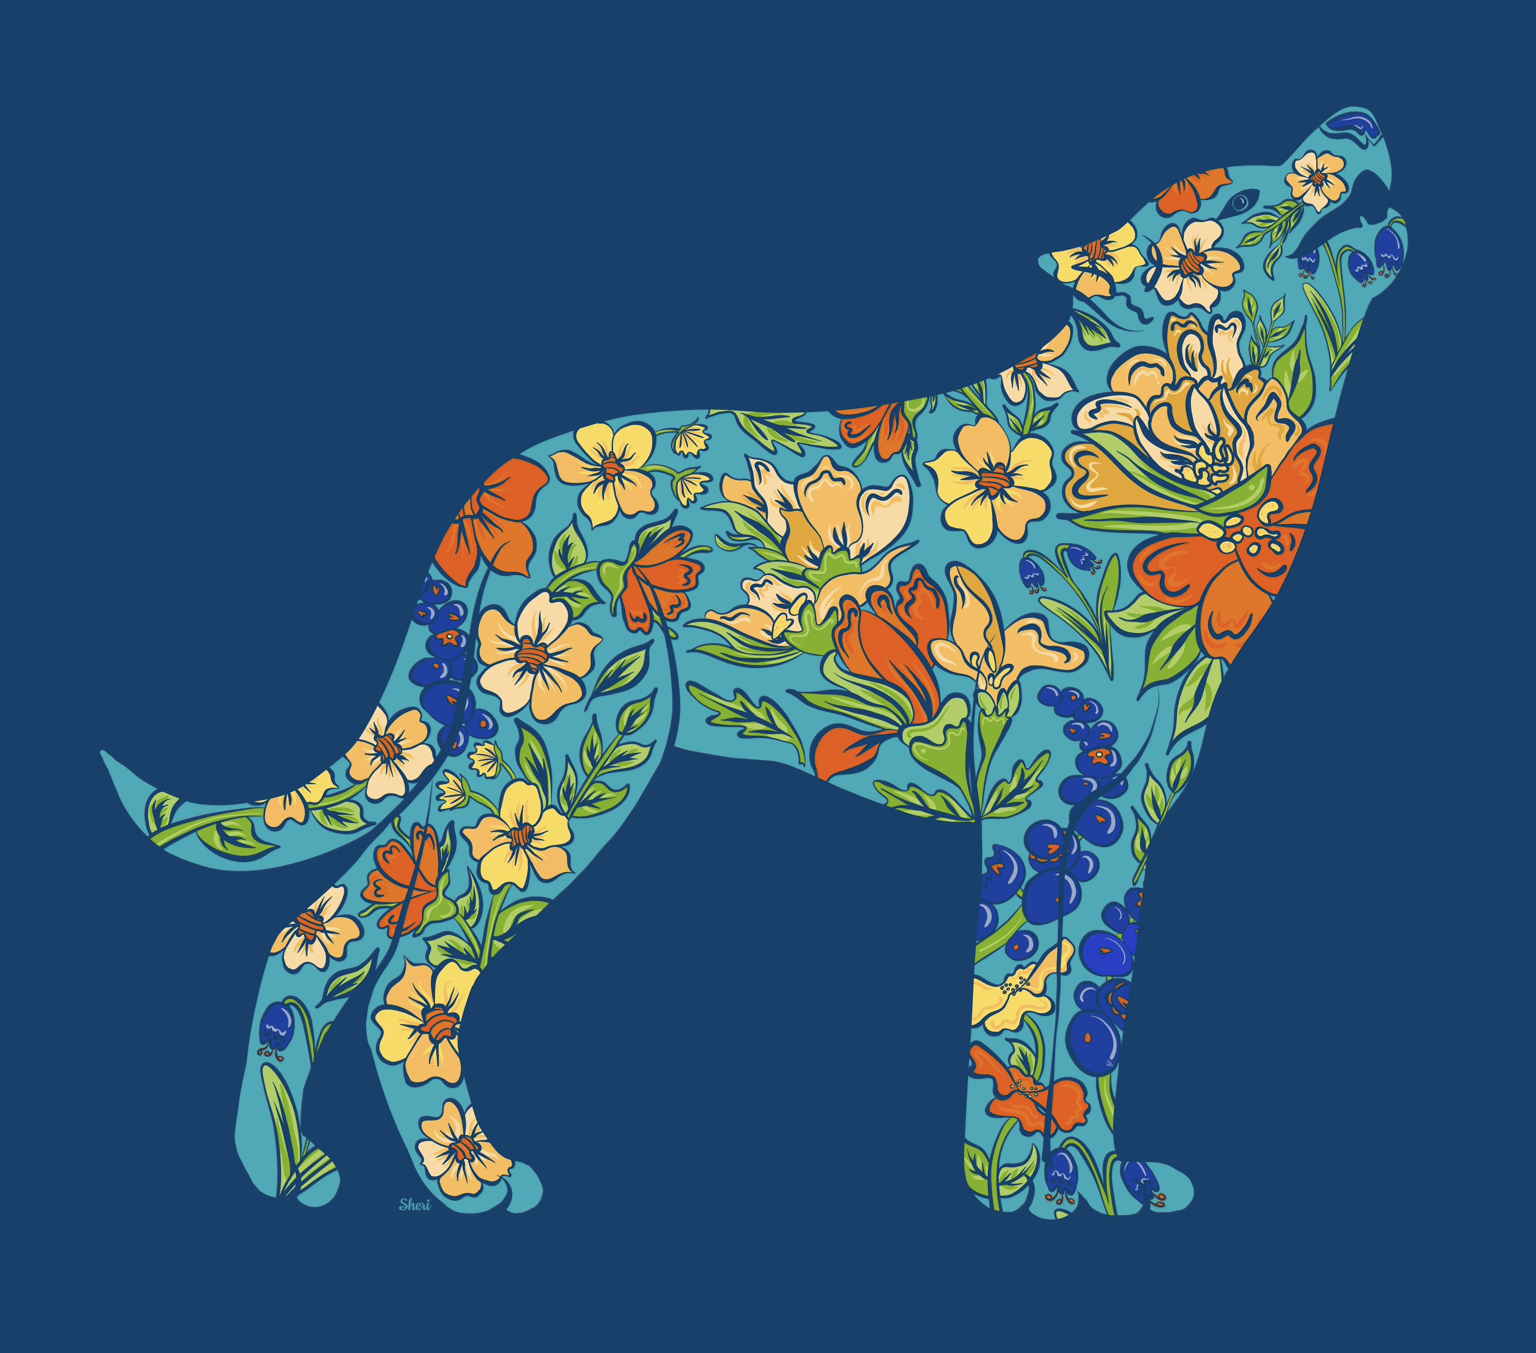
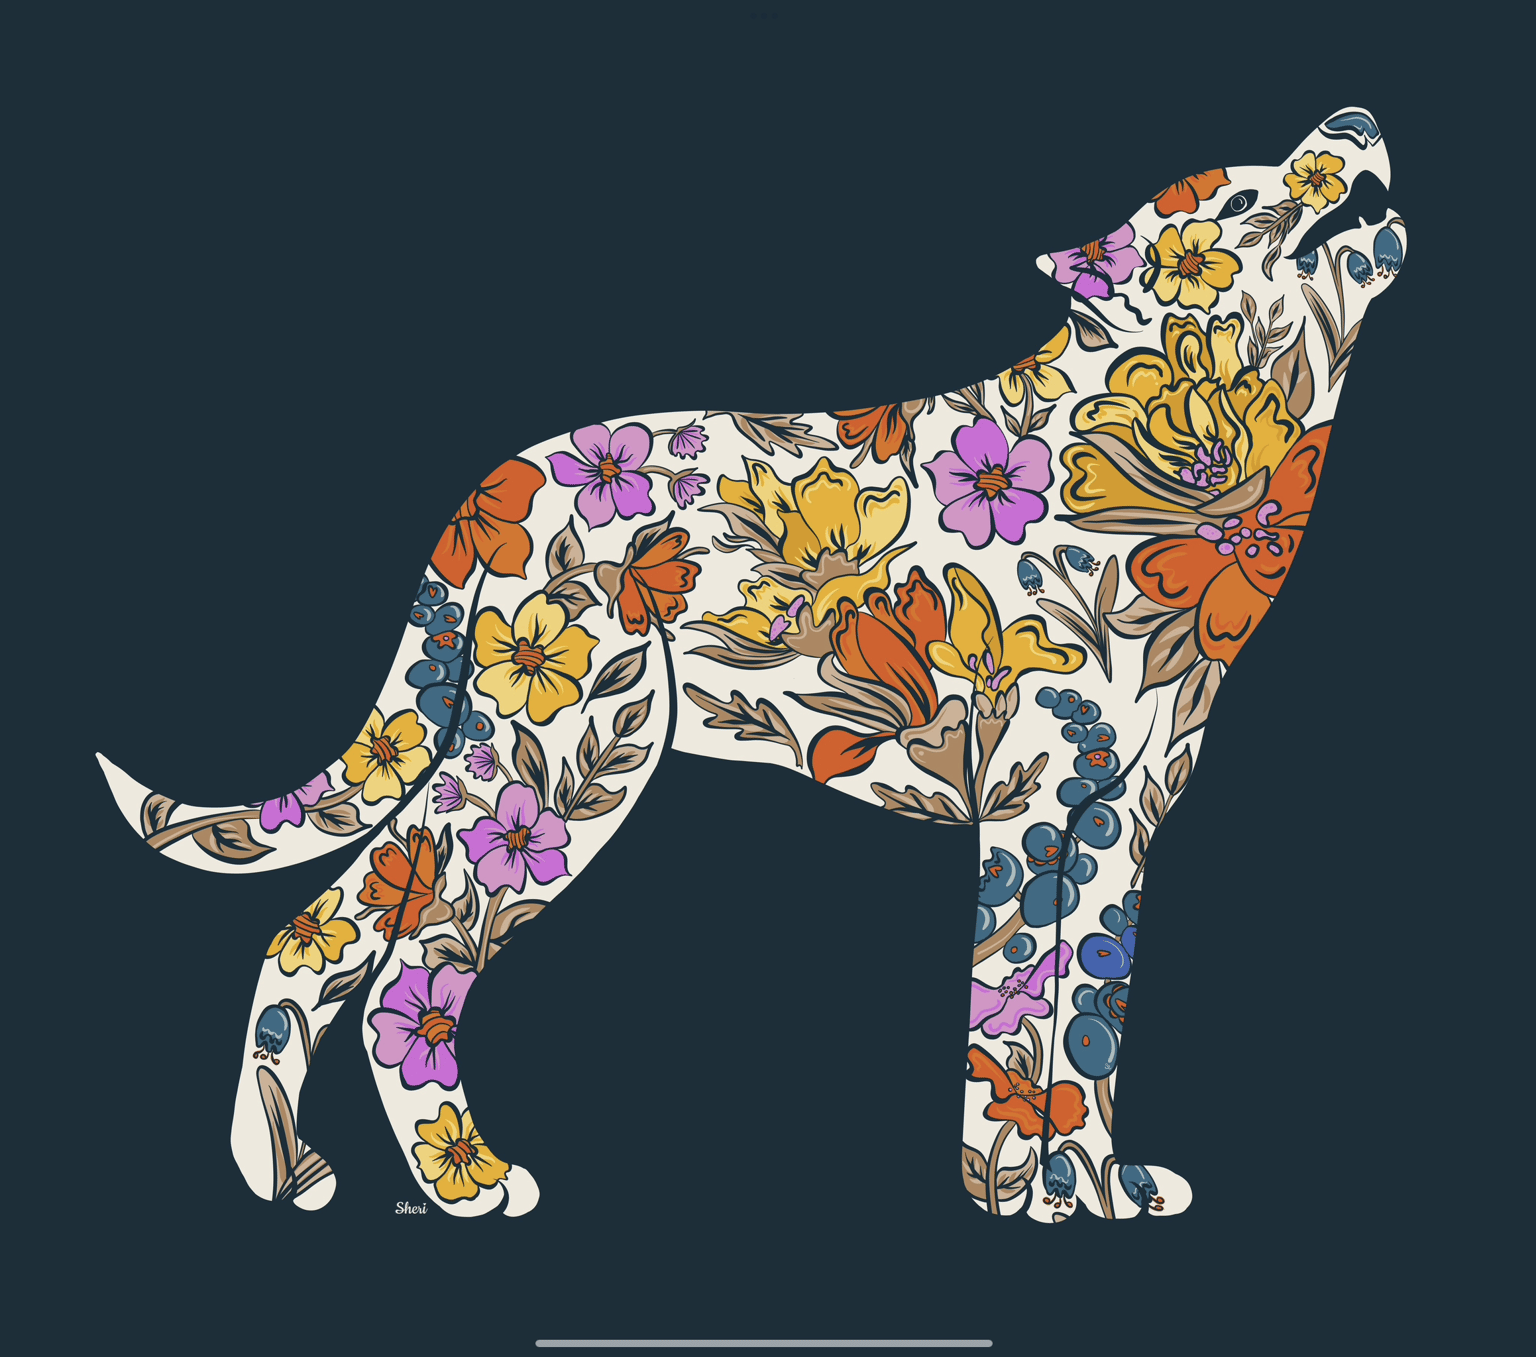
Continuing with the class, I finally finished the "fill" part after revising the original outline florals because the "blue" berries and flowers were too small.
That looked like this:
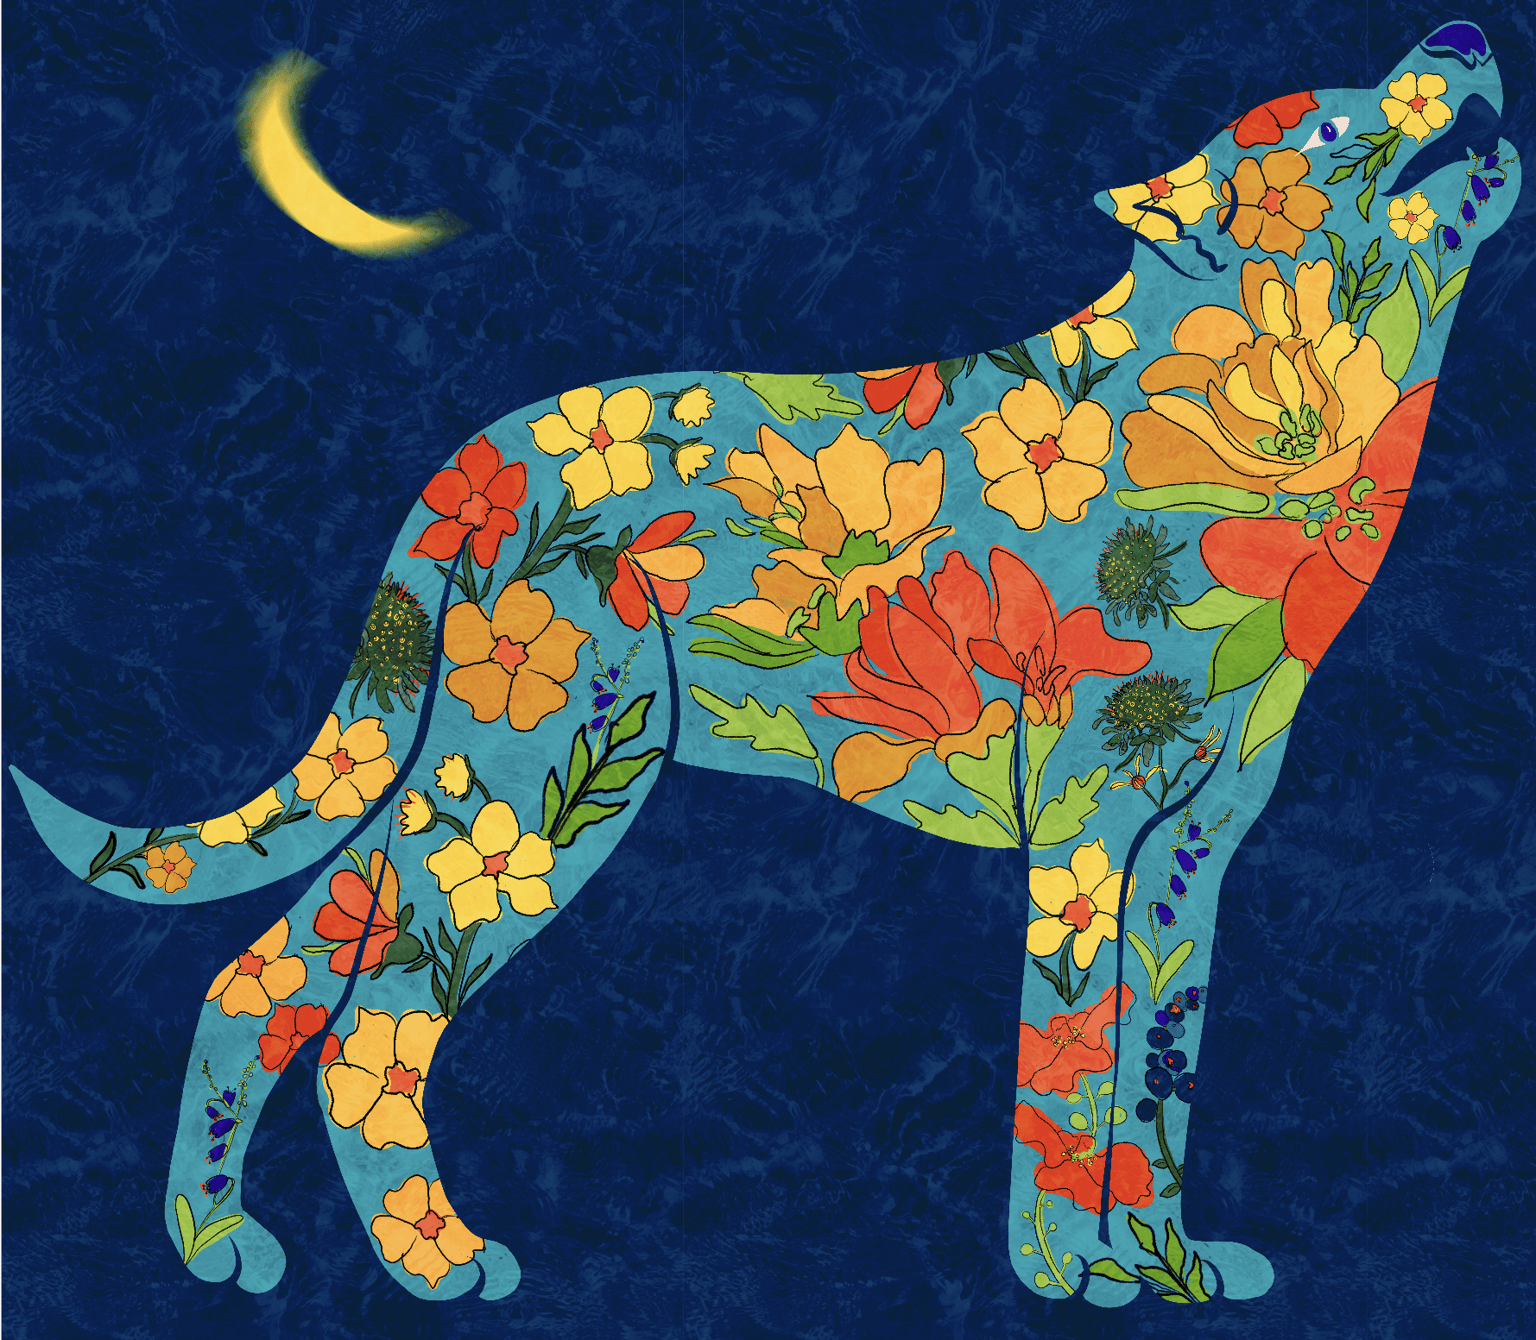
Next, I played with colored themes-- and turned them into this gif as another birthday card for the next family member who loved the original! Here it is with the birthday greeting:
I think I love the chintz version the best, which I made as a birthday greeting for my daughter:
As you can see, the class takes you through step by step, including how to manage layers when you run out. It's exciting to learn how to create LARGE size illustrations that can fit on many POD products, and how to create different color versions after taking the time to create the final filled version with embellishments.
My next steps are to add embellishment florals in the margins and to create transparent images of just the silhouette, in which case my signature will be inside the wolf design.
So if you're still debating about this class-- just do it!
A wonderful class to learn the process of creating large sized digital art. You will love it! Thank you CatCoq!