Transcripts
1. Introduction: Hey everyone, My name is Crystal and I'm an online
entrepreneur from the UK that has been filming YouTube videos for
over three years. During that time,
I've learned about every aspect for when it comes to creating online content. And by now, I think I have a really good idea on what works well and some of the things that you
should probably avoid. So it'd be enrolled
in my class today. I'm gonna be taking you through my simple ten step plan
that will take you from creating your
channel all the way through to uploading
your first video. I'll be covering areas like how to plan and film your videos, how to build an
affordable YouTube setup. And I will also be sharing some top secrets on how to
be more confident on camera. Because I think
that's something that almost everyone struggles
with when getting started. Finally, I've designed
this class so that you can follow
along step-by-step. And at the end we will go
through the class project, which is uploading your
first YouTube video for me to take a look at and
give you some feedback on. So having said that, thanks for watching and I'll hopefully see you
on the other side.
2. Class Project: Hello, and thank you so much
for enrolling in my class. It's really good to see
here before we get started, I just wanted to
introduce you to the class project and
resources section. So yeah, this start off with the project and basically
what I would like you to do is either step-by-step or at the end of the
class is to upload an introduction video of yourself to your brand
shiny new channel. This will mean creating
the channel, planning, filming, and uploading
your first video. And if you would like
me to say it by choice, you can upload it to
the resources section, which is actually where you
will find anything that I mentioned or reference
during this class. For example, there might
be a time where I say link in the resources
section down below. From there, you'll be able to
head over and take a look. So I hope that you can take
part in the class project. I'll be trying to take a look at as many channels
as I possibly can. But if you want to
keep it to yourself, then that's absolutely fine too. Yeah, thanks for watching
and I will see you in the next video
where I talked about choosing your niche and coming up with a good name via channel.
3. Niche & Channel Name: Alright, so in this module we're going to be talking about choosing your niche and
naming your channel, which are the two most
important things that you need to have in place before you can go ahead and start creating. Because the end of the day, if we want people to
watch our videos, we need to be clear
about what we talked about and when they
discover us on YouTube, they need to know exactly
what they have come fall. And it start off,
we've been niche first because we need to know this to help us with
naming the channel anyway, if you've already four of
your niche than that's great. However, if you haven't
and maybe you're struggling a little bit on
what to make videos on. The first thing
that I want you to do is sit down and
write a list of maybe five or six things that
really interests you and maybe something that you enjoy talking to your friends
and family about. Because when it comes to
YouTube, whilst down the line, it can be an extremely
profitable business when starting out, you really do need to make sure that the finger talking about is something you enjoy
because this will definitely show
within your content. Now we have that we need to come up with a name
for our channel. And this is something
that I don't want you to spend too much time on because we can
actually change this a little later down
the line anyway. However, a couple
of obvious points. If you're creating a channel about cooking and don't call it investing with
Fred and you don't want anything that's
too much of a mouthful. I would suggest aiming for around two to three words is
your channel name at most. And this is something people
are more likely to remember. A top tip that I
have for anyone who has gone for quite
a broad niche, you can always just go and name your channel
after yourself. This is actually what I
went for with my channel because my channel covers
the topic of money, because money is
quite a broad niche. I decided that I wanted
my name to be the brand and it just gives me that little bit more extra flexibility. Alright, I think that's
everything for this module. Remember, think about something
that you're passionate about doing and don't spend
too much time on a name. It can always be
changed in the future. But once you've done that, we are now ready to go ahead
and create our channel, which is what I'll be
covering in the next module.
4. Creating Your Channel: Welcome back. In this module, we're
going to be going ahead and creating our
YouTube channel. I'm gonna be going through
this step-by-step. So maybe now is a good time to go ahead and
grab your laptop if you did want to go ahead and follow along and let's get
straight into it. Okay, So the channel
that I'm going to be creating in this example
and throughout the rest of this class is going
to be one that's all based around FPS gaming. So keep that in
mind as we go ahead and create this channel and
create our first videos. But yeah, this
gets straight into it as you can see down here, we've got my laptop
screen loaded up. And the first thing, of course, what we're going to want to
do is go to YouTube.com. If we go ahead and click that. Of course I'm just on incognito
mode or the first time. A doubt this is going to be the first time you've
ever had it to YouTube. So we just go ahead and
click Agree if it is, the first thing we
want to go and do is go and click the Sign In button in the top
right-hand corner of your screen from there, what you can obviously
see is that you need to sign in if you already
have a YouTube account. However, in this case we
do not have an account. So what I'm going to
do is go ahead and click this create
account button. Now, what that then gives
us is a couple of options. So we're saying is this
account for myself, is it going to be from
my child or is it going to be a business
account in this case, in promotion, YouTube is it's always going to be for myself. So I'm gonna go ahead and
click that from there. What I'm going to do is go and put my name and address in. I'm going to just use a dummy name because
I don't want this popping up on
YouTube at all. And then what we are
presented with and what we need is a Gmail account. Now, do not worry if you do
not have a Gmail account, we can go ahead and create one. But because YouTube
is owned by Google, you're going to need to use a Gmail address instead
of anything else. So what we can actually do right here is
instead of having to go all the way over to Gmail
and do it all on that side, can actually go ahead and create our Gmail address within
the YouTube website. It's go ahead and go for what my channel name
is gonna be called. By the way is FPS gamers corner. So I'm gonna go ahead and
create that right now. So we're gonna go FPS
gamers corner at gmail.com. That should all be fine. From there we can
go ahead and create a password for this
email address. So I'm going to go ahead
and put that in right now. And then of course, regarding to confirm it. Once you get through
that screen, you're going to
have some personal details that you need to enter. I'm going to skip
through this because you don't need to know mine. And we'll move on
to the next screen. And then from there
we need to quickly set our personalization setting. So this isn't really something you need to pay too
much attention to. If you wanted to go through
the manual personalization, you can, but I'm
just going to click on the express personalization. And then I'm gonna
click Next from there, we've got the usual stuff
about privacy in terms which I'll leave it up to you if you want to go
ahead and read that. And then finally we
want to click, I agree. What that should then
do is take you to the YouTube home screen we've used signed in with
your new account, as you can see at the
top here, we've got a J, which is obviously
standing for Johnny Smith, the name that we
that we put down. We've got our new email address, and then we've got some
options down here. Now, this is YouTube from
a viewers perspective, we want to actually create a new channel to upload
videos to YouTube. And the way you can do
this is very simple. All you need to do
is go back up to the top where your
account is located. We go ahead and click on that. And as you can see right here, we've got the option
to create a channel. So let's go ahead
and click on that. And then from there
we get to enter our first piece of
important information, which is our channel name. So I said that I was
going to call mine the FPS gamers corner. We're going to go
ahead and do that. And then all we're
going to do from here is click Create Channel 01. Thing that I did just skip
over there is that you do have the chance
to upload a logo, but I'm going to be
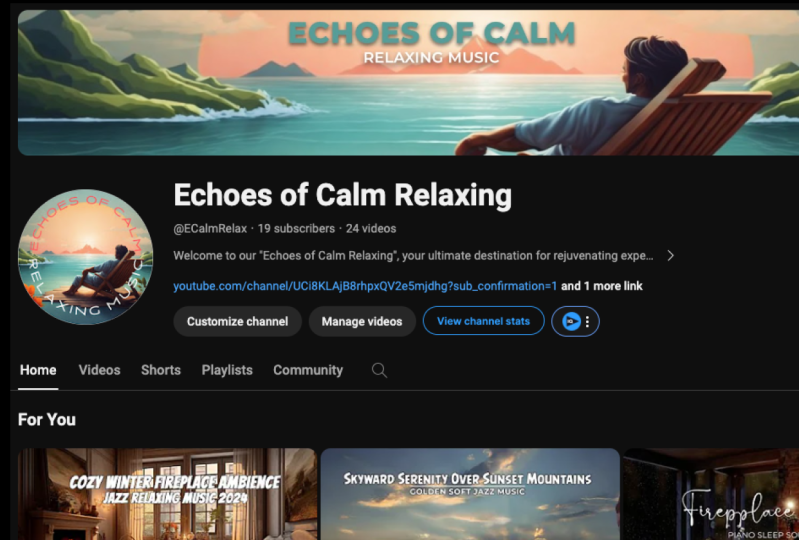
showing you how to design one in a future module. So I've just skip that for now. But here you go. You
should be presented with this screen right now. And as you can see, we've
got no subscribers. We've got our channel name
of the top left-hand corner, which is called FPS
game has corners. We can then go ahead
and manage our videos. We can then go and
upload a video. But what we're gonna be doing in the next module is going
ahead and customizing our channel to give it a
little bit of a branding and a little bit of a better
feel about it right now, because right now
looking at this channel, it's looking a little bit bare. So I'll see you in
the next module.
5. Adding Channel Artwork: Welcome back. In this module,
we're going to be going through creating and uploading your logo and your artwork for your
YouTube channels. So we're back on our
YouTube channel right here. As you can see, what we're
going to go ahead and do. We're going to go ahead and
click Customize Channel. And then from there,
once that has loaded, we're going to want
to go ahead and click on the branding section. And what you can see, we've got two major things that
we need to upload. We've got our picture,
which is our logo, and then we've got
our banner image. So there's a couple of
ways that you can do this. Now, if you're not really too confident on your design skills or you want to just
get this done nice and quick and you don't
have to worry about it. You can go ahead and head over to a website called fiverr.com, which is basically a
marketplace that has loads of different
people offering services like logo design and channel artwork design and all
of that good stuff. However, what I'm going to
do is show you how to do it yourself and nice and
simple, free, easy way. So this doesn't need to
be special at the start. We've just need something
to get us started, get something to show
people what our channel is all about when they
see it from the Outlook. And that's all we're
going to do today. We're not gonna do
anything too fancy. And the website that
you're going to want to head over to do this is a website
called Canva.com. Now, this is a
completely free website that allows you to
do design work. So as you can see, you can
do YouTube channel logos. You can do A4 document designs. You can do thumbnails
for YouTube, which we'll talk about
later on in the class. And you've got things
like Instagram, anything that is logo design
you can do through Canva. It's completely free. There is a paid version, but the free one is more than enough for what we
actually need today. And what's really good
about Canva is that once you've signed in and
done all of that good stuff, where you can actually do is
go over to the search bar over here and you can actually
type in YouTube logo. And what that will
do is give you some preset
dimensions because of course the YouTube
logo is really, really small, so we
don't want to design a massive logo that's not going to fit within that section. What camera does is it gives
you some preset design. So we've got the channel art, which we'll touch on
in just a second. But what we've got
just below it is the YouTube channel logo. So you can see the size is a
difference between the two. So we're going to want
to go ahead and click on YouTube channel logo to
start us off from there, we've got a load of different
templates that we can use to maybe help us
find some inspiration. Of course, we do not
want to use these because this isn't what our
channel is going to be about. Like I said in the
previous class, if we've got a gaming channel, we do not want anything that doesn't really represent gaming. And then other thing
is we want to keep this really, really simple. We don't want to pile
loads of words invocation, not going to be able to read it. It's going to be so small
on the actual YouTube page. So we want to keep
it really nice and basic and that's
what we're going to do. So what I'm going to do just for demo purposes is actually
create one from scratch. And like I said, it's going
to be nice and simple. What we need to do is go
ahead and click on this, create a blank YouTube channel
logo button over here. So let's go ahead
and click that. What I was thinking
just to get us started with this
gaming channels, just to go with something
really simple that actually identifies that
we are about gaming. The first thing that
always thinking escape for a really bright
background and then have an image of maybe like a game's controller with a
really nice contrast in color, so it really stands out. So that's what I think
will build right now. There's only two things
that we need for this. It's really nice and simple
and just really easy to do. So keep it simple. So let's
get started by changing the background color
because we don't want to have it on this boring
white background. So what we can do is
actually go ahead over here and click on this
background color button. What I was thinking is maybe going for something like really bright yellow just to make something stand
out on top of it. Let's go and see what
we can find in here. So let's go over to yellow
on the Color Picker. That's a little too dark. I mean, that's not too bad. Like I said, we
don't want to spend too much time to
effectiveness at the start if you've already got your branding colors
and just use those. But I'm just using this
just to get us started. So we've got our background. What we now need is an icon
or some sort of logo of a controller that can
contrast on this yellow to really stand out to people
coming to our channel. And there's a website that
I use, all of my icons. It's called flat icon.com. Once again, another
free website. And what we can do,
as you can see, there's over 6.4 million
icons on this website. I'm just going to go
ahead and type in gaming and see what
comes up. Cool. So we've got some
black images here, which isn't going to look too great on a
yellow background. I mean, it might look good, but what I really
want to do is find a contrasting color
like a purple or blue. I mean, like this yellow
controller is really cool, but because we're on
a yellow background, it's not going to look as good. Maybe we could switch the background and put
that one in there. But let's go for
this one right here. This is a blue controller
that see how this looks. So what we need to do, we need to go ahead
and hover over it. Click download PNG. We're going to click
Free Download. And then that's going to load up our game controller down on the bottom of our download
screen right here. We're then going to want
to go ahead and head back over to Canva. And all I'm going to do is drag this game controller onto
this picture right here. And as you can see, we've got our controller in the
middle of our logo. Now, one thing that
I do want to do is I want to make this a
little bit bigger. I don't want to make it too big because you'll see
why in just a second. And I want to make it
nice in the center. There we go. A camera tells us when it's in the center by using those lines. There you go. That's our logo. I mean, it's really basic. Like I said, it's nothing to professional but just
getting started. That's all we need.
Something that really just tells people that this
is our YouTube channel. And what it's all about. So let's go ahead and click
on this ellipses right here, and we're going to
click Download. Then going to want
to change this to a picture because
this isn't a video. So let's pick JPEG. We're going to want
to click Download. Okay, cool, So we've got our untitled design to hear that we can go
ahead and select. What we're going to
want to do is head back to our YouTube channel. So back to the channel
customization tab. And as you can see where
we've got this picture, which is our logo section. We're going to want
to click up load. So let's go in here. And then what we can see, we've
got our downloads folder, then we've got our
untitled design here, which is the one that
we just downloaded. And then we're going to want
to go ahead and click Open. Then boom, it froze in our logo. Now the reason why I
said we don't want to make it too big on the square. As you can see,
I've already made this logo a little bit too big. This blue circle right
here outlines what is actually going to be shown
on your YouTube channel. And the controller would
have overlapped those lines. So make sure you leave yourself a little bit of a
buffer in-between, but you can go ahead and crop this and do all
kinds of stuff with it. But realistically, I want to just make sure it's
nice and centered. We want it full size and we've got the whole
controller in our screen. So let's go ahead
and click Done. There we go. We've got our preview
of our controller. The final thing that we need
to do to upload this to our YouTube channel is go ahead and click this Publish button. And what you can see is
where we have our f, where our old logo is
on the right-hand side. When I click this,
this should now update to our new logo for
our YouTube channels. So there we are. We've got our channel
name and then we've got a logo that represents what our channels about that
next up we need to design our banner image so you can guess where we're
going straight back to. We're gonna go back to Canva. And in the top hand corner
here we're going to type in YouTube channel art. And as you can see, we've got our channel
art right here, so we can go ahead
and click on that. Once again, it's going to have some different templates that we can use and feel
free to go ahead and use these and
just edit the text if you're not feeling to
designing or anything like that. But once again, we're going to, in fact, I'll tell
you what pitch. Go ahead and use
something like this. Let's go ahead and edit this. So the first thing
that we want to do is we want to change
the background color because we want to match
it with our logo and our branding to keep it
nice and consistent. So let's go ahead back to the background
color section again. Now, I took the color
code from my logo, so we've got our yellow
so we keep it nice and consistent with our,
with our branding, of course now, the next
thing we obviously want to do is go ahead and change
our text on the screen. So the first thing we want to do is go ahead and change this to FPS gamers corner. Now, looking at that
text right there, that doesn't really
stand out too much. So I guess what we could
probably do is go ahead and pick a color that's similar
to our controller style. So if we went and picked blue and it stands out
a little bit more, I guess what we could
go ahead and do is change the font because I'm not really too keen on this one. I want to keep it nice and bold. So let's go ahead and go for FPS game has corner like that. Still not feeling it too much. Maybe we could go ahead and
click on the Effects and get a bit of a shadow behind it to make it pop a
little bit more. So let's go ahead
and click that. And then we'll change
our shadow color to black up the transparency a bit all now that's
making it pop a little bit better. I like that. Cool. So that's now
coming up like that. I really do like that now. What if I just try this? If I go back, see that when you're
doing these things, you just want to be
playing with it, just whatever works
we view, like I said, don't spend too much
time on this and you can always change
this or maybe you just go ahead and get
someone else to do it for you if you if you
don't want to do it, but just make sure you
have a little play around, see what works best for you. It's actually go ahead
and try purple on there. I mean, that's pretty good. From there we can go and change this text right here because
we want to have it matching. So let's go for Anton again. And I don't really like this gray on the yellow background. So let's go ahead and see
what jet-black looks like. So let's go ahead and pick that. I mean, there's a nice little
contrast between the two. So we've got FPS game has corner new episodes
every Wednesday. This is a good start. I guess the final
thing we can do is go and customize
these logos here. I know this
represents a gamepad. You've got the joystick
there and the buttons there. But Let's have a look on flat icon just to
see if we can find some contrasting colors that make this gray look
a little bit better. So let's head over here once again as typing gaming icons. Let's go for something
a little bit different than a control at this time. So maybe we could go for a headset and that's blue and that could work well
on the background. So this download that
and see how that works. And let's drag that over
this one over here. Cool. So what we probably need to do is make that
a little bit smaller. And then let's put
that out there. As you can see,
we've Canada uses these lines to make sure everything is nicely
measured up while, and it's not really
out of place. So even if we made it smaller. It would still adjust it so
it's right in the center, so it looks nice and
good. There we go. We've got the headset there. I like that. That's much better
than this boring old pad. Let's go and replace
this next one. So this goes back to flat
icon. So we've got a headset. What else could we get? I guess we could get a
PC maybe, or maybe even. We've got a life thing here. We've got a mouse
pad or I liked that actually we've got the blue
mouse pad or this one here, this blue mouse pad. And then we've got the
headset as well because there are two key
components to gaming. Let's go for that
just as an example. And then we're going to
want to make sure that it's the same size roughly
as the headset. So let's go ahead and measure that up
against the headset. There we go. Let's drag it over here. Let's get rid of
this and then this, get this nicely inline. In fact, what I'm actually going to do is I'm gonna switch these because the mouse is
on the left at the moment. But normally most people associate holding the
mouse with the right-hand. These are just really
small details, but it's just something that I think about when it
comes to branding. So let's move this
nice and close again to make sure that
distance is the same. This now, go ahead
and download this and add this to our
YouTube channel. Once again, let's go ahead
and download PNG file. There we have it in
our download section. Let's go back to YouTube now, the channel customization tab, and let's go ahead
and click Upload. Once again, we're going to click gray gaming channel access, what it was called before. We can of course change it
to whatever we want to. I also recommend saving a copy of this
somewhere as well just in case you need it elsewhere and maybe it disappears
from Canada, but likelihood it won't, but just wanted to
get the backup. So there's openness up. And what we can see right
here is our first mistake. So what you can see is we've
made our images a little bit too big so that it's not quite
viewable on all devices. Because what this
guide is here is, is big box is saying
it's viewable on TV. So if you hover over it,
That's what we see on the TV. When we hover over the desktop, that's what we see
on the desktop. And then if we
hover on viewable, all devices is just missing out that headset on the
left-hand side. So let's head back to
Canva and it's just make both of these a
little bit smaller. Like so, cool. So let's go ahead and download that once
more and quickly. Fly through this. We're going to
click on our newly downloaded one right here. And then we're gonna click Open. And as you can see, it
fits on all devices now, desktop TV and of course
your mobile phone as well. So we're gonna go
ahead and click Done, and then we're gonna
click Publish. Now from here, what
we can actually do is go ahead and
click on View channel. What we can see is our
new updated channel art and next to our logo. So I think that's pretty good. We're matching the color scheme. We've obviously we
haven't thought too much about the title color. There was just put
something that works, but I think that
looks pretty good. That just about does
it for this module. In the next module, we're
gonna be talking all about how to add an
About Us section to really sell our channel and
make sure that the viewer coming to our channel knows
exactly what they're getting. So see you in the next one.
6. Create About Us Section + Links: All right, Welcome back. In the last module, we designed our channel art and then we also designed our logo as well. In this module,
we're going to be talking about the
About Us section. So this is really the
final part of setting up by YouTube channel
from a basic standpoint. And this is what we're
gonna be doing today. So as you can see, we've got the YouTube
channel backup on the screen right now we
were on the branding page. But to fill out the
About Us section, what we're going to
want to do is head over to this basic info tab. If we go ahead and click that, what we can actually see here, we've got a little box
that we can actually fill in and actually says tell
viewers about your channel. Your description will appear in the about section of your
channel and search results. So one key thing is number one, we need to get a couple of
keywords in necessarily people do search the
terms may be FPS, gaming or, or
anything like that. We have that chance of coming up in the
search results now, don't get too tied
up on this because I don't think it plays that much of a bigger fact that you're
going to want to focus more on keywords in your
actual videos. But this one is of course
not going to do as any damage in throwing a few good keywords
in there as well. So what we're gonna do is
just simply fill this out. What I'm actually going
to go ahead and do is grab a template of one that I made a little bit
earlier and we're just gonna talk
straight through that. So let me just grab this and
throw this in here. Cool. So basically what I've done with this one is I put
a welcome message, a quick sentence about
what we're actually about. And then we've got
some expectations from the channel about
the different types of videos we're
going to be making. And then some sort of little
call to action at the end there basically asking them to subscribe this,
just break this down. So the first thing
that I've written is welcome to FPS games corner. Nothing really to
look into that. But obviously the
first thing that I do is I make sure that I get this keyword here of
first-person shooter games. So if someone wants to go ahead
and search for that term, there is a really small
chance that they could discover us throughout
the YouTube search. But obviously from
there we've gone for, if you're looking
for, again, reviews, reactions, play throughs,
Challenge videos, top 10s, then you're
in the right place. So why not check out
some of the videos, leave us a comment and
subscribe to the channel. It's free. So a little bit
of comedy in there as well. But basically what I'm
doing with these types of videos is I'm setting
an expectation. So once we've got a few
videos on the channel, we can obviously
make these videos. So if a viewer does come to our channel and they
see this, they say, Oh, I like top ten videos or I
liked reactions to new games. This go and check
out their videos in the first video they
see as a reaction, you've got much more
of a higher chance of that user actually
clicking on that video and potentially
staying around for longer time than that
they usually work. And that is the
About Us section. Now, if we just go back, there is a couple
of other things that we can actually add here. We also have linked. So if you've got any
social media pages you want to build up with
your YouTube channel. So if you wanted to create
an Instagram account or a Tik Tok account, you can add all of
those links there. And you can also add your e-mail address because
in the future you could set yourself up for some
sponsorship opportunities and leaving an email address in your About Us section is the first place
where those brands are actually going to go. But once you've
done all of that, once again, all you have to do is go ahead and click Publish. And that's going to publish
itself to your channel. And it'll be fully updated
for you to go and check out. So that's the end
of this module. I'll see you in the next one.
7. My Professional YouTube Studio Tour: Alright, so in this
module, what I wanted to quickly do
is actually just give you a quick tour of my
professional YouTube setup now, please do not worry
whilst you're watching this that you haven't
got any of this stuff. This literally took me
three years of reinvesting money I'd made for my channel
to get to this stage. And in the module after, I'll actually be showing
you how you can get started without spending
any money at all. But let me just quickly grabbed my phone and keep
you a quick tool. I guess we'll start things off with my actual working desk. So as you can see what
I have over here, two screens where I can go
ahead and plug my laptop. Stand at the back. Basically, this is the
area where I'll do all of my scripting or do all
of my video clowning. And of course I'll
do my editing. Having the two
screens makes things so much easier than
just having one screen. Also got an iPad Pro there
where I do a little bit of animations when I
edit my videos and I, I also designed my thumbnails on my iPad and all of
that good stuff. But not really too
much goes on air apart from planning
and actual work. And obviously, as you can see
over in the corner there, maybe a bit of
PlayStation as well. But the main thing
that we want to take a look at is
this bit over here. Now, this is my actual filming
set, and as you can see, it looks a lot neater when
I'm actually on camera because it has a lot of all of this stuff behind the camera. It's not exactly The best
laid out by a works for me. And like I say, it doesn't really matter what it looks like behind the camera as long as it looks
good on the cameras. So this start things off over
here with my actual camera. And I guess the first thing
that you can probably notice is this funny
little device on here. And what this is called
is a teleprompter. Basically what I can do
is I can put my phone on this tree right here and I
can put some text on there, and that allows me
to read that text. If I just come over here, you can probably see
the lens on there. And basically the texts
will mirror onto the, onto the glass over there. But you won't actually
see that on the cameras. So I can essentially
just write out my entire script and
read that off from that screen without even taking my eyes off the lens to maybe look down at my script
or anything like that. So that's a super important
and really useful piece of kit for me to use. Now moving on to the camera, basically what I have
is what is called an canon M6 marked too. I think there are
about 800 pounds. And then I have a 32 millimeter
cannon EM lens there, which is about 500 pound lens. Like I said, I didn't
start with that. This is only recently I've upgraded to this camera and for the most part I've actually used my phone and a really
cheap Canon camera. If it was an M5, it was called. And I use that for
the first two years. So just moving on here. That's basically the
camera, by the way, guys, one thing that you'll notice is that it is connected
with this wire, which we'll get to
in just a second. Let's move on to the light. So what I have right
here is what is called a three-point
lighting setup. So what we have is
my key light here. This is the main light, beams down onto my face. We then have a fill light
which I actually bounce off my white wall to give me a softer feel on the
other side of my face. And then at the back we
have my background light, which is just simply
a blue LED light, the I-beam against the wall to give me the effect
that you've been seeing in my videos that you've been
watching in this class. I do have another one down here. I believe in the first module, the introduction, you saw
a bit of purple and blue. So if I wanted to mix
things up a little bit, I'll just pop that
on there as well because I'm sitting
in front of it. You never see that light. So that's basically a
three-point lighting setup. From there we have
my microphone, which is actually
boomed above my head. Now, some people use
a clip on microphone. Some people put their microphone
on top of the camera. But one thing that's
really useful to do is get your microphone as close
to you as possible. So as you can see, when
I'm sat down there, the microphone is
probably only a couple of inches away
from my actual mouse. So what I'm doing now is getting the full quantity out
of my microphone. Let's move on to the main
thing about the powers, this entire setup, and that's this
switchboard right here. And essentially what
you can do is plug-in up to eight HDMI devices
into the switchboard. And whilst this is normally
used for streaming, actually use this for
actually recording my video. So what you can
actually see right now is that our cameras
plugged into this HDMI. It comes all the way into here. And this screen over
here, as you can see, is projecting what is actually
going to be recorded. But I can do, I can plug
this hard drive into this switcher and
I can go ahead and click record up here, this button over here. And anything that is
going on this screen is going to be recorded
today's hard drives. So one thing that I could do is if I wanted to
switch to my laptop, I can press number two, and that switches to my laptop. My laptop is now being recorded. I can then go and press
this button here. And what that
essentially does is puts me in the corner there. Basically this makes
my editing process so much easier because
I haven't got to go and record my screen. I haven't got to do
anything like that. I can all be monitored. It is switchboard and
this is just two inputs. I think that's just about it. One thing to mention
that you can't see in this room right
here, just over there, I have another USB
microphone that I plug into that desk over there. This is for when I
basically want to do professional
voice recordings. But the one thing that you
can't see in this office, which I've had to take out, is that I actually have some temporary
soundproofing boards. I'll throw a picture of them
up on the screen right now, which I placed behind
my lights near my camera and over by
the window as well just to help me improve
the acoustics of this room because I'm guessing you listening to this
video right now, my voice probably sounds a
little bit different to the one in my actual modules
that you've been watching. This is because the room
hasn't been sound treated. They're currently sat on the
outside just so I can move around and film this tour. But lots of money invested
into the channel. But once again,
when I started out, I started off with
just this iPhone that I'm filming on right
now. Alright, cool. So I hope you enjoyed that. Like I said, this
setup is completely overkill for what most
people need to get started. But I fought. You would
find it interesting to see how I fill my
videos every day. I having said that,
this now move on to the next module
where I'll show you my cheap and easy setup that anyone can use to get started.
8. Free YouTube Studio Setup: If you watched the last module, you would have seen
a quick tour of my professional
YouTube setup which been investing into over
the past three years. It's taken me a long
time to get there. However, you don't need all of that fancy stuff
to get started. And I certainly didn't
use that either. In fact, I actually just
took a look at my channel. It wasn't until after about seven or eight months of filming videos to a free times a
week, every single week, or actually went an
invested my first piece of money into my
YouTube channel, which is when I went and bought a really cheap camera
to start filming with. So that is 100% a
myth that you need a really good and professional YouTube studio to get started. If you have to just
go and have a look at all your favorite creators. Once again, go ahead and
look at their first videos. I can guarantee you
that they weren't in no studio or anything like that. What I'm gonna do in this
module is showing you how you can actually
get started for free. And there's actually
only two things that you need to get started. Number one is going
to be your phone now, I'm pretty sure everyone
that's watching this has got a smartphone
of some kind. Normally most of the
latest smartphones have actually really
good cameras on them. This is an iPhone 12
is not the latest one, but the camera on this phone
is really, really good. And this is all you really
need to start filming videos. So this has got a really
good mic in it as well. And because we're gonna be
nice and close to the camera. If you watched the last module, I said you need to
keep your mic as close to your mouth as possible. If we're like this in the shot is obviously going to
be nice and close and we're going to pick up
a really nice quality from the bill in
mike on the camera. And then the second thing
we're going to need is some sort of natural
light source. So what you're looking at right now is actual artificial light. I have my blinds closed. I have actual physical
light beaming down on me. However, if you just go ahead and film with natural light, you're gonna get a nice
balance on your face. You're not gonna be too bright, you're not gonna be too dark, especially if you're using
just the pre-built settings on your iPhone or whatever
phone you decide to use. The key thing is, is that you want the light from the natural light to
be behind the cameras. So basically you
don't want to be filming with the natural
light in the background. That's going to cause glare into your lens and
that's going to make the quality look
really fuzzy and there may be a little
bit blurry as well. You want the light
coming down onto you. So whatever you do, use
your phone for starters, and then you want to
be filming right in the center of a
natural light source. And that's how you
can really get started filming YouTube
videos for free. Now if you did want to
invest a little bit of money and you didn't want to go full-blown with the studio, I would highly suggest focusing on audio first because
the end of the day, anyone can tolerate
a little bit of blur or fuzziness in a video. However, if the audio is bad, then the likelihood is people are going to click
off that video, especially if you're giving information or base
videos like myself, people are gonna want
to hear what you're saying rather than see what
you're actually doing. So focus on the audio first before you do
anything else from there, I would then probably
focus on light so you don't have to worry about using
the natural light source. And then maybe from there, go ahead and grab
yourself a camera. But you really do not need an expensive set to
get started with, because I'm going to
prove that when I go ahead and film this
video right now. So thanks for watching this one and I'll see you
in the next module.
9. Planning Your Video: Welcome back. In this module, I'm going
to be talking for exactly how you should be planning
your YouTube videos. Now, planning is so important when it comes
to filming content, because what we
want to be able to do is get the most value and entertainment to the viewer in the shortest time possible. And one thing that we
definitely don't want to do, stray away from our video
topic because that's what's going to put people off and get them to click away
from your videos. Now when I plan my videos, what I actually like
to do is script the entire video
out word for word. And I'll show you exactly
how to do that in a moment. But before we do that in, before we do any
kind of planning, we need to come up
with what I like to call a video structure. Now, having a structure
for your video will really help
your viewers stay engaged and it will give
you more chance of them actually returning and
subscribing to your channel. Because if you stay
consistent with your content that you are constantly
delivering on your promise, the audience knows exactly
what they are going to get every time and that's going to cause them to keep returning. If you just go and
take a look at any of your favorite
YouTubers right now, you will notice that whilst
they're not all the same, they all have a
certain structure and style to their videos. So what we need to do is come
up with one for our own. Of course, coming up with
your own style is definitely going to develop overtime as you start to
film more videos. But what I want to do is
introduce you to basic and most effective one that you can use to get started
as a beginner. And this is a structure
that I still use today for 90% of my own videos. And it goes a little bit
something like this. First up, you're
going to need a hook. This is one of the
most important parts of filming a video because first impressions
are absolutely everything. When it comes to YouTube, you want to keep this
at no longer than 20 seconds and you
want to be hooking that viewer in straight away because essentially you
need to make that view and know exactly what
they are going to be getting at the end of
the video at the star. Otherwise, the likelihood is they're just going to click off. For example, let's say
you're making a video on how to invest in the stock
market with little money, maybe the hook could
go a little bit, something like sup everybody. In today's video, I'm gonna
be showing exactly how you can get started investing
in the stock market, but wait with as little
money as possible. Get what I mean,
you just need to have them hooked from
the first second. Now, a bad example of the hook with the same
kind of video is, hey guys, welcome back
to my YouTube channel. I hope you're having a good day. It's been a little bit of
a busy day here for me, but a found some time to
film this video anyways. But what I'm basically going
to be doing is talking about how to invest in the stock market
with little money. So hope you enjoy it and I'll
see you in the video now. Unfortunately, as much
as you want to tell the viewer how your day is going and all of
that good stuff. The average viewer
wanting information simply just won't care about
how your day is going. As nice as I can put it. They are there for the
information and they don't care about
you in the sense, if you just spend the first
30 or 40 seconds talking about something
that is completely unrelated to the title, there is an extremely
high chance that they're either
going to click off the video or they're
just going to skip until you actually
start talking, which is going to hurt
your watch time anyway, which means YouTube probably won't promote your video
as much in the future. That's the hook
and that is by far the most important
part of the video. Next up is the actual
meat of the video. This is where you need to
deliver on the promise that you gave them in
your title and hook. Now with this part, you
can actually be a little bit more loose with your
presenting style here, but you still want to make
sure that you stick to the point and you definitely
don't go off topic. And the way I like to
break this section down is by splitting it up into
free value points. So every single video, I want to make sure
that I'm hitting free value points
every single time. So value 0.123, I feel
this way it keeps the information nice and bite-size and easy
to consume as well. Now, if I feel that
I have a topic that I feel needs more than
three value points. That's probably a case to split that video into two
separate videos, which then of course
equals more content. Once you've done that part, the final part of the video construction is going to be your call to action. This is essentially the
way that you will end the video and you should
always end it with, like I say, some kind
of call to action. This could be getting
the viewer to watch another video of yours
subscribing to your channel, going to a website that you may be suggested
throughout the video. Anything along these lines are great shouts to finish the video with a good example
of a call to action. And let's just use the investing
example again would be, so now you know how to
invest with little money. Why not go ahead and check out this other
video that actually shows you my own
portfolio where I shared the investments
that I invest into. Basically as you saw, as I was pointing out there with editing, you could put a picture of
the video on the screen, like an N screen and
a link during this. So it will actually
automatically direct more people to that
other video of yours. We're just going
to increase views, engagement and of
course, more watch time. And essentially that
is the structure. You have your hook, you've
got your free value points, and then you have
your call to action. Now, there's talk about
scripting the video. And I think everyone should script that video in
some way or another. But it's very much up to you how deep you actually
want to go with it. Now, I've made, I do all of my scripting on a simple
Google Docs file. This is completely free to use and it doesn't matter
really what you use, basically just anything that
is nice and easy to read, nice and simple and it's not too complicated when it
comes to scripting, you basically got two options. Number one, you could
go ahead by writing a couple of bullet points on the areas you want to
hit for your video. So for example, you
could go ahead and script out introduction
of the video. But then in the meat
of the content, you could just put
some bullet points that you could freestyle and just make sure
that you hit those bullet points
throughout the video. Or the second option
you can go with is by literally writing the
script down word for word. Now, I personally mix
mine up a little bit. Sometimes I use option one and sometimes
I use option two. I probably use option to
more than option one, but it all very much depends on the style of video
that I'm making. For example, if you're
doing some kind of blog or maybe you're
traveling somewhere, of course you're not
going to want to script that one
outward word because you want to make it feel as natural as possible to
maybe in this case, what you would do is go
for a few bullet points of a few things that you may be want the viewer
to make sure they see during the video. However, if you wanted to create some kind of educational video, maybe scripting the entire
thing out word for word would be better to make
sure that you are delivering the maximum value. My entire class right
here is actually scripted out word for word apart from
the screen-share modules, as it allows me to
check that I have everything covered
and checked off. All right, so that's
the structure of your video and some basic
scripting techniques. What I want you to actually
do now is go ahead and script out your
first planned video. Because in the next module, we are going to be talking
all about filming. So I'll see you in that one.
10. Filming Basics: In this module, we are
going to be filming our first video on our
shiny brand new channel. Now, before we do, if you are maybe
feeling a little bit nervous or potentially
lacking in confidence, number one, do not worry. Every single YouTuber will go through this,
including myself. In fact, what I'm going to
do right now is throw up a clip of how slow I took
things in my first video. Hello everyone. Welcome to my YouTube channel. I hope you had a great
Christmas and New Year. Today is the first of January. And I thought What's
not a better video to kick off this
YouTube channel. Then five ways to make money
in your spare time in 2019. So as you can see there, it's a little bit different on the way that I talk
right now on camera. All this comes with practice, but let me give you a
couple of tips that you can take on straight away
when it comes to confidence. And the first one is, I don't want you to
take this the wrong way and you probably guessed
this one already. And that is that
the likelihood is your first video is
likely going to sound. And you just need to embrace
that because it's fine. It's our first ever video
filming yourself on camera is a completely unnatural
thing to do and it will certainly
take time to improve. But if you just keep
filming videos, things will get better. I promise I just played the
first video that I ever made in comparing it to how I'm talking right now on camera. And I didn't do
anything special, I just simply kept
making videos. So that's tip number one. Embrace the fact that the likelihood is your
video is going to be bad, but understand that it
can only get better. Tip number two is to not
worry if you mess up now, this is exactly why
we edit our videos to get rid of the mistakes
so that if we do mess up, we don't have to go
all the way back to the start of the
video and just start filming from the beginning
when you're filming your first video and maybe
you're going to fumble a line, the likelihood as
you will I do it on every single video I make. Take a break, go
back to the start of the sentence where you messed up and just start
again from there, we'll be able to delete
the bad bits in the edit. And tip number three
is to remember to smile and be extra
energetic on camera. Because one thing that they
do say is that a camera zaps around 20% of your energy when it actually gets
played back on video. So smile, be energetic, be passionate, and be as confident as you
possibly can be. Alright, So now that
we have all of that, what I'm actually going to go
ahead and do now is film my first video for
the gaming channel I created in Module four. And all I'm going to do
is plan out my hook, put my free value points in. And what I will then finish
with is my call to action. The video I'm going to
film is going to be about my top three FPS video
games of all time. And you're going to see
the raw uncut version of that in our next
module where I'm actually going to go
through the quick process and editing out all
those bloopers. So good luck we're
filming yours. What I'm going to do
now is grab my iPhone. I'm going to ditch
this professional setup and I'm going to go with my cheap recording setup that I talked about in the
previous module. And I'll see you guys
on the other side.
11. How to Edit Your Video: Cool, So I hope the
filming went well. As I mentioned before, if you
did mess up, do not worry. I still mess up
every single time I film a video even
after three years. And so does everybody else, which is why it's YouTubers were actually quite lucky because we can afford to do that
with the power of editing. And that's what today's
module is all about. And what I'm going to
simply do is perform a really basic edit on the
video that I just filmed. I also messed up a
couple of times as well. So you'll be able to see
may actually doing that. But one thing I do
have to say before we jump into the
laptop screen right now is that when I do edit my current videos on my
actual YouTube channel, I of course go a lot more
in depth with the editing. But this class is all about just getting started, just
like the filming. You can learn more about
editing as you go. But today this just
stick with Free Basics and that's going to be
cutting out the mistakes. Throwing a title on
your video as well. So you can give some texts
to the users and throwing some images up on
your screen as well. These are really basic
concepts of editing that most YouTube is using
all of their videos. But before we actually
go ahead and do this, we're going to need
an editing software. Now the one that
I'll be using in this tutorial is one that's
called Final Cut Pro. Now, this is a paid
software that you can grab. However, no matter
whether you are using a Windows or a Mac, there will be a free software
for you and the concepts in this tutorial will be the same across whatever
you decide to use. If you have a Windows computer, I believe the free software is called Windows Movie Maker. If you have a Mac, you can use iMovie. If you do have final
cut, then that's great. But if not, do not worry, everything we're covering
in this tutorial can be done on any
editing software. It's all going to be
very basic stuff. It just might be a
different shortcut which you'll have to work
out as you go along, but it's all really basic stuff. So having said that, there's getting to the
tutorial, alright, so what we have here is
Final Cut Pro for the Mac, you can only get
this program on Mac. But like I said, if you're using any other kind of video editing
software on a computer, whether it's Windows
or Mac, it's going to look very
similar to this. And all of the
concepts are gonna be pretty much the same. But one thing that you'll
probably notice this common is they'll have
our preview window. We've got our files on
the left-hand side, and then we've got
our main thing, which is our timeline. Now, one thing that I
must actually add how to get media into this timeline, it's very, very simple. You can go over to your
Finder. Over here. You can grab your image or
your media, your video. In our case, you
can simply just, let's just try this one. There we go. We want it
to drag something name. We can drag it
into our timeline, knows our mouse from
our previous module. We could try and do the movie. Now, there you go. We drag our movie in. As you can see, it drags
it into the timeline, but we're obviously
not going to need that because we've
already imported it. So let's go ahead and delete that and make this
full screen again. So as you can see, we've got our video that I just filmed literally
just a second ago in front of the window there with my iPhone until the quality isn't going to be as good
as the professional studio, of course, but like I said, you don't need to
worry about that too much when you're first
getting started. So what we're gonna do is go through three main concepts
that you can do on all of the editing
softwares follow along with me and it will
all make sense. So the first one that I want
to talk about is the cut. Now this is just the simple
cup which you can use to go through your entire video and just get rid of all
the bad pieces. So one thing I did was I messed up loads of times in this video, I've got lots of
things to cut out. I'm going to show you how
to do that right now. So let's play our intro clip, guys and welcome back
to FPS game has corner. In today's video, I'm going
to be giving you my top free FPS online games
of all time now, I've been playing FPS games for a long time now think I've played some good ones and I'd definitely buried plates
and backgrounds as well. So as you can see, I completely messed up there. So what I did was I just took a breath and I came back
and I filmed the next line. So let's go ahead and find because you can see there,
I've just made a mistake. So I'm just going to just letting you know as you can see, I've just made, all I'm going to do
now is either use a shortcut or I'm going
to use the actual tool, the shortcut to cut
on Final Cut Pro. It might be a little
bit different on the other softwares
is control and B. And what you can see that does, is that puts a little cut
line in the timeline. So if I was just to go
ahead and undo that, the other way that
you could do is come over to this toolbox over here and click the blade
option from there. Or you can do is go ahead
and click the line. And once again, it adds
that cut inside there. So what you can
then essentially do is go all the way to the
point where you messed up. So what I did was I
looked at this line, so I started this line
not going to waste. I started with a
so I'm not going to what I need to do is go back and look
at the first credit, definitely buried plates
and bad ones as well. So I don't want to have the SOA now because I've always
I'll be saying so twice. So I want to stop it just before they played some backgrounds as well. Around about there. So we do control Beta cut it. Well, I'm going to
do is I'm going to delete this little section here. I'm going to delete
this section here. And as you can see, our two
clips have now joined up. If we play it and we're
not gonna have any errors, and it should just
naturally flow through to my next
sentence, give or take. Definitely buried plates
and backgrounds as well. So I'm not going to
waste any more time and I'm going to jump into, it's not the smoothest right now what we can
actually do is go in deeper and refine that
even more so we can get that straight in right there. We can play that runs as well. I'm not going to waste any
more time. There you go. That is simply the cut. So what I will simply do
from there is go through my entire video and I will
just cut out all the mistakes. So I'm not gonna
do that right now. I've always been here
for a little while. What I'm going to move
on to next is adding a title and tier video to give you that text
representation. So we can go back
to this clip here where we actually introduced
the video and what we want to do is frozen text along the bottom part of the screen saying exactly what
the video is about. So let's go ahead
and type right now. I've been playing FPS
games for low back, too good to be giving you my top three gamers corner in today's. So what we want to do
is when I actually say, I'm going to be giving you my top three FPS
games of all time. That's where I want to
throw to text just to give the viewer that
visual representation. So on Final Cut, what we actually have is a text icon in the top
left-hand corner here. And then what I'm going to
want to do is I'm going to want to go and
click Custom Tech. So if I go and click that, and then all I'm
going to simply do is drag it onto my timeline, onto that red marker, which is where I
want it to start. So what we can actually
see is on our screen. And if we make this
a little bit bigger, actually, we can see we've got this thing
that says title here. In fact, it's fitness like that. Perfect. So we've got this title here. Obviously we don't
want it to say title, so we can then go ahead
and double-click it and then we have options to
customize all of our texts. So what I want to actually do
is call this top free FPS, not GPS FPS, games of all time. That's the title
we want to write, but obviously we
don't want it to have it right in the
middle of my eyeline. That doesn't look
very good and I'm not too keen on the text fonts. So what I'm actually
going to do is go and pick one that I like
a little bit better. So we're gonna go for inter
and then we're going to make this as bold
as we possibly can, which I think is black. So there you go, It's
nice and nice and bold. And then what I'm
going to do as an extra is add a drop
shadow to that, just to make it stand
out a little bit more from the
lighter background. Perfect. Now, of course, we don't want that in the
middle of our eyeliner and we actually probably want to make that a little bit bigger. So what are first thing I'm going to do is I'm going to go ahead and I'm going to click
on this button right here, which is the transform button, which basically means I can move this around wherever I want. Once I've clicked
that, you can see that it's selected our text. If we make sure we go ahead and select our text down there. And then all we can
simply do is just drag this down to the bottom to
get it out of our airline. Then if we want to make
it a little bit bigger, we can just scroll up on the left-hand side
here in Final Cut, Like I said, it's gonna be different for all
of your software. The features are
definitely going to be there and I'm just going
to simply make it bigger. So it just takes up
the whole screen. So if we go, That's a little bit too big. There we go. If we now go
ahead and play that back. Yes, game has corner
in today's video, I'm going to be
giving you my top. Probably haven't timed
that quite right there. As you can see, the texts come before I started saying my top, giving you my I start
saying it there. So all I simply do is
drag it up to this point. In today's video, I'm
going to be giving you my top three FPS online
games of all time now, I've been playing
FPS guy, right? So the next thing we want
to change is that that's probably lasted a little
bit too long than we want. We want to have it
finished after we've actually finished saying this,
just play it back again. And it's guitar
point where we stop our title games of all time. It's about there. So
all we need to do from there is the same as
what we did with our clip. We make sure we select the title and then we just
go with the Cut option. So we go Control B, we use the blade and
then we just trim off by deleting the last
bit that we need. So let's go ahead and
play that and that should run relatively smoothly, giving you my top three FPS
online games of all time. Now, I've been
playing this game. So that's how to do a basic
cut and a basic title. So you can get really
creative with these says, you can add loads of
different effects. You can add transitions. I'll just show you a
quick example right now, if I wanted this text to come in from the side or from below, I could add in a slide
transition to this. So if I just add that in
right there and then we just modify this to make sure it slides out of the screen, instead it back in, we
can then play it again. In today's video, I'm
going to be giving you my top three FPS online game. So it just gives it
a little bit more movement into the
screen in a little bit more of an animation rather than just the textures
popping out of nowhere. So that really good. Like I've been
saying constantly, these are just basic tips, but if you can just
get these right, and if you only just use these. You can definitely put out a
respectable YouTube video. So that's the title. That's how to cut this. Now, add some images just to make it a little
bit more engaging. So what I'm gonna do it skip on my edit to the point
where I mentioned a game. And what I'm gonna
do is go to Google, download an image of
the cover of the game. I'm going to slide that in with my transition, as
I mentioned it. And let me go ahead and
find a place where we can start this freaking game, guys, I would play. I'm not going to waste any
more time and I'm going to jump into the list
with number three, which is Call of Duty, Modern Warfare two now, alright, so we want to go ahead
and find an image of Call of Duty,
Modern Warfare two. So let's get our starting point again into the list
with number three, which is we go there. We can always just
put a marker point on our timeline as well. If you just go and press the
keyword m using Final Cut. Remember that we'll actually put this little blue thing here, which is a marker points
so we can actually remember where we need
to put our image. But let's just go ahead
over to Google quickly. And this grab an image
of Call of Duty. Call of Duty,
Modern Warfare two. There we go. Get an image. There we go. That
seems like the one that we will use to seeing. We can save image as and
save it to our desktop. So let's come up down there. And then all we need to do, each dragging onto our timeline. Once we've dragged it
onto our timeline, will make final figure again. Now of course, we don't
want this coming up in the middle of the
screen because they're completely blocked out my face. What we want to have it
coming up on the top right or top left-hand
corner a little bit like how they present
the news, right? First things first, we probably want to
make this smaller. So once again, we can
click on the image, we can then click on Transform. Then we can actually go
ahead to these blue dots in the corner and we can drag them to make it a
little bit smaller. From there, we can click on
the middle of the image and drag it wherever we
want on the screen. So let's in fact, it's nice and plane over here, so it's a nice contrast. So let's go ahead and
add it over there. And why not go ahead and add that transitioning
against it slides in from the
left-hand side so we can go ahead and click
the slide transition. We drag that onto our new image. Let's go ahead and play that into the list
with number three, which is Call of Duty,
Modern Warfare two. Now today go a really,
really simple concept, but something that
goes such a long way in terms of just making your content look a little bit more professional and a little
bit more engaging. Now, you can take this even one step further with what
we like to call B-roll, which is essentially just
clips and footage playing over top of me actually speak until I tell you
what in this lesson, it's go ahead and add that
as a quick bonus as well. All right, cool. So what I've done here is I've ripped some footage of Call of Duty Modern Warfare two
from a popular YouTuber. He gave his name
is Ecoli espresso. And basically all I've
done is once again, I've dragged it
into my timeline. But one thing that you
can see is that it's also dragged it in
using his audio. Now, we don't want the
audio of the game playing over me speaking because that's
going to sound quite bad. What we can do is
we can right-click on the cooler duty
audio clip here. And what we can select is
something called detach audio. You can just turn it
down if you want, but I like just to get rid of it completely so we click
the Attach audio, we then select the
bit of audio that's been detached, and
then we click Delete. Then all I'm going to
do here is I'm just going to line it up a little
bit closer to my image. What we're going to see, you've already just seen
a sneak peek of it. There is this video
clip of Call of Duty playing whilst I'm actually talking over this game-playing. So let's go ahead and jump back to the list
with number three, which is Call of Duty,
Modern Warfare two. Now, this is again that of course I played a long time ago as it was the first
major release after the breakout color duty, which I would say it
was called a duty for. Right. So there you go. I've added some B-roll on top
of me talking now, look at the difference in engagement that's
actually going to create, rather than just
me just sitting on camera actually just
talking about the game. People want to see
the game, don't ne. And another good
thing about this is if you don't have
a professional setup, you can use more B-roll. You don't really have to worry about being in the
camera as much. So if you're not confident
and being on camera, you could just do
some voice-overs. So you could do the
whole video of being B-roll and you could just
do a voiceover on camera. So you don't even have to be in camera in a scenario like this. So yeah, that's some really
basic editing concepts. We've got the standard cut. We have got adding titles. We've got a couple of
transitions in there as well. And then we've got adding
images and B-roll. What I'm actually
going to do now is go ahead and complete
the rest of this edit. So I'm ready to
upload it to YouTube. And I will see you in
the next module where we talk all about just that.
12. Uploading to YouTube + Thumbnail: In this module,
I'll be taking you through the step-by-step
process on how to upload your first video to YouTube suggests to recap
on the previous session, we've now filmed our video. We've edited it to remove all the bloopers and we've added some engaging images and texts and little bit
of B-roll on top. We've checked the video
for any further mistakes, and now we're finally ready
to put it to the world. And where we want to
start this off is back on our YouTube channel
on the home screen. And there's gonna be a
couple of ways that you can actually start
the upload process. Now, if you've never uploaded to YouTube video before,
as you can see, we've got this image here with
this upload a video to get started with the upload the
video button down below it. Now, once you've
added one video to your channel and you're
gonna go to add another one. You can actually go up in the top right-hand corner
here and click Create. And then you then have
the same option to upload the video both
at the same buttons, take you to the same place. But in this case, because
it's our first video, I'm gonna go ahead and click the Upload Video button here. Now, the first thing
that's going to happen is that it's going to bring us
up this upload video screens. Now we've got two choices. We can either drag or drop our video into this
arrow right here, or we can just go ahead
and select the file. So what I'm gonna do
is click Select Files. I'm gonna go to My Documents tab because that's where I
saved my new upload. And as you can see, we've
got top three ifs games, which I created
just a while ago. So I'm gonna go ahead
and click that. And then I'm gonna click Open. And once you do that, that automatically starts
off the upload process. So if we have a look
down the bottom here, it says uploading 3%. And it tells us roughly
how long we've got left. It's only got four minutes
on this one because we did a relatively short video. Now, the first thing that we have to do in this
upload process, because it's gonna be
quite a few things is we need to come
up with a title. Now, we need to come up with a title that is going to
appear in the search. We don't want to
have it too long. It needs to be easy to
read, easy to understand, and clear on what we're
actually going to be saying. In this case, I'm
just going to go for the top free FPS
games of all time. And I'm gonna put that
in capital so that stands out a little bit better. So hopefully we can hit
the search results. We can pick up a few keywords there and all of
that good stuff. So that's the title, like I say, keep it
nice and simple. Do not go ahead with
saying, Hey everyone, this is my top
three FPS videos of all time video or
anything like that. It's just going to not
do very well at all. So just keep it nice, short and sweet and
you will be fine. Now, next up is the description. Now we can be a little bit more free with the description, but I like to write about
two or three sentences, just giving a little bit more
detail about what's to come in the video in some
keywords in there as well, because they can definitely
get picked up from description for when people
search for the content. And then what I like to leave as a couple of links
of some call to actions may be another video that I've made in this
case, we haven't got one. Maybe a link to subscribe to the channel may be
a link to a product that we may be want to
promote on a channel to maybe a little bit of money. But in this case it's gonna
be our first ever video. So we're just going to
write a small description and we're going to
leave it as that. So this guy was something
like In this video. I share the top three
FPS games of all time. In my opinion. I believe, again, should not be just
based on it gameplay, but also based on the
emotional experience. It brings you, but
you get the point. You want to keep
it nice and short in terms of its description. And then if you do
have any links, then you can throw
them in there as well. For example, if we just take
a look at this guys you're about and you can see that he's gone very heavy on his link. So what you can see, he's got his little blurb about
what the video is about, and he's got some free stuff
that you can go ahead and grab that will likely
be affiliate links. And then you've got links
to his social medias is discord there. And then you've got a disclaimer from this guy as well
because he talked about financial products and financial advice and
all of that stuff. So you can see it's nice and basic is not like
a massive essay. He's written just a couple
of lines about the video and then some call to
action links that you may refer to throughout
the video as well. So that's the description. Next up is the thumbnail. Now this is actually really important and some
may argue that the thumbnail is actually more important than the
actual video itself. Let me just switch back
to the main screen for this because at
the end of the day, if your thumbnail
is not enticing enough to get that viewer
to click on your video. It doesn't matter how good your video is
actually going to be. If no one's ever clicking on it, or no one's ever tempted to
go ahead and click on it. You're never going to get anyone viewing that content
in the first place. So one thing that I'm
going to be doing is making a full course
on thumbnails and how I get people to click on my thumbnails without being
too what we call clickbait, where basically we're
promising something in the thumbnail that we're not going to deliver in the video, you still need to
deliver the promise at the start of the video on
the title and the thumbnail. Thumbnails are super
important and I will create a class on this dedicated
to this in the future. But for this video,
we're just going to keep it nice and basic. What we're gonna do is
head back over to Canva. If we just switch
over right here, which we used in our
previous module, and we're going to just design
a thumbnail from there. So just once again, by the way, if you type into
Canvas search YouTube, thumbnail, we've got
our preset dimensions that we can go
ahead and click on. So let's go ahead
and click on that. We can then go ahead and
select gaming from our theme. So let's go and find gaming. We're going to select gaming, and then we're gonna
click free as well. And a good exercise that I'd
like to do is if you wanted to go ahead and use
a canva template, go ahead and pick the one
that stands out to you the most when you've just
taken a look at it right now. And for me, it's got to
be this one right here. So this yard band, it's one. I'm going to go ahead
and click on that. And what we're gonna do is
we're going to design and just customize this thumbnail based on this little design here. So we haven't got to start completely from
scratch for this demo. But one thing that I do highly recommend is when you are
looking at your thumbnails, really spend a good
amount of time on this. Because like I said, this is the first thing the viewer will say and decide
whether they want to click on your video or not. So having said that, we want to go ahead and
make this stand out, and we want to make sure that
we're telling the viewer exactly what we're gonna be
talking about in this story. So the first thing that
I'm obviously going to do is change the text and
what I was thinking, oh, by the way, with text, you really want to
keep it at a minimal. Do not put your whole
entire title in there because it has to
get that really small. And on things like
mobile phones, which is where most
people watch YouTube. Never gonna be able
to see that text. That is, keep it nice
and bold, nice and big, and maybe just three
or four words at max. So luckily in our video we can definitely do that
because what I'm going to do is I'm going to go with top free FPS games
just like that. With the S. What I can actually do is make
this text a little bit bigger to make up as much
screen as we possibly can. And we've got a small
little line behind there which we can go ahead and delete because we
don't need that. Now, I'm not really
feeling the blue. So the first thing that I'm
going to go and do here is change the color of
all of this text. And I'm going to go for
something like a red for danger. Now that stands out much better
than that kind of Ti Li, aqua blue that we
had previously. Now, yeah, I really liked that. I think that really stands out. It's nice and basic is
nothing too special, which is good, simple as better I think, especially
with thumbnails. The next thing that
we need to changes, of course, this image. Now this image doesn't
represent FPS gaming at all. I don't really know
what that represents. So let's go ahead and
click Delete there. And what you can
see here is that this is a Canada place holder. So no matter what
image we put in there, it's going to be in
the shape of this. So this is really good. So let's head over to Google and let's go ahead
and find our image, which is one that I
picked out earlier. Which is this one right here, which I think is really
good because he's got freely FPS games on it. And you can't really tell
exactly what they are unless you're a kind of a massive
fan of each one of them. We're gonna go ahead
and click Save that. I think I already saved
earlier, yes, I did. And once that's downloaded, we're gonna head back to Canva. And all we're going
to do is drag this into our camera project. And then we want to click it, and then we want to hover
it over that placeholder. So as you can see, it
then puts the preview up there and then when we
release, it, pops it in there. Now, when we take
a look at this, this is not framed the way we
want to frame this picture. So what we're gonna do is I'm going to double-click on it. And then what we can
then do from there is we can move this about a little bit so we
can make sure that it fits a little bit
better in the frame. So let's go ahead and
take a look at that. Now that's much better now I think I need to go just a little bit further to the left TO
his head just fits on there. Yeah. I really like that now
it's up to us if we want to keep these play
buttons down here. Fast-forward wherever they are. But there you go. That is a really basic thumbnail
that really stands out, is going to catch someone's eye. And when you look at
that with the title, they know exactly what they're
getting from this video. So let's go ahead
and download that. That's now downloaded
over there. So we're gonna head back
to our YouTube channel. We're going to click
Upload thumbnail. And then once again,
It's going to bring us up our file system. We're going to want
to go to downloads, and then we're going to go
ahead and click our fun now that we downloaded and
we're going to click Open. And then what you can see here, it's popped up thumbnail into
the YouTube Upload screen. And in just a second
it'll come up here as well as a preview. Cool. Next up, we have
playlist now on YouTube, you can organize all your
videos into different playlist. So if you were a gaming channel, you could go with an FPS
playlist and you could have an animate playlist and you can have a sports game playlist. So in our case, we're actually going to
create a playlist for our top freeze because this is going to be a regular
feature on our channel. We're going to pop
that playlist there. We're gonna go ahead
and create that. And then we're going
to click on that. So it goes into that
playlist. When we upload it. Playlists are really good
for keeping people on your channel if they want to go ahead and click your playlist. Because what's going to
happen is your videos are gonna constantly keep
playing after each other, even when one finishes. So it keeps them on your
channel, which is really good. Now, the next part is very
much something that you'll have to decide for yourself wherever it's made
for kids or not. I'm going to put no, it's not made for kids on
here because all of these games are
probably going to be 18 plus or something like that, or maybe 15 plus. So I'm gonna put no, it's not made for kids. And then the final
bit on this page, you want to go ahead and
click Show more because then that's going to lead us
to our tags section. Now, tags used to be quite an important part of YouTube in terms of
getting discovered. But as you can see by this
message here, it says, tax can be useful if content in your video is
commonly misspelled. Otherwise, tax play
a minimal role in helping the viewer
finds your video. So I don't like to spend too much time on putting
some tags in here anymore, but I'm just going to for
the purpose of this video. So we're gonna go
with FPS games as go with call of duty, Halo Reach. We're gonna go
with Apex Legends. These are all FPS games I
mentioned in the video. We're going to go with
Xbox. Playstation. You get the point. Wherever your videos about, just put a couple of tags. That, and another good thing I like to always do is always put the channel name
in the tags as well, because maybe that will start
putting it out to YouTube. Probably not, but it isn't
always worth the shell, so we'll put that in there. And then from there
we've got a lot of stuff that I like
to leave blank. I don't really pay too
much attention to it. You can go ahead
and fill these in, but it's not really
going to make too much difference
to your channel. You can actually change
the category right here. So we're gonna change
the category to gaming to once you've
actually set it once. I believe it will stay as the default for
your future video. So it might be worth going
ahead and doing that. And then at the bottom here, you can actually decide if you actually want to
have comments on the videos or
anything like that. But once you've done that, you can go ahead and click Next. And then from there you
get a couple of options. You can either add
an end screen. How I spoke about this
in the earlier model, you know how I was
saying we wanted to have a call to action at
the end of the video. This is where you could go
ahead and put another video of yours on the screen for
the user to click on. You have to do over here
is go ahead and click Add. And then you can select
the video that you want to promote at the end
of your video. Now in this case, this is our first ever video. We're not going to actually have a video of asked
to add on the end. Maybe we can do it
in the next video. But for this case, I'm
just going to skip that. Then we have cards which is basically the
same as n screens, which are videos
that you can pop up throughout the video
whilst you're talking. So for example, if
I was talking about gaming and honest
dimension, Xbox, I could say, well, why don't you check out my video on Xbox, which are leaving the
card at the top here. And then you can go ahead
and add that card and pick where you want that to pop
up in your video as well. So that's n screens and cards. We're not going to add
any of those in there. We're just going to go
ahead and click Next. From there we have this
new feature that you choose recently introduced,
which is check. So basically YouTube is just
using their algorithms to actually just check
your content just to make sure there's no
copyright music in there, or anything offensive or damaging or anything
illegal in your video. They've got an algorithm
that checks that, but in our case it
says no issues found and we're good to go to
the visibility section. We've got a couple
of options here. We can either save or
published this video or we can schedule it so we can choose a date in the future for
this video to come out. And then when you
save or publish it, you have a couple of options. You can either just
publish a private video, you can publish an
unlisted video, or you could publish a
public video which is obviously going to send
it out to YouTube. Or if you did want
to schedule it, you could go ahead
and click Schedule and then he's simply just pick a date in the future when you want to
schedule this video. So what I'm actually
going to do is I'm going to publish this video. I'm going to publish
it as private, so no one's going to see
it as of yet in case I do want to go ahead and
make some more changes. But let's go ahead
and click Save. But that is how you
upload your video. As you can see, we're currently
private at the moment. Or you need to do, like I said, is switching over from
private to public. And then it will be available for your friends, your family, and people all over the world to go ahead and
watch your video, which is actually
what we're gonna be talking about in
the next module, which is different ways to promote your
video at the start to get that initial traffic flowing through into
your YouTube channel. So I'll see you there.
13. How to Promote Videos: Welcome to this
module, which is all going to be about
video promotion. Now, we've done the hard work, we've gone ahead and
we've plan, we've filmed, we've edited, and then finally, we've uploaded our
first-ever video. And if you've been following this step-by-step
and you've done that then massive well done to you, that's
absolutely amazing. However, as we are just starting out on YouTube
and we have no fans yet, the best thing that we
need to do to get our video moving is using
our friends and family through
social media to get those initial views to give our video a little bit of momentum. Okay, so what I'm going to demo to you right now is everything I do in the first hour
of releasing a video. So as you can see here, if you're familiar with
this kind of screenshot, this is from
Instagram and this is the first place where
I go to promote my video because that's where the majority of my
audience is right now. So what I basically do is I go over to an
Instagram story. I take my thumbnail
from my computer, I'll pop it in right there. I won't include
the title because this one is actually quite
an intriguing thumbnail. Actually want people
to go ahead and click. Whereas if I were to say
what this video is about, they may not actually
go ahead and click. So what I've decided
to do with this one is a new YouTube
video out right now. And then as you can see down
below, I've left there, Click Here button where they can click it and it'll take me
straight to the YouTube video. This strategy does really work, even if I can just get five
or six clicks from this, it's five or six clicks. I not going to get our
views that I'm not going to get if I wasn't to
promote it anyway. So that's the first
thing that I do. And then what I then
go and do his head over to my Facebook profile. So I've got to Facebook
profiles, one for my personal, one for my business with both
has a following on there. And I've done something
very similar here. But the main difference
between this and the Instagram post is that as
you can see at the bottom, I've put link is in
the first comment. Now the reason why I've
done that is because Facebook picks up
any links that you put in your posts and
they significantly reduce fuel reach when you're
actually posting them. So one thing I like to
do is hide the link in the comments wherever it
works or not, who knows. But one thing I definitely
know is that every time you post the link in
your actual post, Facebook doesn't
really send it out to as many people from there. I then head over to
my Twitter account. As you can see, I've got a
lot of social media accounts, so you don't have to worry if you haven't
got all of these, but obviously the ones
that you do have, go ahead and post
them onto them. And once again, you
can see this is very, very similar to the
Facebook posts. Once again, even if it
just gets a couple of views that a couple of views that would
have never have got. And then finally, what I do is send that over to
my e-mail list, which I built up over
the past few years. Once again, if you're
first getting started, you probably won't
have one of these, but this is definitely one thing that you can go
ahead and build up using your call to action
at the end of your video. So this is what I'll do
in this normally gets me around 20 to 30 clicks
every time I send it out. I'm sending out to
a lot of people. But once again,
that's 30 views from the start that I'm having
boosted on my video. And it's just going to give it that little bit more
chance of getting recommended by YouTube or maybe even getting
into the search. Now, if you're just starting
out and you do not have a following one option that
you could go ahead and do, which is what I used to do it A-star is actually just going ahead and sending a group text to a load of your
family and friends. Because if you're starting out on YouTube at
the end of the day, you would hope that your family and friends would
actually support you and definitely be interested in your
first ever video. I know when I posted
my first ever view, I've got a massive boost because people saw me on camera
and they want to see what I had to say and then did drop off a
little bit from there, but make sure you're
not afraid to let people know that
you're on YouTube. You can get those initial
views at the start, and it's definitely going to help you get the ball rolling. But this is very much
simple things that I do. I do it all within
the first hour. It's not massively effective. But like I said, if you're
first starting out, every single view is
going to count and make sure that you are promoting
as much as you can, but also bear in mind you do not want to get to
span they with it, so just keep that in mind. Okay, So that's my
exact strategy, what I use for social
media promotion of my YouTube videos.
Keep it simple. Don't be too spammy, and I'll see you
in the next one.
14. Final Words: All right, We've made it, we have created our Channel, filmed and edited our
first ever video, and then we have
finally uploaded it. I really do hope you
enjoyed the process for me. Youtube has been by far the best thing that
I have ever done. And I can assure you that
if you just stick with it, things like being
more natural on camera editing and knowing
what to talk about, what just get easier
as time goes on. Now, as we mentioned way back
at the start of the class, the project for you was
to upload a screenshot of your channel or maybe even a link to your first ever video. So please feel free to go ahead and do that as you please. And I will look forward to checking them out
as they come in. But having said that, I
would like to thank you for joining and completing
the course with me. I would highly appreciate it if you did find this
useful to leave me a review and follow my
Skillshare page as this is my first of many classes I plan
to upload on the platform. Finally, if you did have any
requests for another class, also don't be afraid
in suggesting me one and I will see
what I can do. But thank you once
more and I hope to see you sometime in
the near future.
 Christos Fellas, Digital Content Creator