Transcripts
1. Introduction: head over one. My name is a Rafi on. I'll be your instructor in this class. This class is a quick start to teach you the most basic information to help you to start playing around on. Start watching other tutorials online. I'll assume you are new to Houdini and never opened it. So what is Houdini? Houdini is a three D application like Belinda or Cinema four D, and it's completely free for noncommercial users. Houdini is perfect for visual effects artists on technical directors. With its robust particle system on very powerful dynamics environment, you can create very high quality effects that other three the application can't. But Houdini is complicated, and it takes very long time to learn because it's different than other three D applications . The court off Houdini's procedural. So you are connecting notes together to create the effect you want. This class is for those who are completely new to Houdini had never opened it. So let's get started
2. Quick tour: When you open Houdini for the first time, the user interface should look like mine. Here in the video, you don't have to know everything in Houdini in order to use it. So let's take a look at the user interface first. So here you have the shelf and you see, I have a lying there so I can click on that. I'd move that as you see. So in this part I have static objects like creating box sphere and so on. And I have the characters you can create already characters and you have texture on. You have to rains. You have cloud at sewn on. In this part you have the lighting on all these simulations you need, for example, the grace. This is for creating sand particles, region bodies, flutes like ocean and you have the ocean shelf. We have the lover and so on. We have the pyro effects for creating flames, explosion and so on. You have a lot off tools there, So this called tools. So this is already presets for you. So instead, off going and creating 10 or 20 notes there in the network litter, this is going to create that for you. So let's take a look at the sphere. For example, If I want to create a sphere, I'm going toe click on that on now in the View Port, my mosque. In the report, I can hit enter on the keyboard to create the sphere. So, as you see, the shading is flat. So if I come over here, I can change the shading more toe high quality at normal quality There on. You can move it by selecting the move tool, and I can move that I can rotate that on. I can scale that. Let's go ahead and create another thing. Let's create a box. So let's click wants on the box on my mouse in the view port. I'm going to hit enter on the keyboard. So now if I go ahead and select the sphere, I cannot select that because I need to go to the selectable on Select the Sphere. So now it's working. But if I go to the move tool, I cannot select that on. The reason is because we have the secure bottom there, So if I click on that now, Houdini will allow me to select any object I want, even if I am selecting the move tool. So this is very important. Notice that on here in the network editor, As you see, we created the sphere and we have the box. So this called container. So if you dive inside that you have another note called Sphere so you can create multiple objects in one container. So if I go back, I can click there. Now I am outside the container. I can go to the box container on double click on that toe. Dive inside that and I have a box. And if I go there and carry Condi object as you see, I am outside that and there you see, we have the Balu color. So if I click on that as you see, I am turning the visibility off the sphere in the view port. I can click on that again. Now I am showing the sphere and here you see the green color. So if I click on that, I am going to turn that off. So now if I go ahead and select these feeling the view port as you see, I cannot sell like that because I turned off the green select able bottom there. So if I can recall in that now again, as you see, I can select it again. And this is your parameter editor. As you see every object I select in the Net or editor, I get the parameters off that object. So if I dive inside and select the sphere, I get another attributes for the sphere. So let's go up one level by clicking on object. Now let's take a look how to navigate in the view port. So if you hold out on the keyboard on lift most bottom, as you see I am rotating the camera. And if I hold again Ault on right Mosque Rick and Dark as you see I am, zoom in and zoom out. And if you hold out again at middle most button, as you say, I'm tracking the camera or I am moving the camera. Let's say I am far away from this fear, so I can simply select the sphere on hold space and G to frame the sphere to the camera. I consider the box space and G. As you see, I framed the box to the camera. Now let's see how toe play with the interface. So if I click there at the middle on drug, as you see, I can resize the windows on. I can click again and drag to resize that if I click once there as you see, I am flipping the windows on here too. If I click once I flipped that and if you missed up with the interface, you can simply go toe built there And you can goto reload. Corin, this stop. So there's going toe reset the workspace for us. So if I click on that as you see, everything is as it default. So see you in the next listen.
3. Creating objects: Let's continue. So now if I want toe delete the notes in the network editor, I conceal like them on hit delete on the keyboard to delete that, as you see, I can hit control and Z on the keyboard toe. Undo that. I consider like them from the View port on. Delete them, too. So let's go ahead and open using by going toe file on Click New Aunt discard at new and in the user interface, you can collapse the shell. For example, if you click right here as you see I am hiding the shelf, I can hide the tools there. I can hide the labor and so I can hide the display options there, too. So now let's see how we can create objects in the network editor, not from the shelf. So if I come to the net or editor on my mosque in the network editor, if I hit that on, I can type geo toe, create a container. And now if I dive inside that as you see, it's empty. So if I hit again, I get a tap menu. I can type sphere. As you see, I created a sphere. I can hit up again on type. Let's say box on, I can tap again. We can type greed. So, as you see, we just seeing the sphere in the view port. So where is the box? Or the greed on the box is not inside the sphere. So if I go ahead there on the display geometry on, turn that toe white frame As you see, I have no box in the sphere. So let's go ahead and turn the shading more smooth shaded and you see, we have to fill axe. So the outer circle, the blue circle called display flag and the purple circle called Render Flag. So if I come over here and click on this side on the box on the display, as you see now, I can see the box in the view port on again. If I click there, I can see the greed now. So let's say I want to display all of them in the view port. So how I can do that? So we need to create another note called merch. So if I hit tap on the keyboard on type merge on, this is the merchant Hold on said that there So now I conduct the are put off this fear and connect that to the merge on again the box to the emerge on the agreed to the merge. So now we need toe move the flocks to the merge. So now, as you see, I can see all of them. So if I go to the wire frame, as you see, all of them are there. So let's go ahead on change that toe smooth, shaded. Now let's see how to disconnect the line so you can sell like them on. He did it on the keyboard, or you can right click and choose Disconnect. Or you can hold why on the keyboard and left most button on drug. You see this red line now disconnected, so let's do it again. It's undo that hold Why on the keyboard on lift, most bottom on drug on the line to disconnect that as you see or we can do it in another way. There is really funny way in Houdini to disconnect the notes, so let's see it. So if you select the emerge note on, shake it right and left as you see, I disconnected that really, this is very cool. As you see I am shaking that. So now let's select all of them on. I can creek on the outputs on drag and drop them on the emerge as you see on Let's see how to move the sphere in the view port without using the move to. So if I had tapped there on type transform And now if I move the transform on the line or between the notes as you see hoodie need connect that for you. So now I consider it the transfer and you see her in the transfer Maiken type any number I want. For example, one As you see, I moved the sphere one unit or if you hold the middle mouse button, you can see these numbers. So now if you move the mouse to the right as you see, I can change the values or toe the left toe, decrease the values. If I move the mouse up, I can change the inclement toe 1 10 As you see, moving very fast. I can change that to decimals. As you see, this is very cool way in Houdini. I can do that on why, too. So if I hold middle, most bottom and now direct right or left. I can move it or I can press the middle most bottom on the translate. As you see, I can change all off them at once. On if I go to the transfer note and if I click here to the left And now, as you see, I am disabling the transfer note. So now the transfer or not is no longer active, so I can activate that by clicking here again on you. Notice this ring. We have this ring there, so this is shortcut for you. So let's say your camera is a little bit far, so really, it's difficult for you to click on the buttons, right? But if you hover the mouse over the note, this ring appears to you. This is very cool way. Instead, off, zoom in and look where you will click. So if I zoom out, I can click on The display, as you see, is the display flag I can. Instead of clicking there, I can just zoom out on click there. As you see, it's like clicking here. You can copy the notes by selecting them on hit control and see on the keyboard and control on V. As you see, I made a copy from the Transform. I can shake it to disconnect that from the sphere and move it between the box and the murder note. So now I can move that there and I can again control and we shake it on, said it there. And I can rotate a that or I can move it as you see there. So now let's go to the object level and let's select the Geo on. Delete that on Let's go ahead and click on the front. So if I click on that as you see now, I have this red rectangle in the view port. Now if I hit Enter, I created the text in the View Port Weaken. Delete that on discrete that from the unit or later. So let's hit Tab, type Geo on dive inside and a tab on type formed, and we have the same results so we can change the form from there. So let's type Houdini on. If I click summer in the Interrogator now it's updated for me. I can extrude that I can hit tap on type fully extrude and it's connected them their ad Move the flax toe. The party extrude to show the result. As you see, we don't see any extrusion yet. We need to go to the distance. You can click there and drag that or you can just press the middle. Most button on drug that on in the back You notice we have a whole. It's very simple to fix that. We can scroll down there and change that toe out. Put back! Turn that own. Now we have the back to I could move it by hitting Tab on Titan. Transform on! Disconnect that on! Don't forget to move the flux There on Dykan. Khaliq there aren't move it up. So this is for this. Listen to you in the next listen.
4. Creating your first simulation: Now we are going to create our first simulation in Houdini. So let's go ahead to the file on Creek or new and it's open, you seem, let's create a sphere. You can create any object you want. This will be the emitter for our simulation, so let's select the sphere on. Let's go toe pyro FX. Here you can create flames explosion, for example. You can create a candle and so on. So let's create a flames. So if I click on that now, as you see, Houdini created some notes in the network. A. Later on, if I go to the object level, you'll notice we have three notes. I'm going to explain that for you in a moment. So let's first go ahead and lady simulation. So if I play you see, we have the fire affecting the view port and you notice Here we have this blue line, so this means Houdini cashing or saving the information on your memory. So let's go ahead and continue that. And now if I go to the first frame on now, if I play that now, it will be play fast because the cash or the information saved on memory, so we don't need toe re calculate that when we go to the first frame. Sodini already saved that own memory. As you see and you notice here we have a very important bottom there. So if I click on that now turns red. So this means Houdini will no longer calculate any simulation in the view port. But if I go back on a play that we still see the fire in the view port, this is because we have the blue line. So the simulation already saved on memory. So let's say I want to remove the blue line so I can go toe Auto dock Network said like that on there, you'll see we have the reset simulation. So if I clicked on that now, the simulation will be reset. But the problem is because we disabled the simulation. Now we cannot reset the blue line, so we need toe Activate that on recent that on then go it on the activate that. So now if I click and play nothing gonna happen. As you see, we have no fire effect. And this is the real time bottom. So if you click on that now, you're time slider will play in a real time in 24 frames per second. So let's go ahead and enable that had Now, if I hit play, we can see the fire again in de Vieux port. So let me explain some notes here for you. So you see, here we have the sphere. This is our emitter. But if you dive inside, you'll see some notes created by Houdini. And if I select the auto dock network on go inside that this is your simulation on Dhere it and dynamic. So everything here is dynamic on this is your pyro import. So what's happening here, the pyro import or this geometry or this container importing the information from the simulation container and displaying that for you and deletes or removes any unnecessary information. So if I go to the auto dock network and now in the smoke object, you can increase the resolution off the fire by decreasing this value. So the more you decrease this value, the more detail you will get on the fire. So let's it that was 0.0 a four. Now, as you see, the blue line turns orange color. This is showing you that you changed some values there. So now if I go head to the back at now, play with any re calculate the simulation. As you see, we get more details on the fire. But this simulation time takes longer. Now to calculate the fire effect on as you see, the fire hits the upper area off the container. Right, So we can make that bigger by selecting the smoke object there at make sure the handle tool is selected. You should see now this red box. So if you could own this red arrow on, move that up. As you see, I am scaled that up on, we can scale it in all direction. So now if I go back and play that no As you see the fire going higher now and it's go ahead on and click on file and new new scene, I can create a sphere again. I can create a smoke. We have the same notes there on If I zoom out there, I can click. As you see, I can see the smoke on the smoke is flat in the view port on If you go there and click on the high quality, even that we cannot see any shadow because we don't have any light, so we can go to the lights on. If I click for example, on point light and hit, enter on the keyboard as a cyclist, delight in the view port. I can move that. As you see now, we have a shadow on in a Houdini. This is really fast. As you see, it's almost in real time. I am moving the lights on the shadows, showing in the view port in real time as you see really great, and you can change the intensity off the light from here to click on file at New on. I want to show you another thing there. Let's create a geometry and hit, enter on the keyboard list, dive insight on great a sphere and create a box, and I can move the box to the right, even without creating interest for note. So if I move that there, I know, let's talk about the flocks. So, as you see, when I click, they're on the display. I can show the sphere right on the box, so let's say I want to show the sphere in the Vieux port. But when I go to the rendering, I want to see the box so we can do that by right clicking their aunt in the flags. I can choose render. So as you see now, they are separated, the blue flag and the purple flag. So now if I go ahead, remember, we have a sphere here, right? So if I go to the render view on Creek Orender, as you see, I can see a box now because the purple flag is on the box. And now let's let's reach that. So if I right click, their flocks are in the flag on. If I right, click there and choose the display flag as you see now, I can see the sphere in the Orender, and if I go to the same view, I can see the box. So the blue circle is for Vieux Port on the purple. One is for rendering on. The shortcut is without right clicking and choosing flax. The shortcut is if you hold the on the keyboard on drag a rectangle or a selection on the box. As you see, I moved the purple flag there t on direct rectangle as you see holding T on drag that and if you hold, are on drugs that you can move both off them. As you see now, let's say I want to see the ghost off the sphere. Let's say I am working on on something on. I want to see a ghost off the sphere without moving the flax so you can click on the second button there and, as you see called template. So if I click on that, as you see, I am seeing the ghost off the sphere in the view port so you can remove the ghost by or the template by clicking there again. So see you another time.
5. Creating your first animation: in this. Listen, we're gonna see how to create very simple animation inside Houdini. So let's get started. Let's go to a network editor on Let's Hit Up on Type Platonic and Let's Dive Insight. So now I'm gonna go toe solely type on, then change that toe soccer ball and you notice the soccer ball is Laurie's. So let's at a subdivide note toe. Add more resolution and smooth that. So let's click here and now we need to add a transformer tap on type transform. Now we need to move the ball up five units. So let's hit five here. Now this. Create the animation. So if you were old out on the keyboard and click on the number five, you see this field turns green, that means you have a tear. You can remove the key by right clicking here on choosing key frames and remove a key frame . As you see, I removed the key from the UAE field. So again, hold out on left most Greek to enter a key on hearing notice the play bar, so the play bar is by default 240 so we need to decrease that we can decrease it here. This is the end off the frame. For example. I can say that 12th and now we have the animation from 1 to 12 on. This is the global time. So we can't do that toe 12 to. So now we have from one toe 12 or you can come over here and click on this icon on Change that toe 12 to on They changed a little bit. The play bar here from the version 16.5. So before this Aikens were here, okay? And they added a couple of things here, so don't worry about them for now. So now let's go. Toe frame six ad. Let's move the ball down. It's like the transfer note, by the way. Sometimes you select the transfer note on. If you click on the move toe, nothing gonna happen. As you see, I don't see the manipulator, So I need to go and say, like the handle tool in order to see that I don't know why it's happening sometimes, So let's move that down. Barely touched the ground when I moved the ball. As you see, I have orange indicator here, so we need to set a key all on left. Moscow Tick at now turns green. That means we said a key here and there's go back toe frame 12 on Let's move that back toe five and again, Out on left. Most critique to set a key, and you can remove the case by coming to the times lighter here or the play bar on. For example, if I want to remove this key, I can right click here and choose. Remove delete key. Sorry, the keys. Okay, in order to delete the key here. So I deleted the key as you see the green. He's still there. It should be. So let's do it again. The case. As you see we deleted the key. Okay, so let's undo that by control and zem. And if you want to delete all the keys, you can just right click here on Choose delete channels. So I removed everything, so let's undo that control ansi at night. If I hit play as you see, we have a bouncing ball on. By the way, the real time is enabled here, so if you disable that on play that, as you see, it's very fast, so you need to click on real time in order to see the animation in real time on. Let me explain a couple of things here, so if you click here on the next frame, I can. As you see, I am moving the time slider frame as you see frame by frame on. If you click here, you are moving it to the left on If you click here, you are moving that to the last frame as you see 12. And if I click here, I move that to the first frame on. If I select the transfer mode because we have keys on the transformer knife, I click here. You see, I removed the times lighter to the next key because we said the key on six. And if I click here, I move the times lighter to the next key frame. So on. Let's do a couple off changed here. So if I come over here on right, click on and choose channels on carry corn isolate in Channel East. Let's see what is the shoot appears this the animation editor. OK, so let's close that and do it again. Channels on Dad Channel East As you see Houdini opens the animation editor. This like the graph editor in Maya. So if you hold out on right, most click and drag as you see I am zoom in as room out. And if you hold out and middle, most click and drag. You see, I am moving the camera. So we need to do couple off change here. You know, the Baldwin false, false, very fast. So we need toe make some adjustments here. If I select this handle at movie as you see this handed connected to the right hander. So we need to break them so sad, like the key on this creek on anti handles. So now when I said like that, I can move that without moving the right hander. So I'm going to change that something like that in orderto make it fall faster. Okay, on disclose that at night if I hit play as you see the ball bouncing and another problem. The first frame is exactly like the 12 frame. So as you see, So this is making some delays. So we need toe change that toe 12. Sorry. 11 on this one toe 11 to So now we don't have same frames. So that's it for this lesson. See you in the next Listen
6. Modeling a cup: in this lesson. We are going to use the curve in Houdini to create a cup. So first off, all I'm going toe speed the perspective, you so I can do that by holding space on DBI on the keyboard to create for views. As you see I'm going to the right view or front view Doesn't matter. So now I am inside the right view. I need to hit space and be on the keyboard. As you see now, I am inside the right view. If I want to go to the perspective, you I need to hold again space and be now I am outside that if you hover the mouse over the perspective, you then hit space and be as you see now I am inside the perspective. You let's do it again Space and we I'm going to the right view space and we So now I'm going to the sheriff Tool there on you can see here we have the curve tool. So if I click on that now, I can create a curve and you see we have a curve container there in the Network editor. So now I can go and grow the curve, so I can khaliq somewhere here on, then one Here, aunt 3rd 1 there on the last one. There on. Finally, I can click there, but as you see, we have the sharp lines. The curve is not smooth, so let's hit. Enter on the keyboard on Let's delete everything Now on this. Do it again. Let's click on Curve And this time I'm going to change the curve type toe nerves. So now I can could take somewhere here on there. As you see now, it's smooth. So on one here at zooming on, let's say I want to stab the point at the center, so it's difficult to write to snap it at the center. But if I come over here, you'll see here we have greed, snap big. So if I click on that now, if I move my mouse closer to the center, the point snaps there, so I will click. Once there. Now I will hit Enter on the keyboard to confirm that. So now if I Let's turn off the greed now snapping two degrees. So now if I dive inside the curve, as you see, we have the curve note there on If I go outside as you see, I don't see the points. And if I go inside that I can see the point. I can still like them on Dykan. Move them where I want and I can adjust them as you see. So now let's go into the perspective. You space and be I know I'm going toe create a revolver note. So in the network editor I'm going to hit tab on type revolved, and it's connect the curve to the revolver and move the flags there. So now I can go to the curve on. I can adjust the a curve point from there. So if I move the flax there now the problem I cannot see the revolve note so I can click on the template there. So, as you see, I can see both off them. So now I can simply click on the move tool on. If I select the point now on move that I can adjust it because no Houdini, as you see it's procedural so I can adjust the curve and go back. I'd make any adjustment. I want toe. So as you see there, so now after we finished, we need toe check off the template on. Now let's extrude to add a thickness to it. So knife or hit up on type fully extraordinary on hit enter and it's connected to the revolve. I know I have the extrusion we need toe increase the distance as you see to get the thickness on. The problem is with the back We have a whole there. So we didn't add the thickness yet. So we need to scroll down on check on output back. So now I have a thickness and again I can go back to the curve on dykan template the politics route Select the curve again. As you see, my points are there so I can adjust them again. As you see, even I created the extrusion. I can go back and adjust the cup as I want. So this is the procedural in Houdini. Very powerful. So that's it for this. Listen
7. Link channels: in this lesson will take a look. How? Tooling different channels together. So you see, I created a sphere object on the box. Okay, so I want to link the sphere to the box. So when I move the sphere, I want the box moves at the same distance or at the same value. Okay, so I can do that by selecting the sphere on coming toe. Translate on, right. Click and choose copy parameter and I will select the box on here in the white. Translate Why? Because these x y z I will right click and choose based relative references. OK, so now, as you see, I created on expression here, or Houdini created expression for us again. So now if I select the sphere on the move the sphere up as you see the box moving with the A sphere. Okay? So I can't go back toe box object on if you could equals here. As you see, I am switching between the expression and the value. Okay, So I would click here and I would creak. Wants here to expand that so even I can adjust the expression. So for example, I will divide this expression by two. So now if I move the sphere on Why, For example, if I move that one unit now, the box will move the have value. Okay, So if I connect here off course, I selected the box. And if I click here as you see, I have 0.5 because 0.5 is the health off the one. Okay, so let's take a look at the expression. So I will. Creek wants here, and I would click here to expand that as you see this expression referencing toe the sphere . Okay, this is C H is the channel this called Channel. Okay, you see? Here I have the sphere. Object one. Okay. And this is the sphere. Object one on T y. Is this one? Okay, T y if you hover the mouse here, you see at the second line parameters the x t y t z, and this is the X d y TZ okay. And if you hover on the rotate you see in the second line are X, which is rotate X rotate. White wrote a Z okay and so on. So for example, I can said this one toe t z for example. Okay, so if I said that to Z now, this is translate Z. Okay? So if I move the sphere now, nothing happens because I said that toe t z. So now if I move that own Z as you see the box moving up on down Okay, so why it's moving up on down and not on Z? Because we said the expression here on why Okay, on you can delete the expression by right clicking on choosing the channels. Okay. And that's it. That zero as here I would said that 20 k on this one toe zero to Okay. So again, we can link the Z by creaking by right clicking here and choosing copy parameter and I will go toe box on on the Z. I will, right click and choose based relative references. Okay, so now if I move that on Z the box moving on Z. Okay, So let's take a look at another example, So I will dive inside the sphere on here. You see, I have the transformer on off course. I can copy the parameter off the why here. Copy parameter from the transfer and I can go back on dive inside the box. And here I created it. Transform toe and I can't sit based on relative preferences here. Okay, So as you see now, I have the transform one in the expression. Okay, So this means bring Houdini would bring the values from the sphere Object Aunt from the transform mode on the translate. Why OK, from here. Okay, so now if I move that as you see, we get the same result. Okay, so let's do get the transform here, and I will delete the box. This take a look at another example. So I will zoom into the sphere on I will dive insight. And here you see, I have the radius, right? So if I move the radius, for example 21 Ok, so let's say we want toe bring the bottom off the sphere at the center off the great. So what I will do? I was said that the one and now it's at the center off the greed right. But if I change the value off the radius, as you see now, the sphere is not at the center off the great, Okay, so we can make that easier for us. by doing some expression here. So I will be the radius GOP. Andi, I will based that here. Okay, so in paste relative references. And now the value off the center is the same as the value off the radius. So now it doesn't matter how I move the radius. The bottom of this fear will remain at the center, off the agreed. Okay, so see you in the next listen.
8. Materials: in this lesson, we are going to see how to create materials inside Houdini. You can create materials inside Houdini in several ways. So let's take a look at the 1st 1 So if you go to the material palette here, you can create materials. As you see here we have the first material which called principled shader on. If you scroll down, you can see more materials like a liquid aluminum gold and so on. Andi, even if X materials like flames on fire ball. So if you want to create the material, we need toe Selleck that on drag on, drop it there on this is called principled shader. So if you select that you can see in the parameter editors, we have the basic we have the color speculator and so on. Let's change that toe. Read on. Let's close the window on now We need to assign the material to the sphere so we can do that by dragging and dropping that there, or we can go to the object level there on select the sphere on. We need to go to the render on here. You can see the material so I can click on this icon? No, in the material tab, I need to expand that on. You see the material we just created which called principled Shader on. Now if I hit except as you see the path So the path called matter really principled Shader . So if you go to the material entire there, you can see the material we created in the material palette on. Let's go ahead and sell like that and we can delete the material there. At least do it again. And if I go to the sphere as you see, the path is already there, so you can leave it or you can delete that too. So now let's go to the material tab I had No, If I hit that, I can type currency build on. This is the principle Shader. So let's sit there there and now I can drag and drop it on the sphere on. Now if I go to the object level on select the sphere, you can see the path here toe. So let's go and select the material the principal cheddar on Let's say you want to create a gold materia or anything you want, or aluminium or anything you want. So there is some presets ready for you so you can come to the Gear Aiken right here and click on that. As you see here, we have a lot off pretty sets for us, for example. Glass we have. We have aluminium on a much more. We have a gold. We have Ireland. So let's create another material. Let's hit up on type but inside built shader. Or we can believe that on go to the material palette on. We can choose some materials from here. So if I click on Silver on Dragon, drop me there on Dykan Cilic that on a drag and drop it on the totals. Or you can select the totals and click on a sign. Andi assigned the silver to the totals on Let's Create Another One, the Black Rubber Drag and drop Me there on sale like that on drag and drop it on the greed on Let's say you created a fire. So here I created him fire for you. So if you click on the pyro import you see here I have the fire in the view port and if I hit play, I have the fire. But now if I render that I cannot see anything in the rendering. Just a gray smoke as you see here. So we need to go to the material palette on. Let's scroll down to see where is the flames. This is the flames. I can drag and drop me there on. By the way, in Houdini, you can drag and drop the material inside the rendering toe, and then you will understand that you want to assign it on the shader so I can say like that on drag and drop it on the smoke. As you see. Would any assigned that to the fire? And if I go to the object level there, if you select the pyro import you're seeing, the material palette called the past is Matt Flames. Now let's hide the viral import because I wanna show you another thing there. So let's say I have two objects inside one container. Let's go inside the sphere on. Let's assign other think. Let's type to you on. Let's move it a little bit to the right there. I'd move it up something like that, and now I want toe, create, emerge naled, and it's a sign them to the emerge on your notice. Now if I seeing the view port, the material is on the container, right? So any object you create inside this container will be assigned to the this material. So how we can assign a separate material for each note inside the sphere. The first thing you need to do you select the sphere on, delete the path for that, and now we need to go to the inside of the sphere on. Now let's hit tab on type material and I need to, said the note After the sphere on control and see and control and we shake that we disconnected from the sphere on, set it there. So now we need to go to the material. A tab there or in the material palette doesn't matter on Let's see, where is the principal cheddar on this Waas? The gold one, if you remember that. So let's said the name Gold. Let's control on DSI and control on TV. Just go to the gear. Let's see which one we can create. So let's say we want it Toby plastic, for example, on this type here plastic. So now I have a gold and I have a plastic. So now we need to go to the object on inside the sphere. Now for the sphere, I need to select the material on here. You'll see we have the field called material. So I need to select these I can or click on this icon. And now I need to go to the material tab there and I need to select the gold. So now the gold Shader assigned just to the sphere. Now we need to select the second material on Let's click on material. Right now we need toe, select the plastic and accept that. So now we assigned the plastic to the 2nd 1 at now. If I go to the rendering on this, it surrender there. As you see, we assigned the plastic to the 2nd 1 and you notice in the view port. The Shader didn't update for the tube. But that's OK, So let's go now to the material tab there. And if I said like the gold material you can see here I can change the color. I can change the speculator. If you scroll down, you can change the reflection, transparency and so on on in this step you can assign you textures. So if I click on this step, you can assign a texture for the color They're on for the I. R roughness and so on. And you have the bomb and normals displacement. And you have some settings there and you have the opacity toe, so see you in the next listen.
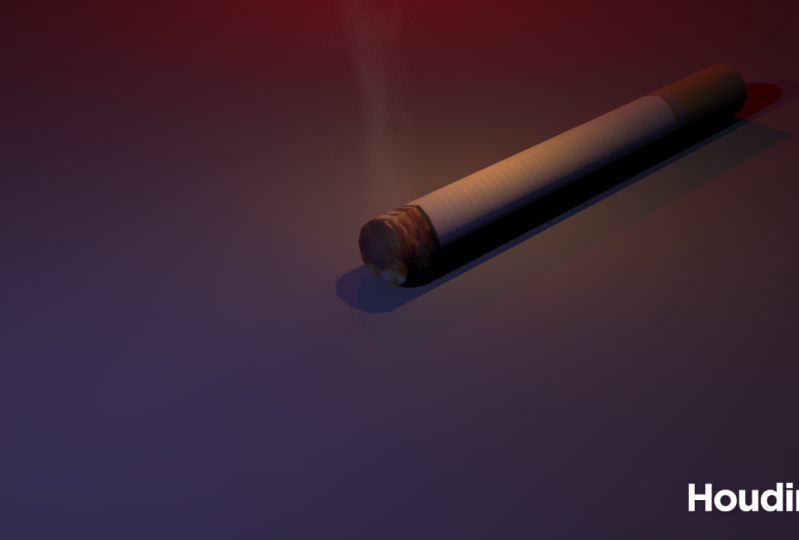
9. Homework: Okay, so this is a homework for you. Make sure you download the same file first called. See? Got it. A smoke start. OK, so make sure you download that on post your result in the discussion so we can all see what you did. You don't have to get the same result as you see here. I want you just to spend 15 minutes doing this homework. So the answer for this homework will be in the next Listen. So let me explain a few things about your homework, So I will start the Philly book on First off all Make sure you download the file and opened the scene called Cigarette smoke. Start knocking. So after you opened the scene, you would see here I have the geo, which is the cigar in body. If I dive inside and here you see, I have UV quick shade. Make sure you load the texture. OK, I will upload this one for you on I would goto object level on. As you see, I parented the geo which is the body with the sphere. So the reason I parented the geo with the sphere. So when you want to move the sphere, for example. Sorry. The body, This fear move with the body. Okay. And that's why I parented this one toe this one on. If I dive inside, you see here just I have simple sphere. Okay. What you need to do is just select the sphere on Goto bio If X tap and Carrie Kahn, we speak a smoke. Okay, so let's click on that. And I want to explain another thing here on a Another thing you need to do here is selecting the A viral solver on did You can't control the direction. For example, if you want the smoke, if you want toe direct the smoke, for example, toe this direction or toe Z axis. Just sit. Simple value here, for example, I would say 0.5 now the smoke will go here on up because I have one toe the up on 0.5 here . Okay. On another thing. If you select the virus all over again on you go to the shape and here you see, I have the turbulence. Okay? If you check that on on, if you come to the turbulence, stab here. You would see here I have the map. Okay, so if I check that on, let me explain what this does. So let's go to the believe last, Nancy, As you notice here, the smoke arises on. We don't have any turbulence here. Right on. After a certain area or certain time, the smoke start starting the turbulent. Okay, as you seem. So this one controls the the timing off the turbulence, or when you want, the turbulence will happen So you can sit a point here, for example. So now if I said the point here now, this smoke will not be turbulent until this area okay on, we'll start be turbulent after coming here. Okay, on this is the control influence. So if you said this one toe one, this will have full control off the turbulence here. Okay, so this is just a control for your turbulent, Okay, so keep that in mind. Okay? On another thing. When you create the play blast, maybe you don't want to see the container, right? Like this one. So if you go toe pyro on, then goto multi on. This is the bonding books. Okay. So you can disable that now. You don't see the container So let's go back on this play and see Now let's go Toe object. Okay. As you see, we don't see the container now. Okay, on after you finish, just high. Hide the sphere object to see the smoke clear in the view port. Another thing here I forgot to mention, is how to control the transparency off the smoke. So if I dive toe Spiro seem And here in this note, if you come to the visualization tap soaring toe multi on here. You see, I have the density scale. So the more you decrease this value, the more transparent you're a smoke will be on. This is the shadow. So, for example, if you decrease that for example, 0.1. So now you see, I have less shadow on here. If you decrease this value, you can't control the transparency off the then city. Okay, so if you said this one toe 50 for example, you would have more dense density. OK, so that's what I forgot. Toe mention. Okay, so see you in the next listen
 Raffi Bedross