Transcripts
1. Welcome!: Hello everyone. Welcome to another super fun and relaxing Skillshare class. Today we're going to explore new ways to make art. I really want you to just relax, take a deep breath, and get your mind off of the challenges you're having in your life right now. Today we have a very special theme for this class, the body positive movement. This movement has inspired me so much lately. I can't wait to live in a world where everyone can feel beautiful, no matter what they look like. Of course, to create this beautiful world, we have to start feeling beautiful ourselves. What better way to do this, if not through our art? With this in mind, we're going to create a very beautiful abstract illustration inspired by you, your textures, your patterns, and your body. We are all unique and beautiful as we are. We're going to use that as inspiration to create beautiful patterns, textures, and color combinations to come up with a beautiful artwork. We're also going to practice some basic lettering to add a little affirmation that we can look back and remember every day. You will learn a very creative process to explore your imagination and get out of the box using different art materials. Any art materials you have at home can be used in this project. Really, this class is for anyone and everyone. You'll definitely be able to use this creative process on future projects. This will definitely help you improve your technique and also create art that's more authentic to you. If you're trying to develop your own personal illustration style, this class will definitely move you in that direction. Grab your favorite art materials, your favorite drawing paper, and of course, your favorite drink, and join me on the super fun and loving art class. Before you go, don't forget to follow me here on Skillshare. Just click this button up here, so you can be the first one to know when I post a new class. See you in the next video. Bye.
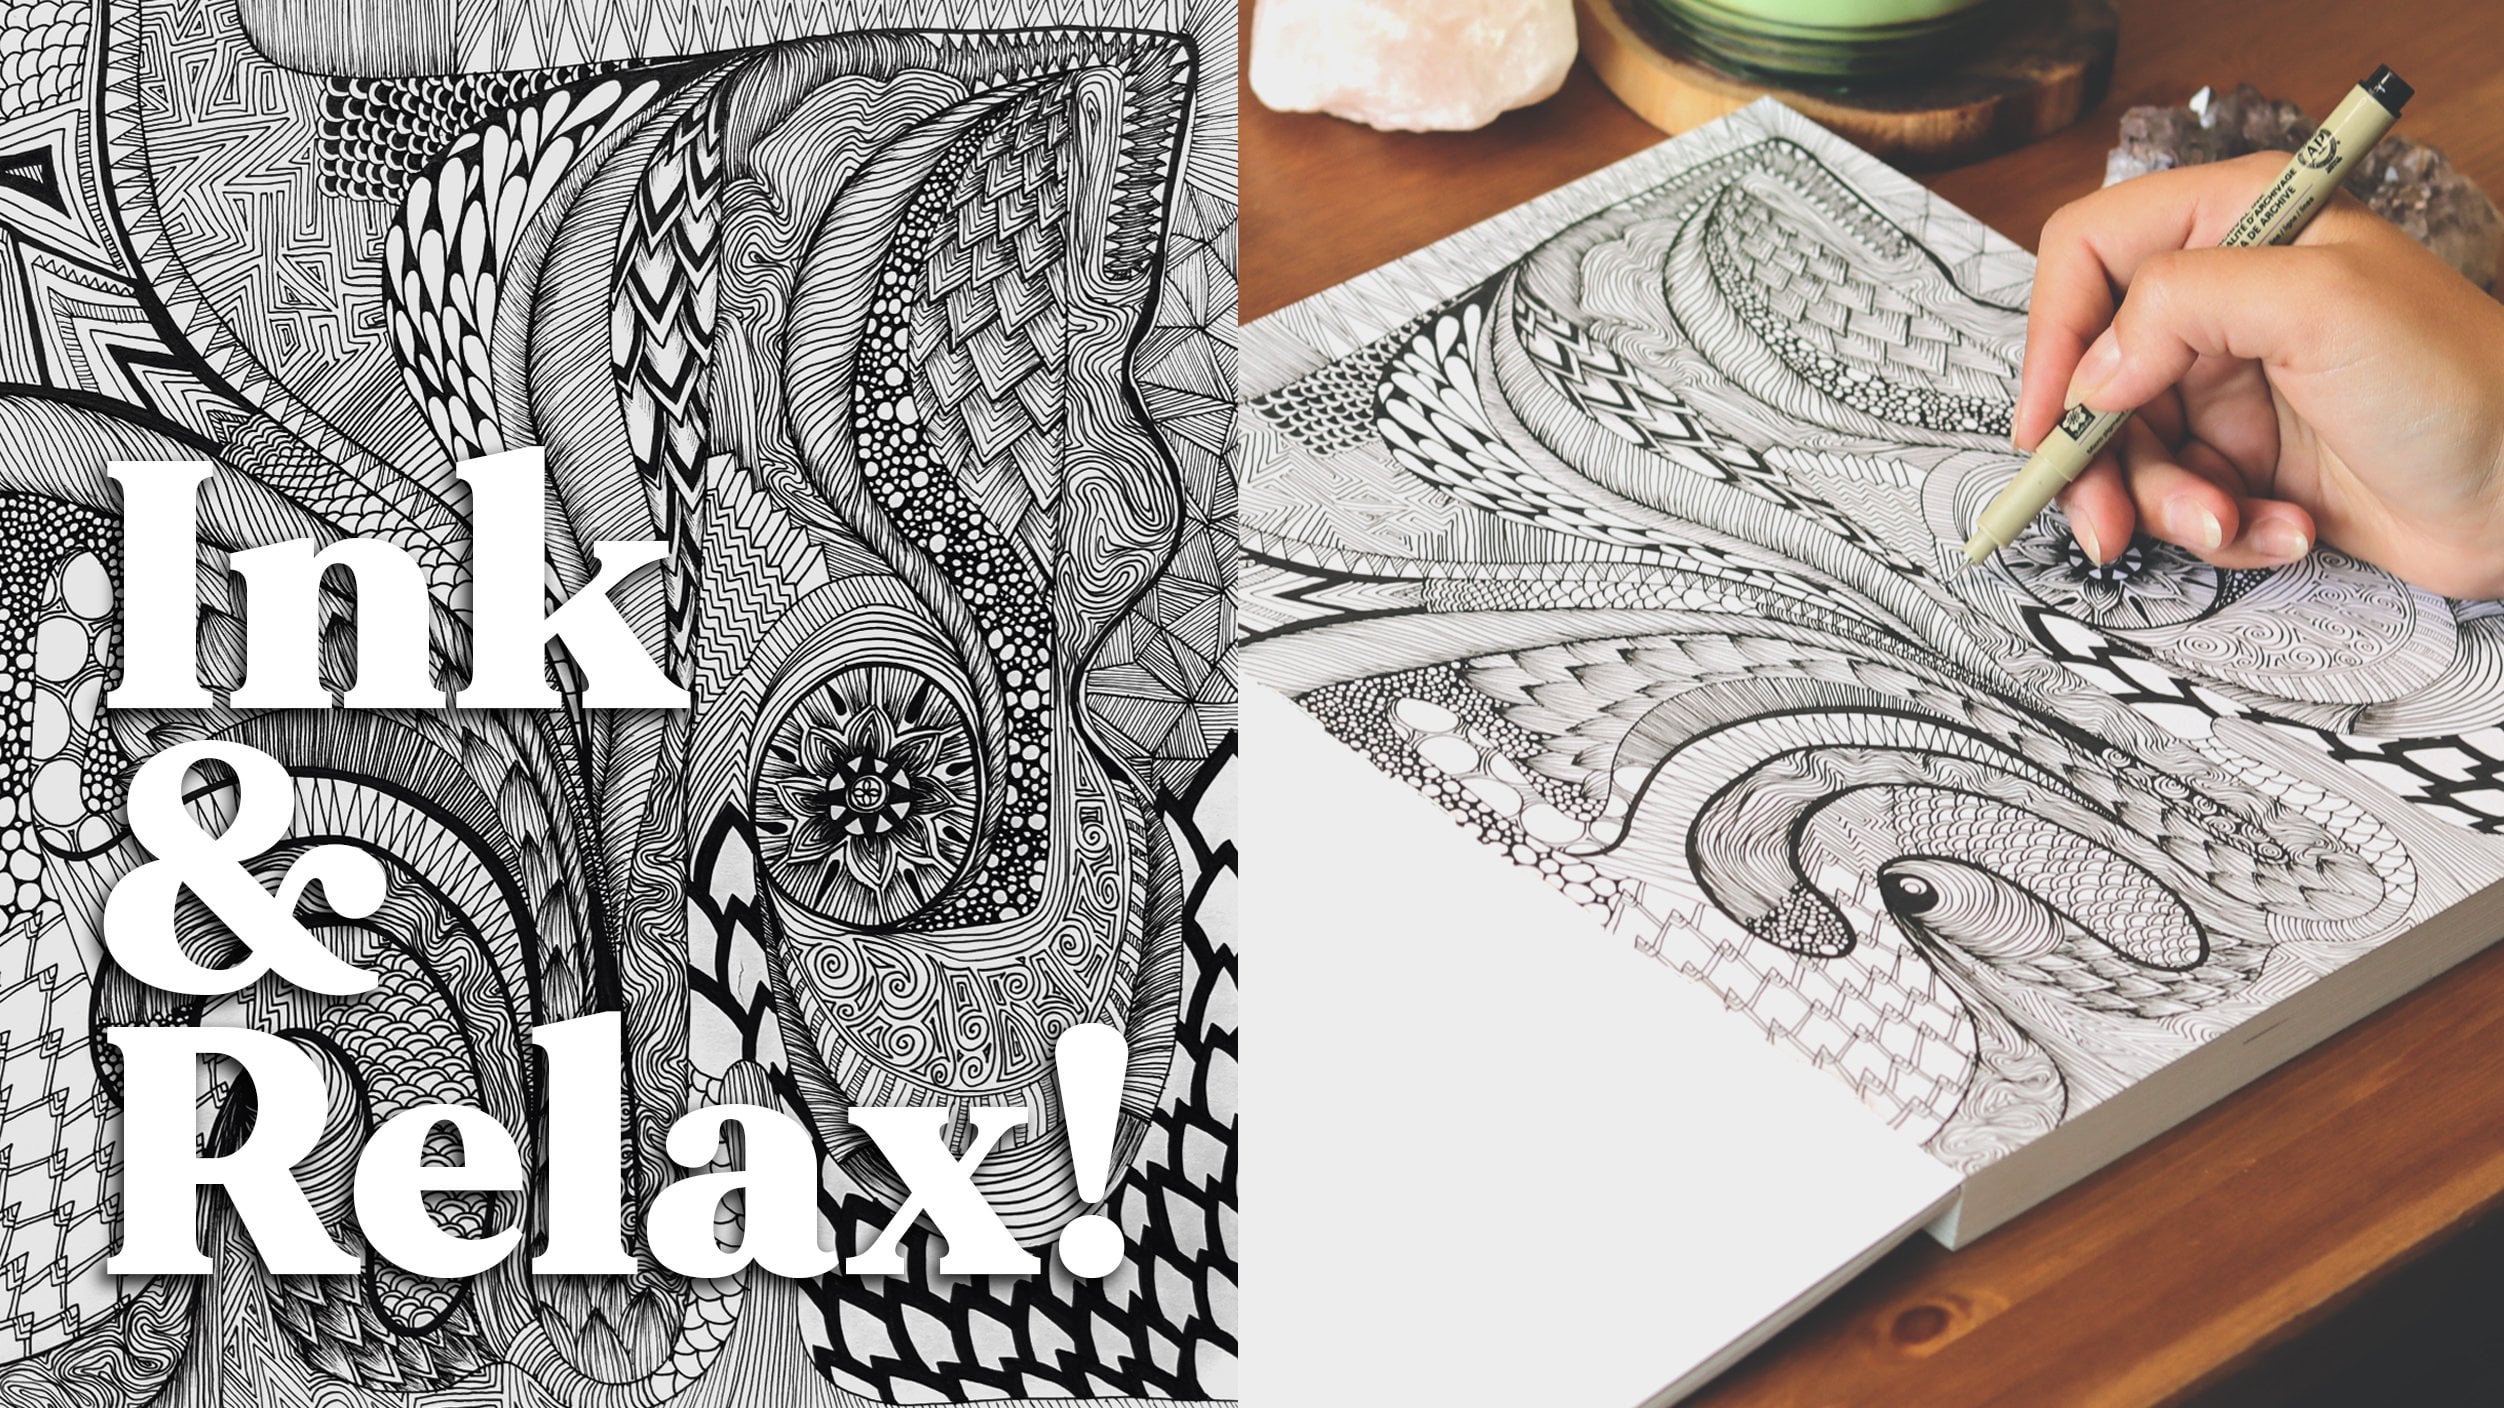
2. Project & Materials: Hey everyone. Today we're going to create a super fun abstract illustration that represents how beautiful we are. To do this, I really want you to get outside of the box and use any materials you have available. I'm going to show you what I'm going to use today, but you don't really need to have any of these materials specifically. Just use what you have available to you. Here are a few suggestions. First, I'm going to be using a 4H pencil and eraser for the sketching part. Then for some details, I'm going to use ink pens. Specifically, I'm going to use a brush pen, two fine line pens with 01 and 05 size. I'm also going to be using colorful markers, some colored pencils, calligraphy ink, and India ink, and I also have this super beautiful pearlescent watercolor set that I really want to try it out. Then of course, we're going to need good paper, and I'll be using watercolor paper because I'll be using watercolors. But Bristol paper or mixed media paper are also great idea if you don't really need a paper that's too absorbent. Lastly, in my case, I'm using watercolors, so I'm going to need some round soft brushes. Again, the important thing in this class is for you to have fun. Don't be overwhelmed with all the materials I'm using, you really don't need them at all. I want you to just grab some art materials that you enjoy using or maybe even some new materials that you've never used and you want to try it out, and join me on the next lesson so we can start this project.
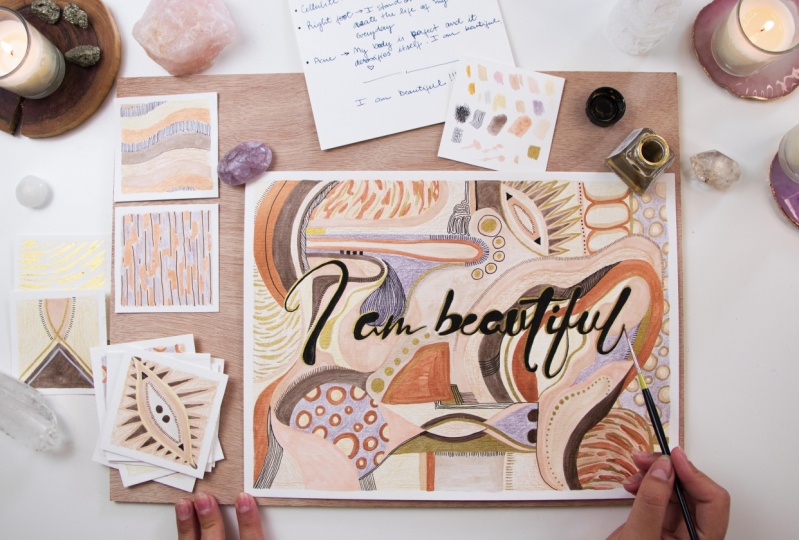
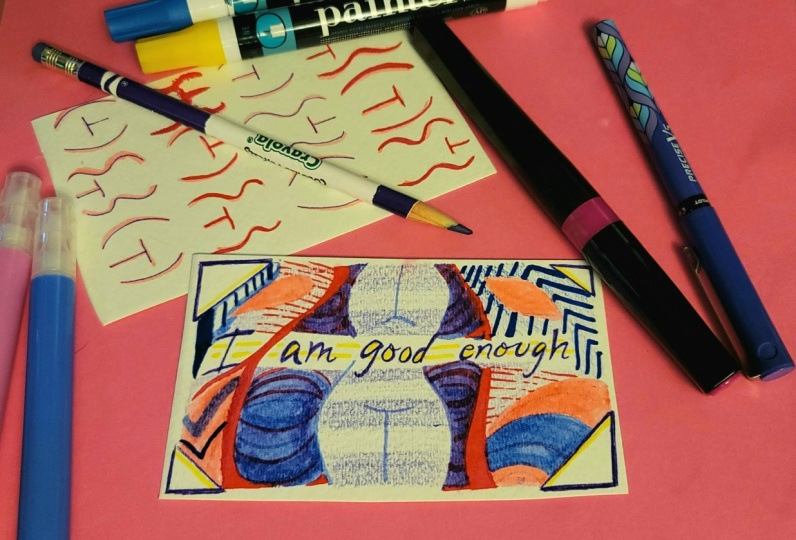
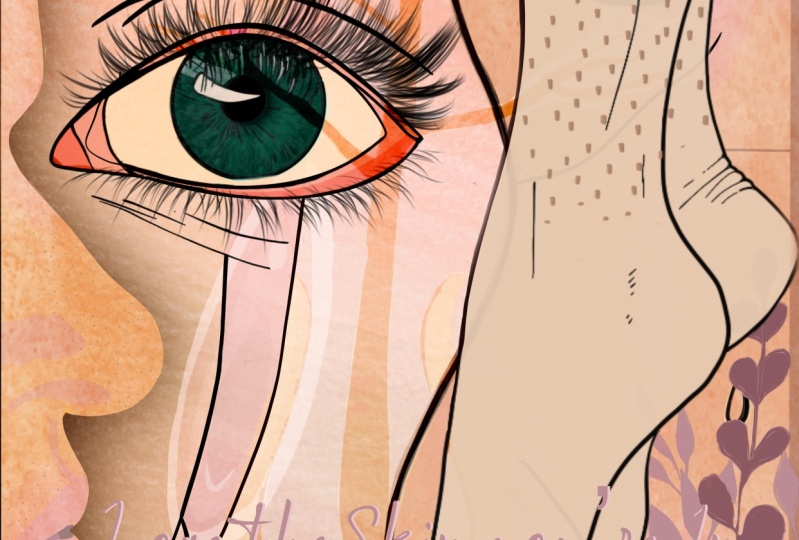
3. Transforming Your Insecurities Into Positive Affirmations: Now, I want you to grab a small piece of paper to write down a few things that would inspire this artwork. I used to always struggle with coming up with ideas, and I find that writing things down really helped me move my creativity around. Since this class is a body positive class, we are using our body as inspiration. What I want you to do is write down a list of things you are insecure about your body or even aspects or parts of your body that could use some love, and right after each item, I want you to transform that into a positive affirmation inspired by that body part. For example, I'm going to start with my stretch marks, such a classic. Well, we only actually have stretch marks because our skin is very flexible. Which led me to my positive affirmation, which is my skin is flexible and it protects me every day. Next on my list is my belly. It's a part of my body that I have tried to change my whole life and I know it could totally use some love. My positive affirmation for my belly is my body holds my vital organs and keeps me healthy. Just keep writing down everything that you feel could use some attention and some love and some care and try to transform that into something positive. This exercise will really help you find positive things about the things you learn to hate or even to reject about yourself. We receive so much pressure from the media and the beauty and the diet industry to look a certain way, and this can be so bad for our mental health as well. Practicing self-love in this way can really help us feel better in general. It can definitely help us feel more confident and more beautiful, and that totally helps us become more authentic and more creative too. Just keep writing down your list and your positive affirmations, until you have at least five affirmations. If you don't have enough insecurities to work with, you are definitely a queen or a king in this world, my friend. I'm a queen and not a pawn. I admire you so much, and in this case, just come up with some extra positive affirmations about your body and how you look. The idea here is to remind yourself about how amazing and beautiful you are just for being yourself and really addressing those bad thoughts we have about ourselves sometimes. I want you to start working on that mindset that you really don't have to change anything about yourself. You are perfect exactly as you are, and you deserve to feel beautiful right now. Now, once you have a good amount of items in your list, right down a short sentence that represents you in your illustration for today. It could be little summary of all your affirmations. I wrote down, I am beautiful and you are free to use this sentence as well or come up with something else. Just try to keep it short and we're going to use the sentence later on. Now join me on the next video so we can start creating beautiful art inspired by you. See you there.
4. Exploring Your Colors And Textures: I hope you enjoyed the last exercise and that you're feeling beautiful and inspired. In this last one, we're going to find the colors and textures that represent your list of affirmations. But the first thing we're going to do to prepare for this lesson, and the next one, is grab a piece of paper and cut it into squares. You can have as many squares as you like. I'm cutting my paper into 12 pieces by dividing the paper in three columns, and then cutting four squares per column. Once you have your squares, save them in a little pile, and grab two of them for us to use in this lesson. This is very subjective, and it's more of a creative association exercise, so there are really no rules. I just want you to go over your affirmations and think, when I read this affirmation, what colors do I think about? What comes to my mind? Well, what about textures? Just start playing with the materials you have available to you to test out a few colors on one of your squares. There's really not a right or wrong answer to those questions. I just want you to find colors you like and that you enjoy using. I feel like since the illustration is about our bodies, it's really making me want to use a lot of skin tones. I'm just going to test out everything I have for skin tones, and see what shades I like. Again, at this point, you're just experimenting with your materials just to see what you like and what you don't like. There's no need to make any decisions just yet. You can also test out a few pattern ideas. For example, you could use your ink pens to create little circles, some lines, dots, maybe some hatching, any type of pattern or texture that comes to your mind and that you think maybe represents your body in some way, you can create a small sample of it just to try it out and see what it looks like. Once you start realizing what colors and textures you actually want to use, grab your second square and just filter and add the ones you like. This will be your base of colors and textures to use throughout this class. I recommend you have at least eight colors and textures to work with. Again, remember that the important thing is that you love your color scheme. Pick colors and materials that you really enjoy using and looking at. When you're ready, I'm going to show you what to do with the rest of the squares in the next video. See you there.
5. Creating Abstract Patterns: Now that you have decided the color scheme of your illustration, I want you to use your squares to create unique and beautiful patterns using these colors and textures that you chose to represent each of the body parts you listed on the first exercise. Of course, other parts of you and your body that you love as well. The idea is to create patterns that represent a creative and beautiful approach about yourself. Let me start you off with an example. My first item on the list is stretch marks, and we want to reframe our perception of each of these insecurities we have. We want to make it into a positive approach. I'm going to draw a few stretch marks in a way that I see in my mind with a pencil and then I'm going to paint using some of these beautiful colors that I chose. The fact that I'm going to use colors that I'm so excited about and just try to make it beautiful, it's in itself a very powerful exercise of self-love. Of course, you don't have to use all the colors and all the patterns all at once in each square. But you want to keep the patterns inside of your color scheme to keep the illustration cohesive. This is more of a warm-up exercise and it's also a good way to guide your creativity in the right direction. Why are really reframing the image you have of yourself? I found this exercise to be super relaxing, and I want you to feel this freedom to create something small, quick, and beautiful without judgment, because this is not our final artwork yet. You really have all the space to create without deciding anything just yet. Your patterns really don't have to make any sense to anyone other than you. Just relax, have fun and let your imagination fly. There's no pressure and you don't have to be specific in any way. Simple patterns work super well, so don't worry about doing anything too elaborate at this point. Leave that for your final illustration. This exercise will help you understand better how each color and texture from your color scheme work together. You will start noticing that you like some combinations better than others. Those are some important discoveries for you to do before you start your final project. This part of the class is very helpful, in my opinion, for you to try out new materials as well, and start getting more comfortable with new things and maybe even discover some things you didn't know about your art skills. I have these markers and the pearlescent watercolors, for example, that I never use. I think they're so beautiful, but I just never really found a way to use them and the way that I like. With this exercise, I was really able to test them out and practice a little bit. Just by getting more familiar with those materials, I'm starting to feel more confident in using it into different projects as well. In the end guys, the more we practice, the better and more creative we will get. I really hope this lesson helps spark your creativity in new ways and maybe help you develop your own artistic vision and your own style a little more. Just keep drawing and painting until you have at least one pattern representing each information on your list, you can have as many as you want, but it's nice to have at least, I don't know, five or six patterns to work with. To represent my acne, I'm drawing little circles like this, and it's not too obvious, but to me it represents the item on my list. Another example is my right foot. I was born with a little condition that gave me a lot of challenges with my right foot since I was a baby and it gave me a lot of insecurities throughout my life. I'm drawing something that represents my right footstep, but it also reminds me of a rainbow. I'm using this beautiful golden ink that just makes me so happy. It's so shiny and sparkly. I just love it so much. Just by using this ink that I love, it's giving me good feelings while drawing this that represents my foot. I'm already sending good vibes to that area of my body. Once you have some beautiful patterns to work with, join me on the next video so we can finally start our final project.
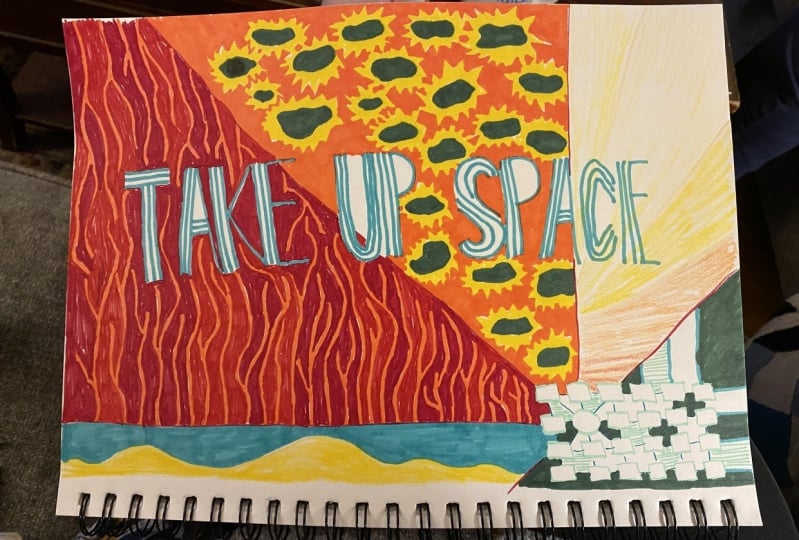
6. Drawing Words: Hello, beautiful people. We're going to finally start our final project. Grab that beautiful drawing paper you're going to use. I'm going to get totally out of my comfort zone here and write something on my illustration. This is really not something I'm used to doing. I don't have much experience with writing things on my drawings, but I wanted to trade out because my imagination is telling me to and who am I to say no? I'm I right? Perhaps you're right. You're welcome to practice with me, or if you just went to go full abstract, that's awesome as well and you are more than welcome to skip this lesson. Let's do this. I'm going to write down the less chart affirmation we wrote on our first exercise. In my case, affirmation is I am beautiful. You are welcome to write the same thing if you want or anything else that comes to your mind, and that motivates you and makes you feel good. I just suggest that you keep it short, like maybe three words max, so you don't complicate this too much. Now, to write this down in our illustration, we're going to use our lettering technique. What we're basically going to do is draw letters to form the words. We are doing this using a font as a reference. Let's try to find a beautiful fonts that inspires us. On your computer or on your phone, just go to fonts.google.com or dafont.com to search for fonts you like. Let's try Google first. Here in this drop-down menu, you can choose the category of fonts you want. I'm picturing like a handwriting style fonts. I'm just going to leave that checked. If you want a different style, just check other boxes and you will see definitely a lot more options. Up here where it says sentence, just write down your affirmation so you can see a preview of the font with the exact words. I'm not really super in love with any of these fonts, so I'm just going to look in that other website, dafont.com. On this one, you can choose a category on this menu and where it says preview, you can write down your sentence. These fonts are making me a lot happier. Once you find a font you love, just open it and you can use it as reference for your drawing. The beauty of drawing letters is that you really don't have to copy exactly like the font you have. You can get creative and change a few things as well. This is more of a reference for you to creative writing you want not exactly free to copy A to T. You can even combine fonts if you like, maybe a B from one font and then the L from another font, for example. Feel free to draw or feels good to you. Let's see, I picked this font and this is the one I'm going to draw. A few tips to start your drawing out is to imagine a few grid lines on your words. She uses a base. You don't need to do this, but I'm going to show you what is grid lines would look like. You can find the ones that would work for you and your font. Start imagining the horizontal lines that support that font. In my case, I have about four important lines. The two ones that are on top and bottom of this small letters, I'm also adding some vertical lines to mark where each word starts. Also I have two more horizontal lines at the bottom and top of the big letters. You also want to picture where your words begin and end on paper. This will help you draw your words in the exact position you want without ending with your sentence too much to one side of the paper or too much to another side. Just start drawing the grid lines you imagine in your head, you can use a ruler for those if you want, and with practice, this will becomes so much easier. Don't judge yourself because I find lettering super difficult. The idea of this class is for you to love yourself and your creations, so don't be too self-critical. Just try positioning the letters on top of your grid lines with the pencil and focus on the angles of each letter. Notice that some lines are thicker than others and that they all follow a certain angle. In my case, my font is handwriting. You can see that all of the letters are actually diagonal and all the letters followed that same angle. Keep drawing and erasing until you have a good writing of your affirmation. Then when you're ready you can erase all the grid lines and extra pencil marks that you don't need anymore. In the next lesson, I'm going to show you how to structure your abstract illustration and start painting. See you there.
7. Final Project: Abstract Illustration Inspired By You: On this lesson, we're going to structure your abstract illustration, and start applying all the beautiful patterns you created. First I'm going to use a ruler to mark some margin lines around my artwork with the pencil, and then what I want you to do is just simply start positioning the patterns you created before in a random way. Maybe with a pencil, you want to draw some random shapes so then you can fill those shapes with patterns you have created. Just be random, and let your hands do the work. With the pencil, just start positioning the patterns you created on paper around your affirmation, and you can do this very lightly, just so you have a structure to follow. I apologize if it's a little hard to see, but I'm trying to avoid the pencil marks to appear on my drawing end-to-end, I'm doing this very lightly. When you're ready, start coloring some areas using your choice of colors, and materials from our previous lesson. I'm going to start with this yellowish beige. My tip for you is to compartmentalize the colors, and spread them out in different spots of the paper so you know you have a balanced results in the end. You don't really have to do this at all, but I'm just telling you my train of thought while I was creating this because it might help you in case you need some guidance. If you want to create in a different way, maybe your system is different than mine, and maybe you like to draw in detail each pattern by itself, by all means, go for it. Keep adding some more colors, and then when you're ready, you can start painting each pattern in more detail. Keep following the swatches you created, and you will notice that not all patterns fit perfectly, and in some places you might have to do something different, and that's amazing as well. Don't feel like you're stuck to your patterns symbols, you are still free to create new ones or even to make them differently in some places using different colors and sizes, there's really no rules. The pattern symbols are more like an inspiration for you, and something to guide you so you don't feel overwhelmed by the blank Canvas, and you have something already done, and you don't have to come up with something from scratch. From those samples you can really create anything you like. Just have fun, and enjoy the process. Anything you create in this class is valid, is beautiful, and deserves so much love. So don't judge yourself or pressure yourself because this is not the goal of this class at all. Think about contrast too, for example, maybe a pattern made of lines might not be so good next to another pattern made of lines. Maybe you want to put lines next to a solid shape, or maybe you want to put lines next to circles, maybe beige next to a very close tone of beige will disappear together, and they won't enhance each other so maybe combined colors that will create a little bit of contrast. When you have most of the structure, and the colors down on paper, you could add some patterns, and details with the ink pens if you have that available to you. Again, totally optional, but I love how the lines create a nice layer of information on our illustration, and it's just an idea for you. If you want to add some details like that, try to think of patterns and shapes that could represent something about your body, even if it's in a very abstract way. Remember, this only has to make sense to you, not anyone else. After you have your colors setup, it's time to paint your affirmations. I'm going to be honest with you in my mind, I wanted to leave my affirmations white with the white from the paper. I actually just wanted to paint around it, and leave it as is, but I ended up choosing colors that are too light, and I think it's too hard to read so I decided I'm going to paint the letters with black ink, and see how it looks. After I painted the letters with black, I'm still not super satisfied with how it looks, and I still think it's not so easy to read. I'm going to add some shadows with gold ink. This will enhance the letters and help them pop a little from your illustration, and it will be easier to read. To do this, all you have to do is choose two directions to paint, I'm choosing top, and left. Top and left sides of each letter will be painted with gold ink. If you're not good with perspective, don't worry, just choose two sides of your letters and, paint them with whatever color you want that contrasts the color of your letters, which in my case, it's black, and I chose the gold to do the shadows. Remember to paint only the two sides. Make sure you're not painting any other sides because this will mess the perspective. Now if this is too complicated and if you want to simplify, you can just contour each letter with another color on all sides and this will definitely help it be more readable. Again, maybe you don't even need to do this because maybe you did it in a way that's super easy to read the writing. Now we are coming to the end of this illustration, and I really hope this can be a beautiful reminder of how unique, and special you are. That your shapes, your textures are beautiful, and inspiring. When you're ready, join me on the next lesson so you can say goodbye, and I can share with you my final words. See you there.
8. Thank You!: Thank you so much for joining this class. I hope you had fun and I hope you're happy with what you created, but remember that beauty is just a concept in your head. Even if you're being a little self-critical with your artwork, remember that this is another exercise that has everything to do with this class. Try to accept what you are and what you create at each moment as it is. Of course, we always know that we can get better, we can improve and we are aware of that, but we don't need to be unhappy or unsatisfied with ourselves or with what we create in order to get there. We can be happy with what we are, we can be happy with our art and still improve the next time. Also, I really think we need to break this belief that we need to be a certain way or act a certain way or accomplish certain things to deserve recognition, to deserve love, to deserve likes and follows. Right now as we are, we do deserve love and appreciation and we are valid and our art is beautiful as it is, and we are beautiful as we are, that's simply because we exist, that's enough. The more we're able to feel like that for real, the more we're going to create this community and this society where everyone can actually feel this way. It really starts inside of each one of us, and that's it for today, guys. I really hope you enjoyed this class. Don't forget to post your projects in the project section down below, I see all of them and I comment on all of them and I give real feedback. It's really nice for you to connect with other students and other artists in the platform. It's really helpful for all of us and really helps me as a teacher to keep creating classes because I see what you guys are creating and just really motivates me to keep going. If you have any ideas for a future class, you would be interested in, leave me a comment and I'll definitely consider it. Also, if you share your work on social media, tag me so I can share your work as well on my platforms, and maybe you get some new fans who knows. That's what social media is for, we should be connecting and tagging each other. That's it. I guess I'll see you in my next classes. Good Bye.
 Gio Vescovi, Visual Artist