Transcripts
1. Introduction - Woodburning: How to Customize Gifts: Hi. I'm Alex, and welcome to Woodburning: How To Customize Gifts. In this class, you're going to learn the essentials of woodburning techniques. You're going to learn about different types of materials and tip options for creating new designs. You're going to learn safety measures, and how to take the design from paper and transfer it on to wood. I got started woodburning about two years ago when I was preparing for my upcoming wedding. My husband and I had created some wooden items for our friends and family as thank you gifts for their participation. I wanted to really take these gifts to the next level by adding some custom designs. So following many tutorials and classes just like this one, I learned how to woodburn. This class is for just about any skill level. You can be a total beginner DIY'er or you could be a more advanced hobby woodworker, and you'll still learn new skills that you can apply to other projects. I'll go over the different types of materials and things that you can do with woodburning throughout this class. It's my goal that by the end of this class, you'll feel confident woodburning just about any design into any material and if you follow along with the class project, you'll have a really neat set of wooden kitchen utensils to gift to a friend or keep for your own kitchen. So without any further ado, let's get started with the class, Woodburning: How to Customize Gifts.
2. Understanding Your Tool: Now let's talk about pyrography or wood-burning tools, so that you can choose the best tool for you. You can buy one of these tools for somewhere around 20-$40. A good one will be about $40 and it will come with a kit to accompany it. You can find them at craft stores, Hobby Lobby or Michaels, or any DIY haven. You can also purchase them online. I've purchased them from Amazon and other websites before too. A good wood-burning toolkit will come with a variety of tip options to get started, as well as very importantly, a stand to rest your wood-burning tool on when it's hot. You can buy additional tips in packages from the same craft stores or online shops that you purchase your tool. Often these will come in sets like alphabet letters or numbers, or maybe in small designs stamps to create patterns or different types of lines. Choosing a wood-burning tool that has variable heat settings will expand your options in terms of materials and designs. Hotter settings are ideal for most types of wood, especially if you're doing a design with strong bold lines. If you're experimenting with adding shading, smaller details are using very soft wood, having the option to go to a lower temperature, will give you more control over the burn as it's applied to the wood. Having a variable temperature control will give you more options when it comes to materials as well. That hottest setting is really ideal for wooden items. If you have the option to go to a more medium or low heat, you can use it as well on raw leather, cork, wax, or even paper for intricate cutout designs. If you have a special type of tip, you can even use it for soldering small pieces of metal like jewelry making.
3. Safety First!: Now because we're working with a hot tool that can easily burn your skin, it's really important to follow certain safety measures as we proceed. Hopefully, you've chosen a wood-burning tool that comes with a stand. You have somewhere to safely rest it when it's not in use. Anytime the wood running tool is not in your hand, make sure that it's on that platform and another important tip is to not put your stand directly on a surface that could be damaged by heat. I recommend using a practice plank or having a scrap piece of wood to rest your tool on in its stand at any point when it's not in your hand. When it comes time to change tips on your wood-burning tool to do a different design or have a different type of line, I recommend making sure that you turn off your wood-burning tool and let it completely cool down before you try to change the tip. These tips are made of metal and they can be extremely hot and will burn you. Tip screw on and off fairly easily if they get stiff or screwed in too tightly, you can use a simple pair of pliers to remove it safely. Now, let's talk about types of wood and unknowing the wood that you're going to wood-burn, it's crucial that you only would burn an untreated wood. If you use treated wood, something that's been stained or infused with chemical additives. When you create smoke from that wood-burning, it could be really toxic. It's important that your wood is naked and free of any other additives and then you know exactly where your wood came from. That's why it's also really important to know the history of the wood that you're about to burn. It's great to use reclaimed materials like barn board. But if you don't know the full history, you won't know if it's been treated with chemical additives that by burning it, you could be creating fumes that are dangerous for you. When you're wood-burning your item, it's important to not inhale the smoke or let it enter your eyes. You can choose to wear a mask or goggles as you're working, or just make sure that you keep yourself far enough away from the fumes that are being created. Another thing to keep in mind is the strain on your body. I find myself often hunched over my work projects, clenching onto that paleography tool really tightly and it can lead to a lot of muscle strain especially if you're working on a larger project, just make sure to take lots of breaks and do things in segments rather than trying to get it all done at once. This last safety tip is the most important. If you're going to be leaving your work area, you need to turn your wood-burning tool all the way off, unplugged from the wall. Just the same way that you wouldn't leave the stove on attended with the element turned on, you need to treat your wood-burning tool in the same way as it's a heated element and it could cause fires.
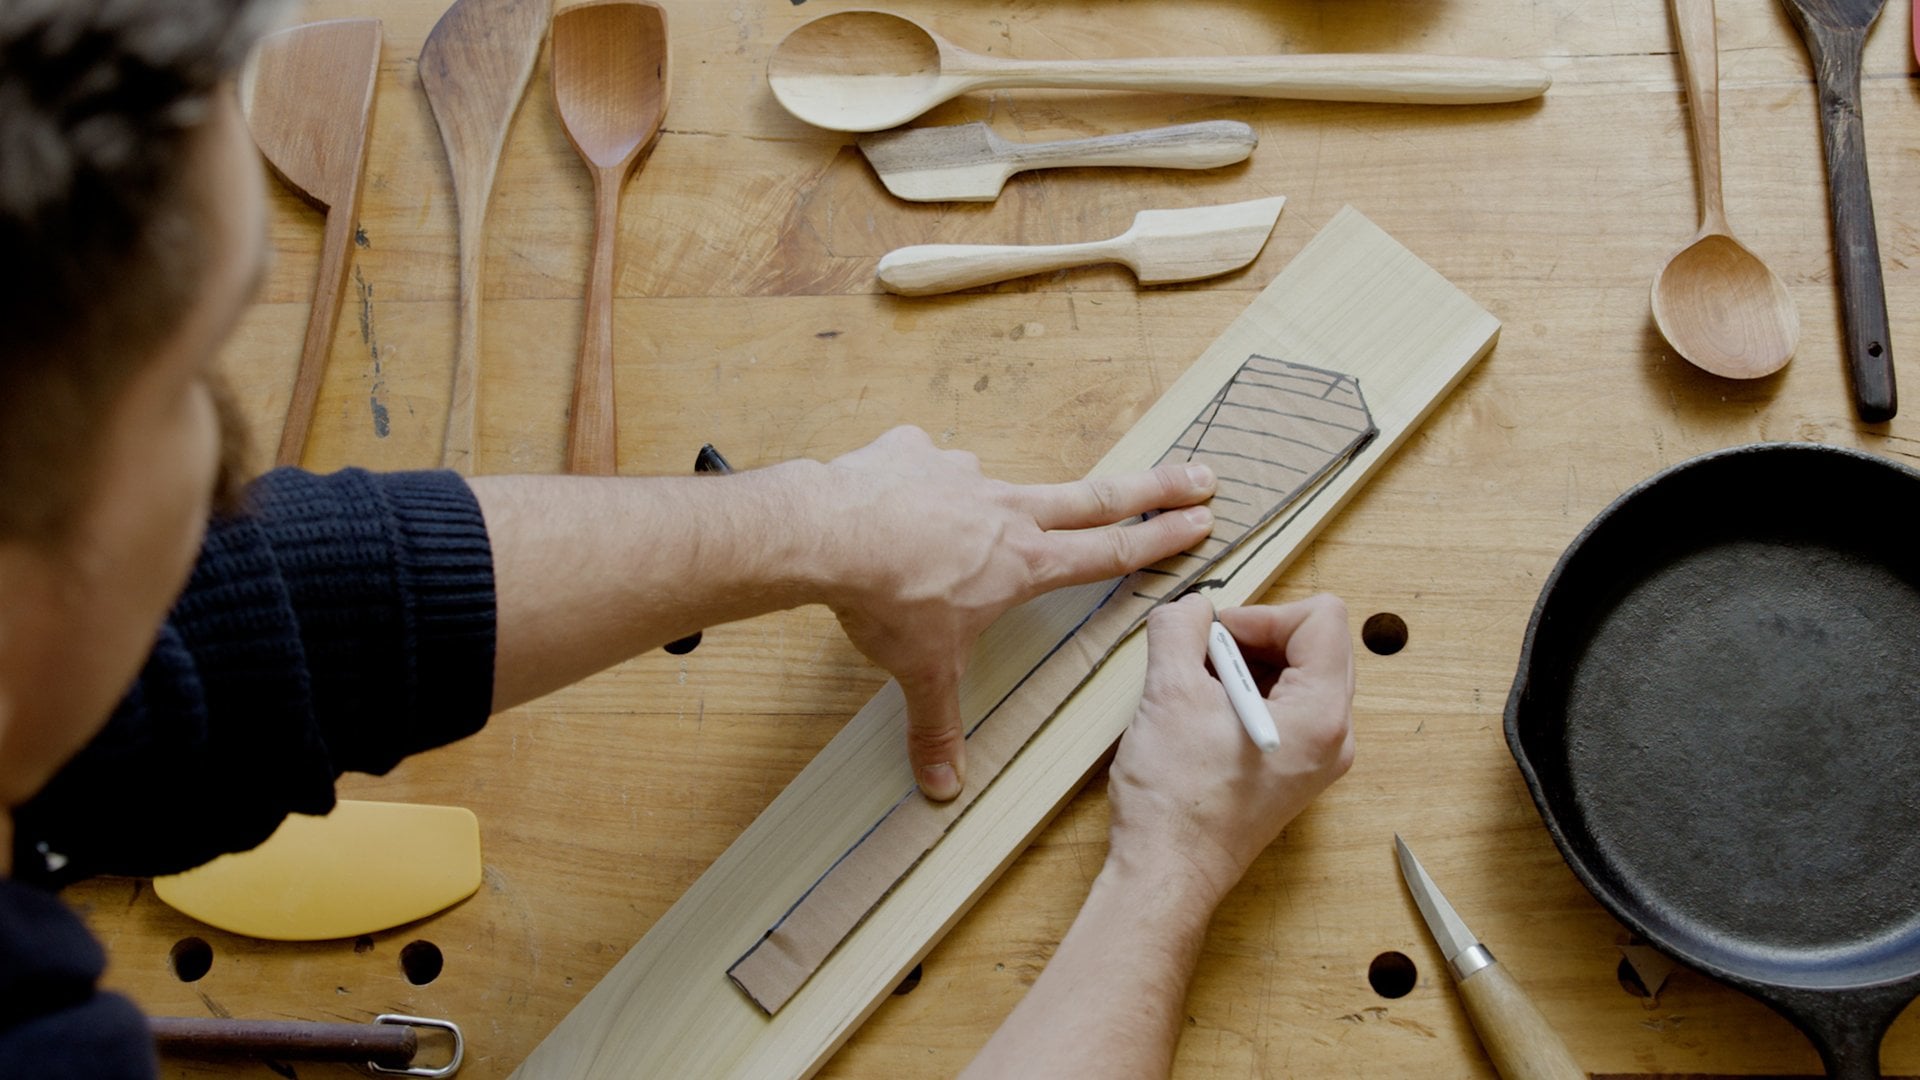
4. Transferring Your Design: When it comes to a design for your wood burning item, you can use a software to create a graphic to transfer onto the wood, or if you're looking for a text design like I'm going to do, you can use just about any word processing software. After you have your design, you'll print it out and will transfer it onto the wood. You can use free font websites or purchase downloadable fonts from places like Etsy online. Using a non-standard font will really make your text design standard. Once you have your design printed onto a regular piece of printer paper. Remember, don't plagiarize artists without their permission. It's important to be original in your design. You can take inspiration from others, but it's more meaningful if you create something yourself. Common design options could include initials or monograms, icons or graphics that are important to you, pretty much anything of personal significance. To transfer your design, simply take your printed paper, use a pencil to shade the area on the reverse side of your design. Then secure your paper, you can trim it to size to make this easier. I like to use a couple of small pieces of scotch tape to keep the paper in place and make sure it doesn't move as I'm transferring it. Once the paper is securely in place, use any writing utensil to trace the outline. Don't skip any lines of your design. Press down firmly. Our goal is to get the graphite to transfer onto the wood simply using pressure from that writing utensil. When you're finished tracing the outline, remove the tape and paper and touch up the transferred pencil markings if needed. But your graphite should have transferred and now you have a stencil to work with for wood-burning. If you're working with a darker material, you can use white chalk instead of pencil for your initial shading. This will help you see the transfer more clearly. You can also use this transfer method for non wood burning projects, like wooden signs using paint.
5. Time To Burn!: Now that your design is fully transferred to your piece of wood, it's time to start woodburning. Let's go over some simple tips for the best technique. It's important to have a practice or marking plank nearby. Even better if it's the same type of wood as your product piece. You can use this wood as a place to set your tool stand and tool when not in use to make sure you have a safe work area. It is so important to practice, practice, practice, and be patient with yourself. Your projects are not going to be perfect. Woodburning is an imperfect art. We're taking a burn and actually trying to control the burn as we apply it to wood. You will improve over time, but don't expect perfection out of yourself. Another tip is not to make your first project something that's really high stakes. Don't plan to woodburn an important gift needed in just a couple of days. Give yourself time and do a practice project like the one in the class project. Go slowly, but not too slowly. Find your own comfortable pace. The pressure of the pen will vary depending on the wood. Some balsa and pine woods are so soft that you may find it difficult to go outside of the grain of the wood. When in doubt, press lightly the first time. You can always go over your design a second or third time to add depth to the burn.
6. The Finishing Touch: Now let's talk about finishing your item. You can stain or paint a wood-burning items. Just make sure that you've finished wood-burning. Always start with untreated wood and then you can add your paints or stains later. For dark colored stains, you can go right over the wood-burning area. It won't affect the color of the wood-burning. Same for clear things like polyurethane or other finishes. But if you're using a lighter colored stain or a solid pit, you're going to want to make sure to go closely around the wood-burning area. You can keep some Q tips on hand or a small cloth to take any unwanted paint out of the wood-burning crevices as you go. If you're following along with the class project to finish these wooden kitchen utensils, we should use a food grade protective layer. I'm going to use a food grade mineral oil to coat the entire wooden spoon. I'm just going to rub it on using a cloth or a sponge and make sure that I've covered it evenly. If you're using something that's not totally liquid like bees wax, just make sure you don't leave it to build up on any spots of the spoon, so it doesn't dry evenly.
7. Let's Recap: We made it to the end of the class. Let's go over some of the key concepts just to keep them fresh in our memory. First, safety tips. Have a safe work area, only burn on untreated wood, and let your tool cool down completely between tip changes. Take breaks often and avoid inhaling smoke, and never leave your tool hot and unattended. Second, techniques. Go slow and steady. Be patient with yourself and practice, practice, practice. Consider doing the class project to have a nice low stakes project to get started with wood-burning. If it works out, great, you can give it to somebody you love. If it doesn't, it's still a wooden utensil and it'll still work in your kitchen just fine. You can do it. Just try it out and let me know how it goes. I'm always here to help. If you have any questions or challenges as you're going along with the class project, just reach out to me. If you're doing the class project, make sure to post a photo in the gallery below. Thank you so much for participating in my first class on Skillshare. I'm really excited to be teaching on this platform, and I plan to post more videos on wood-burning, woodworking and other DIY projects coming soon. Make sure you follow me so you don't miss a single class. Thanks.
 Alex Haggert Way, DIY-er extroardinaire