Transcripts
1. Intro: A you, a pretty designer trying to improve your
skills in blender to create attractive
content that will get you more clients,
and nowadays, it is very difficult to impress the clients because everyone
is copying each other, and it is no longer
enough to just create simple renders
or animations. You need to create
something unique. In this course, I will
teach you how to create unique renders and
dramatically improve the appearance of
your render even by 1,000% and literally
brief life into them. Addiction to this
will also share the secrets of
modeling, animation, and lightning that professionals
use in their work, which will allow you
to become one of them, and with this knowledge,
attract new clients. Don't waste your time and force this course to gain
valuable knowledge that will help you grow
your pretty career from the ground to the sky.
2. Product Modeling: Okay, first, let's create a render that we
can animate later. For that, let's open blender, and after we open. Blender, we can
create a new project. And since we don't
need these objects, we can select them
and delete them. And here you can see what
buttons I'm pressing right now, so it's easier for you to follow along and
learn the hot keys. Now, let's go to the front
view for more convenience by pressing numpad three and import the reference
of our product, which you can find in
the description below, by pressing Shift plus
A image reference. And Let's move the
reference a little bit on the x axis so it won't
get in our way later, and also on the z axis. At the bottom of the product is next to the three D coursor, which will make
modeling much easier. Let's create a circle. Also need to scale
it by pressing S and dite press E to extrude
it on the z axis, according to the reference, then press E plus S
to ex and scale it, and then extrude it
again on the z axis. Let's add some details
to this model, and we can start from
the top, and for that, we need to turn on the x ray and that will allow us to see through the mesh and align everything in according
to the reference. Now we need to press control
plus r to create loopcuts, and scroll the mouse
will to add more. I also forgot to
add loopcat here. After we are ready,
we can press tool to select the edges and by
pressing root plus lt, we can select these
edges and then ble them by pressing
Control plus B. Now we need to use some tools on the left side on the screen, and for now, we need
the extrot tool. Click on this icon,
hold the mouse, and you will see different
options for this tool. Here we need to choose the
extro along the normals, and then just drag
this yellow dot. And the same thing we
need to do for this part. Also, we need to
close the top part, so press two to edit the
edges and select them withholding id and
then press F close it. Same thing we need
to do at the bottom. Now let's add some polygans to the three d object to
make it more realistic, and for that, we need to
add a subdivision modifier. So just go to the modifier tap, click on Add modifiers, and choose subdivision modifier. And to fix this problem, we need to add some loop cuts in the places where we want
our edges to be sharper, by pressing control plus r. You seeing monsters
at your window. No, you can't sleep. You pretend though. You don't have to play the hero. 'Cause I got you
like you got me. When the shakes, when the ball scream to the last
spray every heart beat. And to avoid adding
loop cuts one by one. On the lead, we can
add one loop cut in here in the middle,
here and here. And then just press Control
plus B to bovel them. And the same thing we
can do here and here. Also, we need to press
free to be able to edits faces and select this
face, and then press I. Also, we can right
click and smooth it. At the bottom, we
can also select this phase by pressing
I to in sort. Then press I again and
move it on the z axis. And then press I again. Here it is our basic
product shape is ready, but I personally want to make the main part a little wider. I just click on the x
ray, select this part, and press and plus
a couple of times. T select the whole part, and then I press shift
plus control plus z to scale pin along
the x and y axis. Now let's figure
out how to create and apply text to an object. First of all, let's
create a text. For this, press shift
plus A and click on text. Now, we need to rotate it along the z axis by 90 degrees and along the greek
axis so that it is convenient for us to
edit it in the future. And by pressing tap, we can change the text to
the one we want. If we click on this icon, the text s elected, we can customize the text
in more detail. First, let's change the fond. For this text, we need to
times new Romans fund. After we have selected the fund, we can also turn the x ray
to the text in its place. Now we can press
Shift plus d and duplicate the text and
write another text. For this text, we
need the aerial fund. You can of course, change
the funds to any others, and again, we need
to scale and move the text in the same way
as on the reference. And by the same principle, we need to create another text. So we have our text, but how to attach it to
the battle, you might ask. Many people do it by just
adding a string crop modifier. But as you can see, our text
doesn't look very good. We can also add a modifier
and make the topology. After that, you can apply
a sin crop modifier again. This method is good, but sometimes there are
problems like this, which also doesn't
look very good. Let me show you the
method that I use most often and which doesn't
add polygons to our scene. For this method, we
need to select our text and convert it to mash
by right clicking, convert to and Mash. If we go to edit mode, we can see how bad the topology
is here. Let's fix it. For this, we need to
add decimate modifier. In this modifier,
we need to select the planner and
then just apply it. As you can see, everything has become much cleaner and nicer. Now we need to at our
treasured Shri crop modifier. As a target for the shrim crab, we need to select our bottle. And to fix this problem. We need to select
the rob method as a project and put check marks on the
positive and negative. As you can see, the text is inside the bottle and
at on the surface. And to fix this, we need
to increase the offset. And here is how we can attach the text without
increasing its polygons. This method is especially suitable for those
who do not have a very powerful computer and who want to save time on rendering. And we need to repeat Ervin, we did with other texts. Cause I got you like you got me. When the earth shakes, when the brow scream
a spray every hobby. In my case, before turning
the text into a mesh, I need to change the text and make only the
fos letter capital, and then continue to do the same thing that we
did for other texts. And I can congratulate
you because we have created the main
object of our scene, which will be the
center of our render. And in the next lesson, we will create all
the other objects of the environment
with which we can empathize all the
beauty of the product, and also learn the
secrets of how to attract the attention of customers to render using the environment. So let's not waste a minute, and I will see you
in the next lesson.
3. Creating an Environment: Let's create objects
for environment. That will help to sympathize all the beauty of our product. So that this reference does
not interfere with us. During creation, we
can simply delete it. Our first object will
be the simplest. And to create it, we
will need a cube. And to make it
easier to modify it, we can focus on it
by pressing slash. Our first object will be boards. We just need to
scale the object on the x greg and axis until we
achieve the desired result. S Monster at your window. No, you can't sleep, pertenu you don't have
to play the hero. Because I got you
like you got me. And when we're happy and
satisfied with achieved result, we need to add an
array modifier. And in my case, change the factor
from X to greg. And this will allow us to change the distance
between the boards. And thanks to this modifier, we do not need to duplicate the boards one by one in a row. Because if we increase the
count, it will do it for us. To make the boards
more realistic, we need to add abovel modifier, and then move it up. For it to work correctly, we need to press control
plus A and apply the scale. Now we can change the
bovel by decreasing the amount to a very low value. This modifier will allow
us to soften the edges. We also need to right click
and shade move our object. And we have created
the first object. Let's place it
somewhere here for now. And now let's create a stone on which our
product will stand. For this, we also need a
cube. Let's focus on it. For this cube, we need to
apply a subdivision modifier. And increase the level of
U ports to four or five. Now we need to add another
modifier called Display. And click on u to
create a new texture. If we click on this icon, here we can change the texture that will be applied
to our object. For our purpose, we
need a boroni texture. Here we just need to
increase the size of the texture to 1.12
or slightly more. As you can see, it's not really
in the shape of the rock. Let's go to the modifiers, and then we click here on the cyc in the display modifier. We will be able to
freely change the object in edits mode without
losing the texture. All that remains for
us to do is extrude, scale and move object until we get a stone of the
shape we like. We can also reduce the
strength of the displacement, and the secret to
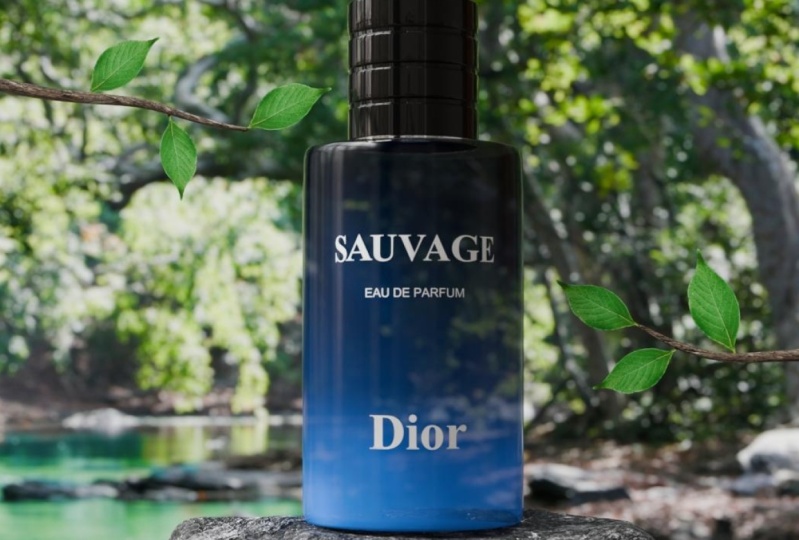
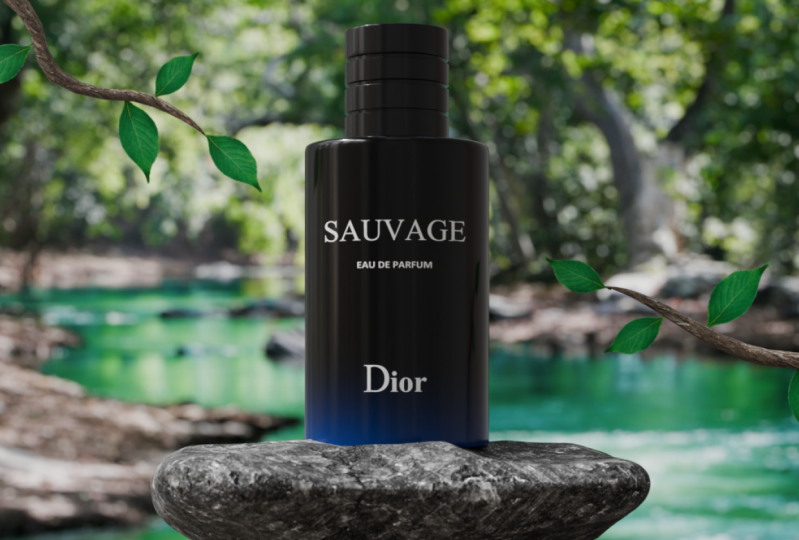
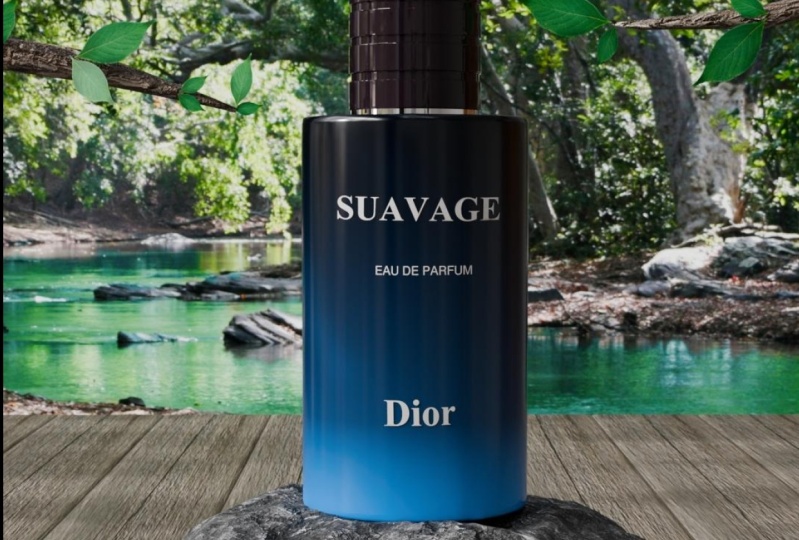
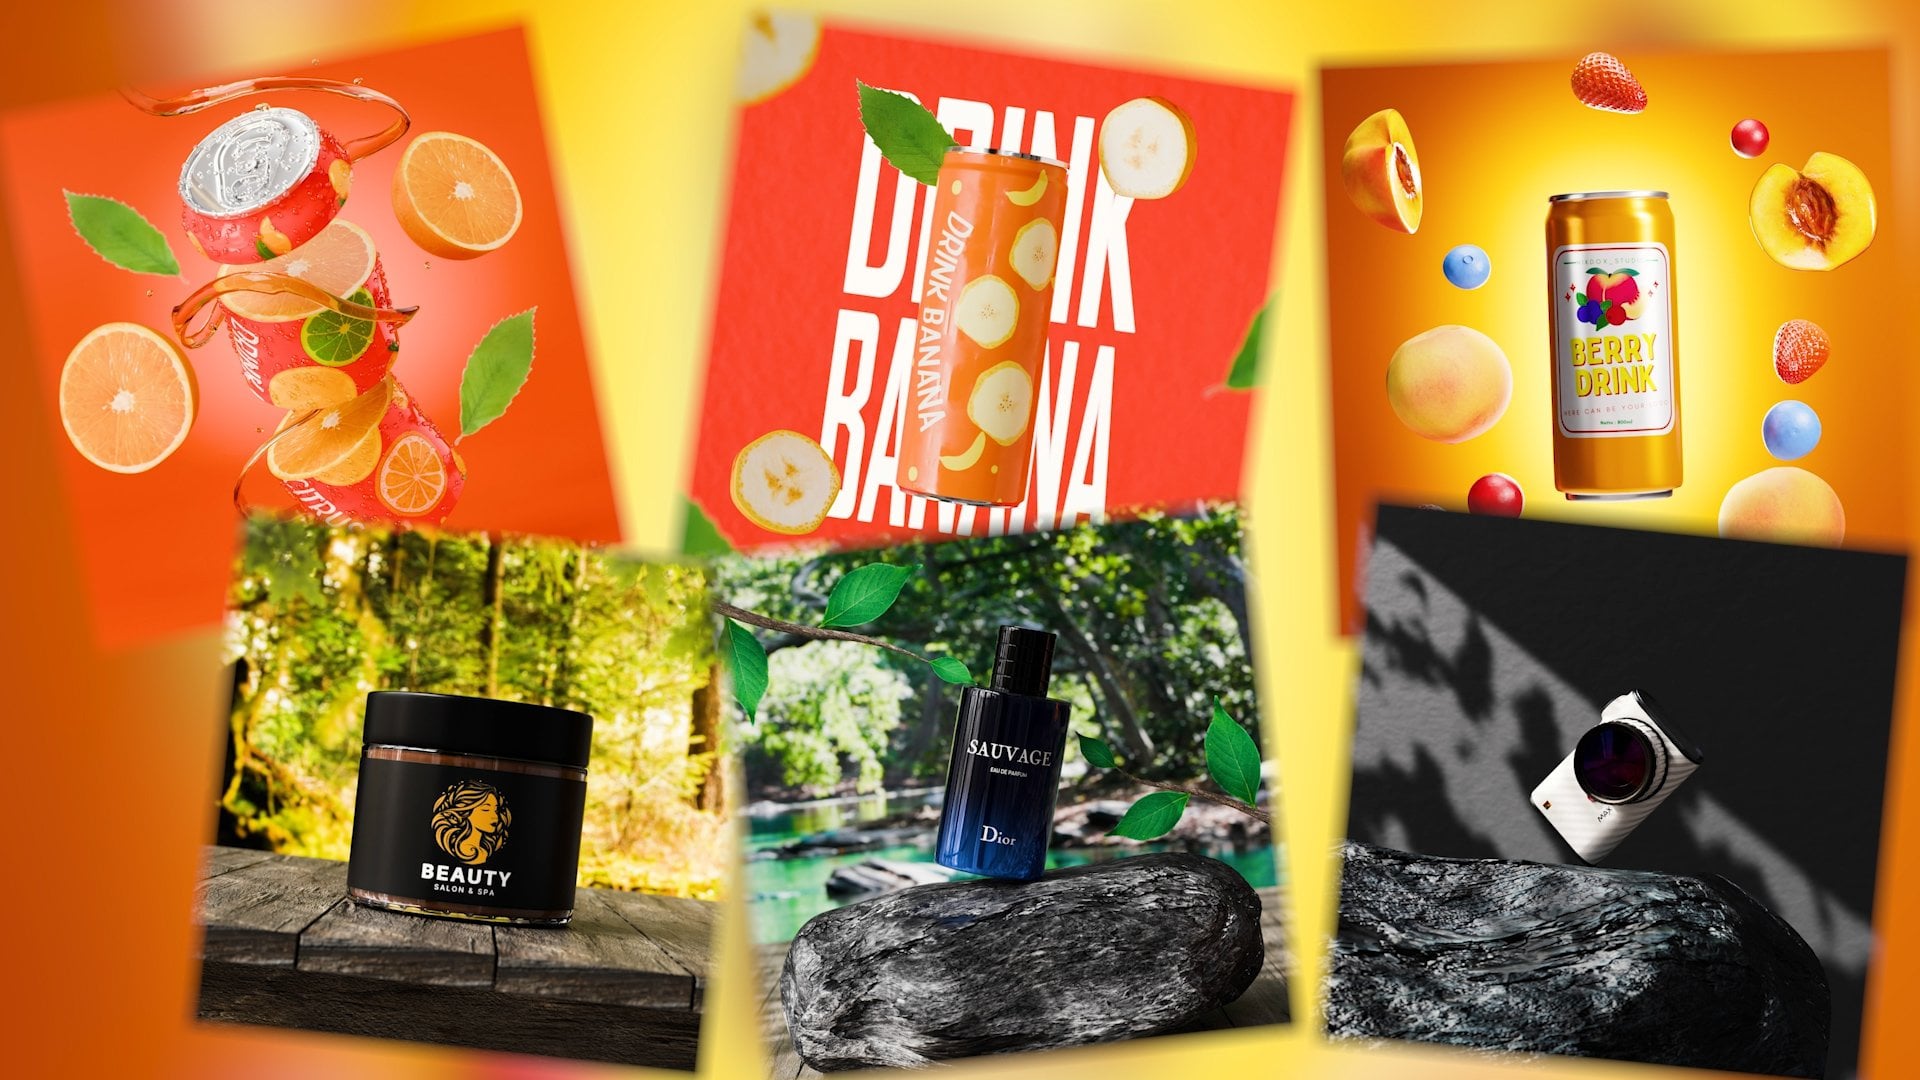
attracting customers attention with your
render that you need to highlight your
product and give it an environment that will
enhance its advantages. That is an example
with perfumes, it can be nature or a forest. In the case of drinks, it can be different fruits, that will amplify the taste, and naturalists and so on. When you have created
the perfect version of the stone for yourself and
are happy with the results, we can go back to the scene
by present slash again. In my case, I need to retain the stone by 90 degrees
along the Z axis. And also apply modifiers. Then right click
and shade smooth. If the abject looks slow poly, you can also add another
subdivision modifier. Now let's modify the stone a little and make
it more realistic. In this case, by making
it flatter at the bottom. For this, we need to
select these faces, and then press control
plus a few times and turn on proportional editing
from above or pressing. After we have turned it
on, we need to press S, z and zero, which will flatten these vertices
on the z axis. In case, I need to select
a slightly smaller area, and now our stone will
look more realistic, not overlap with other objects. Also, if your stone came
out too big or small, it can modify a
disproportional editing, which allows you to move scale, or rotate vertices affecting
other vertices nearby. And to make it easier for us
to move the perform battle. Let's select the bottle
along with text. Then by pressing shift, we need to select the bottle itself and press control plus B. Object keep transform, and this will allow us to attach
the text to the bottle. When we move the bottle, the
text will also move with it. Also, let's make the surface
more flat on the top of the stone that it is convenient
to put our product on it. You can also safely
change objects here and there until you are sure that you are happy
with the result. When you're happy
with the results, it's time to create a very
important object to the scene, and this object is the camera. We press num three, go to the front view and then press control plus plus zero. We can change the
view from the camera to the one that we see
now in front of us. When it comes to
setting up the camera, we need to change a very
important parameter by clicking on the camera icon. Here, you need to change the
focal length to 80 or 125, which is the standard for realistic photos or renders
in camera for photography, and in free D. Also, if we go to output, we can change the
resolution of the camera. My case, I will change the
resolution to thousand 80 by 1080 because I want to put
it on my social media later. But you can use any
resolution you want. After that, we need
to make sure that our product is in the
center of the camera view. Also if you press N, then go to view, and then check the box for
camera to view. Can zoom in or out of the camera view using
the mouse wheel. Now let's create branches. That will highlight our product. For this, we need to
create a bezier curve. And rotated 90 degrees, first along the z axis, and then along the cric axis. By pressing er Z
90 and er grec 90. Let's move it somewhere here, so it will be visible
from the camera view, and if we go to the edit mode, we will see such points
similar to vertices. All we need to do
is just rotate, ex, and duplicate them to get
the shape of the branches. When you're happy
with the result, we can just duplicate
the scurve to the other side by
present shift plus d, and also change it a little. After change the shape
of the branches, we need to add thickness. For this, we need to go here
and open in the geometry. We need to scroll a bit, and we need to increase
the depth to 0.08. We also need to do the
same for the other curve. An to continue
changes the course, we need to convert
them into a mesh. For this, we need to press the right mouse button,
convert to mesh. We also need to do the
same for the other curve. If we go to the edit mode, we can see that the curve has successfully turned into a mesh. As you may know, robes
usually do not have the same thickness at the
beginning, and at the end. At the end, they are less thin. In repeat this, let's like this. Vvertices, with the
ld key down press F to close the mesh and using
proportional editing, we just need to scale
it down by adjusting the proportional editing
radius with the mouse. We can also rotate and move the vertices and change
the shape of the branch. Also, don't forget
to smooth thin, if the branch is too low poly, we can add a
subdivision surface. We need to do the same for
the neighboring branch. On this, we finished creating
objects for the environment and learned the secrets of using this object to
attract attention. In the next lesson,
we will learn how to all the objects
that we created, and we will also
learn how to use the background to improve
your render several times. Let's not waste a minute and I see you in
the next lesson.
4. Texturing: In the last lesson, we created all the necessary free objects. Now let's learn how
to texture them and how to create
different materials. In this window, it will be very difficult for us
to texture something. We need to go to
the shading tab, and here all the materials
and textures are created. Let's start with
something simple and apply textures
to the boards. For this, let's select them and click on U to create a material. If you're a beginner and are entering the blender
for the first time, we need to activate one addin
to quickly export textures. For this, we need to
click on the file, preferences, click
on the addon panel, and in the sarge bar
ride the note wrangler, and put a tick next to it. After that, we can
safely close the window. And to export textures, we need to click on this note, and then press Shift
plus Control plus t and select the textures that you can find in description below. As we can see, the size of the structure is
not very realistic. And to fix this, need to go here and click on the UV editor. Before we continue
to do something, we need to apply
the array modifier, and then go to edit mode, select all vertices
by pressing A, and after that, press and
click on Smart UV project. To change the size and
position of the texture, we just need to move and increase the UV
map by pressing S or G. To add more detail, we can go back to
the shader editor and just increase the
strength in the normal map, which will make all the
irregularities more realistic. Using the same method, let's apply the
texture to the stone. First selected, then
create a new material, and perceived plus
control plus T, and export the textures
found in the description. And to fix the position
of the texture, we need to go to the UV editor, select all the ordics
in the edit mode, then press U, and this time, we need to select
the Que projection. You can also select Smart
TV project so that Blender does the work for us and determine where
the seams will be. But sometimes when
using this method, blender decide to
put too many seams and the texture joints
become very visible. Therefore, in this case, it is better to choose
a Q projection. Let's go back to the Shader
editor, and as for me, this tone texture is very dark, and it will stand
out in the scene. And to change the
color of the texture, we need to press
shaft plus A and add a huge sitration node and place it in the
middle right here. And by changing the value, we can make it more gray. You can also play with node to understand how it works
and what it can do. Let's apply textures
to the branches. For this, we will again
create a new material, press shoot plus Control plus T, select textures, select
fine, and press, select Smart TV project, and go to the UV editor, and just increase the
size and position of this Mp until we achieve
a realistic result. And also for more realism, we can increase the
normal map strength. And all that remains is to apply the texture
to this branch. But in order not to
repeat all this again, we can simply select it, then with the shift pressed, select the branch with
the texture press control plus L and select
link materials. In the same way, we can also copy modifiers from
another object. But we still have to unwrap and change the size
of the UV map. And we learned how to export
and apply textures to objects and now
let's learn how to create materials using nodes. And apply these materials
to our main object. First, let's lect our product, and we need to click
on this ball icon. Here, create a new material by clicking on plus icon,
and another one. Also, let's rename them
for more convenience, and this will be
the late material and this glass material. And we will also need
another material. And this will be
the metal material. Now let's set the boundaries
for each material to apply the desired material to the
desired part of the object. For this, let's select
this phase and then press control and plus until
we select the whole lid. If you went too far, you can
press control and minus. When we select the lit, we can separate it by
press P and selection. Now let's create a
material for the. For this, selected, And here we just need to lower the roughness parameter
to very small amount. And then change the
color to black. Let's also quickly
create a metal material. For this, you need to click
on it in this panel and just increase the metallic
parameter and lower roughness. Let's apply this material. For that, we need to create a seam where we wanted to start. Let's select these edges
with the dd held down and then right click
and choose Mark them. I we press three, we can
select any phase and press, and we will select
the entire area to which we need to
apply this material. Now we just need to select the metal material
and click on a sign. And Fla, we have applied the metallic material
to the desired port. And there is one last material left to create for the bottle, and that is the class material. Let's immediately
apply it to our object by selecting Ervin in
edit mode by pressing A, and clicking a sign on the
selected class material here. And to create this gradient
pattern on this bottle, we need to create a
gradient texture. And connect it to the main node. We will also need
a color ramp to define the colors and
control the gradient, and we need to place it
between these nodes. Also to rotate the gradient, we need to select it
and press control plus t. Now let's change
the type of gradient. Instead of linear, we
can choose quadratic. If you pull the stick
in the color ramp, we can control the area that is occupied by black
and white color. But as you can see this gradient is torned in the
wrong direction. Let's rotate it 90
degrees by changing the ecric barometer in
rotation in the mapping node. You can also look at
different types of gradient and choose the
one that suits you best. But I will probably choose linear and to make the
gradient even smoother, let's change the
color ramp type to is and all that remains to be done is to change the colors
in the color ramp, and also reduce the roughness. That's it, as you can see, creating materials
is very simple. Now let's add basic ly to scene, and to see any changes, we need to go to the render view and then click on this icon and change the render
engine to the cycles, and devise change
to GPU compute. And now click on the Clobe icon, and here we need to click on the CLO Dot and select
the environment texture. If we click Open, we can import HTR, which will be the main
source of our light. And also we can reduce Alpha in glass material a little to
create transparent effect. Just a tiny bit. Later, I also changed color. And changed color ramp to be spine to make gradient
even more smoother. Now let's create the ground
and leaves for our branches. For this, we need to
enable another don, which is called import
images as planes. When you activate it, we
need to press Shift plus a e images as planes and
select environment picture. Let's scale it and
move to the ground. As you can see, it is dull and not very
pleasant to the eye. And to fix it, let's
go to shading tub, and here we need to
delete this node. Instead at and connect We can also lighting power, and as you can see, picture
literally come to life. And let's hide it for now, and we'll create leaves
for the branches. In the same way,
we need to import the images into the scene. All we had to do was scale and play the leaves
on the branches. And in order not to
import the leaves again, and again, you can simply duplicate them by
pressing Shift plus D. Sing monster at your window. No, you can't sleep. Pretendo. You don't
have to play the hero. 'Cause I got you
like you got me. When the shakes, when the
bow scream to pra every. And when you're satisfied
with your result, I can congratulate you
because in this lesson, we'll learn how to import and apply textures and how to create materials and also created the main light
source in our scene. And in the next lesson, we will learn how to
create gobo lighting, which is used by all professionals
in FD and photography, and which will
always be useful to you in creating
attractive renders, for portfolio or for clients. So let's get started, and I will see you
in the next lesson.
5. Gobo Lighting: So let's figure out how to create gobo lighting
that you can confintly use in your renders and add more realism to them. To begin with, let's change
the direction of the HDI. To do this, let's go
to the shading tap. Here, instead of the object, we need to select the world, which will allow us changing nodes on the selected object, but on our HDI. Then we need to press control
plus t and just change the degree of rotation
on the z axis. Now let's finally
create cobol lighting. To do this, we need to
create an arial light. And then just move it to the site and rotate
it to our product. And we can also scale it. To see the changes, we need
to click on this lamp icon, and here we need to
decrease the spread to one. This will create a sun beam. Now let's give the
texture to this beam. To do that, we need to
go again to the shading, switch to the object here. To use nodes, we need
to check the box here, and we just need to
add any texture. In case, it is a nice texture, and we also need to create a color ramp and connect
it all together. To the result, we
need to simply bring these stickers closer
to each other. You can also increase
the light itself, if necessary, and just play with the noise
texture settings. And in this way, you can create any pattern
in any shadow of a light, using different textures
from noise two w textures. Now, let's improve our render
and highlight our product among the scene by adding
focus for the camera. To do this, let's
select the camera. And click on this camera icon. Here we need to
activate the depth of field and select our
product as a focus object. To change the focus strength, we just need to change
the FSA parameter. But keep in mind that the closer the object is to
our focus object, the less blower there
will be on this object. For example, if you want your background to be more blowed, you just need to move it away. After you play it with the focus and you're satisfied
with the result, Let's do a little
color correction. And to do this, let's click on this icon and scroll to
the color management. Open it, and in the look, we can change various
color correction filters. I always use medium
high contrast, but you can look
at other options and see which one
looks better for you. And I can congratulate
you because we have created a scene that you can already render and put on your social media or
send to your client. But we will go further
and in the next lesson, we will learn how to improve
the render ten times, and with the help of
animation, give it live. So let's not waste a minute, and I see you in
the next lesson.
6. How to Use Animation to Improve Your Render: The previous lesson, we
learned how to create attractive and mind blowing
renders from scratch. This lesson, we'll
learn how to bring them to life with animation and attract even more people to your work and show that
you are a professional. So let's get started. The first thing we need to do is to tie the leaves
to the branches. Later it will be much
easier to animate them. So let's lag them
with shift held down, and the last objects the branch. Then press control plus
P, object transform. And now if we move the branch, the leaf will move with it. So let's do the same
for other side. If you look at the branches moving due to the
wind in real life, they will not move like this. Let's fix that. For this, we need to select the branch, and go to the edit
mode and select the last vertices of this
branch with it held down, and then press shoot plus S and choose Corsor
to select it. This will move our Corsor
to selected vertices. Now we need to exit edit mode, right click, and choose
set origin to Corsor. Now because we move the
origin of this object back, we can rotate it in
a way that is more similar to real
branches in real life. Now let's do the same
for the other branch. S the last four dices of this branch with I pressed
and then press Shift plus S, and choose Corso to select it, and then right click
and choose set origin. And then to G coors.
Now our branches are ready for animation. But if we try to
rotate the leaves, we will notice a
similar problem. And we can solve it
in the same way. Let them in, and in edit mode, we need to select this vertex, then press **** plus S, e courser to select it, and then right click and
choose set region to geometry. And if you irritate now, we will notice that this
leaf moves more naturally. And we need to do this with
each leaf in the scene. S window. No, you can't sled. You don't have to here. 'Cause I got you like you got
me when the earth shakes, when the brow scream the spray. And when everything is ready, we can start animating. Let's start with
the branches and check that we are
on the first frame. And to create a key frame, we need to press C
and select rotation. After that, let's
go to frame 40, rotate the branch a little, and put the key frame again. Here's what we got.
Now let's go to the frame and just
copy the first frame by selecting it and
press Control plus C and control plus V. Also to
slow down the animation, we can move the last key
frame a little further. Okay, now let's go to frame 170 and copy and paste
the second key frame. And here's what we
got in the end. This will be the
endless animation. The last frame should be
the same as the first one. We need to copy and past
the first key frame. Now let's animate
the second branch. First, we'll go to
the first frame, and accept the frame just
by pressing the letter I, which is another way
to apply key frame. Then we'll go to
some other frame, rotate the object, and
accept the key frame. Then we'll go to another
frame further away, and again rotate the branch
and accept the key frame. I think my animation will
end on the frame 250. Let's move the
glass key frame on this branch to this frame. And also pat the first key
frame on the second branch. Let's see what we get. Let's also change the end of the animation here to frame 250, and our animation looks good, but the leaves looks wooden
and spoil the whole picture. Let's animate them.
Here we need to do the same thing as we
did with the branches. Just select the object. Put the key frame. Go
to the another frame, rotate it, and put
the keyframe again. And then we can just copy and create keyframes until
the end of the animation. Well not forgetting that if you want to create a loop animation, you need to have
the same keyframe at the beginning and at the end. And using this knowledge, we need to create an
animation for all the leaves. And as you can understand animation is a
very easy process. And to start animating, you do not need to have
an education in Fred. The main thing is
not forget that if you want to make a
realistic animation, you need to take into account
the rotation of the branch and create an animation of the leaves in accordance
with real life. And not just rotate them trino C. You go do. B M. There's
nothing I won't do. Will the chaos come When you have finished animating the leaves and are
happy with the result. Let me show you one
way that will improve the animation in a couple of clicks and make it
more realistic. For this, let's move
this window higher. And if we click here, this menu will open, and in it, we need to click
on Graph Editor. And now let's select every
object that we animated. And in this window, we
press A to select fine, then press T and choose Bazi. This will allow us to soften the animation and
make it smoother. We can also click here and
choose individual origin, which will allow us to select
each key frame separately, and we can scale everything
just a little bit, which will make
the animation even smoother and more professional. This is the trick
that you can use in any animation and it will give you a touch
of professionalism. Now it's time to
animate the camera. Here as always, we need to
go to the first key frame, Zoom the camera with your mouse wheel to
the point you want. The press the I key to
apply the key frame, and Let's go to the last frame of animation and move
the camera a little. And put another key frame. We'll get this result. But since we want to
create a loop animation, let's move the last keyframe
somewhere in the middle and just copy and paste the first key frame to
the end of the animation. And the last thing we left to
animate is a Global light. Let's select it and go
to the beginning of the animation and
put a key frame. Then rotate it a little
on the x axis in my case, and also don't forget to go to another frame and
you rotate the light. When you're happy with
the angle of rotation, just put a keyframe and and the first frame to the
end of the animation. I. And this is what we
get as a result. And to make the animation of the camera in light
more realistic. Let's go to the graph editor
and get the camera selected, press A in this window, then T, and select the B ZA. This made the camera animation at the beginning and at the end. The same thing needs to be
done with the Cob light. In this lesson, we
learned how to bring to life the render with
the help of animation, and all that remains to be
done is to adjust render sentis so that you don't waste your time on a very
long tedious render. And how to do this, we will talk about in the next lesson.
7. Render Settings: Let's talk about how to optimize the render
and set it up, so you don't have to wait
months for a five second video, and at the same time,
not to prefie quality. And to do this, let's
click on this icon, and if you haven't changed the engine two cycles,
we need to do this. And also change the device
from CPU to GPU compute, which will make you render much faster using not
only the processor, but also the graphic card. Next very important
parameter is Max samples and its number directly determines your render time as
well as quality. The more samples, the
higher the quality, and accordingly, the
longer the render time. I will advise you
to set it 170-800, to allow you to make the render pretty fast without
losing quality. You also can change the
color correction if you want and if we go to the output here, we can change the file in which we want to
save the animation. Also the format in which we
want to save our animation. I would advise choosing
GPAC because we choose FF PAC video or
another video format. If blender crashes,
you will have problems with
restoring this file. Unlike a PNG file, GPAC waits and is not
interferer in quality to PN G. All that remains to be done
is to press control plus F 12 to start rendering
the animation. Also do not forget to look at the conclusion because
it contains lots of interesting
information about how this knowledge will be useful in the future and
how to apply it correctly to attract customers.
8. Conclusion: This course has come to an end, and we learned how to create
products from a reference, how to create an environment
that will attract attention to the product
and reveals the advantages, and also revealed a couple
of secrets of professionals, and in the end, we animated the resulting render
using animation. You may ask, and how can I apply the knowledge
gained in this course? Well, you can apply
this knowledge to create animations or render in any field because
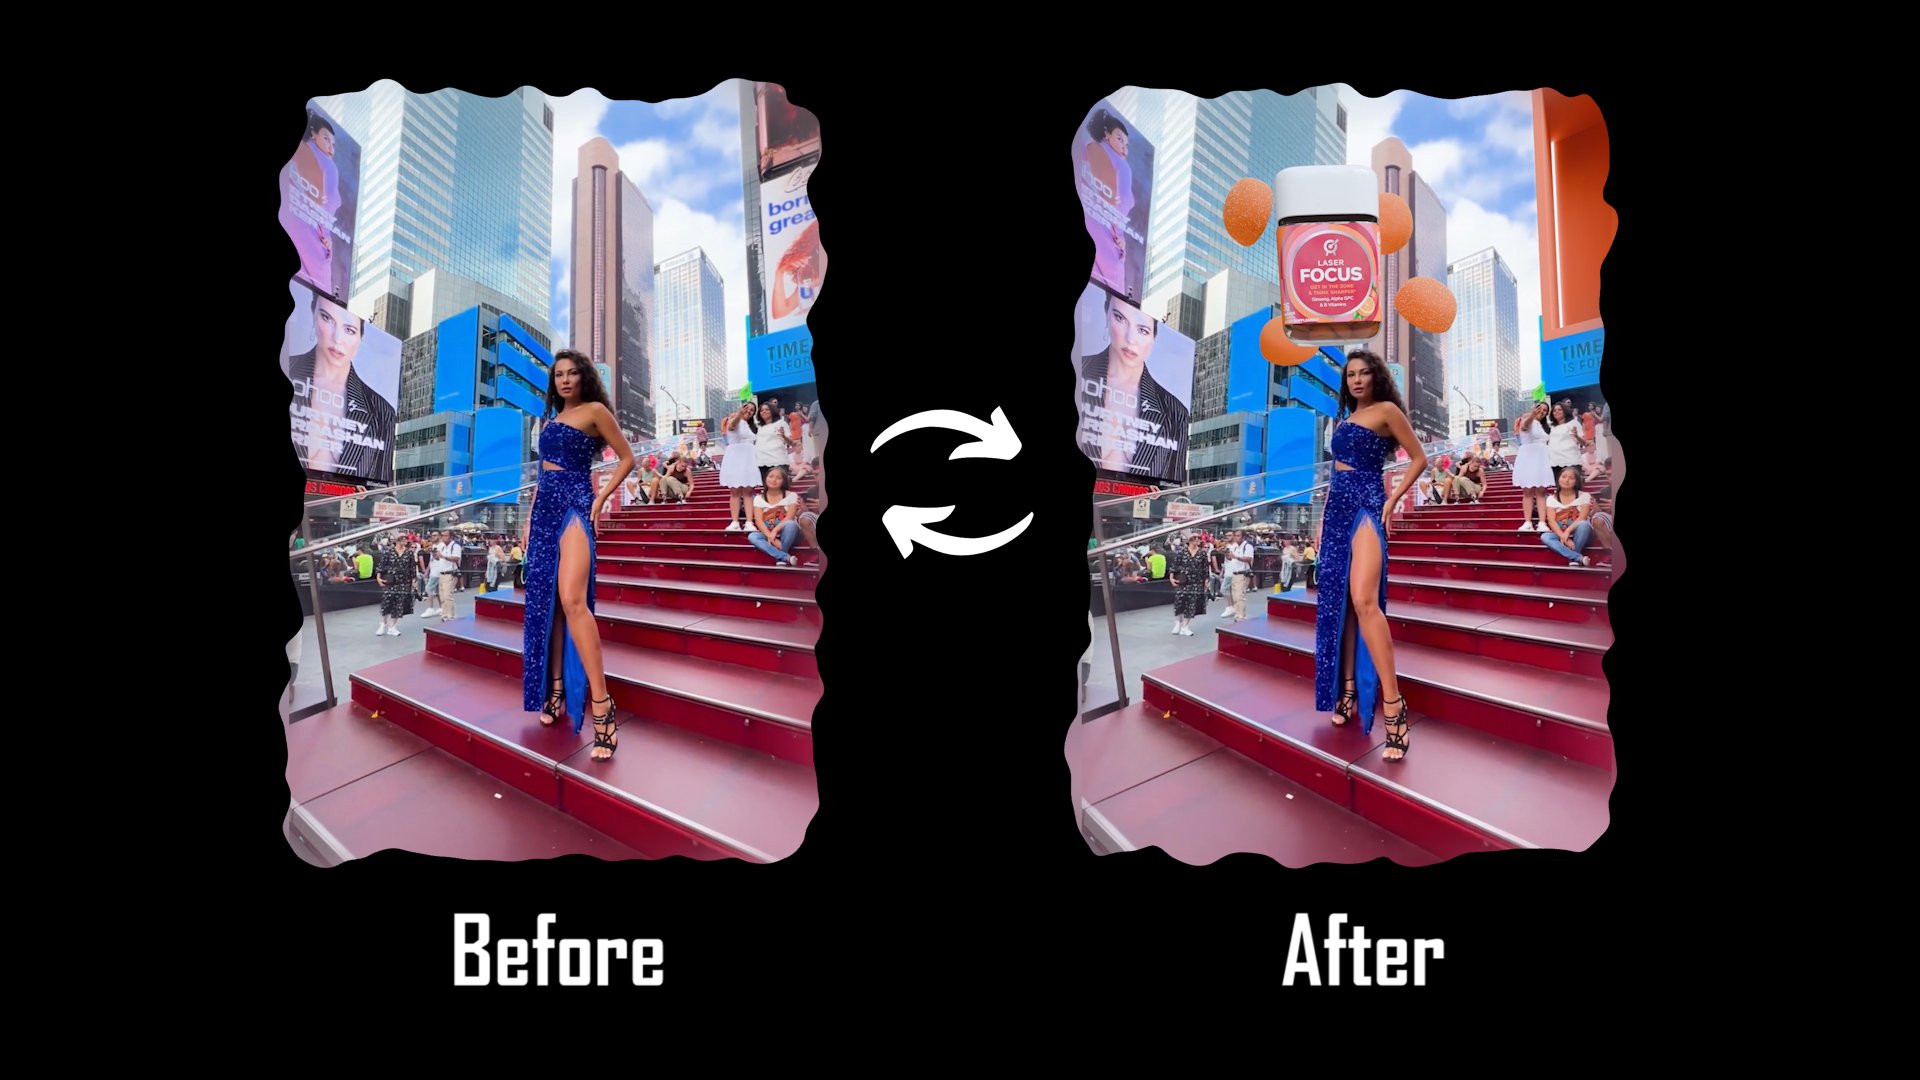
such leavely videos and renders are rare. And they help to attract
attention to the product, which will quickly be noticed by business owners in social media, who need this and who spend
days on end trying to create at least some content to somehow stand
out from others, and attract new customers. So using this knowledge wisely, you will never be hungry. And also do not get to send your final works so that
we can help you develop, and correct you in the right
direction if necessary. And if you have any problems, do not hesitate to ask, and I will personally answer you and help you
with your problem. So do not forget to look at
my other courses in which you can also learn things that will help you
grow in your career, and that's all for now
you in the next course.
 Nikdox Studio