Transcripts
1. Intro: This class we'll explore the fascinating world
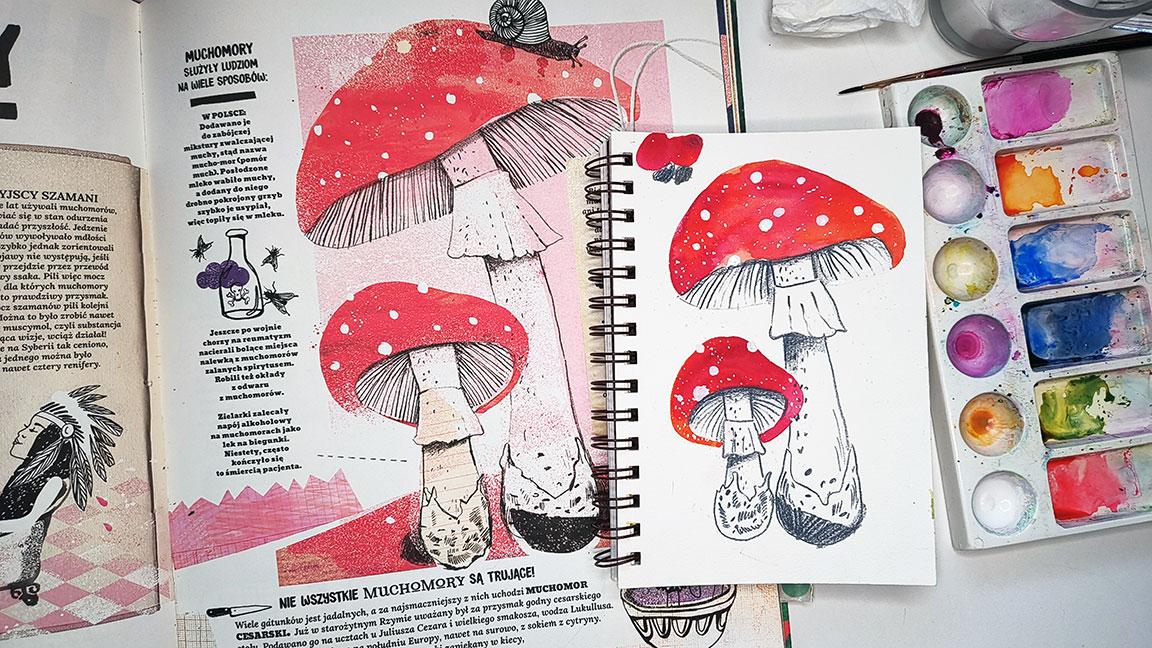
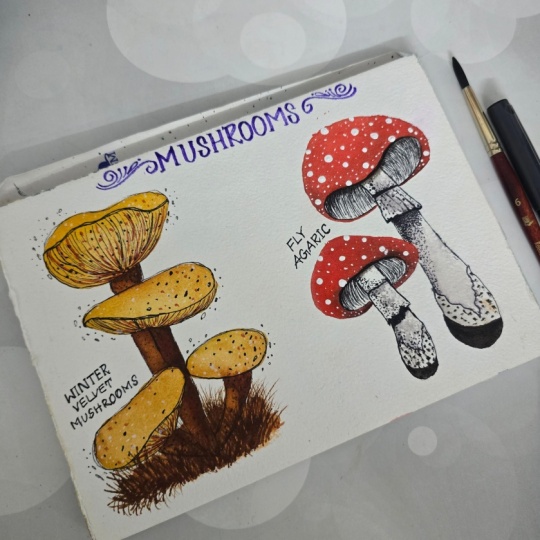
of mushrooms from the iconic red fly agaric to
warm golden honey mushrooms. The class was inspired by the beautifully
illustrated book. Gymnfactus ruta Gib
octuri nmiltpoenta, which exactly means mushrooms, strange facts from
their secret lives. We'll sketch and paint together focusing on simple
shapes, textures, and watercolor techniques that bring these forest
characters to life. Whether you're
painting along for relaxation or to improve
your watercolor skills, take your time,
enjoy the process, and let's have some fun
with colors and brushes.
2. Inspiration: Hi. This class will be a
little bit different from my previous ones because we will use a book as a
reference for our works. When I'm recording this
class, it's autumn outside. In autumn, we pick mushrooms. At least that's what
we do here in Poland. The inspiration, just
like I said before for this class
will be this book. Mushrooms strange facts about mushrooms that you never knew. It was illustrated by Asha
Gus and Liana Fabhmska. I know that it will be perhaps very hard
for you to spell. But this book have very, very beautiful illustration
which I just love and adore and I used it as a
reference for my class. For example, look at this beautiful illustrations and this illustration, I just love how this
was created or how this only with simple colors and simple shades was created. We will take inspiration for
our work from this book. For example, dish red mushroom. Very beautiful and very
interesting to paint because see how these shades
and shapes are created. These are only simple
lines and these are only some simple colors
and with a lot of texture, it gives a very fantastic feel, after all, at the end. In this class, we will explore inspiration
from this book. See you in the first project.
3. Materials: So what we will
use in this class. First of all, this time, I will use my visual journal, so it's smaller size than usual. We have used in my curses. I will use Visual journal
from Stratmor and it's 90 the watercolor paper. We will be painting in
smaller size this time. The second thing which we will use will be watercolor paints, but we will only use some simple colors like reds
and yellows and oranges. You don't have to have the whole range of
colors for this course. While painting with um paints, we need to use
watercolor brushes. We will use mostly
these two for mixing colors and layering first
layer of watercolor. We will also use
gouache or you can use Posca pen or some other brand of white jalpen if you have. But I will use Windsor
and Newton gouache, permanent white for that. This is my choice.
We will use pencil. This is a regular pencil
HB for sketching process. I will also need eraser. I have it here and I
have my sharpener. I have two in one in that case, and we will also use color pencils and we
mainly use black. But since my black
just got shortened and I had to throw the tiny part away and
I don't have black anymore. I need to buy one. I used
for the second tutorial, I used dark gray and
I used Pains gray, 60% five oh seven from luminos. But still, I have from
Mandel's number 38, it's also a good choice. But if you have black, just use black color pencil. This is all for that course and see you in the
first first video.
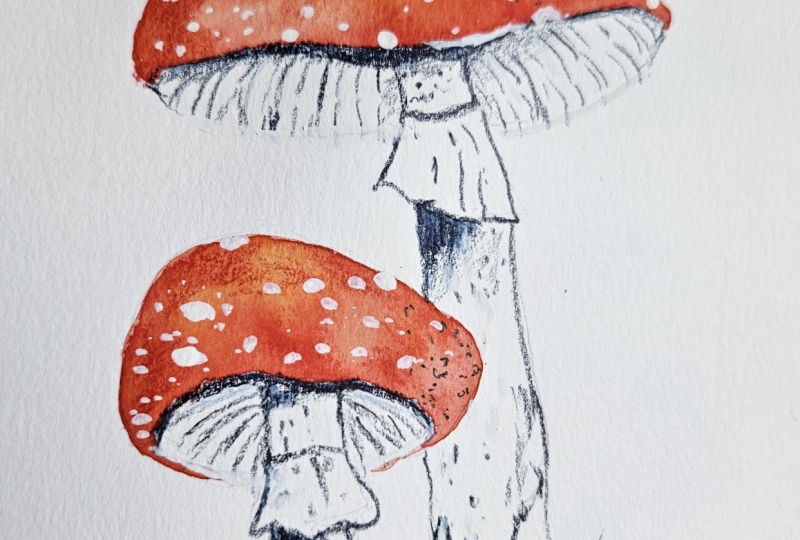
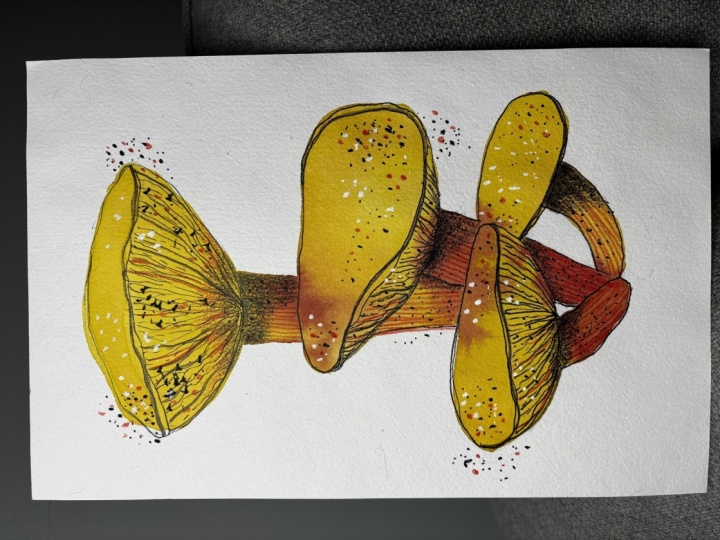
4. Sketching first mushroom : Okay, so this time
as a reference, I picked this mushroom and
it's called stopaduvka. It says here that you
can pick it after first frost in November
and even in December. And the official name of this mushroom is
winter velvet stem. I had to check in a dictionary. How it's real name in English. We will paint this
winter velvet stem, and here it says that the first part of the name says that you can pick it in winter. And the other part, so velvet steam is because
it's very nice in touch. It's like covered with velvet. So we will throw this mushroom with watercolors,
ink and pencils. Thanks for telling
me that crayons is not the same as colored pencils. I know that, but
somehow I just forgot and we will use, um,
colored pencils. As usual, we will
do it step by step. First, we need to make a
sketch of our mushrooms. I will use regular pencil
and it's I think HB. So it's not very soft
and not very hard. It's just this medium pencil
and we also need a rubber. Plastic eraser. I have this one from Tumbost but it can be any
anything you have. I use a watercolor paper
and it's 100% of cotton, it's because I have some work over on the other side
which I don't like, and I usually paint. When I don't like my work, I usually paint on the other
side of the same paper. So I have this paper and
I'm going to use it. So let's start from the sketch and we will
do it step by step. First, we need to draw this. First, we will draw this cup. It's something like that. And with this mushroom, we draw it from top to bottom. We need also to
draw stem for it. So it's somewhere in the middle. Of this cap. That's why we will draw
something like that. We will erase the parts
we don't need later on. While we do our sketch. As I look at this graphic, I see that here is bigger
and here is a smaller part. I will correct that and
make something like that. I will erase
unnecessary lines Okay. Next, we will draw
the second mushroom. This is this cup, just like you see
and look at it, it's just looks like a square. And when we look at
that illustration, we see that the area in
here is not very big, so we will leave not very much space in
here and we will try to draw the shape which will look similar to triangle and we
don't need these lines. That's why I erase
them because when I erase them, right away, it's easy for me to notice the overall shape of my work
and in this case, mushrooms. Again, we draw this stem. It's somewhere in the
half of the first one. I will draw it like that. And raise this because it's unnecessary and now we
have two smaller mushrooms. The one just touches the
stem of the second mushroom. I think it will be
something like that. It's just like you see, it's
almost stright over here. So it's rounded at the top, but it's only
curved, only curved. It's not much at the bottom. And we have rounded like
rounded stem of this mushroom. It's like that. And we have this last mushroom and I will draw the
whole area with the cap and gills
together and you see it touches the first one and it almost covers
the first one. It's something like that let's raise the lines
which we don't need. It will be easier for us to see. I also don't need
this bottom part of this first mushroom and
we also need this leg so It's something like that. Okay. Perhaps even this way. When we have our sketch ready, we need to make it lighter, so we will erase it a
little with our eraser. My sketch is very light right
now and in the next step, we will place a first layer
of watercolor. See you then.
5. Watercolor layer first mushroom: You look at that graphic, you just notice that there
are only few colors here. We have light brown, something similar to Sienna, perhaps, Sienna light. So dark values. This one just looks
like a light brown. But perhaps you
remember that I have only one light brown on my
palette and it's red her. I will definitely use
red char in here. We have some lighter areas, but it's because there
are white dots over here. The same as here, we have a very dark area and it's because we have
some dark dots in here. We also see that we have
some red tones in here. But for your knowledge, you don't have to paint this art just exactly
how it is in this book. You can pick whatever
colors you have, you can choose your
own in this way, use this graphic as a reference, just as something
on which you will learn new techniques and new
ways to create your own art. So let's mix our colors. Just like I said, I will
use just two shades. First one will be senna
light for the cap and I'll mix it in 50 50 ratio and I need
quite a lot of this color. The first work I have painted
from this illustration was work for which I have
used tumble markers. The difference between
that work and the one we will paint today is
that watercolor can vary. The color can vary
on who of the work. I think this way, the illustration
looks um differ. Every time you paint it, it will be different. Let's check our color. This one is the first one. The second one will
also Sienna light, but I will add just a touch
of red ocher to it because I need a shade which will be
slightly darker than this one. I need. This color
to be more brownish. This is my second color. I will place my paints near
me because I know that I usually need to make some colors while I paint because
they are not. They are just ending
and I will take a bigger brush because
I know that this part is quite big and with
a smaller brush, it takes a longer time. I need to make it quite quick. That's why I will take Roman
Schmall it's a medium size, and I will start
just like you see, the cap is in this light value, so I will start with
the sienna light color, and I will just paint the
whole the whole cup with it. Sometimes I just pick water. That's why we create this illusion that some
places are lighter, some places are darker, while I'll pick the paint
from my mixing palette. Then we have our stem. I'll clean my brush, make it dry because I don't
want to dilute the color. While this is still wet, I'm picking this darker
brown and I will add it to the bottom and
I need them to bleed. I want them to bleed
because it will be more interesting if these colors just merge with each other. Let's move on to the next cup. Once again, I will take my lighter broom and I will just touch in here because I want
this color to bleed. Just like you see, it won't
be exactly how it's on this illustration because
there are no bleeds in here, but I like this effect. That's why I will create one. Okay. Next, we have legs. The first one is lighter and
I will use my lighter brown. Perhaps I will add
a touch of this I touch up this medium
brown the second stem, I will paint just with this darker with
this medium brown. Still it doesn't
matter if it bleeds around because we will add
more details later on. Here we have light cups, so I would say and light stem. I will in this cup. With the stem. We have a stem in
here which is darker. Perhaps it will be easier to pick a smaller
brush for that. I will pick my smaller and
add this darker brown, it's just a medium brown
or that Yeah. Okay. And here we have a darker
stem and a lighter cap. I need to mix my moving brown. I think it will be easier
if I start from the stem. Okay then move on to the cap with a bigger brush. We need this layer to be dry while we go
to the next step. You can dry it with a hair
dryer or just leave it to dry by itself and do the ink
layer tomorrow, for example, especially if you don't
have time for painting, and I will dry my work with the hair dryer and I will be right back in the next video.
6. Ink / fineliner first mushroom: Okay, so now we will add
details with pen and ink. I will use just like I showed you in the material section, I will use Windsor and Newton
Ink 951 Black Indian ink. It's because it's waterproof, but it's also very good quality
with a reasonable price, and I will use Deep pen, and it's no name. I just bought it for
just like $2 on Amazon. And it's without a name it's nameless brand,
just like I said. I have few nips and
I like this one because it can create
a very thin line. So it crease this perhaps
not very fin line, but it's not very wide also and it does and it
usually don't bleed. I have other nips and they can sometimes just make you a
splatter and I don't want that. That's why this one
is my favorite one. Still, if you don't
have nip pen and ink, you can still use a
you can still use, for example, micron fine
liners for that stage. So you don't have to necessarily buy the stuff you
don't have in your house. First thing, as you see
at that illustration, you will notice
that all outlines, they don't exactly
cover the area. I meant that the outline may extend both ways
beyond the lines. They may be above the
area which we painted before or inside of this area
which we painted before. So let's start just like
before from top to bottom. When you see at that
mushroom, it's cap, the first layer is very soft and we have much harder lines below. Also, there are few
lines in this area, so we can mimic that. The first stage will be simply outlining our mushroom and here we have this rounded shape. It's something like that. And we go to the
stem on both ways, like I said before, we have here two lines. We can draw the second line. Then we draw the gills and
they are just like you notice, none of it is strike shape. They are a bit rounded. So we draw them like that. If you take a closer look
at this illustration, they sometimes stick
with each other. For example, they
can look like that. And what I like to add
to this illustration, something which is not in
here are the dotted lines. So lines which are not fully visible,
something like that. It creates more
interest in our work. I know that we have a dark
area in here, but for now, we just leave it like that
and we only outline our stem. Next, let's move on to
the second mushroom. Once again, we need to
outline the whole cap. I will outline it. Here we have also
the double lines. We will have something in
here and just like you see, this is something which you want achieve
with the fine liner. I have a line which is narrower in here and wider in here. You can also use for this brush pen to
achieve this effect. And just like on
the illustration, I just draw a second line
or even a third line, it doesn't matter much like
before, we draw gills. Just like the mushroom above, we will add this not fully
perfect dotted gilt. Let's draw the
outlines of our stems. This is the first one here
we had the second, mushroom. Let's take a look at that one. It will be easier for us to draw at the
beginning only the cap. It's something like that. Also, we have some
lines over here. We can also outline our stem because it will be easier and let's draw the gills. They are wave in here. So I draw wavy lines. Just like before, let's
add some more less full. Once again, let's
outline this stem, and also let's outline this
stem and outline the cap. This one is without gills, so it's a full cap. One more thing, just like you
look at that illustration, you will see a black
dots on the caps. Let's draw them. They will make illustration
more interesting. Also, you can draw them
outside of the mushrooms. For example, in
here and in here, when you look at the
illustration in the book, you will see that there are here some red elements which make this illustration
more interesting. Also in the bigger, as you look at it on the stem, we also have these dots. They create this darker effect. Let's throw them. Every detail counts. A Also in here we have, I will also draw on this. That's all for that stage. In the next stage, we will move on to the colored
pencils. See you then.
7. Colored pencils - first mushroom: Okay, so now is the
time to add details with our colored pencil. First will be black.
This is my black. Only this left from
my black pencil, but still I can use it. And while we look at
our illustration, we see that some strokes are
thicker here in this area, you have some texture. On a line and this texture can only give you colored pencil. That's why I will
start with my black and I will make some of my lines thicker and I don't have
to exactly trace the one I had drawn in the
previous step. They just can be lines which
goes next to the inky lines, so This step is only to add more interesting
details to our work. So here are some lines. We can still add some dots with our black tower black, just like you see in here, we have some darks over here. We have some shadow on the stem this I will do
with the side of my pencil. I will do something like that. And this goes slightly
up onto the cab. That's why I will do
something like that. And we have really dark in
this area under the cup. I will do more shadow
under the cub. Okay. And still we can add
some details this pencil. We do the same on the second
mushroom and we have some darkling here where I
have this double line, I will do it this way and I
will draw some more lines on my gills add some more details on a cup and here
we have a shadow, but only on the stem
of this mushroom. Let's make it darker. Let's make it darker over here. We can go a little onto
the gills with our black. Okay. And let's move on to this and once again, I will make some of my lines thicker with my pencil. O. Add some more dots here and on a cup and do the shadow under the because we have a lot
of shadow in here. We have few textures in here. We have these dots, we
have shadow made with pencil But this time, the darkest area is in here. So we do something like that. Also, I will like to add some shadow in
here in this area. In this way, this mushroom will pop will look like
it's closer to us. So we have a shadow. We add some dots to it
and the last mushroom, I think will outline most
of my cup or all my cup at details the same with leg because just
like you see and in here, we have noticed it also that
this side of leg is darker. I will also and we
have the same in here. I will also make this side darker and we have
strong shadow in here. First, I will outline it a bit. And I will create this
shadow still using my black. We have a very strong
shadow under this cap, so I will do it this way. Okay. Looks better now. I would like to add
some reddish tones just like we have here
on our mushrooms. But this won't be
um regular red. It will be sanguine russet, it's just like a brownish
red or reddish brown, I guess, I suppose. I think it's brick wall red, it's a glass in Polish. It's like a red of bricks and we we will add more
details to our mushrooms. Just like before we will
go from top to bottom. So we have some lines in here and also red
dots on a mushroom. Let's start with these lines. With lines, I will add more texture to my stem in
here and just like you see, it goes up on a cap. I will add this,
something like that. And just like before I did
with black pencil, this time, I will do with this bricret
I will outline few of my gills I will add more roundish shapes. Roundish dots. Okay, let's move on to the down part and we
will do the same trick. First, the gills because it's easier and we
will see how it looks. We have this stem is not as light as it
is in our illustration. That's why I will with
the side of my pencil, I will add a shadow in here. We will create a shadow and more the continuation
of this line in here. I will also like to add
these reddish tones in here. That's why I will also make
them just with the lines. And we can add some more dots in here to
make it more interesting. Okay. Now we will go to this
part to this part of stem, and we will do the
continuation of it with the lines here on this mushroom, we have some reding
here. Let's do that. We have this. Let's add some red on gills
just like before, and we can add some texture. In the place where
there is a shadow. To make it more united, we draw these dots
with our color, with our red and the same here. Let's add some more details
on the last mushroom, we will just create more
texture on a shadow. I add something like that. And let's add
details on the cup. I think this is all. I think it looks
much better now when we added the crayons. In the next step, we
will add the last touch with quash and you will
see how this work, how this illustration
also change when we add some white
details to our work. See you in the next video.
8. Gouache - first mushroom: So let's add some
details with white. Well, it doesn't have
to be white squash. It could also be white jalpan. It could also be white poscapen. I have only violet, but if you have white poscapen, it will also be fine. I will be using guash, so I need this
guash to be thick. I test on scrap paper
if I can paint details. Just like you see on
illustration and on a cap, we have some white dots. We can do some
splashes over here, but I know that for splashes, the gouache should be
more mixed with water, but when it's more
mixed with water, it gets transparent on a
work and I don't want that. That's why I will paint
this step by step with my with my hands. I'm just creating something
which will emulate splashes. With this white, I don't go to the areas where we have shadow. Shadows should be in shadows. We only paint in the areas which potentially are in light. Here, next, we have
a great amount over here and some big
splashes in the center. For example, let's start
with the bigger one. Perhaps it's easier. Let's add this, a lot of smaller elements. Okay. Let's do the same
in here because we have some bigger splashes in this area and some
smaller and in here, we have only smaller ones. But still, you can paint. We don't paint exactly
the same illustration. It's only inspiration for us, we can paint just like we want. I need to add more
water to myh we have bigger splashes and
a lot of light splashes. And the same in here, we
have a bigger splashes, and a lot of smaller splashes. Okay. That's it. We have our
illustration finished. I will show you
my previous work. This was made for
my Polish workshop, and this I have done with you. And just like you see, and this is the
beauty of watercolor. No two works are the same. It's opposite with making
my work with brush pen. Because color in a
brush pen don't varies, so it will almost
always look the same. I mean the background layer. When we are using brush pen, the background layer should
be or look very similar. But when we painting
with watercolors, no two works will be
the same because it's very hard to mix the
same colors over time. That's why every
work which you will create will be different and
that's the beauty of it. So I think we will paint
two more mushrooms from this book because these illustrations
are very beautiful. See you in the next project.
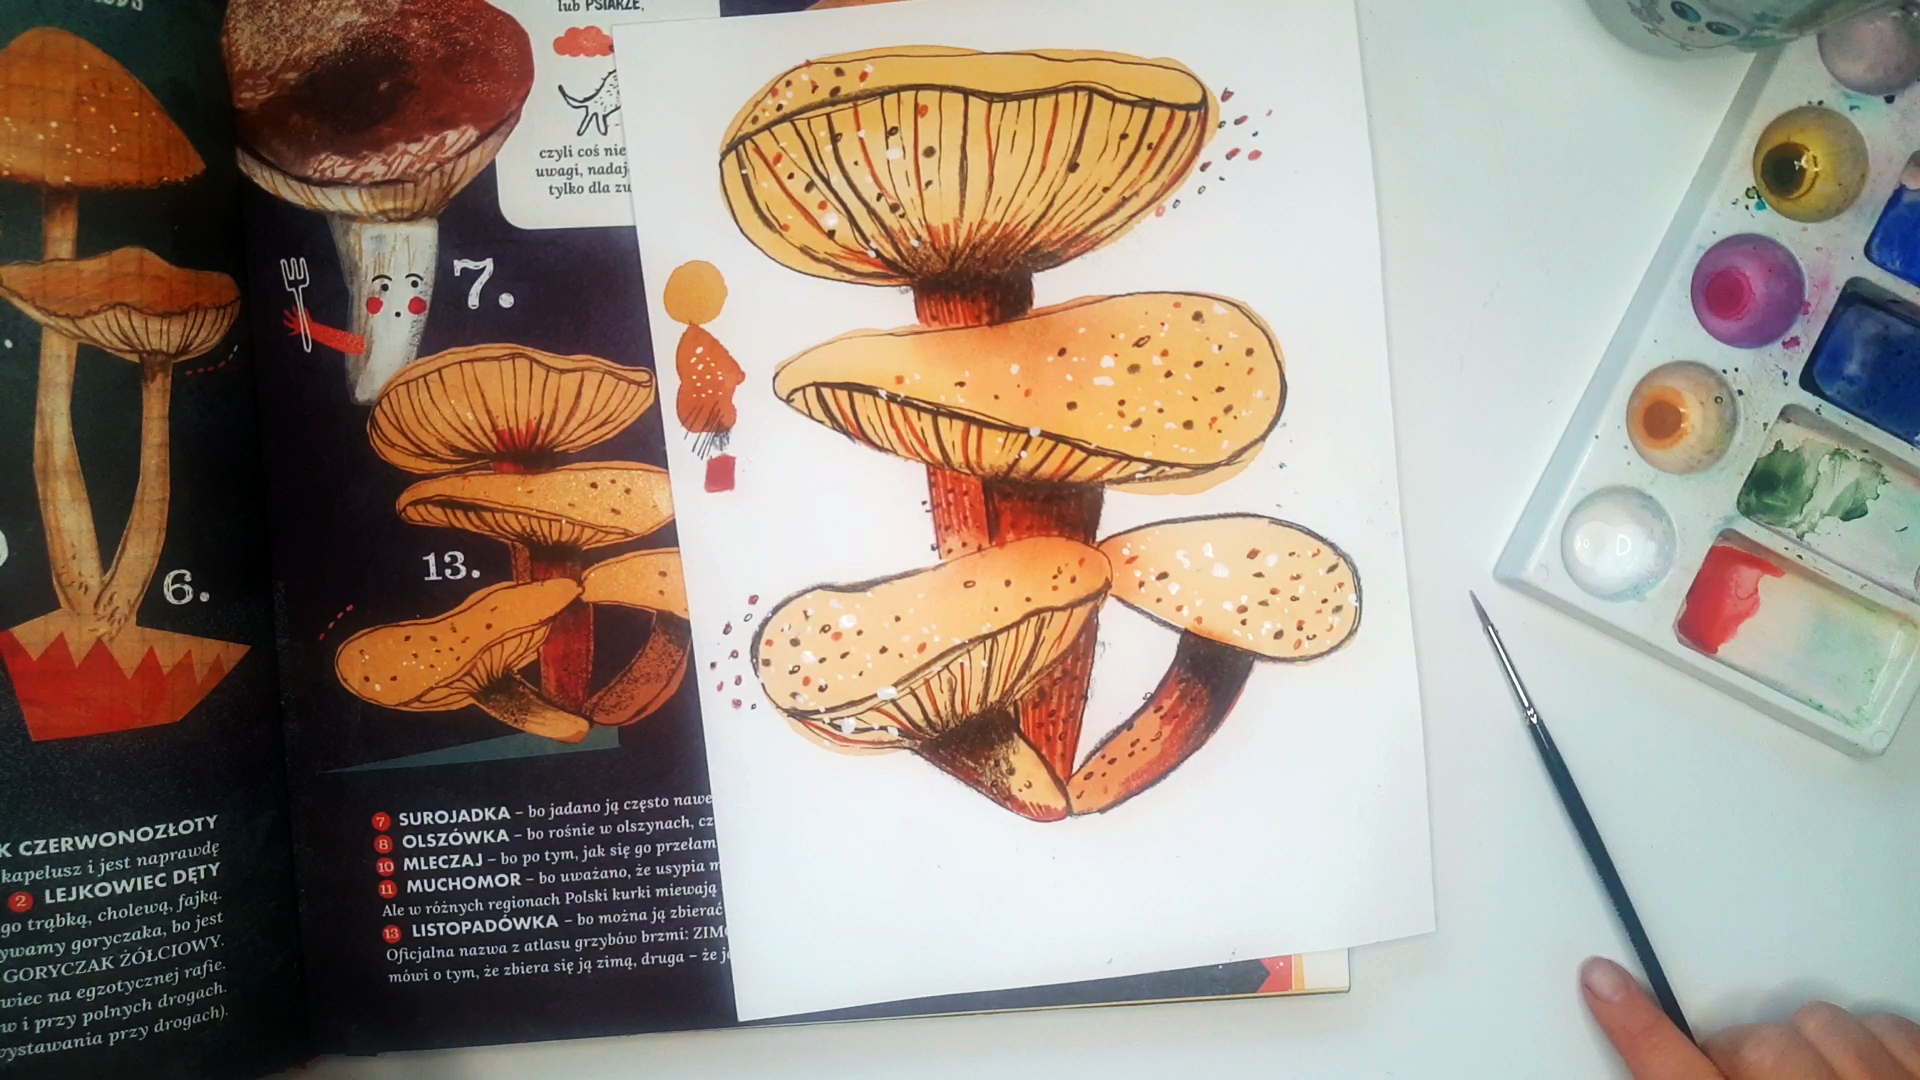
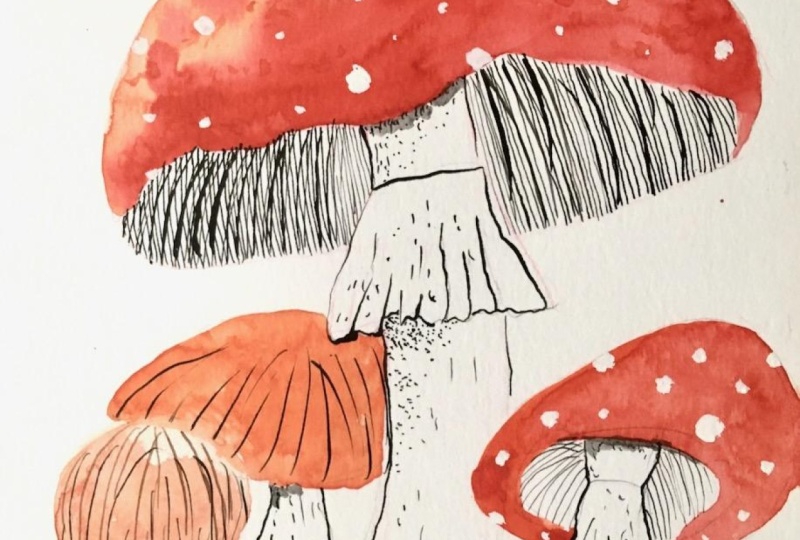
9. Second muchroom - sketch: We will pick another
illustration from this book. I choose this mushroom monito because I like the style
of this illustration. I see that there
is nothing behind the gills and I think it's
very interesting idea. We will use it in
our illustration. Just like before, we will
start from the sketch. For that, I will use
a plastic eraser. I have one from Tambo and
regular graphite pencil. Just like before, we will
start from the biggest cap, and I using Visual journal from Stratmor this time because it's mixed media and watercolor, so I think it will
be better for me and I will show you
the illustration because I did it earlier
with my Polish folks. So we will do
something like that, and it's just this
illustration created with gouache pencils
and watercolor. So let's do together
the Amanita. Let's start with this
cup and we will draw this shape all with this
gilt, it's quite big. I guess this will look
something like that. I will draw this
line already because I need to know where
I will start my stem. I need to have this line. That's why I will draw this line and just like you see or notice in illustration, it's not a stright line and
it's not also a curve line. It's like a wavy line. We will do similar and
it's rounded at the end. If you didn't make the round you can still use the eraser and, for example, make
this like that. Let's draw the leg
of the mushroom. It starts something around
here and at the beginning, we only draw the shape of it. It's the shape of our mushroom. I will erase this line because
it's not necessary for us and it has this ring and it
starts somewhere in here. It's in the one third
above this line, it starts somewhere in here, and let's draw the shape of it. It's easier to draw this
sidelines and then connected, and let's erase unnecessary
lines and still we have this. Something like that
in the middle. Let's move on to the cup and
it's rounded at the bottom. I will make it round. I will erase my lines
which are unnecessary and let's draw this mutton, I don't know how it case, but this cup at the bottom, and it doesn't have
this regular shape, it's something like that. Once again, let's erase
unnecessary lines. I'm using to be pencil
and it smudges a little. I don't like this effect. So I suppose I should use He, but I couldn't find it. I just lost them
somewhere in my space. That's why I using to be, but it's easier to use He. We have this first mushroom and now we move on to
the second one you see, it's in a halfway and its
cup goes on the first leg. It's somewhere here and we
also draw it just like that. It looks almost like
an oval. Let's erase. This line, perhaps it's too big. So I will make it a bit smaller. Let's erase this line
and make it perfect. In here, we have
something like that, like an oval inside. I see that I don't have
much space in here. It's much bigger in here, so I want to correct that Okay. And just like before, we start the stem, and we go In here, as unnecessary lines. Once again, we have this ring, so it's something in here. Let's draw it, erase unnecessary
lines, we have the ring. Just like before, we
will draw this cap. We have our sketch ready, and this is everything you
need to have at this stage, and I will erase my lines. I will make them
lighter with my eraser. Let's do that quickly, especially in the areas where
we will have watercolors. On the stem, you don't have to erase
everything because we will draw it on it with a
pencil with a colored pencil. We only need to erase
the places where we put watercolor and the
places which are translucent in the
illustrations over here. Only cap and the rest
will leave as it is. Okay. In the next stage, we will use watercolors to
color our mushrooms hat.
10. Second muchroom - watercolor: Okay. So I have my water
and my watercolors. For this project, we will
use only two colors. So I don't need mixing palette because I will
mix over here my colors, and I will only use two brushes, one bigger and one smaller
for smaller details. And just like usual, I will add some water. First color, which I will
use will be Alizarin. I will show you
this color in here. This will be my first color. I will add some water. I use two colors because
I want this cap to have different shades of red. If I use only one color, it will be just a solid and
I don't want that effect. That's why I use two shades. I think it's also fine if
you have, for example, granulating color, granulating
red or granting orange. It will also be fine
to use on a cap. This is my second color. It's orange, it's like orange, red or reddish orange,
something like that. I have two colors. And I will paint
from left to right. Let's start with the smaller cap because it's a bit different
than this bigger one. It also has color over here. We will paint the cup and
I will use one color and then switch to the second one. I want this color to
bleed on the paper. And just like I show you, it has some color down here, so I will move my color Okay. I clean my brush between
changing colors. This is the first cup and let's start painting the second one. Sometimes I just add water from my glass and this cup doesn't have color in here. We only paint the upper part. I smudge with my hand. We only paint this part. We don't paint this bottom. That's all when it
comes to watercolor. It was a very short lesson and right now we need to dry it, so I will use a hair dryer
and in the next stage, we will move on to the
colored pencil, see you then.
11. Second mushroom - colored pencil: Okay, so we now move on to the watercolor to
the colored pencils, and I will use only
one color for this. You can use black if you have, but I don't have black, so I will use five oh seven, so it's paints gray
60% from luminance. And I will draw every
detail with this color. But if you have black, I think it will be
better if you use black because you will achieve more contrast
on your work. Let's start. First, we
need to define our lines. Let's define this upper line. And just like you look
at this illustration, it's some shading in here. It indicates that there
is a shadow on this area. To do that, we will
blend with our pencil, but we will blend with
the site of the pencil. We will do this trick. So let's create some
shadow over here. Just like you see, it's
the biggest in here and it gets thinner when
it goes to the sides. We also do this, so it's the thickest on the center and the thinnest
when it goes to the side. It's also the darkest
when it goes to the up. I will use the tip of my
it's not watercolor pencil. All the time I want to say
it's watercolor pencil, but luminants are not watercolor
pencils and I'm using the tip in here to make
this area a bit darker. Let's define our stem and
we have some dots in here. Let's add also this elements because every detail creates
interesting illustration. Let's define our ring. And also we have these
lines and they are striped, and we have also
some dots in here. Let's go back to our gills
and let's draw them. But just like you see, they're not starting
from the center. They start just like that
and they are rounded. They're not straight,
they just a bit rounded. Let's draw and just like you noticed on
this illustration, the line of the lines vary. Some are thicker, some are thinner and let's
simulate that on our work and I will also make
some of them just striped. And the distance between
them also varies. So we have something like that and I will erase the pencil lines because I
don't need them anymore. Just like you see on
the illustration, we also have these
shadows on the sides. With the side of our pencil, let's create a shadow. I will make this shadow darker, so I will once again draw
over it with my tip mice. Let's outline the rest of the stem Also with this cup, We have some shadow over here. Let's bring that shadow. And it's darker at the top. I want it to be
darker in this area. Also we have these
dots on our stem. Just like you see, we have
some very delicate lines, so we can draw them Okay, let's move on to our cap, and we have very
dark line in here, so I will make it even darker. We have this cap almost made in half half the space
divided in half, we have something like that, and I will just color it. We can go beyond it, beyond this line which
we drew earlier. Just like before you
see that we have some lines over here, which tells our mind
that this is rounded, so it's not straight lines. They are a little bit curved. They simulate the curvature of this element and just like before we have
some simple dots. I will sharpen my
pencil and we'll move on to the second mushroom. Once again, let's start with this outlining of the
stem and the ring. We have some dots in here, so let's create this dots. Let's draw these lines and just like you see
on this illustration, they start from the side. They don't start just in
here from the upper side, they start from this back side. Everything starts here. And it's of course rounded. Just like before, we
have this shadow so we can outline it and make
some shadow in here. With this side of the
crayon with the pencil, and make the upper part
darker, something like that. Here, I will try to make
this down part darker. We have some dots in here. You can draw some lines. Let's outline the rest of the stem and also with this cup. We have some lines in here. You can also do this except of the shading with the
ink if you like. Just like you see here, we have some lines
indicating its roundness. We have some dots. We also need to
create this shadow. Let's make this shadow
here and it's darker at the top. Okay. So this is almost everything
when it comes to pancum. Just like you see
these mushrooms also have these shadows, they casting shadow in here, but it's very strange shadow
because just like you see this one casts on the left and this one
casts on the right. It's not very natural
looking illustration, but it's just interpretation
of what the author saw. This mushroom is also
our interpretation, how we see this illustration. This is all for the pencil. In the last step, we will add the details
with the gouache. But I see that I
missed one thing. We add these details over here, but when you look at
the illustration, the author also add
these dots on the right. We can also add this
black dots in here. It's just like this cup of this mushroom is translucent
in here, but it's not. We know that it's not, but it's just the interpretation
of what Otter saw. In the next step, we will add details with the
white quash. See you then.
12. Second mushroom - gouache: Okay, I'm back with quash. I have it placed here here. Just like usual, I will use Windsor and Newton designers
quash, permanent white. I usually squeeze
something on my palette, make it dry, and I will
activate it with water. I will use number three
from restore House. If you have smaller brush from other brand,
you can use it too, and we need the squash
at the beginning to be very watery because we
want to make some splashes. Because when you look
at this illustration, it has a very wide range of white dots in some areas
and they are very small, it looks like the utter did
splashes in these areas. Once again, let's
try with splashes. If you don't have
a white gouache, you can still use Japan. But then you have to make all these splashes by your hand. Now I'm mixing my gouache to
be very thick because I will paint this bigger bigger dots. Let's start with the
smaller mushroom and let's add some dots. Just like you see, some dots are going beyond the mushrooms. We can also paint like that. We can create a smaller
more smaller dots with the tip of our brush. Now let's move on to
the bigger mushroom. That's why I also
have dirty hands. I always have dirty hands with ink and watercolor and
wash. Sorry for that. I smudged the sweat That's not quite all because we also have
some white over here. Let's add it in this area. We have this white
line over here. I don't know if it
will be visible, but still I'm going to add it on one side and on the
other the same in here, we have very thin white line. I think I will add something which we don't
have in this illustration. I will add some white lines
over here and over here, they also can vary, can be thin, can be thick. What else? I think
this is almost all. We can add just very
thin white line also to this part and
see how it looks. And something similar in here. Okay. That's all. I
hope you like it. I can't wait to see your
work in a project section.
13. Outro: And that's it for our
mushroom adventure. I hope this class helped you see the forest a little differently, full of shapes, colors and tiny stories waiting
to be painted. Don't forget to upload your
work in the project gallery. I love seeing your versions and how each one
reflects your own style. If you enjoy this class, please take a moment
to leave a review. It really helps me reach more students and create
new classes for you. Thank you for painting with
me today and remember, even the simplest
mushrooms can turn into something truly magical
when you add your own touch. See you in the next class.
 Anna Krupa, web developer & graphic designer, mix media artist