Transcripts
1. Introduction: Ask almost any
watercolor painter, and they will tell
you the flow and unpredictability
of watercolor is one of its greatest strengths. This flowing random
nature is best achieved when using the
wet-on-wet technique. If you're a beginner, you may be asking, what is Wet on Wet? When should I use it? How can I use it to achieve beautiful results and
avoid a chaotic mess? Hi, I'm Lyndsay Newton, a watercolor artists specializing
in animal paintings. In this class, I'll cover the basics of
wet on wet technique. Guide you through
some exercises that will help you to develop
your skills and knowledge. And finally, we'll put
all that together to paint a beautiful
watercolor toucan. I have a passion for animals, and they have been
the inspiration for my artistic
endeavors for years. I have explored various mediums in my journey as an artist, but watercolor has captured my heart with its
flowing nature. As I hone my skills and expanded my understanding
of this medium, I find great joy in
sharing the knowledge I've gained with fellow watercolor
artists. Like you. Wet on wet is the quintessential
watercolor technique. While it may appear simple, mastering this technique
requires both knowledge and skill in order to
achieve stunning results. This class serves as an introduction to
wet on wet painting. What you will learn
in these lessons will provide a foundation for you upon which you can build your wet on wet painting skills. This class was made especially
with beginners in mind. Although other
artists may also find new gems of knowledge
in these lessons. If you've never tried
wet on wet painting, or if you've only dip your
toes into this technique, then this class is
perfect for you. We'll start our
wet on wet journey by learning what wet on wet is. We'll review the
different levels of wet and dry that are paper can be used an exercise to see how those different
levels get different results. We'll cover the wet
on wet techniques. We'll learn in our project and practice those
techniques separately. Before tackling our
toucan painting. I'll go over the
toucan step-by-step so you can see what I'm doing
and what choices I made. That way. You can have competence in
creating your own painting. If you're ready to experience the joy of wet on wet painting, than Let's get started.
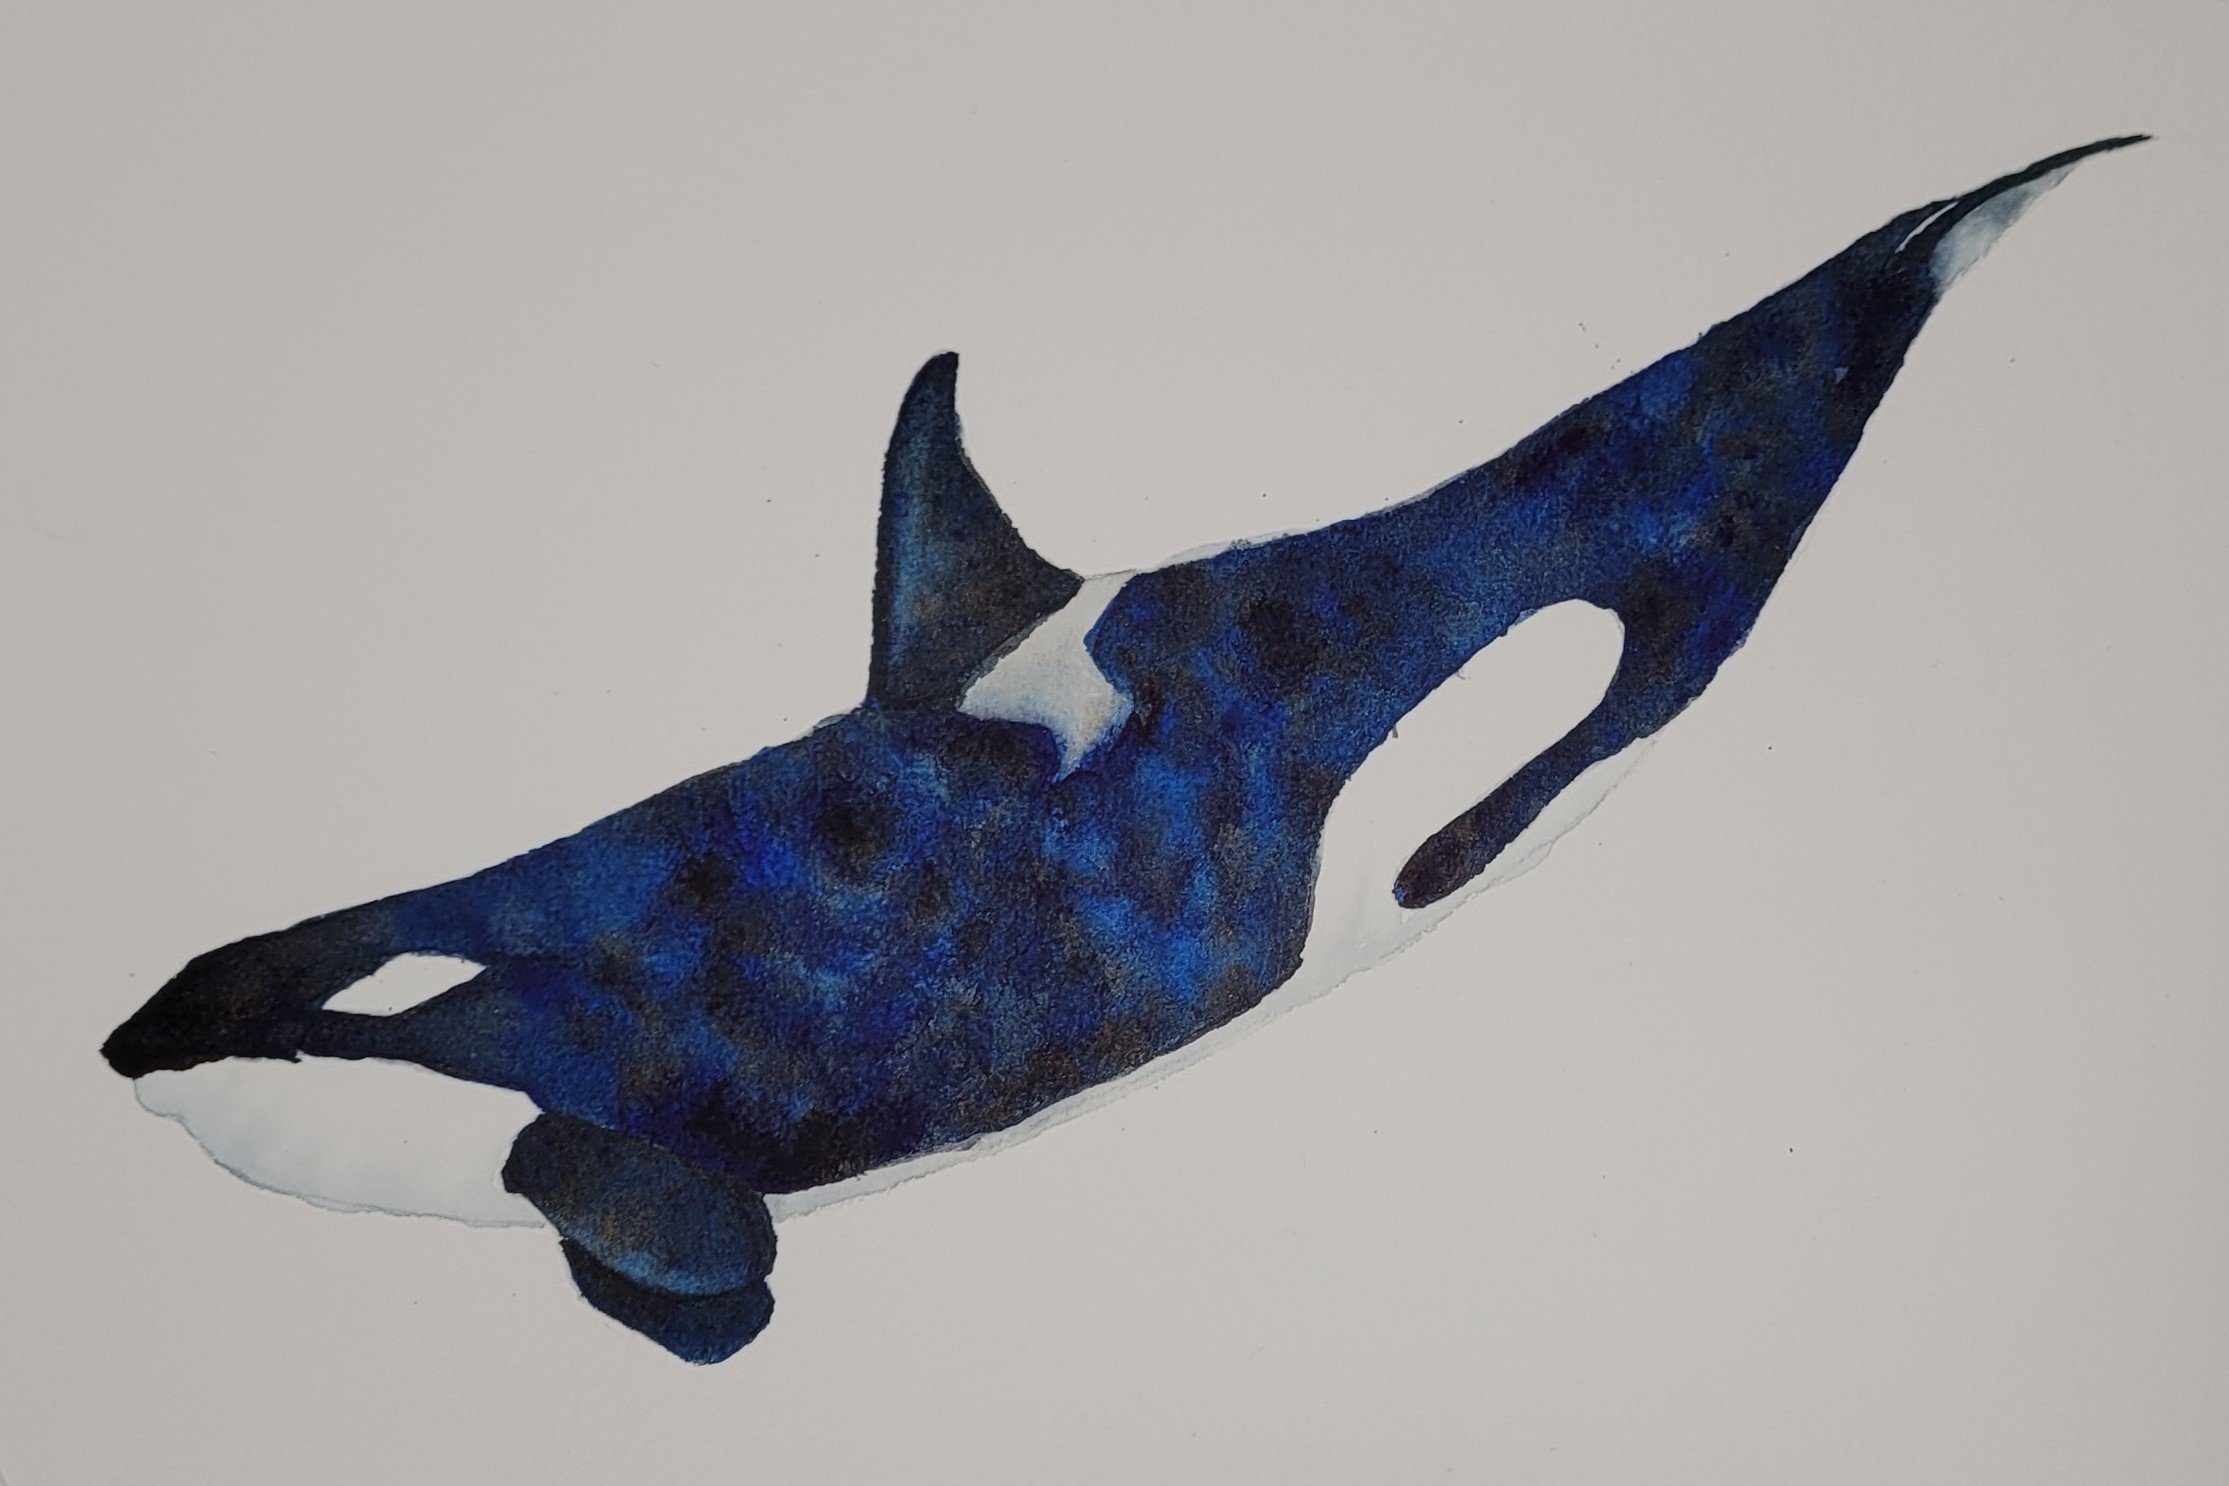
2. Class Project: In this class, we'll
practice our wet on wet skills by painting
a watercolor toucan. While most of the toucan has
simple Colors and features, there are enough
interesting details in our reference photo
that we can practice multiple wet on wet techniques and truly explore it with
this approach has to offer. Before beginning our project, you'll want to review
the five lessons, covering supplies, what is Wet on Wet levels
of Wet and Dry? Wet on Wet Techniques
and technique Practice. These lessons will provide knowledge on the wet
on wet technique. And we'll include two
important exercises. The first will help you gain a better understanding of how
paint flows on wet paper. And the second, we'll
provide an opportunity to practice the techniques before applying them to your project. The last few lessons provide
a tutorial for painting the toucan so that you can see how I apply these
techniques to our project. We'll start by making sure that are outlined is
properly prepared. Next, we'll paint the lightest
colors in the toucan. We'll focus on the
eye and the Beak. Then finish the hip. Will darken the
area of the Wing. Then paint the neck
and the chest. We'll review our painting and make any necessary adjustments. When your painting is finished. Be sure to post it in
your project gallery. If you're ready to get started, come join me in the next lesson, where I'll cover
the supplies you'll need to succeed in this class. I'll see you there.
3. Supplies: To take this class, you'll need some basic
watercolor supplies. Let's start by looking
at paper. Quality. Watercolor paper is the
most important supply a watercolor painter can have. It can be the difference
between struggling to achieve a Technique or creating
an effect with ease. I recommend 100% cotton,
watercolor paper. If you use tube or pan paints. If you use liquid, you may find cellulose paper
to work better. When it comes to
100% cotton paper. There are several brands and every watercolor artist
has their preferences. My favorites are arche, Winsor and Newton professional. And I've recently come to
enjoy bow hang Academy. For this class, you will
need two pieces of paper, either 6 " by 9 " or
seven-and-a-half inches by 10 ". I recommend you buy a
watercolor pad that is either 9 " by 12 " or 10 " by 15 ". The former can be cut in half, four to six by nine pieces, and the latter can be halved
into 27.5 by ten pieces. Another option is to buy
a full sheet that is 22 " by 30 " and cut
the sheet into thirds. Cut each of those thirds again, and you will end up with
nine pieces of paper, approximately 7.5 by ten paints. Our next for this class, I will be using five paints. I will use a warm yellow, which is a yellow
that leans orange. A warm orange, which is an
orange that leans read. A mid-range read that leans, neither warm nor cool. A cool blue, which is a
blue that leans green. And finally, a dark brown. Specifically, I will use new
gamboge as my warm yellow, transparent pyrrole,
orange for my warm orange. Nap fall read for my
red, phthalo blue, green shade for my cool blue, and sepia for my dark brown. All of these paints
are by Daniel Smith, except for the Nepal red, which is by Da Vinci. In addition to these paints, I will use to More Colors, a cool black and a warm black. Both of these colors
will be made by mixing my warm orange
with my cool blue. My cool black, we'll
lean towards blue. And my warm black, we'll
lean towards orange. Make sure to mix
up a large amount, especially the cool black. As much of the toucan is black. You'd like to learn more
about mixing colors. Feel free to check out my other Skillshare class on the subject. The last major supply you
will need is brushes. I recommend having at
least three brushes. A large brush, a medium brush, and a small brush. I will be using silver brush, black velvet for my
large and medium brushes in size 12.6 round,
respectively. Silver brush is a blend of synthetic and natural
squirrel hair. These brushes hold a lot of water and have a
very pointed tip. So they are great for
wet on wet painting. For my small brush, I will use a Princeton
heritage round to. This is a synthetic sable brush. It doesn't hold as much water as similar size scroll brushes, but the bristles are stiffer,
making details easier. In addition to the Supplies, you will also want
cups for water. I like to have one cup
for cleaning paint out of brushes and another
for final writs, or for picking up clean water. A palette for mixing paint, a pencil, and a kneaded eraser for transferring
the Outline. A transfer method, such as a
lightbox or graphite paper. Tape, such as washy or artists tape for taping
down your paper. A board to tape your paper to
use a cut up acrylic sheet. And finally, a rag or paper towels for blotting
off paint and water. Lastly, I have several resources provided for your
use in this class. They are a list of Supplies, outlines of the toucan
scale for both six by nine paper and 7.5 by ten paper. A simplified outline of the
Beak for use in lesson seven. A copy of the reference photo, which comes from Shannon
Potter on Unsplash. And a photo of my
final painting. With our supplies ready to go. It's time to answer
the question, what is Wet on Wet? I'll see you in the next lesson.
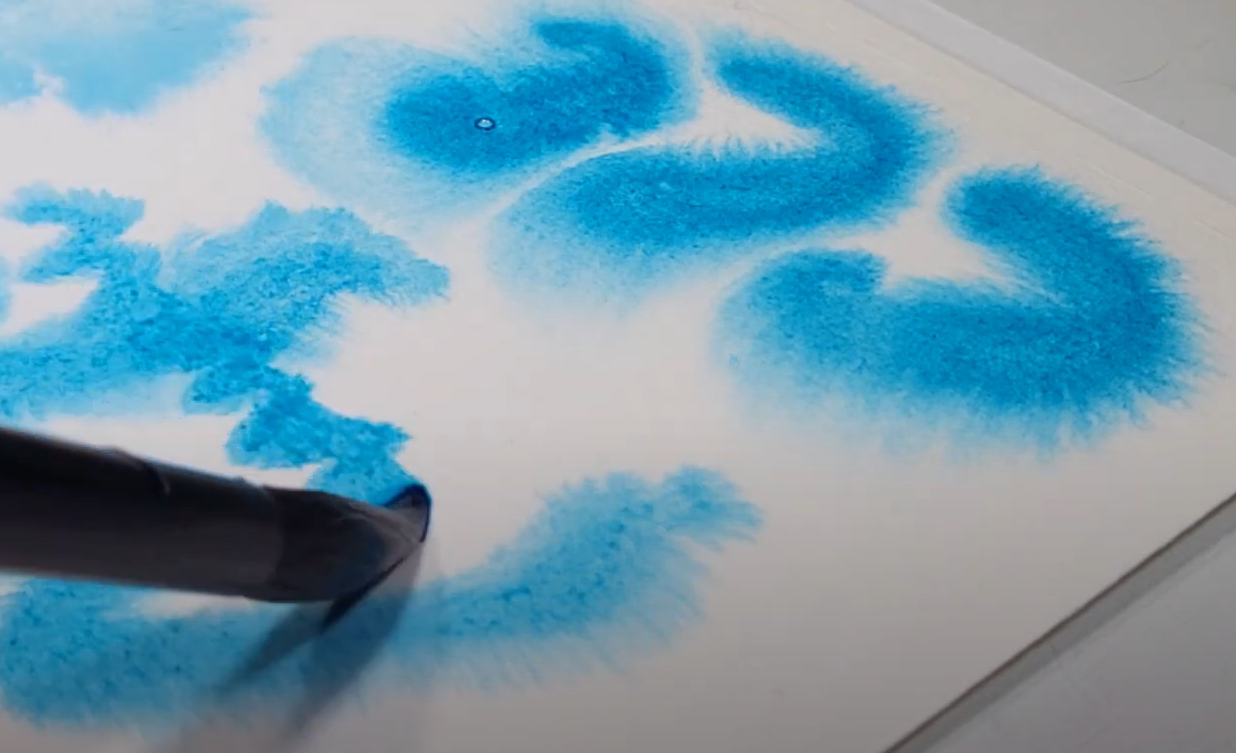
4. What is Wet on Wet?: Before we can use wet on wet, we need to know what it is. Simply put, wet on
wet is when we add wet paint to wet paper. To accomplish this,
start by laying down water over the area
where you want to paint. Next, pick up some
paint with your brush, then add the paint to the
area that you have just wet. Because there's
water in the area, the paint will start to spread away from the area
where you place it. How far it spreads
will depend on the brands of paint and
paper that you use. How much water is
mixed with your paint, and how much water
is on the paper. The more water, the
further the spread. While you can control
how much water you will use and where you put the paint. You cannot control exactly
how the paint will spread. And you will end up
with a unique look that cannot be replicated. Painting wet on wet is also a great way
to get soft edges. That is, edges that
have a fuzzy line. This is in contrast
to hard edges which have a clearly
defined line. Wet on wet is one method of
applying paint to our paper. The other two methods are
wet on dry and dry on dry. Wet on dry is when you apply
wet paint to dry paper. Notice that the paint stays in place and does not flow to
other areas of the paper. Dry on dry, also known
as dry brushing, is applying Dry
paint to dry paper. Of course, the paint
isn't actually Dry. Instead, the brush
with the paint is blooded onto a
paper towel or rag, leaving a damp or
mostly dry brush. As a result, when you paint dry paper with a
mostly dry brush, the paint only
reaches the bumps of texture on the watercolor paper, leaving a broken line
effect. In our project. We will use mostly wet on wet, with some wet on dry. In the next lesson,
we'll learn about the different
levels of wet paper and what effects can
be achieved with each. I'll see you there.
5. Levels of Wet and Dry: Though it may seem that paper
can be either wet or dry. There are actually
different levels of wet and dry that we can achieve. Well, every artist has their own idea of how
many levels there are. For the purpose of this class, we're going to examine
three levels of Wet. Three levels of Dry. The first-level of
wet is sopping wet. This is when an excessive amount of water is on the paper. It's enough water
that the texture of the paper cannot be
seen when the paper is held flat and water may run off the paper
when at an angle. This level of wet is
rarely used, if ever. The next level of wet is Wet. In this level, there is
a good amount of water, but the texture of the
paper can still be seen. This level of wet is good
if you have a large area to paint and are concerned about the paper
drying too quickly. If you want to make a light wash or if you want a lot of
paint flow in your project. The last level of
wet is barely wet. This level shows more
paper texture than wet, but still has a
little sheen to it. This is a good level of wetness. If you want a mild to moderate
amount of paint flow. Moving onto the levels of Dry, the wettest level
of Dry is damp dry. In this level, you can
see that the paper is wet enough that it looks
different from dry paper, but the water has mostly dried, leaving a matte look. This level will provide the least flow and most
control over the paint, but it will still
flow unpredictably. The next level of Dry
is dangerously Dry. The paper no longer looks wet. However, if you touch
it with sensitive skin, like the inside of your wrist, you will feel that
this section of paper is cooler than a dry
section of paper. It gets the name dangerously Dry because it's
dangerous paint on. Even though it looks dry, you will still get some
flow, often irregularly. Also, adding water to a painted area that is dangerously
Dry will cause blooms. Once paper reaches
this stage of dryness, you need to let it
dry it entirely. Even if you want to use more wet on wet technique in this area, it is better to let
it completely dry. Then we wet the area. Finally, there is dry paper. This is paper without any water
added to it or paper that has been allowed
to dry completely after the addition
of paint or water. If you paint on dry paper, you're no longer
painting wet on wet. Your painting wet on dry. Painting on dry paper gives you control over
where the paint goes. It is also what you should use when you want to
make hard edges. Now that you know about the
six levels of wet and dry, it's time to practice to see how these levels work in action. Start off by laying your
paper down in landscape view. Measure to 4.6 " horizontally
from left to right. Then make a vertical line across the paper at
the six-inch mark. The smaller area to the right. For Lesson seven. Next, add vertical lines at the
two-inch and 4-inch marks. Cutting the left side of
your paper in thirds. Finally, make a horizontal line in the middle of your paper. Creating six bucks is
total for this exercise. Now you can turn
your paper and label each box with the different
types of wet and dry. I will put sopping wet, wet and barely wet on the left. Then damped Dry, dangerously
Dry and Dry on the right. For each section, add
enough water to create the wetness level of your
label except for Dry. Don't add any water there. For the other two Dry sections. You'll have to wait
for the paper to dry a bit before it's the
right level of dryness. Once you have the right
level of wet or dry, use your medium brush
to add three strokes. First, a brushstroke
with dry paint. Of course, Dry isn't possible, but add just enough
water to your paint that you are able to pick
it up with your brush. If your brush seems
a little wet, you can debit against a rag
at the base of the bristles As this will remove
more water than paint. Second, a brushstroke
with wet paint. To tell if your paint is wet, it should be able to
tilt your palette a little and the paint will
slowly flow down the palette. It should not be enough
to cause a drop to run down the palette
and a gentle tilt. Third, a brushstroke
with very wet paint. By very wet paint, I mean, there is enough water in your paint that if
you tilt your palate, it will flow easily. It may also result in a drop
running down the palette. Lesson at this time to
complete the exercise. Once you're finished,
returned to this lesson and we'll
review the results. Now that you've
completed this exercise and everything is dry, take a moment to look
at what you've created. Notice that the more
wet the paper is, the more flow you see. The same is true for
how wet your paint is. You may not even be
able to see some of your wet brush
strokes on wet paper. Notice also how unpredictable your results are in the
dangerously Dry section. A good reason to avoid painting when your paper
is dangerously Dry. Use this exercise as a
reference to help you predict how much flow you
will get at each stage. It can help you decide how
what you want your paper to be when using a wet
on wet technique. When you're done
reviewing your exercise. Meet me in the next lesson
where we will talk about the wet on wet techniques
we'll use in this class. I'll see you there.
6. Wet on Wet Techniques: In this class,
we're going to use five different kinds of techniques while
working wet on wet. They are flat wash, charging, pulling
paint, color mixing, and soft edge patterns. First, flat wash. A flat washes where you
have an even wash that is about the same
level of value throughout. You do not need to use wet
on wet to make a flat wash. However, wedding your paper first can help you to
keep colors light, which is helpful
for light areas, and initial washes, which
often should be lighter. Working wet on wet
can also help to keep the area from drawing
before you want it to. And preventing things
like hard edges and blooms that will keep the
wash from being even. Next charging. I also like to call
this dropping paint. Charging is the addition
of wet paint to wet paint. By dropping it into the area. When charging, you generally allow the paint to
flow as it will. Little to no mixing
with a brush occurs. Charging allows
for soft edges and interesting textures as
the paints naturally mix. Onto pulling paint. When pulling paint, you start by adding a significant amount
of paint to one area. Next, removed most of the
paint from your brush. And now you can
use your brush to pull the paint that is
already on the paper. Using this technique can help to create a gradient effect. Up next is color mixing. Colors can be mixed
on the palette, but they can also be
mixed on the paper. As with charging, wet paint
is added to wet paint. But this time, the
brushes used to help blend the colors
and in some cases, create a gradient
between the colors. Finally, we have
soft edge patterns. By painting wet on wet, we can add the paint in the
general form of a pattern, but the wet paper will
cause the edges of the paint to be soft
and indistinct. One catch with making
lines in wet on wet. Notice that on your exercise
in the previous lesson, when you made a line, extra paint came off at
the end of the line. We will be using
wet on wet to mimic the vertical orange lines
on the toucan beak. Since either end of these lines is more narrow than
at the center, we don't want that extra
paint at the ends. We'll solve this problem by painting the
lines halfway down. Then add the bottom half
by painting halfway up. Alternatively, you can
flip your paper and repeat the downward stroke
if that is more comfortable. Either way, the end
of each line is in the center of the pattern where it is thickest on
our reference photo. This will hide the
extra paint that comes off as we
pick up our brush. Now that we've covered the
techniques we're going to use, Let's practice them by doing an exercise based on
our final project. I'll see you in the next lesson.
7. Technique Practice: For this practice,
we're going to paint a simplified section of the
toucan beak. In our project. The toucan beak uses four of the five techniques mentioned
in the previous lesson. Charging, pulling
paint, color mixing, and soft edge patterns. Let's get started.
In the section of your exercise paper
that you left blank. Draw a simplified
copy of the beak. You can draw it freehand. Trace it from the PDF I am providing in the
resources section. This simplified Beak also has
to straight diagonal lines. These will mark where the yellow paint will go in the center, where the yellow paint will be pulled to the top-right corner, and where the orange paint will go in the bottom-left corner. You will not have
these diagonal lines in the outline of the toucan. But for this practice,
they're helpful. For this exercise. You will need your warm yellow, warm orange, and warm black mix. Make sure you've added
a little water to these three colors.
Before getting started. We will use all three sizes
of brushes for this exercise. I encourage you to watch this entire video once before
attempting the exercise. You will want to
make sure the paper doesn't dry between
the first few steps. So make sure you have
in mind what you want to do before
getting started. First, wet the entire rectangle
with your large brush. Note that you don't
have to go all the way to the edges
with your water. It is hard to see
where the water is. So just get as close as you can. When the paint is down, you'll be able to see better. And you can fill in where you didn't quite make
it to the edge. Next, get a large brush
full of yellow paint. Yellow is a very light color. So you don't want
it to be too pale. Use a small to
moderate amount of water with your yellow paint. At the yellow paint to
the center of the Beak. Fill the entire rectangle
except for the top-right, bottom-left corner with yellow. Take the yellow to
the diagonal lines. It will bleed
across those lines. And that's okay. The diagonal lines were put
in place with that in mind. Once this area is filled with a vibrant yellow
wipe off your brush. By this, I mean, wipe
it on the rag or towel. But you don't want to
clean it at this stage. You just want the worst of the paint to be
off of the brush. Next, it's time to pull paint. Take the yellow at the
upper right diagonal and pull it into the
upper right corner. This will achieve a nice light
yellow in the upper right, making it look like the light
is shining on that area. Now that we're done
with a yellow, it's time to clean your brush. Since we're switching colors, you'll want to make sure
your brush is completely clean before picking up the
orange with your brush. Start in the bottom-left corner and add the orange up
to the diagonal line. The next step is color mixing. While we're going to let
the colors mix wet on wet, we're going to help them along
a little with the brush. You'll want to wipe
off your brush just like you did for pulling paint. Thin stroke the wiped
off brush up and down the bottom diagonal
line to help the colors mix. Now it's time to switch brushes. Grab your medium brush and
pick up some orange paint. Make a few evenly
spaced wiggly lines. You can wiggle more at the
bottom than at the top. But don't worry if
you want to keep the wiggles about
the same width. Take the wiggles to the
jagged line in the center. When you finish
painting the first half of the wiggly lines, you can create matching wiggly
lines from the bottom up. If you prefer. You can also flip your paper to repeat the top-down motion, whichever is more
comfortable for you. The last thing we will
do before letting the paper dry is charged the bottom with some
warm black paint. Clean your medium brush and pick up a little
warm black paint. Dab the paint into
the left corner. Deb further into the orange on the left side
than on the right. Allow the black
to mix naturally. Although if you see it doing
something you don't like, you can always come back with a wiped off brush to
make adjustments. Now it's time to let it dry. You'll want to make sure that the paper is fully dry before the next step and
not dangerously Dry. In order to avoid
watercolor blooms. The last thing we're
going to do is re-wet a small area underneath the jagged line to
add some shadows. Use your small brush to
get the paper barely wet. Wet area to go about half an
inch below the jagged line. Maybe a little less. It's just enough so that
you don't get hard edges. Add water to the
first four points. Now, at a small amount
of black paint to your paintbrush
and drop a little black into the
first three points. If needed, wipe your brush off and then help to
blend out the black. Ideally, you will have a
slightly black triangle with two hard edges where
the jagged line is and a soft edge
below the jagged line. Once your first three
points are done, clean your brush and finish wedding the
remaining triangles. Note that we wet the
fourth triangle the first time, but we
didn't paint it. This is because we
were using it as a buffer so that when we added water to the
rest of the paper, it didn't immediately rush into our freshly painted areas, and so it didn't
mess up our paint. This is a good tip for
working wet on wet. When you have an
area larger than you can paint without
the area drying, add water beyond your
initial stopping point. Then when you're ready
to extend your area, your buffer will protect
the area you just painted. Here's an example of what happens if you don't
have that buffer area. Now that all of the
points are wet, add black is before
to each point. There you have it. This is the most challenging
part of the toucan. It will be a little harder
on the toucan itself because there'll be more narrow areas
to paint on the full Beak. But this practice
under your belt, you'll be ready to tackle the beat and everything
else on the toucan. It's time to move
on to our project. We'll start by covering
how you want to prepare Your Outline before
getting ready to paint. I'll see you in the next lesson.
8. Prepare Your Outline: So before you start to paint, you're going to want
Your Outline to be just as you want it. By that, I mean, you
need to think about how light and how dark
your outline is. Watercolor paint is transparent. And that means that
if you're painting a light color over
a dark outline, that outline is going to show
through the light color. Not only that, but once
you've painted over it, you cannot erase
that pencil line. So you'll need to make
sure it looks how you want it before
you get started. Now when you're thinking
about where you need to lighten your outline, you need to consider where
you have a light color, either meeting the paper or
meeting another light color. And let me point out
what I mean by that. Here on the chest, we're
going to have a very light yellow fading into white. And so this is going to be up against the white of the paper. This line right here
will want to lighten. The same thing happens here. This is going to be a fairly light yellow in this
little triangle. Up on the top of the Beak, we're going to have
a light yellow, again meeting the
white of the paper. Another area to be concerned is where this oranges
around the eye. Depending on how light that is, you'll still see the outline. So you may want to
lighten it where the orange meets the
white down here, where it meets this
little white triangle at the very top of the head. Now an easy way to lighten these lines is with
a kneaded eraser. So just get yourself
one of these. And then if I want to
lighten this line here, just going to pad it. And you'll see that line is now lighter than it used to be. I can also do it up here. Not really rubbing,
just padding. Again, that line is lightened. So for my Outline, I'm going to keep it pretty dark because it needs to be seen on camera so that you can see what I'm doing
during the tutorial. However, at your own home, you'll want to make sure
to lighten those lines as much as you can while still
being able to see them. Note that you don't
have to worry where a light area meets a dark area, such as here where
the white right here is going to be going up
against the black of the head. And that's because when I paint, I'm going to be painting over this pencil outline
with the Black Sea. You won't be able to see it. By the same token. This highlight here is a little bit bigger than I want it to be, so that I can paint over
the outline with the black and with the sepia
when the time comes. The last thing that
I want to say about Your Outline is think about
where you want to put it. As you can see, I put my
outline so that it basically meets where my tape
is on the board. And a couple of lines weren't quite long enough
to reach that tape, so I just extended them
a little bit further. Now that's not something
that you have to do, but it is an option
that you can consider. When Your Outline is ready, it is going to be time to paint. Will start our next lesson by painting the light
Colors in the toucan. I'll see you there.
9. Light Colors: To start our Toucan, the first thing that
I'm going to do is wet this area on the throat. I will get close to the
edges with my water. Then I will get exactly up
to the edges once I have some paint on my brush and can
better see what I'm doing. On the backside of the throat. I can even go over the edges because I will be painting over this area with black and won't be able to see the pale
yellow underneath. I want this to be
pretty wet so I can get lots of paint flow and
can keep my colors light. I'm going to use my
medium brush to paint the Chest so that I can more easily reach into
this tiny corner. As you can see, I don't
need a lot of paint. Once I get a little on there, I wipe off my brush
and then pull the paint on the paper up
into those other wet areas. I'm keeping everything
nice and light. Now is the time when I will
make sure that the paint and water will come up to the
edge on the left side. Again, it's okay that
it's bleeding over on this right side
because I'm going to be painting over that with
the black and we'll never see the yellow. Next. We're going to do
the Beak. Again. I recommend watching the video in full before you get started. Good idea in your head of
what you want to do here, because you'll need to work very quickly while painting the beak. I'm going to put down
water over most of this area because
my brushes so big, I'm not going to worry about getting close to those edges. Again. I'll be able to
better see what I'm doing when I have
paint on the brush. I want this to be
wet so that I'll have plenty of time to do
everything I need to do. I'm using my big brush and I'm going to lay down my yellow. There is a lot of paint flow
and that's what I want. Now that I have
paint on my brush and can see where I'm
placing my strokes. I'm going to get into that
corner and paint carefully. I want the deep
yellow to go into this corner and sort of make a diagonal up to
about where the black on the tip meets the
duration of the mouth. It is flowing down out of
that area and that's okay. We want that. I've put down as much
yellow paint as I want. Now I wipe off my big brush and I'll pull up the
paint to this top area. I'm just taking what's already there and moving it
around a little bit. I want this area to be vibrant, keeping in mind that it will dry lighter than it looks now, I'll add a bit more yellow
in this central area. The next thing we need
to do is add our orange. I'll clean my big
brush thoroughly, then use it to pick
up some orange. I'll start by painting
in this corner. It's dry here since this is one of the areas I didn't
cover with water. Now that I have the paint, I can see where I'm placing it. It's okay that this area
is dry because we're going to meet up with a wet area while it's still plenty wet. I want the orange
to go as high as the serration on
left and then move diagonally downwards
along the line that I painted with the yellow. Once the oranges down, I can wipe off my brush and then do a little mixing
where the two colors meet. After that, I'll let the
paint flow naturally. The next thing I'm
going to do is add those vertical
dark orange lines. I'll switch to my
medium brush for this. And I'll make paper is still wet with my orange on my brush. I'll make little
squiggles down to the line where the serration is. I find it easier to draw the squiggles down
from top to bottom. So I'm going to flip
the toucan over. Make sure you still have
enough paint on your brush, and then paint the second
half of the squiggles. The last color we're going to
add to the Beak while it's wet is some warm black to represent the
shadow under the Beak. I'm going to clean
my medium brush, then pick up a little
bit of the warm black and charge the
area with the black. For the most part. We'll let it mix naturally
rather than blending it. Finally, while the
Beak is still wet, I'm going to get a
little orange and smooth out the edge of
the bottom of the Beak. The next thing we're
going to do is paint some light yellow
into this area. You don't have to
do this wet on wet. But I like having
the water there because it helps me to
keep the colors light. I'll add enough water
to make the area wet. I add just a tiny bit of yellow, then wipe off my brush and push the paint to
cover the whole area. The last thing we're
going to do is make a really light wash of the
Wing and the back of the body. I'm going to add enough
water to make the area wet so that I can
keep my colors light. I will be using my big brush and my cool black for this area. Although I want it to be light, I have to keep in
mind that it will dry lighter than it looks. Want to add a little more
black than I think I need. Between the water on my paper and the water I
added with my paint, I ended up with some petals. I use my brush to pick
up this excess liquid. Squirrel brushes like
this, silver brush, black velvet are very thirsty and very good at
picking up this excess. With that, we are finished
with painting or light Colors. In the next lesson, we'll
focus on the eye and the Beak. Come join me there.
10. Eye and Beak: In this lesson, we'll begin
to paint our two cans. I will continue to
work on the Beak. Let's get started with the
orange area around the eye. I'm going to use my medium
brush for this section. I'm going to put down enough
water to make the area wet. Then I will mix an orange
color by combining my warm yellow and my warm
orange on the paper. As before, I will not get my water up against the
edges of the outline. But instead, we'll wait
until I have paint on the paper and can more easily see where my
brushstrokes are going. I'm putting down a little
excess water, but that is okay. As I will pick up the
excess before I paint, I'll start with the yellow. Now that my yellow
paint is down, I'll wipe off my brush. Then push the paint right up against the edges
of the Outline. After that, I will
clean my brush, pick up my warm orange, and mix it with the yellow. I'm adding just a little bit of orange as it will easily
overwhelm the yellow. Once a little is added, I push the paint around
to fill the area. Next, I want to add some
shadow using my warm black. Before I do that, I will test
and make sure that the area is barely wet so that there
isn't too much paint flow. I think this seems a bit light. So I'm going to add more orange and then a little more black. There's a heatwave
where I'm filming this. So it dried faster
than I expected. I can see that the orange around the eye is still
lighter than I wanted. But we can fix that during
our lesson on adjustments. We're going to add
a little bit of shadow here in this triangle. I'm going to make the area wet to help keep
my colors light. I won't add much.
And I'll push around what I've added to
cover the entire area. We've been doing a
lot of wet on wet, but now we're going to
do some wet on dry. We're going to put red
at the top of the Beak. For that. I'm going to use my nap, they'll read and my medium brush. I'm going to paint the
edges off camera as it is easier for me to see what I'm doing and paint accurately. It's time to add the shadows
under the serrations. First and foremost,
make sure that Beak is 100% dry so that
you don't create blooms or other unwanted
patterns when you add the water. Then you can add water to
the first four serrations, bringing the water
about a half-inch below the saturation line, just as you did in lesson seven? Use your small brush and aim for the water
to be barely wet. Unfortunately, I
accidentally did not record adding water to
my first for serrations. But it is the same
process that I will repeat with the
remaining serrations. I'm going to add warm black at the top corner of the triangle
that the serration forms. It's a little more
challenging with the first two since they are curved
areas and not pointed. But I just aim for the
deepest part of the curve. I move the black around in each iteration to
cover the entire area. Again, this fourth
iteration has water, but I'm not going to paint
it until I've extended my wet area like we
did in lesson seven. At the end, I paint my last
for serrations all at once, since I won't be extending
the water any further. I think the shadows under the serrations look
a little light. So I'll repeat the
process to darken them. The last thing that
we're going to do, just to keep this toucan simple, but still get the look
that we want is to add some warm black paint over the pencil line to finish
the mouth of the toucan. That is the end of this lesson. In the next lesson, we'll
complete what we started in our first two lessons by
finishing up the two cans head. I'll see you there.
11. Finish the Head: In this lesson, we're going to finish painting the
areas in the Head. We'll start by painting
the tip of the Beak. It's going to be darker
at the tip and then fade to a lighter black
towards the back of this area. This area is going to be wet. I'll use my big
brush in this area. I will add black to the
tip of the area and then wipe my brush off and pull
the black to the back. I'll do this a couple of times. I'll use my medium brush to tidy up and bring the paint to
the edges of the area. Note that there was a heatwave
while I was filming this, and this area dried more
quickly than I expected. I fuss with it a little
longer than I should have. And I didn't get the
gradient that I wanted. I have to stop and
leave it as is. But I'll work on
it again when it's time to make final adjustments. Now we'll paint the blue
around the eye of the toucan. This is actually blue skin, not a blue iris. You don't have to
pay it wet on wet. But it does make it easier
to keep the colors lighter. I'm going to start by adding enough water to
make this area wet. I'm happy with this
level of blue. And now I'm going to add
the wrinkles in the skin. I'm going to wet the area
Dry until it's barely wet, which does not
take long in this, whether I then dropping the blue the first round of blue
drops that I added, spread a little
more than I wanted. So I will do it again. It is also helpful to
keep your brush dryer. You want mostly paint
with just a little water. I want to make more changes
to the blue around the eye, but it is drying quickly. And I don't want to
accidentally paint on areas that are dangerously Dry. I'll let it finish drawing, then work on it again
when I make adjustments. The next thing we're
going to do is add the black to the
back of the beak. I'm going to keep it
darker at the bottom. That will represent
both the shadow areas where these areas
curve underneath, as well as the
light that reflects from the top of these areas. I'm going to get the area
wet for good paint flow. And I'll use my cool
black and my medium brush When your painting, be sure
the black paint goes over the pencil marks in the surrounding lighter areas
so you don't see the marks? I didn't have a lot
of paint on my brush. So as it comes off, I can continue to paint upward, creating a lighter black. As I near the top of each area. I'll only do the bottom
section as I need it to dry completely before I
start the upper section. I want this area to
be a little darker. Add some black on
the bottom half, wipe off my brush, then pull the paint
up to the top again. While it's drying. I'll add sepia to the eye. This is the iris of the eye. You'll have to decide for
yourself if you prefer to have a lighter
iris so that you can see the pupil or a darker one for a
more natural look. Here are a couple of examples from some paintings I did of an Emerald toucanet with
a lighter iris on top. Choose whichever you like
and paint accordingly. If you're not sure, aim light because you can always
darken the area later. This is such a small area that
I'll paint it Wet on Dry. Now that this lower
section is dry, I'll repeat the process
from the lower section. On the upper section, the irises dry now so
I can paint the pupil. I'll use my cool black for this. As with the sepia, I will
paint this Wet on Dry. Be sure to paint over
your pencil outlines around the highlight
with your black. With that, the eye
and Beak or finished. We'll move on now to darken the Wing section of the toucan. Come join me there
in the next lesson.
12. Darken the Wing: In this lesson, we're going to darken the two
sections of the Wing. The first thing I'm going to do is add more
color to the Wing. I want this to be fairly wet. I'm going to cover
the area of the Wing. Plus I'm going to
have the water go off the edge at the upper back. I'll pull the water
onto the upper back where I want the
paint to bleed from. But I'm going to carry my water a little further down the back. The trick here is that
I'm going to leave a slight line of dry paper between the Wing
and the rest of the back. So the paint only bleeds from
the area at the very top. An example of where I will put down my water is
on this outline in blue with a pink line
to represent dry paper. Due to the heat, I have a little extra water on
my paper then is ideal, but it's still not sopping wet. I will add my cool black to
the Wing using my big brush. I'll start with a lot
of paint at the bottom. Then I'll dab off my brush and pull the black
up towards the top. Because I want the black to
bleed into the upper back. I'm going to add a
touch of extra black at the top because I put down some extra water to prevent my paper from
drying in the heat. I ended up with a
little excess water. I'm going to drive my brush and use it to pick
up the excess. When that's done, I can see that the area is not
as dark as I want. So add some extra black
while it's still wet, and then pull the
paint upward again. For this section. In the next, we will need to take
several breaks to let our painting dry
between sections. When you're painting
is completely dry and not dangerously Dry. Come back to this lesson and
we'll darken the upper wing. As before. We're going
to darken the Wing from the bottom and pull
the paint towards the top. But this time we're going
to leave the bottom half alone and add our Black
starting at the line mid wing. You can see here that
it is helpful to have a dark pencil line at
this mid wing area. So you can see it
through the black paint. As before, I will make
this section wet. This time. I will not add water to
the upper back at all. I will keep it only
on the upper wing. I will use my big brush for the water and for adding
cool black paint. There is a little more
water than I want. Soil dry off my brush
and pick up the excess. I'll add the black starting
at the line mid Wing. My goal is to get the
bottom half of the Wing very dark and then
pull the paint up. Once again, I wipe off my big brush so I can pull the paint up to the
top of the Wing. I didn't repeat
the entire process to darken the upper
wing a bit more. Take a break to let your
painting dry completely, and then come join me
in the next lesson, where we'll paint the back
of the neck and the Chest. I'll see you there.
13. Neck and Chest: It's time to paint the neck
and Chest of the toucan. We'll start with the neck
and back of the Head. In this section, I'll cover the area with water
so that it is Wet. I'll put the black on the left with the warm black
on the top half. And the cool back
on the bottom half will let the two black
colors blend in the middle. And we'll pull our black
colors to the right, creating a gradient with a
lighter color to the right. I'll start by painting my warm black at the top
with my big brush. As I'm painting, I find that it is a little more
with than I'd like. But in this heat,
the extra water will help to keep the paint
from drying too quickly. When I switch between my
warm and cool black mixes, I clean up my big brush, but I don't worry about
it being super clean. A tiny amount of
one color and the other won't overwhelm it. Once my paint is down, I wipe off my brush to pull
the paint to the edges. I also do a little
blending where the warm black meets the cool black. I'm using my medium
brush here to have a little more control and helped me get to the edges
of this section. There's no paint on my brush. It's just lightly damp. As I continue, I add extra
black to each area with my big brushes needed and smooth out the edges
with my medium brush. Even with the extra water, the corners of this area are drying very quickly
because of the heat. The upshot is that we only need the lower corner to dry before we can move on
to paint the chest. Take a moment to let
your painting dry. When your lower corner
is thoroughly dry, you'll be ready to
continue the lesson. Most of the area I have just
painted is dangerously Dry. I can tell that the lower
corner is completely dry, so I can continue to paint. We have just a little bit of chess that we will add
our cool black to. I'm going to use my
medium brush so I can get into the details
and keep the edges clean. This section is small and
we want it to be very dark. So we're going to
paint this wet on dry. I'm trying to limit
the water in my brush, but at the same time, I
don't want to dry brush. I want the paint to
fill in the area, not just sit on top of
the bumps of paper. I want this area
to be very dark. So I'm adding extra
black paint to the area. Some of the area is
starting to dry a little. But because I'm going to
paint over everything again, it'll make the area evenly wet. If you want to try
something different and your paint isn't
drying too quickly, you can always take
your small brush to get a little bit of black on it and add just a bit of texture. I'm using my small brush to add a few random feather lines
coming off the chest. I started out with my
paint a little too dry, but I added just a touch of water and the line smoothed out. Again, this is optional. If you don't like the
look or if you're concerned that
you're not going to pull the Technique off, right? Then by all means,
just leave it be, it'll look just as beautiful. And there we have it. Our
toucan is essentially done. We'll take a break
to let it dry. Then we'll join up again in
the next lesson to look at what adjustments we
want to make before we really say that
this toucan is done. I'll see you there.
14. Adjustments: The painting is
done and it's dry. Now we can make any
adjustments that we want. So we'll review our painting
from left to right. First. I was having trouble
with the paper drying in this area because
it was so hot. I want to smooth
this out and make it a little bit darker on
the right side as well. Another area where
I want to make an adjustment is I want to deepen the orange
around the eye. With the area in blue. I want to see the
blue Beak darker to represent more of the
folds in the skin. And other things that
I thought about is darkening the back of
the Head and Neck. Well, there's a part
of me that would like it a little bit darker. There's also a part
of meat that's very happy with how it is now. Because I don't have a
clear reason to change it. I'm going to leave it as is. That's something
that you can keep in mind with your painting. If you're debating whether
or not to make a change, err on the side of not making any changes because it'll
probably work out for the best. For the tip of the Beak. I'm going to get the
water close to the edge. Then wait until I add paint
before I reach the edge. I'm going to make this area wet. Again. I'm going to mostly
repeat what I did earlier, but I will add more black
to the right half of the area so that the gradient
isn't as significant. Once my paint is down, I'm going to use
my medium brush to pull the paint to
all of these edges. My brush is damp, but
without any paint on it. Now that I'm finished
with the tip of the Beak, work on the orange
around the eye. I'll use my medium brush to add the water to
make the area wet. Then I'll add yellow
and then orange. When I switch to the orange, I'll be very careful
not to add too much as it will easily
overpower the yellow. Now I've wiped off
my brush so I can push around the orange
I've already put down. Once my colors are down, I can see that I
don't need to add any more black to
the shadow area. The colors are translucent, so I can still see the black
that I added the first time. Now let this area dry completely so that I can paint the
blue area right next to it. I'm also going to
darken the yellow in this triangle under the Beak. The yellow is currently the same value as
the nearby Chest. And I want different
depths of color. I'll add just a little
bit of water to make it wet and help keep me from
darkening it too much That looks like more
than enough paint. I'll wipe off my brush and
then push the paint around. I would like just
a little bit more black in there to make
the shadow more distinct. But I want to let it dry first. Now the orange around my eye is dry and I can repaint the blue. I want this to be barely wet. I'll start off with
more water than I need. Then pick up the excess water once I've spread the water out. In order to see
where my water is, I'm going to lift
up the painting. I want to make sure
that the water is going all the way to the edges because I don't want to mess
around with the water. Once I start adding the blue, the water needs to be in place because I'm not
going to paint the area. I'm just going to charge some parts of the
area with blue paint. When I add the paint, I want it to be pretty thick so that it doesn't travel too far. Even though I tried
to work quickly, the heat got the
better of my painting and some areas dried out. As I said, I didn't want to mess with the water once
the paint was down. But I didn't wet
hard edges either. I lucked out and was able to
barely add some water to get some paint flow without
having waterflow into the other wet areas
and disturb the paint. This is a good reminder
though that working with something barely wet,
drying out quickly. So make sure you
are prepared and perhaps wait to paint during
a cooler time of the day. The last thing I'm going
to do is paint over that triangle with a
tiny bit of wet black. I want to keep it very faint. I'll do it a little differently than how we painted it before. So I can show you another
option of how to paint this. I'm going to put down just a
little bit of black thing, come back with water on my brush and push everything around. I will dab off my brush, wants to get rid of
excess paint and water, then finish spreading
the black around. There we have our final toucan. Take a moment to enjoy the wonderful creation
you've just made. When you're ready, come
join me in the next lesson where I'll wrap up this class
on wet on wet painting. I'll see you there.
15. Final Thoughts: Congratulations on all
of your hard work. You've taken the time to
learn what wet on wet is, experimented with different
levels of wetness to see how that influences your
painting. Practice. Several wet on wet
techniques and put everything together in your final beautiful
toucan painting. Thank you for joining me on
this wet on wet journey. No matter your skill level, I hope that you've
learned something new in this class and that you'll continue to practice wet on wet techniques in your
future paintings. Before you leave, be sure
to take a picture of your toucan painting and post
it to the Project Gallery. The link is found on
projects and resources. Create project. I would greatly appreciate
it if you would take the time to leave me
a review on this class. Knowing what you did and
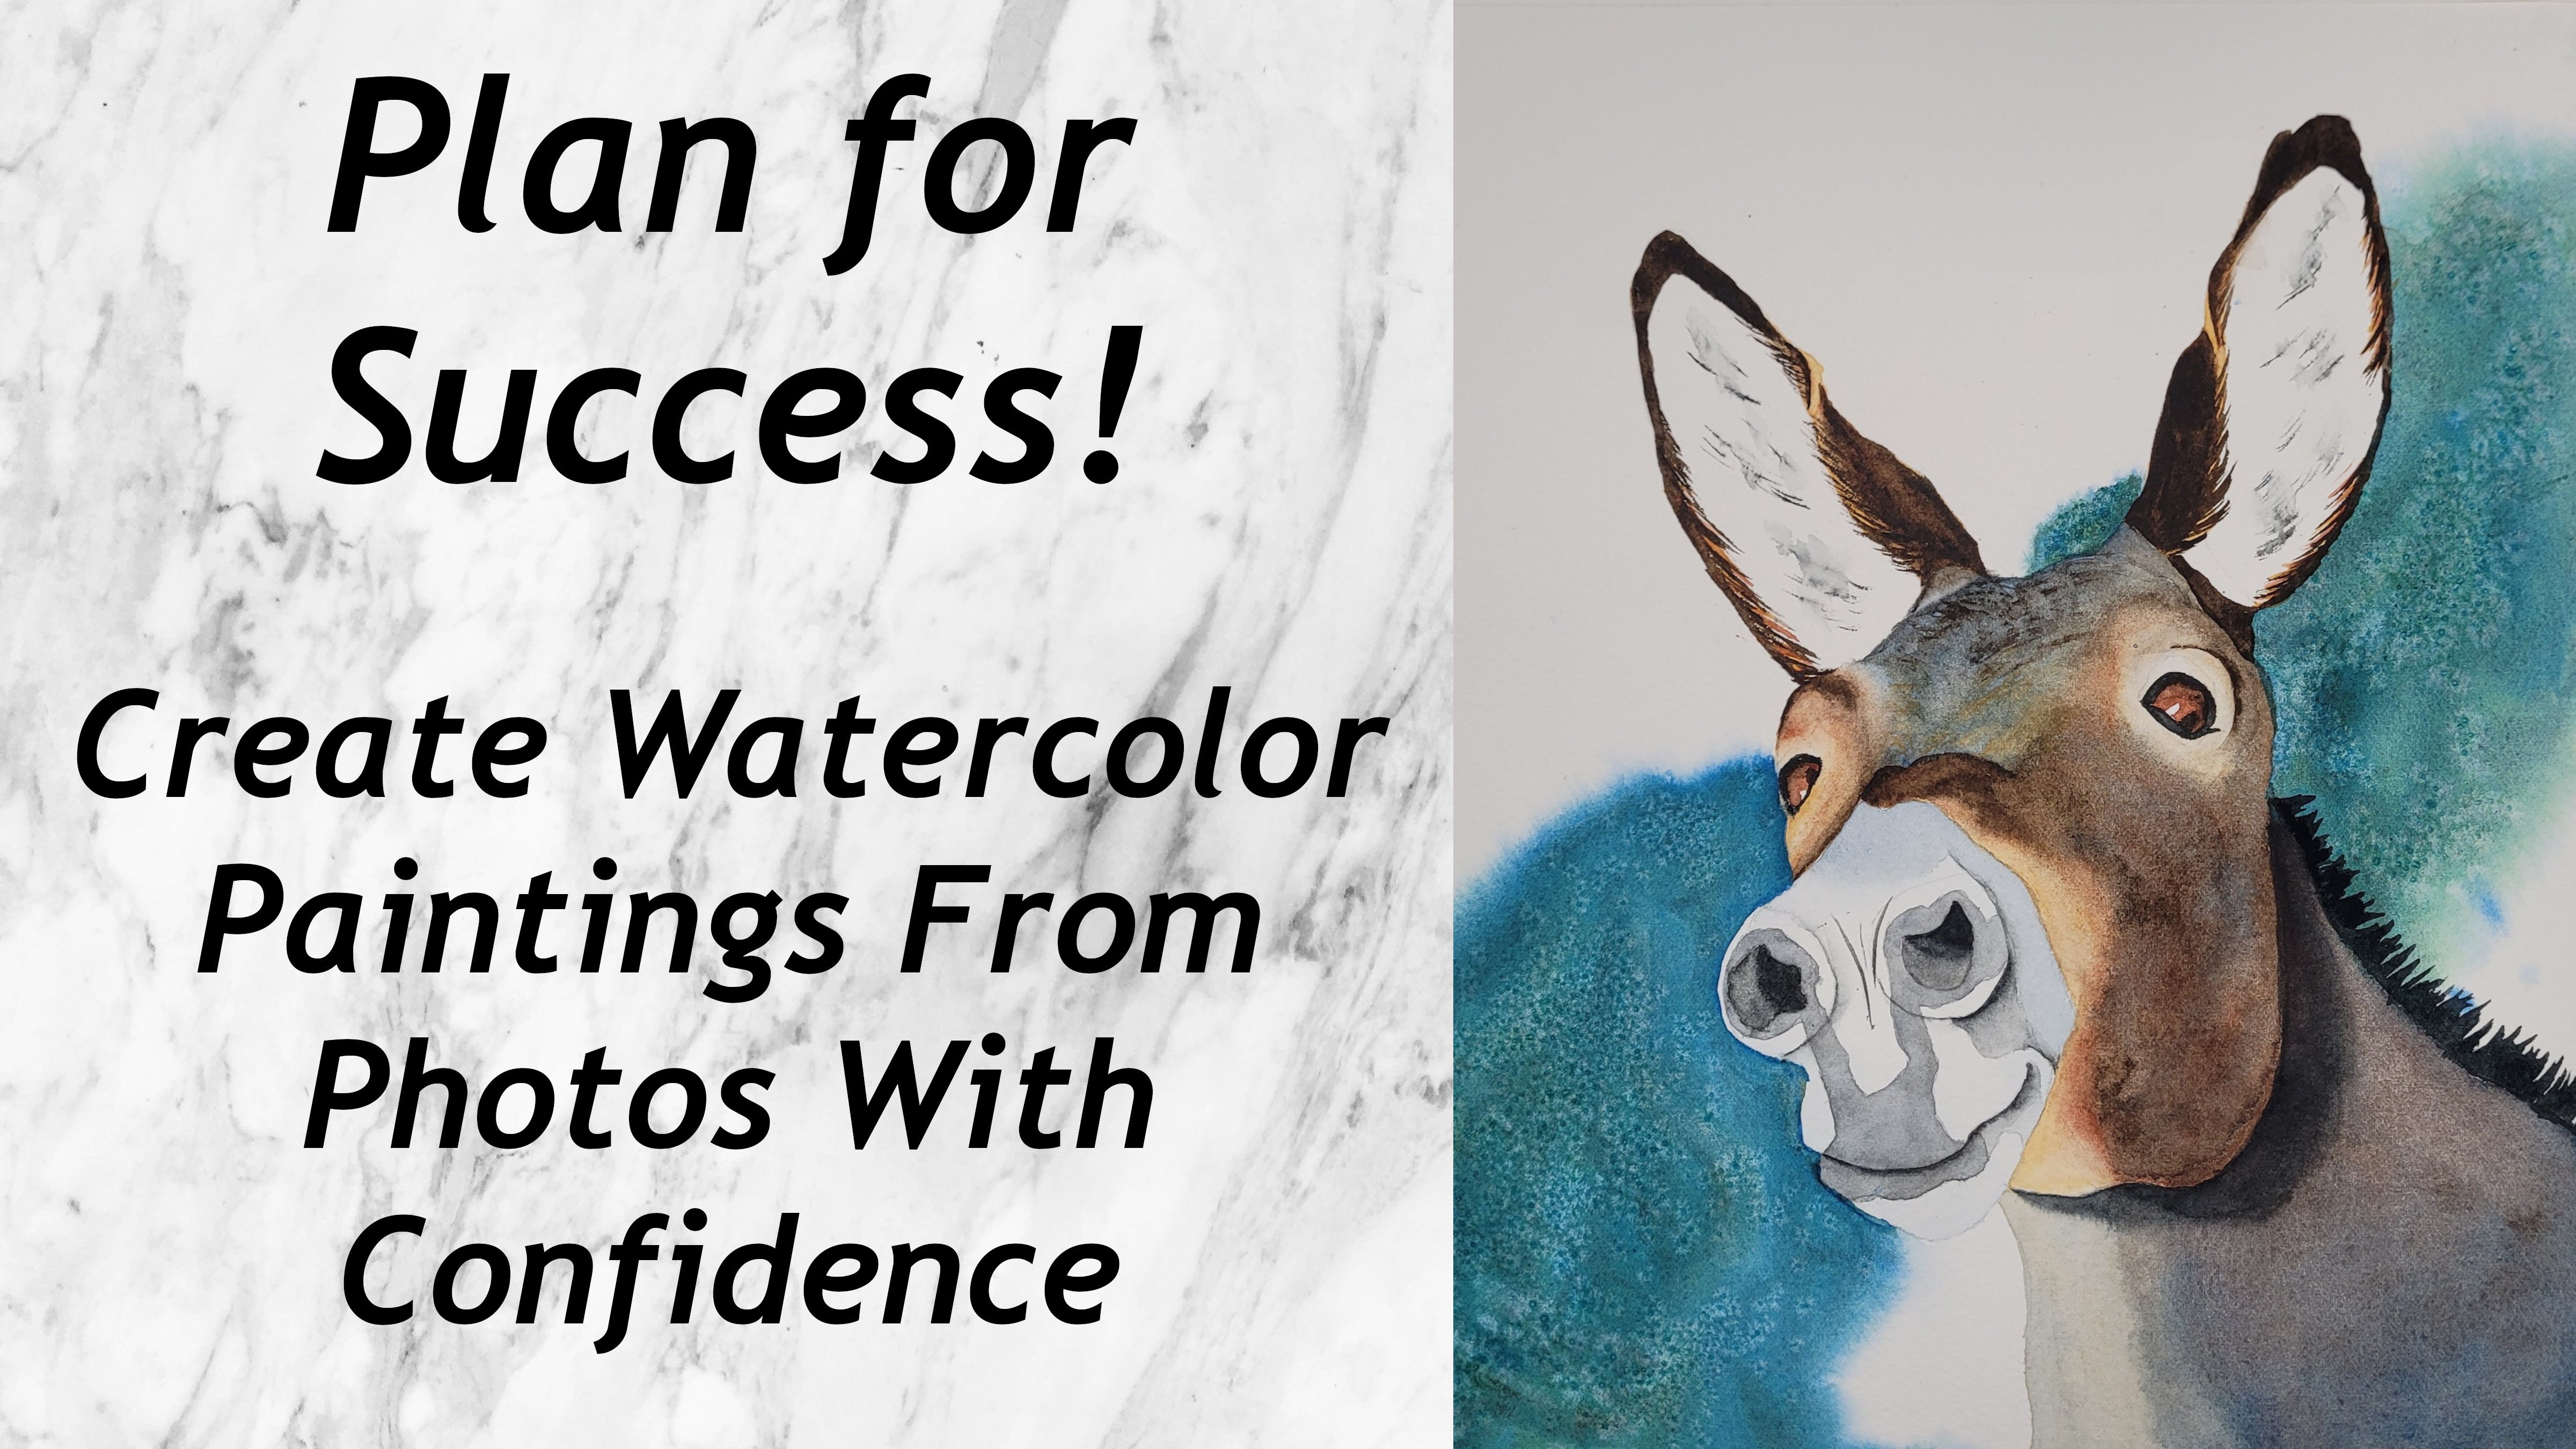
didn't like about the class will help me to make the next Skillshare class even better. Finally, if you're ready to develop your skills
even further, please check out
the other classes that I have to offer
on skill share. One class that might
be particularly helpful is my plan
for success class. This class will help
you to reach beyond the Tutorial and apply your
watercolor painting skills. Reference photo of your choice. Once again, thank you for
joining me and I look forward to seeing you again
in another Skillshare class.
 Lyndsay Newton, Wildlife Artist in Watercolors and Felt