Transcripts
1. Welcome to watercolor flowers class!: Welcome to my watercolor
flowers class. Don't you just love that time of year when nature
starts to come alive. First, everything is bleak
and gray and then you start noticing little
body leaves everywhere. Before you know it,
everything is in full bloom. That's the inspiration
behind this course. We'll start with a
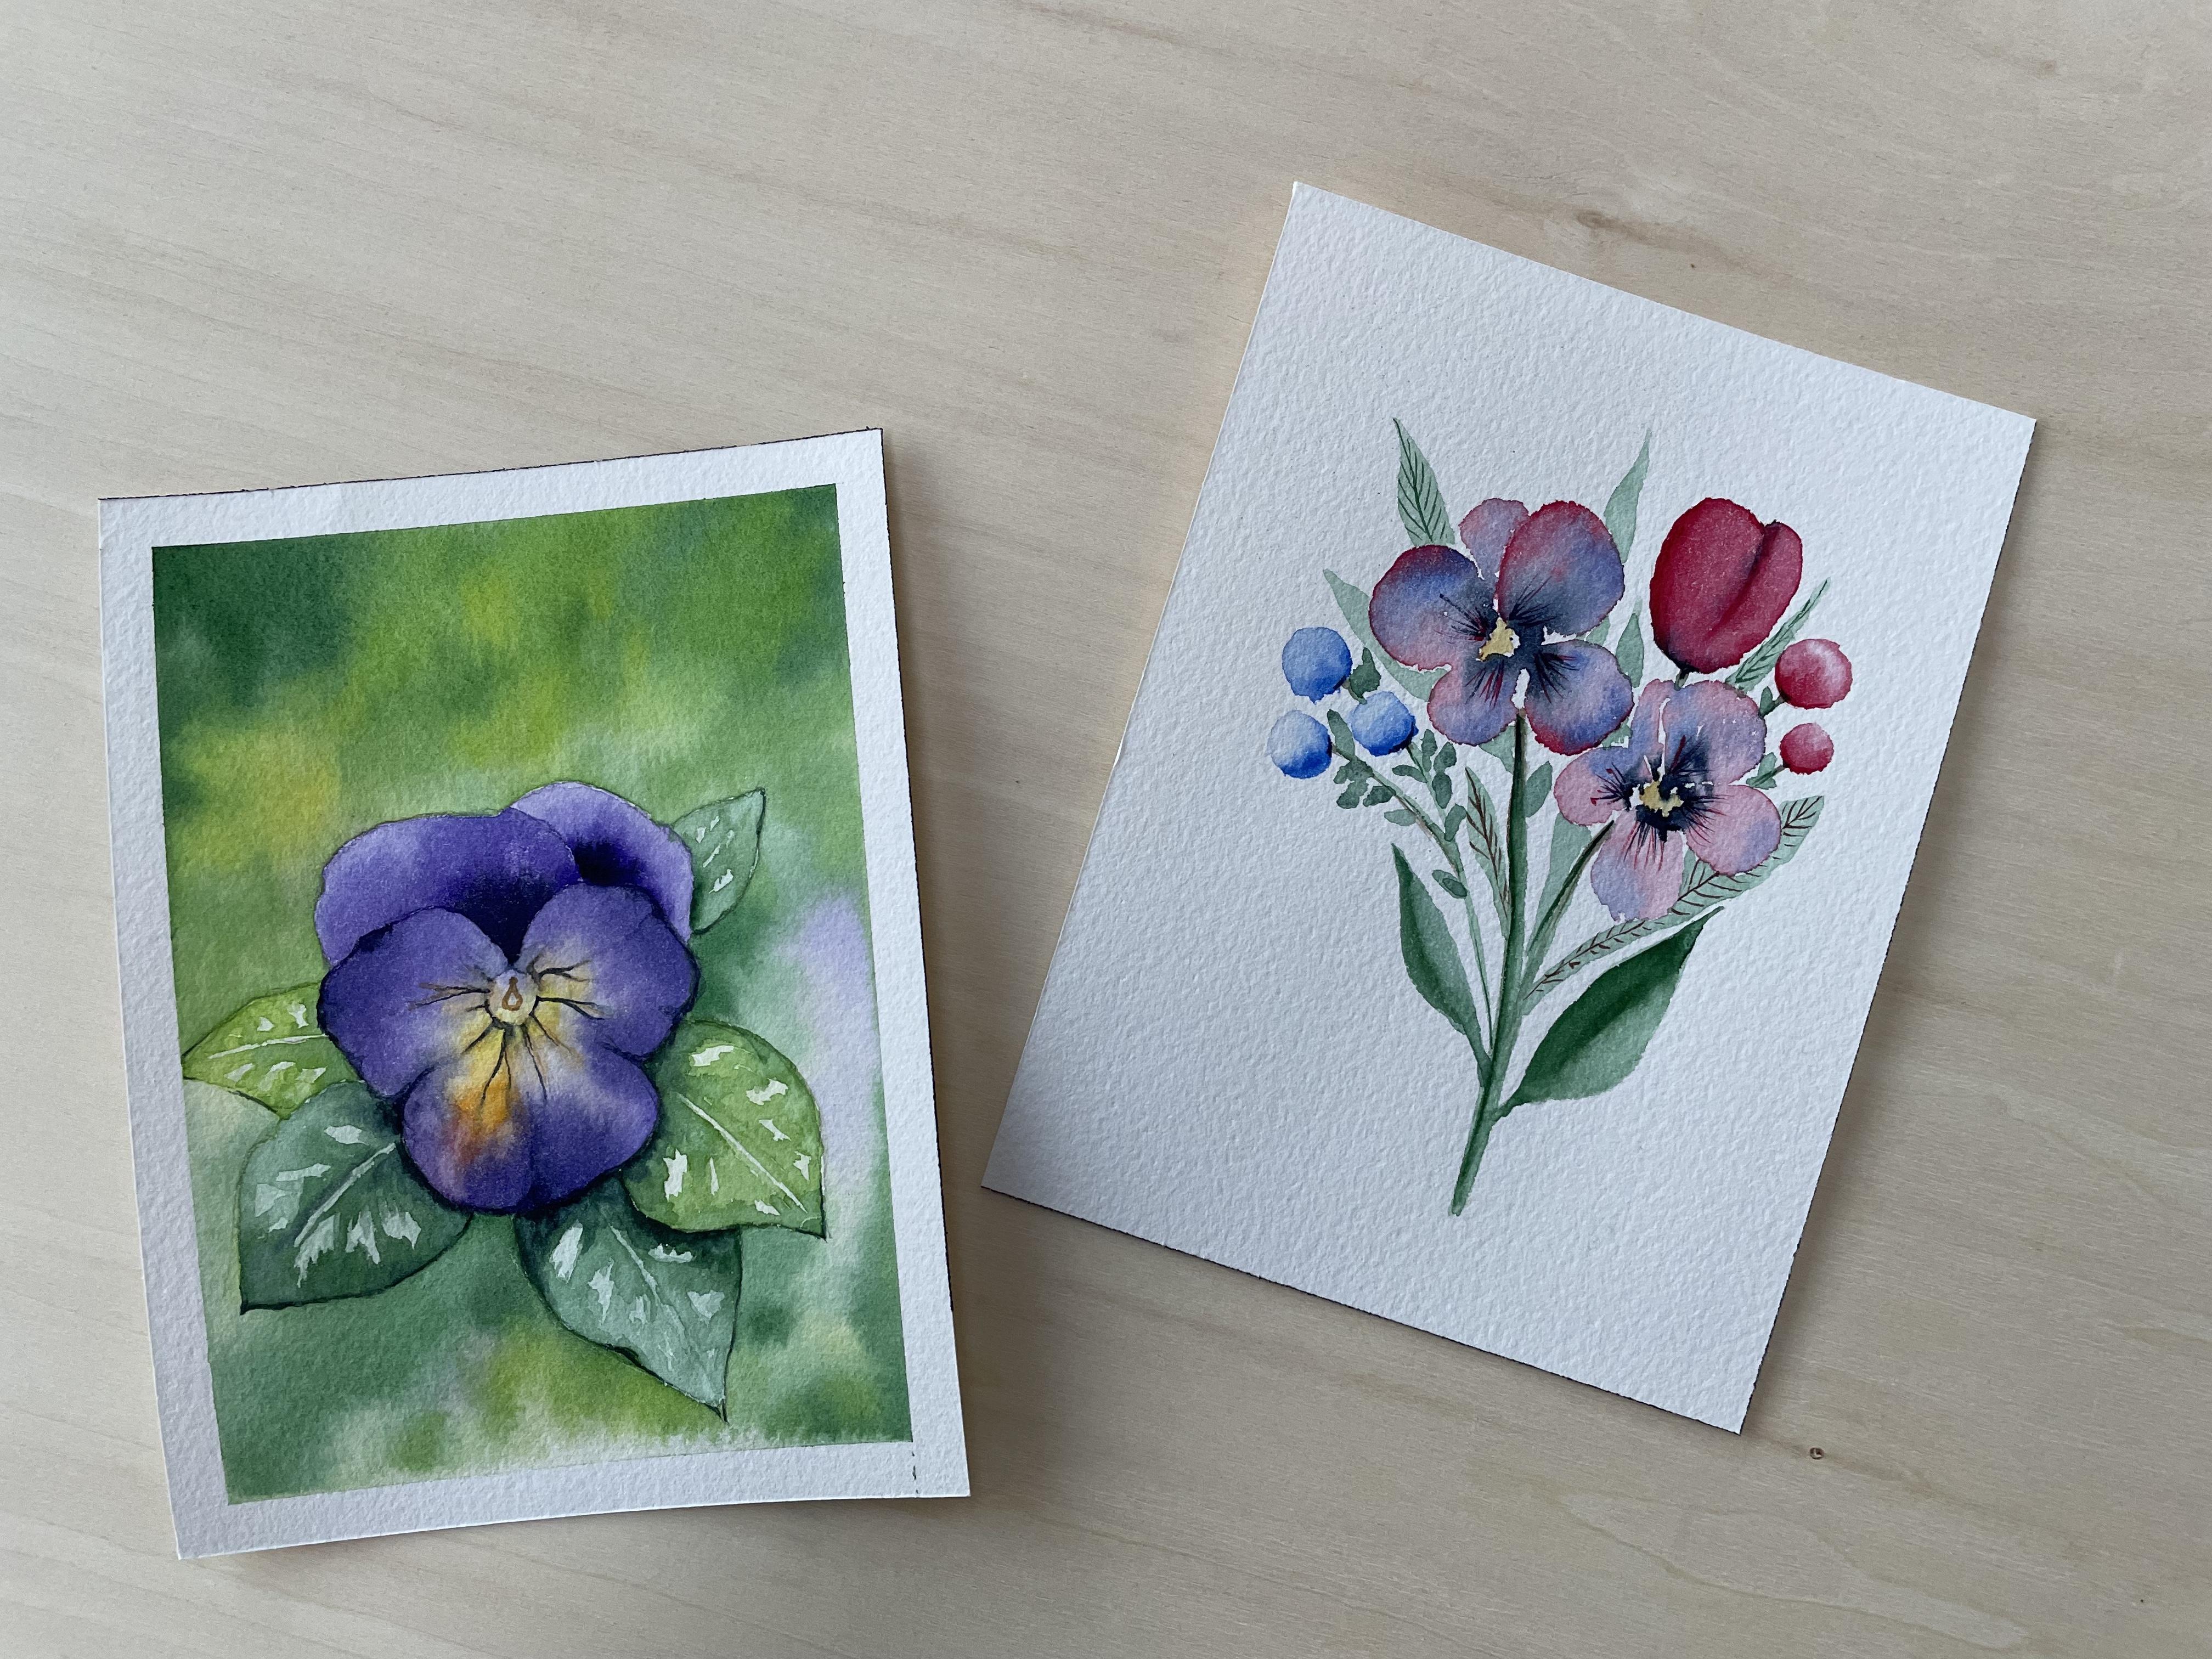
warm-up exercise where we paint a flower bouquet
in loose style. Then we will continue to the class project where we
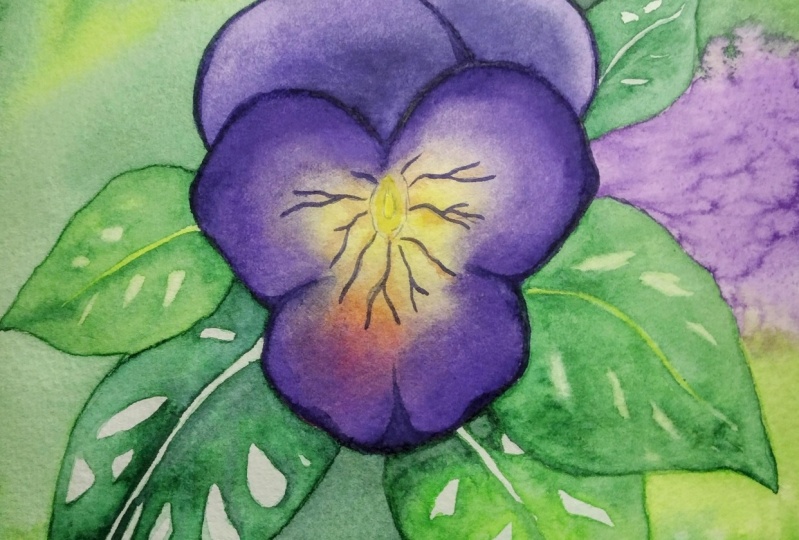
paint a panic or violet. We'll incorporate
wet on wet and wet on dry techniques as
well as layering. My name is Lisa, how to none. And I'm a watercolor artist by night and QA into nearby day. I've learned almost
everything I know about watercolors
from Skillshare. And now I want to share
that knowledge with others. I think learning is a
lifelong process and everyone can become
better by practicing. I've also come to note is
that we build ourselves expectations and demands of what the age we showed
it should look like. But the reality with
watercolors is that they sometimes flow
where they want to flow. What becomes so
far painting is it nearly always what
we anticipated? And that's actually
part of the fun. So let's learn to let go of our expectations and
just enjoy the right. Okay, let's get started.
2. Materials: Let's first check
out the materials. The most important one
is watercolor paper. I'm using these arches,
100% cotton paper. You can use any brand, but I suggest that you use 100% cotton that will grant
you a better end result. I've cut this piece
of paper into four postcard sized papers, which I'll be using
your class project. You will also need masking tape. Then some tissue. Try in your brushes. Then you will need
a few brushes, peripheral or small,
size 0 or size two. Then meet sized for
acceptable size six. Then some kind of palette
for mixing your colors. You will also need a
pencil for sketching and an eraser in case
you make any mistakes. Then I also have this small spray bottle which
I use for wetting my paint. This is optional, but I've noticed that it's quite useful. Then you should also take
two jars of clean water. One of them is for cleaning
the paint from your brushes and the other one is wetting
your brush with clean water. And here's the list of the
colors that I'm using. You don't need to have
the exact same colors. You can choose
whatever you like. Okay, but go get your stuff
and let's start painting.
3. Loose-style flower bouquet - part 1: Let's first get
our paints ready. I have added here all the paints that
I'm using and now I'm adding water to make
them really light. I have here my
green, white, red, my blue and all show
the gold or raw sienna, whichever you are using. Pickup size six
brush for example. And then just start,
I'm painting, relax flower bouquet in your head and start
creating flowers. These don't need to be
any realized flowers. The idea is to learn to let
go and just create something. Let the brush dad's
on the paper. Once you have the base layer done and the paint is still wet. Now pick some other
color, for example, blue. And add small, a small dots of the blue where you think
that they look good. Then you can pick
some darker color. I'm taking indigo and
I'm taking it straight from the pan so that
it's really intense. And I'm adding it in
the center or towards the center parts of
the petals like these, will then continue
adding darker tones of red and blue flowers. Again, I don't have
any method here. I'm just adding the color
where I think it looks good. Then if you think you
are ready to dark tone or few auditing it
in the wrong place. You can always wash
your brush and then just tap it a bit on your
tissue paper to dry it. And you can blend
the colors in a bit. I'm doing it right now. Continue adding two more
flowers using the same method. Make things a bit
more interesting. I'm adding a different
kind of flower. Flower maybe looks
a bit like a tool. But anyway, I'm using
the same technique here. I'm adding some pitfalls
using a lighter tone. Then I will add blue on top
of that and some indigo. Then I will add a bit of
darker tones as well. I'm doing a bit of blending
also because I think that Inigo stands
out a bit too much. That's a bit better. Kind of separate the one
petal from the other. I'm adding a bit of indigo also. Let's do an add some berries. All these can also be blossoms, whichever you like best. But I think these look
a bit like blueberries, just adding small blue
circles like this. Then I am adding a bit more darker tones
on one side of the berry. And after that, I am cleaning
my brush and I'm dabbing dry and I'm removing
some of the color. I'm trying to create a bit
of her eye light spot on one end of the berry so that it looks more three-dimensional. Let's add a bit more
darker tone here. That's starting to
look pretty nice. Let's then continue adding more blue and also red berries
using the same method.
4. Loose-style flower bouquet - part 2: Next I'm taking a lighter
tone of olive green. And I'm going to paint the
stems to all of the flowers. Taking a smaller
sized brush size. And I'm adding a
beautiful brown color on the one side of the stems. On using burnt umber. Let's paint the leaves. I'm taking again my
size six round brush. And I'm taking your lighter
tone of olive green and then just start making
leaves wherever you think they would look good. Pay attention how I'm
forming the leaf on first, pressing down only
the tip of my brush. And then I'm pressing need to
down slightly more so that gradually forms wider
mark on the paper. Then as I move towards the
other end of the leaf, I am releasing the
pressure again. That in the end
there's only the tip of the brush touching the paper. Again. Let's then add more
leaves in the same way.
5. Loose-style flower bouquet - part 3: Okay, I think that's
enough leaves. Let's add a bit more
darker tone to the stems. I'm taking a darker tone of olive green and I'm
adding a beautiful debt. The stems. Next I'll add a few
details to the leaves. I'm using olive green
and burnt umber. Kind of switch between those two beat of
variety in the colors. If you're up for it, you can also add a second to lay your green to some
of the leaves. Or maybe for just helpful. Blend the color. Clean water or with
clean brush. Like this. Not like happy week, the
details in the leaves. And next I'm adding a bit
of details to the flowers. I'm taking a darker
tone of threat, hope to car mine that
I've been using. And I'm adding a bit of
details here and there. All these details are
totally optional. And they kind of depend
on what you think looks good at as much or as
little detail as you want. I'm adding a bit more
darker tones, berries. And I think after I am done, That's define those
steps at the bouquets. Using indigo for
this final detail.
6. Violet: making the sketch: Welcome back. I hope you had
fun painting the bouquet. I hope you've got some risks in-between and you are ready
for the next painting. First, I'm attaching my paper
to a piece of cardboard. You can use any surface, but I advice you to attach your paper
Duchamp theme because otherwise it will buckle because we are using wet
on wet technique. Then start sketching. Sketching is actually
quite simple, so just follow my lead
and you will make it. First we are making
to pathos that form kind of a heart shape. Then we are adding a third
petal at the bottom. After that, we'll add two more pathos at
the top like this. Then I'll add a few
leaves around the flower. Then finally I'll add a few details in the
middle of the flower. Maybe one more leaf
here at the top. Then we are done. Next,
let's paint the background.
7. Violet: painting the background: Then paint the background for the violet to
refresh your memory. Here's a list of the colors
we are using in this project. This is a project to pansy. I think Pansy Violet are
almost the same flower, but I don't know what the
difference between those 0s. So I'm just using both words
just to mix you up a bit. Okay, but let's then
make our palette. I'm adding may green, olive green, or any other darker green to my
mixing palette. I'm also adding a bit of volume let on using
brilliant blue, violet. Blue, violet. You can use whichever violet you have or mix your own
with red and blue. Next, I'm using my
little spray bottle and I'm adding water to the colors because I want to use a light tone of these
colors at first. Let's next width to paper. I'm using a flat
brush to do with, but you can use any
larger sized brush. Be careful with the flower, Let's with everything else except the flower under leaves. Good. No, I'm switching to my
size six round brush. And I start making
the background. I'm picking first make
green and I'm adding just launches of
agreeing on the paper. I do these sweet make
green and olive green, and I also add a bit of
violet to some places. I have no method
for this either. Maybe you have learned that I
had no method on just doing things the way that
they feel good to me. So I suggest that
you do the same at colors in places which
feel good to you. Okay. I've now added the first
layer, light tones. Next, I'm adding
more intense colors. I'm using the same
colors as before, but I'm just using less water in them so
that the total Vc darker. Please note that your background
should still be width. When you are doing these. If your background
has already dried, then you should not add
any more colors to eat. Only do this step if your
background is still wet.
8. Violet: first layer: If your background has dried, it's now time to paint the
first layer of the flowers. But if the background
is still wet, just wait a few more minutes
before doing this step. I'm adding some volume
and yellow on my palette. I'm using cadmium yellow light and chromium yellow hue, deep. Chromium yellow is kind
of it's almost in orange. If you don't have
that specific color, peak some orange color. Or you can add a beautiful
red to your yellow. Again, using my
little spray bottle to make the tones of these
colors really liked. Let's use width on wet technique
with the flower as well. With only the flower. Do not wet the leaves
at this point. Wants to pick our width
and let's add a bit of yellow to the middle
part of the flower. Next I'll add some
violet to the petals. I'm using the blue
violet and I'm adding it to the older pathos basically everywhere
where there's no yellow. I liked volume. Next I'll add a bit of chromium, yellow or orange to some parts
of the flower like this. Blending tone. Can you then guess the next step will be to wait for a moment
for these to dry. After that, we can paint the
first layer for the leaves. Teams that the first layer
of my flower has now dried. So I will mix, start painting the first
layer for the leaves. I'm taking a light tone of olive green and
also make green. I am using both
are making some of the leaves would make green and some of the leaves
with olive green.
9. Violet: second layer - part 1: The previous layers are now dry. We can mixed stock
making a second layer. First width, one of the petals, like I'm doing right now. And we'll use wet on
wet technique to pain. Just this one petal
at this point. Take your blue violet and
add a bit of water to it, but not too much. And add a trope or
few drops off that. To the boardroom. Like this. We lift width paper to help us
to spread the corner. Clean, dry brush. You can blend the color. Looks a bit smoother.
Like these. I think I want a bit
more intense color. I mixed taking violet
straight from the pan. And I'm adding it to the bottom part of
the petal like this. I think I'm also going
to add a bit of indigo. Also straight from the
pan to the same place. While we wait for that to dry. Let's work on a section that doesn't touch the wet
part of the painting. I think I'm going to
work on the sleeve. Next. I'm using
olive green and I've added a beautiful water to it so that it's not too intense. I am leaving a
small white section in the middle of the leaf. After that, I started
adding more colors. Color on the edge of three. I'm leaving some parts on
top so that the first layer of colors is Vc bowl, like this. Then I do the same for the
other side of the leaf. Your leaf is still wet. You can add a bit more
intense told some part. It will look a bit
more interesting. I think I'll even add
a bit of indigo in some places to make the
color even more intense. Mixed. In a similar way. Pick the leaf that
is not touching the sleeve because these
might be a bit too wet. Steam. Next, Next, IT work on another petal because the first petal seems
to be drawing all. Let's use the same technique. So first, width, pit bull, then at quite intense tone of violet to the base of the petal. And after that at
more intense violet and a bit of indigo to the
bottom part of the leaf.
10. Violet: second layer - part 2: Let's leave that petal to try
and work on another leaf. At this point. I think the first two
leaves are now dry, so it's safe to work on the leaf that is next
to the first. To leave. This leaf, I am using make. When I want to make more
intense color or some places, I'm adding a bit of
olive green to the mix. Okay, that leaves the stone. Work on the sleeve here. You will see made between
old shelf for these Warren, also a bit of olive green. For the darker spots. It seems that the sacred pit
all the school show dry. So it's no shapes to work on
this point, I will leave. You were seeing again olive
green for the sleeve. Everything that touches
the lower East now, dry so it's safe to start
working on the flower. Let's first width
the entire flower or the three patterns. This, Let's start adding
more intense colors. Yellow, chromium,
yellow or orange. And then finally
bowl-shaped volume it first at the yellow to the center
part of the flower. I start adding chromium,
yellow or orange. Do some places. I will blend those colors. They don't stand out too much. Mixed thought I'd
beautiful violet, the bottom part of the flower. But please note that
these a violet, now a bit more red than blue. But if you don't have
it, that's totally fine. I noticed that my flower has
studied to try up a bit, so I'm adding a bit more water to the sections that I
haven't paid you yet. And now I will add a bit more intense toll
of a bluish violet. Keep adding more
intense colors of wildland to watch the
edges of the petals. Next, I'm doing a
bit of blending with a clean brush because
there are feasible. For my taste. As a final step, I'm adding a bit of a reddish volume it to
my chromium yellow. And I'm using that color to draw some very fine lines from
the center of the flower. The flower is still width. It showed the slides, we'll spread a little. And that's the point. I'd be using a size
two brush for this.
11. Violet: adding details: We are almost at
the end, my friend. If your flower is
now completely dry, it's time to add a
few more details. I'm using these, these almost
brownish tone that we used in the last step to make some details to the
middle of the flower. First, I'm painting
these water drop shaped section in the
middle of the flower. And after that, I met painting lines from the
middle of the flower, like we did in the last step. But now, because the flower
is int width anymore, these lines won't
spread out anymore. Mixed R, we'll use a beat darker color for these lines as well. I'm mixing a bit of
indigo to violet. One studies done. I will clean my brush
with just a little bit. And we'll let that, run that over the software
lives so that they will blend a little bit to get back so that they won't
stand out that much. Next, I will add a darker tone. In a few places. I am again using the weeks
of a violet, indigo. And I will add that mainly
to the edges of the flower. In some places,
not in all places. Just follow my lead or
follow your own intuition. Okay, I think that's
starting to look quite often pathos or in
Dutch morphing anymore. So low molar for you, to me. The final step, I'm adding a bit more intense
color to the leaves. I have mixed olive green a week, a bit of indigo to create
very dark green tone. And I'm adding that
to some places where I think there
might be a shadow. For example, near the flower and near other leaves like this. I'm using clean water
and clean brush to blend the dark or
dark green color so that it doesn't
stand out too much. I'm adding the shade dark green, mix some parts of the leaves
in the tips of the leaves. And with that, we are ready. Let's remove the
masking tape and take a look at the final
piece that we have made. Thank you for joining me. I hope you had fun. I hope you and I hope
to see you again soon. In my other classes. Please remember to upload your class project
to Skillshare. I would love to see them have a nice spring
and seeing you next time.
 Liisa Halttunen, Skillshare-taught watercolor artist