Transcripts
1. Class introduction: Hi and welcome to the class. Christmas is approaching again. So let's start painting
some Christmas cards that we can send to our
families and friends. In this class will make
two Christmas cards. They require only
a little sketching and we can start painting
almost right away. First we'll make these beautiful
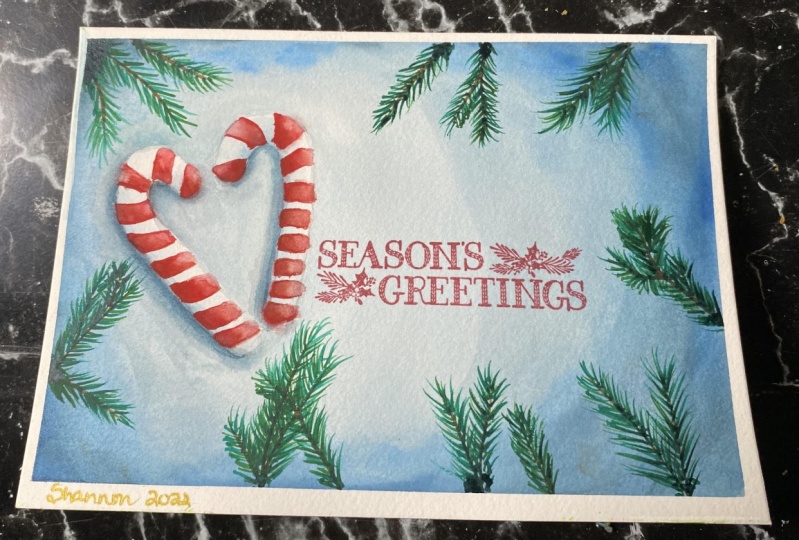
candy cane heart card. And after that, we
will create a card that shows two
Christmas ornaments. And in this painting
we will learn about wet on wet technique, e.g. my name is Lisa
heartburn and I'm a software tester by profession. But in the nighttime, I like to paint with watercolors and I've been
learning to paint with watercolors on Skillshare
for about two years now, I've listed here a
few other winter and Christmas themed classes
that I've made so far. You can go and check them
out if you like this class. I also have an Instagram account where I post my art work. And you can also go to my Skillshare homepage where
all my classes are listed. Okay, but I guess
that's enough about me and let's start painting. Next. We'll check out the
materials for the class.
2. Materials: Let's go through
the materials next. You will need watercolor paper. And it's good to use 100% cotton for these
because we will be doing wet on wet
techniques and that requires a real good
watercolor paper. You will also need
some tissues and eraser and a pencil
for making the sketch. Then you will need some
brushes of different sizes. And you will need two
jars of clean water. Then you will also
need masking tape. I also have this little
spray bottle that I use for wetting my paints,
but that's optional. You will also need paint. But let's go through
the exact colors. Once we start painting. You should also
have some kind of mixing palette for
mixing your colors. And he's the least
of all the materials that you will need. So go get your stuff and
let's start painting. In the next video, I will show you a sketch. Let's go through the colors that we'll use for
the first painting.
3. Project 1: Colors and sketch: Welcome back. Okay, let's check the colors for the
first project. I'll just quickly wet
the paint and then I will paint a small swatches of them so you can see what
the colors look like. Okay, First we have
indigo, very dark blue. We'll use indigo at least when
creating the pine needles. Then next we have
ultramarine blue, and that will be
used together with the burnt sienna to create
this shadowy color. I will show you how
it will look like. Then we have Taylor Blue, which is a really nice, bright and vibrant blue. I will also mix this with burnt sienna to create a
beautiful green color. Then we have burnt sienna. And this is what I'm planning
to mix with the blue. I had a beautiful ultramarine
blue here and then I will paint a bit of burnt
sienna on top of that. And I will show you the shadowy
color that equina create. Then let's take burnt sienna, MHC, tweet Taylor blue. It should create this
beautiful green color. And I'm planning to use that as the background of
our first painting. Let's see how the
green look like. Maybe a bit too blue for me. So let's add a bit more. Hello, Let's add a bit
more burnt sienna. Now it's made to the problem. So let's add a bit
of Taylor blue. It's usually be going back and forth with these color mixes. And it takes a bit
of time to find the perfect tone that you would like to
use in the painting. Yeah, that's good. Then the last color
is cadmium red. And these will be
used for creating the candy canes stripes
in the candy canes. If you don't have these
exact same shapes, that's totally fine. Just try to pick
something similar. Or you can, of course, also just use your
favorite colors and make the painting
look like you're. That is totally fine. We have one more color, sap green, which
I almost forgot. So it's a light
green and you can replace it with any
other light green. Then pick up your tape and
tape your paper to the table. Or if you have a, some kind of a
board where you can attach it that that's good. Also, remember to press firmly a few times so that
the tape attaches properly. This will prevent the paint
from leaking on tape. Shall we go to do it? Let's do the sketch. Next. I will show you
finished painting. This is one of my
practice pieces. And from here you can see that the sketch is actually
really simple. The only thing we will draw are the two candy cakes that
are forming these hard like for everything else will be created
without a sketch. Okay, Let's start stitching. I will position the
candy canes on the, a beak on the left side. And we'll just draw these two shapes that look
like upside down J electors. And that is all that
we're going to do. So you can just follow my lead or just draw them by yourself.
4. Project 1: Practising technique for creating candy canes: Before we start painting, let's first make
a quick practice of how we will be
creating the candy canes. So make a quick sketch
of eye candy cane. And then let's make
some colors for it. Take your mixing
palette and then add some ultramarine blue to it. Then pick up some
burnt sienna and mix these dark gray color. It should be more
blue than brown. Mix the colors on t, you will find tone that
please use your eye. Once you get the color right, pick some color to our brush, and then paint a shadow for
the candy cane like this. And then clean your brush and try it on a piece
of paper like this. And then blend the color to the background so that you won't have any sharp HSBC bowl. Next, let the painting
dry for a while. It should be really quick because we didn't
use lots of water. And once it's dry, then let's start painting the red stripes of
the candy canes. I recommend that you
pick a brush that has a fine tip and it's quite small. I'm using a size four and
then pickup a cadmium red. You can take it
straight from a pain. You don't need to
dilute it with water. Let's start painting like this. So start from the shadow side of the candy cane and paint the edges of the
red stripe, Stripe. And then wash your
brush and tap it, dry on a piece of paper. And then with a slightly damp
brush to blend the color. Tried to blend the color in such a way that the
color is lighter on the lighter side
of the candy cane and darker on the shadow
side of the can decay. And then let's enhance the
shadows by adding a bit of burnt sienna on
the shadow side. Then let's create rest of the
stripes in a similar way. So first cadmium red, then a blend the color
with clean water and then add some I burnt
sienna to make a shadow. And pay attention
that I'm adding more cadmium red on the shadow side. So with that, I tried to
make it appear darker. And that's also when
I blend the color. So the shadow side looks darker and the other side
looks lighter. You can paint with me
the rest of the stripes. Or if you already feel
confident enough, you can skip straight. The next video.
5. Project 1: Background wash: Okay, let's get
down to business. Peak. Quite big, round brush, e.g. size ten or 12, and wet it in a clean water and start adding
water to your background. We paint the background
using wet on wet technique. So we will make the entire background with
except for the candy canes. So pay attention
while you are adding, adding water next to the candy canes so that
you won't get them. Now my background
starts to credit it, so I will start painting
the background. I have a size 12 round brush. First, I will take the low blue to it and
I will start adding color on the corners and the side of the
painting like this. Then I've cleaned my brush and try to beat on a piece of paper. And I will pick a bit of
burnt sienna on the brush. And I will paint that
on top of the blue. This is how we create
the green tone we were looking at while we were going through the colors
for this class. I'll add a tiny bit more
burnt sienna because the color is maybe a bit
too blue for my liking. I like. And then I will start blending the color to the background
because as you can see, we have a lot of white people. So now I clean my brush
and wipe down a bit dryer, and now I'm blending
the color so that we don't have any
more white. We see both. I would like to corners
of the painting to be a bit more a darker. So I will add even more to them. I think I'm happy
with the background, but I still want to add some shadow under
the candy canes. So let's mix ultramarine,
burnt sienna, and let's create great
shadow tone and add a beat of that color next to
the candy canes on the back.
6. Project 1: Painting the first candy cane: Let's start work on
the candy canes next. Let's first add a shadow on
the side of the Candy case. And we will, for the shadow, we will use ultramarine
blue and burnt sienna, make a light mixture
of those two colors. And it should actually be a
bit more blue than drown. So add more ultramarine
blue and burnt sienna. Okay, then we will
paint the shadows on the left side of the
candy canes like this. Then clean your brush and dry excess water
from it to a napkin. And then blend the shadow
to the background so that you won't have any hard edges between the bluish
and the white color, the white of the paper. Okay, Let's give it
a few minutes to dry and then we'll continue
making the stripes. But in the meanwhile, we
could maybe practice a bit. How we'll be making
is a brand cheese, cake first burnt sienna, and paint, a short
curved line with it. So that's the,
that's your branch. And then we will
add pine needles. So first take your light green, I'm using sap green
and start creating these short pine needles and try to make us confined
lines as you can. So it looks more realistic. Then take indigo and paint another layer of pine needles
on top of the green ones. You could also use
a different greens and create multiple layers
of the pine needles. But I think, I think
these two colors, like green and indigo, they create interesting
enough looking pine branches. So I will be using this
method, two colors. Okay, That's how the
branches are done. Let's continue with
our painting then. Okay, My background has dried. Now I'm taking my
size four round brush and let's start making
the red stripes. I'll start with the
one on the left. And let's see if I can work on two stripes at the same time. So I don't need
to wash my brush. So often. You can also work with multiple brushes so that
one of them holds red, one holds burnt sienna, and one you'll use for
blending the colors. But I will just use one
brush for simplicity of it, but you can choose otherwise. Then I will clean my brush and start blending the red
to the background. Here is the first one, and then I'll move
to the second one. I think on the lacking a bit of color on the second stripe, the line looks like it's, it ends too soon. So I'll add a bit of
more red color here. Yeah, no, it looks better. Then I will start next adding burnt sienna to enhance the shadow on both
of the stripes. Just a beetle, burnt
sienna on the edge. And then let's
blend it so that it blends nicely with
the red color. Let's start working
on the third strike. Again, take cadmium red, and these times start
to paint the strike from the left side
of the candy cane, because that's where
the shadow is now. Okay, so first paint
the borders and then add color on the left
side where the shadow is. And then with a clean brush, start blending the color. Beat more blending here. Then with a clean brush, I will remove some of the color so that it
looks even more light. Then I will add
burnt sienna here on the left edge where the
shadow is like this. Then let's blend just a
little bit because there was a bit of a hard, It's okay. Let's paint the
fourth stripe then. So again, start
with the borders. Then the one on the bottom side. And after that color
in a bit of red, then clean your brush
and blend the color. Eat. Then I think I will once again remove a bit
of the color from the highlights because it looks
better that way, I think. Yeah, no, they're so nice. Nice, highlighted area there. Then let's next at burnt
sienna for the shadow. Let's then take more
cadmium red and start working on
the next stride. So again, the borders. Whoops, I ran out of color here. Let's take a bit more. Okay, here we go. Then I'll clean my
brush and blend. Go. Okay, I think that's starting to be a blended well enough. And then I will
add burnt sienna. The left edge. Over here. You don't need to add much, just a bit, that
should be enough. Then I will blend. I will clean the brush and
a bit of blending. Okay? Then the final stripe. Okay, so again, start
with the borders. Then a color in a bit of
color on the shadow side. Then we will blend it like this. Okay. Then a bit of burnt sienna
to enhance the shadow. I will add it here at the tip of the candy cane like this. Then I will blend
it with a clean, damp brush, like so. Okay. You know what? It's ready. Let's paint the other candy
cane in the next video.
7. Project 1: Painting the second candy cane: Okay, One candy cane
gun and one more to go. Let's use the same
method as before and start painting
the red stripes. I've taken cadmium red and I've added eat on the darker
side of the candy cane. And now I've washed my brush and then just blend the color in so that one side is darker and the
other side is lighter. If you want to highlight even more the likeness
on the one side, you can remove a bit of
color there with a clean, damp brush like I'm doing now. Then let's add darker color, burnt sienna on the
shadow side like this. Okay, let's paint the next. Strike. Again with cadmium red. We start making the
borders of the stripe. And then let's add a bit of
color on the shadow side, like this and blend. Then I will again remove
a bit of color from the lighter side to highlight
that lighter, lighter side. And then let's add burnt
sienna on the shadow side. Okay, that one's ready. So let's take again cadmium red and make the third stripe. Again, I'm painting
the borders first, and then I will add a bit
of red on the shadow side. Let's try to make two
stripes at the same time. That might speed
things up a bit. We have so many
stripes to paint, so it's good if it can
be done a bit quicker. Okay, now I've added
the color and then I will blend with a
clean damp brush. And the other stripe. Again, remove a bit of color to make the highlight
even more obvious. The highlights will
make the painting look more realistic
and more interesting. When there's lots of
contrast between the shadows and the darker color
and the lighter colors. Now the highlights are done. So let's add the darker
color on the shadow side. So take it in burnt sienna. And remember to blend it well. We don't want any harsh edges or borders between these colors. Okay, then the next tripe, we are almost done. Bear with me just a
couple of more stripes. Let's blend again. Then add burnt sienna
on the shadow we cite. Okay, then I think we
are at the last stripe. So once again, paint the borders on a color
in a bit of grit. On the shadow side. Maybe we'll add one more here, but that doesn't need
any special work. Then blend the red. Remove a bit of color. Then I will add burnt sienna. And we, we are ready
with the stripes. Okay, cool. In the next video, Let's start working
on the branches. See you there.
8. Project 1: Painting the branches: Let's work on the branches. Next. Take burnt sienna and use a
brush that has a fine tip. I'm using, I think it's size four and just paint
a curved line. Let's start here from
the top left corner. I will create, maybe I'll
create two lines at first. And then I will start
adding the pine needles. So first let's add the
light green layer. I took sap green and
now I'm starting to create the pine
needles like this. Then let's add them also on
the other side of the branch. Let's begin at a light
green pine needles also to the other branch. And then the other
side of that branch. Like so. Let's start adding the second
layer of pine needles. And this time we are
using indigo like in the practice piece
that we made before. So at Indigo pine needles, a bit here and there, it doesn't need to
cover the whole branch. You can choose
where you put them. And I also like to make small dots alongside the
branch because that makes it look like there are these
small pine cones or some small branches or
beginning of branches. So it's at a bit of texture and it looks very
nice at the end. Let's add another branch. This time, let's add it next to the first two
branches may be here. Yeah, I think that
might look good. I'll take sap green and start
creating the pine needles. Try to create as fine
lines as you can with your brush so that
it looks detailed. And in this case, it's also good to use very, very concentrated color
so that there is not, not water at all actually,
like you'll see, I'm taking it
straight from the pan and the color has a
very thick consistency. Let's then add a layer
of indigo pine needles. And you don't need to wait for the light green pine
needles too dry. It's okay to add the darker
pine needles straightaway. I'm adding a bit of
those two dots here, as you can see. Maybe a few needles here. I think that's starting
to look ready. Let's then add another branch. And this time here on the
left side of the paper. So I'm thinking the curved line first and then I think I'll create a bit of a smaller
branches like this. So it looks a bit different. Not all branches are the same, so it's good to make a bit of different kinds of branches. And then with sap green, I start to add those
small pine needles. If you have attached to
your paper to a board. Don't be afraid to turn the board around
so that you will find the best angle to work on the thing that you are
painting currently. I think it's easier to paint
the tiny dose this way. So I turned my board. Now the light green
layer is done. So again, taking indigo and start creating the
darker pine needles. Remember to add a bit of
dots here and there with the indigo to create
those small pine cone. Looking at blocks. Okay, that is done. So next, let's take burnt sienna and
create another branch. I think it's good
to create it here so that the first one
doesn't look so lonely. And first, the layer of light green
pine needles like this. I think we all are all already pretty familiar
how these are created. Then indigo. Here we go. Next, I will create a
branch here at the bottom. And I think I'm again
going to make a bit of a different looking
branch like this. Maybe I'll add one
more over here. Yeah, that is good. Then again, light green needles. If you learn something
from this class, I think you'll be an expert in creating branches
and pine needles. I think although this
is kind of repetitive, we do the same thing
many times over. But that can also be
a bit of meditative. So you can just
concentrate on doing one thing and it can be
actually quite relaxing. I think the light green layer is done for these bottom of branch. And let's next take some indigo and create those
darker pine needles. Start from the top. Sometimes it's hard
to decide what to paint first,
where to start from. But it's good to always
think about where you put your hand next. So if you paint e.g. the sampling on the right side first and then start painting
something on the left side. Your hand might smudge what you will have
just painted before. So it's kind of good to
think of working order in such a way that you won't destroy your
work with your hand. If you're left-handed,
then you might want to work the other way
round that I'm working. So it's always good to kind
of think of these things and then learn to waste that
work for you the best. Now create maybe a
small branch also here. And then I'll start adding
the light green pine needles. Then I will next take indigo and create again
the dark layer of pine needles like this. Remember to add a few
small dots here and there. Okay. Yeah, I think
that is ready. Let's first work on the rest of the brand
cheese in the next video. So I'll see you there.
9. Project 1: Painting the branches, part 2: I hope you're up for more branches because we
have still a few to do. So. Now I'm adding a branch
here at the top, a bit right? Two from the candy canes. And I made this upside
down Y shape so that I get a bit of a difference
between the branches. And now let's add the light green pine
needles like these, like we have already learned to do in many, many occasions. Then switch to indigo and start creating the dark
layer of pine needles. Again, remember to make a small dots here and there to create
interesting texture. Let's then paint
another branch on the left side of the branch
that we just created. So again, paint a curved
line with burnt sienna. Then take sap green for
creating the pine needles. Then needles on the other
side of the branch. And after that, Let's again make another layer of
needles with indigo. The bottom of the page
looks a big bear, so I think we'll add
one branch here, almost at the middle of
the page, at the bottom. Let's make it also split one. So there are more than 11
branch into one single branch. Then let's make another
one here next to eat. And we can work on these two
branches at the same time. So let's start adding a
light green pine needles. I'll start with the one
on the left so that I hopefully won't smudge
the color with my hand. Okay, then then let's
add pine needles to the other other
branch as well. Here on the other side too. Once you practice
this, enough times, I think you'll get pretty
fast in doing these branches. Bit more branches
or pine needles here because the
branches seemed a bit, it may be a bit too small. Okay. Then let's add a layer
of indigo pine needles. Okay, those branches are done. And let's next at a branch here on the right lower corner. It could be a bit bigger
one because there's so much open space. But also, I did position the candy canes on the
left side because I wanted to move some leave some space in case someone
wants to write e.g. Merry Christmas card. So there is a space for that. Yeah. Now, let's add the light
green pine needles and then continue adding the dark pine
needles with indigo. I think that after this we could maybe add one or
two more branches, but then I think we are done. But yeah, let's see how it looks like when we have finished, maybe maybe one more branch, then we can evaluate
the situation. I add a few more pine
needles here on the, on the first side of the pie of the branch Because
it to look to beat, beat in a way. Yeah, but now it's starting
to look more full. I think that's good. Now. Then I think we
could add a branch at the top of the page over here
in the right top corner. And then let's just start adding the light green
pine needles again. Now that I'm looking
at this painting, I think we'll probably add
one more branch after this. But then I promised we are done. I'm again turning my board so that it's easier to paint the, paint the pine needles. Then let's add the needles
on the other side to just watch how I put my hand because some of the pine
needles are still wet. I don't want to smudge dose. Yeah, but I think that's okay. Then maybe it'll be
tomorrow fluffiness here or here and there. And then yeah. Okay. I think that's
starting to be okay. And then I will add the
indigo pine needles. Okay, Then the last branch, Let's add it on the right side because there are
no branches there. So let's put it here. One more curved line. And then I'm thinking, should I make another line here? Yes, I think that's good. Yeah. Each one of these
special branches again. Then let's add light
green pine needles first. Now the light green
layer is done. So next let's add the dark
layer of pine needles. And remember to add those
small dots here and there. Okay? And then a few needles here, a few more here, and we are almost done. So let's see, in the next
video for the final painting.
10. Project 2: Finished project: Good job making all
those branches. Now before we remove the tape, and let's add just a bit of shadow next to the candy canes. So take some of the color that we used
for creating shadows. So that was mixed from
ultramarine and burnt sienna. So use that same mixture again, and then just add
quite thin lines of that color on the left side of both of the candy
canes, like this. And over here as well. And if the line or if the
edge kind of looks too sharp, you can blend it. And I think I'm going
to do just that. So I will clean my brush and
then dry it a bit and then blend the color so it
looks nice and smooth. Next to the background. I'll do the same for the
other shadow as well. Maybe a small shadow
or so also there. Okay. Let's remove the tape.
11. Project 2: Colors and sketch: Okay, first project is done. Are you ready to get
started with the next one? In this project, we will create a Christmas decorations
or Christmas bubbles. And we make a really
moody background and some light on
the foreground. Let's go through the
colors for this project. We're actually using
pretty similar colors than in the last project. But we have added some extra
colors in this project. We'll have burnt sienna. Then we have cadmium red. And you can also use any other prior to it instead
of cadmium red. And next we have a tail or blue. And like in the
previous project, we will also be using this color for the
background. In this project. We'll be using chromium, yellow hue deep, and these might not
be that common color. So you can replace this with any other yellow that is kind
of reddish or even orange. We'll be also using
ultramarine blue and indigo. And then we will also
use white gouache or white watercolor for
adding some final details. Let's take two paper,
the background. Again, remember to press firmly. We will be using quite a lot of water
in these backgrounds, so there's a risk of color
flowing under the tape. So remember to press
firmly a few times. K the tape, it's ready now. So next, let's do a sketch. I'll be using this little
cup to create a round shape. You can do it by free hand also. Then I'll add a slightly
smaller round shape behind this one. So we will be having two Christmas decorations
in this painting. Then let's add the small
details at the top where the Christmas
decoration is usually hanged in a tree like this. And then another one over here. Then one more thing. Let's add a street light
going the foreground. And I will mark with round shapes the places
where there will be light. So I remember to leave those
parts lighter when I create the background with
the sketch is done. So let's see new
in the next video.
12. Project 2: Background wash: Then start working
on the background. Take a beak, round brush, e.g. size 12, and take
clean water and water. The entire background except for the Christmas decorations. Okay, The background is wet and let's then take the yellow paint and add it around the
Christmas lights. I'm using a big round
brush for this. And take a bit of yellow, add it to your mixing palette, and add a bit of water so that the consistency
is in that thick. Then let's start painting
around the Christmas lights. Leave white area in the
middle of the light. That will be the lightest part. Then add a bit of yellow around the Christmas
decorations. And again, leave a slight whitespace between the color on the
Christmas decoration like this. Then clean your brush and why? Damp on a piece of
paper and then blend the color so that there
isn't white visible anymore, but the color is visibly lighter just around the
Christmas decorations. Next, we'll take burnt
sienna and mix it with your yellow so that we get
a slightly darker tone, even almost a golden tone. And let's add that, the round, the yellow
color like this. Let's then add the same color around the Christmas
decorations as well. So chest next to the
yellow that you added. And then a bit of here
in the corner as well. And between the lights
are this way we are trying to create the kind of the blow of the light so that its brightest test
around that Christmas lights. And then it gets
darker when we get further away from the lights
and from the decorations. Then let's blend the burnt
sienna to the background. We can edit burnt sienna
to the whole background. Let's add also a bit of darker color under the
Christmas decorations, because there will
be a small shadow. So it's good to add some
darker tones there. Then I am taking burnt sienna without adding any yellow to it. And I'm making these
darker shadows under the Christmas decorations and
also in some other places, like the corners. And then. Blend. We want
everything to be smooth, so there shouldn't be visible edges between
the different colors. When you are blending,
always remember to clean your brush
first and then remove excess water from it so
that it's just slightly damp and then blend the color. Okay. Then I'm mixing
even a darker tone. I'm taking tailor blue, and I'm mixing it with burnt sienna to create this
beautiful green color. And let's add it top
of the painting. A bit more in the corners and
a bit less in the middle. Then let's start blending the
color to the burnt sienna. This part can get a bit tricky, but we'll get through it. We just keep adding the green mixture and
some burnt sienna. And eventually we will find
a balance between the, between the transition
from one color to another. I'll switch to a
slightly smaller brush. This is size eight. And I will make some more, more of the green color, which burnt sienna,
phthalo blue. And I hope to add a
bit darker tones. Green. At the top of the painting. Keep an eye on the wetness
of the background. If it starts to dry, then you won't be able to
blend the colors anymore. So you should stop
at that point. But if you have good
watercolor paper, you should be able to do these steps without
any problems. I'm now blending the dark, dark green so that there's a smooth transition from
from burnt sienna to green. And let's see, a bit of
blending there as well. I think I'll add a
bit of green also at the bottom of the painting. And then I will try to
blend that. That's well. That actually doesn't seem
to be blending nicely. So I think my background had started already to
try at the bottom. So adding the color here wasn't such a good
idea after all. But that's totally fine. We'll find a way to make
it part of the painting. I think I'll add a bit of
burnt sienna at the corners. So I will kind of mask
My mistake like this. Then I'll take a
slightly smaller brush, e.g. Sikhs or A4. And I will add some clean
water to the brush. Let's add some blooms with
that brush like this. Just tap lightly on the
brush and you can see that some clean water is
dropping to the painting. And since the background
is still a bit wet, the water will push
away the paint and it will create these blogs. Let the ground now dry entirely. And then let's mixed paint. The Christmas decorations.
13. Project 2: Painting the first Christmas ornament: Let's start painting the
first Christmas ornament. My background has totally dried, so it's now safe to start
wetting the paper again. So there shouldn't be
any blending of colors. Now, I take a slightly
smaller brush. I have size six. And let's start wetting the
first Christmas ornament. Let's only wet the round
part so don't touch the hat of the Christmas
ornament meant at this point. Once the ornament is wet, take your yellow color and add a bit of it to
your mixing palette, and then add some
water to it because we want the hue to be really light. And then let's start painting, but leave a small
space on touched, so don't add any color there. That will be the point of the ornament where
the light is hitting. So that's kind of The
Shining of the light. And let's try to
keep it on touched. Okay, then take some cadmium red and pull it also to your mixing palette and
add some water to it. Let's first add a
light layer of red on the ornament at the
color so that there is a small white space between the color and the edge of the Christmas
ornament like this. Then clean your brush and wipe
it so that it's only damp. And then blend the red color. Blend it towards the
edges of the ornament so that it has this light
red color instead of white. And then after that blend, also the red and the
yellow color like this. Once it has been blended, then let's add more red color. Let's add these layers
and try to get it in kind of an intense red color. Add more red, but this time
it should have less water and more red pigment and add it like this to the
Christmas ornament. And then once you have added it, let again blend it with
a clean, damp brush. Again, remember to leave that
one part of the ornament on touched so that it looks like the light is shining
from that point. Next, I will take red color
straight from the pan. So it will have really
intense pigment. And I will add it in a similar way to these
Christmas ornament. Then again, after I
have added enough, Let's fill out a bit more there. Now, I will blend it again. I don't want any hard edges
on this Christmas ornament. Okay, that has been blended. Let's continue to build an intense color
for the ornaments. So next, let's take burnt
sienna and add it to your ribs. Let's make a mixture of
those two and then add that to the Christmas
ornament like this. Then we want to
blend that as well. So with a clean, damp brush to blend
the color well, I think we need even
more intense color. So let's take more burnt sienna and add it straight from the pan like this
to the ornament. And I think you can see that
I'm adding the color to the same places and
then play from there. So I want to kind of build
the intensity to those parts. Those are the darkest
parts of the ornament. Then let's take some
ultramarine blue and mix a shadow tone with
blue and burnt sienna. Let's add a bit of these also
to the Christmas ornament. Okay, I think now the
toe nice, dark enough. So I will add it here. I think it might have had a
bit too much water in it. So you can maybe see that
some of the pigment is, is pushed away after I
added this dark color. So let's start. Let's try to add more intense, such a version of that
color that it has less water and more pigment. So that should be that should fix the problem
that we just faced. Yeah, I think that looks better. Now the pigment is
not pushed away. I think my ornament
is starting to get dry on the right side, so I probably shouldn't
touch that part anymore. But I can still add the dark
tones on this left side. That should be safe. But if your ornament
has started to dry, then stop blending, stop
adding color or colors to it. Instead, you should
let it dry completely. And after then,
you can re-wet it and continue adding more layers. But let's hope your ornament
is still wet like mine, so you can still work it. Work on it like this. I decided to add a bit more
red color here because I got a bit carried away
with the shadow tone. So a bit more red was
needed here, in my opinion. But now I'm starting to be
happy about the colors. There's enough intensity and darkness, but also lightness. So let's move on
to the next video.
14. Project 2: Painting the lights and adding details: While the Christmas
ornament is still wet, we cannot work on
the other ornament, but let's pick user at a time. We have to wait and
let's start working on the streamline. Take e.g. size six brush with a fine tip, and then take some burnt sienna and paint these curved lines, but leave a part in the middle where you
won't put any paint. And after you have
made two lines, clean your brush
and wipe it down. And then with the damp
brush wipe line from the burnt sienna line towards
the other part of the line. So this way we will
get a really light, brownish light that line. But it looks like there's
a light shining from there because the line
is so light in color. So in this method, Let's create a rest of the, rest of the lights as well. So now I am, I am taking more burnt
sienna and I will create a line here
at the bottom. Then I will clean
my brush and make one line from one side and another line from the
other side like this. Then I will again take more burnt sienna and
continue making the lines. One line here, then line with a clean brush. And then one more line. And we are soon Don, Don with the string light. I will make a line here with a clean brush,
one line here. And then I think one more line with a
weak the birds here. Like this. I'm following the sketch that I made in the beginning
of the class. A couple of more lines
with a clean brush and we are dominant with
at least with this part. Next, I will take some
indigo and I will add that to the darkest places
in the string light. So basically in the middle, middle parts, like you
can see where i'm, I'm adding it right now. So I want to add a
bit of shadow so that the contrast between shadow
and light, this is bigger. Then I think the ornament
is still a bit wet, but it's dry at the top. So let's next work on the very
top part of the ornaments. Take a light shade of yellow. So that means that
you have added quite a lot of water to it and paint the entire hat of the ornament with
the yellow color. Then take some burnt
sienna and add that on the edges of the hat. Then with a clean
brush, blend it. Take even more color, add more, more of
that on the edge. And also some on the
right edge of the hat. Let's add a small
group of line weight, burnt sienna in the
middle of the ornament. So that will be a small detail that makes the ornament
look more interesting. Let's then add the
same colors and saying details on the
other ornament as well. So first, add a light layer of yellow color on the
entire top hat. Then take some burnt
sienna and add that mostly on the edges. Like this. Let's then blend the color. We take a clean brush. Then I'm adding the line in
the middle of the ornament. I think the line has
almost disappeared, so we might need to add
that actually later again, once the top part has dried. But in the meanwhile, let's mix a darker color. This is the shadow color
that we have been using. So let's take ultramarine
blue and burnt sienna. And this color, we will add some shadow
under the ornaments. So under both of the
ornament, paint, a line with the dark
color that we just mixed. It's also paint or line here. And then fill in the part
between the ornaments. And then we will
need to blend this. So clean your brush and Y be damp and then start blending. Then let's blend or
so on this left side, I will add a bit more
color in the middle of the ornaments to make
it even more dark. And then a bit more color
also under the red ornament. That's enough shadow for now, but we'll get back to
this at the end, I think. But next, let's take
burnt sienna again. And let's paint
these small loops on top of both of the ornaments. So this is the loop
where the ornament can be hacked to
the Christmas tree. So just a simple loop like this. Let's then add a beat, a darker color to
the loops as well. So take again the shadow color and add it to some
places in the loop, but not the entire loop, but in some places. I think they look now good. Then next, I think the
top parts have dried. So let's add that
scribbly line again. Take again burnt sienna, and paint the line
again like this. And also on the
other decoration. Let's then also add a similar
line with yellow color and also on the other one. Okay. Then what else? Let's add a bit more
burnt sienna on the side of the top part just to
make it a bit more dark. And also on the other ornament like that. And then let's blend it
again with a clean brush. But watch out for the scribbled lines that
we draw or paint it there. Well, it doesn't
matter if it gets smashed because you can
always paint it later again. Then I will take the
dark shadow tone, and I will also add a bit of that on the side
of the top parts. And these were the final details that we are adding
at this point. So next, let's start painting the other
Christmas ornament. I'll see you in the next video.
15. Project 2: Painting the second Christmas ornament: Let's paint the other ornament. The red one is now dry, so it's safe to put water on
the other ornament as well. So width the entire bubble. And again, you're
small enough brush I'm using again this size six and a wet the
entire declaration. But to be a bit careful, near the red ornament, because we don't want to accidentally make any
color bleed from there. But if you're painting
is totally dry, it should be saved to add water. Okay, my ornament is now wet. So next, take yellow and add
it to your mixing palette, then add some water to it. Again, we want to add a
very light layer first. And like before, I leave a small white space on
the side of the ornament. So this is the spot
where the light is reflected because it's the
lightest part of the ornament. Then blend the yellow color all over the ornament like this. Let's then add some burnt
sienna in the ornament. And let's add these
to the part where the ornament is supposed
to be a darkest. And that is right next to the
red ornament because it's shadowed a beat by the other ornament at
burnt sienna here. But again, be careful next to the white spot because we don't want to put
any color there. Then clean your brush and
again, blend the colors. Let's add another
layer of yellow. Add a bit thicker
consistency of yellow, and then blend it again
with a clean, damp brush. We keep adding the layers
this way until we are satisfied with the colors and with the intensity
of the colors. So now I just added more burnt sienna and
I'm blending that again. Then I take burnt sienna
straight from the pan and I'll add it to the darkest
spot like this. You can see that
the color is quite intense when it's added
next to the yellow. And then I will again
clean my brush. Y be the damp and I will blend. Let's then take the shadow
color and add that also to the very darkest spot on
the ornament. Over here. Let's take a bit more
these foster color that we mixed from ultramarine
and burnt sienna. Then let's also blend
this with clean brush. I'll add a bit more color
here and then blend that. And after that, I think
we might be done. I'm removing a bit of
color here because it has bled onto the white spot. So with a clean brush, I removed some of the wet paint. So it now looks like a but let's move on
and in the next video, let's add some final details.
16. Project 2: Adding final details: Okay, This is the final step. Let's add a bit of details. Take white gouache
or white watercolor, and add small dots of it to the center of the
string. Lights are. Let's also add some white dots at the very top of the painting. At the dots, at least in the middle of the
blue that we created. But you can also
add them elsewhere. You can decide what
looks good to your eye. Let's then add a
small white line here on the red decoration. That's kind of a
reflection of the light. Then I'll add some
white here also on the sides of the top parts of
the body of the ornaments. Let's then add some splatters. Cover your ornament
with a piece of paper. At least I don't want to
get any splatters on them. So this will keep them safe. Then take a kind of a smaller sized brush and
add some yellow color to it. And then tap it
with another brush. And you will create these
small dots of color. Then I'll mix red and
yellow and create these reddish orange color spots also here at the bottom
of the painting. Let's then also create some
splatters with white color. Let's do it the same way as
we did the other splatters. If you think that
if you feel like you are not creating
splatters enough, tried to add a bit more
water to your paint. Let's add a bit more
yellow splatters. Feel free to stop at any
point when you feel you have enough enough splatters
and enough details. I'm still adding a few more, a bigger dots with my
brush with yellow color. I think that starting
to look fine. Then I will move the paper towel and I will create some splatters at the top
part of the painting. I will be using white gouache. Again. I'm adding lots
of splatters here and then I will move the paper again so that I can it
was plugging some parts. So I decided I want to add a bit more splatters
at the bottom as well. Then the right upper
corner is splatter free. We have to fix that. So now I've added more splatters
there as well. Then as a final details, I'm painting the side, the left side of
the red ornament with the dark shadow color. I want to add a bit
more definition to the shape of the ornament. And now I will blend
it a bit more color. Maybe. We'll see where I
feel like there should be something more and I will add this dark color in those places. So some color here at the top. And I will blend it. Let's still add a
bit more shadow under the ornaments week, the dark shadow color like this. Then I will blend it
just a little bit. I think I want even
darker shadow, so I will add just a bit of indigo underneath
both of the ornament. Then let's see, what
else could we do? I think we could add a bit
more dark details with indigo here at the top
part of the ornaments. I will, I will blend it a bit so that it doesn't
stand out too much. I will also add a bit of
indigo on the left side of the red ornament, like this. And then maybe between the two ornaments to add
a bit of inch there. Then what else could we do? I'm adding a bit of a lie. A better, better line for the yellow ornament
with the Burnt Sienna. Because I feel like the edge of the ornament is a bit blurry. So I will add the line there
so it looks more sharp. Let's do the same for the
upper part of the ornament. Maybe some blending that's
standing out quite a lot. Okay. Then I think I've maybe added too much dark color
on the red ornament, so I will just add a bit
of cadmium red on the, near the edge of the ornaments, so it will look a
bit more red and the dark color won't stand
out so much from there. Okay, I will blend that a bit. Then let's take a bit
of burnt sienna and add that in the darkest spot
of the yellow ornament. So we're still trying to
create a bit more shadow here, a bit more darker tones. And then let's blend
that with a clean brush. I already removed the
tape from my painting, but now I see that I
want to add a couple of more white details here
at the top, like this. After adding the final details, remove your masking
tape and take a look at the gorgeous Christmas
card you have created.
17. Thank you for joining!: These are the beautiful
Christmas cards that we created. Thank you so much for joining. And I hope you had fun. And I also hope to see your projects in the
project gallery. Have a wonderful Christmas time, and I hope to see
you again soon. Bye bye.
 Liisa Halttunen, Skillshare-taught watercolor artist