Transcripts
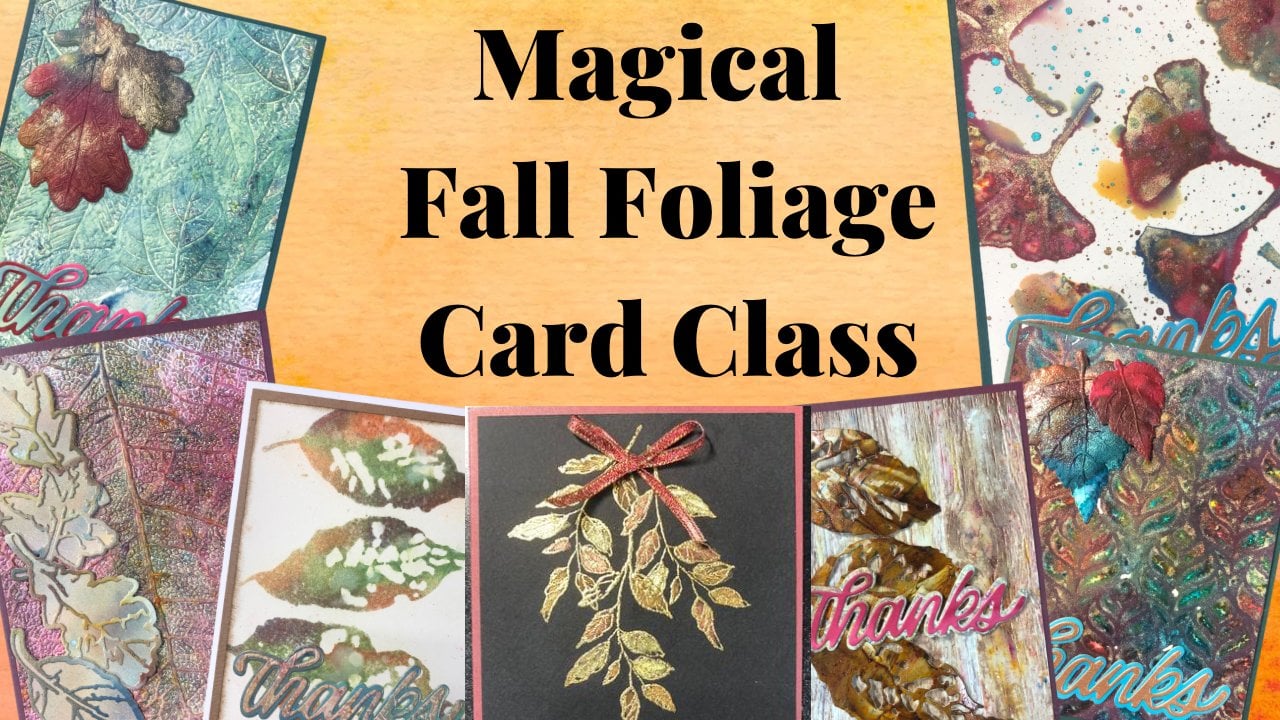
1. Wax Paste Techniques for Card Making Introduction: Welcome to the wax paste techniques for
card making class. There's so many fun
techniques that you can do with
different wax paste. And I'd like to show you
some of my favorites. Let's go take a look. These are the cards
were making in this class you seeing
duplicates because I've got both the sample card as well as the one
that is created during the class
because I'm filming this after the class
is completely done. This is Tech, is not every single wax paste
technique there is, but it's just my favorites. I am using Inca gold
for this class. It is a water-soluble wax paste. And it is one of my
favorites because there are some Water
techniques that you can do with it that just make it a
little bit more versatile. If you choose to use a
different wax paste, most of these techniques
are going to work. The ones you may have issues
with are the ones where I use water to help
move it around. So just be aware that there are a couple of techniques that
you need to use water, you may find a
workaround for those. But as far as I'm aware, this is the only
water-soluble wax paste. I could be wrong. We'll be, we'll be creating six
cards in this class. This class comes with
a supply list PDF. It's going to break down
every single card and all the supplies used for it so you don't need to worry
about remembering. The supplies that I used
are the colors that I've used as we're going along. And then those supplies are
also linked to where you can purchase them and have them
shipped right to your home. Just to make it a little
bit more easy and let you have more fun creating, unless time shopping, unless
you enjoy the shopping part. As you can see, I'm using a
bunch of different dyes and embossing folders and I'll share which ones those are
on the supply list. But those techniques
will work with any dicot or stamp
or embossing folder that you choose to use. So you're not limited
to what is shown here. So just be aware of that you
can be creative. Have fun. Once again, the colors I'm
sharing, which ones I'm using, but you can use whichever ones are your preference
suit your needs, or ones that you already have. We'll see you in class.
2. Stamping & Embossing the Sentiments: The cards that we're
making in these clots in this class have different
sentiments on them. They're all from the
same sentiments step or a stat that if you wanted, you could stamp and embossed
individual sentiments. I'll tell you right now
is really hard to cut, just one that tiny. So this is what I like to do. I like to do an entire sheet, the entire stamp set in a color of embossing
powder and then cut them all up and I have
them sitting in tin here. Then when I just want
a quick sentiment, I can go through here and I'm
trying to get all sorts of different powder colors on them and different backgrounds. I'm working on white and black backgrounds and I'm working on the metallic embossing and I don't have one that
is embossed with gold, so I'm going to show
you how to do it. This is a great way
to just have a bunch of bunch of sentiments already. At a moment's notice. So I do this with my
stamp set facing up. Put my versa mark
ink pad, ink on it. Versa mark is a watermark ink that is sticky and
stays wet for awhile, so it's perfect for embossing. I just want to make
sure there's no nothing on my card stock here. I'm holding it in place
and I am rubbing it. Now. I'll tell you right now, sometimes when you do this you might have a
sentiment or two that don't be embossing
is wrong and you didn't get ink
completely over it. I don't worry about it because
most of them will work. I just toss away the ones that don't and sometimes
the ones that don't. There might be a word or
two that you could use. And it'll just cut
out those words. I'm gonna take my powder
and put it on my embossing. Going to put it on the top. There we go. Now we have to emboss it
before we emboss it, Let's get this powder
out of the way. And you can see that I
didn't put it straight on my on my piece of card stock. I typically try to
get it straight, but it doesn't always
work. So here's the magic. Right now it is Matt
and it's not shiny. When I'm heating it with the
heat gun and I want to have my heat gun and a
couple of inches away, it's going to go, it's going to melt and it's going to
go nice and glossy. And that's when,
you know it's done. This is a heat gun. It cannot be done
with a hairdryer. One of the most
common questions I get asked when embossing
is can you just do it the hairdryer and
that the reason there's no heat going to miss heat. A hairdryer blows air. A hairdryer would blow and dry the ink and
blow the powder off. Whereas this leaves the
powder where it isn't, it just lets it
melt where it is. I also do this, holding it in the air so that I can see where it has melted. The other thing, make sure the heat gun is not
peace in your hand. It gets really hot and
you can burn yourself. So typically I will hold it
up so that he can go right through and I'll have the heat guy and
facing away from him. Now let's do that part
where my hand was. Now as we've turned it around, There's a couple of
spots that I asked, spot that I noticed that
wasn't completely done. While your heat gain
is here and still hot, just kind of twisted and makes sure that everything
is completely done. And you'll notice that
as I went through it, I started going
faster and faster. And that's because the
heat gun is hot and it happens a lot quicker. So now I will take my tremor out and I will cut
the entire thing up. First thing I do is I
line up one of the sides. Then typically gonna say typically the rest of
it will be square. Sometimes. It's not. So I don't necessarily
rely on squaring it up. I rely on making sure it's
straight with the words there. Here we go. From here. What I do is I'd line up the
edge of my ruler here with the bottom part of
one of the segments. And I just cut the
entire page up. It takes a little
bit longer than just stamping and cutting
one sentiment. But in the end, you have a ton
of Sentiments ready to go. In the end it's a timesaver. It just takes a
little bit of time right now to get it all done. I will do that for
the rest, the sheet. And then what I do
for these ones, rather than doing these
ones with a tremor, I'll just take out my scissors. I'll just cut read
in-between them. And then I'll put them
in my little tin. For this particular class. Some of them, I'm even covering
them with the Inca gold to customize them to the
card that I'm making. But once again, a great way
to get a ton of sentiments all at once and have them ready to go for
your next project.
3. Die Cutting & 3D Embossing: The cards that we're
making in these clots in this class have different
sentiments on them. They're all from the
same sentiments step or a stat that if you wanted, you could stamp and Emboss
individual sentiments. I'll tell you right now
it's really hard to cut just one that tiny. So this is what I like to do. I like to do an entire sheet, the entire stamp set in a color of embossing
powder and then cut them all up and I have
them sitting in tin here. Then when I just want
a quick sentiment, I can go through here and I'm
trying to get all sorts of different powder colors on them and different backgrounds. So I'm working on white and black backgrounds
and I'm working on the metallic embossing and I don't have one that
is embossed with gold, so I'm going to show
you how to do it. This is a great way
to just have a bunch of bunch of sentiments already. At a moment's notice. So I do this with my
stamp set facing up. My versa mark ink
pad, ink on it. Versa mark is a watermark ink that is sticky and
stays wet for awhile, so it's perfect for embossing. I just want to make
sure there's no nothing on my card stock here. I'm holding it in place
and I am rubbing it. Now. I'll tell you right now, sometimes when you do this you might have a
sentiment or two that don't be embossing
is wrong and you didn't get ink
completely over it. I don't worry about it because
most of them will work. I just toss away the ones that don't and sometimes
the ones that don't. There might be a word or
two that you could use. And it'll just cut
out those words. I'm gonna take my powder
and put it on my embossing. Going to put it on the top. There we go. Now we have to emboss it
before we emboss it, Let's get this powder
out of the way. You can see that I didn't
put it straight on my on my piece of card stock. I typically try to
get it straight, but it doesn't always
work. So here's the magic. Right now it is Matt
and it's not shiny. When I'm heating it with the
heat gun and I want to have my heat gun a couple
of inches away. It's going to go, it's going to melt and it's going to
go nice and glossy. And that's when,
you know it's done. This is a heat gun. It cannot be done
with a hairdryer. One of the most
common questions I get asked when embossing
is can you just do it the hairdryer and
that the reason there's no heat going emits heat. A hairdryer blows air. So a hairdryer would blow and dry the ink and
blow the powder off. Whereas this leaves the
powder where it isn't, it just lets it
melt where it is. I also do this, holding it in the air so that I can see where it has melted. The other thing, make sure the heat gun is not
piecing your hand. It gets really hot and
you can burn yourself. So typically I will hold it
up so that heat can go right through and I'll have the heat guy and
facing away from him. Let's do that part
where my hand was. Now as we've turned it around, There's a couple of
spots that I asked spot that I noticed that
wasn't completely done. While you're here again,
is here still hot, just kind of twisted and makes sure that everything
is completely done. And you'll notice that
as I went through it, I started going
faster and faster and that's because the
heat gun his hot and it happens a lot quicker. So now I will take my tremor out and I will cut
the entire thing up. First thing I do is I
line up one of the sides. Then typically gonna say typically the rest of
it will be square. Sometimes. It's not. So I don't necessarily
rely on squaring it up. I rely on making sure it's
straight with the words there. Here we go. From here. What I do is I'd line up the
edge of my ruler here with the bottom part of one of the assessments and I
just cut the entire page up. It takes a little
bit longer than just stamping and cutting
one sentiment. But in the end, you have a ton
of Sentiments ready to go. In the end it's a timesaver. It just takes a
little bit of time right now to get it all done. I will do that for
the rest, the sheet. And then what I do
for these ones, rather than doing these
ones with a tremor, I'll just take out my scissors. I'll just cut rate
in-between them. And then I'll put them
in my little tin. For this particular class. Some of them, I'm even covering
them with the Inca gold to customize them to the
card that I'm making. But once again, a great way
to get a ton of sentiments all at once and have been ready to go for
your next project.
4. Let's talk about Wax Paste: Alright, so first of all, before we get into
making any cars, let's talk about waxes. The wax that we're using for, or wax pace that
we're using for. This class has Inca gold. It comes in tons of
different colors. This is more of my
large collection, but I've narrowed this class
down to nine paste colors, so we're not going to be using
every single one of them. I've narrowed it down
to a smaller selection. The thing that I like
about Inca gold is it is a wax pace, but
it's water-soluble. So there's some water techniques
that we can do with it. If by chance you choose
to do this class with a different type of wax, it'll work for most techniques, but unless you have
a water-soluble wax, it won't work for
some of the ones where we're using water. If there is a different
brand that is water-soluble, I haven't heard of it yet, but that's one of the things
that I like about this one. The one thing though, it's got some natural ingredients in it, that sometimes mean
it may start to mold. If that happens, just take
a wet cloth or a baby wipe. And you just wipe it right off. It's usually only
on the surface. I've never had it go
into the paste and then your paste is good as new, tiny
little bit right there. The other thing is because
it is water-soluble, sometimes it will dry up in this one is one
that has dried up. The way to get it back. It's not lost, you
don't throw it away. Is you can break it
up with a skewer, put some water on it, and then let that water absorbed and then go back
to it, check it, put some more water
on it, let it absorb, so it takes a little
bit of patience, but you can get it back. I hadn't played with my
Inca goals for a long time, so mine were quite dry. And that's all I did was fine. His ice broke some of the ones that were really dehydrated up and
spray them with water, but water just
absorbs rate in it. And then you can get them back. You're not gonna get them. This sorry, the creamy, creamy consistency that
you got them with, but you'll get them
so that they're good for using four different
card making techniques. The other thing is the tools that we're using is our fingers. We're gonna be using our
fingers to wipe them around other than when we use
the water techniques, I typically will choose a
different finger for each color so that I don't
contaminate them. Most of the times, even if
you do happen to get, say, a bit of pink onto
the turquoise, you can just use a wet wipe
or whatever to clean it up so you're not ruining it if you do happen to get some colors into a
different container, but it's more getting
it on the card. If I have different
colors on one hand, that I'm not gonna be getting the exact color that I want
in the area that I want. But that is what we're going to use for this
particular class. Like I said, if you have a paste that is not water-soluble, it'll work for most of the
techniques that we're doing. But you will have an issue
with some of the water ones. With that being said, let's move on to our first card. We'll see you in the next video.
5. Roses Card: All right, So this
is the first card that we're gonna be creating. And we have an image here that's just a 3D rows embossing folder. It's a beautiful folder that's got some extra
dimension to it. This is one that I
didn't demonstrate in the embossing and 3D or die cutting in
3D embossing video. But the background is done
exactly the same way as all of the other 3D backgrounds. The only difference is it's a smaller version
or a smaller size. So first thing I'm gonna
do is I'm going to use a finger and I'm going to work from the back to the front. So the pace or I want
to say semi-opaque. I got a little bit of
turquoise on the leaf there. And for 3D embossing folders, especially if you're trying
to be a little bit precise, it is a little bit more
challenging to do that. But by working from
the back to the front, if I happen to get
some different colors onto the flowers, I can put some of the
pink over top of it and it's not going to
completely cover it, but it is going to
mute those colors. And I don't necessarily worry about getting the
turquoise onto the leaves because it's not going to be
a weird color for on leaves. It's just gonna be more
of a weird color on the flowers and the
paste dries super quick. You can see that I'm keeping
my fingers in Intuit quite regularly and that's because the paste
has already dried, which means by the time
I'm done this card front, it's ready to glue rate onto the base of the card
or the matter, whatever. So I don't have to
wait for things to dry and I'm gonna do my leaves. I'm just using a very
fine light touch. Okay, I wanted to
get a little bit of turquoise in that
behind those there. I'm just using a
light touch to try to get just the surface. For this particular look, I'm not too worried if I get a little bit on the background. It's just part of the whole
look of this particular card. So the precision is not
something that you're gonna be easily able to do with this. Which for this one, you may want to be a
little bit more precise. Cleaning my fingers off,
I'm just going to use a baby wipe because I don't
want to take my fingers. I typically choose a different
finger for each color, but I don't have five. Why do you have five fingers but you can't do it
with your thumb. Now I'm going to this light. Pink here is very, very light, so it's not
going to cover a whole lot. But I wanted to do a light pink based on my flowers before I
go and do the darker pink. And I love that it dries so fast because I don't have to wait for anything to dry before
gluing it down. Now you'll notice I went from the light pink
to the dark paint. I use the same finger because I'm not going to
contaminate anything. They're both pinks and
be the lighter one, you're not even gonna see it
into the darker one there. Alright, so that is done in the last thing I
want to do for this, because I just wanted to
frame it in a little bit. So I'm using a brown gold. I'm just putting a little
bit around the edges. I just found it at framed
it in just a little bit. Wait my fingers off. Then I'm going to glue
this onto the mat so that it can dry while I'm
working on the mat piece, I'm using the same
Inca gold colors to color in the map piece. You could use a solid piece
of card stock if you wanted. But by using the
Inca gold colors, I am making sure that it's
going to match perfectly. The one thing with the 3D folders is you have to hold them down to
really glue them. So rather than hold it down, I'm just going to put that
on there for right now. Then. I don't want to get any of this
brown and turquoise. I'm going to clean
it up super quick. I'm going to do this
on my mat piece. Now. I want this is a little bit wider Matt than I normally do. So this is about a half an inch. I'm gonna be doing it
about a half an inch in. I don't need to do the center
is going to be covered up. There's no point in doing it. I'm gonna move this
over here just so it's a little bit closer. You see how quickly I have to rethink my finger because
this is already dry. Now having said that, it does not drying in there that fast. But if I was spending hours
with my container open, I would take my misting bottle and I would just missed
it periodically, just technical difficulties and phones not working the
way they're supposed to. My phone or my video cutoff, partly through recording
that last bit there. There's a few
sections we need to re-record, but that's okay. I'm just gonna finish putting
the paste on this mat. I'm not sure what I've already said and what I haven't said, but you'll see some
variations in the color. There's some lights and darks. I don't mind that for this particular card, this
particular technique, because with the background, there's different darks and
lights and stuff like that. I think it goes with it. As well as the fact
that because this pink matches perfectly with my roses and I don't have
to match card stock. I loved that because of the
glitch with my recording. My card has already
put together, but I would just glue this to my card base and then glue
this to the front of it. And it will cover all of that
white little center there. So there is our completed card. There are sample super
simple technique. This card was done
within ten minutes. Aside from doing
the embossing for the flowers and having to wait for that to completely dry. That's what took the longest the actual card in together,
super, super quickly. I'll see you in the next video. We're going to be doing this technique with
different background. And then we're also
gonna do a little bit of water coloring.
Will see you there.
6. Your Beautiful Self Card: This is our second card. This background is exactly
the same technique as the first card. The only difference is it's
an all over background. So we're not worried about getting one color
mixed in the other. And I'm actually doing
it intentionally to create the funky brick color. What we're gonna do with
the front here, with rent, with the flowers here
is we're going to use our water brush and we're
going to watercolor them. And because of my camera
era recording issues, I've already got that done. But that just means that
they are completely dry. And when I tried to
record it before, they weren't dry enough to
glue, but now they will be. So what we're going to do is I'm just taking
my water brush here. And I am going to
pick up my color. And I'm gonna watercolor
my flowers now because this particular water
brush has water rate in it. So I don't have to have a
water brush or water jar to dip my brush into wet
it and stuff like that, which is great because
in all honesty, I'm a little bit of a klutz. So if I would have a water jar, chances are probably
contaminated. I probably knock it over. I'm just going to add a
little pink to the center just because, why not? I typically love when
I watercolor flowers, I typically love having
two different colors, whether it's a lightened,
dark version of the same color or
opposite colors. Either way. Then you saw that I quickly
just wiped my brush onto the paper towel and now it's cleaned
for my next color. There we go. You can squeeze a
little bit of water out if you really want
to clean it off. Now I'm going to put some
yellow over top of that green. Now this particular green is not my favorite for
doing greenery, so it's a little bit
to Emerald for me. I prefer a more yellow
green and there is a yellow-green in Inca gold. When I was looking
up what colors were available so that I could
link them on the supply list. That one wasn't
available at that time. I did not choose it to
do the class width. However, I did notice
the other night that it was available. Again. I'm gonna set my
piece aside to dry. I've got these ones
that are already dried, which is fantastic. Now let's work on
the background. I'm going to just move
from one color to another. I'm not really concerned with
what color is going, where. What I tend to do is have
three sections of each color. I work in the rule of thirds. I just realized I
had grabbed purple. Purple on the sample
carpet. That is okay. We're adding it to
this background. Anyways, because with
my camera errors, I already have my background
done in glue to the base. Now you see what
the background is gonna look like if
you had purple. Now this background is inspired by a YouTube video and I
have no idea who it was. I thought months ago. But it had a background of a brick wall that
was super colorful. And I think it's a
background that you can get off of Amazon or something. Because I know I have seen that background
somewhere to purchase, but I just thought
it was so funky. When I saw all these
colors and had my brick folder out,
I thought, fun. You'll see that I am not really making sure to keep
each other color pristine. I'm actually intentionally going over to get a little bit of
a blend between the colors. Let's get a little bit
of this champagne color. The nice thing about
the Inca gold, like I said before,
it's semi-opaque, which means it's opaque
enough to color, but you do see the
colors underneath it. So when I go over the green, I still get some green in there. That comes in handy when you're working with
different cards, dot colors, you'll
be able to see. When I do the bird card, I can still see the
yellow tone from the card stock that I'm
using underneath the birds. So that is what I'm
gonna do for the brick. At that point, I would
glue it to my card base. I've already got that done. Now what I'm going
to do is I am going to wipe my fingers off. Really. I'm wiping my fingers
off for myself because the Inca gold dry so
quickly on your hands that it's not that it's going to
transfer to the the card. I'm not really
worried about that. One of those things as
a craft or you get used to cleaning your hands off when you're going to
try and put a card together because you want to
keep everything pristine. So I'm going to glue one flower there and I typically
will hold it down for a few seconds to give it
good contact with my base. The ones that I painted for this card as
opposed to the sample. The sample is all pink ones. What I ended up painting for this one is two pink ones
and a yellow one just to, just for some little
bit of dimension, a little bit of difference. To show you that you don't have to do them all
the same color. You can do them
different colors. The sky is the limit,
the imagination. Your imagination is
your limit. Basically. I really liked how doing one in a different color just made
it pop a little bit better. If you wanted, you could do background that
doesn't have any of the flower colors so that
they're not competing with your background if that's
what you wanted to do. And then I've got
my sentiment here. And the only thing I
did with the sentiment was I took some brown
gold with my finger and I just did this just to frame it a little bit because that way it
popped out a bit better. Just got some stuff on my hand. I'm going to put
some pop dots on the back of that sentiment. These particular popped
out or particular pop-ups. These particular sentiments, I like to raise them on pop dots just because they're small, but by raising
them, it gives them some dimension and makes
them a little bit, it makes them stick
out a little bit. There we go. Last, but certainly not least, I want to cut those stems off, so I'm gonna cut them at the
bottom of the brick. There. There we go. Our second card is done. There's the sample and
there's what we did. So very similar. The only difference is
the flower that I chose to color and cut out
is a different shape. And then I added this
one here that is yellow. But there you go. Another beautiful color
done with wax paste. I'll see you in the next video. We're gonna do some
more water coloring, but a different spin
will see you there.
7. Butterfly Watercolour Card: Here is the next card
that we're gonna do. We're gonna do some
watercolor again, but we're gonna do it within a stamped and embossed image. The embossing is done
exactly the same way as I did for the sentiments
at the beginning. I'm just using this
cute butterfly set and you can pick
whatever one you want. And really it doesn't need
to be a butterfly can be whatever image you want. But let's get to it. So I am, because I'm
doing watercolor, I am using watercolor
card stock. Because otherwise, if you don't use
watercolor card stuck, most card stocks don't enjoy
being watercolor down. They tend to bubble. It doesn't look too good. So the embossing powder or the embossing completely
resists the Inca gold. Now if by chance
you get a really, really thick layer and it
seems to cover your embossing. Let me try do it right here. See how it's kind of a color
covered some of that black. All you do is wipe your brush off and just kinda thin it out a little bit so
that it resists. Sometimes if you get
a bit too much of the wax pigment or whatever
it's called on there. The embossing will
resist it a little bit, but it's super easy
to get it back to. Seeing those lines. Images are seeing them a
little bit more clearly. I just use my paper towel
and clean my brush off. For this particular one, the colors are kind
of in the same tone. So I don't really have to worry about contaminating anything. If by chance I was going from something dark
to something light, I would want to squeeze
my brush to get the color out of it before
going into the lighter color. You can see that I am
not super colored. English is hard today. I'm not super careful when I watercolor and I do have some that has
gone outside the lines, but as soon as I go over
it with a different color, it re moisturizers that wax
and blends it right in. Go a little bit
on this side now, like I said, it doesn't
need to be a butterfly, can be whatever
image you want and you don't necessarily
even need to emboss it. I like the look of an embossed stamped
image because it has a raised it raises the image and it just gives it
a little bit more. Especially when you're
using the wax paste. It's a lot easier to resist the embossing by
just going back over it. If you're just using
a permanent ink, then, um, it would
be slightly harder. It would be super hard, but
I just liked the look of it. And then I'm going to
put a little bit of brown in the body there. There we go. Clean my brush, that aside to dry
for just a couple of minutes while we
do the background. The background is a wood
grain embossing folder done with black
watercolor paper. I really like the black
watercolor paper with this because I like the look of the black watercolor paper. But because we have to
missed the embossing folder before we do the
embossing black paper, the watercolor paper
just takes the missing. So much better. I'm just combining
the three colors that I used for the image. You could do the brown as well. But I didn't for this, I just did the the violet, the pink, and the turquoise. Once again, just
like the white one, I tend to go over blend colors that
are beside each other. I just liked the look of that is an incredible how
much different it looks on black and bossing
versus white embossing. Neither is right or wrong. But doing it on the black just, it just seems to
pop a little bit more than metallic looks
a little bit different. A little bit more of
that purple in there. Because these are all kind
of in the same color tone. I'm actually using
the same finger. I'm not too worried about
contaminating them, but I certainly could be using a different finger if you
were worried about that. Clean clean it off. Put the lids on there. Lately. Let's glue the card together. This particular 3D
folder doesn't have quite as much dimension
as the brick one does. So I find that it's not as
challenging to glue it down. The ones that the
brick one especially I find because there's
so much dimension to it, I typically need to
put the glue on it, put it down and then put
something on top of it to hold it in place
while it dries. Because it likes to
curl up a little bit. Because of that dimension. This is already dried. I can feel that it's
still a little bit damp, but I'm not moving any of the color around
when I'm doing this. So typically I would wait
for the card stock to be completely dry and not be
glowing it down when it's damp. But for this, it will work. Just have to hold it
down in a few seconds. And then last but
certainly not least, I'm putting the sentiments
so I've got one that's white embossed on black because I wanted it to pop a little bit
and I wanted that black to shine through. I could do it on a purple card
stock embossed with white, just to tie in with
the card base color. But I think because
the purple is so dark, I couldn't do it with purple. Emboss with black because I
don't think you'd see it. There we go. There is our third card done. The next card we're
gonna be working on a black embossed
background as well, but we're going to use a
different technique on it. I'll see you in that video.
8. Industrial Card: All right, So this
is the next card that we are working on, a little bit of an
industrial look to it. The very first thing
we're gonna do is work on the card base. And I actually don't remember the name of this
folder right now, but it's kind of a bunch
of metal that is riveted. What I'm gonna do, I have
a Collage brush here. And I'm going to
lightly go over that, working both horizontally
and vertically. And that Inca gold
is going to be darker around the edges
of those raised bits. It just creates a
really cool look. Just a little bit different
than using your hands. Just a little bit more subtle is still makes that embossing pop. But just in a completely
different way. Now because the Inca
gold is water-soluble, I don't need to worry about it drying on my brush
and ruining my brush. It will moisten up and wash off. When I am ready for that. I'm going to set that aside
for a moment and then I'm going to color
my dicot here. I've got my gears die. It's probably a
little bit hard for you to see the part
that isn't inked simply because it's black on
my black mat here. But I'm just gonna do
it all with gold first. With gold first, and then I
will use the other colors to make the gears, a couple of gears a
little bit different. I could leave it with all
gold gears if I wanted. But I just found by doing
a few different metals, it just gave it a more
interesting look to it. I'm just going to
do three of them in the brown gold and then
three of them and silver. And then I'm gonna do some
separate gears to go with it. Trying to do the same ones
that I did on my card. If you see me going
like that slope, That's why I'm trying to
trying to do the same ones. And I think I just did
that one in brown, gold, but I'm gonna do that silver that I want to thank
hold right there. Alright, that is done. What I'm gonna do now
is I'm going to glue it onto my embossed piece
so that I can weigh it down because this
one I found it took a little bit of being
weighed down in order for it to really adhere
to my embossed piece. So let's do that. We go down here. I'm going to take a break
till my furnace turns off. There we go. If you haven't taken a class with me before
where I said it, I share my craft room with furnace and our
hot water heater. Every once in awhile while
I'm filming a video, a furnace legs to pop itself on, which is not a big deal. My husband likes to say, Well, at least you're warm. I just never know whether it interferes with being
able to hear me. I know myself. I have a hearing thing where I have a hard time
hearing if there's white noise in the background and the background like running water or a fan or whatever. So I figured I might
as well shut it off if it could
possibly interfere. So I am just inking a couple of the individual
gears that I have cut. Then we will glue
it onto the card. There we go. Before we glue them
onto the card, I've got a few
Brad's here and yes, you can absolutely
get metallic Brad's. But it's again,
nice to have things that match your project. I'm just going to take them. I'm going to quickly
color them with the brown gold google. And once again, it
dries super quick. Wipe off my fingers. And then we will put
here these gears on. And then I'm just putting the brads through
a couple of them. You could put them
through a whole bunch. I am tend to be of the thinking that less is
more so I don't want to overdo it sometimes and sometimes I think if you do too many, it takes away from it. So I'm trying to just fit the gears in
a little bit where. I think they might work. Obviously, they're not
going to work everywhere because the gear
spacing is different. You'll notice I held it
down for a few seconds. Just to give the glue a second, I get some good contact
with the paper. Put her last one down here. There's popping up a bit. All right. So to put the brads through, I'm just going to
take my die pick, poke a quick poke the Brad through and I don't really
have to be super careful, but wiping off that Inca gold. I've never found
it to be an issue. If you found that was happening, what you could do is
after you've put it in, you could just take
your finger and just just touch it up. But all the times that I've done this I haven't felt and found that it's affected at all. You definitely want to put the brads through before you put your this piece onto
your card base. Because this way
this will be encased within that card and
you won't see it on the inside of your
card. All right. Now, I'm going to
put my sentiment on because there's a lot
of metallic on this card. I decided that I wanted my card base to
match that metallic. I am going to put some
of the Inca gold around the edges of my
card base before I put the front piece on. Let me go. No, we
have all of them. I'm going to put my
sentiment on here. In order to make it
pop a little bit more. I'm gonna take my
the same goal that I did on the base here. And I'm gonna do the
exact same technique. And it's just going to frame that piece and make it
pop a little bit more. Go tuck that to the side. And now I'm going to
the base of my card. I'm trying not to get it all over the rest
of my card though, so I'm gonna put it on
a scrap piece of paper. I'm doing it with a brown
gold you could do it with actually for this
sample are for demo. I'm going to do it with the gold just to see what the difference between the two colors
would look like. Obviously, it's
personal preference. You can do whatever
color you want. You could do a
gray card base and then these silver to put
make that pop if you wanted. Once again, same as some of
the other maps we've done. I only need to do the
part that's gonna be covered by the image
piece of my card. I'm not doing it in the center. A, it's a waste of product and be your card stock is
going to stick better. Actual card stock, the glue
is going to dry a little bit quicker than it is
to the Inca gold. It'll still stick
to the Inca gold. But it's gonna be a
little bit easier. If you're gluing it
to the card stock. Go with center it on here. Hold it down for a
few seconds to give that time to get
some good contact. There is our two cards, one with the brown gold as the
mat and one with the gold. And you can see how just those two differences make different parts of the card pop. But both are really,
really cool.
9. Bird Emboss Resist Card: This is the next card
that we're gonna make. This background here. We're going to stamp
it and emboss it. And then we're going to rub
the Inca gold on it and then use a wet wipes to
wipe off the excess. And that embossed area is going to really
shine after that and it's going to make
the embossing just pop. So I've got my bird
dies already cut. I'm going to ink them so that I can glue my bird together
and cut it aside or decide, put it aside so that it's
ready for when we need it. I'm only inking the part of the bird that is
going to be showing through the openings
of the dicot. I'm using brown and I'm
using my champagne color. For no other reason
than I felt like it. You can create your birds and
whatever colors you wanted. Because there's vines on
the back on the stamp. I thought it would
look best with kind of a natural color scheme. Now let's glue or
dicots together. This one goes
together super quick. A couple of pieces to it, but it's amazing how just
a couple of pieces layer together with different
colors is really effective. Let's leave that wing. Alright, set that aside to dry. Let's do the embossed piece now, the color that I used for
my sample is a dark green. I'm using a brighter green for this one just to show you how the different colors look. I've got my stamp here. Confuse the paper to put
my embossing powder on. The process for this is exactly the same
as the sentiments. The only difference is I
am using clear powder. What that's gonna do,
it's going to protect the the color of our background card stock piece so that you will see it through. You could do it with a gold or a different colored powder, but you just wouldn't
have their resists. You wouldn't have the color
of card stock that you're using showing up in your card. You get a nice firm press on
there to get it all stamped. Stamp aside. Dump off the excess. Remember all of that excess
goes right back into the container so you're
not wasting anything. I know some people
like to only put just a tiny little bit of embossing powder on their piece. But you might as well just
dump a ton of it on there so that you ensure that you're
not missing areas. All right. Let's keep this up. Flip it around so we don't
remember heat gun rate. Your fingers. There we go. So I did get the edge of the
stamp on this part here. I'm not going to worry
about it too much. This particular one here, I cut it down so that
there's a wider, wider part of the
card-based showing. I could do that with this. For right now. I'm
just gonna leave it. So all I'm doing is
rubbing the colors that I want on my base here. Similar to doing it with
the embossing folders, I typically do three
areas with each color. Rule of odds. Oops, there we go. I'm gonna do some
brown and I think I'm going to add some
gold to this as well. I'm pretty sure I did
that with the sample. Just because this champagne
color is quite subtle. And I wanted a
little bit more of the gold showing to
bring out the bird. If you happen to get your Inca gold a
little bit too thick, remember we're gonna be going
over it with a baby wipe. That's going to bring out the embossing powder
or the embossed image. Again. If you're embossed image starts looking
a little bit dull. It's just the Inca
gold over top of it. For this last color,
I'm just making sure that the rest of the
card stock is covered. I realized I had too
much gold altogether. They're just like
the emboss part. I do deliberately go
over, overlap the colors. I like the Blend be I don't want to have any
plane card stock, so we've got everything done. Good or card-based ready? I'm going to take my baby wipe. I don't need to press very hard. I don't need to be
gentle. I don't need to be worrying about the back of the card stock
wiping all of that, paste off. It's not going to all wipe off. There we go. Let's glue this to the background
of the card. Hold it in place
for a second to get that good glue,
some good contact. Then go your dicot down. Again, I'm using a bird. You can use whatever
image you want. Just personal preference. Now I have a sentiment here that is white card stock with
silver embossing powder. And it really doesn't blend
well with the whole card. So all we're gonna do to make it blend a
little bit better. Put some of the
champagne color on, and then just darken it
slightly with the gold. One thing you do have to worry about with these wax paste. If you have nails, sometimes you get a little bit
under your nails. So I'm trying to be
careful about noticing. I'm getting a little
bit here and there. Alright, so that is done. Let's put some pop dots
on the back of that. Oops. That was just the backing of it. I'm going to glue that right
to the front of our card. There. There you go. You see the tutor
friend background. You get a different
look with that. Neither one is right or wrong. It's just personal preference. But it's interesting
how just changing the color tone of a background changes
the look of the card. This one is definitely more
bright green, fresh, springy, and this one's definitely
little bit more, I want to say that's a little
bit more polish to me. But there you go.
10. Use your Wings Foil Card: All right, So this here
is our final card and all it is is a silver foil
tape on top of card stock. Then we ran it through
the card stock. I run it through the
big shot machine with a 3D embossing folder. Now, for this, I am using this, I think industrial tape I've gotten it at I guess for ducting and houses
and stuff like that. You can buy foil tape sheets so that you could
do an entire piece of card stock with a whole
sheet without having seams. Because if you look
super closely, you can see a seam in here. But by the time we're
done this technique, you're not actually
going to see that. For trying out a technique. It's nice when you can get some inexpensive
supplies to try it out. What I'm going to do here, and I realized that I got
the wrong color here. This is actually supposed to be this one here that I
have on my background. So all I'm doing is
rubbing the Incan gold on the metallic foil. You can see that some of the
colors show up very well. Some of them are a
little bit more subtle. But it just all as
to the look of it. It goes on super easy because
that foil is non porous. It just comes right
off your fingers. And then let's use a little
bit of the brown here. I've got some turquoise
on my fingers, so let's use a
different one here. But just so you know,
you don't have to use just card stock. You can absolutely use some
other surfaces as well. I've done the last one
of the last cards. We did some Brad's, but
I've also done some on, some metal charms
on cards as well. And it works really,
really well on that. And after it's dried, it's really hard to scratch
it off. I've tried. I'm going to put
my lid on there, clean my fingers a bit. We'll let that dry for a
few seconds and then we're going to highlight some of the embossing with some stays on Inc. which is a permanent ink. Realize I had the wrong
ain't got sitting there. So I want to make sure
that I'm doing it with a right to ink pad. Alright, now we're
gonna do our dicot. Now, I'm doing this
penciling with a die. You could easily do this with a plastic stencil
if you wanted to do a stencil background
using the Inca gold, this particular die only cuts
the outside of the image. There's a lot of detail in there that it doesn't
actually cut out. And the reason for
this is so that you can stencil if you want. Now you do need to
press a little bit harder with this
just to get down into that image just because there's a little
bit of dimension two dyes. You could also do
this with ink pads and whatnot and Blake blending brushes and
stuff like that. I'm not saying this
is the only way to get to stencil your dies, but it's just a different
way to use some of the Inca gold with your
dicots or with stencils. I'm gonna take this
off right now. Any of the Inca gold
that's on that die, there can easily be
washed radar off. I'm going to set that aside
and now we'll do the season. So all I'm doing
for this stays on, is just lightly running
my pad down that foil. I'm trying to do
at all directions. What that does is
it just highlights some of that raised surface. And it also ties in the
black that I have going on with that butterfly
and with that sentiment. So typically I would
wait for this to dry. It only takes want to
stay like thirty-seconds. It's a non porous
surface and stays on his great for non porous surfaces. We're going to put our image or our embossed piece down that
stays on is not dry yet. So this is going to need to
be weighed down to stick. Then once it's done, all I'm doing is gluing
that butterfly on there and then popping up my sentiment
with some pop dots. I'll do that once
it is completely dried and I'll see you
back in a few minutes. Alright, so our base piece
is glued onto our card base. I'm going to glue
the butterfly on. That is going to take a few minutes for
that to dry because we are trying to glue it
onto a non porous surface. So I am going to let
that sit there to dry. I'm not going to lift it up. But there we go. Inca gold onto
silver foil and then also sensing stencil
with a dicot.
11. Wax Paste Techniques for Card Making Thank You: Thank you so much
for joining me for the wax paste techniques
for card making class. I hope you enjoyed
learning these techniques. I hope it inspires
some creativity and makes you want to co-create. I'll see you in the next class.
 Artsy. Island Girl, Teacher