Transcripts
1. Welcome To The Class!: Hello, everyone. My
name is Will Elliston. And today, we'll be painting
a classic still life, a small pumpkin glowing
in natural light. It's a simple subject
that teaches big lessons. We'll explore how shape and
value create convincing form, how warm and cool shifts
bring life to oranges, and how the white of the paper can sparkle like highlights. You'll see how glazing builds
depth without heaviness, how edges drift
from crisp to soft, and how a cast shadow grounds the object and
completes the story. I've been a professional
artist for many years, exploring lots of different
subjects from wildlife and portraits to cityscapes
and countryside scenes. I've always been entranced by the possibilities of watercolor. But when I started,
I had no idea where to begin or
how to improve. I didn't know what
supplies I needed, how to create the
effects I wanted, or which colors to mix. Now I've taken part in many
worldwide exhibitions, been featured in magazines, and been lucky enough
to win awards from well respected
organizations such as the International
Watercolor Society, the Masters of
Watercolor Alliance, Windsor and Newton, and the SAA. Watercolor can be overwhelming
for those starting out, which is why my goal
is to help you feel relaxed and enjoy this medium
in a step by step manner. Today, I'll be guiding you
through a complete painting, demonstrating a
variety of techniques, and explaining how I use all
my supplies and materials. Whether you're just starting out or already have some experience, you'll be able to
follow along at your own pace and improve
your watercolor skills. If this class is too challenging
or too easy for you, I have a variety of classes available at different
skill levels. I like to start off with a free expressive
approach with no fear of making mistakes as we create exciting textures
for the underlayer. As the painting progresses, we'll add more details to bring it to life and
make it stand out. I strive to simplify
complex subjects into easier shapes that
encourage playfulness. Throughout this class, I'll be sharing plenty
of tips and tricks. I'll show you how to turn
mistakes into opportunities, taking the stress out of
painting in order to have fun. I'll also provide you with
my watercolor mixing charts, which are an invaluable tool when it comes to choosing
and mixing colors. If you have any questions, you can post them in the
discussion thread down below. I'll be sure to read and
respond to everything you post. Don't forget to follow me on Skillshare by clicking the
Follow button at the top. This means you'll be the
first to know when I launch a new class
or post giveaways. You can also follow me on Instagram at Will Elliston
to see my latest works. So grab your brushes and paints, and let's get started with
this classic painting.
2. Your Project: Thank you so much for
joining this class. I'm really excited to be
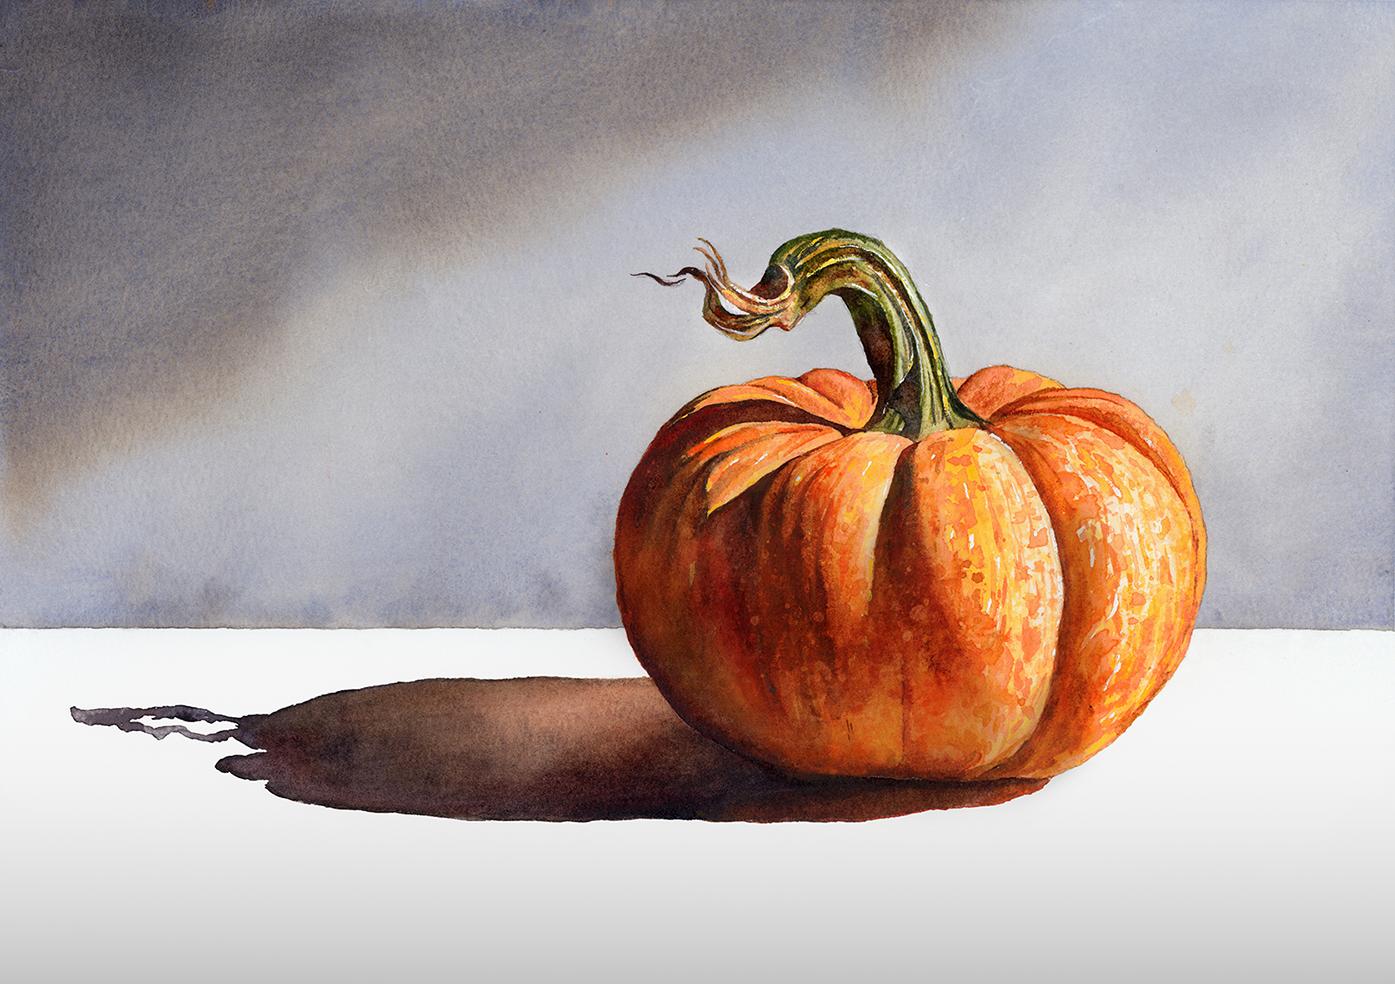
painting this with you today. So our aim is to create a luminous pumpkin that
feels solid yet fresh. Think in clear shapes. Let gentle layers
reveal the ribs and allow small temperature
shifts to suggest texture. Keep the background quiet so the light has room
to breathe and let the cast shadow anchor the form while staying
elegant and simple. Use just enough detail
around the stem and a few textured notes on the
skin to suggest character, then stop before you overwork. This project invites slow
looking economical marks and a relaxed confidence
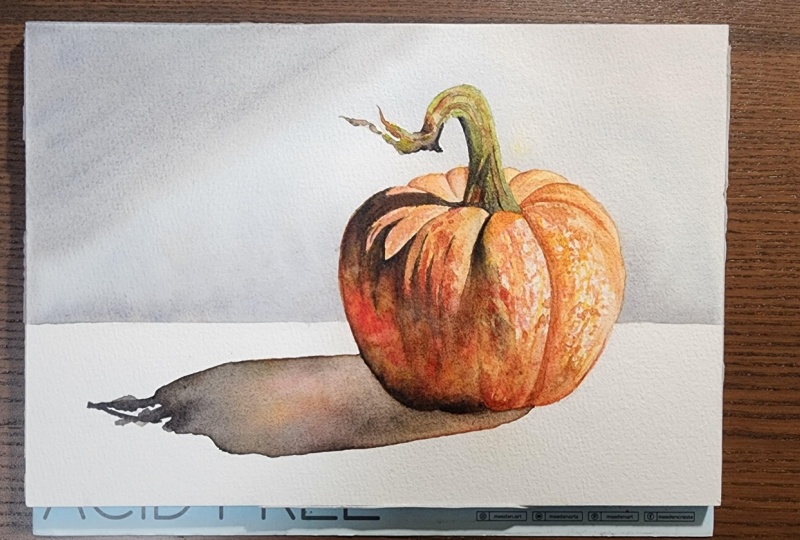
with color and value. In the resource section, I've added a high
resolution image of my finished painting
to help guide you. You're welcome to
follow my painting exactly or experiment with
your own composition. As we're going to be focusing on the painting aspect
of watercolor, I've provided templates
you can use to help transfer or trace the
sketch before you paint. It's fine to trace when using it as a guide for
learning how to paint. It's important to
have the underdrawing correct so that you can relax and have fun learning the
watercolor medium itself. Whichever direction
you take this class, it would be great
to see your results and the paintings you
create through it. I love giving my
students feedback, so please take a photo
afterwards and share it in the student project gallery under the Project
and resource tab. I'm always intrigued to
see how many students have different approaches and how they progress with each class. I'd love to hear
about your process and what you learned
along the way, or if you had any difficulties. I strongly recommend
that you take a look at each other's work in the
student project gallery. It's so inspiring to see
each other's work and extremely comforting to get the support of your
fellow students. So don't forget to like and
comment on each other's work.
3. Materials & Supplies: Before we get started
with the painting, let's go over all materials and supplies you'll
need to paint along. Having the right materials can greatly impact the
outcome of your artwork. So I'll go over all the supplies I use for
this class and beyond. They're very useful to have at your disposal and will make it easier for you
to follow along. Let's start with the
paints themselves. And like most of the materials
we'll be using today, it's a lot to do
with preference. I have 12 stable colours in my palette that I
fill up from tubes. They are cadmium
yellow, yellow ochre, burnt sienna, cadmium
red, alizarin crimson, Opramarne blue, cobalt blue, serlean blue, lavender,
purple, viridian, black. And at the end of the painting, I often use white gouache
for tiny highlights. I don't use any
particular brand, these colors you can
get from any brand, although I personally
use Daniel Smith, Winsor and Newton
or Holbein paints. So let's move on to brushes. The brush I use the most is
a synthetic round brush like this Escoda Purl brush
or this Van Gogh brush. They're very versatile because
not only can you use them for detailed work
with their fine tip, but as they can hold
a lot of water, they are good for
washers as well. They're also quite affordable, so I have quite a few
in different sizes. Next are the mop brushes. Mop brushes are good for
broad brush strokes, filling in large areas and creating smooth
transitions or washes. They also have a nice tip that can be used for smaller details. But for really small details, highlights or anything
that needs more precision, I use a synthetic
size zero brush. All brands have them,
and they're super cheap. Another useful brush to have is a Chinese calligraphy brush. They tend to have long bristles
and a very pointy tip. They're perfect
for adding texture or creating dynamic
lines in your paintings. You can even fan them
out like this to achieve fur or feather
textures as well. And that's it for
brushes. Onto paper. The better quality
of your paper, the easier it will be to paint. Cheap paper cuinkles easily
and is very unforgiving, not allowing you to
rework mistakes. It's harder to create
appealing effects and apply useful techniques
like rubbing away pigment. Good quality paper, however, such as cotton base paper, not only allows you to rework
mistakes multiple times, but because the pigment
reacts much better on it, the chances of
mistakes are a lot lower and you'll be more likely to create
better paintings. I use archers paper because that's what's available
in my local art shop. A water spray is
absolutely essential. By using this, it
gives you more time to paint the areas you
want before it dries. It also allows you to
reactivate the paint if you want to add a smooth
line or remove some paint. I also have an old rag or t shirt which I use
to clean my brush. Cleaning off the paint
before dipping it in the water will make the
water last a lot longer. It's always useful to
have a tissue at hand whilst painting to
lift off excess paint. Also, you never know
when an unwanted splash or drip might occur that
needs wiping away quickly. I also have a water dropper
to keep the paints wet. When you paint, it's
important to have them a similar consistency to what
they're like in the tubes. This way, it's easier to
pick up sufficient pigment. A hair dryer is useful
to have for speeding up the drying time and controlling the
dampness of the paper. And lastly, masking tape. And this, of course, is just to hold the paper down still onto the surface to stop it sliding
around whilst painting. Also, if you plan on
painting to the edge, it'll allow you to create a
very crisp, clean border. And that's everything
you need to paint along. I encourage you to
experiment and explore with whatever will make this class more interesting for
you and helpful. Let's get on and
start the drawing.
4. Preparing The Composition: So to start off
with, we're going to indicate where the table
meets the background, where the surface meets
the background, the wall. And I'm going to use a ruler to measure so that it's
completely flat and even, so it's not a wonky line. Then we're going to
very quickly suggest the circle of the pumpkin,
breaking it down. And I want to add a
ray of light going across the top half. So I just lightly
put that in and then mark out where
the shadow is. Notice how that
line of the table is about in between a
third and halfway down, and the placement of
the pumpkin is in between the third and halfway across the paper on the right, because we want to
keep things off center to keep them interesting. So we start off with that simple circle using
nice broad strokes. I don't mind overlapping my pencil lines with
this soft lead pencil. And I'm just marking out
the different segments quite roughly to begin with. And then we go back in with
a bit more pressure once we're confident or at least
happy with the general shape. Drawing in the stalk now. Keeping it nice and organic. Don't need to be so precise. After we've mapped
everything out, we can swap to a
mechanical pencil and have a bit more precision
with confident clear lines. We can, in fact, get the
putty rubber and rub out that horizontal line
going behind the pumpkin.
5. Pre-wetting The Paper: I'm going to apply
some masking fluid over the pumpkin itself. I don't need to worry
about the stork because that's going to be
darker than the background, but to make the pumpkin glow, I don't want to paint over it
with the background color, so I'm using a toothpick just
to put it out to the edge. You don't have to
cover all the pumpkin, just the edges and
remember not to paint over the rest of the pumpkin. The masking tape muskin
fluid just helps the precision and
the accuracy of the edge of the shape
of the pumpkin. Now, I've mixed a neutral black at the top of my palette with a big brush and I'm just showing you how to mix a warm or cool
black with other colors. You can use neutral
tint or black as your default neutral color, but you can add some warmth using any of the other
colors to tint it. Maybe you want it cooler
to add some blue or some yellow to add a bit of warmth or even brown to
add some warmth. And you can decide what kind of influence you want your
grays to be in the background. I premix them before
painting the background. Now I use a large brush to wet the whole of the
background area now. And you can see very
lightly the pencil line, the horizontal line that separates the wall from
the table surface. Now you can and I, in fact, suggest use masking tape to create a nice
clean edge there. I'm going to show you
how to paint it without that just using the
precision and the brush. But if you want to
make it a lot easier, you can put masking
tape and just wet all this area in the background because
we're going to apply the pigment wet on wet and
let it flow naturally. A
6. Painting The Background: So now that that background area is fully saturated with water, we can start dropping
in this neutral gray. I say neutral
because it's neither warm or cool at the moment. When I'm just covering
the whole area, you can see how wet it is, and I've made sure it is this wet because I don't want it to dry unevenly
at this stage. I go right down to the bottom
right down to the edges. And then we can start
adding warmth or coolness and getting the tones right once we've
covered the whole area. But whilst we're
starting this painting, I just want to make something
clear that we don't have to achieve full realism for this to be a successful
exercise or painting. Still life has trained
artists eyes for centuries because it teaches
careful observation, clean design, and how to
control light and shadow. So please don't judge your painting next
to mine so directly. You can use it, of course,
as a full reference, and you can aim for as much precision and
realism as you want. But you don't have
to be disheartened if it's not the outcome. We're learning a way of seeing and the way of
building a picture, and I want this class to be
approachable for anyone, even a complete beginner, and beginners aren't expected to paint fully rendered
realistic images. So our success today is simple. If the silhouette reads, if the value story is
clear and the pumpkin feels grounded on the table with a convincing cast shadow, we'll have done a good job. And I'll try to guide
you step by step, and I'll name all the
terms and terminology of watercolor as we go so
that anyone can follow along, even a complete beginner. Even if the exercise
seems complicated, I'll explain things in a way that is approachable
and understandable for you to use at whatever
level you're at. So going back to
the painting now, you can see that I've kept
the paper equally wet. It's not drying yet, and I've dabbed some coolness in there. I put some ultramarine
blue in there. It's very subtle. But
because it's wet and I distributed it evenly,
doesn't really stick out. And I'm using a large brush now in the top left hand corner. I've marked two points
on the masking tape. So that I've got
a kind of guide, and I'm just applying
more pigment at an angle whilst
it's wet on wet so that it remains a soft edge. Always keep a tissue
in hand in case you get some splats on that
clean white paper below. And now I'm mixing some
burnt sienna and ultramarine together to create kind of muted neutral color, not black. And that's what makes it a bit more interesting than using pure black because you've got brown particles in there
and blue particles, and as they dry, they separate. Even though it creates the
illusion of a neutral color, you've got more things going in there that
makes it exciting. Every now and then, I use my tissue to dab
the masking tape on the border so that the water build up on there doesn't
flow back into the painting. So bit by bit, as the
paper is drying now, I'm adding thicker pigment, keeping in that
diagonal direction. The wetter the paper is, the
softer the line will be. So as we take our time
waiting for the paper to dry, that line that edge will
hold itself a bit more. I'm not agitating the rest of this background,
just that corner.
7. Starting The Cast Shadow: So I allowed it to dry
completely and replace the water in your
container now because it's going to be
all gray and dirty, and we're going to
paint the pumpkin next, so we want it to be clean water to achieve that nice vibrancy. Also, take off your
masking fluid. When you rub off the
masking fluid, of course, make sure that the
paint is completely dry and the paper is
bone dry as well. As many of you know, we make orange by mixing
red and yellow. So I have my cabium red
here and cabium yellow. I'm not following
any specific rules. I'm finding the right
balance for me. I want it to be a kind of
reddish orange rather than a yellowish orange because I've actually decided
to paint the shadow, the car shadow first, and
we'll paint the pumpkin later. So starting off with a gray, it's kind of a warm gray, but
it doesn't really matter. It's a very mid
tone diluted gray just to fill out the general
area of this car's shadow. I'm using a much smaller brush now with a fine tip so that I can go very specific
to the edge. And as we go closer
to the pumpkin, I'm adding that orange,
that browny orange. It's not a very saturated,
vibrant orange. It's a earthy kind of tone. And this gives the
shadow a bit of warmth. It doesn't really
exist in real life, but it gives that
feeling of glow. So now I'm going back
and I'm just dropping in more water with the pigment, a bit stronger, a bit
darker on the edges. I'm using my pencil
line as a guide. We're not aiming for
perfection because actually, when it comes to still life
and painting organic things, if it's too perfect,
if it's too circular, then it doesn't look natural and it doesn't look interesting. The irregularities is what
makes it interesting. So you don't have to be so
precise when filling this in. I'm just generally following that pencil line that
I drew out earlier. And we're correcting
the tone as we go. So I want it to be
a bit stronger, so I'm dabbing in more of that orange burnt sienna
kind of color. So I'm into the outside now. So at the moment, it's
a very warm shadow, and I'm using the liquid on this left hand side of the
wash and dragging it across.
8. Warming The Shadow: A this shadow is actually a very important
element to the painting. Of course, it can be easily overlooked because we don't actually think of
shadows as things, but as a compositional point
of view, it takes interest. It's the second subject
in this painting. Its length and edge describe the time of day
and the stance of the form. It also balances
the composition, pulling to the left as the weight of the pumpkin
sits on the right. Adding much richer
vibrant orange to this right hand side
of the shadow as I'm allowing the left hand
side to dry a bit because I want to define the tones a bit more
on the left hand side, so I allow a little
bit more time, and now I can use my
brush to draw out some of that pigment to make it lighter on the top half
close to the pumpkin. I can drop a bit more tone
on the left on the bottom, because it's still wet,
it'll soften its edge. I'm going to play with
tone and contrast in this shadow by
having it lighter on the top half where it
meets the pumpkin and then very dark underneath where it meets the pumpkin
on the bottom. So it's a good exercise with how to practice blending and tones. I'm adding a bit of
a isarin crimson, which is a very cool red. Lots of warm colors. Notice how the warmth already in this shadow affects
the background. It makes the background
look cool cool gray. So there's a bit
of back and forth, so I agitated the rest of the wash in this shadow because I wanted to
even it up a bit. It wasn't quite sitting right. That's okay to go backwards to rearrange and assess and
9. Cast Shadow Tones: At the moment, you
might be thinking this shadow looks too colorful. In real life, shadows
aren't that warm or red, but that's okay because
we're going to come over it later with some
darker neutral tones. We might even add a little
bit of blue to neutralize it to make it more interesting. But because I know through observation that it needs
to go a lot darker, I can get away with
vibrancy at this stage. This is actually a quite
simple setup composition, a solo pumpkin with
a cast shadow. The table surface
is left completely white and a subtle background. We can start painting the shadow of the stalk
using a nice strong, dark black, and it just
needs to be a little twirl. It's distorted at that angle. So it doesn't need
to be thought of. I'm just adding this
distorted kind of oval shape. The shape of the shadow also
reveals the ground plane, a clean oval that
stretches away, suggests a flat table. Then we've got a
broken textured edge that suggests a rough surface. So where the shadow
passes behind the form, we get a thin contact band and the darkest note in the painting where it
gives it real weight. That's why I'm adding lots
of dark pigment right here where it reaches
underneath the pumpkin. So by letting the
pumpkin sit slightly to the right and having the
shadow pull to the left, it's a counterweight which
balances the picture. Also another element that makes it dynamic is the dark shadow
against a light table, then the light pumpkin
against a darker wall. And that alternation keeps the edgework and the
tones quite alive. Although I'm using
black as my dark here, you can experiment with complimentary colors
and color temperature. Maybe you want to add blue or violet into these darks
instead of just pure black. That's something you
can play around with.
10. Pumpkin Underlayer: So now we've finished
the cast shadow here, we've got the darkest part
of our painting done. So now we know the full tonal range that
we're working with. And now that we can
see that visually, it'll make our adjusting and
decisions when it comes to painting tones a
lot easier as we go forward because we have, of course, the lightest,
the white of the paper, and the darkest,
the darkest part of the shadow as a reference. So I'm starting with this pure orange which is
cadmium red and cadmium yellow. And it's a classic
fire Halloween orange. And it might take a bit
of back and forth with your cadmium red and cab
yellow to find that balance. Maybe your red is quite potent. Reds usually are more
potent than yellow, so you need a lot more
yellow to even it out. But as we go through
this composition, you'll see how some areas have a more yellow glow and some areas such as the shadows have more of a
reddish hue to them. And already, I've made some of it a bit more
yellow than red. So this left side of the
pumpkin is in shadow, as we can see the cast
shadows going that direction, using a tissue to soften up the edge on the right hand side, where the light is coming from. Course the left is in
the shade in shadow. That's why the cast shadows
going that direction. So we can be a bit more expressive on the
left hand side of these ribs and segments.
11. Pumpkin Textures: Creating a bit of texture with
this tissue, just dabbing. It's basically an
underlayer at this stage. Well, of course, come
a lot richer later on. But the good thing about
watercolor is that we can add bit by bit with layers. So we don't need to
do it all in one go. You can see I've got
little blotches of yellow, little blotches of orange, and I'm using the tip of my
brush at different angles, create these little freckles. On the right hand side of
each of these segments. And then I quickly use a
tissue to smudge them out. Keeping it very diluted. I also make sure that my brush isn't completely
saturated with water. I don't want to
overflowing because then there'll be too
much water on the paper, and it'll be hard to achieve this kind of stippling effect. That's why it's important
to have a brush with a tip. If you have a textured sponge, you could also
experiment with dabbing that on there to create
nice organic marks. Agitating it a bit with a brush. Just trying to create
that illusion of texture. And if it's looking too sharp, we can just soften it up a
bit and go back and forth. So moving to the top,
I'm using basically a very yellow orange up here. Again, I'm not thinking
of this all in one go. I'm thinking with
the end in mind and how to break it
down into simple steps. So I'm looking for a
kind of base color, which is this yellowy
orange on this side. Because I'm trying to avoid using opaque
paint at the end, like yellow squash
or white guash. So when I can get away with using the transparency
of the paper, that's what I'm going
to try and use. So I'm just creating these
underlayers right now, which will end up
being highlights. And bit by bit, whilst it's still wet, we
can drop in more pigment. Try to keep an
awareness of which sections are wet and which areas are drying so you don't have pigment spilling out into areas that you don't
want it to go. But that's also why it's important to have
a tissue at hand. So if areas do bloom or flow into sections
you don't want them to, you can quickly block
them out with a tissue. Being very careful here so that the edge of the pumpkin
is very defined, a nice clean, clear silhouette. When you think about
pumpkins or squashes, you get a whole range
of colors really. Of course, the classic
color is orange, but some of them have
green in yellow, some of them have this kind
of gray blue hue to them.
12. Distant Segments: So whilst we're painting that
right side of the pumpkin, the left side has
had time to dry, so we can go back in
with a second layer now. And I'm using burnt sienna, which is basically a very dark, unsaturated, muted orange. I'm starting to define the ribs, the shadow areas in
between the segments now. Using the smallest
brush I ever use, I don't go much
smaller than this, because it has a
very fine point, and I'm not painting
a large area, so I don't need a
large brush for this. And I'm trying to
create that illusion of curvature with a
much thicker pigment going a bit darker
than the underlayer. Using the pencil lines, even though they're
very light as a guide. So every now and again, I
clean my brush like I am now, use a tissue to draw out all
the liquid so that I can smooth that edge and basically rub it into
the paper gradually. I use that sponge to
clean my brush again. You can see how my brush
goes from the sponge. And when it goes
off screen, it's going to a tissue that I have in my hand to clean it. I don't always dip
it in the water. Back when we were
doing the underlayer, I was making sure there
was quite a lot of water on my brush because we were filling
out a larger area. But when it comes to
a bit more precision, I want to control
the amount of water I have on my brush
because I don't want it to go out of control
and too chaotic when it comes to these little tonal
differences and details. At the very top of
these sections, these segments, is going to be the lightest parts
where the highlights are. And then I just use a line
for the shadow, basically. Even, of course, in
reality, it's not a line. We use that dark line to create the illusion of the segment going into
the shadow and shade. Same thing on this
side, we can add a base mid tone wash and
then add a dark line at top curves around
into the shadow.
13. Layering Textures: Now we can start adding
a bit more texture. And as I'm adding this texture, I include a few lines in
the direction of the curve, the curve of the pumpkin. In between all
these little dots, there's a few lines
that bind them all together and give them
the illusion of form. Even with this texture, I'm not doing it all in one go. Realism is achieved
by layer on layer. So this is actually technically the second layer that we're doing this texture, but it's so light, and
that's what makes it feel so real and etherial because they blend
seamlessly into each other. And we don't have to spend
too much time doing it. It's quite an abstract texture. Every now and again,
I smudge it up a bit. If it's looking too contrived, too neat, I use my finger or the tissue
just to agitate it. Then I use a dry
brush technique where I fill up my brush as
usual with pigment, and then I dry it with a tissue and just scrape that above
the texture of the paper. Then adding some pure yellow at the bottom and
scraping it upwards, again, blending it by agitating
it, scrubbing it away. By scrubbing, we're blending in a more textured way rather than a smooth way like we
did in the cast shadow. Making sure I use the
side of my brush rather than purely the tip because I don't want to
get rid of that tip. Don't want to wear away the
brush and get rid of the tip. So I'm painting light to dark. So when I observe my subject, I'm looking at the lightest bits and how I can
achieve that first. And then once I think
I've achieved it, I look at the next tone down
and try and merge that, integrate that into the piece. So you can see the shadows
are completely untouched, except the cast shadow. The shadows on the main
body at the front on the side of the pumpkin is
untouched to begin with. I'm just making sure I'm kind of getting the
general idea of the light tones to begin with. I found this to be a
very useful exercise because although
we're incorporating different colors into the
rest of the composition, the pumpkin itself
is just one tone. It's a monotone
orange, basically. So all we got to
think about is tone. We can keep the color
as orange as we want, maybe add a bit of red, yellow that make orange. But we don't need to think
about blue, purple, green. So we're just focusing on
texture and tone, really. And because we
don't have to think about what colors to mix, when it comes to
painting the pumpkin, we can practice these
elements that are important to so many aspects and other subjects of painting.
14. Right Segment: So now we've given the
texture some time to dry. We can go back over it again with an even stronger
consistency. Notice how I'm not
holding the brush up close as if drawing
very precise details, and holding it close to the
back so that I'm creating more expressive shapes
more organic mark makings. Adding a few suggestive lines, following the direction of
the curve like we did before. That helps anchor the chaos. Because when I'm painting in
these dots and rough shapes, they are following the pattern, the rhythm of each segment. Creating a bit of
illusion or form. O. And as I'm painting
in these textured areas, I'm starting to think how
I can integrate them into the main color and
tone of the pumpkins. So it's going to gradually transition from texture
to clean washes. And by that, I mean, the white of the paper that
we see in between these textures are going
to come less and less gradually until
it's full of paint. But before I do
that, I'm just going to use a darker pigment just to further define
the edge of this segment. Now using a very strong orange
and using the pencil mark, I can see where the next segment begins and painting up to that edge filling it out, loading my brush. And now we can
start transitioning this solid line into
the texture next to it. And to do that, I
purposely leave some white gaps in
between these lines. And then as we move
further along, the white gaps increase. If you find you haven't left enough white lines,
that's perfectly fine. You can go back and use white wash as a safety
line to bring them back. Whilst you're doing this,
keep in mind the curvature. So we're not painting
a flat surface. So as it bends, allow your shapes to
indicate where it bends. Imagine there's a line
going across all this area. Even though I haven't
drawn out the lines, we can use the edges of
the segments as a kind of goalpost to aim for and we can make up the
difference in our mind's eye. Adding a bit of yellow and softening out
some of these edges. And now, I've given
it time to dry. I'm using a tissue
just to blot it out to create more texture.
15. Right Groove Shading: Okay. Now, it's going to be very strong from
the bottom because, of course, there's
less light down there, and the shadow will be darker
coming from the bottom. So that's why I'm adding
almost a pure red. We had yellow underneath it, so adding pure red on
top of the yellow will, of course, make it orange. And now we can push
the tones and see how far we can push the tones
to get them correct. If it looks too light, be brave and just add
more and more tones. If you're using cotton
watercolor paper, you can always scrub off the
paint if it gets too dark. When it comes to still life or painting in a
more realistic way, there'll always be an
element of having to go back and readjust your
values and tones. So you don't have to worry about it getting correct
straightaway on the first go. Of course, if we're
painting in a style that's more expressive or
impressionistic, we don't have to be so loyal to the subject
in terms of tones. We don't need to correct.
We can allow ourselves and the viewer to expect
some differences. But when we're training
the eye in observation, and the actual goal is to make it as
realistic as possible, we'll always have to readjust because there's so many
parts of the painting we have yet to paint that in context will affect
things later on. So the stork, the left hand side of the
pumpkin is yet to be painted, so we may have to come back to this area
to change things. Doing what I can to match
what I see at the moment, but perfectly happy to acknowledge that it's
not going to be correct. Now, whilst this
area is still wet, I'm just going to slide
a bit of dark pigment, burnt sienna right
in the shadow. And because it's still wet, it'll have a nice soft
edge and it'll blend out just like a
regular shadow would. It's not going to have a
hard edge if it's a curve. So this dark line here creates that
illusion of form again. And we can scrub the brush to soften it out
a bit more at the bottom, where it's naturally
more shaded. If this area has
already dried up, you can add a tiny bit of
water to reactivate it. So we're working each
segment at a time. It's a bit too weak, so I'm
going back over it again, giving it a bit more
encouragement to come out. Then expanding that
shadow a bit more. As the pigments left my
brush, it's a bit lighter.
16. Front Segments: Now moving on to the next
segment and like before, we'll start off at the top. And before even starting, I check to see where
the pencil lines are and where I'm
going with this wash, how far I'm going down. I think I'm actually going to blend this one with the
next one at the bottom. So at the top, there's quite
a clean, clear division. But at the bottom,
where it's in shadow, The tones match, so there's
no need to separate them. So that means I need to focus on the top for that
clear division, and then we can be a bit
more free at the bottom. I'm having fun
playing around with the different
possibilities with orange, some areas will be yellower, some areas will be red. Adding pure water to
fill some areas out. I'm mainly using cadmium
yellow and cadium red, as I said, but occasionally,
just for excitement, just for a bit of change, maybe I'll add a bit of a isarin crimson or a
bit of yellow ochre, not as a rule, just for
experimentation, for curiosity. But as it's wet and wet here, I can have more control over the tones when it's
wet and wet because I can draw liquid out using my
brush as a kind of sponge. But then I can drop
more liquid in. So wet and wet can be difficult, but there's a sweet spot where you actually
have more control. Flicking a bit of pure water
on there as it's drying, and you can see how that creates a natural
kind of texture. Because the water by
its nature without pigment pushes away
the pigment that's already on the paper to
leave those white kind of blooms that creates a kind of believable texture that
you'd find on a pumpkin. And, of course, these
textures can be used more in a pumpkin. You can use if you're painting a seascape mountains I've seen, even portraits, So that's why still life could be
so useful because you're learning techniques that can be used beyond the subject
you're painting itself. Leaving a little white gap
in between the two segments here because I'll need
light and shadow.
17. Left Segment Underlayer: Now, I can be very
bold on the left here. I'm using a zarin crimson just because it's in the
shade, the shadow. Even though red, of
course, is a warm color, a zarin crimson itself is a cool red when
compared to cabim red. So you can see there's
a contrast between this cool red and the vibrant warm orange
on the other side. This red is just a subtle
underlayer undertone. It's not going to be directly
perceived at the end. And I'm dropping some pure
yellow onto this area to further create texture, make most of that wet on wet. Then using a tissue,
scrambling up a bit, so that it draws up liquid
and pigment unevenly. You can also again use a sponge. So we're creating a nice
expressive underlayer as a kind of base, and then we can work on top. That underlayer is mid tone. So some areas we
can make lighter, some areas we can make darker. The areas that we
want to get darker, we can apply wet on wet. When we look at the subject
and see a soft line, this is when we want to do that when the paper is slightly damp. If there's a hard line
or a hard shadow, we have to wait
until the next spot. We need to wait until
it's completely dry. So at this moment, I'm taking advantage of that
wet and wet nature. This to me is the most exciting
part of this painting, the wet and wet aspect. On the right hand side,
when we were creating that texture, of course, we're trying to be expressive, but we're not exactly using
the water to do that. Here, we're applying pigment and letting the
water itself create the interesting marks,
we're manipulating it. And that's what creates that ethereal feeling
of watercolor. The magic comes through because it's not something
we do ourselves. We're allowing the watercolor
to do the work for us. Again, as I'm feeling the
paper starting to dry, we have a bit more control. So these lines that follow the direction will
hold their shape a bit more. They'll be less random. I'm just looking at the
top of this segment here, dabbing it so that
it dries off a bit quicker because I want to go in with a bit more texture at the top where it's
catching the light. So mixing that camium red with the yellow again with
a tip of my brush. Some descriptive lines
just to follow the curve.
18. Front Groove Shadows: And now we're going
to start adding some bold shadows onto
the pumpkin itself. So make sure that layer we just painted
is completely dry. And now I'm applying
some pure black. Well, it's pure dark pigment. I've added a bit of brown
in there just to keep it exciting because I try not
to use black by itself, although that rule
isn't so strict. Starting to bring
that dark down. When using black, make
sure it is thick enough because we don't want
it to dry very light. When black is wet,
it looks very dark, but then as soon
as it dries out, it goes a lot lighter. So don't be worried about it being quite pasty
to begin with. Now, as that comes down, we're adding burnt
sienna into it. A nice little transition. Using pure water to dilute that. Notice how my orange pan, the pan of orange in my
palette is always changing. Sometimes it's more yellow,
sometimes it's more red. I'm not being too clean or tidy or strict
about it at all. But cleaning up that line. So I wanted to soften
that line a bit, so I use pure water and
I paint halfway across it and halfway outside of it
so that it blends it a bit. Softens that edge. It doesn't
happen straight away, but because we've re wet it gradually in the space of a couple of minutes,
it will blend out. So when you paint
things with watercolor, you've got to anticipate
what they'll do rather than seeing it as it
is straight away. And that takes a bit of a
learning curve to kind of get an understanding
and a feeling for how the water and the
pigment interact. Because of course,
as a beginner, you don't know how
fast the water flows through damp paper. And that's not something
that can be taught directly. It's something that
has to be practiced with and through time,
it becomes intuition. But I actually find watercolor
can be very forgiving, especially for realistic kind of painting because
you can scrub away, you can take away,
you can add back on. In quite a quick manner. You can use a hair dryer or you can use a spray
to reactivate it. What's more difficult is
being spontaneous with watercolor and being
a bit more abstract. But being able to
paint loosely with style comes from first knowing
how to control the medium, and it's through
exercises like this that we learn how to do it.
19. Surface Texture: You can see how as I brought the wash of
this shadow down, it actually made the
pigment above thinner. So I've gone back into it and dropped more pigment to
bring that darkness back. And as it's wet and wet, I can dab more, and you can
see it softly blending out. And again, softening
that edge again on the side to convey that
feeling of curvature. If it was a hard line, it would feel like the curve it's at a hard
angle, a hard edge. But I want to convey
a soft smoothness, a gradual bend in the segment. So that's why I'm softening
out the edge on this side. But on the left hand
side of this shadow, it's the cast shadow
of this edge. So that is going
to be a hard edge. So you can see this particular shadow that we're painting now. It's hard on the left
and soft on the right. Most cast shadows
are going to be hard because they're
close to the object. If the cast shadow was very far away from the object,
then it'll be softer. But in a still life
situation like this, they're going to be hard edges. Now we can go back
over that wash, again, adding more and more
texture as we go along. If this was any other
medium like oil or acrylic, we could have used pure white paint to paint
this texture on top. And while we could
use white guash, it just looks a bit
more natural and authentic to try and
paint it this way.
20. Stem Cast Shadow: When we painted the cast shadow of the pumpkin on
the white surface, it demonstrates how
flat that surface is. Now we're going to paint the
cast shadow of the stalk. And because the
pumpkin, of course, in its nature is curved, this cast shadow is
going to be curved, too, and that's why
it's a useful element to describe the shape
of the pumpkin. And whilst we're doing
this, I'm going to go over a few terms that will help us understand still life painting and how to organize our thoughts when it comes to observing the subject. The first thing to observe
is the local color, and that's the pumpkins
inherent color, which is orange before
light itself affects it. So that's what we
should use when establishing the first wash,
and that's what we did. Then we got to
think about value, the lightness or darkness, and we use that to group
big shapes together and to organize our painting because we're going to have high values, mid values, and low values. When it comes to
painting shadows, we need to be aware
of the terminator. That's the line where light
turns to shadow on the form. So we need to gently
soften it on each segment. Then we have the core shadow. This is the darkest area inside the form shadow past
the terminator. It lives in the troughs in
between each rib and segment. Then we've got the occlusion
or contact shadow. This is the thin darkest band where the pumpkin
touches the table, and that's what gives it weight. Of course, we talked about
the cast shadow before. Then we've got the
reflected bounce light, which we haven't
yet painted yet, but this is the light bouncing up from the table
onto the underside. So this will warm the
lower edge later. I'm just going to
go back in with a pencil to clear up where the shadow lines are going to be shown so I can
organize my edges.
21. Starting The Leftside Shadows: Apart from the vibrant orange in this composition and the
organization of tones, the white of the table, the darkness of the shadows, and the mid tone of the orange, one of the most
striking elements of this composition is
the variety of edges. We've got hard edges,
some soft edges. So I'm just going to talk
about the different kind of edges you can get and
what they can do. So of course, the hard
edge is as it sounds. We're painting
against dry paper, and we're using that
for accents to create a feeling of sharpness and
precision, some definition. Then we have soft edges, which, of course, is
what it sounds like. We're painting into damp paper, but we can also soften them
afterwards with a wet brush. And then we're using that
around the terminators, like I said before, the soft shadows that
blend and transition. Similar to a soft
edge is a lost edge. This is an edge that
disappears into similar values or colors
or merges softly. So this back of the
pumpkin is going to blend gradually and transition into the light side with it out
even being perceivable. You have no clear edge. Then we have something
called a broken edge, which is kind of in between
a soft edge and a hard edge because it's a slightly
textured, interrupted edge. It adds the feeling of realism or naturalism
to a cast shadow or the texture of the pumpkin and definitely the stark
later that has that natural kind
of sharpness to it. So to achieve these
different types of edges and textures, we need to be aware of the
different stages of wetness. So we've got glossy wet, where we really get the soft marks and the
completely lost edges. Then you have, like, sheen damp paper where it's
not so glossy wet, but you'll still achieve
a soft line, almost dry, which is a very precarious but also exciting
time to paint and then bone dry where you'll
achieve the hardest lines. I
22. Bold Orange Shading: We've been using a combination of a lot of essential
techniques, and some of them we've
been using by themselves. Some of them we've been using them together and
mixing them up. Initially, we were
using a lot of flat washes of one even value, just to map out the general value so that we can then make it
lighter or darker. That's basically the
background as well. We use the flat wash
for the background. Then we added a
graded wash to that, that diagonal wash of the background and also sections
of the pumpkin as well. Even now, we're using this orange and then
grading it into the dark shadows above where the value shifts
from light to dark. Then similar to a graded
wash is a vari graded wash, which not only changes the
value but also the color. So we haven't used it so
much on this painting, but in other subjects, we might have to change from
a dark blue to a light red, which are completely different
colors and different hues. We've done a lot of charging, which is dropping in pigment, adding a stronger
pigment to a wet wash. So we use that to
deepen the ribs while the wash was still wet. You can also charge
pure water into a highly pigmented area like we did before also to
achieve some texture. Another technique that
we've used a bit of, but we'll use more of
later on is glazing. So adding transparent
layers over a previous layer to build depth without losing the
luminosity of watercolor. That's one of the key
techniques to achieve realism is to gradually build up layer over layer, glazing. Scrumbling using light, broken layers over dry paper to
achieve that texture. Notice right now how I'm
using pure yellow straight from my pan directly onto
the paper, wet on wet. And as it melts
into the pigment, it looks orange, but it
looks like it's glowing. So it's reflecting some
light within the shadow. Now where these intricate sharp shadows are
happening up above, I'm actually using blue, which is the complimentary
color to orange. But because the two colors
are mixing together, they neutralize each
other to make a black, so you can't even see
the blue on there. At the moment, the line is too hard on that shadow on the left, so I'm just going to soften
it out by adding a bit of brown and feathering
the edge of it.
23. Wet on Wet Shadows: There's so many different
types of watercolor pigments, and they all behave
in different ways. It's not just that
they're different colors, some of them have different
qualities to them. So many watercolors
are transparent, but some are semi opaic, some of them are
completely opaq. So we've got clear pigments compared to slightly
milky pigments. And it's the transparent
pigments that help with glazing, whereas the semi opaq ones are better for covering up mistakes or adding a strong
vibrancy like the orange. The orange pigment,
the cadmiums are quite opaic not so transparent. And then we've got pigments that stain and some that don't stain. The orange is actually quite
a strong staining pigment. So it's quite hard to
lift from the orange. But the black, that's
very easy to lift. So when it comes to correcting
your tones and shadows, it's useful to know
which pigments you can lift and which are going to be harder to scrub out. Then there's the
size of the pigments and how much they granulate. Pigments settle into the
paper to create texture. And whilst that's
not so necessary for this particular
painting, you can see, actually in the background, the granulation of that shadow, that diagonal wedge
of shade on the wall. Then there's dispersion, how
quickly a pigment spreads in the water because that can help control blooms at the
different wetness stages. Then you've got to be aware
of the tinting strength. For example, when
mixing the orange, the red dominates the mix so
much more than the yellow. So we know we have to be a bit more sparing of the
red than the yellow. Now, these are lots of
different terms that can make you feel a bit
overwhelmed hearing them, but they're not actually rules. They're just tools that
being aware of can help you. So you don't need to memorize
them all, little by little, in your practices,
being aware of them, considering them
can help over time. There's quite a few
interesting things going on the shallows here because
in between each segment, there are little wrinkles
that follow that curve. So using the wet
on wet approach, I'm adding these lines. So they've got a nice soft edge, but they're still a bit broken. They're textured,
they're not even. I'm not trying to keep
them all slick and clean. Then I'm using pure water, splattering it on there, and then rubbing away to
create even more texture.
24. Correcting Tones: Here are a few more
concepts that might help your perception with still life, but also beyond it into any other subject
you want to paint. So usually a strong
compositional tool is silhouette and
the recognition of the main silhouette
from the contour of the shape before any detail because if you make the
silhouette clear and readable, it'll be much more
aesthetically pleasing. Than all the details within it. And then you have the gesture. So for example, here, we've got the stem as
a gesture line that adds organic flow and
rhythm to the piece. And that gesture helps
the visual path, how the eye travels. So that includes all
elements from the angle of the shadow in the background along the
plane of the surface. They're all visual cues and lead the eye around
the composition. So if your eye ever gets lost, it can draw it back in.
25. Starting The Stem: Now it's time to paint the stem, and it's the same process
as everywhere else. So first of all, I'm considering the color, and I'm mixing that
on my palette. I used yellow ochre and a
bit of yellow cavium yellow, and I'm using the blue
that was already on my palette which is a
bit of cobalt blue. And I'm observing
from light to dark to begin with and want to
preserve the lights areas. And then from the ltus
areas, the mid tones. So I start off with
a broad brushstroke, and I use that as a base, so clean my brush, and I can drag and draw that out to fill that
light tone area, preserving any white areas
that will count as highlights. Then I can add a bit of burnt sienna because it's
not all green. Now, working from the bottom,
I can do the same thing. I can apply a bold stroke where I know it's quite dark and then use water to draw out from that section
and fill it out a bit. So that's the first
pass, basically. I've seen where my mid tones are and my light tones are
and where the white is, and now we can build
on it in the areas that are darker bit by bit. A lot of the tone in this stork is a bit
like the pumpkin. It's following the direction and flow and curve of the stalk. So they're basically lines, but lines in nature,
are shadows, basically. Painting this statork
is a bit more forgiving than the
pumpkin because we can come back with the whiteah
to add thin highlights. And as it starts to dry, like we were saying before, the pigment will hold its shape because it's no
longer glistening wet. It's almost dry. So by applying a
thick stroke now, this green that I've mixed
is a bit more vibrant. It's not as muted
as the first one. When we apply a
stroke like that, it'll remain soft at its edge, but it'll hold its shape. It won't become lost. I can even fit a extra thin
line in between that one.
26. Adding The Darks: And now it's dry, we can mix a very dark pigment and paint the shadow
side of the stem. And try and figure out
how we can integrate these dark tones to the
rest of the stem we painted softening a
lot of the edges, grading the wash so that
it becomes lighter at the top into the green so
that it's seamless basically. It blends into it. Then at the base here, we can define the edge with
the point of our brush. I'm simplifying the shapes, so I scrip my eyes, see the general shape and
work it into the composition. It doesn't need to be exact. If I see a shadow
creeping around the curve, I kind
of summarize it. It looks a bit like a triangle. Connecting it with the
rest of the curves. Now I can see there's a bit
too much light tone going on, so I'm going to
cover some of it up. I'm going to fill the area out. I'm going to draw out
some of the liquid from that shadow area and blend
it with some of the orange. Enhance some of the
shadows, some of the lines. Define them a bit more, bring them all the way
down to the bottom. Make them a bit clearer
and a bit more bold. Block off this section here where the sork
meets the orange. I want it to be a nice contrast between the orange
and the green. And in fact, I think we can
follow that all the way up to the top so that that silhouette of the
stalk is nice and clear.
27. The Wispy Bits: And now we can move
to the other end of the stalk where all
the wispy bits are, where it's all thin and curly. I have to be quite defined
with my shadows here because it's probably the more
intricate part of the painting. All the details and
the textures on the pumpkin were quite
organic and random, but here it's a bit
more organized. I have to make sure the shadows
are painted underneath, allowing the highlights
to be preserved. Using the tip my brush, and swirling it
across, connecting it. Like a squiggly S shaped. This tip is more
brown than green. Using the tissue to just dab away some pigment where
it was too strong. Now we can move to
the end and very carefully add that
squiggly line. Pure black. There's even a little
gap in those strokes. They're not actually connected, but it doesn't matter.
It does its job. We don't need to overstate
what we're painting. Blending a bit of green
into that golden color. So there's a bit of
overlapping going on there, and that creates that
illusion of depth. Just trying to figure
out what connects with what Now that that's dried, that area on the stalk, I can go back to create some
nice soft lines. Varying the thickness. So
some will be very thin lines, some will be slightly thicker. Now we can go back
to this area now that that's dried to
create some lines. So sometimes you're
going to have to wait a bit to reach
the correct wetness, so you can just
move to a different section and go back and forth, darkening the area underneath
so that it creates that deusional depth of layering of different areas of
space and perspective. Where the shadow may be and where the other strand
is touching the light. And then if you want, you can go back and refine it
with some guash.
28. Final Thoughts: Welcome back and
congratulations of completing this class on painting
a pumpkin still life. Today's study highlighted
rhythm and balance. Repeated curves of
the segments created a gentle beat varied in size
and spacing for interest. The stem acted as a
directional line, guiding the gaze into the form and down
through the shadow, while asymmetrical balance kept the composition
lively yet stable. The same ideas apply
to fruit, ceramics, florals, and any single
object you wish to spotlight. Remember, watercolor painting is not just about technical skills, but also about expressing your creativity and
personal style. I encourage you to continue
exploring, experimenting, and pushing your
boundaries to create your own unique
watercolor masterpieces. As we come to the
end of this class, I hope you feel
more confident and comfortable with your
watercolor painting abilities. Practice is key when it comes
to improving your skills, so keep on painting
and experimenting. I want to express my gratitude for each and every one of you. Your passion for
watercolor painting is so inspiring and I'm honored
to be your teacher. If you would like feedback on your painting, I'd
love to give it. So please share your painting in the student projects
gallery down below, and I'll be sure to respond. If you prefer, you can
share it on Instagram, tagging me at Will Elliston, as I would love to see it. Skillshare also loves
seeing my students work, so tag them as well
at Skillshare. After putting so
much effort into it, why not share your creation? If you have any questions
or comments about today's class or want any specific advice
related to watercolor, please reach out to me in
the discussion section. You can also let me know about any subject wildlife or scene you'd like me
to do a class on. If you found this class useful, I'd really appreciate
getting your feedback on it. Reading your reviews
fills my heart with joy and helps me create the best
experience for my students. Lastly, please click
the follow button Utop so you can follow
me on Skillshare. This means that you'll be
the first to know when I launch a new class
or post giveaways. I hope you feel ready to paint a simple still life that
shines with confidence. I look forward to
seeing you again in future classes until
then, happy painting.
 Will Elliston, Award-Winning Watercolour Artist