Transcripts
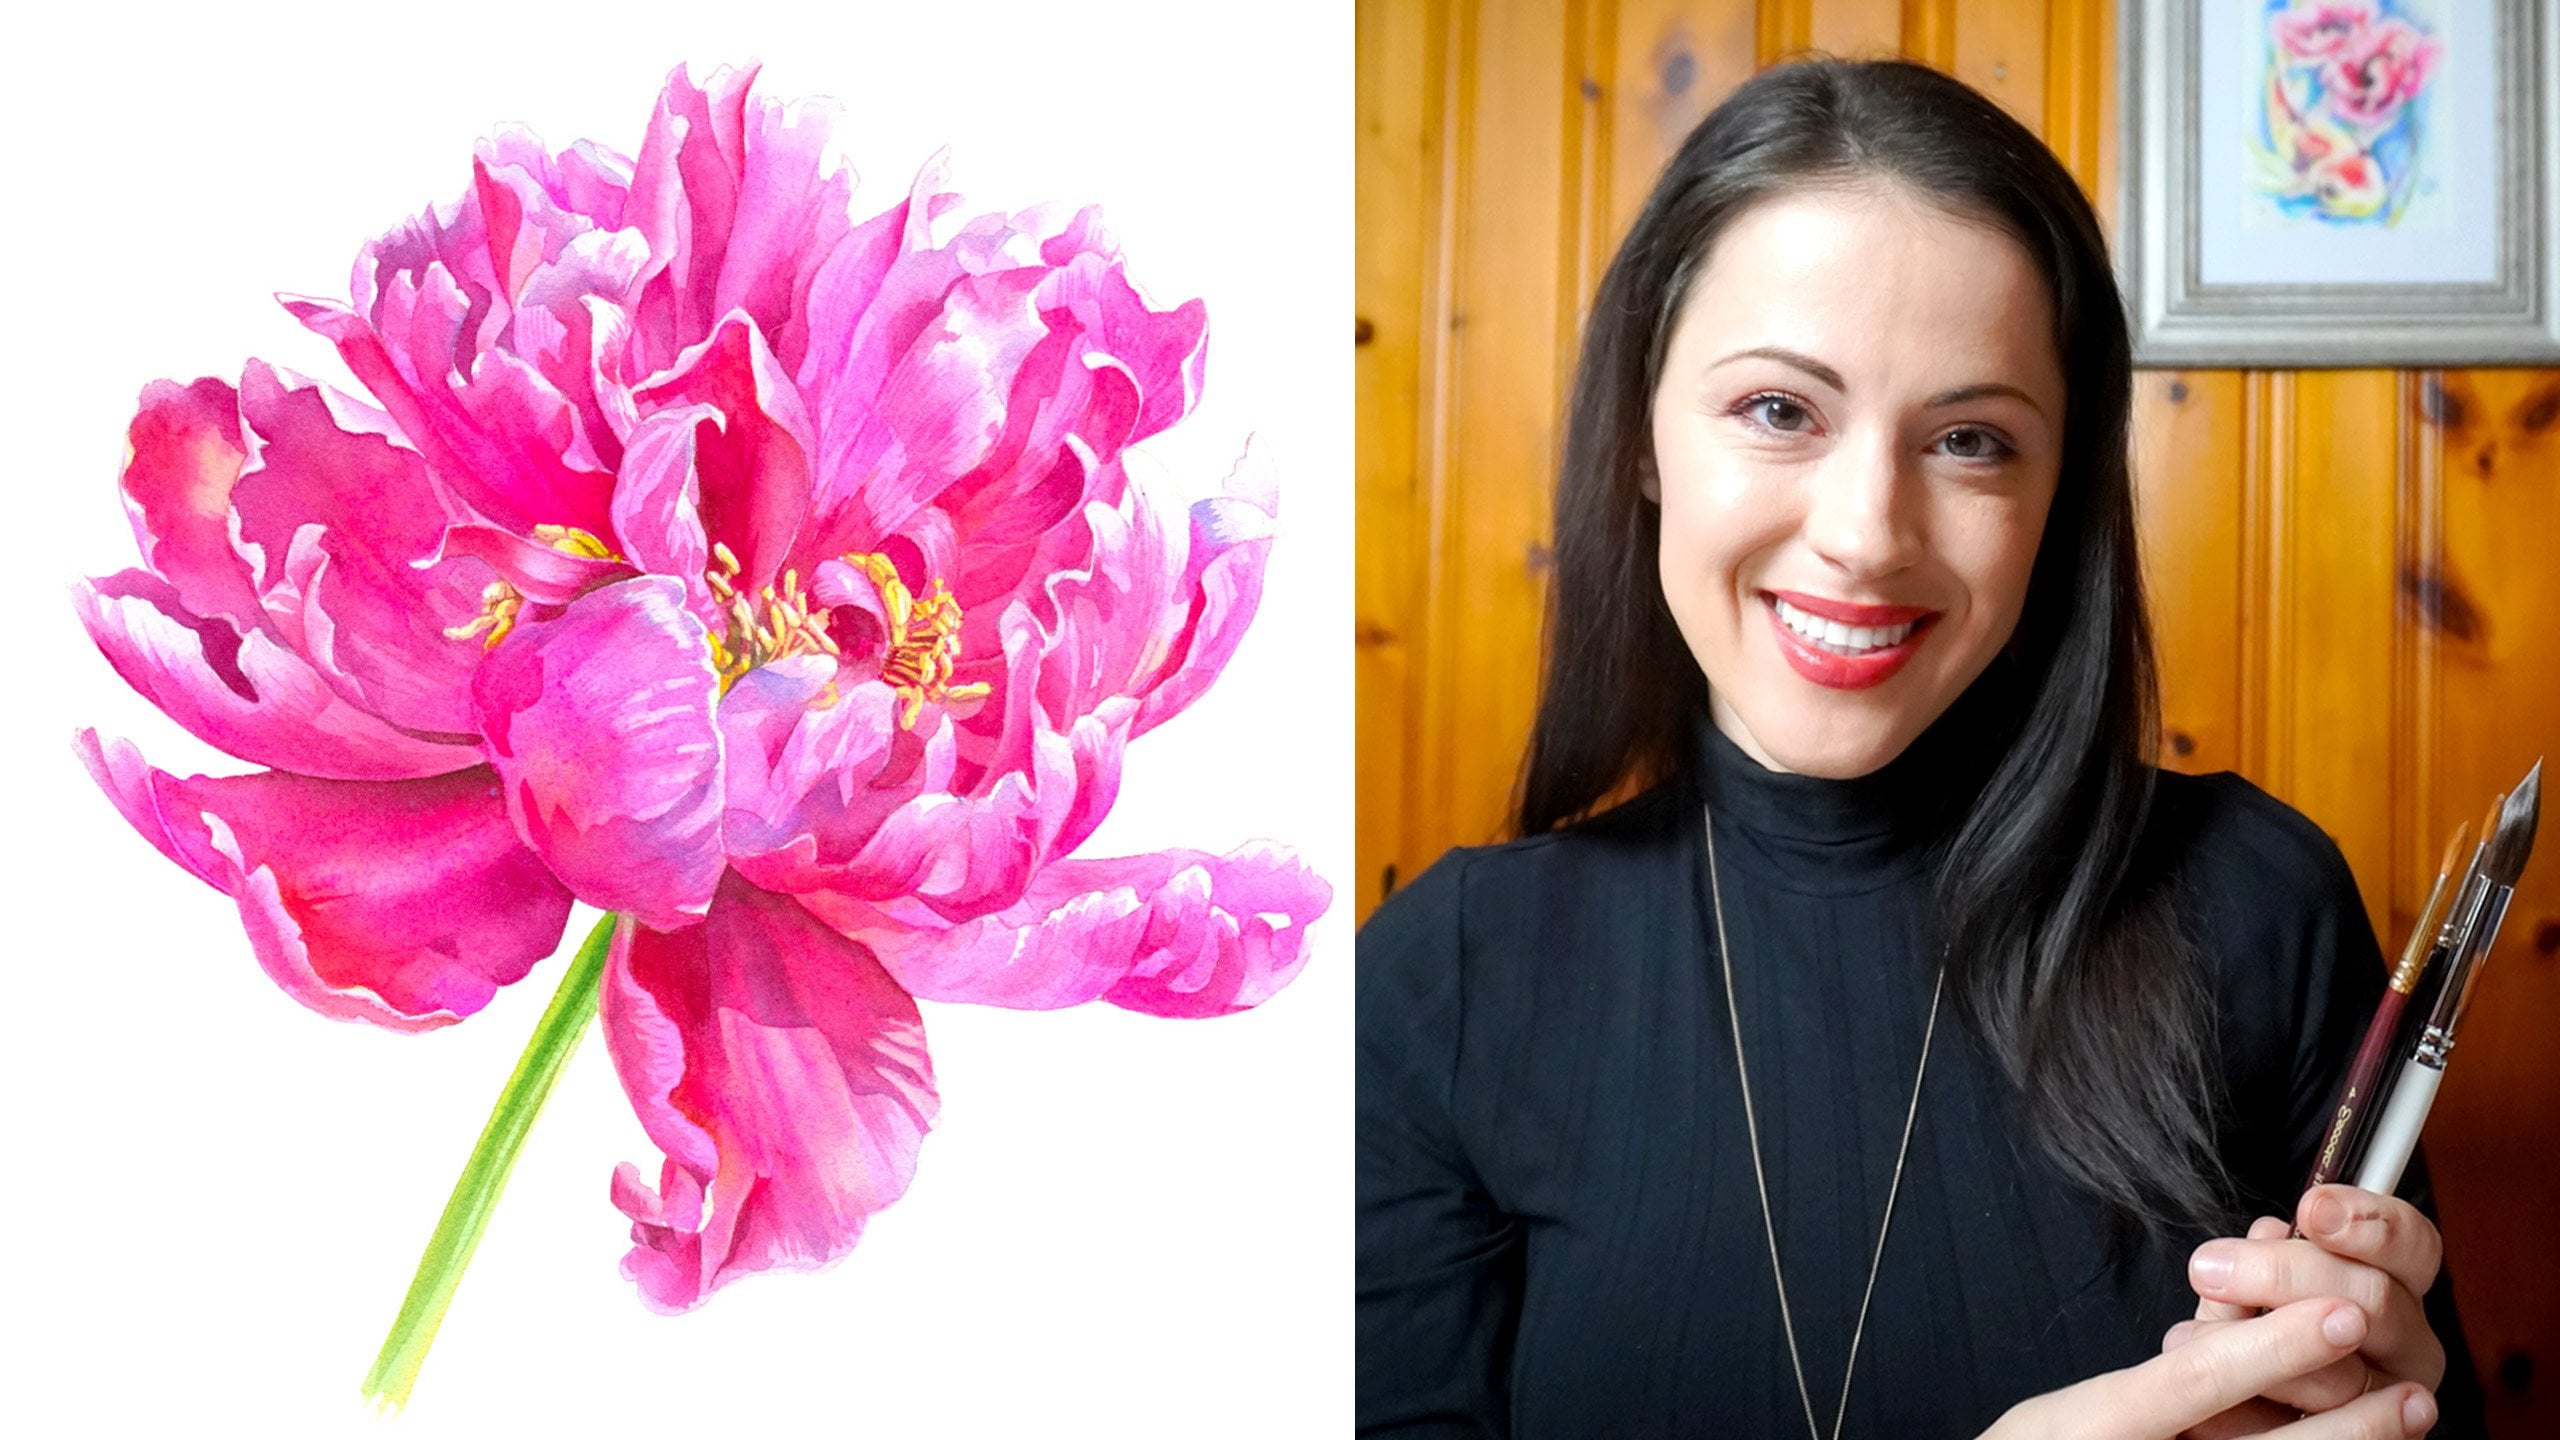
1. Introduction: Hi everyone and welcome to my watercolor leaves masterclass. I'm Emily Watson, a watercolor artist and educator based in the UK. I specialize in painting botanical and natural scenes. So that's things like loose florals, leaves, even fruit and vegetables. And an expressive, very loose quick style. I love to play with a wetter my effects of watercolor. I'm really bring some life and some interests and my work. You can find me on Instagram or Emily wall. So Arts where I share my work, my inspiration, I'm tutorials and also creative challenges to encourage other people to get painting. In this class, we are going to be looking at painting watercolor leaves. Now they're one of my favorite subjects, especially for beginners, because you can get the shape of them with just a few brushstrokes. And that's the method that I'm going to be teaching today. So we're going to be looking at how to use brushstrokes and the way that you move your brush to create the shape of different leaves. And then we're going to add various effects on top as well. So today we're going to start with some color mixing and looking how to make different greens. And we're going to move on to the different brushstrokes that I use and how you can utilize those to create different styles of leaf. And then we're going to look at adding different effects, whether on wet, on dry, and then building out a composition into a branch or a stem. And finally at the end, there are two projects that you can do. You can do both of them or you can pick your favorite. And what we're going to do one that is a scatter composition, so it's layering different leaves on top of each other. And then a wreath, which I'm really looking forward to. Please don't forget to share your work in the project section at the end. Or you can post and tag me on Instagram or both. I absolutely love to see what you guys create, so please do share it. All right, Then let's get painting.
2. Supplies You'll Need: All right guys, before we get painting, Let's have a quick chat about supplies. So for this, you will need paint, brushes, paper, water, and something absorbent like a piece of cotton or some kitchen roll. So first of all, paints. This is my pretty messy. What color palette? It's a cheap plastic folding one. And what I do is I buy the paints in tubes in liquid form like this. So these are all Winsor and Newton professional paints. I choose the colors to make it my own palette. So I buy them in the tubes. I squeezed them out into the wells and let them dry for a day, maybe two days. And then I just come back with a wet brush, rehydrate them, and start mixing them in the wells. So that's my palette. For paper today we are going to be using two types. So I have here a big A3 size, the Langton paper by Daly Romney. So this is cold press a 140 pounds and it is cellulose paper, It's not cotton, so this is a slightly cheaper paper. That's what we're gonna be using for practicing. And what I do is just chop it up into smaller pieces. And then for the final projects, we're going to be using Legion Stonehenge, Aqua cold press. So this is also a 140 pounds, but it is 100% cotton and so it's a slightly finer paper. I also like to buy it in a block, which means that it's glued in place. I don't have to worry about taping it down or it moving as I paint. And it also stops at buckling too much. So if you want to really premium paper, this one I really recommend. Okay, For brushes, we're going to be using just really one type of brush, which is a round brush, which is anything that has a round farewell here, and then a pointy tip. So I basically use two ranges from the same brand. So Princeton heritage, 1450 round brushes. I've got a few sizes here, a 10 or five, really big 16 there. They're notoriously difficult to get hold off. So I also like the aqua range by Princeton. Again around they just have a slightly pointed tip by fined and they keep their shape a bit better. You can see these can get little fuzzy after awhile. So yeah, size eight. So I six eyes to lots of different sizes just depending on how wide the Federalists, Yeah, I love round brushes. They're my favorites. And then we're going to be using to water cups. This is really important for watercolor because the water is such an important part of the paint mixture that if you were to guess dirty or it gets lots of other colors mixed into it can make the college, you're mixing the dirty and make the final painting look a bit dull. So there are two ways to do this. My method is to separate out warm colors and cool colors. So in this eye wash off my reds, my oranges, browns, my yellows. And in this cup I wash off cool colors like blues or greens. So what happens is that then they don't mix together and create brown. If you mix warm and cool, you're going to get brown, which keeps them nice and fresh. If you don't want to do that, you want to know the method. Some people use a dirty and a clean cup. So they wash off their brushes in one. And then they pick up clean water with a now clean brush and then mix the colors that way. If you really can't do that, I recommend typing out the water quite regularly. Otherwise it does just get all dirty. And then the final thing we'll be using is something absorbent to dry the brush or pick up any excess water? I'm using like a kitchen towel here. But if you've got a piece of cotton or any old absorbent fabric, that's perfect as well. Now I will say one final thing on the supplies. You don't need these exact supplies that I have. Use whatever you have at home. I really don't want you to go out and buy anything for this class. It's not necessary. We'll just be using whatever paints and paper that you have a home.
3. Colour Mixing Greens: So first up we're going to do some color mixing. And this is one of my favorite ways to start painting anything. And we're going to be mixing lots of different greens. Now. Greens are essentially mixture of yellow and blue. So there's the two primary colors and we mix them together and they make green, which is a secondary color. So here I am putting some lemon yellow in and then maybe a little cobalt blue. What is going to mix a green color? So if we put that on the palette, you can say we've made ourselves a nice green. And essentially you can then use those ratios to change your green. So if you have more yellow in it, you're going to make a yellowy green like an acidic green like that. And then if you add more blue, that a lot more blue there, we're going to make a more bluey turquoise, green like that. So you can use the different ratios of yellow and blue to make up a green that you prefer. We can also vary the temperature of the colors. So let me wipe that off for a minute. So we can use warm colors. So this is a cadmium yellow. And then we can add some leaves like an ultra marine. This should give us a slightly muddy brown green. There we go. So you can see that's a kind of forest green. So that's using warm colors. You can also do the opposite and wipe off and do cool color. So if we do a lemon yellow there, and then a call blue, like Prussian blue for example. You're only going to need a bit of plush. Prussian blue is very, very dark. You can make them quite a clear, cool, green color as well. So can you see this one is kind of a war memorial. Yellowy Reddy tone and this one's a cool, a blue-green. So you can play around with the temperature like that. You can also buy premixed greens if you don't want to mix your own. So there's a couple, I really recommend sap green, which is one of my favorite greens, which is what we call a mint green. So it is somewhere in between, equally in between yellow and blue. You can then vary this up as you did with the other colors. So you can have sap green, and then you can add Prussian blue to make more of a bluey green, and vice versa. You can add yellow into it as well. I actually keep some yellow. The second yellow in my palette over here where I can mix up green yellows without smudging my regular yellow. So if you paint a lot of greens and a lot of leaves, That's quite nice. Little tip is to have a yellow that's for mixing with green, so you don't dare to yellow. So that was sap green. Another one that I really recommend is Hooker's green. So this is more dark. Forest green is very on the blue side. It's great for if you want to do forests or tropical leaves. And again, you can add even more blue to that to make more of a julie turquoise tone. Now, one more tip when you're mixing greens, if you want to mix up some greens that are more muted, more vintage, or you need to do is add the opposite on the color wheel. So perhaps a bit of red. So if we get our sap green in here, and then you want to dial that down and make it a bit browner bit more neutral, we take just a very small amount of red, maybe not even that much, and mix it in until you can get a more moss color. Like that. If you keep adding red, you will essentially get to a slightly dirty looking brown color. And you can take this as far as you are comfortable with and without mixing something that looks a bit like that. You can also use colors like close to read. So things like pink or orange. Just to try out different towns is a really nice activity to play around with some of the colors. If you add pink, especially to something that's very blue, you're going to get more of a smoky blue. That's a great way to get something for eucalyptus, for example. So you can add in other opposites on the color wheel to meet any color that you like. You can also add obviously browns and blacks too dark in them. So if we take a little sap green again, and then you want to add some black to dark and it will get a deeper tone there compared to the original sap green which is there. Okay, Then one last important thing to bear in mind when mixing colors is to do with value. Now this is something that makes such a difference to the way that began as paint. So I really recommend playing around with this. And what you essentially want to do is change the value or the lightness and darkness of a color by adding more or less water. So if I use quite a dry brush and pick up the paint from hookers green there. And what we're going to get is a really deep rich color. We're going to paint a little square and then we're going to rinse that off. Just wipe the brush on the edge of your water cup and then come back in for a lighter value. It's not a different color, but it is a lighter value. And we're gonna do the same thing washing y. And then again, wash and y. And you can see how from one color you can get so many different levels of lighteners. So many different values out of this. And what we want to do is we paint is think about this value scale. So we have some that are very dark and some that are very light. And mostly, I mean, this is just water with like a tiny hint of watercolor in it. And we want to be using these different values as we paint to create contrast. And what this will do is create depth and movement in your picture. So this is how we mix various greens in watercolor. Have a play around with your colors. If you don't have these exact colors, they might come out slightly differently. But the more you mix and play around, the more you're going to understand your paints and how to mix them into the colors that you want.
4. Brushstroke Drills: Okay, so before we start painting leaves, what we're going to do is look how awesome drills. Now, a huge part of my painting philosophy and the classes I do is focused on brushstrokes. Because once you have control over the brush and how you're moving it, you'll see that you can almost without even trying make the shapes of leaves. So this is a really good way to get into painting leaves and anything really. And I really recommend that you stick with this one and practice the drills. So we're just going to use any color you like. I'm going to use Prussian blue. I think the darkness of it is pretty easy to demonstrate on the video. So I'm going to use Prussian blue. We're just going to practice a few different brushstrokes. So the first one we're just going to do is just to put your brush on the paper and pull it along. So what we're doing here is just making lines and using the brush. You can go quickly or slowly. You need a bit more water when you can see it starting to skip there. You can also do down or up. But essentially what we're painting here is straight lines, just dragging the brush. You can do long ones or little Show Options. Just really getting a feel for the brush that you have. What I'm gonna do is all of these strokes, by the way, with just one brush. You can try different brush styles or shapes and really experiment as you want. What I want to show you is the versatility from just one brush here. So these are really easy to do. And then we can try in different directions as well. You can try if you can go diagonal or diagonal in the other direction. O, do little down with one's alternate down, up, down, up like that. And this starts to give you some idea of the different shapes and you can see how we can easily start to turn these strokes into leaves. So another technique that we're going to focus on a lot today is using the round brushes for both the tip and the flat belly. So we're going to do the tip. For example, if you hold the brush more upright and you do thin lines with the tip. And again, you can do that in different directions. You can go slowly or quickly for little marks. And then the other way to use these brushes is to press them down flat and drag. So that starts to give us a wider stroke from the same brush. And then what we're going to do is practice using both of them in the same stroke. So using the tip, just touching the tip down and then pressing with the belly and then lifting backup. And what we'll get then is a little point. So press down, lift up. Use the tip. And then press the whole thing down and drag it a little bit and lift it up again. So what you're aiming for is a kind of elongated, pointy. I don't know what shapes that is. A sort of semicircle. It's not even a semicircle, It's just a line with pointy edges. There we go. It's a very elongated, oval. I don't have someone come in and tell me what shape that is. Somewhat better shapes and derogatory than I am. So what we can do this is also vary the length of it. So you can do a little short one like that. Or you can do a really long one like those. And then what we're going to do is try it in different directions. So can you do on pulling down towards you or going away in diagonal? Don't worry if you make a mistake, just carry on. Can you go up or can you do I'm crossing. Really getting that muscle memory answer that you're doing it quickly and almost without thinking. So that's really the objective of the drills is to be doing and doing and doing until you are not thinking about it anymore. You're hundreds knows what to do. And you're not kind of get yourself into a point where you start painting, you hesitate and it starts to fall off. So the other thing you can do once you've mastered this technique is then to vary this in and now in the same stroke. So we start with a little bit and we press down, we lift backup, we don't lift the brush OK. And then we repeat. So we can get a sort of wavy line that you can try putting more and more pressure on it. And I'm pulling up. And then again with the directions of it, it's really useful when you're learning to pain to be able to do the same stroke in different directions. So you can do this one up and down. Little bit more water on that, for example, or try it in different directions. So the mastering control over it in any direction. Okay, Let's get a second sheet. So the next step that we're going to try is trying to get various directions in one. So if we mix up some more blue and then we try, for example, a curved stroke. So not straight lines anymore. A curve in that direction or that one. Or more like a U or an N. And you can do long curved strokes or little short loops like that. We can try short loops that way, or short loop along one and a short one. And you can also try then to create a pattern where is even so you're doing almost like a letter U over and over again. And you can do that upside down as well. Like a lot of em stuck together. So these are quite useful to get your hand happy to move around and getting that variation as you do the stroke. And you can also try where we skip one. So instead of doing, it becomes like a continuous wave or a line. And again, you can do that in other directions as well, you know, coming down. Another useful one to learn is a loop. So you go up and then almost back on yourself to make a loop. And you can do that the other way as well. And then the final stroke, it's worth practicing because this will come up later is a zigzag. So for this, focus on how you can use almost the side of the brush and to push and drag sideways. So for example, we do is excited like that. You can use a standard brush up and get a thinner stroke. Will lay the brush on its side and get a really thick stroke. He needs a lot more water like that. Now, I really encourage you to practice these drills to get yourself even some cheap like notebook paper or printer paper or whatever. And just do these sorts of drills over and over again. I'll also put a printable in the resources if you want to do a bit more practice. And they really helped must your control over the brush. And it will be really useful for painting the leaves later on in the class.
5. Simple Stroke Leaves: Okay, so for our first type of leaves, we're going to do simple leaves or single straight leaves. So for this, I'm going to use the greens and we're going to practice some of the strokes that we've just done in the drills. So let's mix up a nice sap green. And then essentially we are doing the same stroke. So we can do a little line for a stem and then press and pick backup. And that's your leaf. Stem. Press and pick backup. And don't worry about if you got a bit of a smudge like that and you want to change the shape. You can just go back in and tweak that. They don't have to be perfect first time. Although there are simple stroke leaves, if you don't like the shape of it, you can go back in and tweak it and it's not a problem. So we can make these very pointy. For example, we have quite a long, little bit rounder. Or we can make them rounded tip by just lifting up like that. And they have a sort of stubby, rounded end. You can also almost pull the brush back through as well. If you want. To create a nice rounded end. You can also do these in different directions again. So just pull it down and going that way, for example. And the other thing you can do is try the same thing but with a much bigger brush, which is really great for single stroke ones. So for example, Let's get this huge size 16 and look at that. And then you can go around the edge and just tidy that up if you want. You can also pull it. If you wanted to create a bit of movement in it, you don't have to do it straight. You can also make it curve. So for example, if we start one here and start pressing and then pull the brush round. Okay, that is a single stroke leaf.
6. Long Stroke Leaves: The next step we're going to do is what I'm calling a long stroke. It's a very similar process, but we're just going to drag it out much longer. So for example, we put the brush down with the tip, we press down, dry quite a long way and then pick backup. And this makes a leaf something more like a leaf or a daffodil leaf or on a palm frond, for example, if you want to do more tropical colors, you can take a few strokes to get there. But the idea is that it is then one long line with a little tip. And like with the last ones, you can carve them as well. So move them around in different directions or have it going over like but so that it cocks have one even going around in a circle if you'd rather. You can also again, use a big brush for these. I love to use them. A huge brush for painting leaves. These grateful if you ever want to paint tulips or any of those plants that have really long straight leaves. You can make them the whole width of the paper if you want. They're really simple. Long version of the single stroke leaf.
7. Split Stroke Leaves: Okay, so the next type of leaf we're going to do is probably my favorite and this is the split stroke leaf. So we're essentially going to do the same sort of thing, but with two strokes. So for example, let's get loads of water on here. We put the brush down political stem and then we push the stroke. You're pushing it out to one side to do half of the leaf. And then we come back. We touch the brush back to the base, and then we pull out and do the other side. Let's do that again. One stroke and then two strokes and connect them at the top. So we're connecting at the base and then again at the tip. There we go. So as with everything, you can do them in different directions. Some people prefer to pull them, some people prefer to push them away from them. You can use multiple smaller strokes to make the shape that you want. If you decide actually I wished I was wider or don't like that. But you can go over and use as many steps as you want to make the leaf, but it's essentially done in two hops. You can also leave a gap in between the two halves for almost a highlight or whether the vein of the leaf would be. So you can do and then come back and leave a gap. For the other half. Can be quite a nice way to make sure you've got lots of whitespace left and pictures and stuff overcoming one big blob of color. Again, these can be done using the short or the long strokes that we learned. So you can do a little short one or you can do a really big old long one. You can also make them thinner or fatter. Broader. Let's not insult the leaves and up fat. So you can make a little thin one like that. Or you can really press the brush down and go out for a much broader stroke. And you can have a lot of fun with the tips as well. You know, do you want them to bend? You can pull the brush out and create little details. The split strike leaves also on my favorites. And once you get the hang of like pushing up and then pulling down to create the shape of them that they become a really great thing to do drills with as well. You can push up like that and pull down and then you can always go back in and fill the center if you like. Tweak the shape of it. Again, I really encourage you to try out with different brushes. If we try a, say, a really little size two, It's going to make very delicate little baby leaves. For example. I'm all very good, long thin ones. A lot of sizing on it. And again, with a huge brush. I love to paint with a huge brush and can't recommend enough that you get a massive one. And they're also really good for forcing you to stay loose if you want to do more kind of loose floral work. And you can leave a little gap so you can join them up. And you can do drop the point of it more if you want to change the shape of that. But essentially we doing half and then the other half.
8. Zig Zag Stroke Leaves: Okay, and then the final leaf type that we're going to learn today is what I would call a zigzag stroke or a roughly. Um, so these are really great if you want to do textured leaves like sunflowers for example. And we're essentially going to use this exact stroke and the split stroke. So if we start with a stem and then you're going to use the brush on its side. And you're going to drag back and forth to create a wide base and then a point. Okay? And then we're gonna do the same thing in the other direction. And then we have as exactly if you try that bit darker. So you can also draw a stem up the middle and then zig-zag. And again, dragging and brush around to create that rough edge and that texture. Can do it if you prefer to pull down or go up. However you want to do it, you can also turn the paper. You can also turn the paper. If you find a funny angle and you might drop your brush like what happens to all of us. The other thing you can do is leave more whitespace in the middle. So for example, if we draw a bit of a stem up the middle and then we can pull and sort of leave whitespace in those gaps. And do that a bit darker so you can see. And then we can do the same thing on the other side. You can see how these are great for like oak leaves. Or if you just want something, you've got a bit of a rough texture of the flower. And these are great leaves to fill that space. And again, you can vary the direction of them so they curve. So you can pull it up like that. Pull it down and you can also, again go back in and tweak the shape of it if you don't like if that's been rough or if you want to shape that again. And you know what I'm going to say next? Don't you play around with a giant brush? Have enough myself much space for this, but the textures you can get with a huge, huge brush. A second to none. So have a go at trying these in different directions. I've run out of space on this paper, but by all means, start another sheet and keep practicing.
9. Wet on Dry Techniques: All right guys. Now we're going to have a look at adding wet-on-dry details to these. Now this is a really great technique if you've got any big leaves or if you want to add more interest. So we're going to look a few different techniques to really bring them to life and add extra details. I'm so one of the first ones, especially with leaves, is to really think about the vein. So I'm using a size two brush here. I'm gonna go back over the stem and then just pull out some vein details. You can add as many or as few as you want. You can go from a central vein. You can also do if one big one and then we'll have some little ones just on one side. You can also do more kind of loose veins by just, for example, doing a bit of a long wiggly line. You can make the stems longer or thicker as well to create nice contrast. Another thing you can do with wet on wet is to use a layering techniques that you can essentially add more color over the top of a lighter one. So for example, on this one, if we fill it, the the leaf Hobbs with a darker color but without going to the edges will be able to add some interests into this. Essentially by filling in the shapes. You can create some good contrast in there. You can also, if you want to do a more detailed version of that, you can let's say little sections. So for example one, and then we leave a space for a vein and then do another one. And the same on the bottom so that you're almost kind of filling in the dock in a section. And then you've got that sort of interest in layering on some other techniques you can do. You can do around the edges as well if you want to just incase the leaf in a bit of wet on wet, wet on dry detail, I should say. And maybe do a little stem as well. They in detail. Or you can change the color as well if you want to lever up, say, a bit of blue to half of the leaf, really change the color and additive interests that way. So there are lots of different techniques for adding details on dry to your leaves. You have to let the base layer dry. And then you can come back in and add contrast or details. So they really nice techniques. The other wet-on-dry technique you can do that is really good with leaves is a glazing. So that is where you've got quite light base that's dry and then we're going to glaze. And another light tone over the top, but in a different color. And where they cross over, you're going to get really good. And it kind of mixes of the colors. So for example, if you've got a stem that's a big gap and you want to fill in some of the gaps, what you can do is come back in with a different color and then add some leaves over the top, maybe in blue. And then what you're going to get is where they cross over, you're going to start to get other colors coming through because it's to do with the translucent layering of them. So if we add a bit more of a green blue on the other side. And then you can see whether it's layering. It's creating another kind of third color there. So this is a great technique if you want to fill in some gaps or you finish a piece and you come back to anything. Capital is a massive capillary. I don't know how I didn't see that. This is a really great technique for that. You can make your stems like a lot thicker and fuller. It doesn't have to be this striking a color difference either you can try, you know, even just a darker sap green will work. And it helps if they're both translucent for the best effect. If you do a very dark value, you're just going to end up with irregular layering and you won't get that nice crossover effect. There we go. That's a glazing technique.
10. Wet on Wet Techniques: Okay, so the final technique we're going to look at today is wet on wet. So this is about adding details and interests while the paint is still wet. It's one of my favorite techniques in watercolor because it really, it's unique to the medium. You know, it's not an effect you can get with oils or acrylics pencils. So for example, let's put in quite a big leaf so that we can play around with this. So you want your water to be just gonna pick it up there. Consistently wet but not puddle. So when you move it, it shouldn't all rush. And when you move the paper, they should all rush to another part. That's the sign of a puddle. And wet-on-wet technique works best with even wetness but no puddles. And then we're going to pick up a darker color. Maybe some of these really dark from earlier. We're just going to touch it into the wet paint. Now, the more water you have on your brush, the feather it will spreads. If you have a very dry brush and you put that in, It's not going to spread very far. But if you have a very wet brush and lots of wet paint on it, then it's going to spread a lot further. Now, you can touch this to the edges. You can draw up the middle. And what we're going to do is allow that then to spread on dry. And one of the best things about what's cool is that it's so unpredictable. You, you're not going to have that much control over how it dries and that's what makes it magical. It's a little about to the, up to the watercolor. God's up to the universe, how it comes out. So we can do, for example, a stem and allow that to bleed in and then maybe the tip as well. That's quite nice little technique. Pick up some more hookers green there. You can also do, for example, if we do a little one here, you can do say a vein detail of the middle like we were doing with the wet on dry but while it's still wet. So if we do for example, the stem and then nice vein detail way to the tip. You can also do a color just in one part of it. So if you want to do, for example, rather than necessarily dropping the color in, what we can do is paint half with one color and then paint half with a different color and allowed us to blend. And in the wet on wet, they will simply all mingled together. I really like to also play around with the different types of green. So for example, if we mix up a nice mid green with sap green, for example. We then put a regular leaf in there. And if you find yourself looking at it, thinking, it's kind of a bit boring. And you can start to add, pick up a bit of yellow and add some yellow pigment and go already, that's more fun. And then we add the blue as well. Maybe on the other side, and we start to create that variation in color as well. Another thing you can do is an outline in a Docker and, or different color. Um, so for example, if we get a little brush and pick up some Hooker's green on this. And then what you can do is almost trace around the leaf and you don't have to touch it. You can pull out and then come back in, leave little whitespace and gaps. And then that will bleed through, maybe add a little vein detail as well. And that starts to create some really lovely effect. The other, one of my favorite wet-on-wet techniques is to do just a color or a water drop. So for example, if we do quite a dark one this time, we do hookers green leaf there. And then what you can do is common with a bit of water on your brush and just drop it in and watch it move the pigment around. You can also come in if you want to drop some other colors like that. And then let that dry. And it will create lots of really interesting effects in the paint. The other thing that's really useful for wet on wet is when you've got leaves that are touching each other. So for example, you can have one leaf that comes up here. And then you might have a dark leaf next to it and you allow them to touch. And then where they touch, they will bleed in together. And it will create lovely effects. You can also touch the stems if you want to. You can also if you think actually this is, you know, there's not that much bleeding going on. You can always go back in with your brush and just tap more color in there and it will spread further. Smooth out any puddles and you are good to go. Another technique you can do with these so many ways you can use wet on wet. So this is not an exhaustive list. Is actually to create a leaf and then put in a stem of a different color. So for example, if you've got a bit of a brown stem, for example, let me get on another person. If you want to do a brown stem and then simply connect them and allow it to bleed like that. And you can see how it pushes in. You can also do if you want to do some autumn leaves and the brown is a good choice as well to show them as they start to decay. So if we pull Beverly felt like that. And then we add some brown around the edges there to show it starting to go in autumn. Or reds if you don't want to do brown, but gives a really nice texture as well. So these are just some of the ways that you can make your leaves it more interesting and create nice effects. Vary the color up. And really make sure that they are interesting. And they don't look like just one big flat blob of green.
11. Stems Composition: Okay, so now we're onto probably my favorite part, painting leaves, which has to do with building them into stems and the composition of them. So first up, we're going to look at some quite simple compositions of leaf pairs and triple leaves. These are great motifs to having your painting toolkit because they're a really nice way to fill spaces in floral compositions, for example. So we're going to paint some little leaf pairs. Um, so essentially for this one or you want it leaves that are in some way connected, whether you're connecting the stems or along the leaves themselves to touch you, creating little pairs. And you can also do this in a triple if you pull out that way. And then we have another one coming up here. And then the last one coming in this direction. So what you'll see with these as we're making them, is that I'm trying to change the value on the color. If we paint all of these in exactly the same paint mixture, they're just going to look flat and two-dimensional. So what we're after here is making variation in the color. You're adding hookers, green or blue. You're adding more water. To make it a lighter value. You changing the direction, you changing the shape you're adding, highlight, whatever you're doing. The idea is to create variation and making it look natural. And you can see how these little motifs are going to slot in between, say, a floral. So there are really good ones have in your toolkit. The next thing we're going to look at is painting a simple stem. So one of the most important things to remember it stems is that they should not be straight. You don't see stems like bought in nature. And then they're going to have little like leaves coming off at right angles the way that children draw them. And that's just not going to look natural at all. It's going to look static. Strange. So first things, first, the stem should curve. So we pull up a stem like that. And then we want the leaves to go in the same direction as the stamps and not coming out a right-angle. That going I'll just do a rough one so you can see the idea. They're going in the same direction. Can you see how much more natural that looks then this very static angular one. So that's the effect we're going for. So let me get some brown on the other brush. And we can paint ourselves a curved stem like that. And then you essentially have two ways of doing the leaves on this. You can either do the leaves directly off the stem. So they are adjoining it. Or you can paint little mini stems for the leaves. So for example, we do a nice curve. And then we do some stems. They're not coming out at right angles, but they are going in the same direction. And then we can add our leaves. And what this will do is just create a bit more space between the leaves and the stem so you'll get more whitespace. It'll feel more like a branch. It's also a really great way to get some brown bleeding and which is a lovely effect. So then you've got a bit more space, whereas with that one you don't have so much. If we get another shaped. One of the thing you can do with Stems is to do with how you arrange the leaves on them. Which of the two different ways that they appear in nature. And they're both right, it's just a personal preference. So if you have, for example, let's paint two little stems there. So you can either have your leaves. Let's try your hookers green for this one, just for a bit of variation. You can have your leaves that are joining each other. So they are pairs coming up from the same point of the stem, but just on different sides like that. So that creates some things very symmetrical. Um, or you can have alternating leaves. So for example, one day and then the other one would be further down, and then the next one will be further down. And then on the other side further down. So they are this side, that side, this side, that side, all the way down the stem. They're both valid and appear in nature. It's more personal preference. This one is more symmetrical and this one is a bit more. It's still not random. It's, it's got just a natural variation to it. Lead to different styles that you can play with. And as with all of the techniques that we've learned throughout this class, you can of course, create variation in one of my favorite things to do is to cross stem Dover. So for example, if we have a stem going that way and a stem coming this way. And so we can create some really nice kind of crossovers and textures and bleeding in those. So if we pay one like that and then we'll get a different color for the other one to maybe do it differently for smaller. Little dark leaf will be doing some of this in the final project as well. The big stem crossing, you can do it while they're wet or you can let the first one dry and then paint the second one over the top. And it's entirely up to you.
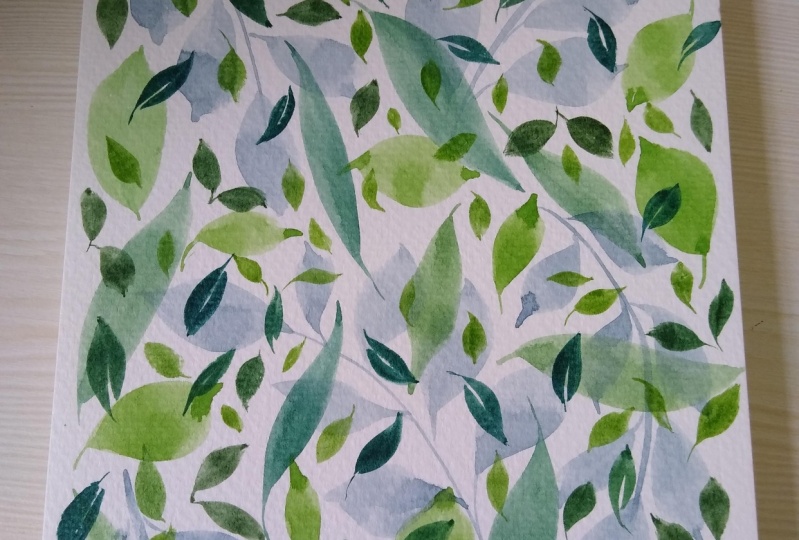
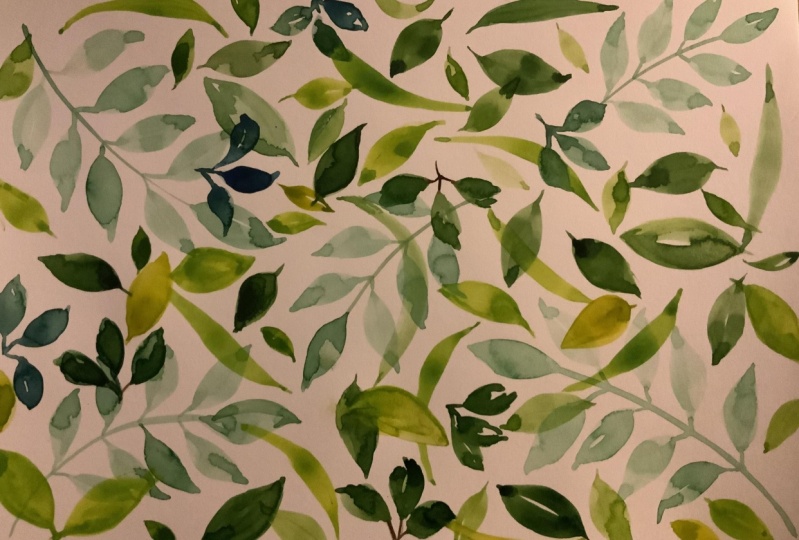
12. Project 1 - Scatter Pattern: All right guys, it's time to do the first of our two final projects. So I've given you two options in this class. You can do both of them or you can pick your favorite. We're going to start off with leaf layering. So this is essentially a scatter pattern. So if you imagine that we picked up a bunch of different leaves and stems and threw them in the eye and let them land on the paper. That's what we're going to paint. So I'm going to start with the underlay. So I'm gonna do this in a light value and a bluey green. I think. I love these kind of bluey greens faded out into like a eucalyptus type color. What I'm gonna do is just paint some stems on the base. So for this project, we're going to be thinking about layering using the different techniques that we've learned. We're going to be thinking about color. So we're going to add some cool colors like blues and some warm colors with more yellowy greens in. We're going to be thinking about direction. So how can we have leaves going in different directions and where do they cross over? And this is, it looks more complicated than it has in it's surprisingly easy to make this look good. So it's a great project for beginners. So we're going to work relatively quickly. Because sometimes I think, especially with composition like this, it's really easy to overthink it. And to spend ages going mood, I put that here or there. I really encourage you to just make decisions. Your paintings and nearly always better for it. If you really struggled with that. One of the things I recommend is actually setting yourself a timer. So you have, say, five minutes to finish a painting. And that will really stop you from overthinking it. So you can see what I'm doing here is this one's coming down, that was going up that way. This one's coming up that way. We are varying the direction and filling the space with a nice light color. This is going to be our base layer. For love. This pale blue. I mean, what is that? Duck egg maybe or I don't know. Tell me what you think it is in the end the discussion. The other thing I'm gonna do this is try and create odd numbers of things. So what we don't want with any composition is for it to look too symmetrical, which is going to look unnatural. So what I'm gonna do is create se sections of three or five instead of twos and fours. Because it just looks so much more balanced away without looking static. Let's do one last one. Let's go down again. Can you see how this down is contrasting with that one going up and round? You can see also that I'm being quite rough and random with these, I'm not worrying about the leaves being perfect. They're not symmetrical than not. In many cases, even straight. That's absolutely fine. The point is to keep, especially when you're painting natural things, is to keep that variation of, okay, next layer we're going to do some sap green. Now, I'm going to try and let the base layer dry as much as possible, but I might let some of it touch for a bit of wet on wet. And if you don't like touching, you can always leave it to dry or give it a bit of a blast with a hairdryer. And so what I'm gonna do is then just fill in the gaps. And we're going to make these different by making them a bit thicker. So we've changed up the color, we've changed up the size. We're going to try lots of different directions and essentially fill those gaps. So it's supposed to look random, like we've thrown some leaves up in the air and this is how they've landed. You'll also notice that I work from this corner and kind of go across. It's a right-handed thing. If you're left-handed, you might want to start in this corner and work down. So I'm really taking care to lift my arm up off the table, give myself lots of freedom. Making those knees nice and big. I'm going to try some with a bit of a highlight in the middle. Let's try that. Perfect. Okay, we're going to fill in this gap here with a nice thick one. Now the great thing about these sorts of competitions is that there's no wrong way to do it. You know, you are simply looking at the paper in front of you and filling in the space. Okay. We are now going to fill in some more gaps with a slightly darker tone. So what I'm going to do is get that sap green out and then start adding some blue. I will add a bit of Prussian blue to get us a nice deep color. And then in this one we're going to do some longer leaves. So for example, we could pull one down there and start to layer that into a nice long leaf. Maybe whatever then it does the same. There's going to be a bit smudging that, but I quite like how that looks. If you don't again, you can dry it. Let's do one coming up here. And you can see how we're essentially just building this. Really mixing up the direction that darkness. Color, which is one of my favorite ways to paint leaves. You can see where the base layer is dry. It goes on quite well and then if it's still wet, it smudges. I really like the wet on wet effect. Let's come up the other way. Go. Can you see how we're starting to build this now? With the lightest? Okay? Now let's try something a bit darker and smaller. All of these are quite big leaves and what we're gonna do is some little leaflets. You know how we did the composition where we have the three leaves all connected. So we're going to mix up a really nice dark, rich color. And then we're going to start putting triples. And so maybe one here, turn them in pairs or threes. I think that's still better than I thought it was. No matter. If you've painted with me before, then you'll know that I am brutally bitterly impatient. I can't wait for anything to dry. I actually quite like the smudging effects, but I know some people on a farm. So please feel free to pause the video, draw your work and then come back and do the next layer with me. And I won't be offended. Yet. They'll show ones going on here. That's lovely. I find this sort of thing, very meditative painting, especially when it's just quite simple strokes because you can't really, you can't really go wrong with this. It's just quite soothing. You know, it's all very simple. Not too difficult. Wasn't a very easy. It's not very easy. But it's not taxing. You don't have to mix a million different colors. It's all quite simple mixing simple shapes. Bit of layering. I think you really can't go wrong with it. No, I'll show it to you. So maybe down here. I really want some dark up in that corner. Do another one. Okay? And then what we're going to do is drag that brush and have a bit of a look around and ask yourself, Okay, where are the gaps? You know, there's a bit here, the sum here that feels a bit gap, hey, maybe that. And we're going to go in and fill those. What we're gonna do for this is add some more blue to the sap green and get blue town. Rather than the more emerald color that we've just painted with. And then let's try some sample medium strokes. Can you see how this is still quite cool? So we've got the kind of yellowy soft green going on and then the cool bluey greens over the top. I really like a good bit of warm and cool contrast with these. I'm going to do some glazing as well, even if you can get it a bit thinner and layer over. One thing I would say with these compositions is try not to fill up the middle bit too much with little details. It makes more sense. It just looks more natural with little fussy details around the edges. So we're going in lots of different directions. We're crossing over. And we are fundamentally not overthinking these things. We're looking for areas where there are gaps. We're looking for areas where there are. For example, there is a lot of yellowy green in here. I think we felt that pretty well. And then what I'm gonna do just for some final touches it out a bit more of a yellow sap green. So let's mix up a more yellow we want. So what we're gonna do now is simply fill in any areas where there's a lot of blue like this one for example. I might go back in with a nice yellow leaf and maybe touch those together. Well, so we've got a lot of blue maybe here or there a little long. Maybe. There's quite a bit of blue down here. So let's get one of those in love where it leads. You see how this yellow seems to be really linking it all together. I also really advise using a light value there, for example, can you see it's, it's very translucent. And if you're finding towards the end of a piece that you feel like you've got some gaps to fill, then a really light value. Sometimes it's just all you need to bring that to life. Maybe as well. Okay. I'm going to stop that because I'm at risk of overdoing it. So that is our first final project. Now, if you want to go back in and add wet-on-dry details or veins that would add even more detail to it. But I'm going to stop there. I prefer them quite simple.
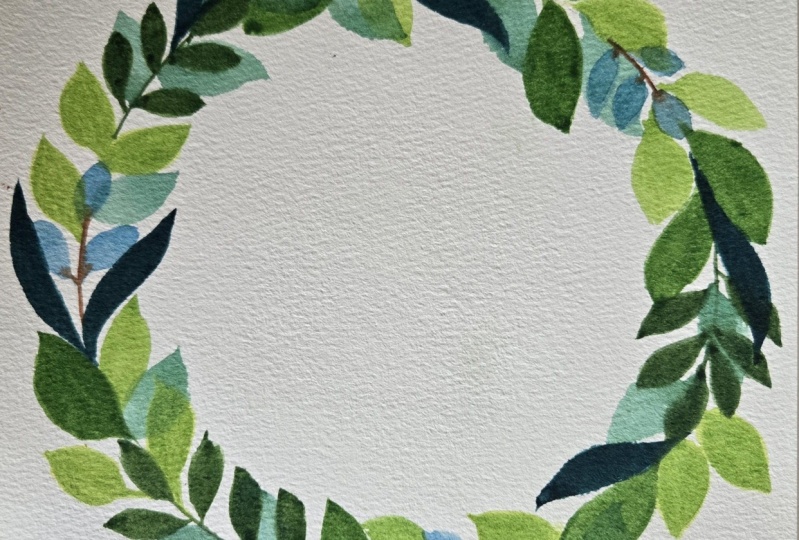
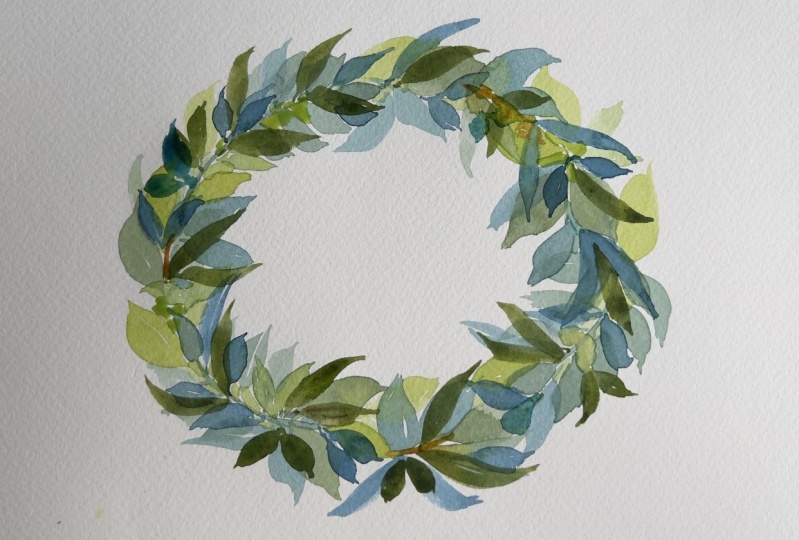
13. Project 2 - Leafy Wreath: All right guys, we are on to the second project, so this is going to be our wreath now, you probably won't see it that well in the video, but I've sketched out a really rough circle outline. I like to leave just a bit of space either side, just for a bit of whitespace. It doesn't feel like it's compressed by the paper. So we're going to be using a range of different leaf types for this one. So what I'm gonna do is start with the darkest, and we're gonna do a sort of framework to begin with. So it makes up a little Prussian, not Prussian blue. Hookers green with Prussian blue. This is Hooker's green. To make ourselves a nice dark forest green. Oh yeah, that's nice. And then what we're going to do is paint some little individual branches with quite small leaves. And what I'm gonna do is do a curved stem and then add some little too straight leaves coming off. I'm, I'm keeping these relatively tight. We want this to feel like a very full leaf, so they need to be relatively tight together. And what I'm gonna do is paint three oh, branches here. Now you can see that I'm using quite a bit of water with this and also working relatively quickly. Now, if you don't have cotton paper and you find that your paper is drying out before you able to come back and add more leaves. What I would suggest is doing it almost in halves. And it's a paint half of the leaf and then come back to the other half. And that will give you some time to paint wet and what effects. And just make sure that you're getting all the nice blends and bleeds. Now what we're going to do is we've built our framework, so we're going to add some bits around it and in the gaps. So I'm gonna do some medium leaves in a sap green and mix this into the palette here. Pick up a little bit of the yellow we were using in the previous project. And then we're going to paint some bigger leaves as well. And we're going to allow them to touch so that they're all nicely blending together. Because I want it. So we're not worrying too much about.
14. Bonus! My Whimsical Leaves: All right guys, We are here with a little bonus video. Now, I've added this in because probably one of the most common questions I get about leaves is about how I do my jag, it leaves. So I'm going to show you a little tutorial if those as well. So I'm mixing up poker's green and Prussian blue. I prefer these in quite a dark mix, but you'll free to interpret them however you like. And essentially they're all the same rules. But instead of creating nice smooth strokes, what I'm gonna do is wiggle a brush around to create some real variation. So paint my stamp. And then I'm going to push out into a brush stroke and then wiggle and pull it down. And the other side, um, I do know the idea is that you create a rough shape. If we add a bit more water and then we do the same thing. And I want them to look ugly and random. Well, not ugly then naturally beautiful. The way that they would appear in nature, they're sort of stylized, but they are, I'm doing is wiggling around and I'm pulling out two little points and then pulling that away and whatever direction. Iphone SE. And if I think that's a bit smooth and I just go back in and do that to it. So it's simply a case of squiggling about. And if I decide you know what, that looks bit stumpy, I might then start feather out and we go back in and join them up. To be the ugly cousin. A beautiful perfect leaves. I'm going to add some more blue. They're almost meant to look like that on this side. So you might say pull up a thin one that's meant to go around because it's being seen from the side and so it's quite thin. And you can add some that then flick up. And so they're going in different directions. And you can add a nice light one after a dark one. And essentially you're just creating random shapes. You know, letting your brush kind of push and wiggle about, lift your hand up off the paper as you paint. If I pull this down and do some more examples, one of the things that really helped me paint loose was actually kind of lifting, you know, if you've got your hand fixed then you're trying to kind of push with your fingers. Whereas if you lift your hand up and rest maybe the middle of your arm, we'll elbow. You've then got a lot of space to move. Unless my hand up on my hand is not even touching the table, the desk. And then I simply just press the brush down, pick it back, wiggle it about. Unless it almost decide where it wants to go. You're only partly in control of this. And we pull it towards me and then bring it around that way. That's fun. And then I might go back in and sort that out. Quite like that little gap. I'm going to leave that. So that is how I paint my wiggly random leaves. And I love the darkness of them are often go back in and purchase mode, colorant. Oh yeah. There we go. That's a little bonus lesson for you.
15. Wrap up: All right guys, that set class complete. Thank you so much for painting with me today. Now, first things first, please don't forget to share your work in the project section on Skillshare. We'd love to see what you create. And secondly, don't stop that. Keep painting leaves. The only way we learn how to do anything is by practice. So I hope this is the stocks if you'll long leaf painting journey. There are lots of ways you can try out with different effects. You could use different colors, maybe blues or papules, or try some autumn colors like reds and oranges. Try different pay per different brushes. This loads of ways that you can take this then and build out into something that's really wonderful. This class is meant is just a starting point. So I hope you'll go into paint beautiful leaves and please do tag me in anything on social media. I love to see them. If you're interested in loose florals. I also have a loose florals master class on Skillshare, which is great for beginners. And if you have any comments on this class or any feedback, I'd love to hear it. Please stick in and review. Go back. I promise I read them all or I am with that. Thank you so much for painting with me and I will see you in the next one.
 Emily Wassell, Watercolour Artist & Educator