Transcripts
1. Introduction: Hello, and welcome
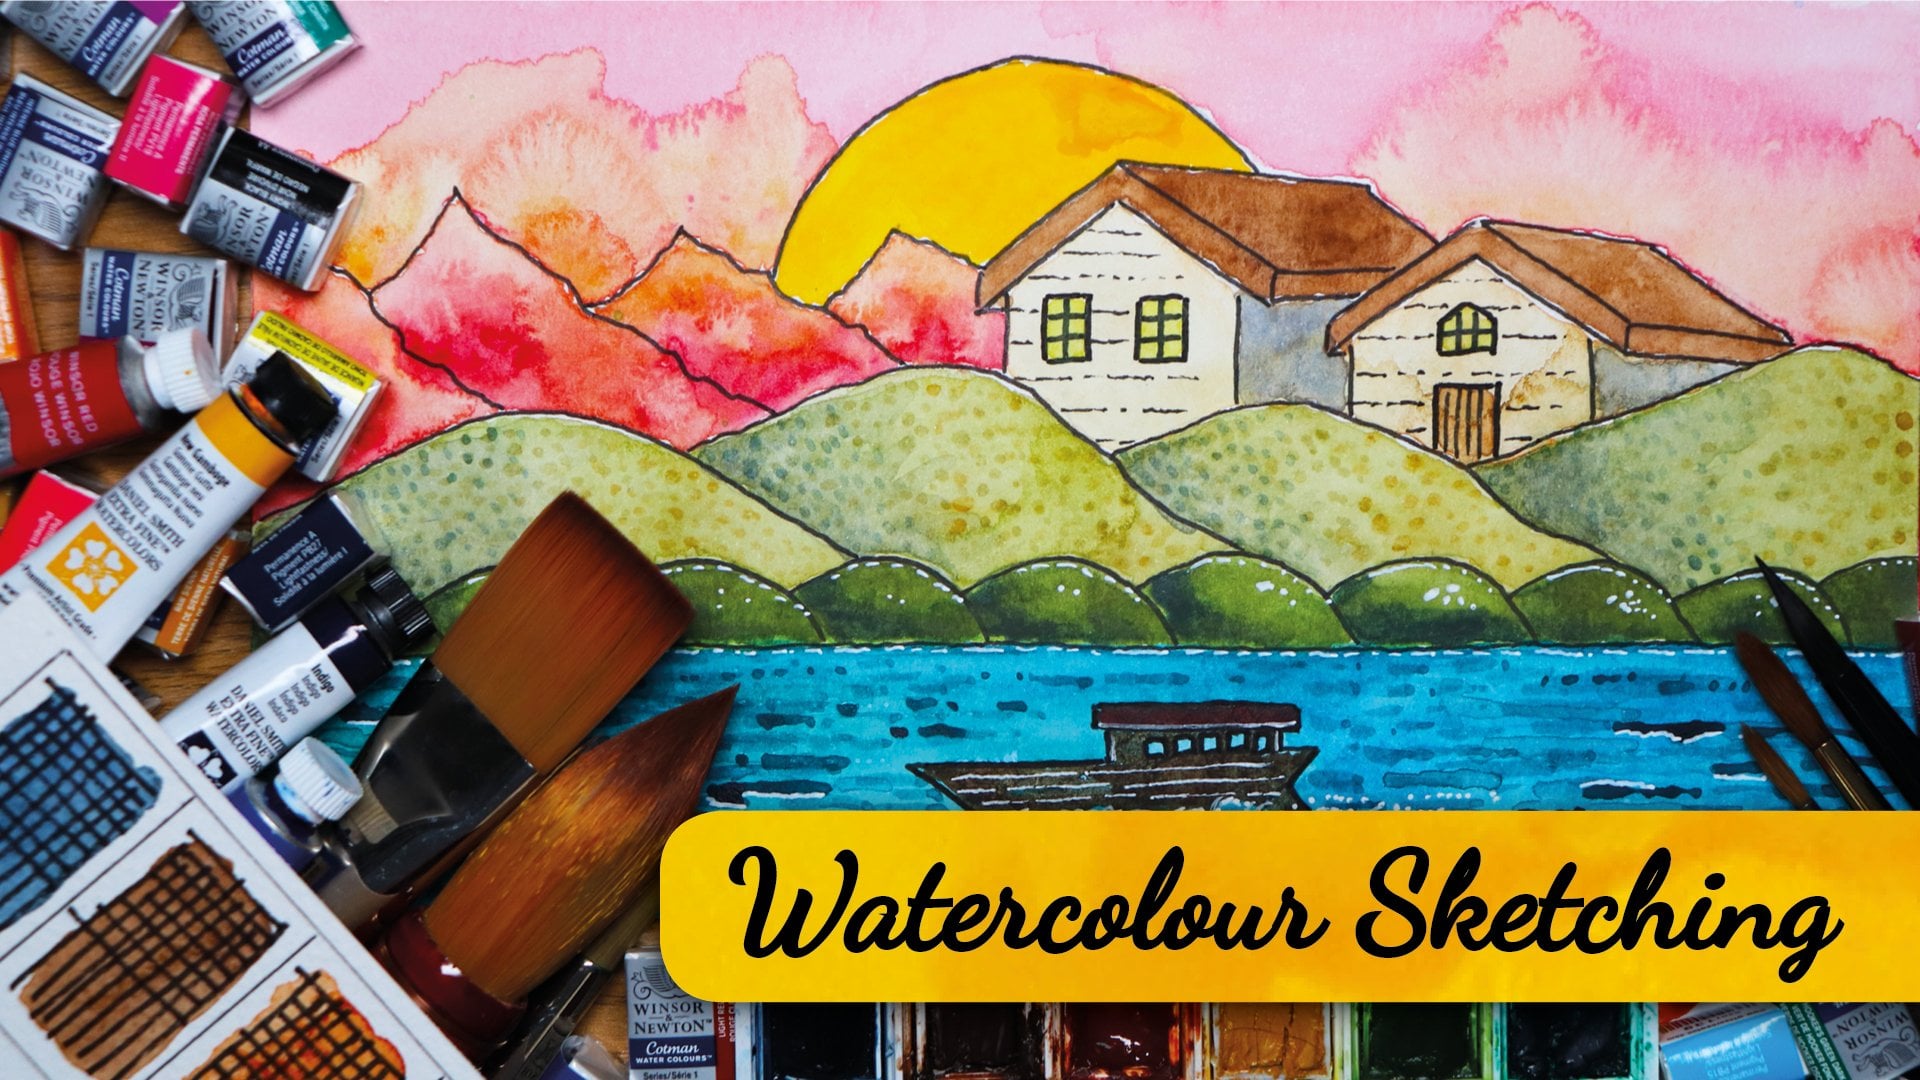
to my new class, Watercolor Expressions
Inspired by Autumn. My name is Im Ran. I'm a graphic designer
and illustrator, and I absolutely love
the season of autumn, where the wonderful
colors on the leaves, and on the trees emerging and turning into these gorgeous, warm, oranges, yellows,
vibrant reds, sepia browns. It's so inspirational. As you go for your daily walks, or your daily chores, looking at the
environment and seeing how these beautiful
colors change. I find it super inspirational, and that's the reason I've done this class so that you
can be inspired and enjoy wonderful colors and bring them into your artwork
using watercolor. So in this class, we're
going to start off by going through some simple
exercises for you to follow. We're going to be looking at how watercolor can be applied in a few different ways to produce different outcomes and
different effects. We're also going to
look at how we can use inking mediums that can be
added to add some detail. But do remember, this
class is not about detail. This class is about being
loose in your watercolors. So you want to express
yourself nice and easily. We don't want to get
bogged down with doing so many details and getting
stressed. We don't. We want to relax with
our water colors, and we enjoy this process of
just getting those colors down and watching the
magic happen on our paper. So what we're going
to be doing is looking at how these colors so merge into each
other by just using a simple primary color palette. And then we're going to start
doing some exercises to see how ink and how water color affects each other and what
type of results we can get. Then we're going to
be doing a beautiful, step by step sketch
and painting that will get you all warmed up and
ready for your class project. This class is all
about relaxing with water colors and being inspired by those beautiful autumn
colors that we see, especially in this
part of the season, where you've got
these gorgeous greens and warm oranges and yellows. Just take a stroll outside, especially if you're watching
this at autumn time, have a look at those beautiful
trees and those leaves, and see the magic
of autumn create these gorgeous colors
and get inspired. Come back home and
start dim in the class. So grab yourself a nice drink, get yourself a nice
cake. Sit back. Relax and don't stress
and get ready for the adventure of
watercolor expressions being inspired by Autumn. And I'll see you
on the next one.
2. Class Project: One, welcome back. I know you're super excited to get
on with the class. So let's start off
by talking about what your class project
is going to be all about. So it's really simple. This structure of the
class is going to be divided into doing
some simple exercises, and then we're going to be doing a full sketch and painting
that will be step by step. Once you've completed all of these little lessons
within this class, then you're going to be ready to jump straight into
your class project, where you're going to be able to express yourselves within watercolors by using
the fantastic, gorgeous colors of autumn. And then once you've
completed all of this, then you can just take some beautiful pictures
of your lovely artwork, whether it be the exercises, full sketch or your
gorgeous class project, and do post it onto the class project
gallery so that we can all view your
beautiful work, and it can inspire us
and motivate us to produce gorgeous artwork
in watercolor expressions. And that's all it is. Follow the structure of the
class, follow the lessons, have a go at all the exercises, do the full sketch, do your class project,
and you're done. So without further ado, let's now move on
to the next one and get ready for
our class supplies. So you don't have
to wait any longer. Might be able to take a nice little coffee
break before you start. I think I'm going to
take a coffee break. I think I'm going to
have a nice Americano, nice, gorgeous
aromatic bean roast. So I'm going to
have my Americano. I'm sure you're going to get yourself a really nice drink, maybe even a little treat, so we can start the
class together. Let's not waste any time and
get started with the class.
3. Class Supplies: Oh, that's a nice one that. Nice caramel style t. Oh, puts me right in the mood of some beautiful autumn colors. Okay, Dk, welcome back. Let me just put
me t to the side. Now we're going to start off
the class by going through the class supplies that
you're going to need for this class in
order to follow along. The exercises. So if I bring your attention
to the screen now, we've got our surface, and this is our
watercolor surface that we're going to use
throughout this class. Now, the surface that I use
is something that I like, particularly because
of the quality and the grain of the surface. Now, you may have your
own preferred choice of watercolor paper, and that's absolutely fine. But generally, for this class, you're going to be needing some form of watercolor paper. So watercolor paper comes in either standard watercolor
sheets, in glued pads, or in actual, watercolor blocks, or it might come in the form
of an actual sketchbook. So whichever watercolor
paper that you have, just grab hold of that and
get it ready and prepped up for the fantastic, exciting, lovely lessons that we're
going to do in this class. So on the screen here, I've got a watercolor block, and this is the brand that I'd like to use. This is arches. It's a French brand, and the texture on this
is absolutely fantastic. I prefer using the blocks, especially when I'm
doing exercises, so I don't have to bother
taping the corners down. So I've got this block over
here in the cool press, and I'm also going to be
using the rough paper. Again, this is by arches, again, 100% cotton, like you
can see over here, and it's a slightly bigger pad, and you've got the
individual sheets, if I just flick it through, and this one has a gorgeous, lovely, thick grain
paper on top of it. So the grain is much more coarse than was on
the cold press. But again, I'll show
you this when I come to using this
in the lessons. So the first main item was the surface and
the watercolor paper. Now that we've got
that, we can move on to the second and probably
the most important item, and that is the watercolors. Let's move on to that one next. Okay, Dk, so watercolor, again, is an essential part of this class because
we're going to be doing these beautiful
designs using watercolor. And you can have any type of watercolor that you
have available to you. I personally use
the tubes myself. So what I tend to do is,
I use watercolor tubes, and I empty out them in
the pants that I have in my spare kind of palettes of watercolor like this
Daniel Smith one over here. So you can see, I've got
some empty wells over here, and what I tend to do
is my favorite colors. I like. I tend to just empty them out into the
little well so that I have my own
personal preference and selected watercolors
that are ready to use. So whichever watercolor
you want to use, whether they're
professional watercolors in the tubes or from the pans, or whether they're
just student grade, it makes no difference
for this class. Just get them ready and set so that you don't have
anything to worry about. And again, over here, I've got this nice little set that contains a nice
range of colors. This one is by
Windsor and Newton. This is one that I like
to use on my travels. Really nice and convenient, with a nice little swatch that I've made with a travel brush. So if you've got
this one, that's an absolute great choice. And then over here, I've got
Daniel Smith set over here. These are the professional
colors by Daniel Smith. Very highly pigmented. I use these quite a lot. I also have other sets of watercolors that
I use generally, and again, it's all on
your personal preference. But for this class particularly, I'm just going to concentrate on the three primary colors. So we have lovely yellow, and this particular
one that I've got here is new Gamboge by Daniel Smith, which is in this well down here. And then I've got a lovely
red by Windsor Newton, and this one's called
Windsor red Fantastic red. That one, that one is this here. And then I've got a
beautiful blue over here. This one is by Windsor
and Newton again, part of their
professional colors, and this is called Windsor Blue. It's a red shade of that blue. So I've got these three
lovely primary colors here. They're the tones
that I like to use, and I'm going to use
these in most of the exercises that we go
through in the class. So get your water colors ready, get your watercolor paper ready, and let's move on to
their next item now, and that is lovely
brushy brushes. So let's look at them next. Okay, so for this class, I'm going to be just using
my favorite round brush. This one is by
silver black velvet, and it's the number eight brush. This is a lovely round, versatile brush.
It's all synthetic. I'm not going to use any natural hair brushes for this class, although I do like to use
my natural hair brushes. But for this particular class, Not going to be going into
things in too much detail. It's very loose and
expressive work that we're going to indulge in, so we don't really need very
expensive brushes for that, whatever brush you're
comfortable with, whether it's a round brush or maybe a flat brush like this. Just get them prepped up, get them cleaned, and
it's ready to go. And then I've got this
nice big one over here. This one is a number 1 ". It's just a synthetic
studio brush like this, nice soft bristles on it, and this one is going
to be used mainly to just spread around the
water on our page. And I think that's
a great brush. So if you have a nice big brush
that covers a lot of kind of bristles on the page with a nice wide range of coverage. Then grab hold of that
brush, but if you haven't, absolutely fine, you only need
one brush for this class. Get your favorite brush out
and get it all cleaned up. Let's move on now to the next few items that we're going to need
for the class. So now what we've got
on the screen here, we've got a nice little pencil, so you need any pencil. It makes no difference
what grade the pencil is. Grab hold of a pencil to
do with it a light sketch. Then I've got this fantastic
little washi tapes. This why washi tape that we've got brilliant tool
for watercolor creates gorgeous clean edges on your artwork.
Very, very useful. If you have washi tape, then grab hold of some washi tape, and then let's now move on to
more of the exciting tools, which are all about inking. Let's move on to them ones next. Dokey, now we've got some really interesting
tools on the table here. Let's start off with
what we've got here. This is a funky looking pen. I bet you're thinking,
what type of pen is this? It doesn't even look like a pen? It looks like maybe,
I don't know, a toy or something or just a fidget spinner
or something like that. I assure you this is a pen, and it's one of my
recent favorite pens. It's a beautiful
fine liner style with a nice soft tip,
and it's refillable. So I like to use this
one as a fine liner. This is my fine liner pen. So if you have any
type of fine liner, whether it just be
standard fine liners like these that have got on the side let's just grab hold of these. So maybe you have some
of these micron pens. You've got a uni pin fine liner. Then grab hold of these. If you have them, these
are great to use. Again, I like to use this fancy one because I just love the feel and
expression of it. So I'm going to be
using this, but again, there's no difference between this and any other fine liner. So we just need a
tool that we can do nice fine line work on to
add a little bit of detail. And the color that
I'm going to be using is a black, bluish shade. So whichever color you have, a nice dark color
will be fantastic. So that's the fine liner. I'll move the other
ones to the side. Then I've got a nice, funky little fountain pen. So if you've seen my
class on fountain pens, you would have seen
this funny little pen, which is the eco sport pen. This is a beautiful little
mobile fountain pen. So again, if you've got a fountain pen with a
nice thick nib on it, I think the nib on this
one is a double broad nib. This is a fantastic tool to
use to do some inking work. And again, the thicker the
nib with a fountain pen, the more expressive you can get. So if you're comfortable
using fountain pens, then maybe get your fountain
pen all inked up and ready. I've just got a standard
black ink in that one, so I'm just going to put
that one to the side now. Then I've got a lovely,
brushy brush pens. These are part of the fine
line range from pigma micron. This is the brush pens. This is just a nice, fantastic little brush pen that can come up with beautiful, beautiful, expressive
marks, which is going to be fantastic
for this class. This color that I've got here, this is just a brownish
sepia type color. If you have some brush
pens laying around, then get hold of them, these are going to be
fantastic for the class. Then finally, my favorite tool, and that is the dip pens. So I've got a couple
of dip pens here. These are really used
for calligraphy. These are very flexible nibs
that I've got down here, but again, this is something that you
may or may not have. If you do have it, it would be useful to get these ready
and all cleaned up. And then obviously, you're going to be
needing some ink in. So I've got my favorite
ink over here. So whatever ink you have,
If you have dip pens, then just get them
ready for this class because these are the main
tools that I like to ink with, especially with
expressive watercolors. So that's pretty much it
for the inking tools. Let's now just move on to some extra bits
that you may need, and let's have a
look at them next. Okay, Dk, what we've got now is we've got two jars of water. Yes, with water color, you're always advised to
use two jars of water. At the beginning, when I
started so many years ago, I only ever bothered
with one jar of water. And then I soon came to my senses because I
realized that you always need a clean brush with clean water to stop
muddying those colors. So grab yourself two
jars or two cups and fill them up with clean water
so that you're ready to go. And that's about it. Let's have a look at all of our beautiful lovely
materials all at once. Kiki, so we've got all our lovely materials and surfaced here ready for the
class. And you know what? I've forgotten about one of the other main items
that you need, and that is a mixing palette. I totally forgot about that
because I got so excited by looking at my inks and my
lovely pens and fine liners. So this is another
item that we need. I've just got this flat
mixing palette over here, whichever palette you
have, if you have a little bowl, ceramic bowl, plastic bowl, whatever type
of mixing palette you have, get that ready and
all cleaned up, so we definitely need
a mixing palette. And if you haven't specifically
got a mixing palette, then you can just use the
side of your watercolor pack, which usually has some
indented little sections to it that you can do for mixing your colors because
we will be doing some color mixing for one of
the exercises of this class. So that's about it for
the class supplies, get your class supplies ready, get a nice little warm have
a sip sip if you like, just to get yourself revitalized and re energized
and all excited, and we can move on now to the exciting stuff and start
the exercises of the class. I'll see you on the next one.
4. Exercise Set-up: Okay, welcome back,
Let's now set up our lovely paper
so that we can do the next couple of
exercises within the class. For this, what I'm
going to do is, I'm going to use my arches, watercolor rough paper,
with a rough texture on. I'm going to go ahead and I'm
just going to cut this into smaller shapes so
that we don't have too much wastage when
we're doing the exercises. I suggest you do this too. But if you don't
want to do this, you can just work on
one page and just work different areas of your
page so that you maximize that space of watercolor
paper because we don't want any waste waste because
we don't want to waste beautiful art materials, because we want to look
after our environment. Yes, we do. So let's look after our environment
and be good, be green, and let's
make us start on this. What I'm going to do
with this is, I'm just going to go ahead and I'm going to take out a sheet out
of my glued pad like this. Then I can move
this to the side, and then all I'm going to do is, I'm just going to go ahead
and I'm going to divide up this page into
smaller pieces. We've got nice, six lovely little kind
of shapes over here, rectangles that we can use
for all our exercises. So what I'm going to do next is, I'm just going to
quickly cut this up into those beautiful shapes. Again, if you don't
want to do this, then just work on the sheets, maybe draw out this grid
that I've got here, so you've got four of the
same and two of the same so that we can start working on these wonderful exercises. Let's quickly get
this one all cut like and look at that,
just like magic. My pieces are all
cut up perfectly. Well, they're not too perfect. And you see I'm a little
bit out of line over there, not to worry about my rubbish cutting
skills, but that's it. So we've got ourselves some
nice little rectangle shapes. What I'm going to do is
group these ones up, so I've got four that are
roughly the same size, put that to one side,
and then I've got two that are similar in size. So we have a nice set. So let's just move
these out of the way, and we can now start on
exercise number one, and we're going to be looking at color and how
color works with watercolors and
how we can produce these beautiful effects and what type of results
we can achieve. Let's move on to that one. Next.
5. Exercise 1 - Colour Mix: K, welcome back. Let's now bring our attention onto the
screen and start off with exercise number one with our lovely colors and
watercolor paper. So you can see on the screen, I've got my nice little square attached to my table so
it won't move around. I've just attached it
with a bit of blue tack, so that doesn't go
all over the place while I'm showing you
this lovely technique. So that one is attached
on to the table, beautiful little
piece of paper there, and I've got my palette over here for the mixing.
So let's start. Let's maybe get some
of our colors ready. So what I'm going
to do is, I'm going to use my primary colors, like I mentioned in
the previous lesson. And I'm just going
to start adding in a little bit of these primary colors
onto my palette there. So just like that, adding it on. Now, again, if you guys have not got these tubes and you've
just got these in your sets, then just follow along using the colors that you
have within your pants, and this one's not coming out. So come on, I actually
need to replenish. I need to go to the art store and get some more because I've been doing so much of
this watercolor, lovely, lovely kind of exercises
on a day to day basis, and I'm running out of the
lovely watercolor paints. So let's get that one out. You can see it's a little bit. Dry that one, isn't
it? That's no good. No, it isn't, but
we'll sort it out. So let's just add a bit
of bluey blue over here. So we've got our lovely primary
colors there ready to go. And now, what I'm
going to do is, I'm just going to grab
hold of my round brush. So I've got my silver
round brush over here. And I'm just going to add a little bit of water into this, so just bring this
into the water jar, so I'm going to use this
jar for maybe clean. Water. So just like that, I'm going to get a
good drench on that. So we've got this nicely
wetted on the brush. And then what I'm
going to do is, I'm going to go in
over here on my paper, and I'm going to actually
mix on the palette first, then go onto the paper. So what I'm going
to do is I'm going to take a little
bit of this yellow, bring it down over here. And just get a bit
of yellow onto that palette to make it a
nice, movable solution. So just like this, making
it really nice and intense. And then just
getting my bristles into that water
there, just like so. And now, what I'm
going to do is, I'm just going to go ahead
and I'm just going to create a nice little swatch
coming down like this, using the color that we
made on the palette. So just like this, creating this lovely little
swatch of color. So if you're following along, just do what I'm doing here, create that swatch,
ensure that you've got a nice bit of mixture that
you're bringing along. Now, your results might
be different from mine, depending on the paper
that you're using, because this is a rough
watercolor paper. This tends to be very absorbent, and the paint usually dries up a lot faster on
this compared to if you're using just hot pressed or just normal coal pressed
watercolor paper. So depending on the paper and
the humidity of your room, It will make a difference on
the drying times of these. But you can see I've just added that lovely swatch of
color onto the dry paper. This is the wet on dry technique
that we're looking at. I'm just gently just bringing
that color into the area that I've got the water solution so that it doesn't dry out. Again, just picking
that in over there. And then what I'm
going to do is, I'm going to go ahead with the same brush, I'm
not going to clean it. I'm just going to
bring in a little bit of red and just
bring it down here, and you can see that
with just that solution, that yellow solution that
was already on the brush, it's kind of creating a
second color from that red. Now what I'm going to do is,
I'm just going to bring this in and just mix it up over here. So you can see we've got a nice mixy mix of the
yellow and the red, and then I'm just
going to drag a little bit more down over here. So that we can see we're getting a lovely lovely mixture of
color from yellow and red, and you know what happens
when you get yellow and red? Yes, you get orange orange. Beautiful autumn
color that orange. That's what the
focus is on again. These gorgeous autumn
warm colors that we see on the leaves changing
from the green to the oranges, yellow, reds, and those beautiful browns,
fantastic stuff. That's what the inspiration is from using this color palette. Just like that, I've got
a bit of orange there. I'm going to clean me brush. Now I'm going to add in some clean water from my other jar, and now I'm just going to add in a little bit of red
over here underneath, so we've got the pure red. So we've got the yellow and red, orange there, and then I've
got the pure red over here. You can see that's
very nice and vibrant, very saturated, beautiful color. And then what I'm
going to do is, I'm just going to go ahead
and add this red onto The edge of this yellow. Now, you can see that the yellow is quite
damp now on the paper. The paper is still wet to
touch, but it's quite damp. So all I'm doing is
adding that yellow on, give me brush a cleany clean. And then I'm going
to pick some of that orange that we mixed
onto the actual palette, and I'm just going to
dab that over here. You can see we've
got this orange now It's merging into that red. Now it's becoming a wet on wet technique where
we've got wet paint, going into the wet, and that's spreading and creating
a beautiful blend. Again, I'm going
to pick a bit more of that orange that I created, maybe bring in a little bit more yellow, and just like this, I'm going to add it in between the colors
where they meet. You can see we've got this
beautiful gorgeous blend. This is the mixing on the palette and then bringing
it in onto the paper. And you can see we've got this gorgeous
gradation and change in color from the red orange
all the way into the yellow. Fantastic, that isn't it? And remember, this was the wet on dry technique initially
with the yellow. Then we went in wet on
wet with the colors blending already onto
that damp yellow. So let's give our
brusher cleanly clean. Now, we're just going to see
if this is still a bit wet. Now this is dried
out from the bottom. What I'm going to do is I'm
going to go ahead and just add in maybe a little
bit more yellow, so I'll just get some
clean yellow over here. I'm going to make
sure that I've got a bit more yellow
over here so that we've got a nice bit of
damp wet solution there. Again, we just intensified it by adding that yellow,
cleaning me brush. Then what I'm going to do is, I'm going to get that yellow, bring it across over here. And then just drag some
of this blue into it. Now, you know what happens with blue and yellow? What do we get? We get greeny green, one of my all time
favorite colors green. I'm wearing green today as well. We've got a nice bit of a
green shade over there. Just like before, what I'm going to do is, I'm
just going to go in, and I'm going to get
some of that blue, which is very nice and
saturated and vibrant. I'm just going to add
that onto the corner. Of this just like that. Now you can see, Look at that. Look at that beautiful
color blending in, looking absolutely fantastic, but we don't want to put
too much of that in. Otherwise, it will overpower. So clean me brush, clean me clean on the brush, and then We're going to go
in and add in our yellow. We've got yellow here, bring it back into that greeny
mixture that we created, maybe bring in some from here, a little bit more of the blue. Then what we're going to do is we're going to
encourage this blend. We're going to add in that
onto this level over here. Onto that next level, you can see it's very
nice and subtle, is blending into the yellow now. Then we're going to
bring it across where they both meet just like
we did with the red. And orange and look
at that fantastic. Look at those greens. Then all I'm going to
do is just keep dabbing it on top of where the
edge of that blue is, so that it blends
in beautifully. Look at that fantastic stuff. Clean the brushy
brush and then maybe bring in a bit more of
the yellow from here. We don't want it to
be too mixed up and then just add in some more
yellow in the middle, so that it starts to merge up with that lovely
blue and green, and then just keep dabbing all the way to the
bottom over here. And you can see, we've got
this gorgeous gorgeous blend of color from yellow in the
middle to orangey red on top. Then we've got yellow from
yellow and greeny blue. Fantastic stuff. So cleaning me
brush on that one. What we're going to do
next is we're going to let that dry naturally. And then we're going to
do a couple more samples over here to see what
effects we can get. So I'm going to start
with the yellow again. Pick up a little
bit of that yellow. Make sure it's pure yellow. We don't want the mixed
color at this moment. So with the pure yellow,
It's going to go in, I'm going to draw in maybe just a boxy box shape over here. Doesn't need to be super neat. Just keep it nice and
symmetrical as you can, don't worry if your kind of color goes all
over the place. We don't want to stress. We
want to chill and relax. That's what it's all about.
Improve your well being with beautiful beautiful,
vibrant water color. Again, I'm going to create another kind square
swatch over here, just off that beautiful new gamboge color
from Daniel Smith. Fantastic color that. And that's looking great. Now what I'm going to
do is clean me brush. Then I'm going to
go in and I'm going to pick up some red from here. I'm just going to pick
this red up direct. This was un mixed red, so it was just pure red,
and I'm just going to drop it in in the
middle. Just like this. Can you see dropping it in
the middle, then again, pick a bit more red to make
it a bit more saturated, and then I'm going to drop a little.in the middle
just like that. Look at that fantastic. So clean me brush, and then we're going to do
the same with the bluey blue. So we've got this
blue over here, just bring in a little bit
more water just onto the blue, and then just drop that in
over there. Look at that. Look at that magic
happening over there. And then again, bring in
a bit more saturated blue onto the tip of
the brush and then just drop that in
in the middle woe. Magic stuff of that, isn't it? Okay, so I'm just
going to clean me brush and put me
brush to a side, and we can just wash this dry for about half an
hour. I'm only joking. I'm not going to make you
sit down and wash it dry. I'm going to let this dry. I might even bring
out me hair dryer, and then I've got
another excuse to have another cup of tea
because this one's finished, and I think I'm going to
go get myself another one. I'll see you once
that dried out.
6. Exercise 1 - Results: Okay, k. So now you can see that we have got a
beautiful dried out, perfectly dried out swatch of magical color that's
going on over here. So, you can see over
here, if be analyzed, we've got this
beautiful blend of that beautiful new gambo
yellow color in the middle, and it blends beautifully into that red that
winds are red. And then on the opposite
side, we've got the beautiful windsor
blue over here, the red shade, Windsor blue, that color there, and then
it blends into that yellow, creating this
fantastic green shade. And again, the shade on top is going from yellow,
orange to red. And you can see that it's already bringing out
that autumn vibe. So with the swatches over here, where we just did a little dab of that red onto it.
It kind of spread out. It actually looks like a
leaf in itself, doesn't it? It looks like a sycamore leaf. So look at that fantastic stuff. And then with the blue, we've got this beautiful
spread of color, and that was the
first color exercise where we mixed a little
bit on the palette and added the color onto
the dry surface of our watercolor paper to see what effects we
could come up with. And this is what we're
going to utilize in the full sketch and full
watercolor painting that we do to get you ready for
your class project. That was exercise
number one of color. Let's now move on to a
slightly different technique on color again and move on
to exercise number two.
7. Exercise 2 - Mix on Paper: Oh, I did spend quite a bit of time on this one, didn't I? Yeah, well, I can see
them details coming out. I wonder what fine
liner I used for that. What did I even
use a fine liner? I don't know. Hang on a minute. It was probably a dip pen. Oh, that's very interesting. Probably have a couple more
sips of this lovely coffee. Oh, that's a good one. That's a gorgeous one. What a great copy of that. So I think we need to
start the class again now. Oh, Okay, welcome back. Hello, we, welcome back. I was just getting
lost in thought of what beautiful tools I used to do my doodles
that are on the wall. And let's get ourself back
into the mood of the class. So what we did in the
first exercise was, if you see on the
screen over here, we did the lovely
wet on dry method. Then we went in wet and wet
to create these beautiful, lovely little patterns
with our watercolors. And what we're
going to do now is, we're going to do exercise two, which is going to be
similar, but different. So if we can grab our attention and bring
it back onto the screen, you can see, I'll just move me coffee out of the way over here. And we've got a really nice, lovely sheet of paper like we
did before, the same size. And what I'm going to do
is, I'm going to grab hold of my big flat, wide brush over here. So if you don't have a big
flat wide brush like this, then just use whichever
brush you've got. It makes no difference. This is only to increase
the speed of what I'm doing so that I'm not here all day trying to do
these techniques, but if you do have one of these, then that's absolutely
great grab hold of it. And all I'm going to do is, I'm going to get some clean water. And I'm just going to dip
this into clean water. I'm just going to give it
a little bit of a shake to make sure that
there's no element of any colored pigment on there because we want to have
clean water for this part. And I'm going to get a
nice drench on that brush, so you can see over here,
it's nicely drenched. Move that water out of the way. And then all I'm going to do is, I'm just going to very gently, just add a nice strip
of water over here. And then I'm going to add a nice strip of water over here. Like a little boxy box, and then again over here. No too sure whether you can
see that on the screen, but you'll be able to find out when we move on
to the next step. So we've got these nice little
kind of patches of water, effectively, they're
resembling what we had here. So a nice strip of water
there representing this, then two little boxes of water over there
representing that. Now, we need to work quickly
on this before it dries out. So I'm just going to get
my normal round brush, mix it into a bit
of water over here. And then I'm going to grab
hold of my lovely yellow, which is slightly dried out now because I've left
it for a while, so just adding in a nice
bit of pigment on there. Then all I'm going to do
is, I'm just going to drop that pigment into the
water area over here. And I can see that the
water is fairly damp, so it's not really taking too much of that pigment,
but not to worry. This is just another technique
where you have water on the paper before you apply
the actual color itself. So, again, I'm taking a
bit more of that yellow, just dabbing it on
like this so that it spreads within the bounds of
the water that we put on. And I might actually
just go ahead, add a bit more water with me brush onto these
squares over here. Nice bit of water there, nice bit of water water there. And then again, all I'm
going to do is just grab hold of my lovely yellow, and you can see, we're getting much more of a
spread over there. So just like this,
spreading that on, keeping it wet on wet. And that's really
the main difference between this technique
and the one previous. We're just having a nice wet on wet effect over here
to make sure we've got a decent amount of liquid on our paper before we start
doing the color blending. And again, I'm just
adding as much as I want to to make sure
it's nice and saturated. And you can see,
with this method, you don't really have to worry too much
about spreading it because the water that's already there is kind of effectively
doing that for you. So this is a great technique
that I like to use, and is going to give a
cleany cleaner on me brush. And now I'm going to
grab hold of my red, so I've got a bit
of red over there. Just bring it down
into this area here, what we did before, just pure red over here, and let's just drop it in. I'm going to drop it in at
the top over here like this, like we did before.
Let that blend in. And then I'm going
to drop the red straight into the
middle over here like we did previously and a
little bit more lovely. And then let's go to the blue, cleaning cleaning on the brush. Add some water onto that
blue to activate it. Beautiful, stuff that.
And then just at the bottom over
here, look at that. Gorgeous stuff that, isn't it? Beautiful. Wet on wet
technique, fabulous. So just like this, a nice bit of wet and wet. And what I'm going to do is I'm just going to leave
that and let that dry. I'm not going to try
encouraging blend to be perfect
between each color. I just want to highlight
this technique to you. So when we come to doing this in our full painting or in your class project, if
you want to do this, it's just a great way to
vary the visual effects of your colors when
you come to putting your beautiful autumn
artwork together. So let's let this
dry on its own, not encourage it at all. And I think I might take
a few more sippy sips of me coffee while we
wait for that to dry. So I'll see you
want that dried up. O k, OK, welcome back. Now you can see that we've got a lovely dry swatch of color over here and
look at them results. They look absolutely
fantastic, don't they? We've got this beautiful, soft kind of coliflower style
blend going on over there. And that's purely because
we had the water on first, and then we added
more wet solution on, and we didn't try to
encourage it by blending in between the lines like we
did on the first exercise. So if we look at
the side by side, I'll just grab hold of this now. Dk, so, you can see now
we've got them side by side. This was exercise one over here. This was exercise two, and you can see that the
results are very different. You get these beautiful,
different effects. And this is what I
wanted to highlight to you by doing this exercise to see the lovely effects and
kind of differences we can get in varying the
application methods. So with exercise one, we've
got this really nice, controlled blend of color, and then with exercise two, it's nice and random. Creates this beautiful
organic type of look. And you'll notice that you find a lot of these type
of beautiful kind of frilly organic colors blending into each other
in autumn leaves, and that's what
it was all about. So give this a try exercise
one and exercise two. Vary the color, maybe
add more saturation of the red or the blue to see
what type of results you get. And it will be a nice kind of warm up to your
lovely class project. So two exercises done. Let's now move on to the third and final color exercise that we're going to do, and that is all about using
your limited color palette to come up with
different shades and beautiful warm colors of autumn. So let's quickly move
on to that one next.
8. Exercise 3 - Colours: Welcome back. Let's now
start on exercise three, which is all about producing various lovely
autumn shade colors from the limited
colors that we have, which are our standard
primary colors. Let's get our attention
back to the screen now, and we've got our
lovely card here, watercolor paper, which was
that bigger rectangle shapes. If you remember, we cut
these smaller shapes, and we cut a nice
bigger shape there, so I'm using my bigger
shape over there. What I'm going to do here
is, I'm just going to grab hold of my round rush again. Give it a nice little
cleanly clean. What we're going to do
is we're going to create a nice little matrix of colors that we have
our three colors. I'm going to start
off with a yellow. I'm going to work on this pretty fast because I don't
want it to dry out so that we can see what results we can quickly
achieve with this. I've got my yellows here, maybe start off with
a nice bit of yellow. That's just pure yellow, a nice little round
swatch of yellow, doesn't have to be perfect,
throw in a little swatch. Then again, another
one over here. And then maybe again another
two or three across, depending how many you can fit. So just make sure you've got
a nice bit of pigment there, and that's what I'm
going to do here. So we've starting with the
yellow swatch first because yellow again is one of the
main colors of autumn, especially when the leaves start turning from
the standard green. You just get this beautiful
kind of yellowing of color, this golden yellow color, and then you get the oranges
and the browns and all sorts of lovely lovely shades
of kind of orangey red. Do a quick clean on the brush, while these are wet, let's
now add some red to this. I'm just going to go
ahead and I'm going to take maybe a little
bit of red like this. I'm going to keep
it nice and watery, so keep it nice and
watery over here, little bit of red on the brush, and then I'm just
going to add it to this bottom part of this swatch. Just like that, adding in a bit of red and keeping it halfway. Then what I'm going to
do is I'm going to clean me brush, then I'm
going to go in, and I'm going to add
in that same red again over here using that watery kind of
solution that I may, don't want it to be too thick. Then again, adding in that
same amount of red over here. Beautiful stuff, and
then you guessed it. What I'm going to do
is, I'm going to go ahead and do the same again, a bit more water over here
from the red water solution so that we have a similar look across all three
of these swatches. What we've got here now is
we've got a pure yellow, then we've got some red added to it on the three
swatches over here. What we're going to do
is we're going to start slowly intensifying
the amount of red, and then what that
will do is give us an idea of how much
red we need to add to our yellow depending on the
type of red that you're using to create a deeper
shade of orange red. You can see over here, it's already blending in
to the wet on wet. So we've got this kind of
nice muted orange color here. Then what we've got here is
a slightly darker orange, and then this is more red. What I'm going to do is,
I'm just going to add in a little bit more red now. From my area here on my palette. I'm just going to
pick up the red from the actual pigment itself rather than the watery solution. We've got a nice bit of red on the brush over here
like you can see, and then just going to drop
that red into the middle. Couple of drops in the middle. We've got the most
saturated one here, and then maybe just one drop
in the middle over there. We've effectively got
a gradient going from yellow all the way to the darkest mixture
of yellow and red. Now, we'll wait
until that dries, let's just do a cleaning
cleaning on the brush. Next, what we're going to do
is, what I'm going to do is, I'm going to do
exactly the same. On this next row,
I'm going to just add in my four little
swatches of yellow, so I'll quickly go
ahead and do that. Ki Dokey, I've got
my force watches of yellow again, and
yet, you guessed it. I'm going to bring in
some of this blue now, so I'm going to use
that watery solution from the blue that
I previously had, just the water solution not going directly into the paint. I'm just going to add a dot of it at the bottom over there. And again, pick up some, add a.in the bottom over here. Pick up some more again. Add that.in the bottom so it
can spread into the yellow. Give a clean on me brush. And then what I'm
going to do is, I'm going to pick some from
the actual pigment here. If you can see on
the right hand side, you can see I'm picking from the pigment purely
from that pigment, so I've got a lot of
pure pigment on there. Then I'm going to go in and do a little.in the
middle like this. You can see how sharp that
is, a couple of dots there, and maybe just one
dot over there. Now, I'm going to wait until that dries out and what'll happen is, it'll spread nicely, and it'll give me that
nice variation. So on the first kind
of row that we've got, we've got the yellow with the red added,
then on the second, it's a yellow with a
blue added to create these lovely greens and
shades of autumn greens that start merging into those beautiful warm yellow
tones, brown golden tones. And then what I'm
going to do again is, I'm going to go ahead and
do the same at the bottom. I'm going to add in
those yellows again, so let's quickly do that
while the paint is wet. Okay, ok, now, what
I'm going to do is, I'm just going to
grab hold of my red, so just put it into
the water part of the mixture over
here like this. And I'm just going to add that red at the bottom
here like I did before. A couple of dots there,
a couple of dots here, a couple of dots over here. And then what I'm going to do
is quickly clean me brush, get a nice clean on the brush. Then I'm going to go
into that blue solution, where that watery part
of the blue solution is, and then I'm going to add a
dot on the top. Over here. And then what that'll do is, that'll mix these colors
in really nicely, and we'll be able to
see what effect we get when we have all
these colors on a page. So while this magic happens, when while it dries, I think I might go
for a little treat. I might fancy maybe a
slice of cheesecake, but I think I better wait
and have my dinner first, otherwise, it's not
going to be good as it. We don't want to
have too much sugar. No, it's not good for us. Keep it just as a dessert. So I'll probably take a
little break and relax, and I'll see you
once this is dried. Okay, k, welcome. Back. So if we have a look at this green, you can see magically everything's dried up
so quickly for you, but for me, it took
quite a while. But actually, little secret. I use the hair
dryer to dry it up, and you can do that too if
you don't want to wait for maybe half an hour to an hour for your watercolors to dry. So let's have a look at
these gorgeous results. You can see on the top row, we've got this beautiful
lovely stuff over here. You can see, I'll just
show you with my brush. We've got this yellow. Then we've got this lovely
orange, muted color, then we've got a darker orange, and then a darker orange. The darkest is on the right. Same with the lovely
blue shades, the yellow. Then we've got this
kind of tealish earthy type green
coming up over here. Then it's more teal,
more bluish shade there, and then we've got
this beautiful blue and greenish
look on the end. Then at the bottom row,
we've got the yellow, and we've got the mixture
of the blue and the red forming this gorgeous autumn
type of shape over here, looks like a leaf
that, doesn't it? Gorgeous merging of the orange and the green together
with the yellow as a base. Again, slightly intensifying it towards the middle
and the right. But the results are
completely random, and that's where the
magic of it all starts, where you start adding in these colors and
letting them dry on their own accord so you
can produce these beautiful, random, organic, lovely effects. And that's what
autumn is all about, these gorgeous emerging colors, golden warm colors, and
I absolutely love it. So give this a go with the
colors that you have and maybe your colors in
terms of the shades of yellow and red and blue will be different and you
get different results. You may get cooler colors
or more warmer colors, and that's absolutely fine. Whichever colors you
have, try it out. If you have two
shades of yellow. For example, I'll just get
this on the screen over here, get me color palette
on the screen. Like with the Windsor and
Newton colors like I mentioned, in the earlier lesson, you get a different
amount of color shades. You usually get two of each, you usually get two yellows. You get a nice cool
yellow and a warm yellow. A nice orange, red shade there
and a pinkish red shade, and then two different
shades of blue. If you have this palette, why not try doing this exercise with each one of those colors? That'd be absolutely fantastic. You don't have to just use
three color primary colors. You can even go ahead and start mixing with any other
colors that you have to produce a various range
spectrum of beautiful colors. Use the greens that
you've got as well. The idea of using
three colors initially is really to get you thinking about how colors merge together, and that's what the theme
of autumn is all about. Merging from turning from
green to yellow to orange, red, and then
eventually to brown. That's a nice highlight of
what's to come in the class. Do you give this a
go, try it out with the various colors that you have and see what
results you get. I think now it is definitely
time for something to eat, something to feed the appetite, and then we can recollect our lovely exercises and
move on to the next one. I'll see you on the next one.
9. Exercise 4 - Sequence: Oh, I think I need to
change this one over here. This one's been here
since my last class. Let's maybe change it to
some lovely autumn colors. Yes, I think I'm going to
do that for the next one. So, welcome back.
That was me again, just thinking about my
artwork on the wall. I want to give it a
bit of a refresh with the beautiful autumn
work that we do. Might go ahead and
actually do that. So let's get back to the class. Now, what we're going
to do is exercise four. So if we get our attention
back onto the screen, we've got the last two of our lovely little cutouts that we did of our watercolor paper. So we've got same size
next to each other. And what I've done is I've just kind of like taped it down. And on the right hand side, I've got me palette,
I've put me yellow, red, and I've got my blue, the same colors that we were using. I've just added them on. You can see them on
the screen as we we And what we're going
to do in this exercises. It's going to be a
nice and quick one. We're going to work on
both of these sheets at the same time to demonstrate
two different kind of sequences of adding
paint and coming up with some design side of our
illustrations in autumn colors. So firstly, what we need to
do is grab yourself a pencil, so I've got my pencil here. And what I'm going to do now is, I'm just going to
roughly draw out a shape of a leaf really
nice and rough like this. I'm not using any reference. I'm just using this
kind of basic shape. Effectively looks like a
tear drop, doesn't it? A drop of water, but it's actually meant to
represent a leaf. So just like that,
really nice and easy. And then I'm going to do
exactly the same on this one. Just try keeping it to the similar bounds and
symmetry of that first one. If you're doing this,
don't worry if your kind of shape is going all
funny or all wonky. It makes no difference. This is just to demonstrate two slightly different
sequences and techniques to apply
our watercolor. So at done, you can see they're
roughly about the same. Then what I'm going
to do is, I should just get the pencil
back on the side. Then I'm going to
quickly go ahead, and I'm going to get my big
flat brush that I did to add the water on to grab
hold of a nice clean brush, a big one if you have it, and I'm just going to drench
it in some water over here, so just like I did before. Just a nice drench
of water on there, and I'm just going to
move that to the side. Then what I'm going to do is on the right one, I'm
going to go ahead, and I'm just going to add
water to the whole sheet. So over the drawing, all the way to the edges, I'm going to go into it again
with water and just make sure I've got a nice spread
going all the way across. I don't want to do
it on this one. I just want to keep
it on the right one. So just like that, maybe aother layer of water. I want it nicely
drenched with water. All the way across. If it goes on your table or all over the place,
don't worry about it. If you want to tape
down your piece of paper with your
kind of washy tape, you can go ahead and do that. I've actually used
blue tack to go ahead and just get it fixed in
position on my table. So if you have blue tack, then that's a good one to use
as well for this exercise. So I'm just going to get
that jar out of the way. Now I want to work
fairly quickly. So what I'm gonna do is,
I'm gonna wet me brush, me round brush, I've got
me round brush here. And I'm gonna go into the
yellow straight away like this. With that yellow, let's get a
nice bit of solution there. Maybe add a bit
more water to this, get a nice bit of solution, pick up some pigment. And then all I'm going to do is, I'm just going to drop that into the top left hand
corner like this. Maybe drop a bit over here, pick up some more pigment, maybe drop some down here. Go over the drawing that we did, randomly place this pigment in three or four
different places, just give it a little
dibby dab like that. Clean the brush, keep
it nice and clean. Let's now move on
to the red color. So again, adding a bit of water to the red
color just like this, get the water really nice and in a movable motion
with the pigment, just like that and we brush. Adding in a couple
of red spots here, and maybe a couple here, let them merge up
with the water, add a little bit
more of that red. And look at that. It's
looking gorgeous. That. Isn't it a
beautiful, abstract, gorgeous bit of watercolor
wet on wet technique. So go to clean me brush again. And yes, let's just
pick up some blue here, some nice, beautiful
blue and I'm splashing it all over
the place, aren't I? Not being very neat,
but it doesn't matter. Let's continue a
bit of blue there. Look at that gorgeous, vibrant blue over there. And let's let that mix up, clean me brush again. Then what I'm going
to do is, I'm going to go back
into the yellow, now my yellow is actually
muddying up and becoming green, but that's absolutely fine. Just adding a few more dots of that maybe green color
that we've just created. Now clean your brush again. That's why it's
really important to clean your brush and
then go into a jar. Of normal water, as well. Oh, and I think I've
run out of water. Let me go get some more water. I think my jars dry and empty. Let's go get some more water. Now I've got myself
some clean water. Wasn't prepared. Then was I? No, I wasn't. So let's just give a clean and
some clean water. Now my brushes nice and clean. I'm going to pick up some
more of that yellow now, get some yellow on the brush there. And
then I'm gonna start Throwing in that yellow in the different areas where
the colors meet up. And you can see
what's happening is. We're getting this
beautiful blend of color from yellow to red, this bit of orange being formed, some greenish tones
going over here. And then again, with
that same brush, I'm just dabbing over the color to mute it out a little bit, to
get it blending. And just like that,
I want you to just throw in that water color, wet on wet technique nice
and quickly onto your paper. I'm going to clean
me brush again. Now I want to get some
clean water on there. And the key really is to use your yellow as
much as you can, because yellow is effectively the base color for our
autumn kind of theme. And yellow is what will really merge all these colors together. So I'm just adding
them on like this and making sure that they
melt away really nicely on my beautiful
little sheet and cut out of watercolor paper. And again, clean me brush. Nice bit of clean water on that. Let's now add some
lovely, vibrant red. So let's throw in that
red, and look at that. Look, we're getting
that beautiful, lovely magical effect. Maybe throw in a
little bit here. And now our brush is kind of mixing with the
yellow and red creating this gorgeous warm
orange tone over here, this brownish golden orange, just like that, I want
you to throw it on. It doesn't have to
be specific like I'm doing it in certain
areas, do it randomly, but just ensure that you have
a nice bit of color that's kind of vibrant on each
area of your sheet. That's it for that one. What we're going to
do is we're going to let that one dry,
and as that dries, we're going to use our colors
on the one on the left, so I'm just going to
make sure I've got a nice cleanly clean brush. So with me brush now, I'm going to just
going to pick up some pure yellow now
onto me round brush, and let's focus now on this one. And on this one, we're not going to bother
with the background. We're just going to go
straight in with our brush. So this is effectively that technique that we
did in exercise one, the wet on dry method initially. So we're just putting
that first kind of underlayer of this beautiful, gorgeous gamboge yellow or whatever yellow
color that you have, just to kind of wet the
shape and get the outline and undertone ready for us to start bringing in those
beautiful blends of color. So just like this, I'm
just filling that in. And as that's wet, give
me brush it clean. Nice clean brush. Let's
now bring in the red. So nice bit of red there. I'm going to drop that
red in in the top. Look at that. Beautiful stuff. And now that red's go to stay within the bounds of the yellow, and it won't spill over
to the background. And even if by mistake, you accidently spill it
over to the background. Don't worry at all. Don't
want you to stress. These are just small
exercises to show you the different visual
effects that we can get with watercolor. So just carry on. Keep adding
those wherever you like. I'm preferring to do it on
the top left hand side. And then going to
clean me brush. And then a bit clean
water on the brush, and they're going
to pick up me blue over here, me gorgeous blue. I'm just going to drop that blue in the bottom corner here. Look at that. Fantastic,
that isn't it? Drop that blue over there, and then maybe pick
up a bit more blue. From the actual spot of color there and then just
add it there so we get that effect like we
did in the previous exercise. So just like this, I'm
going to let that spread, and I've got quite a
lot of pigment there. I don't want it to waste,
so I'm just going to spread it out on the
palette over here. Just like that, we want
to kind of preserve our pigment and not do any wastage so we
can use it again. So let's just wait
until these dry away, and then we can
come back to them. So as we're waiting, we can go for another drink. My might even go get myself a nice milkshake, actually, yet. I Do fancy a milkshake. So I'm going to
get myself a nice chocolate milkshake with
some lovely hazel nuts, and I'm going to sit
back and I'm going to enjoy this drying process. So I'll see you once that done. Oh, oh, that was good. That was a good one. That nice, bit of chocolate milkshake. I think I've finished
every last Ah, sip. Okay, put that to the side. Let's get back to
the class, kiki, so we've got a nice little
dry on our watercolor, lovely, little kind of
abstract like artwork. You can see over here, it's
nice and dry to the touch. It's blended in really nicely. You've got some kind of,
like, cool flowering going on here and there. And that's kind of what
I wanted to achieve. And if you've not
already guessed it, the one on the right is
effectively the background layer. So we've got this
background layer, and then the one on the left, we've got this beautiful
blend of the actual shape. So what we're going
to do now is, we're just going to get hold
of our round brush again, give it a nice little clean. And me water colors
all muddied up. I'm gonna get a bit of a damp
tissue and get that away. I don't want that muddied color. I want to get a
nice bit of yellow. I don't want it all
becoming green. So just like that,
get some clean water. Drag that down, and we've got
some gorgeous yellow there. So what I'm going
to do with this is now I'm just going to go ahead and add that yellow
now into the shape. We can still see the outline with the pencil that we made, and that's all I'm going to do. So effectively, what we did first here was on
the first layer, we just created this kind of mixture to create a background. And that's kind of
really what I wanted to highlight in this exercise that you can actually go ahead. Drop in your
background first with the water color and add in
those beautiful blends, wet on wet to create
this gorgeous effect, or you can just work
on the actual shape of your element itself
and leave it at that. So that's entirely up to you. It's good to explore
different techniques and different sequences to see what type of results you can
get with the same colors. So cleaning cleaning
on the brush. A nice bit of clean water there. Now I'm going to
add in some red, let's grab hold of this
beautiful red again. And then I'm going to just add that red into the
similar area where I did this one so we can compare and then drop
that red in there, clean me brush again, and then a bit of clean water, grab hold of that blue solution, drop it in over here. Look at that fantastic
that isn't it? And you can see it merges some nicely
with the background. It's quite distinct. It adds
a slight contrast to it, where you've got the sharp
colors in the middle, and then you've got the
muted colors at the back. That's all I wanted
to do with this one. Let's just wait
until this dries. Okay, ok, welcome back. Now, you can see that we've
got a nice dry result, and we can quickly compare
and contrast the results. You can see we
went ahead and did the background first on this with the wet
on wet technique. And on this one, we just
went straight in the wet on dry technique within the bounds of the
shape of the leaf. And then once it all dried, we effectively applied
the same technique that we did here onto
this with the background, and you can see we're getting similar but
different results. Now you can see it just looks
fantastic that, doesn't it? It was so easy to do, so quick, and nice and organic. So give that to go
for Exercise four. And then we can take this
to the next step and move on to adding some lovely
details in Exercise five. So let's move on
to that one. Next.
10. Exercise 5 - Outlining: Okay, Donkey, welcome back. Let's now move on to
exercise number five. And what we're
going to do is add some lovely little
quick details to see the process through and
move on to the next stage. So on the screen, if we
bring our attention back, then I've got the lovely
artworks that we produced, one without the background, one with the background. They're beautifully dry. What we're going to do now
is do some inky inking. So what I've decided to do for this exercise is use
my fountain pen. You can use any inking
tool that you like, whether it would be
a ballpoint pen, fountain pen, fine liner, or even one of these lovely
fancy Cligraphy dip pens. It's entirely up to you. I'm going to save my
Cligraphy dip pen for the full sketch
and full painting, so I'm going to
leave that for that for this kind of
demonstration exercise. I'm just going to go ahead
and use my fountain pen. Now, one thing to note
is, in this stage, we're going to go
ahead and do some little outlining work So if you want to add maybe watercolor after you've
done your outlining work, then it's really
important that you select an ink that is
waterproof when dry. Otherwise, if you
go ahead and add your watercolor
after you've done your inking for whatever reason, then you're going to
have some kind of like really funky designs
coming out of your ink. I can assure you that, so, if you've decided
that you want to maybe add or kind of
experiment further, then do use your waterproof ink. The ink that I always use in my fountain pens is this one. This is Datriments. It is document black ink. And this is waterproof when dry. So do bear that in mind. So I've got my de atriments
black ink in here. Let's just give this an open and make sure it actually works. Maybe give it a
bit of a scribble on the back of some
card over here. Does it work? Yeah.
Fantastic stuff. So what I'm going to do is, I'm going to go
ahead and just do some outlining work on
maybe this one first, so I'm just going
to go ahead and create this kind of
like jagged pattern. Following the outline,
just like this. Again, this is just
a made up shape. This isn't a real kind of botanical kind of study
or anything like that. This is just a nice funky
little leaf, isn't it? So just like that, I've
done a jagged line. And you can see it's brought out that illustration and it's just made it pop a little
bit. Hasn't it? So in the middle, all
I'm going to do is, maybe just drop in
a line like this, and then just throw in some
of these kind of veins, maybe wiggle them
up a little bit, make them a bit random, entirely up to you, M two
or three coming out of one, do whatever you like,
just design it. However you like. It's
your made up leaf. Just like this, I'm just going to go ahead
and add that in. And you can see I did that
just within a few seconds. It's so much fun, isn't it? So we're going to go ahead and repeat that process for this. So again, I'm just
going to follow the actual shape of the
edge of the paint there. And what that does is it creates this really nice organic
look rather than it being too kind of
robotic or straight. We want to give it more of
a organic natural look. Even though we're not using
any reference pictures, it just adds a bit
more visual interest. You can see I'm
getting this kind of jagged line that I'm following the edge of those kind of paint marks rather
than the pencil mark, and it just adds a bit
more visual interest to your overall illustration. So just like that, that
one's done, and again, just dropping in a kind
of wonky line there, throwing in a couple
of these kind of vein branches over here. Beautiful, beautiful kind of leaf shapes and kind of
representations of kind of, like these little
branches coming out. They're absolutely fantastic, especially if you
have a look at them. If you go kind of leaf picking, like me and my
daughter always do, all the leaf that
fall in all them on the floor. It's such a shame. They just get fallen and grinded and kind of disperse away
or thrown in the bin. Why not pick them up and
kind of preserve them, put them in a frame,
clean them up. It's just a fantastic
kind of visual of autumn. And me and my little daughter, we do this all the time, and then we go ahead and
draw our leaves. So that's our inspirations. That's just another
good point for you to kind of use as a top tip. So just go grab some leaves
that have fallen, obviously. Don't be picking any
fresh leaves from trees. That's not nice. We don't
want to pull fresh leaves. Use the leaves that
are going to be thrown away on the floor that
people are trampling on, just pick them up clean them up, make them look really
nice and be inspired in this class with those
lovely findings of leaves. So you can see on the
screen over here, we've got this beautiful
little illustration, and that's about it. So what we did was,
we just added in our watercolor in two different
ways with the background, one with out, and it gives
us different results. So practice this, add in
whichever colors you like. Maybe you're using colors
from your color palette, from your watercolor set
like the Windsor and Newton, if this is one that you've got, or whichever one you've got. Just test this out with
different colors, maybe. Do some browns, maybe some
greens that you already have. Add them on, let them marble in the background of your lovely
watercolor illustration, and use this as kind of
an exercise step before you go ahead and
do the full sketch and painting for
your class project. So, that's about it
now for the exercises. I know you're so excited and you just can't wait to start
on your class project. But before we do that, I
want to just do a small, little kind of painting sketch that kind of brings
all these exercises together to produce
a complete piece and something for you to follow
along with step by step, if you wish, or just be
inspired by what I do. So I think we should move
on to that one. Next.
11. Full Sketch & Painting: Okay, welcome back, Let's
now start the full sketch, the full painting, step by step. We can use all of the exercise techniques that we learnt and put it on a nice, full complete little painting of some gorgeous autumn leaves. Now, on the screen over here, if you bring your
attention on the screen, I've got my lovely
watercolor block. That I showed you
earlier on in the class. This is the coal pressed
watercolor block. What I've done is,
I've just blue tacked it onto the table so
that it doesn't move. So I've got that
nicely in place. It's ready to use gorgeous
coal pressed texture on it. And I'm gonna get
my washi tape now. And what I'm gonna do
with me washi tape is, I'm just gonna go ahead, and I'm going to
add my washi tape onto all of those corners. So effectively we have a nice white border once our painting or
drawing is complete. So I'm gonna quickly go
ahead and do that now. Ok, got it nicely taped up, so we have a nice
frame around my block. This doesn't necessarily
need to be done, especially if you're
using a block because the block
is going to hold itself into place anyway. But I just like to have
a nice white border around my artwork just to
give it a bit of contrast. So do this step if
you want to do it, but if you've got
a block like me, absolutely fine if
you don't do this. But if you're using sheets
of watercolor paper, individual sheets,
then maybe it's a good idea to get some
tape and tape it around, so you have a nice frame or if you want to
tape it into place to your table or onto a board so that you don't
get too much warping, then go ahead and do that Next, what I'm going to do is, I'm
going to get inspired now. So, like I mentioned, in the earlier lessons,
me and my daughter, we usually go leaf picking and pick up the leaves from the kind of floor that have fallen down, especially in the autumn time, just to kind of preserve them
and get some inspiration. And then what we do
is with the ones that we've picked
up from the floor, we kind of frame them in gorgeous little
frames like this. So I'll just get to
Zoomy Zoom back on this now so you can see
And you can see, you've got me light
shadow going on there. A me right light reflections going on there, but
just ignore them. I'll just bring this up
closer to the screen. You can see we've got some
fantastic colors over here, all sorts of beautiful leaves
that fall off the trees. And that inspiration is
just absolutely fantastic. You can see over here,
we've got the gorgeous, yellow and greeny leaf. I'm not a leaf expert, but I kind of know
a few of the names, but I won't mention the So
that, I don't get them wrong. So I'm just going to refer to
these as just nice leaves. I've got a beautiful
leave over here. Then I've got this one,
which I think it might be a sycamore leaf
or a maple leave. No 100% sure. They're all very
similar in shape. But look at the color on
that gorgeous bit of yellow. Then I've got this
beautiful kind of like Christmas tree shaped
type leaf over here. Gorgeous leave, that one. And then we've got these fantastic orange
shade leaves over here. Absolutely beautiful these ones. And then over here, we've got more
greeny type leaves, beautiful shapes and tones, and warm autumn colors. Absolutely fantastic. I'm going to go
ahead and maybe do some drawings of some of these leaves just
to fill my page. I will leave a image of this in the class resource sheet
for you to have a look at. So if you want to
follow along and do the similar kind of exercise and similar type of leave
shapes that I'm doing, then just go ahead and do that, or you can use it for
your class project. So I'm going to move this
one to the side now, or I might just flip
it up over here so that I can see on my screen, and then I'm just going to
grab hold of my pencil.'s get a Zoomy Zoom back now again on the screen over here so
we can see what I'm doing. And with me, pencil, all
I'm going to go ahead and do is draw in a few
of these shapes. So I'm just going to
quickly go and do that now. Ok. You can see now I've got a nice coverage of
different shapes of leaves. Now, I've not designed
these perfectly or done, perfect botanical
illustrations from the kind of picture of the leaves
that I've got or the actual real leaves
that I've gotten me frame. But it's just to get an idea of some rough shapes and sizes. And that's all I'm
doing for this class. I don't even know how
many I've got on here. Maybe about seven or
eight, two, four, six, eight, ten, actually,
I've got ten leaves here. But if you want to follow
this step by step, then maybe just do a few. It's just to kind of
express and show what all those exercises
are going to look like altogether in a final piece. And again, I'm going to
put this a lovely frame Of these leaves that
we collected me and my daughter in the
class resource sheet, so you'll have that as
a nice reference to use for this exercise or
for your class project. So what I'm going to do
now is, I've done that. Let's move our lovely
pencil out of the way. And for the background on
this, what I'm going to do is, I'm going to use the
technique that we used in the previous lesson. It was where we had our two lovely little leaf
drawings over here. If you remember, we had a
nice background on this one. We started off with
a nice background. And this is kind of the
technique that I'm going to go towards for this
complete sketch. So with that one, let's just
move these to the side. To start off with a nice
wash of plain water. So let's just get the camera
back into sink over here, and let's just get
our brush ready. So nice bit of clean water. I'm going to spread it
all the way on me page. So just like this. Nice
bit of clean water, going to get it all
the way around. I want it to be nice and wet. We don't want to have dry
parts for the background, because effectively the
background is only going to be part of this illustration. And if you remember, all we did was just drench
the paper with water. And again, if you don't
have a big brush, don't worry about this stage. If you don't want to do the background color,
that's absolutely fine. If you just want
to concentrate on the color of those leaf shapes, then go ahead and do that. I just think it's a
nice way to kind of do an illustration before you do your class project so that
you have a nice bit of kind of firsthand experience
with your water colors, and just to really
get you in the mood and in the flow of autumn, beautiful autumn
colors and get ready. For this beautiful journey
into watercolor expression. So just like that, I think
that should be about enough, and maybe a little bit more because I am in quite
a humid room here, got quite a lot of
lighting going on. So I'm going to throw in
as much water as I can. This paper, this arches, cold press paper is
absolutely fantastic. It won't warp too much. It will warp, but it
won't warp too much. But what we want
is a nice spread. Of water like that. I think that should be enough. Let's quickly move that
to the side and get working quickly now
with me round brush. Let's just make sure
we've got two jars ready. So with me round brush, let's just get a little bit
of gorgeous gambled yellow. And I'm going to use those
same three primary colors mainly for this background, so I'm just going to
drop a little bit there. And again, maybe
drop some over here. And just randomly place
it into different areas of the frame of this kind of drawing
background, just like that. Throw a little bit over there. Add a bit more water. Give me brush it clean. Maybe just take a
little bit more of that yellow color and make
it a bit more watery. Add it there. Yellow is
really the base color. When we start building all
these gorgeous color tones and values of autumn, it's a fantastic
color, isn't it? So just like that beautiful And then I'm going to add
a little bit of red now, just mix me red, and then start dropping that red in into these gaps
just like this. I just want it to be subtle. I don't want it to
be too overpowering. I don't want the
leaves to kind of just blend away into
the background. I want them to pop out, so I'm just going to keep it to this red and yellow
kind of mixture. Don't go over all the leaves
if you don't want to. I just want to make sure that these kind of edges don't
have any white on it. Just want this beautiful
spread of color. So just like that,
I'm just picking the mixture up from my palette like this and just
spreading it on. While the background is wet? So just like that,
that's absolutely fine. And you can see, it just looks gorgeous,
that, doesn't it? We've got this beautiful kind
of mixture of yellow and red and kind of merging into these beautiful autumn oranges. Fantastic stuff.
So just like that, give me brush a clean it clean and maybe add a little
bit more yellow now, to start blending it in a
little bit. Look at that. I love it when the red
and the yellow start mixing to create that
beautiful warm orange, gorgeous gorgeous tone of color, that pure autumn color tone. It's just fantastic.
So just like that, maybe just add a bit more
here to mute it out. We don't want too much sharp
color for the background. And then, again, just getting this mixture of the
yellow and the red, that orange mixture,
just like we did. Previous exercises and
applying it to our background, maybe having a little
bit more over here, a bit more orangy over there. And I think that's
looking quite nice. So again, your results are going to be
different from mine, depending on where you
place the water and how much pigment you
use in your paints. So I'm just going to get a
cleany cleaning on the brush. And what we're
going to do now is, I'm just going to
let this dry now. I want this to be completely dry so that we can
start adding in those gorgeous tones onto
the shapes of our leaves. So let's quickly let that dry.
12. Colouring Shapes: Oki doke, welcome back. Now you can see that
the beautiful spread of color has completely dried. It's dried to the touch, and we can now start working
in our beautiful tones, autumn colors for our leaves. Now, what I'm going to do for the colors
of the leaves is, I'm actually going to go ahead, and I'm going to use my Windsor and Newton colors over here. So previously, we only stuck to the three primary colors for
all the exercises up to now. And now this kind of main
sketch, main painting. I'm going to go ahead, and I'm going to use the
colors that I have in my basic Windsor and Newton
color palette over here. So if you want to use the
colors that you've got, whichever colors you may
have, then go for it. If you just want to use the primary colors or the
yellows and reds and oranges, then you can absolutely
go ahead and do that. It's totally fine. So What I'm going to do now is, I'm just going to go ahead
and I'm going to just wet maybe a couple of these
colors with me brush. Another tip is that if you have a water bottle that
can spray water, then use that to spray
and activate your paints. That's a great idea.
I've actually lost mine. I don't know where it
is, so I can't do that. And so I'm going to have to just do it the
old school way. So let's just get a bit of
water onto me round brush. And I do like a bit of
this color over here. To be totally honest with
you, I can't even remember what these colors are because
I have so many colors. I just can't remember
their names. I should really write them down, but I've got this really
nice shade over here, this kind of brownish shade. And I'm going to go ahead.
And I'm going to wet that. I'm just going to add that on to maybe this big
leaf over here. So if you look at
the reference image, this kind of leaf was
quite a brownish shade, and I do like that. You don't have to copy
the actual image colors, exactly how they are. Just use it, however you that kind of picture
that collage of those leaves was
just to give you an idea to kind of
get some shapes down, and then you can merge them
into whatever shape you like. So just like that, I'm just
going to add a bit more water to this to get a bit
more paint out there. And then just add that on. Look at that
gorgeous color that. It's absolutely beautiful. It's like a sepia
brown color that isn't it? Fantastic color. So just like this,
all I'm doing is, I'm just going to add that on really nicely with my brush, and then maybe just
add a little bit for the stork that's coming
out just over here, keeping it really nice and wet. So I'm going to effectively use this brownish shade
for the base color. I'm not going to
imitate the color that's actually
on the real leaf. I just want this
as a base color. Clean me brush.
And then what I'm gonna do is I'm gonna pick up some of my yellow
from my palette, my lovely gambos yellow. And then I'm just going to
start dropping that in just like we did in our exercises, the wet on wet technique
after doing the wet on dry. So as it stays like that, you can see that beautiful
color adding on. Then clean the brush again. Some clean water, and then just get some
more of this red. Make sure it's not too mixed up, get some of that red
from the palette, and then I'm just going to
drop that red in over here. Look at that. Beautiful.
That isn't it nice, bit of red on the
side of that leaf. And I think for this one, I'm just going to leave
this one as it is. I've got quite a bit of
red on me paint over here. So what I might do is, I
might just start adding on a little bit of red maybe to some of these
leaves over here. How about this one? Yet?
Let's just add it onto this. Look at that gorgeous
red color on this kind of maple
shaped leaf beautiful. I mean, maple trees
are just gorgeous. We have a lot of
these type of trees. Where we are based in
Manchester in, the UK, whereever I'm dropping
off the kids, when I'm having a look around, especially at this
beautiful autumn time, you can see so much
gorgeous gorgeous colors, just as you're driving around, having look at the
trees that are all posted up on the
kind of pavements. It's just fantastic. One of my favorite
favorite colors, this reddish orange shade. And I love the shape
of maple leaves. They're just
absolutely fantastic. So All I'm doing here now is, I'm just going to add in
red, just like I did before. And you can see
the underpainting that dried earlier on
for the background. That's showing through when you're adding watercolor on top, so this beautiful transparent
layering effect adds on. So just like that, you can see it's getting a bit
orange over there, isn't it fantastic stuff? So I'm going to clean me brush. Don't want to waste me paint. So clean me brush, and then maybe just add in
that yellow again, that gambos yellow,
fantastic yellow, that one, maybe just add it on onto the kind of edge part
of these leaves here. And I think that is
just going to be great. Maybe just add a
tiny bit over here, just to merge it all together. And that just looks
fantastic, gorgeous stuff. Isn't it gorgeous stuff, right? Now, what I'm going to do is, I'm just going to go ahead and maybe choose another color
from my palette over here, maybe more of a dull color, maybe this one. I
think this is ok. Just a standard
ocher color this. I think that's quite nice. And maybe we can add that to, let's say this color here here, this area here, sorry. So over here, I've got this
beautiful kind of cha shade. And it's always nice to mix
in these beautiful, warm, yellow type shades,
brownish shades, onto your leaf shapes. It really just adds
that another dimension to your drawing and
illustration. Clean me brush. Just going to add a
little bit of that kind of water to it just
to help it along. Want to get it too heavy
on the paint side. We want to keep it nice and
flowing just like this. So I'll just carry
on doing this one. And then what we'll
do is we will just go ahead and maybe just add in a little bit of another color so that it looks a bit different
so clean me brush. And how about we add
a bit of this kind of pinkish shade
of red over here. This gorgeous pinkish
shade of red, and we'll see what happens. Maybe add it over here. Oh, that's gorgeous.
That isn't it? It's so subtle, that,
so just going to add a bit more of that over here. Look at that. Beautiful. Look at the way that color
merges. Nice and subtle. And then if we add a bit more, we can get nice
and sharp up here. We've got quite a lot of
water on the top over there, which will probably just end up becoming a Cliflower shape, but not to worry,
if you don't like this kind of pooling
of water effects, then just get a bit of tissue, damp tissue to pick it up. I actually like that because
of the style of my artwork. I like it when it
califloers out. But if you don't like that, then just grab hold of some dry paper towels
and bit at the end, and it'll soak up that water. But again, I'm going
to keep it as it is, so I'm liking that the
way that has turned out. Let's give a cleaner
on the brush. Now, I'm might adding a
little bit of green actually. I've got this
beautiful green here, this standard kind of
sap green color here. I'm just going to add a drop of this green here just
on these corners, just to add that kind of merging from green to
yellow effect over there. I think that looks quite nice. And again, a little bit
more of that green, maybe just adding it over here on the bottom part of
the stalk of the leaf, a little bit on the top. And then a little bit more
maybe just over here, just to make it a
bit more prominent. I think that looks
really, really nice. So maybe add a bit to that
green over here again. Just on the bottom
area over here. Not too much. We don't want
to overpower it with green. Just a little little speck
of that green there. It just blends those
colors beautifully. So let's get a cleaner
clean on the brush. Now, I quite fancy doing something a little bit
different on these leaves. So I think what I might
do is I might go in with a nice shade of
light yellow here. So I've got this lemon
yellow color over here, this really nice
lemon yellow color. And let's get a bit of green shades coming
into our drawer, so a bit of yellow lemon
yellow over the yellow lemon. Lemon yellow, whatever
way you want to say it, and let's just drop
it in over here. So you can see that gorgeous lemon yellow
color over there, to make sure adults do so
smudgy, smudgy with me hand. You've got to always be
careful with watercolor. And because I can't turn
my lovely paper around, because I've kind
of pinned it onto the table and might end up
creating some smudgy smudges. So do turn your paper around to ease the watercolor kind
of filling in effect. So whatever makes it easy
for you just do that? So let's just add a
little bit of water now. Now, what I want to do is, I want to add in some bluey blue. I might actually
go ahead and pick up blue from my palette here, that windsor red shade of blue. And now let's start
adding this in. Whoa, look at that. Look at that. Beautiful
magic there, eh. Gorgeous, gorgeous stuff. So got a bit of blue there. Let's now clean the
brush and maybe add in some of our yellow gamboge color over here, that deeper yellow. And now let's add
that to that blue. I want this to merge. And I want it to kind of
really create this beautiful, beautiful color of green,
going into yellow. And then going into that
lemon yellow shade. Look at that. Fantastic that isn't it. Let's just maybe add a little
bit on the stalk there, just to give a bit of an indentation that we've got some thing coming off over here, and then just add a
little bit at the base. Then you can see
this. Look at that. Gorgeous, gorgeous stuff
mixing it on the paper, just like we did in
our previous exercise. So have a play around with that. Maybe I accidentally put me brushing to me clean water.
Can't be doing that. We don't want dirty water
coming on our paint. So just going to give
that a little rinse. And then maybe just
add a little bit of that red and maybe put it
on the tip over there, just like that, and
let that spread out. I want to have that
element of yellow, green, orange, red, and I just want to
see how it emerges. And I'm just going to add a
drop of clean water here just to encourage that
blend. Just like that. If you're finding that the
colors are not blending, just get, you'll brush, dab it into clean
water and just add a couple of drops in
the for it to blend, and you're gonna get all sorts
of magic happening there. Fantastic stuff. So let's see what we're doing
now for the time. I think what I'll do now is, for all these other colors, I'm going to use a similar
combination for all of them, and I'll quickly go do that now. And then I'll see what the results look
like when it's done. Okay, so now you
can see that I've got that gorgeous blend
of colors going on. They're all mixing,
mixing away nicely there. And once these are dry, then we can move on
to that final step of doing the Inky ink. So, let's let this
dry, have a break. Enjoy watching those colors
dry and merge up together. Absolutely fantastic
and relaxing for your well being. It's great. Get yourself a nice drink. Sit back and just watch
that magic happen. And I'll see you
on the next one.
13. Inking: Okay, welcome back. Now, we're ready to do our inking process. And if you remember, earlier on in the class, we went through some
inking tools that would be useful for this
part of the class. And I decided that
I'm going to go ahead and use my lovely dip dip pen. So if we bring our attention
back onto the screen, we've got a gorgeous, nice, dry bit of
artwork over here. I mean, just look at that. Beautiful, beautiful
merging autumn colors all over the
place, looks fantastic. So What I'm going
to do now is I'm going to grab hold
of my dippy dip pen. So I've just got my nice, flexible dippy dip
pen over here. If you've got a dip pen, then maybe give it a go
with your dip pen and ink, but if you haven't,
it's absolutely fine. Use whichever inking tool you have and whichever
one you prefer. I'm going to be using this lovely green ink that I've got. It's one of my
favorite inks this, this kind of like fancy ink, but whatever color you
have, just grab hold of it. A darker color would probably
look better on this. So if you have a
darker color ink, then just grab hold of that. But if you have a fine, use whichever color you like. So I'm going to quickly open this now, I'm going
to be careful. I don't want to open this
on top of my artwork. Never open an ink
bottle on top of your artwork because you
don't know what spilly, spilly might happen,
and you don't want to ruin your
beautiful work. So I'm just going to open
this on the side over here and make sure that
it's all good. So there it goes, so I'm just going to show you
the color over here. Fantastic color, that
beautiful green. It's going to get a nice
little dip onto me pen. And then let's just
move this away now. I don't want to have any
spilly spillis on me artwork. So just like that now, I think I'm going to start
off maybe with this one. I'm liking the look
of this one here. So it's going to be the
same kind of case of just going onto the edge and
just following that edge, making it into a nice
organic kind of pattern. So you can see, I'm
just moving it along, and I'm just creating this
kind of like rough edge, just like it is on a leaf
all the way down there. And then, again, I might need
a bit more ink on me pen, so I'll get a bit
of a dip on that. And then from the side, I'm just following the edge, and I'm kind of like letting a bit more ink flow here just
to keep it nice and random. We don't want to have
robotic leaves now, do we? We want to have it nice,
expressive and random, vary the line just to give
it more visual interest, and it just makes it
look rather nice. So just like that,
I've gone ahead and outlined the outer
part of the leaf. Now, I'm just going
to go ahead and add a bit more inky ink
with my dip pen, and then I'm just going to drop in a nice line in the middle, just like this, vary
that line with, make it thin, make it
thick, entirely up to you. Fantastic. How easy was that. So again, get a bit more ink. Ooh, I got a little bit of a spily spill on the side
there. I better be careful. I'm getting too
excited as usual, so I need to concentrate. So let's just throw in some of these kind of lines
that we get on leaves. Now, I'm not really
following the lines from the actual resource
of those leaves. Oh, dear. Look, what I've done? I've done a drippy drip, but that's why I like using these dip pens because I want
this to actually happen. Yes, I do. And now
you're thinking, Oh, no, what's he done? But sometimes when you're using dip pens and you're moving
along and you kind of like jerk the pen
a little bit or put your hand with a bit
of pressure on the pad, you get a little drippy drip, and that's absolutely fine. I actually love this effect, and I actually go ahead and do this right at
the end, as well. I do a couple of ink drops. So that's a nice one
there, isn't it? So let's just carry on. So I'm just going to go ahead. I'm just going to drop
in these lovely roads that go into this kind
of leaf shape over here. I'm just making this up.
Not following no pattern. But if you want to kind of
follow the pattern from the reference picture
in the resource sheet, you can go ahead and
do that if you want. This is just really an
exercise to have a bit of experience on completing your beautiful
shapes and outlining them. So that one is done over there. Let's now get a
bit more inky ink and dip it in over here. Now I think I might end up doing maybe this one
here. I like this one. This one is going to have
nice bit of contrast. So what I'm going
to do here is I'm just going to start
off maybe from here because the
angle is easier for me because I'm recording
this on the camera. So just like that,
keeping it nice, thick, making it thin over here, keeping that jagged edge. On the side of the
lever. Oh, look at that. Bit of a drippy drip
on there as well, but it will all add to the
effect. I promise you. And if you're not
using a dippy pen, then you're not going to have
this kind of extra effect, what I like to call it,
but it's absolutely fine. So just like this, my angle is creating more of this
kind of jagged edge, following the edge
of the watercolor, however, it kind of
dried up on the page. And even if you don't go on the edge of the watercolor,
that's absolutely fine. You can kind of have a line within the color or a
line outside the color. It just adds to that effect. It just makes it look
really nice and unique. That's what really this class is all about, expressing yourself, using your watercolors in
these gorgeous autumn flavors. So just like that, what I'm going to do now is,
I'm just going to go ahead, and I'm going to drag
some of that ink up here, create this kind of broken line going all the way to the top. And then I'm going to bring
in some of these edges, and then just join
them up over here. And that's all it is, joining up these edges into these
wonderful kind of shapes and roads that appear on these mini
worlds, on leafs. Absolutely fantastic.
What an inspiration. So, again, on this
side, let's go in. And I'm getting a bit of
feathering of my ink. That's just adding
to the effect. That's why I like to use
ink pen and nib Dipens. Absolutely fantastic,
just like that. Look at that fantastic stuff. So this is what I'm gonna do
now for all of the leaves. And once it's all done, we can see what results we get. H o. O kid key. You can see now I've done
my inky ink with load of little ink dots that have just
dropped onto those leaves, and I think that just looks
absolutely fantastic. And me hands are all inky inky. So let's give them a nice
clean. Oh, that was fun. That wasn't it. So, me
hands are kind of clean. I've just got the ink, but
that's the thing with ink. It just gets all over the place, especially if you're
using a dips, we're going to do now is
this is still rather wet, especially where we've got
the kind of ink spldges. So I'm going to let
that completely dry. Maybe go for a break. Maybe have an little coffee. Yeah, I think I do
fancy a coffee. No had one for a while now, so I think I'm going to
grab myself an ice coffee. And then once that's dried, we can maybe add in some
more kind of ink marks or maybe some mini little illustrations using
another tool, and I'll see you
once that's done.
14. Expressive Marks: That was good. That wasn't it? What a gorgeous, gorgeous
cup of dry roasted, beautiful coffee beans, and look at that creme.
Gorgeous crema there. Okay, welcome back.
Right? Now, let's look at what our
inky inky is doing. And you can see, it's still a little bit moist,
a little bit wet. I'll just get me
coffee out of the way. And I think what
we're gonna do is, let's just move on
to the next part. I'll be really, really
careful not to do any smudgy smudgies on
those kind of ink dots. A lot of the outline has dried. It's just those kind of spldges. Ink, fantastic ink that, but we'll let it dry
on its own accord. Okay, so next, what
I'm going to do is, I'm going to grab hold of my brushy brush pen,
if you remember, we went through these
little items in these class supplies earlier on in the class in that
part of the lesson. And I showed you this lovely
brush pen that I've got. This is a nice brown sepia
color that I've got over here. And with this, what I'm going to do is, I'm just
going to go ahead. I'm just going to draw in some little leafy leafs like this. So just some little kind of outlines of some little leafs, just like this,
easy little shape. A bit of detail on the inside. And I'm just going
to kind of, like, pepper them all the way
whereever I have a gap, so just like this,
nice and lightly. Don't need to have too
much detail in this, and maybe just a couple of other type of shapes
over here like this, maybe some like this. And I think that's just a nice little way to add a bit more interest
into your artwork. You've got some kind
of empty space. I mean, you don't have to do
this, if you don't want to. I just like to do
this when I'm putting together my artworks,
especially with terms. I just like having these kind of funky little leaves
all over the place. It just adds a nice bit of visual interest to your
piece. Just like that. Nice and rough. Maybe
have one over here, but I'm going to end
up spilling me ink. So let's move me inky ink
out of the way first. We don't want any
more accidents. So let's just do that over
here, maybe just a nice, cute little leaf over here, just like that floating in
that lovely background. Think maybe that's
it. Shall we maybe do another one over here. Now, I think we'll
leave it at that. So I just peppered a few
little leafy leaf shapes. And what you can also do
is if you really want to, if you want to kind of
fill in these spaces, just do kind of little
circles like this that look quite nice just
to fill in those spaces. A couple of circles here, a couple of circles there. And what this does
is, it just creates this really nice patterned
look in your artwork. So you don't have too many gaps, just like this, just a couple of dots there, a couple
of dots there. Maybe some random dots here
and over here as well. And again, when I
do a final kind of addition after I've done this
brush pen work over here. So just like this, a
couple of dots over here, and then just some random dots scattered across the artwork. I think that just
looks rather nice, makes it look quite
nice and organic. So just like that, just
randomly scatter some dots. With your brush pen. And because
I'm using another color, it's not making
it too prominent. It kind of just blends in with the tone of the background. And I think that
looks rather nice. So that's it for the brush pen. Next, and the final kind of thing that I'm
going to do is, I'm going to get me
watercolor out again. So, if you remember,
we had our watercolor, our three main colors. Our primary colors.
I'm just going to get a bit of clean water now. Open up me clean water jar. Get me round brush. And what I'm gonna do is get a nice little drench
of water on there. Let's reactivate some
of this mixed mixture. I want a bit of red
in there as well. So grabbing hold of that red, I on an nice, bit of red, get that gamboge
yellow back in there, create this beautiful orange, deep, reddish orange
shade of color. I want quite a bit
of water on here, so maybe add a little bit
more water just like this. Then let's add this kind of final effect to finish
off this illustration. I mean, you don't need to do this if you don't
want to do this. This is entirely up to you. I just like to do this
as a complete process. So just like this,
what I'm going to do is going to grab hold
of me brush now. I'm just going to put
that palette on aside. Grab hold of me brush
like this in me hand, and kind of with my
index finger over here, I'm just going to do
a little tap tap. Just like this, a little tap, and then I'm going to
spread these kind of water tap dots all
over the paper, whether it goes on the leaf, whether it goes on
the background, and this just brings
it all together. It gives it a
really nice effect, picking up some more over here. To do this, you need to
make sure you've got enough mixture on the
bristles of your brush. And again, just like this, tippy tap tap, and
it's looking great. So just like that scattering these dots
all over the place, Just like that again. And then maybe I'm
going to add in a little bit of the blue just to get a bit
of a darker color. So you've got this
gorgeous kind of mixture of blue tones, that beautiful warm brown. What a gorgeous color that is. That's just the pure autumnnss
that you have in autumn. The ending is just
brown on the leaves. And that just looks fantastic. So just like this,
with the brown, maybe add a bit more of
the blue to darken that. And again, we just
use primary colors. Haven't we for all
the background and all this type of special
effects that we're doing. So just like this a
bit of brown there. And there look at that gorgeous, nice, bit of detail.
Spatter it on. Maybe add a bit more water to that mixture because
it's a little bit dry, so bring in some more color, vary it, add it on, make it look gorgeous. And this is what your watercolor
expression is all about. Again, I'm going to keep doing this because I'm
having so much fun. It really is such a fun
exercise, isn't it? So relaxing, just to splatter all these spludges
of water everywhere. Just got to be careful. It
doesn't go all over me camera. So can't be doing that. Otherwise, you're
going to just see splashes of water
in all my classes. So let's just final one. Nice, big ones there. Nice, big, sprigy
spldges of water. And I think I'm going to stop. At that point. So let's just get that palette out of the way before I get tempted to do more. And I think that's it. So, just looking at the
artwork, you can see. We've got this beautiful kind of explosion of autumn
colors floating around. And it just looks so nice. How easy was that to do? Nothing difficult,
So easy to do. You don't need any kind of super skills in drawing
or anything like that. You just follow the kind of
patterns and the shapes of the colors that you've put on
paper, and it's fantastic. So I'm going to wait until
this completely dries off, and once it's completely dried, then we can do a peel
peel on the tape. But do you know what?
I can't wait for that. I'm going to do the
peel peel right now. Let's do the pee peel right now of the tape.
I love this part. So I love taking the tape off and seeing that gorgeous clean
edge. Look at that. Look at that
gorgeous, clean edge. Let's get a bit of a Zoomy
zoom back so that you can see probably one of
the best parts of revealing your artwork.
I know it's still wet. I know I've got inky
inky spoges everywhere, but I just can't wait. So there's one bit
of tape over there. Let's get the other one off,
which way did we did this? You've got to remember
which way you actually taped down your paper. So I've got this one here on the right. Let's just do that. Nice and slowly, don't do
this too fast, otherwise, it can mess up or pull your paper depending on
the quality of your paper. That ones come, Oh, dear. Look at that. See what I mean. So I've just gone ahead and
pulled it a bit too hard, and it's messed up, hasn't it? But, not to worry. We're
not here to worry. We're here to relax. Relax and carry on
and look at that. Oh, I love it. Look, how
gorgeous that looks, that beautiful white border. It really enhances the
look of your artwork. Want it all dry. So let's just maybe,
I've done it again. Let's just take it off
the board, actually. Let's just take it off the
board. What am I doing? So let's just grab hold of that. And again, I want you to see this part because this is
the best part, isn't it? Taking it all off. Look at that. Gorgeous, and that ASMR
sound absolutely fantastic. But then again,
you probably can't hear it 'cause I keep talking. Don't I? I don't stop talking. Less talking and more
drawing and sketching. That's how it should
be, but it's all good, right. There you go. Look at that beautiful
bit of artwork, autumn expressions
in watercolor. And that's it, so we've done. Le exercises. We've done
this full painting sketch. Let's now just have a
look at some more of the artworks that I've done in this style so that you have
a bit more inspiration, a little bit more kind of
an open active guide of what you can do when you come
to do your class project. So let's have a look
at that one next.
15. Inspiration: Kiki, welcome back.
Let's now have a look at some of the
artworks that I've done in a slightly
different style so that you can get inspired for
your class project. So on the screen, I've got some funky little
artwork over here. Let's have a look at this one. So on this one, you can see, I'll just get a Zoomy
zooming on this. Let's get it on
the screen fully. Can see on this one, I've been very loose with
my drawings here. I actually went in
with the paint first, and then I went in
with the outlines. If you remember in the
class in the exercises, we put the paint down first, and then we started the outline as we did with the
full class sketch. But the only difference
here is, what I've done is, I've gone in with the outline with the ink in a
very loose fashion, so you can see I'm
not keeping within the bounds of the
actual color shapes. I'm just going
within or outside. I did this one really quickly, and I loved how it
turned out this kind of pure expressive, loose,
relaxed kind of artwork. And I think that's just
a fantastic style. So you don't need to worry
about details and keeping it exactly to the kind of structure or the shape of
the leaf or the pattern. You can just completely be in an expressive semi
abstract form, and it's just fantastic. So that wasn't nice kind
of semi abstract style. So let's move on to something that's a bit more
controlled over here, so you can see, I'll get
it the right way up. Let's get a Zoomy Zoom back. Over here, I've got two more that are way
more controlled. So you can see the one
on the right over here. This one has, again, a nice background on it. And then we've got
the colors very similar to our class ful sketch. And we've got some
nice autumn colors that really went in deep with those yellows and
kind of those reds and got them to merge really nicely with a bit of blue there. And then on the left over here, if we just bring this one
closer to the screen. You can see this is
controlled as well, but we've not added a
background on this one. This one, I've just gone
in with the shapes, and I've kept it really close to the shapes concentrated
on those beautiful lines. And you can see it looks
really, really nice. And I even added a
little bit of wordy wordy a bit of
sketchbook journaling, if you remember from
the previous class. So let's just put this
one to the side as well. And then I've got quite
a few in my sketchbook. I love to do this in my
watercolor sketchbook. I'll just show you over here. So I've got a nice
bit of a spread. I got a bit of a
zoom back over here. You can see over here,
if we look on the left, we've got one that's done
without the background, so just the leaf shapes
in that very loose style, and it's so much fun, especially when you've
got a sketch book. So as I mentioned earlier on, if you've got a
watercolor sketch book, absolutely use that
for this class. And then on the right hand side, I've even added some
colored pencil over here, so I've got some lines
in colored pencil, and I've gone in very
loose, very expressive. But in this one,
what I've done is I've not actually
colored the leaves in. I've put the watercolor
on the back. So this one, I drew
the leaf shape out, and then I started adding mixing the watercolor
on the back. The background just to vary it. And that's what we want to do. We want to kind of do
different styles of artwork in this expressive mood, in this autumn colors and
fantastic beautiful shades. So try this out, try it
out in a different way, but do try it out. And if you don't like the whole expressive
type of artwork, then you can go in
and do detailed work. So over here, you can see, I've got a nice, little
double spread of detailed leaves. I've even got the names of
the leaves on this one. So I enjoy doing this one. But again, this one takes
a little bit more time. And what I don't
want you to do is, I don't want you to stress. So if you don't think
that you want to spend too much time on
details or getting it right, then don't spend too much
time on the details. Just be as expressive
as you like. It's all about well being, and it's all about getting that beautiful color
blend going on. And if you want
to add in detail, absolutely, go for it. So that's it. So we've got All these beautiful, lovely
exercise, ready to go. You've got your step by step
sketch like we just did, and now you're going to be
ready for your class project, and I can't wait to
see what you produce. So let's just sum
up the class with some final thoughts and get ready for your
lovely adventure. So I'll see you on the next one.
16. Final Thoughts: Oki doke, we have now completed the exercises
in the class, and we've completed the
class sketch step by step. And I had a lot of fun. I'm sure you had a lot of fun. And now it's time to have even more fun and do
your class project. So I hope you enjoyed the step by step processes
that we went through with the color mixing
and application of watercolor and seeing how
watercolor reacts and creating Beautiful tones. Absolutely
give these exercises a go. Maybe if you have a
watercolor sketch book, do it all in there, so it's all nice and together and collated. And then just give your
class project a go, try using this expressive kind of way of applying watercolor. Don't worry about the details. It's not about the details. It's about the journey. That's what it's all about.
That journey, that adventure. In experiencing
these magical colors melt into each other and form
beautiful tones of autumn. So hopefully, you
would have picked up some skills in this that
you hadn't had already done, and if you already
knew about this, then it's a new little adventure
for you to start doing a little bit more
watercolor expressions on a daily basis. So, I can't wait to see
your lovely class project. I can't wait to see
your class work. Whatever you've done, make sure you take a
lovely picture of it. And post it onto the class project gallery
so that we can see and keep posting to the
class project gallery because that will
motivate all of us, and it will inspire us
to create more and get into this kind of habit of
creating art on a daily basis. So hopefully, this will give you that lovely little push into the autumn direction
and vibrant, beautiful warm colors of autumn. Do also check out
my other classes. I've done so many classes on skill share or using
different mediums. So give them a go if there's something that
you want to learn. And again, keep sharing your beautiful
artwork with us all. And if there's any
question that you have on this class or on any
of my other classes, then do drop me a lovely little comment
in the discussion. Or you can e mail
me if you want to just discuss it personally
with me yourself, and I'll be absolutely happy to answer any of
your questions. So Hopefully, now, I've
done my little bit, and I think I'm going
to take another break. Yes, I'm going to
take another break. I think I might go
to me coffee shop, maybe do a bit of
sketchbook journaling, and then I'm going to come back, and I'm going to do my class
project on this class, and I can't wait. So thank you so
much for your time. Thank you so much
for your help and your patience and your support. And hopefully I shall see you on the next one.
Take care of yourself. Keep smiling, keep relaxed, don't stress, and peace.
 Imran Mughal, Graphic Designer & Illustrator