Transcripts
1. Welcome :): Let's paint a fun in happy watercolor snowman in a loose, intuitive way. Hello, welcome to my skill share class. I'm guessing Sanders Color may create art dot com. I would like to invite you to come in water color with me in this class for all levels. I'll take you step by step through the process of creating this adorable little snowman, and you can use it as a card or as a standalone painting. First will loosely sketch our snowman, and then we'll begin the process of layering on our water color. We'll focus on light and shadow and contrasts. We'll work on adding a snowy texture. We'll even be using some salt for this. We'll add details to our snowman and make him really come to life. We'll talk about life in Shadow will talk about moving and lifting our color and even a few things to Dio. If you feel like you've made a mistake. And of course, we'll add some spotters because you know how I love to splatter paint. But this will look just like snow. This class is broken up into 10 simple steps so you can paint right along with me each step is just a layer. So it makes it simple for you to pause the video, finish your step and then continue on. So come on and join me. I can't wait to get started.
2. Supplies: Theo. Basic watercolor supplies. You'll need watercolor paints. The brand of your choice is perfectly fine. You will need watercolor brushes. I suggest synthetic for this, since we're using it to make a card. But natural hair will work. It just holds more water, and that's a little bit more difficult to control if you're not used to it. I have a number 10 round and a zero for fine details. You'll need a pencil. If you want to sketch your snowman, you will need watercolor paper. Now. I happened tohave Strathmore Watercolor cards, Which means it's watercolor paper. £140 cold press. But it comes easy to turn into a greeting card that's blank on the inside, and it comes with envelopes dissidents. So it's pretty cool product. But again, any kind of watercolor paper will work. I do suggest you have £140 cold press to avoid buckling, but this will be very convenient for making green carts. You will also need water one or two jars. Your choice. I'll be using salt to create some texture washi tape to tape the edges or any low tack tape . It doesn't have to be washy It can be a masking tape, but I just think why she's so fun to use and look, it's winter themed. I love it as cloth, too, to dry your brush, and that's all of our supplies, so let's get started.
3. Step 1 - Draw your Snowman: Theo. The first step and painting a watercolor snowman is to draw the snowman. Now this step is optional. Feel free to just go with the flow. And don't worry about drawing if you'd rather because snow men are very simple right there . Three circles. They don't even have to be perfect circles, so let's just catch that one too. Well, that one's really wonky, so that looks like the snowman will fall off. So I'll just work on that a little more. And three Afghan looks like this. No man will follow up. I'm not going to worry about it racing. I don't mind if my it's a mark show and we're gonna have a little hill of snow there. And let's see our indicate where our nose will be with the pointy sort of triangle shape. I'm drawing very lightly because that's the way you should do when you drop of water cover and let's give him a big smile. I'm not sure about the nose yet. I may make that a circle, too, and maybe he'll have some buttons and an arm, a stick for an arm, and he's waving at us. We go and a hat so for the hat will draw a curved line that way and then occur this way and sort of a rectangle on top. Yeah, now, right now, he looks a little bit like a jack O lantern in the face, but when we watercolor it, it won't really matter. I'm going to actually race that little bit dinner on the outside edges. So this is just a little sketch. It's OK if my lines show it's OK. If my watercolor is not perfect on it. We're just going for loose and fund and free, so let's get started.
4. Step 2 - Add Shadow to Snowman: Oh, now that we've drawn our snowman, Let's get started with painting. So I'm going to use my large brush large for this size paper. If I was using a really big paper, this would not be considered a larger brush. And I want to start with a light blue. I have a till blue here. That's nice and wintering. I'm going to start with a very light color and I'm going to start by painting the shadows of my snowman. So here around this edge and I'm being really loose with it. And C it's very light because this is a white snowman, right? Maybe a little more. They're a little more there, and this is even going to dry lighter. So I'm putting this shadow area all on saying side, so it looks kind of shadow under the hat. There we go. I'm happy already. Hope this makes you happy, too. Let's let that color flow out a little bit on Tous now. Very good. Very nice. A little more here. This is going to dry light or so That's why I don't mind adding a little bit more of this deal, just dropping it in, creating some texture. That's it. Nice. Have fun, simple and pretty much your snowman could be painted at this point, and we would just need to do the background. I think house soften some edges a little here by using a very lightly damp brush and pushing into that. Remember, you don't want to rush really wet just lightly down. It's too that soften that a little bit. I left some hard edges and some soft edges. You soften this face also a little bit more, and actually, I want to pick up some of that. It's a little too much for me, and I can always go back and add more if I wanted to. It's off in that area. Okay, very good.
5. Step 3 - Background - Layer 1: Theo, Let's think about the background. We're going to make a snowy background. I want to make a really dark blue for this. So here's a sort of an old for Marine blue here. That'll be perfect. It's OK if I mix it in with that teal. I can always get more of that later. That's really nice. Now let me add a little bit of indigo that turned out to be a lot of indigo. So let's add some more sort of an ultra Marine blue, a purple lee blue and let's start the top because that's where I want my darkest color to be. I wanted to be darker at the top and sort of fade as we dio and some darkness by the Snowman, too. So let's just see how that all works out and let's get the hat. For now, I'm not sure I wanted to be night or day. That's a nice soft blue. Yeah, there's still quite dark. Now. I'm using this synthetic brush because it holds us water and a natural hair brush. We can go right over the arms, and in this case, because of this particular paper, I want that I'm not worried about going over the into the hat, not worried about going over the edge of this side of the snowman. But I do want to not leave hard edges there. So I'm trying to work back and forth and not let he used to write too much, keeping it kind of wet and modeled looking. Just go ahead and a little bit more around the edge of that snowman there. Drop in when you drop in more color, that's called charging. No, ive clean my brush, and I'm just adding some water all the way down over the edge of the snow. Look, I've for gotten about Sancho over here. Go back to it. I tend to paint in layers, so this will be our first layer. And on this first layer, while it's still dance, I want to drop into some salt. Just a little here and there, too. Sort of some of the hell and turned out to be a lot, didn't it? But not on the snowman. I just want to create some snowflakes. And now I need to let this dry. Do you see a small area and the hat? I feel like I need to fill in there. So we're going to have some small areas where we put this salt is going to leave some nice , snowy looking texture. So much fun. We soften this. I don't want that line there. I just want that color blended down. We can't actually take this while that's trying and add a little shadow under our snowmen. And I want that also to be sought. So I'm softening those edges. Lightly damp brush. Not too much water. Now we have a hint of a shadow on our snow.
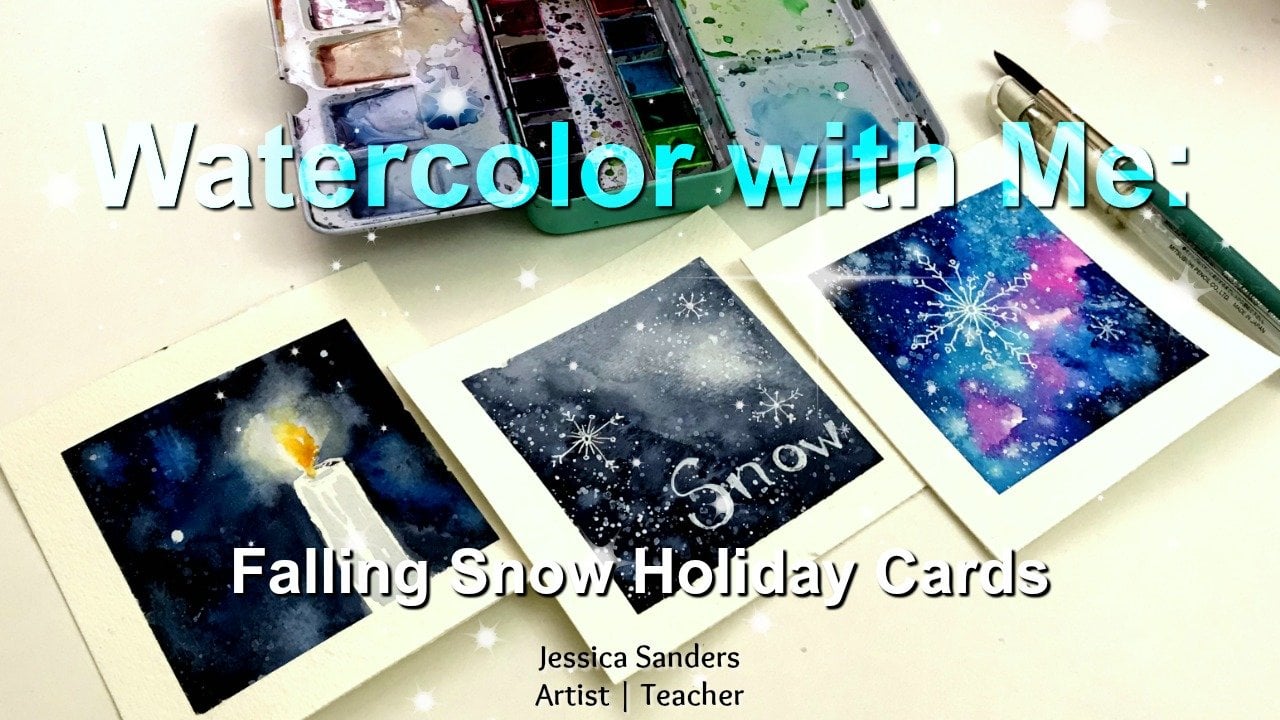
6. Step 4 - Snowman Details: now, while the outside edges drawing, we actually can work on our snowman a little bit more, not on the edges, but on the detail. I will give my small brush now. You probably don't need one quite this small. This a little smaller than you may want to picking up that into go. I want to be fairly thick. Can what's put in some eyes. I want my eyes to be happy, so I'm just going to do a little partial circle and leave a little cut out for some light. I don't make my eyes look full of life that's optional. And of course, you can always go back in with white. Now let's do some buttons, which I will do in the same color these air charcoal buttons. So I'm not worried about being perfect. In fact, I'm making them cool. White, messy, very good. Very good. Now we can do the nose. Let's do some going to pick up some orange or you connects red and yellow to make an orange and go ahead and thanks one of a carrot he knows from the mouth. I'll go back to the indigo and the pain in a smile That makes me happy. Touch my nose a little bit and that's okay with me. Very good. And I want to give him some rosy cheeks, so I'll take a little bit of this pink. Not much. And there, maybe a little bit around here, just to you tied together. We can see now how this is drying. It's not dry yet that you could see the nice textures that it creates assault. I actually have a class on one or color holiday cards, and I talk a lot about assault in different ways to make snow textures. And so if you would like to have over that class, I'll leave the link in the discussion section. It's a really fun class. I made three holiday cards in there with different kinds of snow texture, and it was a lot of fun. So maybe you can you check that out? I think this is dry enough for me to paint a hat, and I think I want to use my big brush for that. Now we'll go back, maybe to the indigo make you think mixture. Remember my class? There's different mixtures of water color just thick and thin and everything in between, which changes the value. So this thick mixture, it won't move as much and it will make a dark color. So we're going to start from here, Have a little No, I don't want it to be dark all over. I wanted to have some light, some highlights. So now I'm cleaning my brush, tapping it off and just letting that color flow out there onto the other part of the hat. Um, even have a little piece of salt there. Him perfectly fine with that. I think that was Adam. Nice interest. Pull that out a little bit there. I'm not going to paint the brim of the hat yet, in fact, I think the way I drew it, I want to be a little bit bigger when I'm finished. So I'll wait on that because I don't want to mess up. The other part of that's maybe pull little color here to make that a little more around it , a little less blended into the background, rather a little more blended into the background and a little softer. I think I'll actually make it even a little wider. Susan
7. Step 5 - Add Depth with Shadows: Theo, pick up some, please teal and reinforce the edge of the snow in here can reinforce the edge. Shadow there. Remember, this is already dry in these areas. Look that move around a little. And in fact, I think I'll take a little bit of the indigo, but very watered down, very watering, dropping a little bit that match and even can very wondering. See how light it is, Remembering that down a little bit. This is a sphere, so I want to look like a ball, not like a circle. Then I'll let that color flow out a little there because that's fun. Pull that color in a little bit. Were there this is too much. So I'm going to pick it out with a thirsty brush, which is too much. It's overwhelming. So see you can, you know, make little adjustments and things to your what color at nice on watery and connected. I want to do a thing. Layer of the trick was here. Also sad. A little more dimension to face and at a little bit thicker in this area, have too much water, really. So I'm going to pick it up a little with my brush. There's deeper that escaped a little bit. I'm also good with that. So we still have his arms to go. We still have to finish the background. That thinking her snowman is looking pretty snowy right now, a little bit more of the indigo to the buttons to make them a little bit darker, but not cover the whole thing again. Like to have a variation of color a little more into come there and there so you can see as I'm letting the background dry. I can keep working on some of the details as long as they're not connected. Look, some of that escaped handled lovely. I love watercolor love how it moves inflows, adding in your office. Lovely, adorable smile and even a little bit more orange, too. Some strokes on that to make that knows, being a little bit more dimensional, a little bit more on the bottom area. Now this getting very fiddly, and I don't always do that, but this fun. I'm having fun painting, so I'm going to pick this up. See, that's escaping way too much, so I'm using a thirsty brush. This is a dining thirsty brush puts till Thursday. All right, there we go. No, e a little bit of that. I have a fairly dry brush pushing that away, and then I'll pull a little bit of that more. That That's what happens when you continue to work when it's still wet. Okay, so I'm going toe, actually, let this dry now and then we will continue.
8. Step 6 - Removing Salt and Making Corrections: Oh, so now that our painting is completely dry, I'm going to just brush off this assault. You could see that really lovely texture Now may be stuck a little bit. I love it. I love that I love this little. Come in here. I'll give you a closer look in a second. Actually love that. I had a little bit on the hat there, brushing it off to this side, just in case it's still slightly damp that way won't get streaks on the backside of my card by putting wet salt across it. You're wondering. Just brushed that off on a little piece of paper and I think there's save it and use it again. Four. Throw it away. So totally up to you, your your choice. So now I think you could see this texture really pretty. I love it. Some other things you may notice about this painting is this is all washed out and not very defined. This has a sort of a hard line, and I haven't finished the hat yet. Of course. So there are more things to do in this painting. But I just want to show you that if you get into the middle of a painting, and it's not. Maybe what you expected the result to be, that's okay. They're still things you can do to kick it up. So let's go now and see what we can do. So the first thing I want to do, I think, is soften this hard line. So I have a lightly damp brush and I'm just going to scrub that a little bit and then I will tap it to sort of pick it up with each issue. I just want the line to disappear there. I just think it's too much. We'll do the same. They're a little and I like this line over here, so I'm not going to worry about that, so there we go.
9. Step 7 - Background - Layer 2: I think I want to do to work on this area is I just want to think I went the background to be darker So I'm going to go back and with the indigo and the blue sort of theme Ultra marine, purple e blue and indigo Just the dark blue really dark blue And I don't want to be quite that thick There we go. So sort of a mid mitt thickness of paint to water ratio I m closer, but not super thick, So I don't want to be liberally super loose and flowing But I do. But I also don't want to be super thick where it doesn't move at all That makes any sense. So I mixed up quite a big puddle and I'm just going to go in across the top right over the texture, right around the hat, and ran around the snowman with this dark color. See how I'm careful around the edge. But then I get looser as I go. Too much water there. So let me just more paint unless water So right around the hat. Now, I don't want this to be as dark on this side, so I'm cleaning my brush and using just a damp brush can lending that out, using really loose movements and strokes, more water. We're blending it out. They're bringing it all the way down in a very splotchy kind of way. Now I'll go back to this edge, which is already starting to dry and pick up more paint, bringing in a hate here. I'm going to sort of skipped that area there. Are you really like that little spot? I just want to bring in some Parker over here, and I'll do something to make that had stand out later. So bringing this dark down this is pretty watery, not okay to. And let's just you somewhere and lend that out right over all that texture. And now I have a fairly dry brush and lending it out also down to this little line. And while I'm at it, I'll add some show sitting on a snowbank. So one thing shadow. Remember, this will drive letter, but I'm going to just drag the shadow down. In some areas. It's a little make to darken down lots. I'll take a little bit up by pushing it and lifting it with a I'll leave the stark area. I like the way that looks. So we have the light coming from this side shadow underneath and over here, shadow on this side of the hat shadow on this side of the body. Refined that just a little by adding in some of that Nike smaller brush. But I can also use the tip of my brush there. Do you want to just charge in a little bit more dark color there in that area and also this area and I want to soften these agencies, So damn brush just moving that around a little. Mm. I'm loving your snowman so far. But you know what? I want to add more salt, so I can this my painting. This is optional for you. You don't have to add more salt if you don't want. Just send a little It's assault that I want to add in this area where it's dark because I think that would give us some really nice textures. Our snowman is starting to glow. We could that excited
10. Step 8 - Reinforce Details: Theo, while that areas drying the background. Let's work on the face a little more back to the indigo with my very tiny brush. And I want to dark in those eyes and dark in whose eyes dark in that smile so darker Tark's will naturally cause you to see a lighter lights. That's a very important principle of art. Darker darks create lighter lights, and lighter lights create darker, dark. So that contrast just can make or break you, really. So add a little bit more to her hat. Here. We still haven't done the brim, but that's because I've been working on the background and I don't want that paint. All you know. Now I see you kind of have this rough edge here, so I'll go to my end ago with the tiny brush, and I'm going to refine that even more. No, it doesn't have to be perfect by any means. No need for it to be perfect, but I just want that to be more defined. So was this easy way for me to be able to do it while I have this little brush in my hand and then charging in a little dots of color there, connected all I love, texture and the texture of water. Color can be just absolutely amazing. And I'm loving the snowman So far. I see I have this line here, So let's pick up a little bit of the turquoise. Just go right over that area and drop in. Now I noticed I didn't have very much water on my brush and let me add in little bit of the makes A little bit of the ultra Marine with Dirk. Was there a little bit more shadow? Not much, a little and a little Here. Also, add more water to that area to be softer. Have to remember not to touch this because it's wet. So you may want to wait until the background is dry. Before you do this part, I tend to be We live life on it, so to speak. I guess so. That's the way it works out for me, really, really loving this. I love the rosy cheeks. Okay, I need to let this try one more time so that I can finish the hat and we need to put in the arms. But the background has to be dry for that, so I'll be back
11. Step 9 - Pep Talk, Hat, and Arms: Oh, painting is dry down when you can check that is to feel the back of your paper. And if it doesn't feel cold, it's dry if it feels cold and it's not dry yet, and you need to wait a little bit longer or you can use a few tools. Okay, our snowman is looking amazing. So far. I hope your snowman is meeting your expectations and if not, consider practice. It's watercolor, It's paper and it doesn't have to be perfect. And I practice and you have to practice to so it may not turn out the way you want to do the first time. That's OK. Keep practicing. You will get better. So all I want to do now at this point is I want to add my arms and I want to add part of the hat there. And what I think I want to do is take a red. Yes, nice read. Thank I don't even want to use my big brush, have my big brush out. But I think I want my small brush pick up some red, nice and thick and create sort of a red area, just a lively INGE and one curve that around. So this is an unusual hat, right? There's a red room, but just read on the edge just to add a little pop, because it's fun. And then I'll go in with that and ago, Think makes sure this time and put it right under this. Rid. Not that it needs to flow right under and a lot here along this curved line that I drew and right up to the red. I think that's a lot of fun. I added a little bit of dark there, a little more there, and that is cute. I hope that you think so. Okay, now, at this point, if you like your painting, you may be thinking, I don't want to mess it up. I don't know about having those arms. So what I'll suggest that you do is your use your small brush and you make a very watery mixture of our indigo so that it's going to be a really light value, and then you can put in your arms and you will put them in lightly and you can lift them back up if you don't like the way they turned out. So I will put my arm here on. I want to be waving. It's just a stick, thanks. Sees really liked and kind of long instantly. And this one I'm going to put here, it's a little different. There we go. So see, it's really light. If I didn't like the place and I didn't like where it was, I could still remove it. Now I'll go back with a thick mixture of the indigo because I am happy with this placement and I'll add to it really gently. And I don't want to be, like super, um, dark, because I don't want it to really be the focal point. I just want them to be some arms there, like their hands, like their sticks, and that's I don't want them to be like focal points, so I'm using lists pigment. Then you might think less border color, and I will add in a little bit more just to put some dimension there. He's waving. Here we go. What do you think? To need anything? I see one spot that I think needs something. I believe I need a little bit Port eel shadow, right this area using my small brush because they don't wanna and much, and I don't want to add a lot of water. And then I also often that out, much more dimension there. I'm pretty happy with Snowman. Is it perfect? Is any snowman perfect? No. Disguise. Fabulous. Okay, so I'm going to let those dry and I have one more final touch after that.
12. Step 10 - Snow!: O s. Oh, I have my white drawing in care and my family rushed, which is my favorite for making splatters. Yes, we needs bladders. We need some spotting snow and I have a little this year so that I can I used my white and we're just going to take this paper, tell that I've been using and kind of fold it up and kind of cover up part of my snowman. I just want to kind of do that. You can use a scrap piece of paper. I don't mind that the hat is showing. I don't mind that some of the snowman is showing. I don't want it to be all perfect. Okay? And then I'm just going to splutters. I'm thinking my family's you can use a toothbrush. You can use a regular brush. Just is my favorite. I want some bigger drops. I'm going to get more white water co owner on there all the way down, even on the white area. Now I see that this is more than I really want here. So pick that up with just damp brush. Look, I re some of my hat there. It's OK. Add that back in real quick. There we go again. You can make corrections with power. It's just a whole bunch right here. I don't know how I managed that, but how? Tap some in here and there. Some bigger snowflakes. They're closer, right? If they're big, I'm using my to shoot it out. And I'm actually picking up some the Rio and again cover up with face. But leave this area so that I can do the same. So some of the snow is between us and Stillman and closer and some of its far away, and we see some nice icy texture in some areas. It's a big snowflake. Big snow think makes no, like I love him. I think that's a little too much snow there going to push that back a little. There we go and pick up a little mining to go on. Just added in there, that's where we had that snow texture. Okay, now I'm fiddling and I need to stop. Okay, so we have actually only one more step. And that is the big revealed
13. The Big Reveal!: So here we go. Let's remove the Washington pull it at a 90 degree angle way. Protects your paper. I was wrong. We have two more steps. But this is the first of the last two steps that was catching on the paper there, so I pulled it from the other direction. Nice, clean edge. Very. There is one more step, and that is to sign our painting. I'm going to do that with the white and with my tiny, tiny brush. And I'm just going to initial. He earned the snow, and that is it. Okay, let's talk about your project.
14. Thank you! and Project: Now it's chat about your project. I would love to see you paint a snowman. You can turn into a card or just be a painting that's completely up to you, but I can't wait to see what you do. If you have any questions. As always, please leave them in the discussion section and please share your work with me in the project section or on Instagram using hashtag Js a skill share or tag me at Jessica Sanders Art. And if you love this class, don't forget to leave a review and let other students know that you enjoyed it. Thank you so much.
 Jessica Sanders, Artist | Designer