Transcripts
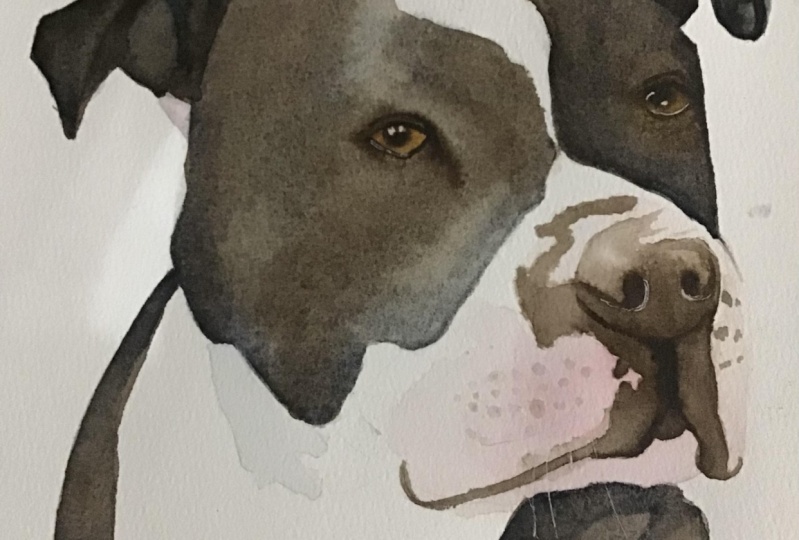
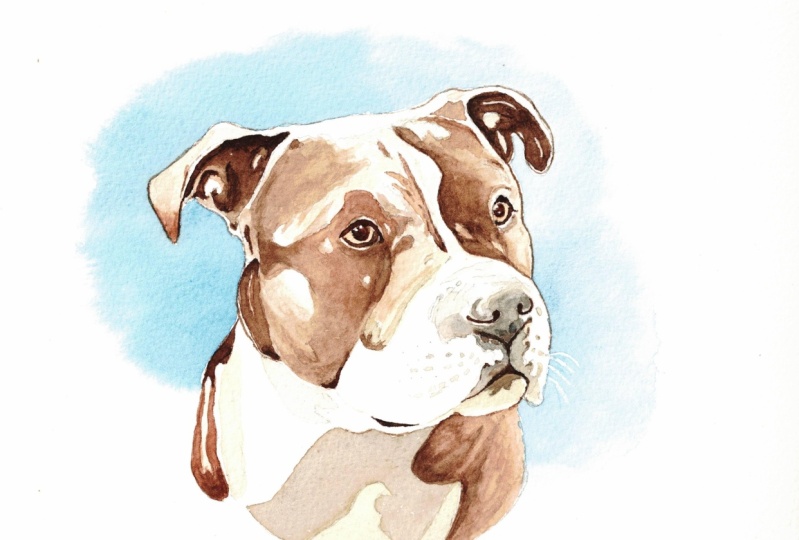
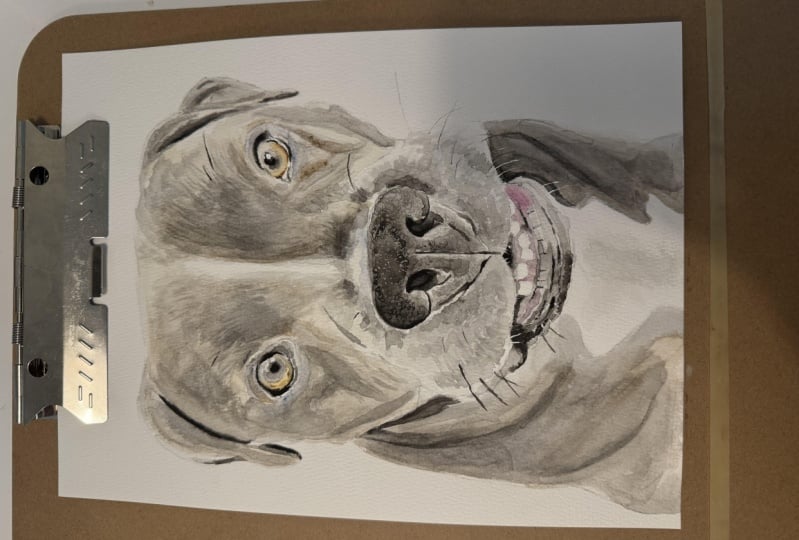
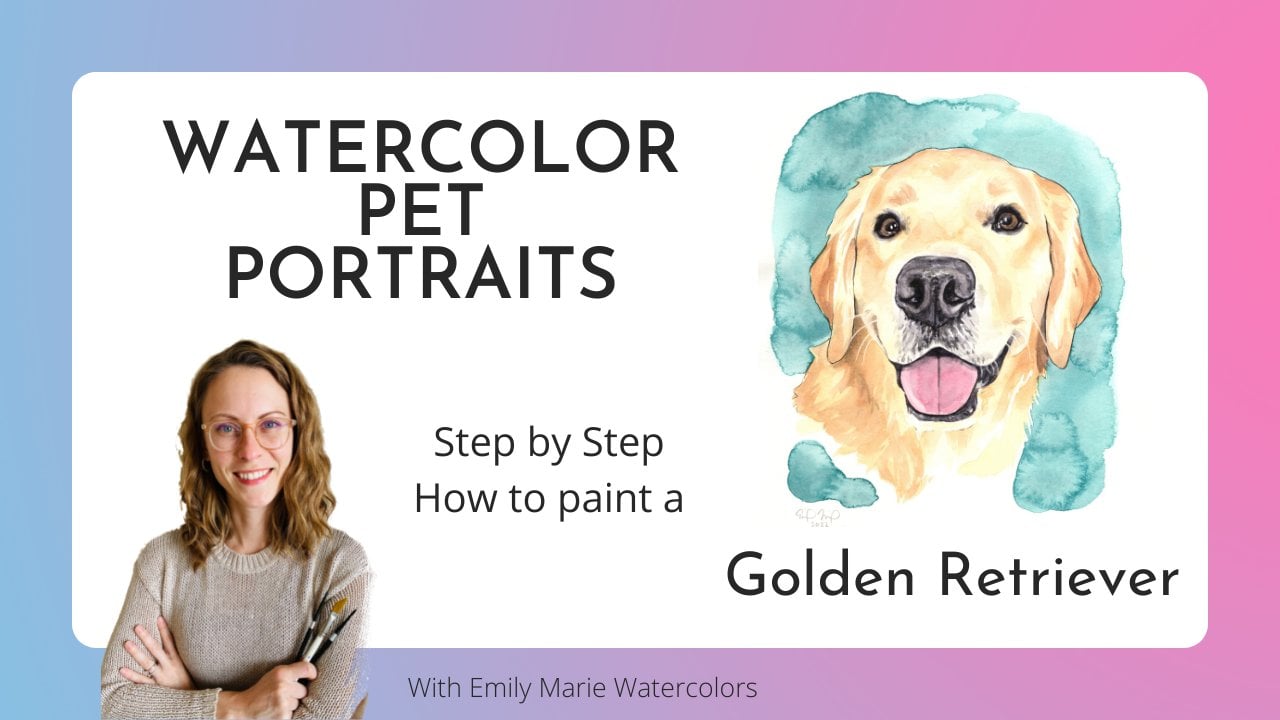
1. Intro: Painting an American Staffordshire Terrier with Watercolors: [MUSIC] Hello and welcome. My name is Emily. I'm an artist and owner of
Emily Marie Watercolors. In today's class, we're going to look
at painting Hercules, an American
Staffordshire Terrier. Pit Bull breeds are some of my personal favorite
breeds of dogs to paint. If you are a beginner that
has some experience with watercolors and would like to explore the possibilities
of pet portraits, pit bull breeds are great
dogs to start your journey. This is because they have short, straight hair that's a little
bit easier to paint than some of the curly,
long-haired breeds. But first a little about me. As a watercolor artist, my goal is to convey the emotion and personality
of the dogs that I paint. This means that I focus more
on painting eyes, noses, and mouths, and I'm less focused on painting
individual hairs. You'll notice that I talk a lot about painting an
illusion of hair instead of spending hours replicating my reference photos. I'm also known for adding a bright splash of color
behind my portraits, which I'll also
teach in this video. We'll start by talking
through the supplies needed. I'll share with you
the supplies that I use to create my
professional portraits, as well as the
special color palette I found gives me
the best results. Then we'll dive into tracing
your pet and preparing your paper using masking
fluid and painter's tape. Next, we'll start painting
Hercules layer by layer. I'll show you a combination
of real-time video with time lapses so you can see the whole process
from start to finish. We'll end with adding a
colorful splash behind our dogs and finish our piece by using
a black micron pen. You are welcome to use the same reference photo that I used in order to
create Hercules. The reference photo
is located just below this video in the Projects
and Resources tab. Or you're also welcome to use your own reference photo of your own American
Staffordshire Terrier. Either way, I'd love to
see your finished projects and answer any questions
you have along the way. Let's get started. [NOISE]
2. Supplies: Let's start by talking about
supplies, and studio setup. The one thing that I
love about painting with watercolors is that it doesn't require a whole lot of space. As you can see, my studio consists of a student's eyes desk in the
corner of a spare bedroom. We'll go over all
the supplies needed, and then we'll get started. Let's talk supplies. You can find a detailed list of all the supplies that
we'll talk about during this segment in the projects and resources tab just
under this video. Let's start by
talking about paper. For this class, I'm going to be using an eight by
10 sized paper. The watercolor paper that
I choose to use with my pet portraits is the
brand called Arches. It's a £140 paper, and I prefer a hot pressed paper when I'm working
with pet portraits. A hot press paper
tends to be smoother, it doesn't have any rigid
bumps on the paper. However, there are some
artists who are not big fans of hot press paper. If you are one of those people, feel free to try this
with cold pressed. The one suggestion I do have is whatever paper you are using, try to get a 100 percent cotton. This is just going to
allow your watercolors to correctly seep into the paper
instead of sitting on top. You'll notice that this is
a nine by 12 pad of paper, so I did have to cut
this paper down. Next, let's talk
about our paints. The palette that I'm using has a few different wells in
order for mixing colors, and of course, I am going to be using a very limited
color palette. Most of the paints that
I use are Daniel Smith. Let's talk about the
specific colors. For the majority of
my pet portraits, I use a combination
of these 14 colors. I say 14 because although I
use Art Philosophy's maple, you can switch it out with Daniel Smith's
Quinacridone Burnt Orange. A printable copy of
this color palette can be found in the resources
tab below this video. I personally love to use granulating colors
when painting pets. I find that the separating
of pigments nicely mimics fur which
is a great benefit when we don't want to
paint every single hair. That is why I always use a combination of either
shadow violet or a moon glow, and lunar black in
my pet portraits. For this specific class on painting an American
Staffordshire Terrier, the colors that I used are Art Philosophy number
132 Sassafras, Art Philosophy number 130 Maple, Daniel Smith Piemontite Genuine, Daniel Smith Moonglow, Lunar Black, Quinacridone, Magenta, and Phthalo Blue. Let's move on to the rest of the supplies
that we'll need. You'll need some masking tape in order to tape your
paper down to a table. I will be using
some masking fluid. This is to keep the white of the whiskers and the white
of the eyes clean of paint. In order to apply
my masking fluid, I use an old small brush, and this is a size 0 brush, and I also use a pen that
has a small nib on it. This pen I use solely for applying masking fluid
for the whisker areas. I find that it
allows for a finer, thinner line of masking fluid as compared to my brush that tends to be a
little bit thicker. For the brushes that I'm
using for this project, I tend to not use a
different brush for details, but you are more than welcome
to use a different brush. The brush that I use for
the entirety of my piece is a silver limited black
velvet round size 6. I find that this brush holds enough water for some
of my larger layers, and it also has a
fine enough point that I can use for details. For the color splash
in the background, I need a brush that can hold
a little bit more water. And so I'm using this
brush by Polina Bright, she's another Instagram artist. It is a size 0, but you
can use any brush that has a higher capacity
of holding water. We'll also of course
need a pencil and a kneaded eraser to
sketch out our pet. At the very end
of today's class, I'm going to be using a Micron
Pigma black pen size 03, in order to add a few details
around my pet portrait. I like adding this black to my watercolor
paintings because I feel that it adds a crispiness
to some of my edges. If you are a watercolor purist that likes to only
use watercolor, feel free, there's no need to add this black pen at the end. I always use an old
towel when I'm painting in order to tap my brush on it if I need to lift any colors. I have gotten in the habit of
using two glasses of water. The reason being is that at the end when I add
my color splash, I always need to use fresh clean water so that
I don't dirty up my color, and I usually use one cup of water while I'm painting
the actual dog itself. A detailed list of all the
watercolor supplies that I use can be found at my website,
emilymariewatercolors.com. You can scroll through
all the supplies that I use according to category, and also click on
any of the links. When you click on a
purchase here link, it'll bring you to an affiliate link through
**** Blick Art Supplies. Now that we have our
supplies together, we're ready to paint.
3. Tracing and Using Masking Fluid : The first step to creating any pet portrait is to correctly transfer the image that you have from your client to
your watercolor paper. There are many different
ways to do this. The simplest way is to
just freehand your sketch. But in order to save time, I like to use an app
called Da Vinci Eye, in order to help me trace my pet portrait onto
the watercolor paper. After I've correctly adjusted the size of my head onto
the sheet of paper, I'm going to use this
app to start tracing the outline of just
the pet's head. I'm going to start to trace
partially down the neck, but I'm not going to add any of the little details such as the bow
tie or the collar. When I'm done drawing, I'm going to use some white masking fluid by
Winsor and Newton to keep the highlights of
the eye white before I add my watercolor paint. Make sure you use an
old brush for this, as it's very difficult to clean your brush once you
use masking fluid. Next, I'm going to use
the same masking fluid, but this time with a
calligraphy pen and a small nib in order to paint the white whiskers that you see on the right
side of the muzzle. Make sure to dab off any excess masking fluid
before you add the whiskers. I would strongly suggest to
practice this skill before you attempt to mask your
whiskers on your final paper. Now we're ready to tape
our watercolor paper onto our desk or a
different artboard. I am using blue painters tape. I'm going to tape on all
four sides of my paper. I like to remove some of the
stickiness from the tape by placing it first on my pants
and then onto the paper, I find that it doesn't peel off any of the paper if
I do that, step first. I have all of my supplies
setup and ready to go. Let's start looking at our first layer of
painting the eyes.
4. Painting the Lightest Colors First: Whenever I start
my pet portraits, I tend to always start by
painting the iris of the eye, that's the colored area. Right now, I'm mixing
a golden color to match the color of my American Staffordshire
Terriers eyes. I'm mixing some art
philosophy maple along with Sassafras to
get that golden color. I also find that if I
start with the eyes, it gives them enough time to dry before I move on to the
area around the eye. After I finish
painting the iris, I'm going to check my
reference photo to see if there are any pink
areas in my pet. You might find some
pink under the ears, or in this case, there is some pink in the muzzle area of my
Staffordshire Terrier. I am using a quinacridone
magenta mixed with a lot of water to paint the pink
area around the muzzle. [MUSIC]
5. The First Layer of Fur: After I finish with the iris of the eye and the
pink of the muzzle, I'm going to start with
the first layer of fur. I'm going to mix a Piemontite Genuine
which is a reddish brown, along with a little bit of sassafras and maple that I
used for the iris of the eye. I'll add quite a bit of
water for this first wash because I want my first wash
to be very transparent. [MUSIC] I'm going to start painting
the upper left ear. This way when I rest my
hand on the painting, I'm going to avoid messing up any of the fur that
I already painted. I'll start with a light wash in the whole ear and then I'm
going to drop a little bit of Piemontite Genuine which
is my reddish brown into that tip of my ear. I also noticed a bit of a
shadow creeping up the ear, so I'm going to use some more concentrated
Piemontite Genuine, while my first layer is still
wet to create that shadow. Next, I'm going to use the same light-colored wash
to apply one solid layer. I'm only going to paint the
left side of the face because I don't want this
layer to dry before I have a chance to add
in some darker colors. I found that if I do half
of a face at a time, my first layer will be
wet enough to work with. While it's still wet, I'm going to dry my brush and
I'm going to lift some of the color out of the areas that are highlighted
in my reference photo. If you notice in my
reference photo, there are some
strong highlights in the top of the head and
around the muzzle area, so I'm cleaning
my brush off with my towel and lifting
that color up. When you lift color, you have to make
sure that you're using a dry brush to do this. If you use a wet brush, you're going to create
some unwanted blooms. Next, I'm going to mix some more concentrated
Piemontite Genuine, that's the brown I'm
using and I'm going to drop in some of these browns. You'll notice that
my first layer; that lightest tan is still
wet, it's still damp. I am not able to drop in any of these colors if that first
layer has already dried, so this first step
I do have to move quite quickly in order
to drop these colors. I'm going to clean off my
brush and dry it on my towel, and now I'm starting to blend these colors that I dropped
into the first layer. I'm cleaning my brush
off every single time I touch the paper
in my paper towel, and I'm just softening
the edges so that this brown doesn't have
a very rough edge. I'm going to continue to add the shadows that I see on
the left side of the face. I'm using barely any
liquid on my brush at all. If I use too much
liquid on my brush, I'm going to create
some unwanted blooms. Our paper towel is
an invaluable tool. As you notice, I continue to blot off some of
the excess color that I have on my brush because I do want
to lay down color, but I just don't want
it to be that dense, so I'm going to use my paper
towel to soak in some of that color to control the amount of color
I have on my brush. I think that will do for now. I'm not looking to add
the darkest colors, I'm only wanting to add the
beginnings of the shadows. Now I'm going to do
the same process that I did on the left side, but now on the right
side of the fur. Right now I'm only focusing on the brown areas of the fur, so I'm going to
speed up this video a little bit so that
we can get through this section a little faster. I'm doing the same steps that I did on the opposite side, so I'm going to start
with that lightest tan colored wash and
while it's still wet, I'm going to do two things. First, I'm going to lift any color in the areas
that there are highlights. I'm using a dry brush for this. Then I'm going to drop in any darker shadows using
a Piemontite Genuine, and I'm going to then
dry my brush and blend any of those
areas with a dry brush. You'll notice that the
darkest areas are the ears; the part that's on
the underneath side. I'm not going to add a
Layer 2 because that is using a very dark brown so I'm going to come in
and do that later. Right now I'm just focusing
on these middle tones. The last little bit of fur
that we have left to paint is the area of brown
fur on the neck. I'm going to do the
same technique of painting a light
wash of brown first, then dropping in some of my more concentrated
browns on top. It can be difficult to know where exactly to stop painting. I usually do not continue my pet portraits to the
bottom of the paper, I like to leave some white area, but it's tricky to know
exactly how far down to paint. I like to think about an imaginary oval that covers the entire face
of my pets that I'm painting and that oval
line will guide me to only continue the neck
to the end of this oval. We're all done with the fur, now for the first layer
of the nose and muzzle.
6. Painting the Nose and Mouth: We are now ready to
paint the first layer of the nose and
mouth of Hercules. The paint that I'm using
is a combination of Piemontite Genuine with just
a touch of lunar black. I'm still adding quite a
bit of water to my colors because I want this layer
to still be transparent. In the nose area, I'm going to paint
a uniform layer of color that covers
the entire nose, except for the two
little slivers of white that you see
underneath the nostrils. I'm going to try my best to keep that part of the paper clean. Pit bull breeds tend to have a unique facial feature underneath the nose
and above the mouth. If you can tell from
the reference photo, Hercules has more of a splotchy brown that is below
the lip and above the lip. We're going to try to mimic this facial feature in
watercolors by using a lot of liquid and allowing
the liquid to pool in the area below the
nose and above the lip. What this will do is that that pooling liquid will
start to dry and the edges of this
splotch are going to be very delineated
with a hard line. It's going to give a
very similar effect to this splotchy
coloring below the nose. These brown splotches also continue up to the
left side of the nose. I'm going to continue with the same technique on the
left side of the nostril, where I add a larger
amount of liquid. I'm not going to have quite as much liquid
as underneath the nose because I do notice that it
is a lighter shade of brown. Before my paint dries, I'm going to dry off my
brush and use a dry brush to lift some of that color
from around the mouth area. I noticed that there is a
highlight that is just to the right side of that line marker that connects
the nose to the mouth. To the left of the mouth, I'm going to use the same
colors that I used for the nose and the muzzle
to paint some area, some darker dots of
brown to represent where the hair follicles of the whiskers are coming
out of the muzzle area. I'm going to start
with quite a bit of liquid on my paintbrush. Now I'm going to
clean my brush off and dry it using my
paper towel and then I'm going to lift some of the color from these hair
follicles because I noticed that it's a little too dark for what my reference
photo is showing. I'm going to add
a little bit more brown to the lower jowl. I think I'm ready for a
second layer now on the nose. I'm using the same mixture of Piemontite Genuine
with a little bit of lunar black that I used for the first layer of the
nose and the mouth. But it looks a little
bit darker now coming in for this second
layer on my nose, simply because I'm adding
a second layer on top, so it's going to look
a little darker. I'm using my reference
photo to see where the shadows on the
nose are and making sure to leave that brighter highlight
that you see on the top of the nose with only one
layer of paint instead of two. I'm going to make sure to delineate a little
bit better the mouth. I'm also going to add another layer of brown
to the lower lip, this little triangle
in between the cheeks. That's all I see for the
dark brown on the nose, we're going to continue to add another layer of dark
brown to the face and body before we come back
to the nose and add black.
7. Adding a Darker Brown Layer: So far, we've done one light wash on the
face of Hercules, and dropped in some
darker colors. We waited for that to dry, and went back with a
slightly darker brown. Now, before we add
our black details, we're going to add
just one more layer of a deeper, darker brown. The brown that I'm using
that I mixed up is a combination of [inaudible]
genuine with Lunar Black. I'm adding just a
little bit less water than I did for my second layer. After I paint a uniform
layer under the ear, I'm going to dry my
brush off with my towel. I'm going to start to lift
up some of the color from underneath the ear to show those highlights in the
underside of the ear. I need to make sure
to clean my brush off every single time
I lift up color, and make sure you're not using a wet brush for this or
you will create blooms. [MUSIC]. All right. I'm just going to add a little bit darker
brown pigment to this edge of the ear. I noticed that that's
the darkest area. I want to make sure that it's
reflected in my painting. [MUSIC]. I'm going to do the same
thing for the right ear. I'm going to speed this video up just a little bit for time. But remember that we're
using the same technique of first laying down
that layer of brown. Then I'm going to
clean my brush off, make sure it's very dry
before I lift up some of that pigment from
the areas that are highlighted on the
underside of the ear. Next, I'm going to
grab more pigment, and drop in some darker pigment wherever I see
those dark shadows. [MUSIC]. Using that same brown pigment that I just used
for under the ears, I'm going to look at
my reference photo, and paint wherever there is the darkest brown on the face. I noticed that there are some darker tones on the
left side of the face. I'm going to start
there so that I don't smudge any of the
work with my hand. I'm going to wash
my brush, dry it, and use a dry brush to
blend these hard edges. [MUSIC]. Now, I'm going to start
working on the eye area. I always want to have at least
a few different layers of dark color in the eyes
before I add black on top. That way the colors
underneath are going to shine through
when I add black. I'm going to start by
outlining the eye shape, the upper eyelid, and the lower eyelid
with my brown paint. I'm going to also add some
brown to the pupil of the eye. Then clean my brush, and blend that hard edge so it's not so crisp of an
edge in the pupil. [MUSIC]. When I'm painting brown
in the face area, I need to control the amount of liquid that's on my brush. I'm going to tap my
brush on my towel to take away some of that
liquid before I start painting. This is going to allow me
to have less dark areas, and a little bit more
control with my brush. Now, that I've added brown to all of the shadows to
the right of the eye. I'm going to dry my brush off, and blend those edges. Blending is a great
tool to help create a soft look in the fur especially when we
have short-haired dogs. Most of the time we don't
want these hard edges. Every time I lay down
some darker color, I'm going to come back, dry my brush off
on my paper towel, and blend those hard edges. [MUSIC]. Once again, clean my brush off. I'm going to use a clean, not fully dry brush to drag some of that extra pigment
that's on my brush, and create more of a gradient tone on this
left side of the face. While the area that I just
painted is still wet, I'm going to drop in
a little bit darker, more concentrated
pigment into some of the areas that I noticed
still aren't dark enough. Now, for the second eye, I'm going to show you
a little closer up how I first paint the darker
section of the eye, the upper eyelid, and the lower eyelid. Then I move to the iris
in the center of the eye. As soon as I have
all the paint down, I'm going to clean my brush. With a clean dry brush, I'm going to soften
some of those edges. I'm going to speed
up this section of the videos so you can still
see what I'm doing up close, but not have to watch
it in real-time. All right. Now, that
I've laid down color, I'm going to dry my brush off, and blend those edges. Remember that this
is all a combination of laying down darker color, then cleaning your brush, drying it, and blending. [MUSIC]
8. White Fur Shadows: Painting the white fur can
always be very challenging. I like to paint white fur using a very watered-down
wash of moon glow. I've added quite a bit
of water to moon glow. Moon glow is a combination of some purples and
blues and grays. I love the way that
it looks on my paper. It granulates in a way that it looks like fur without
you having to do much. What I'm doing now
is I'm adding, dropping in some moon glow in the areas of the white fur that have the strongest shadows. I'm cleaning my brush and drying it to create a softer edge. I know it's difficult looking
at the reference photo because of the tie that
Hercules is wearing. But I'm going to do my
best to guess on where these shadows are going. [MUSIC] I do want to leave some of the white paper shining through, for the white fur. I'm not going to
completely cover every single section of his
white fur with moon glow. [MUSIC] I'm going to move on
to the muzzle area. I do notice some shadows on the very left side
of this muzzle. It's mimicking the same curve as the smile here, as the mouth. Then I'm going to
move on to where the dots of the
hair follicles are. I'm going to add a little bit of depth with my light
wash of moon glow. Occasionally, you'll
see me drying off my brush and then blending
those harder edges. I'm relying a lot
on this technique of drying my brush and
blending out my edges, especially for the white fur. We can't forget about this little triangular area underneath the mouth,
the lower lip. This is going to be a little
bit darker of moon glow. I'm dropping just
a little bit more liquid underneath this area. At this time, I'm also going to mix a little more magenta, the quinacridone magenta
with quite a bit of water. I noticed that the
left of the mouth. I see a little bit darker of pinks than what my
first layer is showing. I'm going to add just a
little bit darker pigment to the left of the mouth. [MUSIC]. Now the last area of
white that we have not added shadows to is this
white in-between the eyes. Once again, I want to
leave some of that white of the paper
to shine through. But I do notice a slightly darker shadow
on the bridge of the nose, right in-between the eyes, and another little tiny shadow at the very top
of that triangle. [MUSIC]
9. The Last Layer: Adding Black: The very last layer of
paint that I'm going to add to my Staffordshire
Terrier is black. The color of black that I'm
using is called lunar black. It's a color by Daniel Smith
and it's a granulating color meaning that when I paint on top of colors I've
already painted, the granulation will allow for those colors underneath
to shine through. Looking at my reference photo, I notice that the area underneath
the ears is very dark, so I'm going to add a light wash of lunar
black to that area. If you notice, I'm not
going to completely cover every single part of the
area underneath the ears, I'm only focusing on
the darkest shadows. [MUSIC] [NOISE] With every pet
portrait that I paint, I always add lunar
black to the eyes. Right now I'm adding a layer of black to the upper eyelid
and the lower eyelid. I'm going to be very careful
to not get any of this black into the colored
iris of the eye. In the pupil of the eye, I'm going to be very
careful to only add black to the darkest
area of the pupil. If you notice from
my reference photo, the pupil is not a
complete circle of black. There are highlights
in the pupil itself, and so I'm only
going to be painting this lower arc of
black in the pupil. I've dried my brush off, and now I'm blending some of the harder edges
around the eye area. [MUSIC] Now that the eye on the
left side is complete, now I'm going to work on
adding black to the right eye. Once again, I'm going to paint a line on the upper
eyelid and lower eyelid, and then I'm going to paint
a section of the pupil, the black part in the
center of the eye; but I'm not going to paint
a complete circle of the pupil because there are highlights that break
up that full circle. I am still using my black velvet round
size 6 brush for all of these details but if you need to switch to a
smaller size brush, that is totally up to you. Now that the ears and eyes
have a layer of black, I'm going to add
some black details into the nose and mouth area. I'm going to start with the
creases of the nostrils, that's where the nostril
connects to the nose, and I'm going to make sure that the nostril part is completely
filled in with black. [MUSIC] Now I'm going to rely heavily on my reference photo to paint the darkest shadows of
the nose and muzzle area. I noticed from my reference
photo that the area just below the nose is actually a touch darker than
the nose itself. I'm going to add some
lunar black below the nose and continue it through
the creases of the mouth. [MUSIC] I'm just going to add a
few extra black details around the side of the nose
and the top of the nose. [MUSIC] I don't want to forget
this little chunk of black where the edge
of the mouth ends. But I don't want to
connect the mouth to this corner of the
mouth with a black line; if I do that, it's
going to make it look a little too cartoonish. Right here I'm adding a
lighter wash of lunar black. So I added a little bit more
water to my lunar black to add the darkest shadows to the fur directly
underneath the head. Remember that when I paint lunar black onto the brown fur, as you can notice
from the video, the granulation of
the colors allows for the brown to
still shine through.
10. Adding a Splash of Color: After you finish
painting your pet, an optional step is to add a splash of color
behind the head. You'll want your color to be focused wherever you
add a masking fluid, so I added masking fluid
over the whiskers. The top of the head is
quite light as well. I'm going to add some color to make those areas really pop. I'm going to start by painting clean water in the areas
that I want to add color. This is known as a
wet-on-wet technique. Before I add the color, I need to fully wet
that area of paper. I tend to work on one side of the splash
of color at a time. That's because I find the
water tends to dry faster, and so it's usually a good
idea to do half at a time. You'll want to be very
meticulous during this step, because remember that
wherever you wet the paper, the color will run to that area. You'll want to make sure to have clean edges all around your pet. For this color splash, I'm using a phthalo turquoise
mixed with some water. I will eventually drop in a little bit more dense pigment. But the first layer of color
that I'm adding wet to wet is needing to be
mixed with some water. I'm going to get very close
to the edge of my dog, making sure to not paint over the far that
I've already painted. [MUSIC] Now I'm going to dry off
my brush so that I have a completely dry brush to lift off some of the
color around the edges. By lifting some of the color around the edge
of this color splash, I'm going to soften the edge so that it's not so hard of an edge around
this color splash. I'll then drop in a little
bit more color towards the base of the color
splash to have it a little bit more
dense and grounded, and in a few other areas such as around the ear
and behind the whiskers. I'm going to do
the same thing on the upper section of my splash. First, I'm going to
wet the area that I want to add the color to. I'm going to speed
up this section of the video to save time. Now that the area that I want to paint is wet with clean water, I'm going to drop in
my phthalo turquoise. Whenever I am creating a
splash behind my pets, I don't want to make the
splash a perfect circle. Here in the upper section, I'm going to extend it slightly
in the upper left corner. That's just going to create
some interest for the eye. Once again, I'm
cleaning off my brush, so I have a dry brush
and I'm going to blend the edges so that I don't
have that hard of an edge. [MUSIC] Moving on to the
last segment and my color splash on
this left side. Once again, I'm going to wet it first and then drop my color in. I need to mix a little bit
more phthalo turquoise with water before I drop it
in on this left-hand side. If you are mixing your own color using multiple
colors from your wells, make sure that you
mix enough color to completely cover the
splash around your dog. [MUSIC] While the area is still wet, I'm going to drop in a little bit more
pigment around the edges of the head just to create a little bit more interest
in this color splash, so that there are areas of higher density and
areas of lower density.
11. Finishing your Painting: Once my painting
is completely dry, I remove the painter's tape
from around the edges and using kneaded eraser to erase the masking fluid
from the whiskers, the highlights of the eye, and any pencil marks that I can still see from tracing
my pet portrait. After I erase the masking fluid from the highlight of the eye, I always go back with some lunar black paint to
touch up those highlights. I find that the liquid masking fluid tends to create
some rough edges and a lot of times the highlight is a lot larger than what it
is in the reference photo. I'm using black to clean up
that eye area a little bit. I also had added a very
small line of masking fluid underneath the eye on the highlight of
that lower eyelid, and so I'm going to go back
with some brown; a very, very light wash of brown and just cover that white
so it's not so bright. Last, I'm going to
add a little bit more brown to the
iris of the eye. Usually, the iris dries a lot lighter than what
you expect when you put your first
layer of paint down. I'm just going to add a few darker areas into the
colored part of the eye. Lately with my pet portraits, I enjoy drawing
with a micron pen, this is a permanent felt tip pen around the edge
of my dog's face, and also using it on the inside to add some very,
very crisp details. When I'm drawing an outline around my watercolor portrait, I'm going to be very, very careful to not have a thick line around
the entire portrait. Right now I'm focusing
on the inside of the ear and around the
bottom area of the ear. I'm going to have a
darker line on the tip of the lower ear and I'm
going to continue this line down the
edge of the body. The size of pen
that I'm using here is a Micron Pigma Size 03. I wouldn't suggest
anything larger than a 03. When I'm ready to
outline the areas that are the brightest
highlights of the head, I'm going to vary the pressure that I'm
using with my pen. I'm going to press a little bit harder around the
corners of the ear, but around the top of the head where the
highlight is the brightest. I'm actually not going to
completely draw that edge, I'm going to leave it
free from micron pen. I'm going to do the same thing, outlining the right
side of the head, making sure that the
areas that are the darkest in color I'm
pressing a little bit harder with my micron pen
and I'm lightening up my touch with areas
that are highlighted. [MUSIC] I also am going to
add a little bit of micron pen to the eye area. I want to focus on where is
the crispest area of my eye. I will draw over the eyelid, especially the upper
eyelid and then I'm going to only
add a little bit of micron pen in the darkest area of the pupil which
is the black center. [MUSIC] I need to be very
careful when I'm adding an outline around
the whisker area. I'm actually going to avoid
it entirely because I don't want to very clearly
separate those white hairs. I will come to the bottom
of the mouth and outline that jaw as well as
the side of the body. I'm going to add a little
bit of pen to the center of the mouth where the lips
meet and just a very, very light touch under the chin. I'll outline the nostrils. [MUSIC] I'll add just a hint of black pen to the farthest
corner of the mouth. My very last step is
to sign my piece. I like to sign using
a pencil to not detract away from
the painting itself. That's it. Once again, I'd like to re-emphasize that the micron pen at the
very end is optional. But I do find that
adding a very, very light outline
and details with the black pen do help your
pet portrait to really pop.
12. Final Thoughts: That's it. Congratulations. You've now finished
your painting of an American
Staffordshire Terrier. Make sure to upload a picture or a scan of your painting that you created
using this tutorial. There is a green rectangle below this video that
says Create Project. There it will give you
instructions on how to upload a picture of
your pet portrait. Make sure to follow me as an
artist and teacher here on Skillshare by clicking the green "Follow"
button above this video. You can also find more of my pet portrait
paintings and some of my botanical watercolor
art by visiting my website, that's
emilymariewatercolors.com. Make sure to leave me a
comment below if there's a certain breed of dog that you'd like to
learn about next, and we'll see you in the
next Skillshare class.
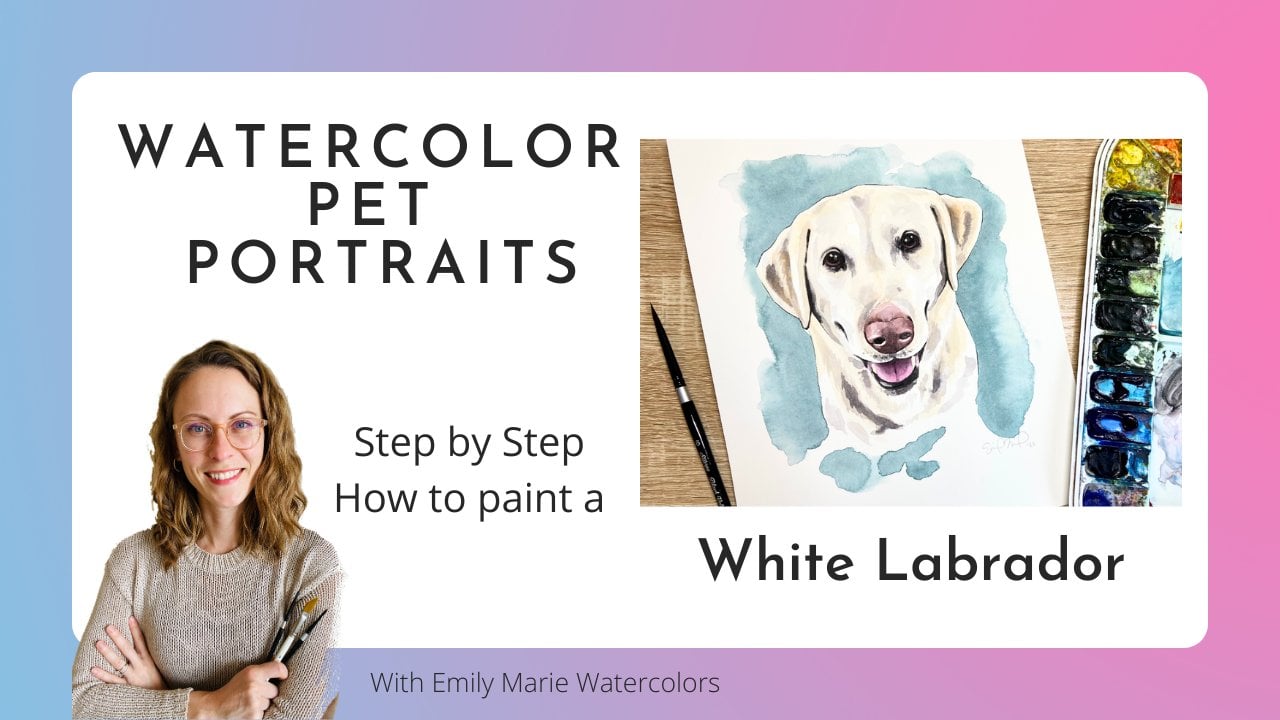
 Emily Marie Watercolors, Watercolor Artist and Dog Lover