Transcripts
1. Welcome!: Hello, my name is Kim and I'm an artist in Chicago, Illinois. I have been loving watercolor lately, especially the wet on wet style. It's so dreamy and so soft. And I decided I wanted to learn it. So I've been practicing a lot. And it took practice. I thought I was going to pick up my brush and just masterpiece. Now, that didn't have hours of practice. And I finally came to a point where I really like what was happening. It's so loose and free, hence the name of this class. So that's what we're going to focus on in this class. The wet on wet technique. Lifting off pigment and blending edges so they have that soft, beautiful, dreamy look. I listed this class as intermediate. However, for me personally, when I was learning, I always took classes that were above my skill level because it just taught me so much by seeing other people in these advanced stages. I learned so many valuable skill lessons. So in the next video, we'll go over our supplies. I'll see you there.
2. Watercolor Peonies Supplies: Let's talk about the supplies I'm going to use in this class. This is a Strathmore watercolor art journal. It's the 400 series. And what I like about it, you can paint on both sides of the paper. One side has a smoother texture and the other hands a little bit of a tooth to it. So I really liked this. You don't need to go out and buy expensive paper or even niche journal, as long as you have paper that can hold a decent amount of water, that will be good for this class. The paints I'm going to use are the Daniel Smith, quinacridone rose, quinacridone, gold, and then the Winsor and Newton paints gray and Winsor Newton opera rose. The thing I like about these paints is their professional grade and they have a great vibrancy to them. The brush is going to be the black silver velvet number 8, round. What I like about this brush is the belly holds a lot of water and it has a nice tip. So with this technique, especially we'll be using the belly to hold the water and the paint will be on the tip and it will help us blend really nicely. So any brush you have that can hold a decent amount of water with a nice tip. As long as I would suggest to number eight, at least at or a number ten, whatever you prefer, but that will work. Pellet is the dB at to Lear palette. I've got it on Amazon. It has 18 wells for paint and it has ample space for mixing. Doesn't take up much room on my desk and I can take it with me, which I like. And then just two bowls of water. One is going to be cleaning up your pigment is going to get a pretty color. And then one to keep fresh and clean with for just rinsing and blending. And then lastly, a towel. I used to use paper towels, but it just felt like I was wasting so much and I think we have enough garbage in the world, so try not to use them anymore. I just used a towel, a hand towel, or a washcloth, and you can use it so many times over and over until you have to clean it. And it works great by just saying it to dry after I paint all of these supplies, I will have listed with links to them in case you're interested. Some of them I got an Amazon and others I got at Blick Art store. So I'll list those for you in case you're interested. All right. Let's go paint.
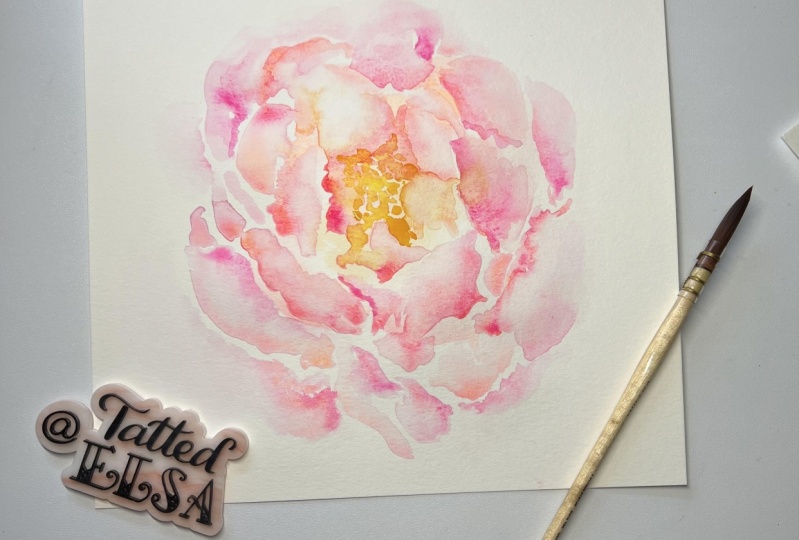
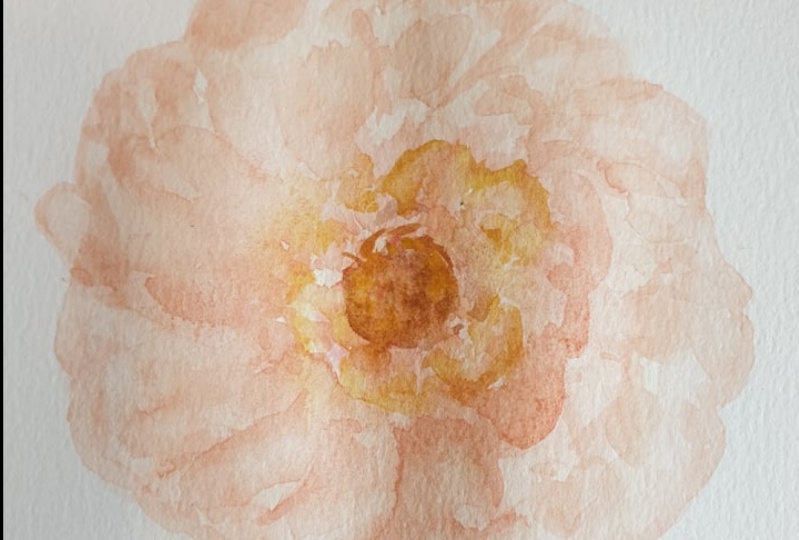
3. Class Project: The project for this class is going to be your finished peony. Because we're going to go from the very beginning to the end. So if you follow along through the whole thing, you'll end up with your own beautiful peony. And please upload it to the project gallery. I can't wait to see it. It's so wonderful this style because everyone's is going to look so different. And you can never really replicate one after the other. Because every time it will look so unique and so beautiful. So please upload your project.
4. Wet on Wet Technique: All right, so let's do a little demonstration of the wet on wet technique. I'm just making a shape and there's a little bit of color in there. So you can see a little better, but you can tell the sheen on here. It's not soaking. It's not tripping, but it's got a good sheet. So now I'm going to take some pigment and I'm going to add it in here. And I'm going to wash off my brush and pat it dry, dip it in the clean water, lightly pat it dry, and just put some water here to blend. Blend that color in nicely. Then you'll have that soft transition. And then we can add a little bit more pigment, maybe on this side here. And then rinse off our brush. Padded try a little bit and then just softly blend the edge and see if this is where you get this nice transition. So beautiful technique that I love working in. If you wanted to add a little more here, bring that up a little. Rinse off your brush. Come in here with some clear water. And there we go. It's just a nice soft transition. So this is the technique will be working with today. The wet on wet. And I think you're going to enjoy it. And it's a real fun. Wait to paint. In the next video, we'll go over how to lift off paint. So we'll see you there.
5. Lifting Off Technique: All right, so the lifting off technique is exactly what it says. It's lifting off paint. So let's do the same thing. I'm going to make a rough circle shape here. And I'm going to take some pigment and just put it in there. Cover it good. So you can see, Let's just to a shape. Like so. Now I realize, Oh, I want to highlight in there, so I'm going to clean my brush off, dip it in the clean water and dry it. And I'm going to just lift off wherever I want. And that's it. So let's get started. In the next video, we'll begin our peony.
6. Beginning our Peony: All right, so let's start with our goals. That's non-perfect. What down our little eerie I hit. We're going to start with the inner petals. The center petals. Take some opera pink and just do a couple of the strokes just to give us that starting section. So we know where to go from there. I'm just going to make shapes here right now. I'm not trying to do anything exact and just giving that idea of what I'm seeing, come back later and work on this. So let's just get a little bit more opera pink in here. And see how are just putting some of those shapes that I see. They're not perfect and letting the paint do what it wants. And then I'm going to come back and just soften a little like we were doing. So I don't want any harsh edges in there. Take a little more opera pink, just to a couple of strokes in here so we can see what's here. Come back and soften those a little bit. And it's just the idea of that center. Just the idea just to little strokes here to show that shape. A little bit in here. All right, let's go in and soften right here. All right. And now what we wanna do is we take some opera pink and some quinacridone gold. And you get this nice soft. You can see it's very watery and it's very watery. And I'm just going to go around. Here. Are some more that it's wet, maybe add a little more water, gets more of that mixed. And it's just a soft color. That little dot is just a speck of dry paint. So don't pay any attention to it. And see it's just a mess right now. Looks like a mess. You be still kept our center here. So in the next video, we're going to go over lifting off some of our shapes.
7. Lifting Off Color: All right, so now we're going to go with a clean brush, dip in that clean water, wipe it off on your paper towel or towel here. Here we'll take off some nice step comes up when it's still wet. Look at this now, it's starting to look in that shape of a flower. Some takeoff, maybe just a little bit more in here. Some of these edges. Because we're going to come back and put more color. And this is just to give some of those subtle highlights. All right, In the next video, we're going to be adding color, more color.
8. Adding More Color: All right, so now I'm going to go into straight up our pink and the tip. And I'm just going to start making some of these shapes that I see. Same idea come in and soften those edges. Come back here. Maybe make this one here. Now see how I put a little bit more paint there. I'm just going to lift that off because I don't want it quite that harsh and just soften. That. Seems just like Fant. And now you see that pedal forming. Let's get some more opera pink. And we'll go over here. Clean off our brush. So I've ended up some more opera pink. We're going to go in here and get some of the shapes. And remember, I'm not following them to the t. I don't want it to look an exact replica. I want my version of it. So let's just come here. And another shape here. Rinse off your brush, soften those edges, and then just flare out some of these. So you get that pedal. Look. Let's get some more. I think we'll come down here. A couple of these shapes. Rinse off my brush. Soften. Soften again. Listen, you can always add a little more water if you feel it's drying too much. Grab a little more opera pink. And look how I use this tip right here. So I'm, I see something here. It's a little darker and I just looked at tip, do the work. I'm going to rinse it. Soften. Come back here, put this little bit over here, and soften it up, lift some of that off. Come back and I work all around. I don't stay in one section all the time. So over here, I'm seeing this over here. We'll keep that little shape, come back, soften it up, get some more opera pink, and make the shape. This little lady over here. Then we're going to get this other petal that's kinda like this. Now remember, I'm not trying to do it exact. I'm just getting the idea of what I see here. You could get a little bit of this in here. Go on that opera pink and get a little bit more to that edge. Let that just blend out. Then over here we have a bit of darkness to this edge. Just soften that a little bit. Grab some more opera pink. Maybe put this little lady in over here, and then soften her out because there's a pedal in front or her. It comes like this. And then I'll put her edge a little bit over here so we can see that side of that petal. Like so. We have another one and see this is all tip, tip work. Really love these brushes for that because of this belly and this tip that does this kind of work so nicely. See how that's starting to form. Beautiful. Right then over here we'll bring little bit more of the shapes here. I want to soften this a bit, dry it off and lift some of that up and then come back, bring this side. Like so. So I can then act. And then over here, we get a little petal over here in the back. So I'll come in and shape a pedal in front of it like self. And look at that. It's just, I love that softness. Love it. All right, and then we have some like so. Bring some of this in here, some of these edges. Then we're gonna go like so. Shape that pedal that's below these to the network tip like so. We have another darker one here. And I'm not doing as many petals or counting or doing anything like that. I'm just going to give me this coordinate joke with the flow. So there, okay, and then over here, a little bit of something like so, like so and like so. Now I'm going to just come and soften again because that is the key. Here we have another one. And then up here like so. Right? Now at this point you can start incorporating if you want more quinacridone, gold or an act. If you just want it to be more pink. And that's, and that's great too. So now let's grab some quinacridone rose. And he had some of these darker parts still going to soften it. Like in here, darken this a little. And it just makes it push that darker part further and that pedal forward little more connect on rows. And we will go over here. Make these inner shapes. Now I'm just doing the quinacridone gold so I could get that little bit of darker than I see in here. For that center. Soften it up a little in a little more. I'm not going to put all the petals because it tends to look like a mage patching. We don't want that. We just want the idea. This is the center and this is where they grow from. This a little bit, little bit more quinacridone gold. Quinacridone rose, sorry. And a little more on this side to show some kettles. Some will soften this up here and I can still lift off over here. If I need to come here, I just want to lift a little bit of that off. I'm going to soften this, take some opera pink and show this bit of shadow. Again, just soften those edges so you can tell what's going on there. In now let's take some I'm going to take some quinacridone rose and a touch of the quinacridone gold. And put some of it in here to give some pretty variation of color and get some of that orangeish, pretty orange in there. And just putting it where I wanted to. No rhyme or reason. Some more. Some in here. Come out here like so. Socket, cup pretty that is above that. Get a little more tickets, some of these. And I'll come back and soften. So go and then let it go around and do a little more of that so we can get some of that pretty coloring there. Put someone in this back one here and come in and soften, remember the soften those edges. And more in here. This one like so, little deeper color here, softening and it's blending. And here, keep my ears to be a little bit wider. I do like to add some soft edges like that just to soften this inherent little proof. Here, we'll bring some like some BP a little more in here. So in the next video, we'll go into deepening this center and adding a little bit more tonal value to some of the petals.
9. Let's Finish Our Peony!: All right, so now let's get back into the center a bit more. Now I'm going to take some quinacridone rose and add a touch of Payne's gray. And you can get nice muted purple. And I'm just going to go into some of those darker places I see and just put some in there. You can hear interest a little more. And when it a little bit darker, just like that, lift up those parts that are too wet. So it's just going to give us that nice depth. That's within there. Get a little more paint here. Coming around here. Here. And again, I'm not going to do too much here because it can tend to be muddy and it will look overworked. And we don't want that. We just want the idea that this is the center. The little quinacridone rose on its own. Here. Some more depth in there. Still a little bit more Payne's gray. Come here. So and then a little more rows to get a little bit more deepness in their interests in spots because it's going to dry lighter. So like so there's a pedal. I'm going around here. We have a nice shadow here. Soften it up. And now we can bring that, a little more of that into some of these petals here. Still use a little bit of that Payne's gray with the Quinacridone Rose. And just get some of these to lift. Don't forget to soften them because we don't want it too harsh. We just want it where those darker parts are in here. I'll put it just there. And then I'll stop and take a little bit more of that color. Put it here. And again, you don't want to do too much with this because again, it will look muddied. Trust me. I've done these many, many, many times. So I'll take a little bit more of connected on rows with the Payne's gray. And anywhere else, I just want to add a little bit more deeper tone. To get a little bit this here. Just to get that different tonal value. And a little bit more in here to show the edge of this one and light that is barely have to blend it because it's still wet and it's going to blend nice on its own. So just get that tip again. Maybe do a couple in here. And just love this technique. I know I keep saying it, but to I write just to get a little more of that. And we're coming over here, here, like so. And this side, a little bit over here. Let's put a panel there. So there we go. And then back here is petals a little darker, so we'll just put that in. And so I finished up. Come back a little behind here. Like so. See that Blache don't want it lifted off, dry, lifted off. So see how that has formed so nicely. I'm going to come in here and do a couple of these here a little bit. And when we start water so we can just forward it wants to go. And in here we need a little bit more. I'm going to soften it back here. I'd like to just get up this color to show that pedal they are. And of course, shopping, so infant, so softening is a big part of this style that I'm doing. And then in here we need a little bit more. A paddle. So we're gonna come in here who chooses a little bit better here? So another petal there. And see that. And then let's add a little bit over here. And then we will. So I've entered in, back into here, we might need a little bit of b, darker color just to show that. Here is a pedal back clear and a compatible. So we're gonna come in here who chooses a little bit better here? So another petal there. And see that. And then let's add a little bit over here. And the softening that up comes down like so. I feel like I just need a little something over here. So I'll just go with my tip again in the paint and just add. Because remember at this issue of power, it doesn't have to look like the reference to references just there as a guide. The rest is just fun. Right? Now I go round and I do my little crazy touches because it's hard to put my brush down. But see how that came out. So pretty. And if you want at the end, you can just go in a little Payne's gray. If you want a little bit more depth in there or value, just go straight. Payne's gray. Give a little bit of those and always soften them up because that will lighten. It won't look that dark. And I think here's my problem now. It's hard for me to to stick a fork dinner and color done. But I'm going to have to add a little edge here and maybe just little petal here. So we'll just go like so. Softener up keeper, little more color. Maybe a little more edge to her. My quinacridone rose, like so. And maybe just a little bit over here. In this part, is it it's kind of difficult because you've got to go with what you wanna do. How many petals do you want? How many? I'm going to just bring a little bit of this color. How much do you want to personal choice? I'll put a little quinacridone rose over some of my darker Payne's gray. Because I want to, I'm going to put just a little petal right there. Color in there. Maybe a touch, darker, dark and here. And then this is kinda fun to do. Just go in and put some leaps of color. Just to show just the tip of my brush. Brushes wet and just putting some, just want to add this darkness back in here to show that, to bring that pedal out. Maybe a little Payne's gray in there. So often that right there. Still little bit of darkness here blended out. Maybe one in here just to show this darkness there. Right here. Just those little, little touches. We can hear. A little bit. Somebody stop me because this is the hard part. Really just want to keep going. But sometimes that's not the right thing to do. Alright, so there, all right, let's stop it there. And I'm going to clean off my brush. And I'm showing you proof, laying down my brush. And that's it. You did it. You made a beautiful peony.
10. Thanks!: Well, I hope you had a good time. I hope you learned some fun new techniques. And I'm so glad you joined me. I really appreciate it. And don't forget to upload your your beautiful painting so I can see it. And if you have any questions, please leave them in the class page and I will get back to you as soon as I can. Thank you again for joining me. Take care.
 Kim Lewellyan, Art and Illustration