Transcripts
1. Watercolor Painting. I'll show you how to paint this Beautiful Sailing Boat: Hello, everybody, and welcome to another lesson. So today we're going to be painting this lovely scene. this is the lesson that I prepared for you today. So I'm going to be leading you through all the stages to make this of your painting. Don't be intimidated even if you think it's too complicated. Probably for an intermediate level. But have a go even if you are a beginner. You might be surprised. My name is Michelle. So thank you for joining me today. Let's get straight to work.
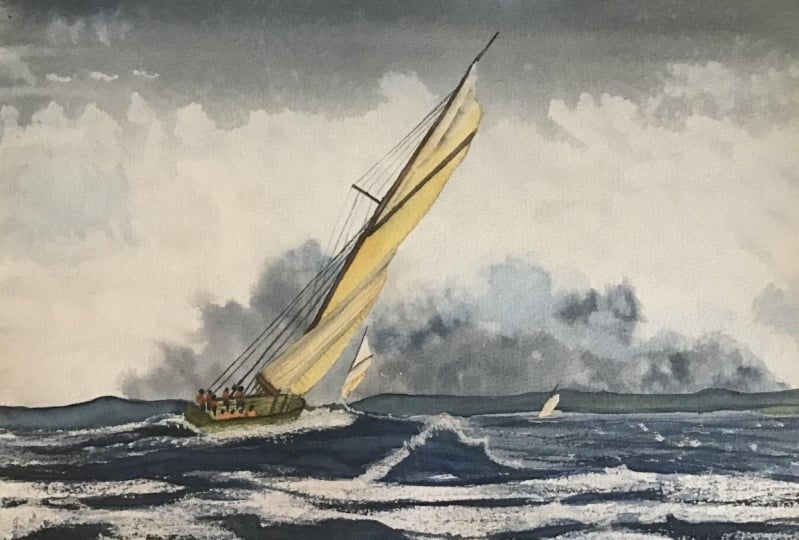
2. Sailing Boat Painting Lesson Phase 1 Masking the Lights: Hello and welcome to this lesson. We're going to be painting this sailing boat Looks complicated, doesn't it? Well we're going to try and tackle it because somebody has asked me to paint a sailing boat. So I've chosen this photograph. It's by a man called Patrick Le Golodoc. I found this on Flickr. So this is what we're going to be using. First I want to do is block out some of my lights. This time I'm going to be using some wax. Resist And, some masking fluid. So I have my mask in fluid here, Handy because it has this very, very fine nozzle, it has a little needle that goes into the top. So it stops it from drying up. And also, I've broken a piece of candle off of the bottom of a candle because I wanted a sharp tip. I've just damped my pallette over here on the right. I'm gonna be using my , Sennlier pallette over here because the colors are really quite brilliant. So the first thing I'm going to do is block out one place with my wax, which is going to be these waves, I've done my drawing already. You can just about see it on there. Let me zoom in a little bit so that you can see it. There you go. So here we are. The reason I'm going to be using two different types is because here I want the white paper to show through afterwards. It doesn't matter if I can't go over it with paint, which is what happens if you use wax. Whereas here it's not completely white on. I'm going to need to be able to use the paint over the top of it. So that's why I'm going to be using masking fluid on the sails but, not on the waves. I could have used it on the waves, but because it leaves such hard edges, then it would have looked really, really fake. So I'm going to trust my wax. Resist a little bit more over here on these lights. So we're gonna be doing that. So bare with me and then, after we've done that the masking fluid, has to dry perfectly, which can take quite a lot of time. So it's just what we're going to do right now. Shaking it up. I've lifted up my board because I want it quite flat going up to the edge very, very carefully. I'm hardly pushing the bottle i'm dragging down what I have on the paper with the nozzle. - Put on my wax. Resist on the waves I've got to be very careful not to touch that. And, let's try, see what we can do with these waves. Think that will do. I don't want put too much on because otherwise you can't go over it with the paint. So too little is better than too much. So gonna let my mask in fluid dry and get back to it when that's ready to be painted on .
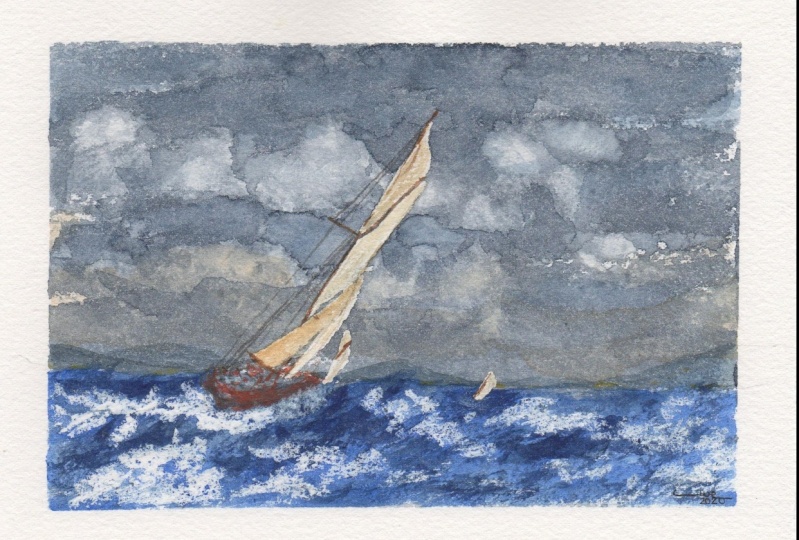
3. Sailing Boat Painting Lesson Phase 2 Clouds: back again, and it's just about dry. It's slightly tacky, but I think that's just because it's robbery. So I'm keeping my reference photo handy for me to look at . I'm just about to start. So just to remind you, I always paint standing up, because that gives me more freedom to step back and have a look at what I'm doing from a distance. Have my board propped up at an angle just on a couple of books or thick canvases or whatever you have handy. I've dampened my paints already with my faithful little spray bottle here and. I've also got some paper towel handy. a handful of brushes today I think I'll give this a run. I've always got this with me, small squirrel mop, a long rigger, a smaller rigger. This is also for fine lines. I don't know which of these three will work best for me, but I thought I'd have them handy. This ah, could get some quite fine details with, but I might not use it. And, this is probably going to come in useful for the waves. So let's get started with the sky. I've got my Payne's Grey. I thought I'd add that to my palette. I think it's going to come in handy, so just put a little squirt of that on my palette. Now let's start Here's the water, I usually keep one cleaner. Got some blue left on my palette from another painting that looks like Prussian blue. Could be indigo, but it's more likely Prussian blue. So I want the sky quite dark at the top. That's really dark, a little bit more blue. I dampened my paints I said, so.... that looks nice. Here we go , See..I can go straight across the masking fluid. More blue make that more intense some more Payne's grey a few dry brush strokes, they might come in handy where the water is. So now I want to concentrate on my clouds a little bit while the paper is still wet. So gonna lift off here.. following my photograph roughly. As long as the clouds look nice. wow, right..a little bit more. there, where there was a hard edge, try and get them irregular. Yeah, I think like that. Okay, so change brush now. Now, I want my small squirrel mop. And, I want to deepen that color. at the bottom of the clouds. A little bit more intense. A little bit more Payne's gray into the blue. Now, I want to. While that's still quite wet and damp. I just want to add a little bit more depth. So I'll start lighter because I can always add some more. Little bit wetter. Don't like that hard edge. Tell you what, Try a different way, going to add the water first and do wet in wet... over here. Now that's nice and dark. Such a good photograph because the white sail on the black cloud behind it, makes the boat stand out more. Just gonna drop in some paint on this wet area. - Now going to do the same and lift off the hard edges. I just played around a little bit with my paper towel. Unfortunately my camera turned off, but you didn't miss much. I was just playing around with my paper towel to lift off areas to make the clouds look as realistic as possible or as dramatic as possible while it's still damp, going to try and lift off a little bit of white here and there that I didn't take off with my paper towel. I can use that water here to lift off. To say all I'm doing this for is to soften some edges. The good thing about clouds is they nearly always look realistic. And that's enough. If we touch them too much. They're gonna lose their freshness.
4. Sailing Boat Painting Lesson Phase 3 The Sea: That looks dry enough, so I'm just gonna put in the nearest part of the land. So I want quite a dense paint.. just mixing up the blue that I had and a bit of the Paynes grey but I want it slightly brownier. Just to put in a little bit of contrast, because everything is so blue. So this is where I want it, Just leaving some gaps, just to make it look as if there's a town there. Putting in a little drop of Naples yellow, Not too many details, just couple of dots. Okay, so now gonna tackle the sea I'm gonna leave the boat till last. So I've chosen this brush. It's like a dagger, but it's longer and it's got a very calligraphic point. So this is 1/4 of an inch Rosemary. Pure squirrel. It's gonna hold a lot of paint. So let's have a go, try this one. The blue, that we're gonna put on first. It's going to be... This quite bright... Should be ultramarine, but it's very, very intense. I've just de-saturated a little bit with some orange.... some of this other blue. Now I want to look at this carefully and look at the large blocks of color, going to try and get just too long strokes. Don't forget that I'm going to go over in some places with a darker color. I'm dragging it across. So I get half a wet half a dry stroke. there we've got our wax resist. you can always add more, but once it's on, it's on. So just think about it, have a look at your reference photograph... on the left hand side. I'm gonna put in some more. There's wax resist there. So I need some color underneath between the bits of wax. Don't want it all white. That's a bit better. I'm not satisfied with the clouds. I have been standing back having a look, and I really want to try and get that with as much depth as I can. So I'm gonna put in some more dark on the large cloud.. Could ruin it, hopefully not. So I'm mixing in a very sort of grey purple with the blues. Bit of red, which isn't alizarin Crimson and the Payne's grey and I want it quite dense. So I'm just gonna play around with this main large cloud. So cross your fingers for me. Take some paint off it, Soften this edge. bit better, bit more paint, Might as well do over here while I'm at it. I quite like that one. I gonna soften this edge,. just get it up to where I want it. Okay? Now that's a bit better. Yeah, that is dry and I've added some Prussian blue to my palette. It's very dark and intense. I'm gonna add a little bit of Payne's gray to that which is going to de-saturate it a bit and make it even darker. So this is my darkest area, So I want the paint quite thick. And, I've got my faithful dagger brush. So hope he is faithful. I'm just looking for the dark shapes and also looking on the areas on my painting that I already like. you can do so much with this little brush. - So just trying to get an idea of those waves. I don't want it to look fake. Look for the shapes in your photograph. Make sure you paint what you see. and not what you think. you can see . And even though this area isn't on my photograph, I like it and it gives me an idea of the sea with the foam and being rough. So I want to keep it. - - So waves are their darkest underneath the foam, there is shadow here, that's wrong. But those waves this more in the background, so I don't want as large. Marks as in the front.. well they could be other boats. Could be anything. Just a bit of an illusion. I just turned my dagger brush round and using the point. Okay, I'm gonna let that dry, and then I'm gonna put another layer of dark on. I'm not going to do the boats and the people on the boat until the very last. Even though that's not my darkest darks, it's where the most detail is. So I'm gonna be doing that when everything else is dry. Quite dry, probably just slightly damp. So I'm just looking at my reference photo and the light is coming from this side. So the foam on the other side of a wave isn't going to be as white as it is on the side of the light. So I've decided to make this a little bit greyer and, possibly even over here. So I'm just gonna mix up a grayish, um, lilacy grey, actually, that should be okay. Just dry off my brush a little bit and, just go over here. On this side. Just slightly more lilac and over here As well, a bit here Yeah. I think that's better ..gonna make this darker as well. Same mix of blue and Payne's grey. Quite dense, Quite.. a little bit more Payne's gray. So I'm gonna darken some areas, dry off my brush slightly.. just gonna do this wave here again, not dense enough... some smaller lines. So here I want that peak different. I've got some more Prussian blue on there. Stand back. have a Look. Yeah, I think I'll leave that otherwise it's gonna look too fiddly.
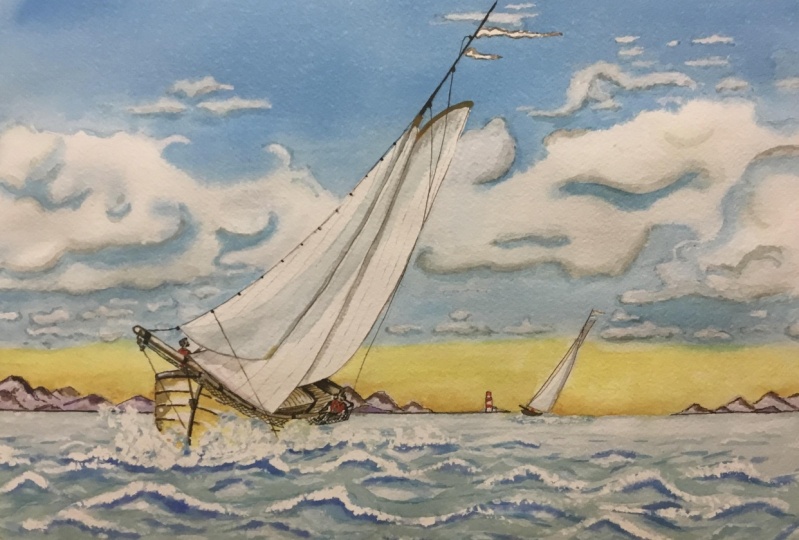
5. Sailing Boat Painting Lesson Phase 4: I Took a Risk That Paid Off !: At the moment, the painting seems to be too much of the same color. There's not enough contrast in colors for me. So I've mixed some white with some Naples yellow and a hint of my cobalt orange because I'm gonna try and make this area a little bit more yellow. So fingers crossed. Don't know if it'll work out But if you don't risk, then what's the point? So I'm just gonna try and not dab at it too much. But just go across the bottom here with... I suppose it's, um, milky consistency, the paint itself. But I don't have a lot on the brush. So let's see what happens... now just to get rid of that hard edge. See that's the beauty of the transparency watercolor you can still see what's underneath.. Because the color underneath can still be seen. It mixes with the color that you've put on top, to create a completely different color. Now there was yellow one blue, so hopefully that's not gonna turn green, but we'll see. I just need to go back over there. Remember, the paper underneath is dry, I'm barely touching this. I'm so glad I did that. I've watered some of that down, so it's very, very faintly colored. And, I'm gonna just go over these clouds as well. No, I don't want it too wet That's definitely enough, or we'll end up making a right mess.
6. Sailing Boat Painting Lesson Phase 5 The Boat: Let's take off our masking fluid ...so you can get special tools for this but I just use my finger . Make sure that it's perfectly dry. The paint that went over the top. Just rub this off. Perfectly dry . So. Make sure I've got it all off Great Going to put my little figures on the boat back in. - Okay , so now all we've got to do is draw in those details..I've chosen this brush cause I don't want it to be too soft otherwise, I'm not gonna be out to draw well enough on such small details. So I've got this. The bristles are quite hard. I think it's still squirrel hair and i'm choosing to use the purple color. Um, so I don't want it too watery and it's probably consistency of milk. Now I'm gonna change brush. I think I will use I'm gonna use my dagger brush again. My rosemary dagger brush. Got some white on here. While that's still damp. I'm just going to go into the reflection, the light on the shirts. Quite thick. Okay. look like people, now some more dark color. Thick, dark, purple. Yeah. So that's alizarin crimson and Prussian blue and It's really quite dense. So they've got their little trousers on same brush same colour I just watered it down cause I need to do the shadow on the boat Change brush. Really small rigger. And don't want a lot of color don't want too much of a dense line. I'm going to try and go as quick as possible to get a straight line... and here we go. Okay. a little bit too dark. Just lifting off. So, now for the sails. Oh, do a little bit there. Yellow ocre just to make it look as if there's a boat underneath the sail. Small squirrel mop And we want white and. Naples yellow.. More white So here we go. The sail. just lift off some of that Some more white on here fine rigger, just do details that I can get away with on dry paper. I don't want to touch where it's wet - I want to darken this a little bit. Very watery, it's already quite wet under there. I just very lightly dipped my brush into some sepia. Make it a little bit brownier here. Okay, Now let dry
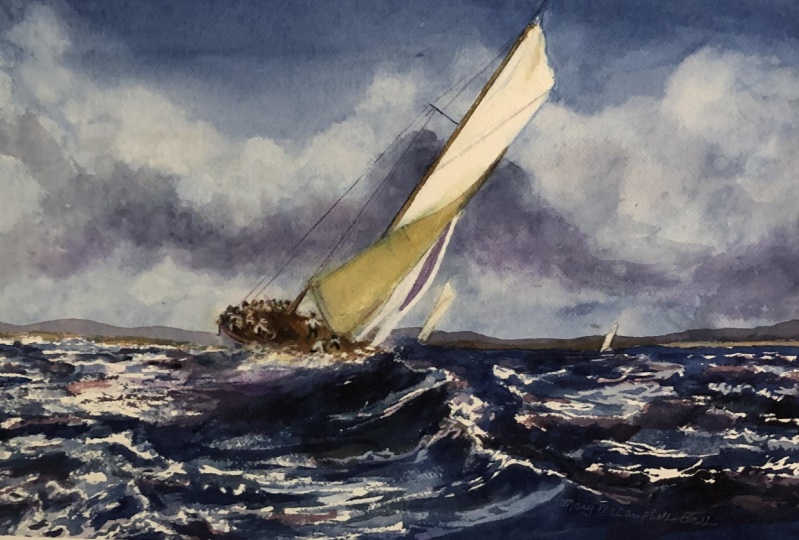
7. Sailing Boat Painting Final Touches!: Right, so just gonna put in finishing touches I want some quite dense. sepia, maybe with a touch of Payne's grey. I think that's alright. Now. Dry off my brush a little bit. A little bit of water.. I need to go over that. Not where I wanted it..clean water And we can correct that. Okay, Clean water. See, it's bit of a myth that you can't correct watercolor. So very, very, hardly any color on my brush, it's more or less Just dirty water. Just enough to stain it slightly. There's actually, some sky in between that. So I'm gonna pick up some of my, hopefully, sky colour and put it in. Just looking at my reference photograph and putting in whatever little details I can see. That's dry So I can put that on there. Now we want the main mast across. Bit too obvious here. Gonna lift off some of it. That's better. Now, Back to our see our sepia-ry brown colour. I think I need some umber, natural umber here. more sepia It's not exactly. the same as the photograph, but I think that'll do. Just a couple more lines here. Sailors will probably be able to tell me I'm doing things completey in the wrong place, but never mind!...This is still sepia I need to do some more in there.. squirrel brush.. sepia mixed with that purple. Just to make the people stand out a little bit more. Raw umber.. to few little details in the background. Very little color on here. and it's quite dense. The reason I'm putting that in there is to make the side of the boat show up more Right, I'll get some white, just gonna put a reflection on this side of the boat. This is practically pure white, straight out of the tube. I'm just gonna darken underneath there, just to make the boat stand out a bit more. Prussian blue. I could have done it with a larger brush probably. just a bit of white to go up the side of the boat. I'm okay using white I'm not a purist. If John Singer Sargent and Turner could use white, then so can I! Do that wave a little bit better. Just here. Darken that even more. So this is sepia final little touch up here. Just noticed a little flag. I just do this boat a little bit better. Just going to do this part that I'm not satisfied with. Nearly missed out a mast - - Okay I think that's finished now. So just gonna take off the masking tape. I want to dampen the masking tape. So it doesn't stick to my paper. Not too write or it's gonna run all the way down. my painting. There you go. Thank you for joining me on and I'll see you in my next lesson, Please. um Show me your paintings and leave any comments and reviews, so I really appreciate it. So see you next time.
 Michelle Smith Watercolor, Watercolor Artist-Sommelier in Rome