Transcripts
1. Introduction: Hello, everyone.
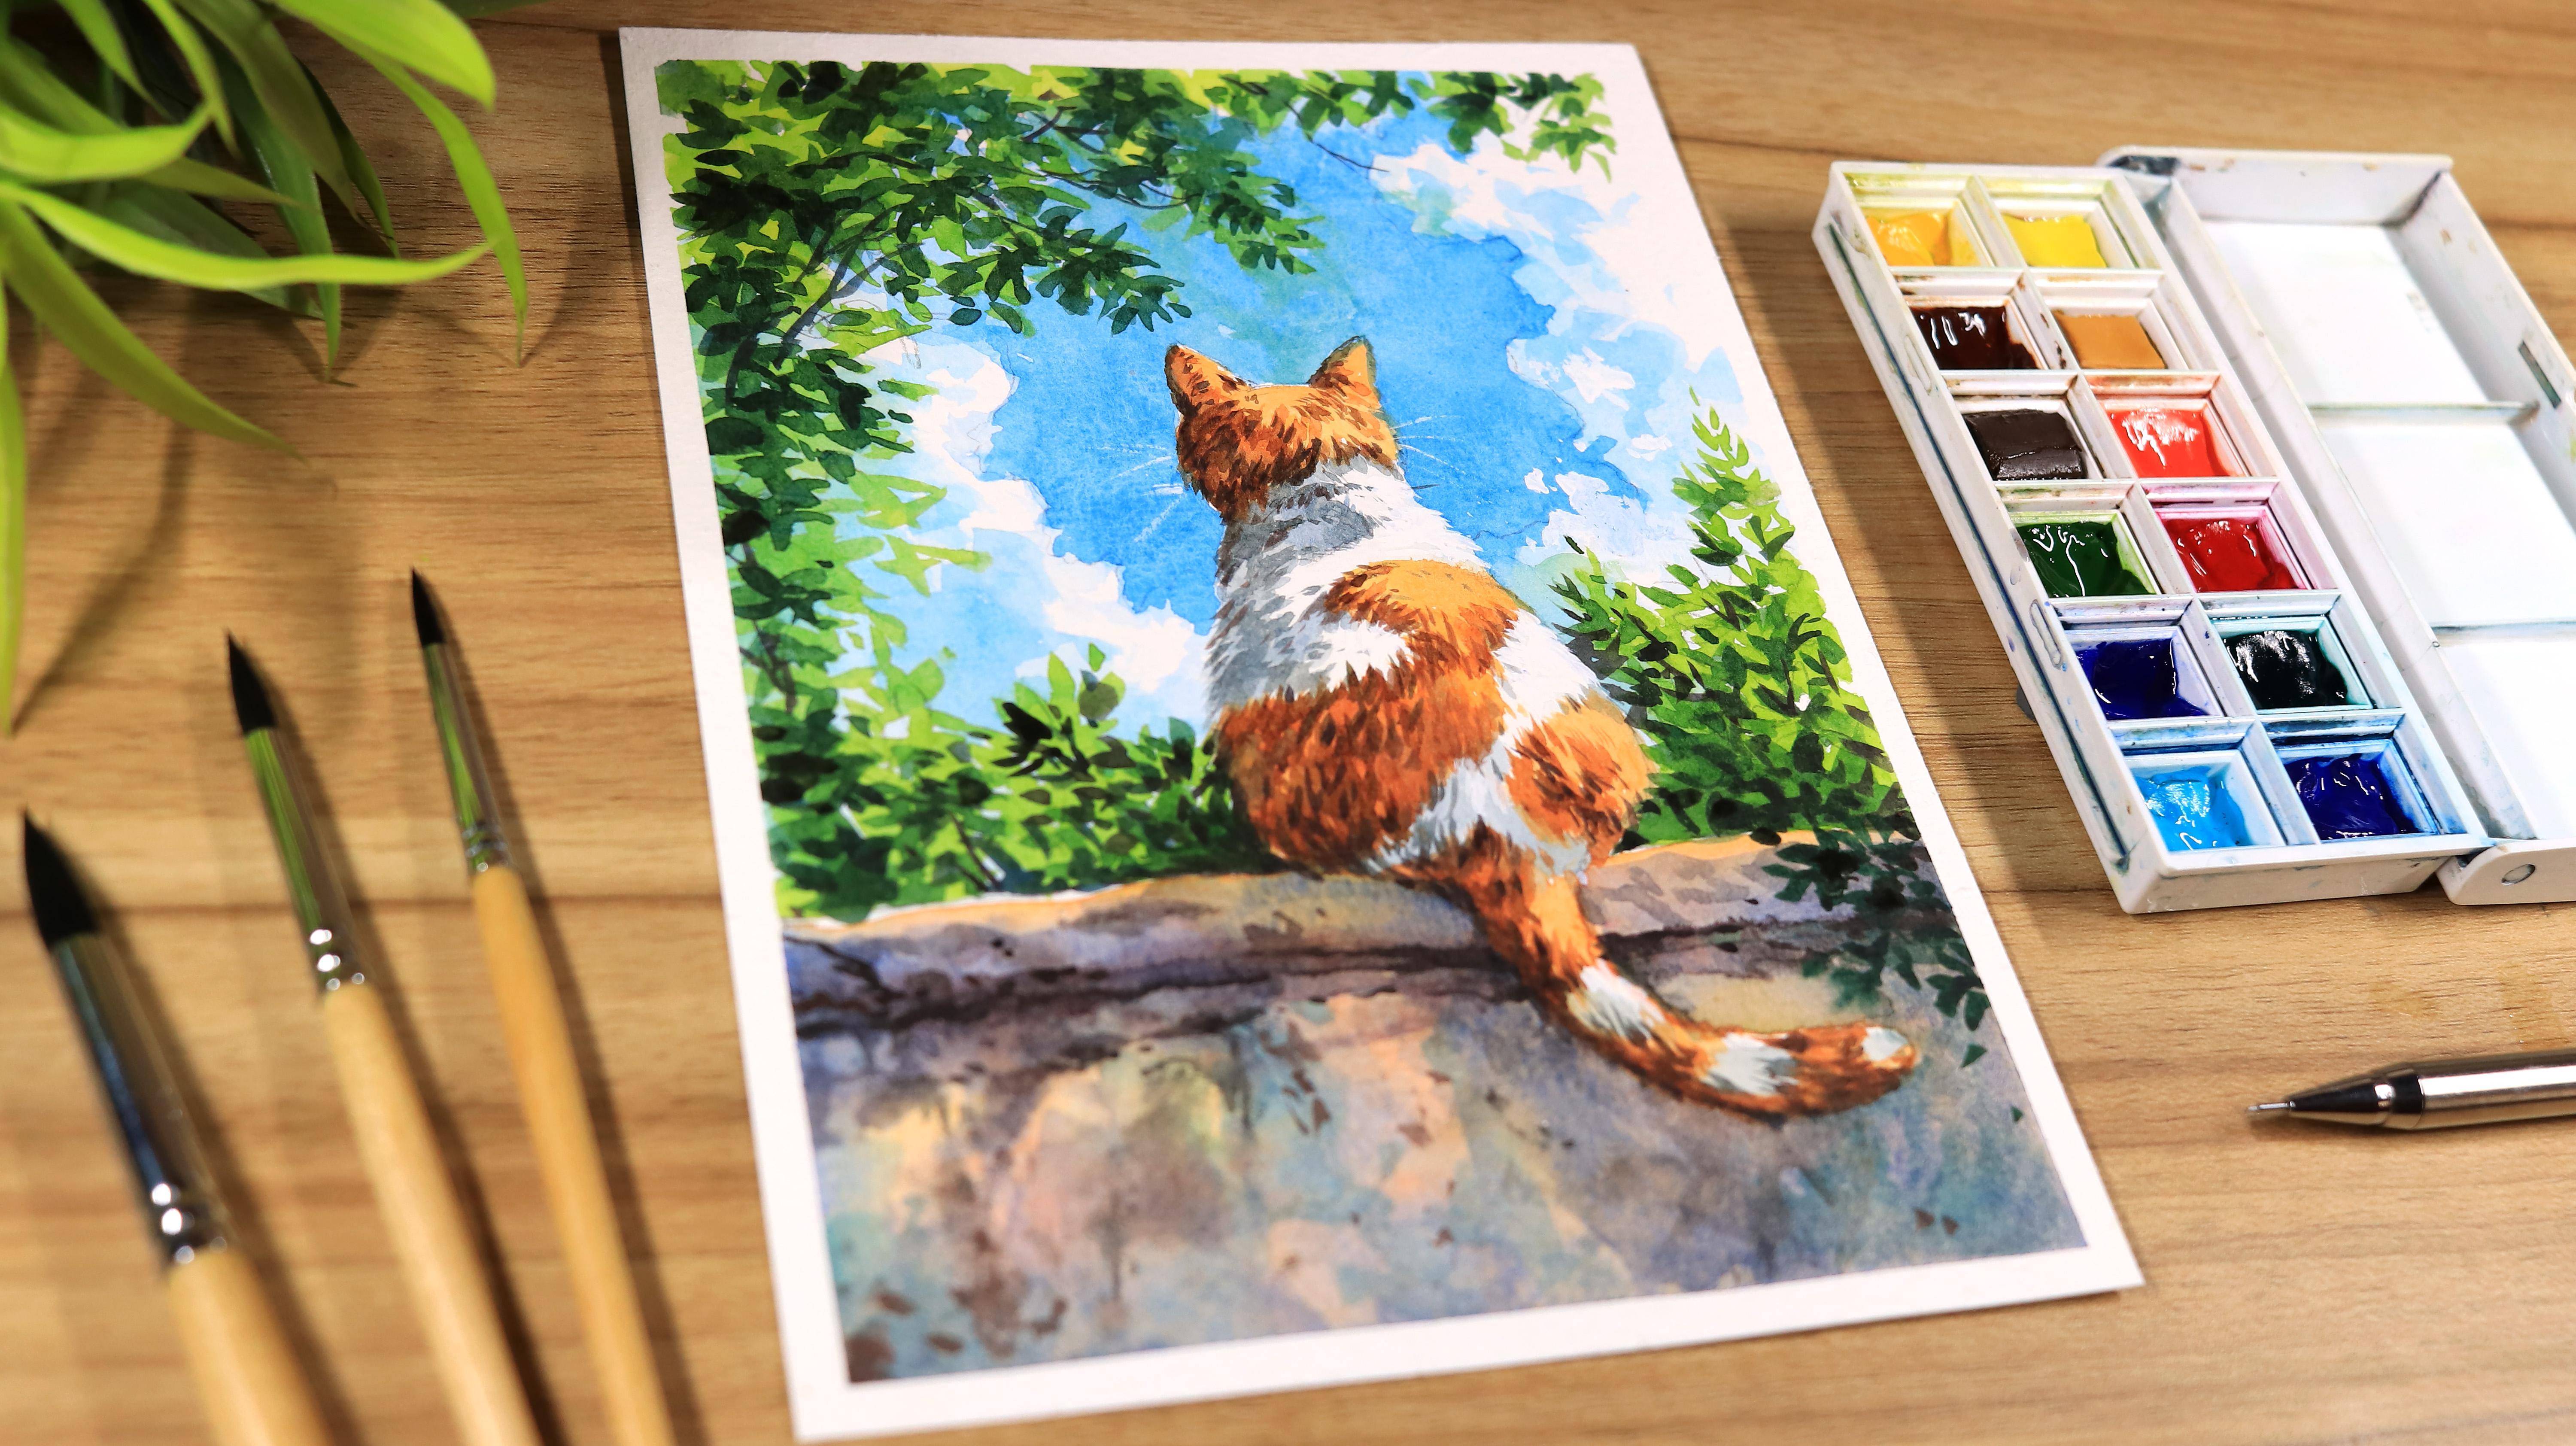
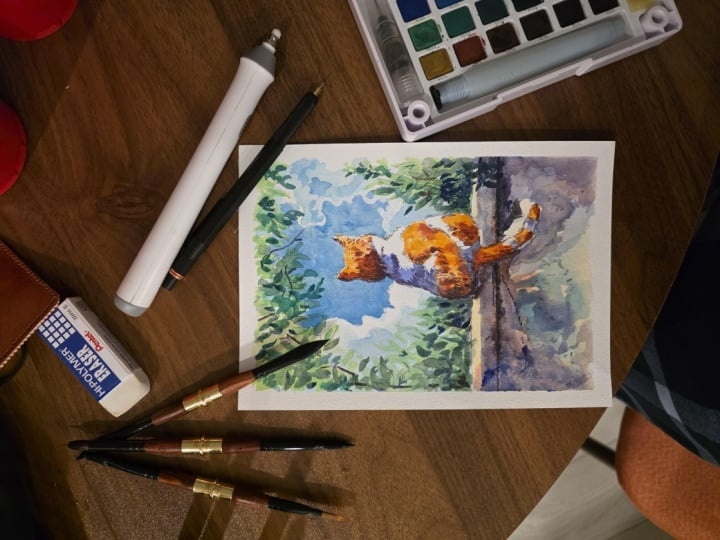
My name is Shiba. Welcome to my painting class. In today's class, we will paint a beautiful and
relaxing garden scene with a cute cat
sitting on a wall. I will first show you
all the materials you will need for this painting, and then I will go
through each steps in detail explaining the
colors and techniques, as well as materials
I use along the way. This will make it easier
for you to follow the painting process and create your own
beautiful garden scene. I mostly love painting
with watercolors. I enjoy painting
old rural areas, seascapes, landscape, birds
and animals, and much more. I always try to keep my paintings vibrant and
full of rich colors, which you will find today in my watercolor painting class. As we know that
watercolor can be challenging mediums,
especially for bigness. So I have kept the steps very
simple and easy to follow. This class is perfect
for beginners, and by the end of this class, you will be able to paint
this beautiful painting. You don't need to worry about this watercolor painting because I have explained
every simple steps throughout the painting process, and I hope you will
learn something new and useful that will add to
your watercolor knowledge. I'm very happy that you have chosen to join for this class. So let's quickly move on to the next part and see
what materials we need to create this
relaxing garden scene with a cute cat
sitting on the wall.
2. Materials Required: Hello everyone.
Let's see what are the materials we need
for this painting. For the paper, I'm using
Canson watercolor paper, 300 GSM cold pressed. Now, these papers are cold
pressed and they come in cutout sheets of E five
size, as you can see. Now, they have a very beautiful
green to hold the water. For the colors, I'm using Windsor and
Newton Cotman colors. Now, these colors are
good for beginners and are pocket friendly
in terms of budget. In this color set,
I have replaced the white color with
turquoise blue, as you can see, because I don't
use white in my painting. For the brushes, I'm using
mob brushes from Brustro. Now, these are semi
natural brushes. It is not important to
have the same brushes. You can use any
brushes you have. Now, this is one of
the flat brush that I will use for the flat
washes in my painting. This is from the brand Snyler
soft aqua Raffle series. Now, this brush is quite soft and holds good
amount of water. To erase the pencil lines, I'm using a needed eraser. Now this is quite good
because we can mold it into a specific shape
as per the requirement. Now, this is a mechanical pencil with lead 0.5 from Brustro. You can use any pencil you have. We just need it for the outline and basic sketch
of our painting. To tape down the painting, here I'm using a half
inch masking tape. Now, this also helps in getting a clean boundary at the
end of the painting, a tub of water to
clean the brushes, and I'm also using it as a
medium for the painting. Of course, it's a
watercolor painting. Now, this is a hair dryer, which I will be using in between the paintings to dry the layers. So, friends, now let's jump onto our next part
where we will start by drawing the basic sketch of our painting, and
I see you there.
3. Basic Sketch of the Painting: Hello, everyone,
and welcome back. In this part, we will
draw the basic sketch and cover the basic
outline of our painting. Here I'm using a half
inch masking tape to tape down the paper
along all the four edges. This will keep the
paper in place and also gives us a clean boundary
at the end of the painting. Now, we will apply
this masking tape on all the four edges,
as you can see. Once your paper is in place, press it against the board to keep it stick to
the board firmly. Let's start with the sketch. Here I'm starting by drawing the basic outline using the mechanical pencil
with lead 0.5. First, I'm drawing a
straight horizontal line to get an idea as to
where the character, basically the cat
will be placed. Now for the cat, I'm drawing an oval shape to
draw the body of the cat and then a small
circle for the head. Now let's define the structure and draw the entire sketch. While sketching it is
important to draw the lines lighter so that you can erase
them whenever required. Once the overall
structure looks good, we can start refining it. Here I'm darkening the
lines to make them visible for you or else I
would have kept them lighter. You can see I'm going
quite slow while adding these darker lines and trying to follow the
sketch underneath. So we have completed the head. Now let's add a few
lines for the body. Here I'm adding a few
lines to draw the cat's back and then it's hump, showing that the cat is
sitting in a relaxed position. While adding the pencil strokes, I'm drawing them in a same
direction as the cat's fur. Now, this helps in creating
a natural fur texture. Here I'm erasing some
parts to readjust that and make the cat
body slightly thin. Now let's draw the
tail of the cat. B so we have finished
drawing the tail. Now let's erase some of the unwanted pencil lines
and refine the sketch. You can make as many changes
to the sketch as you need. Now here I'm also refining the sketch and making
adjustment whenever required. Now, let's draw the wall or
the parapet where the cat is sitting and gazing at the sky
through the leafy greenery. Now it's time to add the leaves and the trees beside the wall. Here I'm making these
sketch lines a little darker by applying slight more
pressure with the pencil. Now, these lines will act as a guidance when we start
painting in final steps. Now, let's add few more leaves. It's time to add some more
details to the wall lining. Now I'm adding a few light lines to sketch a basic
outline of the clouds. Now I'm keeping
these lines light as they won't be visible at
the end of the painting. Now, let's make the
pencil line lighter using a meteor eraser and get the sketch ready before we
start applying the paint. So, friends, this is all
about for this part. Now let's move on to the
next part where we will be starting with the paints
and I see you there.
4. First Layer of Paint: Hello, everyone. Welcome back. Now let's start with the paints. Here I'm taking a turquoise blue and mixing it with
ultramarine blue. I'm applying this color
to draw the sky and the brush I'm using is
around brush number ten. I'm keeping the cloud
area untouched for now. I'm also keeping the cat untouched and applying
the colors around it. I'm following the basic
shape of the outer line of the cloud and keeping the
blue mixture away from it. It's time to complete the
sky on the right side. Now let's pin the shadows
of the white clouds. For this, I'm using the s
mixture of Cobalt Turquoise, mixing it with ultramarine blue. The only thing is
that I'm keeping this little dilute and
light by adding some water. I'm also taking the
help of water to blend the colors softly so that
the cloud feels real. Here I've wet the area first, and then I've applied the
colors for the smooth blend. Here I'm doing some small things like blending some
hard edges for the sky and then moving it onto the clouds for the shadows. For the shadows, I'm keeping
them mostly on the left, assuming that the light is coming from the right direction. Now for the shadows, I'm using a light mixture of
Cobalt Turquoise mixed with ultramarine blue. While painting, it is
important to maintain the basic autonomy of the clouds and draw the
structure in the same way. Now, let's add some
few more details and make the sky feel
nice and natural. It is important to use a
light mixture because we can further add
some more details to make them a little more good, which will keep the
painting fresh as well. Now let's increase
the darkness of the shadows by adding
few more pigments. Right now, the clouds
in the sky almost look same because we have
used the same colours. The difference is
only in the opacity. Now let's remove some colors
from the body of the cat. For this, I'm wetting
the area and then removing the colors
using a damp brush. Now, let's paint the cat. For this, I'm taking some cadmium red and then
mixing it with cadmium yellow. As this is the first
layer of paint, we will keep them little dilute, and the brush I'm using is
around brush number eight. You can see that the color is looking like a orange color, which is a mix of cadmium
red and cadmium yellow. Here I'm applying the paint as if I'm painting
the cat's fur, using small brush strokes
to create natural texture. Now the entire cat is
not in the same color, so we will place the
colors accordingly. Now I'm adding a
little cadmium red to tone down the bright cadmium yellow before applying
it to the painting. We will work with the white
furs of the cat later, but here first I'm covering all those which are
in orange color. While painting the cat, it is important to keep the
cat hair running in the same direction as it should be because this will
make the cat look real. You can see that I'm
applying the paint slowly and thoughtfully to avoid
mistakes and errors. It's time to add some
more cadmium yellow mixed with cadmium red
to the tail of the cat. Here I'm not painting the entire tail with the same color. Instead, I'm adding few
stripes and leaving some white spaces in between to create a
more natural look. Now we have almost finished painting the red fur of the cat. Now let's paint the
shadows in the white fur. For the shadows of
the white here, I'm using the ultramarine blue and burn sienna,
which is the brown. I'm drawing the shadows on the left side as the light is
coming from the right side. Now, let's add a touch
of ultramarine blue. Here I'm placing the shadows on all the portions where we are not getting the
direct sunlight. For the tail, I'm adding shadows to the
white fur as well, since the entire tail
is in the shadow. Now I'm using brush number
ten for the further details. Now, let's mix color
for the tree leaves. For this, I'm taking sap green and mixing it
with cadmium yellow. For the leaves, I'm using pointed tape of the brush
to create the leaves shape. For this part, I'm not
focusing on the details, rather, I am
blocking the colors. Now, let's paint some leaves on the left side using sap green
mixed with cadmium yellow. I'm drawing the leaf
shapes and then I'm interconnecting them to form the bunch of leaves,
as you can see. Simple techniques
like cross hatching can bring beautiful texture. If you want to bring in
variation in tree leaves, you can increase or decrease
either of the color. Now, let's add some cadmium yellow to sap green
for the leaves. For all the leaves of the tree, I'm following the same
technique and using a cross hatching to
create the leafy texture. For the smaller leaves,
it is important to use a smaller brush
because it will give you some small, sharp strokes. Dalian. Sometimes you can use the tip of the brush to add some smaller details so that you don't need to switch
to a different brush during the painting session. So, friends, this is all
about for this part. Now let's move on to the
next part where we will paint the wall and the sky and we'll add some more details, and I see you there. The
5. Painting the Wall and Sky: Hello, everyone. Now, let's
paint the wall for this. First, we will wet the area. Here I'm using brush number
eight for applying the water. Now let's take some cadmium
red and add cadmium yellow, and then we will
apply a wash of it. Here I'm taking
some crimson red, but before that, let's
clean the palette. Now let's take some crimson red, and we will add a light
wash of it, as you can see. I'm applying it quite randomly. Now let's take some
ultramarine blue, and we will add a few drops of it and make it
flow on the paper. Here I'm also giving a touch of blue color so that
it looks good. M Now, let's take some burn sienna
and ultramarine blue and add them in the same way to create some
variation in the color. I'm applying this
color specially to draw the shadows of the wall. Now, let's add a few strokes of burn sienna and
ultramarine blue. It's time to add
some more blue and orange on the palette
to draw the shadow. I'm also trying to
pin the shadows formed on the wall by
the tail of the cat. For now, we are done
with the walls. Oh Now, let's paint the sky. For this, I'm taking
Cobalt Turquoise and ultramarine blue. Here I'm using brush number
ten to apply the colors. While applying the colors, we will keep in
mind the shape for the clouds and we will
not disturb that. I I'm also layering the leaves with the same color because we will make
them darker later. So there's no need
to worry about making them too
dark at this stage. You can also go back and mix some more colors if
you run out of pins. For the same area,
I'm using the tip of the brush rather than
changing the brush size. We have almost
completed painting the sky and leaving
the clouds as is. It's time to add
some more details to the cloud like adding
some more shadows. For the shadows, I'm
using the same paint that is Cobalt Turquoise
mixed with ultramarine blue, but I'm keeping the
mixture a little dilute. Here I'm adding a light
watery wash of blue to make the painting come together and mute the bright
green leaves. So Friends, this is all
about for this part. In the next part,
we will be painting the cat in detail
and I see you there. And
6. Adding Details to the Cat: Hello everyone. Welcome back. Now let's start with
brush number eight. First, we'll paint the cat here. For this, I'm mixing cadmium red with a touch of
ultramarine blue. I'll paint the
shadows and hairs on the left to show that the light is coming from the right side. For bigger area, we will block the area with
the same paint, and then we will
add the details. On the right ear of the cat, I have added a few strokes to show the fine hair
catching the light. Now, let's add some shadows to the back of the cat
using the same color. You can see that with
each layer of paint, the cat is starting looking
like more three dimensional. Now, this part of the cat's
body is entirely in shadow, so I'm blocking in the whole
area with the shadow color. Now, I'm adding some burnt
sienna to the mixture of cadmium red and ultramarine
blue to make it dark. I'm applying the paint
when the colour is still wet so that
it blends easily. For the portion on the right, I'm adding few strokes
to show the light. Here I'm continuously applying the strokes to make
the portion dark, which is away from the light. Now, let's paint the
tail of the cat. Here I'm using the same
mixture to paint the cat tail. Now, let's mix some burn
Siena and intense blue. Now I will use brush number
five for the smaller details. This dark mixture of burn
sienna and intense blue will be used for the darker shadowed
areas of the painting. Now I'm working quite
slowly to make sure that the new layer blends well
with the layer underneath. If needed, we can adjust them. This layer will add
some more depth and bring more character
to the painting. I'm adding the has following the direction of the cat body. For these smaller details, using a small brush is
sometimes a better choice. Now let's add details to the back of the cat
using the same paint. Right now, I'm working
on the orange fur. Later, I will also add
details to the white fur. While painting the hairs, it is important to
follow the direction of the cat's body to make
it more realistic. Now let's add few
details to the hair of the cat on the right
side of the body. I'm adding some darker hairs
to the tail of the cat, keeping it mostly
on the left side. Try to avoid using black as it can make the color
look dull and muddy. Instead use darker sheets of the existing colors to
create depth and shadows. Now, let's add a
few more details. It's time to add details
to the white hair. For this, I'm mixing ultramarine blue with burnt sienna,
which is brown. Here I'm using the same brush number five
for the details. Now, this color almost
looks like a cool gray, which is perfect for painting the shadows in the white fur. I'm also adding
the same color to the orange hairs to
mute the colors. Now, let's draw
some more shadows to the hairs close to the tail. It's time to add details to the specific areas to
refine it a little more. I'm adding some more
intense blue to the burn Sienna mixture to make it dark for the
deeper colored fur. You can see that with
each brush stroke, the painting is coming to life. A few more touches before we
complete painting the cat. Here I'm adding some
more mixture of burnt sienna and intense
blue to draw the hairs. So, friends, this is all
about for this part. I hope you've
enjoyed the session. Now let's jump onto the
next where we will draw the leaves and add details to the wall, and I see you there.
7. Adding Final Details: Hello, everyone. Now let's
pin the leaves in detail. Now, let's mix some sap
green with ultramarine blue. Here I'm using the same brush number five
for the details. Now I'm adding individual
strokes to draw each leaves. I'm also blocking for larger
areas of the tree leaves. Each small leaf may seem
like a small detail, but when we will
paint a few more, they will slowly
bring some more depth and variation to the painting. Now it's time to add some more ultramarine blue to draw some
small darker colour leaves. Let's take some
ultramarine blue and sap green to draw
the tree leaves. Here I'm adding a
few more leaves close to the cat to
make them in shadow. The layer below is just the base for the darker color leaves. Here I'm working on each individual brush stroke
to create the leaves. I'm also following the same
cross hatching technique to draw the tree
leaves in bunch. You can bring in some
more variation to the painting by changing
the ratios of the colors. Let's draw some more leaves
close to the cat head. This beautiful mix
of sap green and ultramarine blue will slowly bring the whole foliage to life. Oh Now, let's use brush number
12 for the painting. First, we will add
some ultramaline blue, and then we will
add crimson red. I'm adding a very light wash of paint to draw the
shadows on the wall. Now, let's add a few
more brush strokes to paint the texture
of the wall. Switching on to brush number
five for the details. Let's take some burnt sienna and ultramarine blue with a
touch of crimson red. I'm applying this paint to pre wet the area to
darken the shadows. Here I'm also drawing
the horizontal lines to draw the brick
lines of the wall. Now let's add some ultramarine
blue to the mixture, and then we will add paint
to draw the shadows. Now I'm adding some cracks to the wall to add some texture. Now, let's take some
Cobalt Turquoise and add a blue tone to the wall to
give it an old weathered look. I'm also adding some
random brush strokes to make it look more natural. Now, let's add few more details to further refine the shadows
between the brick lines. For the dark tones, I'm taking some intense
blue and crimson red, mixed with burnt sienna. I'm adding some
small details like broken cement lines to give the wall more texture
and weathered look. Some random strokes to add natural effect to the painting. Some more shadows close
to the tail of the cat. Let's make the shadows of the tail of the cat
a little more dark. Now, let's add few more
random strokes to the wall. Now this mixture of
blue and brown is slowly making the wall look
realistic and natural. Now let's take some sap green, intense blue and crimson to paint the darker
shadows in the foliage. I'm adding this color only on specific areas to paint
the shadows of the leaves. We will apply this
paint where we want the darkest leaves
of the tree beside. Here I'm applying
very small strokes of paint, as you can see. Now I'm applying
some small paint using sap green and
ultramarine blue. I'm not overdoing it with this paint because the
mixture is quite dark. I'm applying it only to a few selected areas,
as you can see. It is important to follow
the shape of the tree leaves to make them look
like unnatural leaves. Let's take some more intense
blue for the tree leaves. Now I'm adding some intense
blue mixed with crimson red. I'm adding few more
brush strokes on the left side to create the
shadows of the tree leaves. Now I'm taking some crimson
red and then mixing it with green on the palette to create the color for
the tree branches. Let's add some crimson red to draw the branches
of the tree. It's time to add some smaller
details using this paint. Now I'm adding some final
touches to the cat's fur by adding a few darker hairs to bring out more
details and depth. H Here I'm using a dark paint to add a few
small strokes to create darker hairs and add
more details to the fur. Now, let's take some
intense blue, crimson red, and burn sienna to create
dark mixture of the paint. I'm also adding this mixture
to draw the shadows of the brick wall and adding
some smaller details. Now, these small textures are slowly adding realisticness
to the painting. Let's add a few more lines and dots to add
texture to the wall. Few more lines and strokes to refine the texture. Now I'm adding some darker
tones to the leaves to help separate the cat
from the background and make it stand out more. Just add few more
brushstrokes to refine the painting and add
some more final details. I'm mixing sap green
with crimson red to add some subtle color variations
and texture to the wall. Each of these
strokes will slowly add the realisticness
to the painting. Now I'm adding some
water to wet the area, and then we will
apply a dark miture to create a soft
dull color effect. Now, let's take some sap
green and intense blue to draw the darker colour
leaves, as you can see. This bunch of leaves will add some more beauty
to the painting. Some final strokes to paint the shadows
of the tree leaves. I'm adding a touch of
brown red to create a few more details
in the cat's fur. So, friends, this is all about for this part. I hope
you've enjoyed it. Now let's move to the next
part where we will add some final details and
share our final thoughts.
8. Final Thoughts: Hello, everyone,
and welcome back. Now, let's add some
final touches. Here I'm using a white
gouache to paint the whiskers and add
some white bright hairs. Here I'm using a
thin round brush to add these fine
lines and details. Let's add some more white
for the brightest areas. Here I'm using the
paint directly from the tube to get the best
opaq effect I want. A few more touches
to the white hairs. Now, let's add some white
touches to the edges of the clouds to make them a little brighter
and more glowing. So we are done with
painting the white clouds. Now let's remove
the masking tape and reveal our painting. While pulling the masking tape, pull it outward so that you don't end up tearing your paper. So, friends, I hope you've
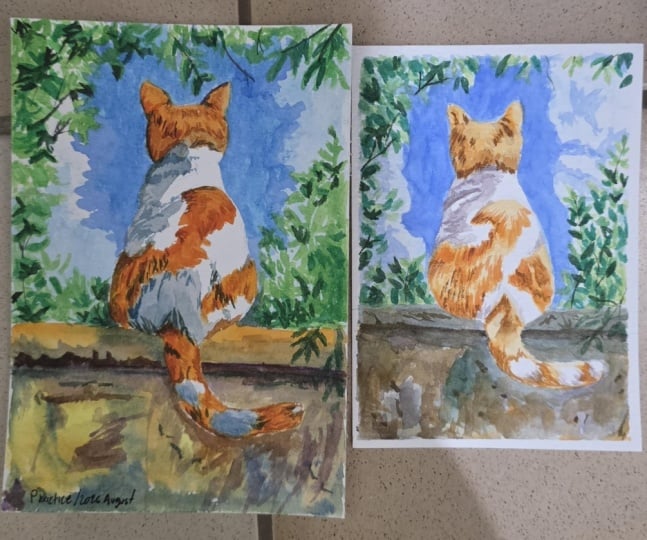
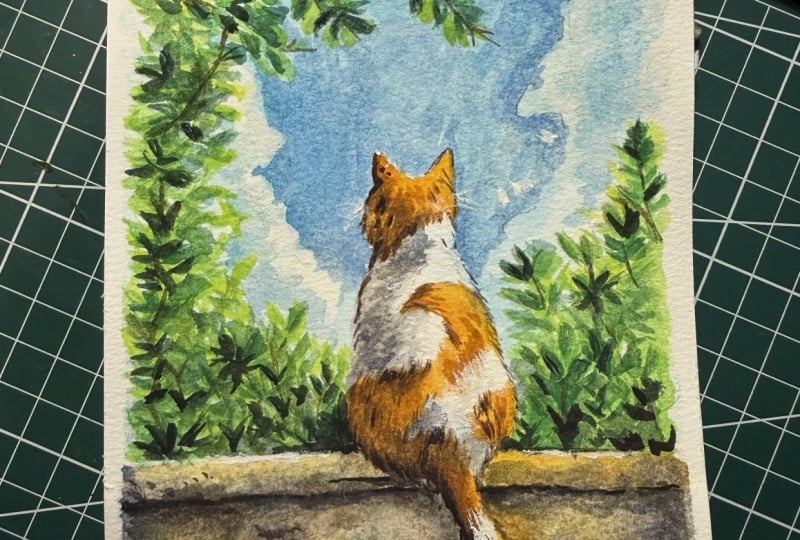
enjoyed this painting session. Don't forget to
share your projects. I would love to see your work and your painting in progress. If you have any doubts,
feel free to ask me. I would love to answer
those till then take care and stay blessed and I see you in the next class.
 Shiba Basan, Art influencer and Content Creator