Transcripts
1. Introduction: Painting animals eyes is
a really fun thing to do. And in this class,
we're going to have a go at painting this owl. We're going to look
at three things. Firstly, how to paint eyes. Secondly, how to create a
beautiful, soft background. And thirdly, how to use the
lifting technique to lift out any areas that
may become too dense and then how
to glaze on top. I'm Catherine Jennifer. I'm
an artist and art educator. I teach in person
watercolor classes, and I'm a top teacher
on Skillshare. And I taught this lesson to my in person
Auto Color class, and they seemed to enjoy it, and they got some good results. So I thought I would
share it with you. This is a fun and achievable
project which can be completed in one
sitting or one weekend, and it's a great way to practice
your watercolor skills. So I hope you will
join me in this class.
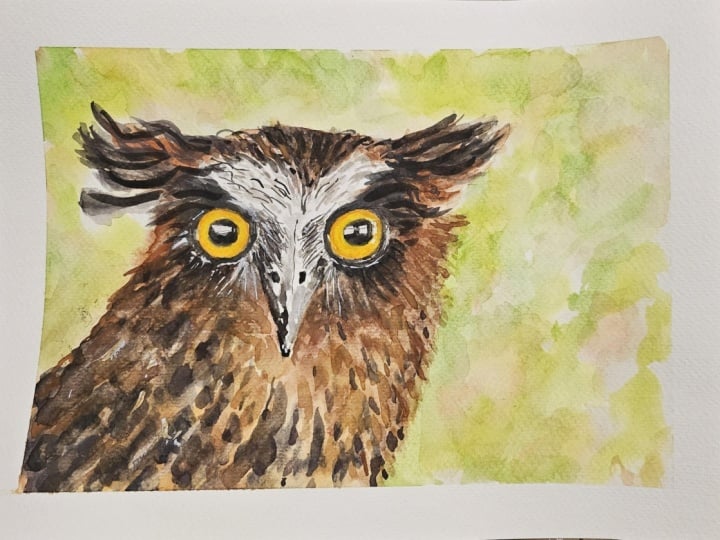
2. Project: Project for this class
is to paint this owl. You will find the
reference photo in the class resources section. If the drawing part
is tricky for you, I will also put an outline of my sketch in the resources
section, which you can use. And you will also
find some step by step notes which you can
follow as you go along. You finished your
painting, don't forget to take a quick photo and upload it into the
class project gallery so that I can offer
you some feedback. If you have any
questions, you can ask a question directly
in your project, or you can use the class discussions panel
to ask a question. Don't forget to have a look at other students projects and leave a comment or a bit of encouragement
for someone else.
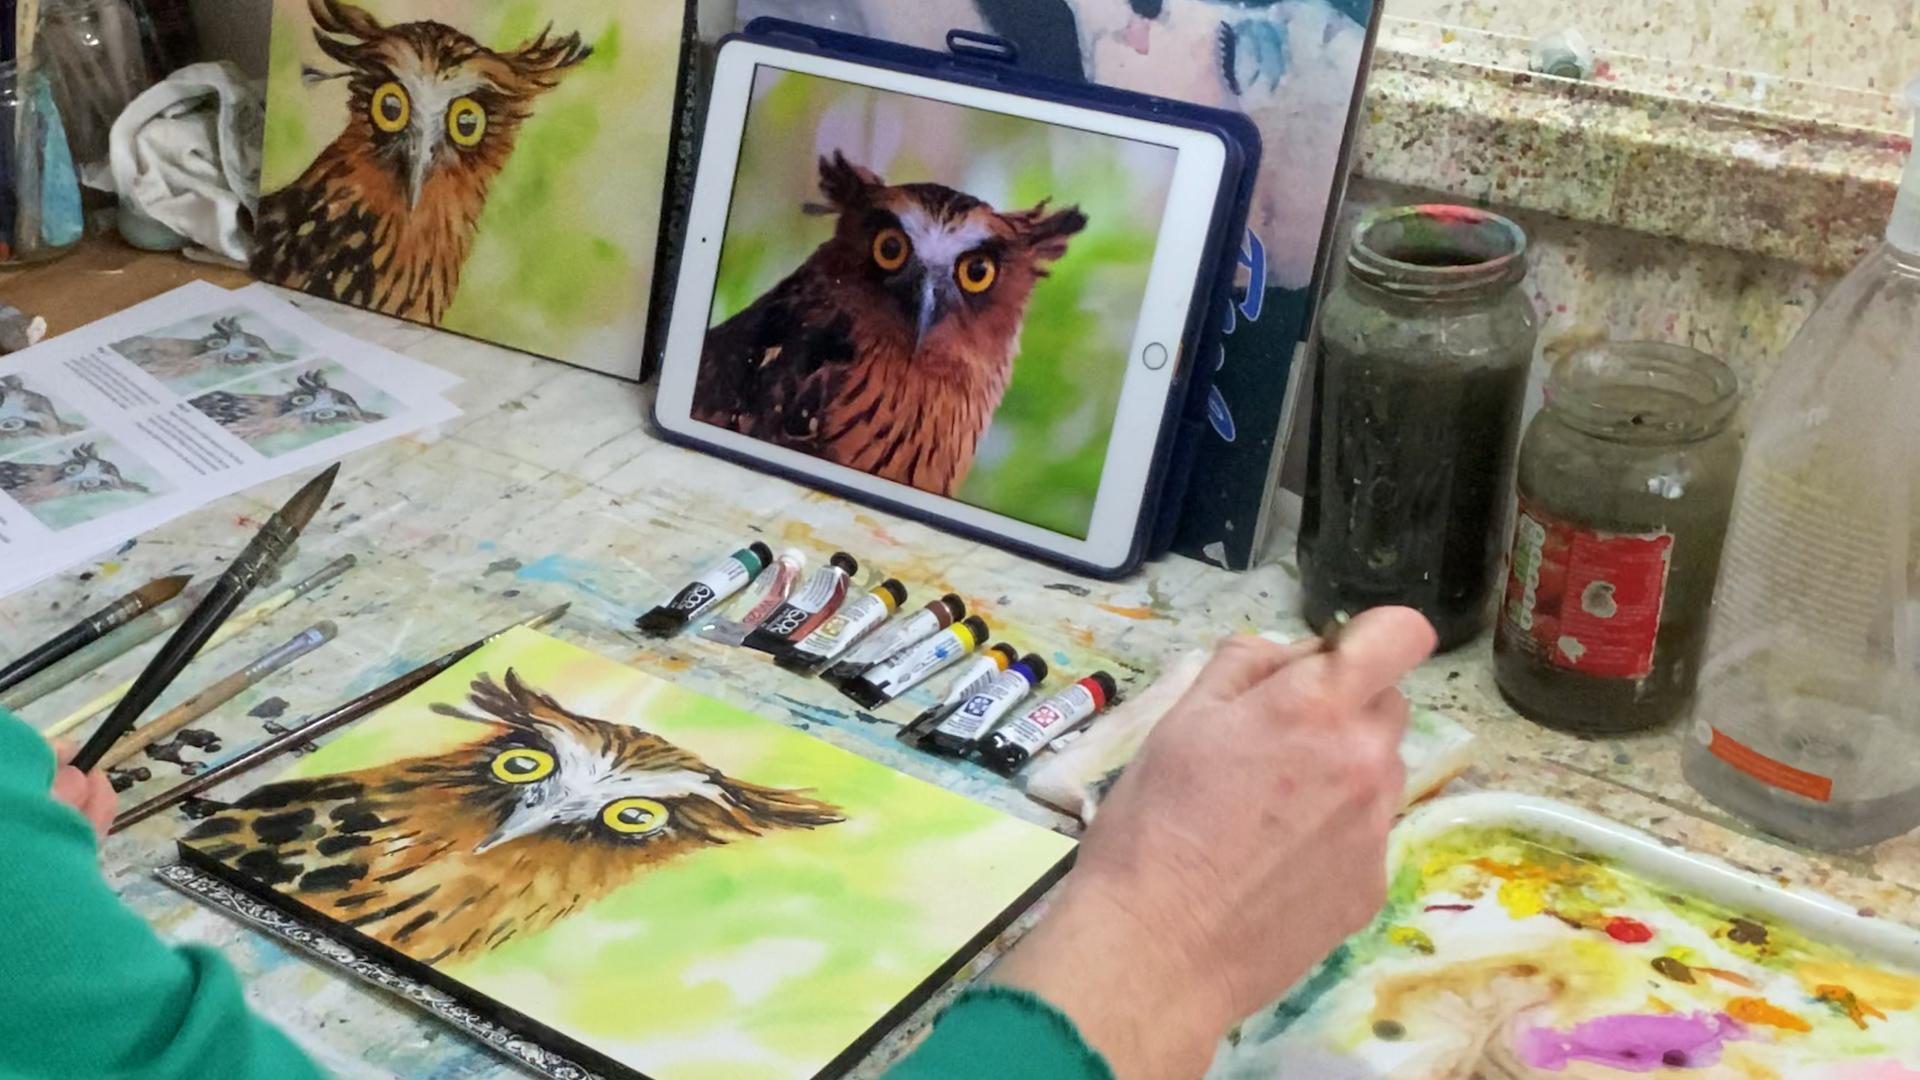
3. Materials: Materials that you will
need for the class are your basic
watercolor paints. But the main thing is, please
work on good quality paper. So I'm working on Arches paper, this is seven by 10 ", which is perfect for
this little project. But if you can't get
hold of Arches paper, then at least try to work on
paper that is 100% cotton. The reason for this
is that it makes a difference when you try to
do the lifting techniques. The other thing
you will need are brushes for the
lifting technique. Now, you can get specialized
brushes for lifting, but I've just been using
these two brushes. So this one is an acrylic brush. It's just a cheap,
synthetic acrylic brush. But the key thing is that it's harder than a watercolor brush. I also sometimes use this brush. This is an old oil brush, so it's even harder
than my acrylic brush, and it's quite short. The bristles are quite short, and it enables me to scrub out the dry paint when I
want to lift it out. So if you can get hold
of something like that, you will have more success
with the lifting technique.
4. Eyes and First Wash: So we're ready to paint the owl. We're going to start with
the eyes and the body, and then we're going to go
onto the soft background. So I've got my photograph here and I've got my
sketch ready to go. You can find a copy
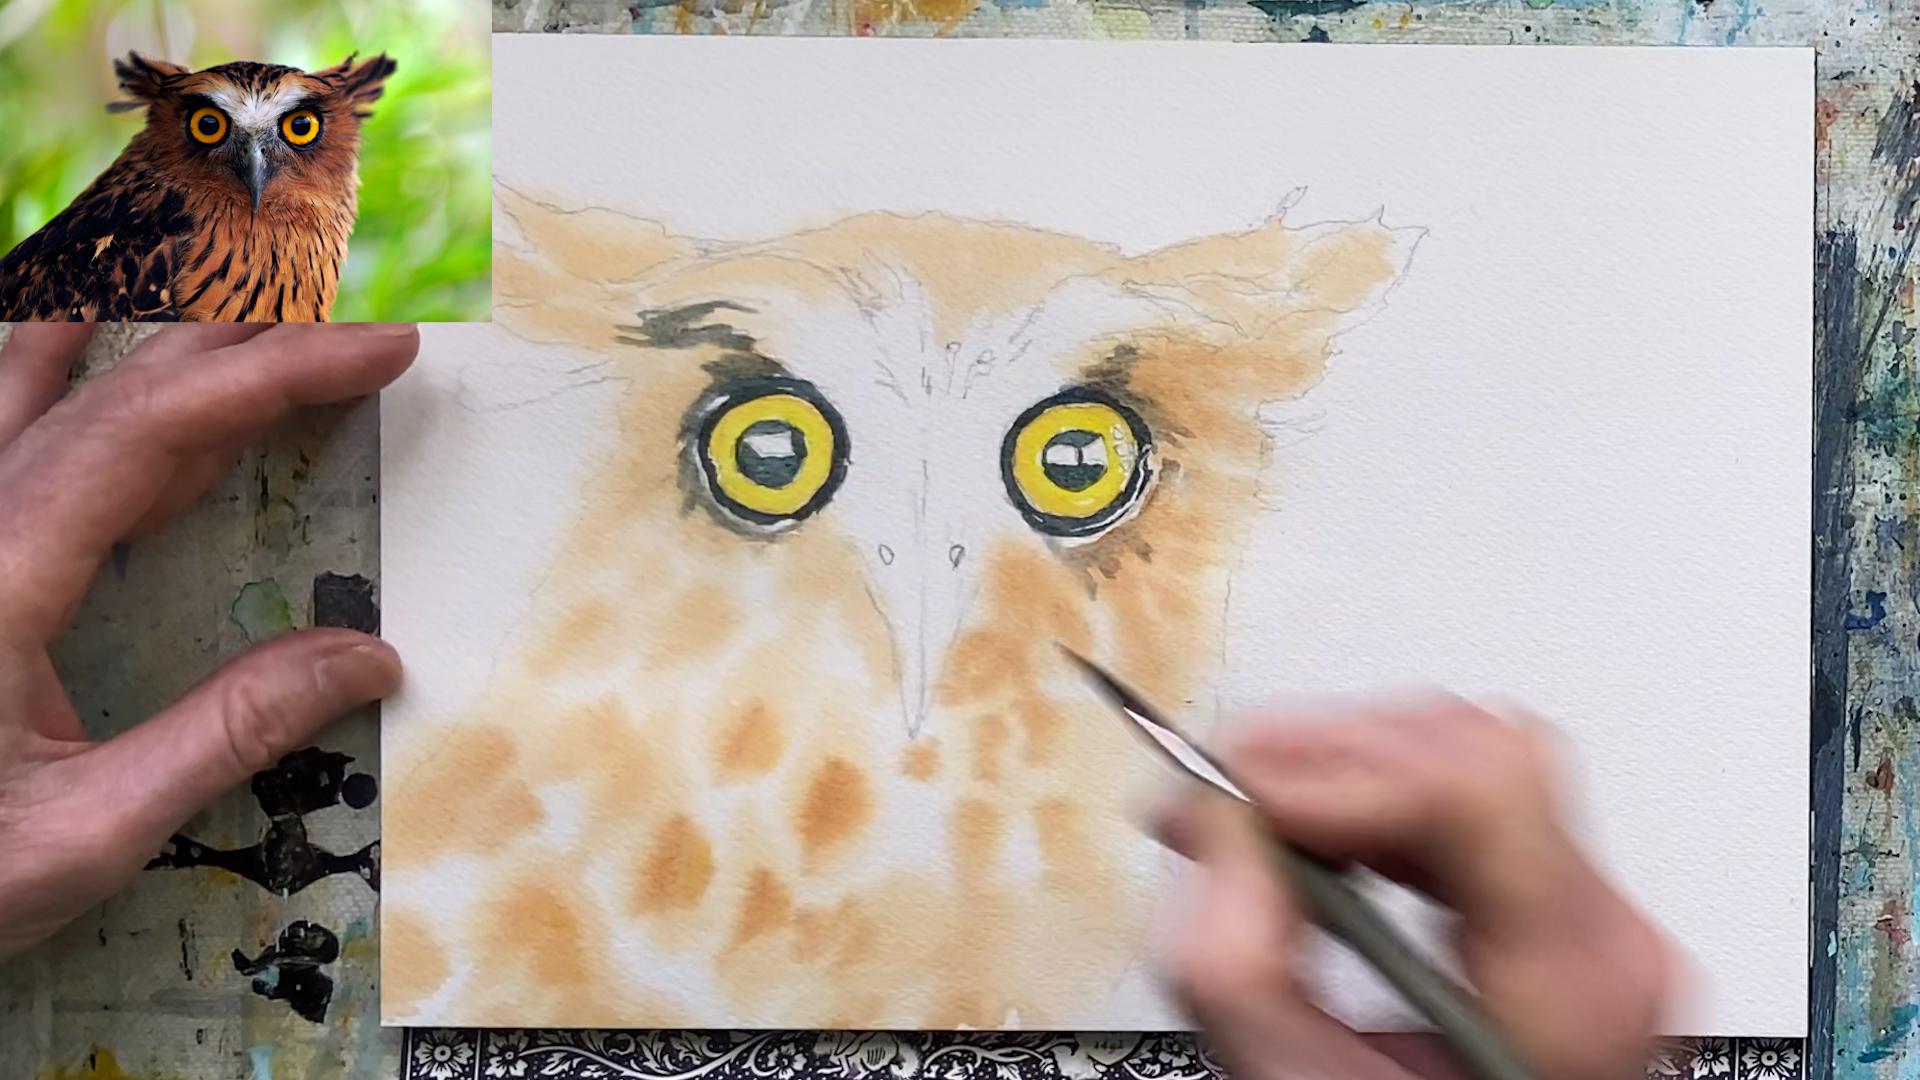
of this sketch in the class resources. But if you're confident enough to have a go at drawing it, then rather draw it yourself. I'm going to start with
just a bit of lemon yellow and paint in the yellowy
section of the eyes. I'm just working wet on dry. So it's a nice
easy way to start. When you draw out your eyes, notice that they're not
just round circles. They actually have quite
a lot of angles on them. If you zoom into the photograph, you will see the
different angles. I'm going to just bring in a
little bit of pearl orange and tiny bit of gamboge and mix it into my yellow to
create a little bit of orange. I'm going to drop
a little bit of this orange into my yellow, just around the edges
while it's still wet. Get some nice little
gentle blends going. And leaving some areas of the lemon yellow as just yellow. And the areas where the
highlights are on the eyes, I've penciled out and I'm just leaving those as
the white of the paper. Now, I'm going to use the
wet-in-wet technique, and I'm just going to wet the body of the
owl with clean water. So I'm going to actually go
a little bit over the edges of the owl's body because I
don't want any hard edges. At the moment, I'm
avoiding the beak area. I'm just going to leave
that dry for now. I'm leaving the middle of
the forehead area dry, where it's white on
the source image. Now we need to wait
about 30 seconds for the shine on the
paper to come off it. And while that happens, I'm just going to
get my colors ready. So I'm going to take a little
bit of my burnt sienna. And a bit of my gamboge, a tiny bit of my
French ultramarine, and I'm just mixing
up a few dark colors to get my palette ready. I've also got a nacrodne gold. This tube here. So
that's Bern sienna. This one is called
CacridonGld deep, and it's a beautiful, transparent brown that
I find very useful. Now, if I come back
and look at my paper, if you lift your
paper, you can check, and the right moment for
the wetting way technique is exactly when the shine
has gone off the paper, but it's still damp, and you need to have
a nice even coverage. So that seems like
just the right moment. And I'm going to start
by just dropping in some lightish browns, just dropping in some
color into the wet area. And letting it move
around on its own. I can adjust my color
intensity as I do it. I want to keep it quite light, a light touch as I do this, because I want to
retain as much of the transparency as I can. Anywhere that it's white, I'm going to retain the
white of the paper. Lovely. I'm now going to just
intensify a few areas with a little bit deeper
color just in places while it's still wet because watercolor
dries lighter, about 30% lighter than when
you put it down on the paper. I was going to adjust
what I see when it's wet, knowing that it's going
to dry, much lighter. Okay, so that's a great start.
5. Eyes Part 2: So my eyes have dried. I've waited a little bit and
let them dry completely. And I'm now going to paint the
dark area around the eyes. To paint the darks
with the eyes, I'm just mixing up a
little dark color. I'm using a mix of Thalo green
blue shade with some red, a warm red and a cool red, and I've created for
myself a nice dark color. And I'm just going to
come in with my dark and paint around the
edges of the eyes. Everything has dried, which is great because it means I can control the edges of the paint. If I want soft edges, then I need to paint wet-in-wet. But if I want to
control my edges, then I need to paint wet on dry. Once again, if you
zoom into the eye, you'll see that it's not
just a solid ring of black, it's actually got indentse and little bits of
white here and there. There's more to it than just drawing a circle
around the eyes. I'm going to extend
the dark outside. I'm just going to wet
the area a little bit first so that I can get a nice soft edge where
my dark comes out. I'm just wetting it
with some clean water and save the side. Then I'm just going to bring
my dark out a bit like that. Same thing here. Just bring it out and ending with
a nice soft edges. Then I'm going to come into the middle part of
the eye and I'm going to just paint the dark bits
in avoiding the highlights. The highlights need to stay
as the white of the page. I'll probably do a few
layers on the eye, don't worry about getting it completely dark in one layer. I'll take a few goes. Perfect.
6. Soft Background: Now we're going to start
painting the background. We're going to work wet-in-wet, and I'm going to show
you how to soften the background so that
there are no hard edges. So once again, I'm going
to take clean water, and I'm going to just
wet the background. Because we want it to
be beautifully soft. And as I did with the owl body, I'm going a little bit over
the edges because I don't want any hard edges between
the awl and the background. When you wet your background, it's important to get the
coverage nice and even. Try not to have deep swimming
pools on some parts of the paper and very thin
sections on other parts. Tip up your paper, which will allow you to see what's going on with the water. And owl, the part that I've
painted already has dried, so I can go over it with
my brush and clean water, so long as I don't
linger for too long, I won't upset the paint
that's already there. And now just like before, we need to wait for
exactly the right moment to put down our color. It's usually 30 seconds or so from when you wet the paper. With some pieces of paper, depending on what kind
of paper you're using, also, depending on how
warm your room is, you may need to wet it
twice because sometimes, by the time you've got to
the other side of the paper, the side you started on might have already
started drying. So get everything wet
in a nice even way. I've got a swimming pool here, so I'm just going
to smooth that out. Don't worry if your page
buckles a little bit, it'll flatten out as it dries. Now, while I wait for
that exact right moment, I'm going to mix up a few
of my background colors. I'm going to start
with my lemon yellow, drop in a little bit
of my thalo green, blue shade, which is giving me a beautiful, very light green. And I'm just going to mix
up a few other shades. I want something that's more yellowy with a tiny hint of
orange in it. That's it. I need a bit more
of my lemon yellow. I'm using a mixture of Daniel Smith's and car
paints, there we go. And then I'll also want
a little pinkish color. And I'm going to
use a bit of this shell pink just to save time. So get that one ready. It's still too wet, and
if I rush this part, I will end up with caterpillars, which is when you put the
paint down and it distributes little fingers all the way around that look like
caterpillar legs. So don't be tempted
to go too soon. You have to be patient when
you paint in watercolor. Okay, the shine has
gone off the paper, and it's almost time. To do the dropping in
of the background. Now, the paint intensity with this step is quite important
because it's wet-in-wet, you want it a little more
intense than you think, but not so intense that
it overpowers everything. So if you can get the mix
right on your palette, that's an important first bit. So I'm going to just drop in. Yeah, that's about perfect. Dropping in some color. I want to vary my the way
I put the paint down. I want some splotches
that are bigger, and different shapes like
a stripe coming down here, and then in some places, I'll put smaller little spots
so that there's variation. You need to do this quite fast because you don't want
any hard edges forming. Start with your lightest color. And bring it in and then move to your next
color quite quickly. So this is my deeper green. That Thalo green is very strong, beautiful color, but you do have to control it, tame
it a little bit. So that is darker
than I want it to be. So I'm just going
to take it back a bit with more of
my lemon yellow. And I'm going to just take a bit of the
intensity of color out. So here, I'm just adjusting, having more water
and less pigment. And you still need to control the wetness
that's on your brush. So if your brush is too wet, dab it on your bit of soak
pad, your kitchen towel. The key thing with
working wet-in-wet is that your brush needs to be
less wet than your paper. If you have wet paper and you come in with
a very wet brush, you're going to
create cauliflowers. So we want to try and
avoid cauliflowers. If you've got too much
water on your brush, simply touch it on
your paper towel there and the excess
water will come out. Okay, that's looking nice. A little bit there,
a little bit here. And then my final bit
of background will be coming in with my shell pink, which I'm mixing in a tiny
bit of my burnt sienna. And I'm just going
to pop that in. So when you mix your
burnt sienna in, it takes your pink and
turns it more brown. I'm going back to my pea pink now because when the pink
mixes with the green, it's also going to go brown. So it's a question of controlling how much brown
you want in your pink. And then the last
thing I'm going to do with this background is I'm just going to do a tiny
bit of lifting out already. So in order to do lifting out, I am cleaning my brush. I'm taking out most
of the moisture, and then I'm just going
to press and lift. Clean the brush, take
the moisture out, press and lift. Press and lift.
7. Darks on Head: Now going to use the
wet-in-wet technique to deepen out the color
around the eyes again, a bit like we did before. But first, I'm going to wet the paper just
with clean water, and I'm going to extend it this time down to the
sides of the beak. I'm also extending it
just a little bit over the edges of the owl, and I'll do it both sides. I'm not going over the edge into where
the beak is because that's going to be
a hard edge. Okay. And then I'm going to mix up
a little more of my brown. So I'm taking some of my cinacrocrodon gold and a little bit of my
French ultramarine. And I'm just drawing it up
into the bristles of my brush and feeling for it to be the right consistency
on my palette. I'm going to take a
bit of the excess moisture out on my tissue, and then I'm just going to start deepening the color
here around the eyes. I'm going to work both sides. That colors a little
too strong there, and I'd rather build
it up more gradually. So I'm going to take the color
back a bit on my palette, back to my burnt sienna color, mix it in with a bit
of my yellow and just start building up the tone
around the face here. Because I've already
put water down, the paint can move and I
won't get any hard edges. With watercolor, you're always working from light to dark. So as I come up into the ears, I'm just going back to my lighter color and bring in
some lighter tones in here. Again, I'm going
to just soften out this edge by bringing some water across
the edge of the awl, and then I can
deepen that color. Same thing over
here. Just make sure your brush is clean
when you do this. At the top here, I actually
do want more of a hard edge, so I'm taking care to
put my water in and not go across the barrier. And then while that dries a bit, I'm just going to
re wet the body. I'm going to come in and deepen that color out again. Okay. So I'm just building up a
nice rich surface of browns. Over there, I didn't want it to travel quite so
much into the background, so I'm just going to pick
it up with my tissue. I'm conscious of my timing as I wait for my water to soak
in just the right amount. It's still a bit
shiny over here. So while I wait for that, I'll come in around
this side and just deepen this color. Okay. It's ready now for the color. So I'm just going to go back to my that's too yellow.
Take that out. I want the lemon yellow. There we go. A bit
of my boot sienna to get my lighter brown. Okay. And I'm just adding
another layer in here in the body so that I've
got a deeper set of colors. I'm taking care to retain some of the areas where
the paper is white. Now I'm going to
bring in some of the dark color around the eyes. So I'm going to take both
my reds, my cool red, and my warm red, mix it
with a bit of my green, and there I have a lovely dark. And I'm going to come back in to this area and deepen out
the darks around the eyes. Now, I'm going to start putting in some of the
darker areas on the ears. You can see I'm just
building it up in layers, and my consistency of paint
is sort of at the moment, it's tea or coffee consistency. W colorists often talk
about consistency of paint in terms
of tea, coffee, milk, cream, butter as you
use the paint thicker, each consistency a
little bit thicker. So I'm using Tea slash coffee
for this at the moment. Okay, here, I'm just
going to come back in with a few more additions. And I can see that
it's probably ready now for my dark bits
to come in here. So I'm going to start bringing
some of my darks in here. And your painting
doesn't have to be exactly like the photograph. So don't get too hung up on the exact proportions
and things. Just get it in and
enjoy the process. Add a bit more detail
around the eyes. And this side looks ready, so come in with my
nice dark paint. This side, okay, it's right. I'm just gonna wet it a
tiny bit around the edges. And while that soaks in, I'm going to work here
and then draw it out. Just use confidence strokes. Don't be scared of
the dark paint. And then bring those darks up over the top of
the head and work little patches into the
wet paint that's already there and let it spread and
travel however it wants to. Lovely. Deepen out the color here at just the right moment, I'm going to put in those
last few black marks. I
8. Beak: So this area has now dried, and I'm going to come in and add some light gray
details around beak. I'm leaving the white
of the paper for the areas that are white
in the photograph. Sometimes these owls can
initially look like koalas. So if you've got a koala,
don't worry about it. It starts to look more like
an owl once the beak goes in. It's not as difficult
as it looks. So just keep going. If you're working on it at home, it'll come together in the end. Perfect. Now I'm going to
go back to my dark color. My reds combined with my greens, and I'm going to just darken out the middle
of the eyes again. If your reds and greens are
tending towards browns, then just add a bit of
your French ultramarine. So just go to deepen
out the center of the eyes a little
bit with another layer. My hand got the wobbles
there. Never mind. That's fine. And now this
light gray is soaked in just long enough that I can come back in with some darker gray on top. And then this part here, I want to soften again. Like that. Just get the
end of that big in. Pair the area. It's a bit
of lighter gray. Like that. And then come in with
your smaller brush, get those deeper darker bits in. Get some of these
thin hairs in here. No two paintings that I make or you make will
ever be exactly the same. But that is part of
the joy of painting. You can paint the same
subject a few times, and each one will be a
little bit different to the one before, and that's okay. Then there's just a few bits of very light gray
on the top here. So get those in.
That's looking great. Just going to pop a
bit more gray here. So in this case, I've
put it in the middle. Now I'm going to clean my brush. I'm just going to tickle around the edges just to get
a slightly softer, slightly more
loosened edge there. So with these, I'm just
going to deepen them. And then I'm going to
with a moist brush, just go slightly round just to loosen the
edges a little bit. So once you've got the
basic darks and lights in, it just becomes a case
of going back over it, deepening things out,
making small adjustments to lights and darks and
adding a bit more detail. I'd suggest you do it quite slowly because you
can always add, but you can subtract, but it's harder to subtract. Build up the darks
quite gradually, take your time and
don't rush it. And then there's a few
marks just on the face, and I'm going to use
this rigger brush for the very fine lines on the face. It doesn't have to be an
exact match of the photo. So as it's more or less.
That's enough for now.
9. Building Up Feather Layers: Now we're going to try
the lifting technique, and you will need your
harder brushes for this. Key things are don't scrub so much that
you damage the paper, but do work it a little bit in order to get the
paint to come out. For the lifting, I've
got two brushes here. One is very hard,
an old oil brush. The other is an acrylic brush that is not as hard as this, but much harder, much stiffer
than a watercolor brush. And what I'm first of all, going to do is wet the brush. I want it to be moist, not super wet, just moist, and I'm going to just
feel some of these edges so I can use that to soften
an edge just like that. If I've got an edge that's dried and I didn't want it
to be such a hard edge, I can use that to soften it. There's one over here
in the background, which again, I've wet the brush. I've taken the
excess moisture out, and I can just rub over that edge to get rid
of that hard line. It's amazing how well it works. The trick is to keep washing it, tap the excess off, and then just rub gently. You don't want to be adding
a whole bunch of water onto your canvas paper because what you'll do if you do that is you'll create a cauliflower. So it's about having it clean
and controlling how wet it is and then coming in and
just scrubbing that edge out. Okay? That's one thing you can
do with a brush like this. What you can do
with an oil brush, well, you can use the
Cook brush as well, but you can actually use it to lift out a patch like that. So clean it, tap the
excess moisture off, and then you can
lift out patches. So if your painting has got
a little heavy in places, this is a brilliant
technique to use to reintroduce the sense of luminosity that watercolor
is so good for. You don't want to scrub so hard that you
damage the paper. So be careful of doing that, but just enough
that you bring back that lightness of the
paper showing through. So I'm going to just work into the body in layers and
alternate between glazing, lifting, glazing and lifting. Go to go back to my clean water and just wet everything again. And each time you go
in with another layer, you're deepening the color and getting it to the sort of
richness that you're after. So I've wet it there,
and I got to wait for the time to be exactly right when the shine
has gone off the paper. While I wait for the body, I'll just do a little
bit of glazing over the head here,
which is now dried. I'm just deepening out
some of the color here. So it's coming in, building up the color again. The consistency of
paint is like tea, so it's very thin. But I'm still controlling how
wet it is and making sure that my brush is less
wet than my paper. Now, here, it's dry. And I want it to
be dry because I want to start building up the edge of the owl and defining some of these
sticky outi feathers. Now I'm going to wait for
exactly the right moment, and then I'm going
to start putting in the dark patches on the body. While I wait for
that to be ready, I'm just coming in again to this face area and deepening
out some of these darks. Okay. And I think the
timing is just about right. So with a slightly bigger brush, I'm going to come in and start lodging in some
of these dark patches. It's pretty wet still, so I'm almost getting
caterpillars. Can you see that? I'm almost
getting caterpillar edges. So I'm going to just
wait a few more seconds, get my color ready while I wait. It's nice to mix
your own dark colors because then when
it separates out, you get all sorts of interesting
tones coming through. Okay, I'm going to
have another go. It's still quite wet, but let's have a look. I'll just wait
another little while for it to dry a tiny bit more. And while I'm waiting,
I can go into the eyes and put a tiny bit of
shadow in the highlights. Now, it's almost a
case of cleaning your brush and just
painting in a tiny, tiny shadow there on this side. I can also, while I wait, use my rig of brush
and just pop in a few more of these hairs now
that the beak has dried. Okay. Let's see. Yeah, so the timing
is right now. So I'm going to just put in some quite confident
dark patches. Doesn't have to exactly
match the photograph. Just want to get the idea of dark feathers on top of the
brown with some soft edges. Just take a bit of that
pigment out of my brush. Control the witness. Come in again. So do you see how I had slightly less
dark pigment there? And you got to be
a bit careful with this step not to overdo it. And then a few thinner ones
as we come up this side. So the timing is the key
issue when you're doing this. You want it to be just
wet enough that you can get these darks on and
you'll get a slight soft edge, but not so wet that you
get a caterpillar forming. There we go, that's about right. Switch to a smaller brush and just pop in a few
more of these details. If your timing if you're too late and everything
is already dried, then just go back over it
with a clean wet brush, re wet it, and start again. What I don't like
over here is how all these darks are
ending in the same place. So I'm just coming in and playing a bit
with the tone here. There we go. Just adding some strokes going across out just to give
it more variation.
10. Working the Paper Surface: So this is now dried, and we've got some
very nice dark patches here and some nice
dark bits and pieces. And now we're going to go back
in with some more lifting. So once again,
I've got my small, hard old oil brush. I get it wet and I
make sure it's clean. Then I take the
excess moisture out, and I'm just going to
lift in places like this, just scrubbing a bit
along the edges. And then then clean it, take the ss out, and lift again. And as you can see, what it
does is it just gives you a different kind of
texture to your picture, and it brings back the luminosity that you might
have lost in some places. It works particularly
well on dark paint, and bear in mind that some wood colour paints are
staining and some aren't. So it will work better on the
ones that are not staining. Ones that are staining,
we in lift, as well. But it's quite a fun
technique to use, just to add something
extra to your painting. If I go back to
my acrylic brush, this is less gritty and hard, so it won't lift quite as well. You have to kind of scrub. You are doing a bit more
of a scrubbing motion. Now, obviously,
the first rule of watercolor is don't scrub, and now I'm breaking that rule, but I'm doing it on purpose
to create a little bit of a different texture on the page and let the
lightness come through. If I do it over here where I've got a little bit of a hard edge, you basically introduce a
little bit of water and just tickle around
any hard edges that you've got that
you don't want. I quite like what I got
here with my glaze, but I'm just going to go
in and soften some of it. So you can take any surface and just fiddle about
with it like this. As an additional step, and it gives you a more
interesting surface. I'm going to use this brush now, which is similar
to my other one, but it's much smaller,
little oil brush. See the comparison in size. So this is an old oil brush, and I'm going to use it to lift out a little bit of
white around the eyes. Just adding highlights. If you look closely
at the source image, you'll see that there
are little highlights to the side of the eyes. I want a sharper edge there. And so I'm coming back to my acrylic brush and
just going in there, get a bit of highlight
back in there. And this step can
take a bit of time. You go back and forth
between lifting and then glazing
and touching up, lifting, glazing, touching up until you're happy with the
surface that you've got. On this side, same thing. Just take out a bit
of paint there. It's quite subtle,
but I think it adds something interesting
to your painting. This is why you need good paper. If you're working on cheap
paper and you do this, you might find the paper
starts to come up, which you definitely don't want. And now I'm going to go in with another layer of my burnt Siena, just deepening out
the color again. So this is a glazing
consistency, which is it's like tea,
very, very watery. I'm going to first of
all, wet the area with a damp brush just because I don't want to
introduce hard edges, so I'm just wetting it
with my clean damp brush. I'm not dumping loads and
loads of water on it. Okay? I'm controlling
how much water, just getting it
ready, and I'm not lingering too long over
where the paint is. I'm just touching it gently. Okay? And now with my thin
glaze of burn sienna, I'm just putting another layer. And just keep doing that
back and forth until you're happy with the richness
of tone that you've got. Remember that when we're
here, we can come across, get a bit of my nacrate gold and pull things this way, a bit. I'm controlling the wetness
in my brush all the time. I'm taking care not to have
too much water on my brush, especially when I'm going
onto a wet surface. I just want to deepen
out the color in places. And I'm not planning each
stroke meticulously. I'm just painting quite freely and letting it
happen on the paper. Now I want to just add a few
extra bits coming off here. First of all, I
want to get rid of any hard edges that I've
got that have crept in. So there's a little hard
edge there that's crept in. So clean brush, acrylic brush, take the excess moisture out and just gently tickle
along that edge. Depending on how your
background looks, you might want to
go in again with another layer, and that's fine. And anywhere like here,
I've got a hard edge. I'm just going to
get rid of it, okay? It's surprising how easy it is. Just moist brush, soften
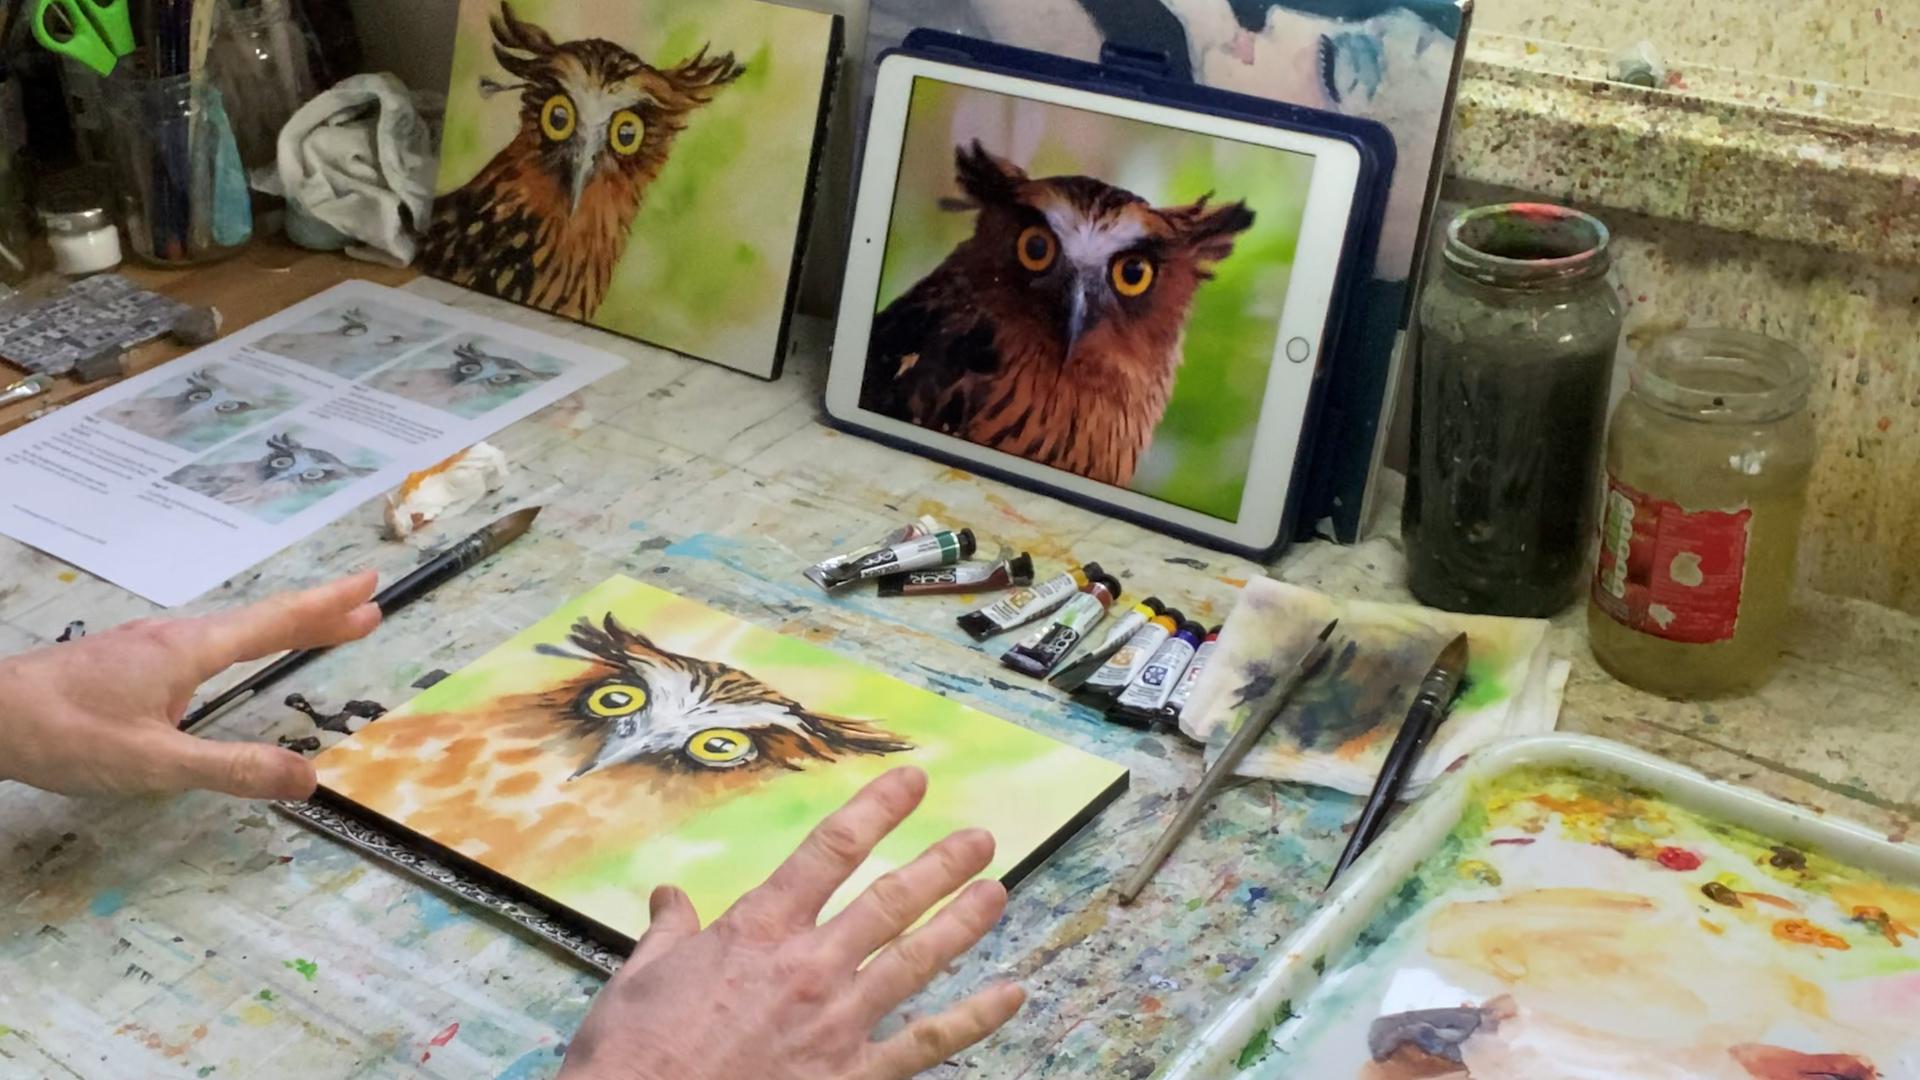
out that hard edge. When I did this painting, I went I did two
layers of background, but I'm happy with that
background for now. I'm going to let that
dry and then come back in with some lifting
and some more black.
11. Finishing Touches: Now it's just a case of
putting in the final touches. My paper here is almost dry. Tiny, tiny bit of
moisture still in there. And so I'm going to come
back in with my darks. Need a bit more of my
permanent lizarin crimson. I just want a cool
pink to mix with my green to make a
little more dark. And I'm getting it so that
it's not sticky on my palate, a little more more water. It should move easily on your palate and not
be sticky. Okay? And getting my brush ready, and I'm going to just put
back in a few more darks. Now, what I should have done was I want to get soft edges,
and it's too dry there. So I'm just coming in
with a moist brush. Now, if you get a hard edge like that that you didn't
want to soften it, come in with a moist brush, start a little bit away from it, and then gently touch
onto that edge, and that will soften it. Now, that's put more
caterpillars in than I wanted. So I'm going to take
my acrylic brush and just tickle along there to calm it down a
bit. That's fine. A lot of watercolor painting is knowing what to do
when you make a mistake. And the mistake I made
in that case was, I forgot to pre wet the area. So I'm just doing that now. My brush is just
a tiny bit moist, introducing a little bit of
wetness where I want it. In some areas here,
I actually want to lift out a little bit more. So I'm going to use another oil brush
that's slightly wider to get a
slightly bigger area. So I've wet it, and I'm
going to lift out in places. Where I feel like the
paint's got a bit too heavy down here. Going back to a
smaller oil brush and do a little bit
more lifting out. And even smaller one just
coming along this edge. You should be aware of how hard you pressing on the paper. If you press too hard, you're
going to damage the paper. If you don't press hard enough, you won't lift any of the paint. So adjust the pressure
until you feel you're getting the paint out but
not damaging the page. Now I'm going to go back
in with my dark paint, control the wetness, and just add a few more
spots here and there. I'm going to take some
of that pigment out. There we go. I've got a lighter, a more transparent gray. Control the wetness and bring a few more of these
patches up here. Change to a smaller brush. Control that intensity of paint and bring in a few more details. Final touch to the beak. There's an edge on the beak
that I'm not too keen on. So damp brush. Just going to soften
that. Solve that. And then I'm going to deepen
out the shadow that's here. And in here. And then final touches
to the top of the head, deepen out some of these darks. When you finish a painting, you should always ask yourself, are the darks dark enough? And with watercolor painting,
usually they are not. So punch up your darks to get
that contrast to its max. Watercolor often is very easy for things to
sit in midtown. In other words,
everything is a mid tone. So check your values, increase your darks as one of your last touches
to your painting. And then as a final step, you can use a little bit of
white acrylic or gouache. This is a white acrylic gouache to introduce some
final highlights. So first of all, I'm going to
just bring in a bit more of my Burnsiena here with a bit of yellow and adjust things
here a little bit. Can use this as a good time to get the texture on
the edge of the awl, a little bit better and add
a last layer of detail. Once your body is dried, you can make final touches. For instance, I've
increased the intensity of the eyes by adding a little more yellow,
a little more orange. And the last thing I'm
going to do is just make some very light, white strokes around the eyes. So I'm using my rigor brush, and I'm just going to come
in with very fine lines, bringing some of the lightness
back in around the eyes. Taking the time to make these final touches can have quite a difference
to your painting. So don't stop too soon, but equally, don't
fiddle for too long. It's a delicate balance. I hope you found
that interesting and that you've got
the general idea of how to build up the layers as you paint the
feathers on the ale.
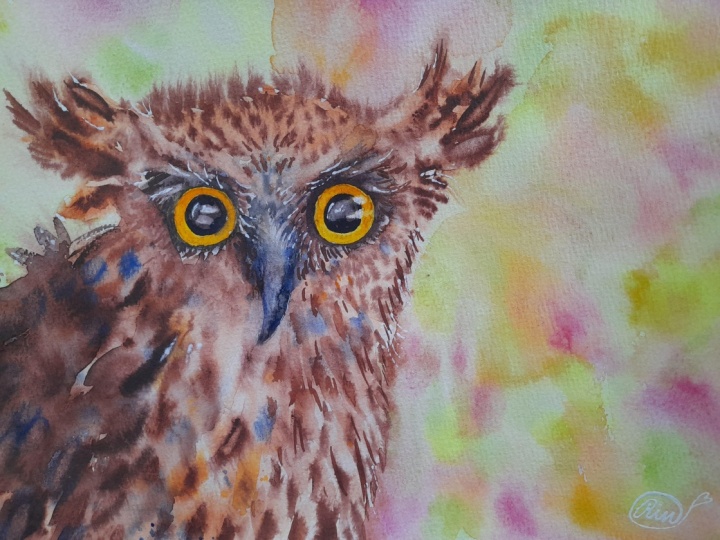
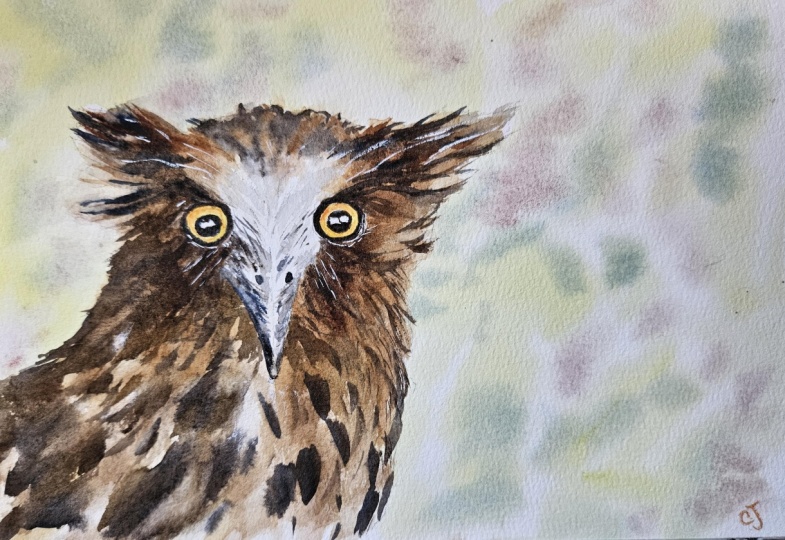
12. Conclusion: I hope you enjoyed
painting that owl, and I can't wait to see
what you come up with. So please take a quick photo and then upload it into the
Class Project Gallery. If you enjoy this
class, I've got lots of other watercolor
classes on Skillshare, each one focusing on a
specific technique or skill. And also, if you did enjoy it, I'd be really grateful if you could leave a review
on Skillshare. If you want to connect with me, you can find me on Instagram. I am at Catherine
Jennifer Designs. Same on Facebook and
same on YouTube. Until next time, Happy painting, and thanks for watching. Okay.
 Catherine Jennifer, Artist, Art Educator, Designer