Transcripts
1. Welcome! and Supplies: Hey brands, let's relax and paint together how low migraine acronyms? Jessica Sanders here, welcome to my channel. We'll paint this lovely little landscape in this short quick class. For this class, you need watercolor paper. This is 140 pound cotton paper. If you have that, that's perfect. But at least have 140 pound watercolor paper, whether it's cotton or not. That's up to you. And then you'll also need washy tape or low tack tape to tape off the trees. You'll need a round paintbrush, a pencil, and pallet knife, along with your watercolor paints. Are right. Let's get started.
2. Palette Knife Techniques: Now let me talk to you a little bit about a few things to remember and to keep in mind when you're using a palette knife. So one thing you want to keep in mind is the angle of the palette knife. So the palette knife can be flat against the paper. It can be turned at an angle. And this angle, this angle can be adjusted right? So it can be more flat or less flat and you'll get different effects depending on how you angle it. It can even be turned completely on its side. Move up and down. So the angle of the palette knife, that's what I'm talking about when I refer to that during the lesson. How much pressure you can push hard, push hard, or you can do light. It's skim across the top of the surface. Do you hear this? That's a light pressure. That's a heavy pressure, flat. So there are a lot of ways to use the palette knife. Do what's comfortable for you and what seems to be working for you. Your paper will probably be a little bit different than mine. So just just remember it's just for play and refund and let's loosen up. So we talked about the angle, we talked about the pressure, and we actually also just talked some about the motion when I told you the different positions. However, usually when we're painting the birch trees, we want to maybe make a little swooping motion and an up and down motion. So I'll demonstrate that for you really quick. Let me put some paint. Some water gets gets a paint going here on my palette. I am not concerned about colored today at all. I'm using what I have there sitting in my palette. What I'll do is I'll dip by pallet knife into the water. Then I'll just move it across to pick up some paint on the bottom. You see there's not very much there. That's okay. That's all we leave just a little. We'll go back as we need it so don't get so, so when you move it in the arc motion, you're basically going to have it at an angle and sweep across. So it's going to go, the tip will go up, across and down. And that's going to give you some dimension and roundness to your tree. The other way is to move it up and down. So what you'll do is again, just load up your palette knife. And then you can just slide it along to create the edge of the tree. And then as you slide along, you just tip it and move it over. And of course you can do the same on the other side in the opposite direction. And it's creating some lovely texture. And you're going to get blooms and blossoms and different things depending on how much paint and water you have. And that's actually perfect. It's what you want. Now, if you move this as flat, you'll get these little types of stream lines. So you can make different marks and different angles using this palette knife. So want to just encourage you to have fun. Let go, be loose, tried all the different ways. So see, this is flat. This is swooping in, this is up and down to create an edge. Ok, that's it. Just a few techniques to get you started. Now let's paint.
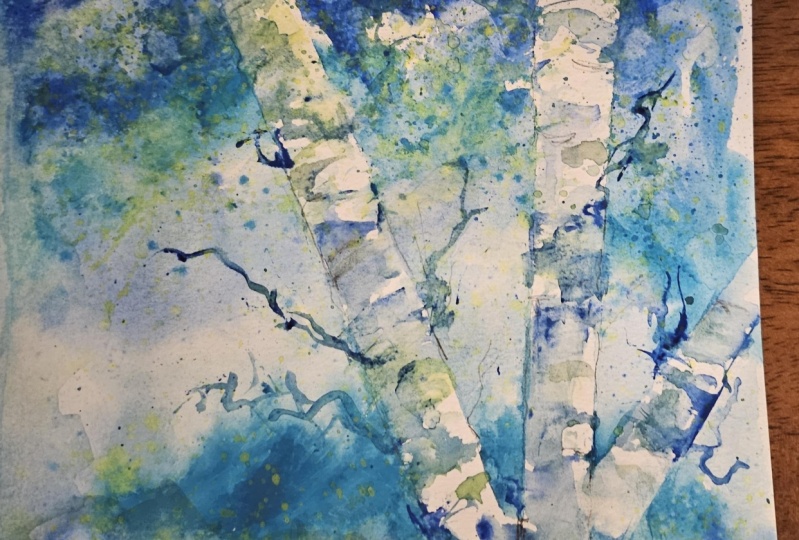
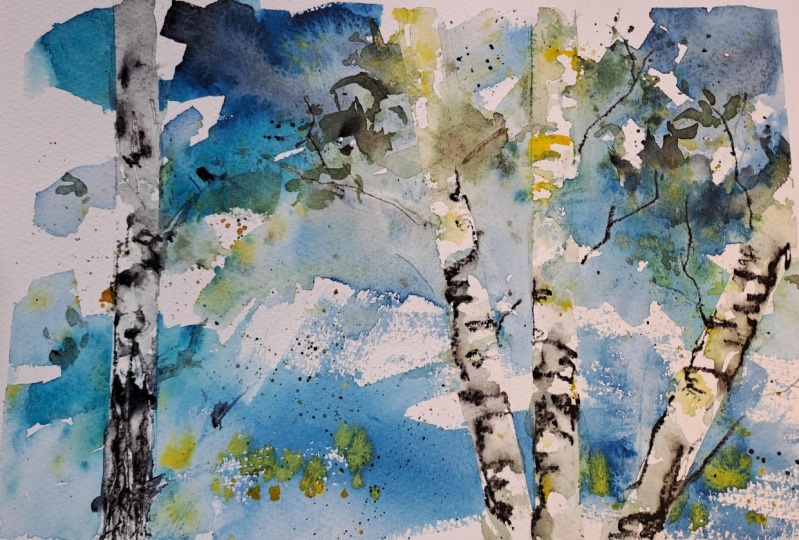
3. Let's Paint!: So I thought it might be cool to combine sort of the landscape idea with the birch tree idea. And I don't know how this is going to turn out or exactly where this will go and it may change completely. But I've got my watercolor paints, I've got my brush. Oh, I have a couple of brushes here, actually quite a few. And I have palette knife. So let's just see what happens. Ok. First off, I've taped off where I may wanna put birch trees where I want them to stay white. That's an easy way of use Washi tape. It doesn't hurt the paper or anything like that. And it's an easy way to do it. And then I'm gonna put my I don't know what I'm doing in the background. Yeah. I'm thinking of an abstract landscape, but I'm not exactly sure where I'm going. And we just want to play, so I'm not gonna plan just gonna play. One thing I'm gonna do is pull out my brush. I brush my sprayer and put some water droplets. And then I'm gonna go for it. Let's have gorgeous sky. Any color you want. I happen to want this amazing turquoise, cobalt. Cobalt turquoise maybe. Let me put that over here. A little paint swatch. Alright, what else do I want? I want cobalt blue. So really gorgeous. Bright, bright blue. That's more big, pretty good size puddle there and do the same thing and just toss it in there. And working quickly. So I'm not going to worry. It's perfect or not, not going for perfect to remember, we bring in a little bit of Indian thrown, some sense of depth. They're gorgeous. Okay. Tap a little bit of that off. Creates some cloudy effects. So just playing here to play. And I don't know how it's going to turn out. But I have to say I love the colours already. I love it already. Okay, now, what should I do here? Hmm, you know, I think I'm just going to continue what I'm doing with this background and bring in more of this, we're just color. Bringing more of the Indian throne. Is this realistic? Know, does it have to be and soften all this out? Here. So something's going on here is just for fun, dropping in some water. So maybe, you know, maybe you can't see a lot of the background. I don't know. I think I'll so I'll bring in now this is a little risky. Risky, pretty handsome yellow, that completely green brush here. That was a bright yellow. Michelle, You're my palate. See you that yellow. And then I had enough blue left about at turned completely green here. It's okay. Remembering this. Create some jobs and some leakiness. Maybe not a whole bunch and look, my tape keeps coming up there. I'm going to have to live with that. I think we kid even makes them. What? Blue Leaves. Oh, yes. Any color will do. Is SY, that just means they look like they're further away. Alright, that's pretty fun. That we want anymore. Colors. Might as well do some drops of this turquoise. Because why not do some drops of this yellow here on the bottom and leaves have fallen down. Alright. This makes me so happy guys, makes me super happy. Alright, I think I will tap that a little bit. Like going to do, let's see, let me see if I draw on this right now it's going to it's really soft because it's wet. And I'm not sure what's going to happen. Let me even though it's wet, again, I'm just taking riskier. Apparently this one is all about taking risks because that's what I'm doing. The whole thing I'm doing here, let me do my pink color swatches here. Because I forgot to do that. So far I have used these three colors plus, oh, yes, I use the cobalt blue. So nice. Oops. Okay, that's okay. Alright. And that was a little bit of a stall tactic, I guess. Even though this is where I'm taking off the tape because I'm impatient and I do that stuff sometimes. You can dry it first. The other thing though, is c-hat. These really perfect lines for my trees. Well, trees aren't really perfect. And you really want to include the background color, right? And so I'm just going to take advantage of this whip pain. I'm in a wet my palette knife. And just start point and some of this paint Now this may create some bloom effects. Okay, that's alright. Maybe use the tip, scratch it up a bit. Kind of arch that shape. Actually really have had so much fun painting birch trees. So I'm blurring some of those edges. I don't want them to be perfectly sharpen nice everywhere. Why not? Because that's not what a tree really looks like. And even though this is a realism, that wouldn't remind you of tree, I'm going to tap it into there because why not get a little bit more water? So I'm bringing in some of these color blurring some of the edges. Let me give a little bit here now which treating it. Oh yes, I love that. I love that a lot. See, you will get this kind of murky green color we've got going on because that will actually be pretty perfect. Now, if you notice, I'm going a lot slower with my palette knife than I did with my paintbrush. So keep that in mind. You've got to slow down with watercolors. Sometimes I like to work fast to, and sometimes you need to kinda work fast width, watercolour, it's like a little bit of a balancing. So see my dirty water. I'm going to take advantage of my dirty water with my palette knife and just bring in a little shadow or my trees there. So it's this gray water and it'll be really nice and settle on the tree. Which I think will be cool. And I may let those paints bleed in a little bit. I want to bring my brochure, but unlike almost feel a little desperate. But I'm, I really probably should wait. Now I think I'll use the tip. See if I can bring in some more shapes with the tip of this knife. I love painting birch trees or maybe they're aspen trees. I don't know their fantasy. They're not real. But we don't, we haven't done putting branches in and that would be cool. That's something we could do with a pencil too. But let's just go ahead and do that. Some of that with this tip of this paradigm, some holding it almost flat but not quite. Okay, is that we're going to create some interesting lines. It doesn't even have to be branches from these trees in particular, but just branches, right? That you can see. And in this area is going to be really soft, but that's kind of a watt. So it just, And I'm not afraid to use my fingers. But you might not want to. Yeah. So. Bring that in. Here we go. Hey, I'm recording but it's not live. So maybe. Yes. Okay. Thanks. My daughter says hello. I may not cut that out. Some really creating some branches that maybe don't quite make sense. I'm okay with that. This needs something here. Looks like the tree. I don't know. Just doesn't look right. So I'm just going to fix it. Who said you can't fix watercolor? Now? Granted, there are some things that are really difficult to fix. I'm not saying that. Look, I picked up this stark color. Look at that. This gorgeous go. Oh, yeah. I like that contrast there. It looks really dark color in there. And then wherever I have water, it also moves out. Let me put some sort of brain T-shapes in this area. See this is very, very white. We do not want that that will distract your eye. So I'm using my dirty water again. And great. Knew that. Just gray it up a little. Right now this is still wet, but I am going to bring in my HB pencil which creates some light lines and kind of just emphasize the edges of this tree a little, not everywhere. And if it goes on and on, so K, right? Because these trees have lot of texture and I liked that if my lines are pretty scribble ease, you could see baby even put in some little bronchi bits with the pencil. This is so fun. This is fun. I love it. Sometimes I would draw the birch trees first. And I think as I said, I, I, I have at my Brush oh, but I don't know if I'm going to use it because I really like where these are right now. So a little bit of pencil marks there. I think that was fun, adds a little texture to it. Now I have these whites along the bottom and it may get covered up if this were to be framed, but it might not. So I'm just going to bring in a little bit of that Indian thrown mixed with make a murky, That's a murky color. And you know what a marquee color is. Muddy coloring is. It's a neutral. Okay. It's just a neutral. And the only reason why we call it murky or muddy is because it's not the color we want it. It's like a weed. So you know what the definition of a weed is? An unwanted plant. Yes. And the unwanted, and the definition of mud in art is the same. This is an unwanted color. So don't worry about it so much, just let it go. Right. I'm going to bring in the yellow, bright yellow, which looks a little green because I'm not clean my brush thoroughly and I still have this big broad, so I'm just gonna do a little dropped in some places it's wet. It's ok with me. But some places it's less wet and it's gonna create some interesting Marx effects. So it's okay. You know, I'm not a purist when it comes to painting. I'm self-taught. I've heard someone say they were self-made, but, you know, I feel like I'm not self-made or whatever, and I call myself self-taught that really, I can also call myself internet taught because I've taken so many classes and learn so much. But I haven't been officially to art school, right? Like some people have in that's amazing. And I haven't gree in something completely unrelated. But here's the deal. That's one thing that maybe lets me be free to explore and not follow the rules. Sometimes I don't even know what or okay. I admit it. Sometimes I don't know what the rules are. I don't know what they are. I don't know. You know, something you're not supposed to do and I do it like you're not supposed to use your fingers. Well, OK. But I do that sometimes, right? And so that's one thing about the way I teach is more about exploring and learning and growing sort of organically. And yeah, let's just play and have fun. Because the reason we got into art most likely is because we enjoyed it, right? We enjoyed art. And that's what we're, why we're here. And, you know, if you're not enjoying the truth, the hard truth of the matter is you're not going to keep doing it. I mean, it's not required. I mean, don't get me wrong. We need it for our mental health and stuff like that. But if you're not enjoying it, and I'm gonna keep doing it. And so that's one reason why I emphasize this so much when I'm teaching is that just relax, enjoy the process, experiment, paint, play, have fun. Just see what happens. And you learn so much that way. And you will also grow. You'll also improve your mental health. Because having fun, relaxing, giving into the creative flow, all those things are really good for you. Alright, that's my little soapbox, I guess. So I actually really loved this painting, super simple to hate. A lot of fine coconut water.
4. Project and Thank you!: So your assignment or your project for this class is to paint some birch trees on an abstract landscape. And mainly your assignment in project is to enjoy the process and have fun and don't put pressure on yourselves. Just paint along with me. Enjoy painting. Relax. Remember to go easy on yourself. This is for fun and relaxation and enjoyment. It's a creative play session more than anything else. But try it out and see what happens and be sure and share your birch trees with me. Thank you so much for joining me and I'll see you very soon.
 Jessica Sanders, Artist | Designer