Transcripts
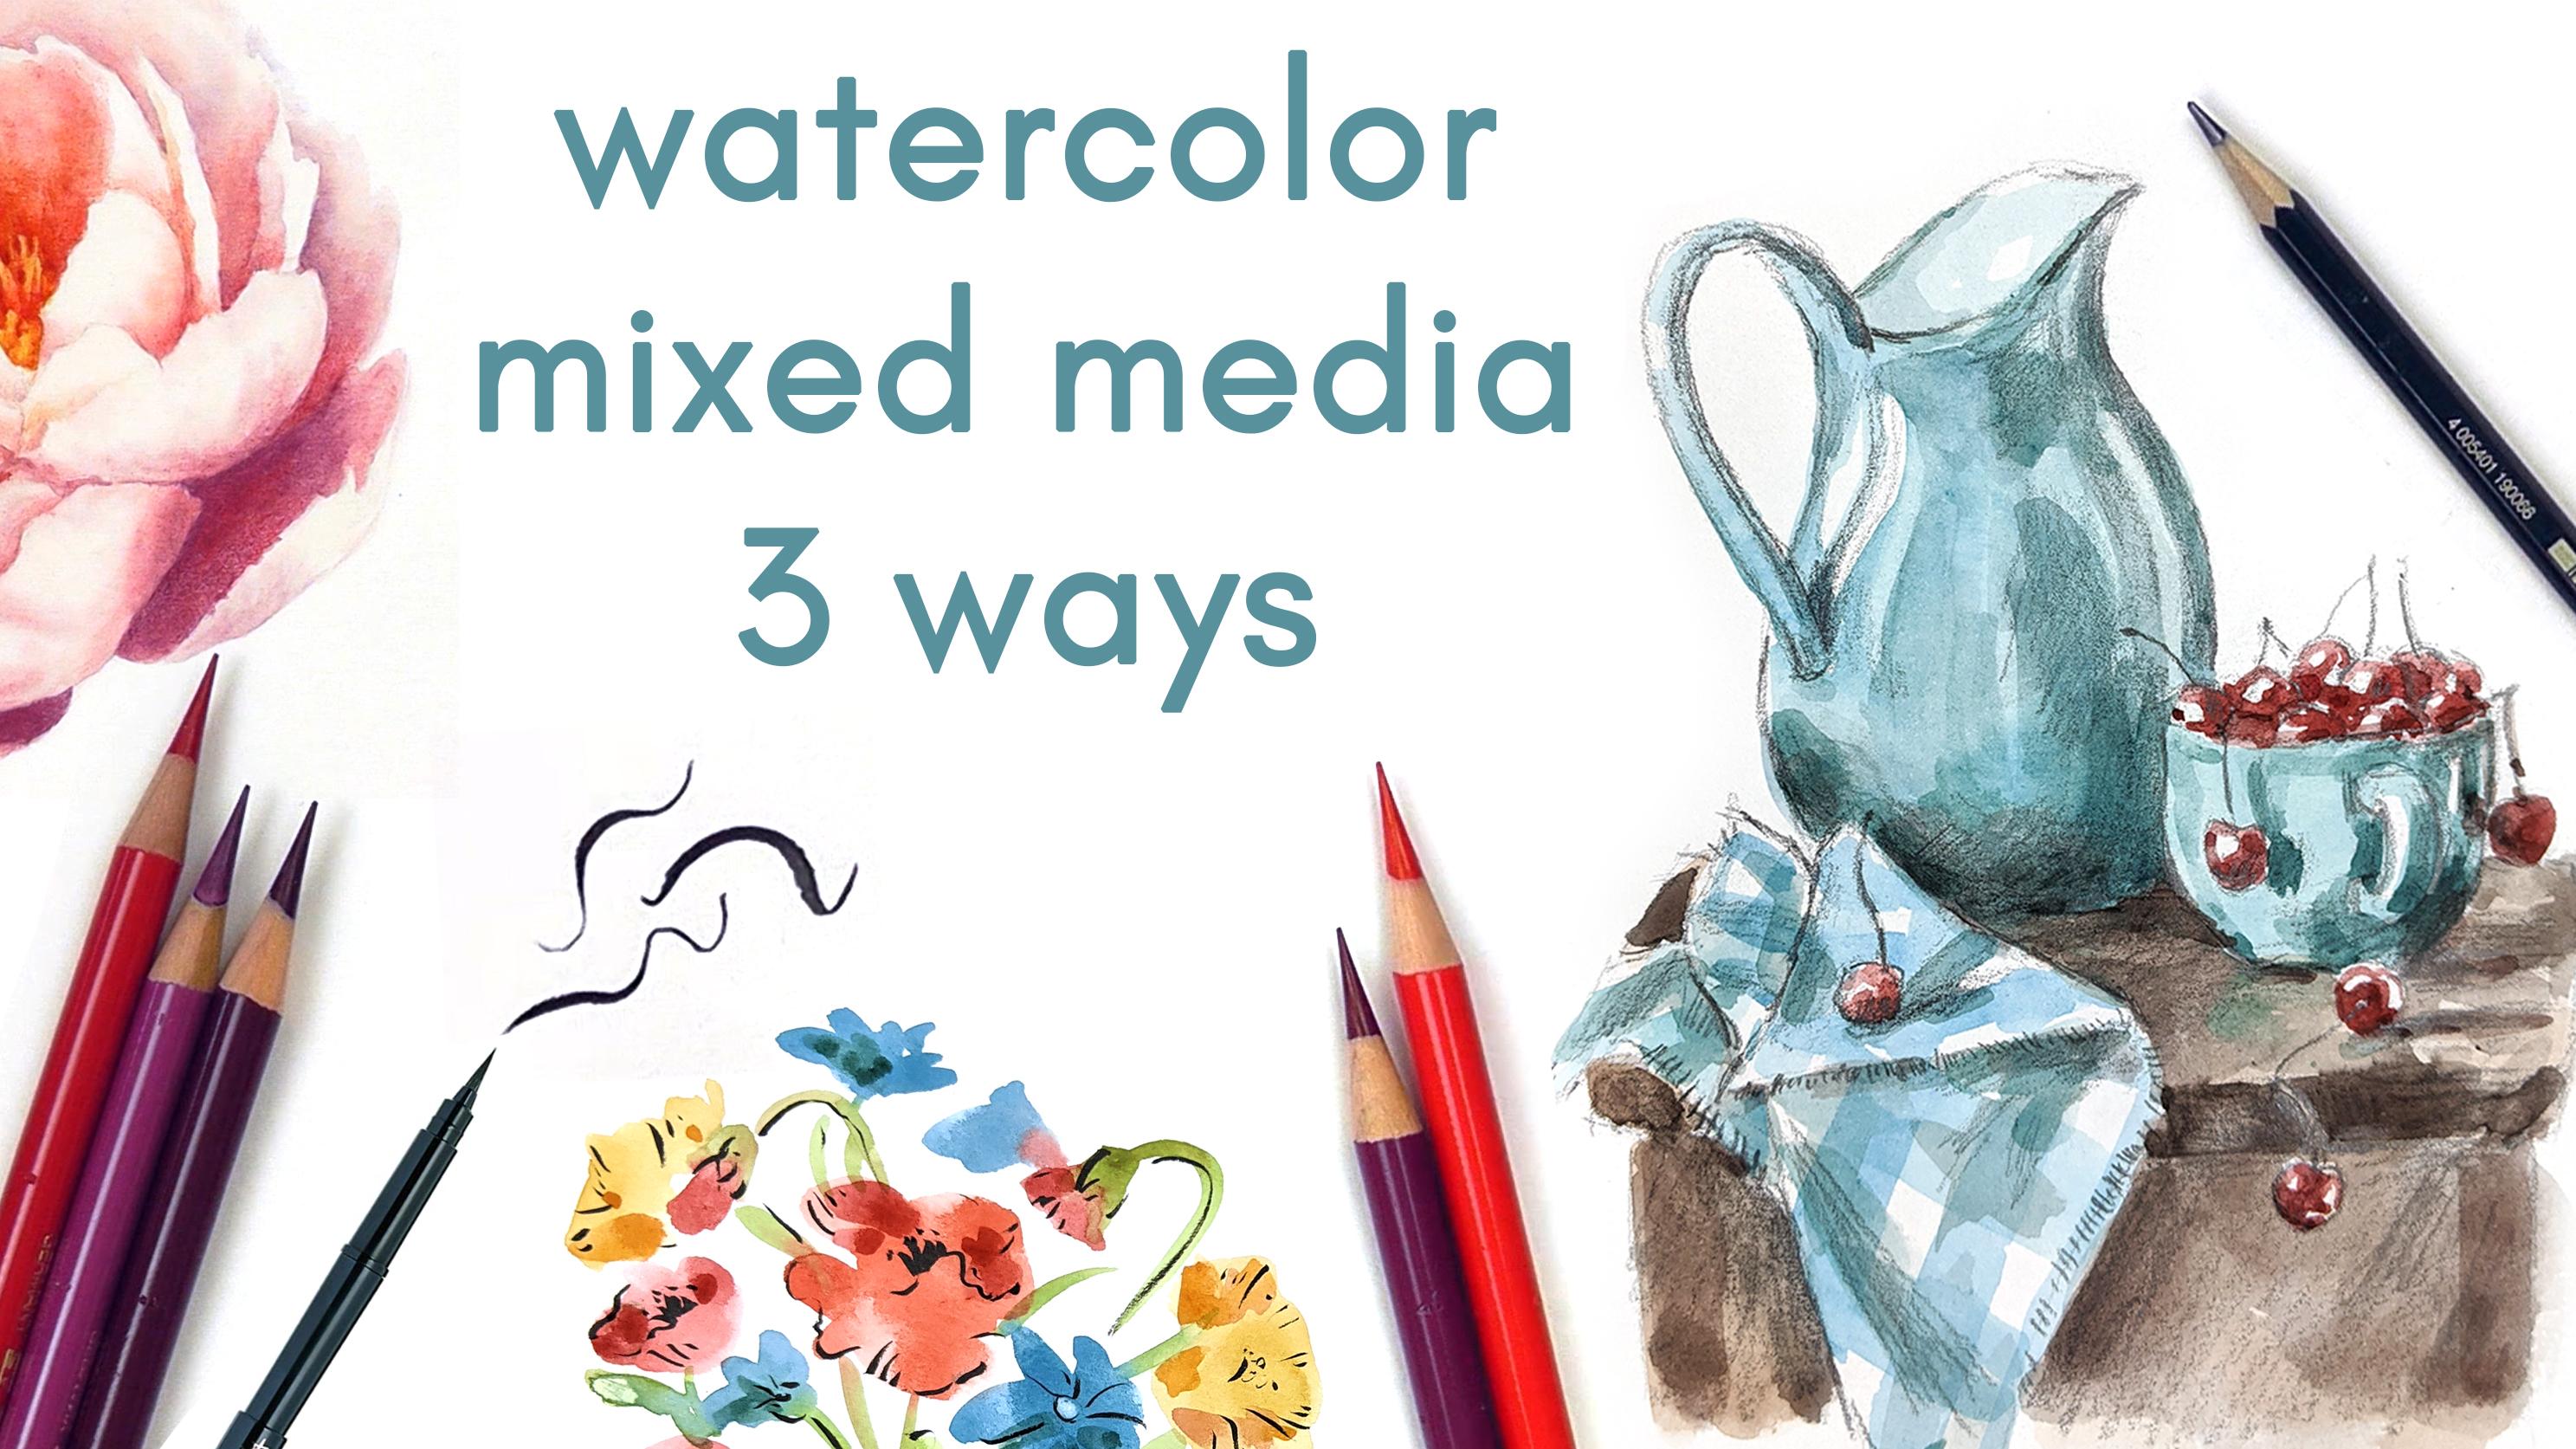
1. Intro: Hi and welcome to the eight and last class of watercolor master class from beginner to intermediate an eight classes long course that aim to teach you the fundamentals of watercolor painting by make you focusing on one important aspect of it in each class. So by the end of it, you'll have an extensive knowledge of this fascinating medium and you'll be able to make beautiful paintings. During these classes we explored the endless possibilities of watercolor that can be used in many different ways to get different results and effects and even very different and distinctive styles. So it's clear how versatile this media is. This flexibility extends also to the combination with basically any other water-based material like gouache inks and even acrylics, but also dry materials like wax or oil pastels, colored pencils, and graphite. Mixed media means using two or more different materials in the same piece. And even if watercolor is sufficient for itself, like we have seen, it is also interesting to experiment how we can combine it with other media. So the possibilities are endless, really. In this class we're going to see three examples of mixed media, and we'll also talk about style. Let's get started.
2. Project: In this class, we'll see three examples of mixing media with watercolor. The first one with colored pencils, the second one with graphite. And we'll paint an expressive Still Life. And last, we'll use some ink. As always, you can post your projects below if you want to share and receive feedback from me. And remember the practice is key for learning.
3. Art supplies: This is just a recap on the materials you need for this class. But if you want a longer explanation, I made it in class number one, art supplies, which and why. First thing you need is paper. It must be watercolor paper. And my advice is at least 300 GSM. I like they XL Canson cold pressed watercolor paper. For the brushes, tree -four rounds Synthetic brushes in different sizes will be enough. But you can explore other shapes or types of bristles if you want. Any basic watercolor set will be fine for this class. I am using Sakura Koi, the set of 12 colors. And if you prefer tubes, they are totally fine too. I suggest you to have a ceramic or plastic palette to mix your colors in, one or two jars of water, paper towels, and an air dryer to speed up the drying process. Besides the usual list of watercolor art supplies, which is the same as the other classes, to complete the following projects, you also need color pencils, a soft pencil, like a 4B or softer, and some ink. I'll use a brush pen, but you can just use any ink and apply it with a small brush. Or if you haven't, you can use a fine liner or any pen that has a waterproof ink in it.
4. Mixed media project 1 - part 1: The first mixed media project involves colored pencils and using them with watercolor is quite common when we want to achieve an high level of realism. Because color pencils gave us a control that it's hard to have with watercolors. So by using them, we can make some very fine details, some soft gradations of tone for refining our painting. So we can practice this using one of our many paintings done during this series of classes, like the peony, I want to try making it even more realistic, but feel free to choose any other painting, maybe one that you are not very happy with, that you wish to improve or you can also make a new one if you prefer. First of all, you need to go picking the right colors, the closest to the ones that you used in your painting. So if you don't have a decent range of color pencils this may be hard. I'm going to use those five colors. You can see that they are quite close to the colors in my painting. And since I'm using them to make fine details, I need to sharpen them. I'll start with this warm red for the pistils area. and I want to separate a bit more the pistils in the foreground and the ones in the background. So I start darkening the bottom part. And it's so easy and quick when you have a good base of watercolor. And now on the petal behind them, to make them pop even more. It's important to vary the pressure. So sometimes I make a very light layer, others I make a darker and richer one. If you want to blend, a really fast method is to use some tissue or smudge tool or even better, I recommend these eye shadow applicators. They are very good at bending dry materials. I'm looking for any spots where I can use this pencil before moving on to the next one. You can see that the color is richer, more even and more saturated. But it's harder to make soft shades. You need a light hand. And in general, you can tell where it's used the colored pencil for the different texture that it creates. In fact, if you like this technique and want to use the colored pencils more often, I suggest you to use hot pressed paper, which is smoother, best suited for color pencils. I can also create some shadows and not just reinforce the ones that are already there. And one of the advantages of the color pencils is that you can erase them. So if you overdo it, you can make it lighter with an eraser.
5. Mixed media project 1 - part 2: Now I’m picking my purple pencil, and I go over all the areas that have a predominance of a purple tone. - - Here, look how just a thin layer of pastel improves the evenness and consistency of this area. And it’s a good idea to layer the different color pencils, so try that too. - - - - - - -
6. Mixed media project 2 - part 1: For this project, our mixed media consists in watercolor plus graphite. We used our pencil already to make the drawing part, but then we erased the pencil marks as much as possible to achieve a clean and neat painting result. With this technique on the contrary, we want to enhance the pencil marks. We're going to make a loose, expressive sketch and then use the watercolor in a slightly different way than usual. In general, this style is sketchy and lose and expressive, and it can be perfect for a quick painting from life, for example. Anyway, I suggest you to use soft pencils from 4B up. The subject for this painting can be a still life. That is a topic that we never faced. So it can be interesting to paint, but feel free to use whatever photo reference you want. I'm making my sketch and I want my subject to be recognizable. So I start from the proportions and all, but I'm not going to clean my drawing as usual. I can make dark and sketchy lines. I can also start to make some chiaroscuro, so some shadow areas. And you can use like cross hatching or just be loose. Just make sure that you keep free the highlights and the light parts in general. Also don't worry about doing everything now because we're going to alternate watercolor and graphite. Now it's time for the first layer of watercolor painting. Always being careful to not go over the highlights. For the inside of the bottle, I'm using the same color but lighter And here I lift some color to make the wash less even and more interesting. I'm avoiding these lights. Here. I find these way of painting relaxing because you don't have to be precise. The goal is not realism anymore. So let it be expressive and loose, you can go over the borders, distorts the shape a little bit So as you can see, I painted darker the vertical stripes and then a lighter value for the horizontal ones. I'm not sure about how much dark I want the wood to be, so i start with a light wash. I pick a lighter red for the cherry as well, I don't want them to be as dark as in the reference picture. I keep on painting them always avoiding the highlights. I dry this first layer and then I take my pencil again and I add some darker lines here and there You can soften and blend the graphite if you want, with a piece of paper. I’m adding some details like this part of the cloth, with some little pencil strokes.
7. Mixed media project 2 - part 2: I'm working mostly wet on dry as you see because with this style I like intense colors and hard edges, and even when I soften I can be a lot more inaccurate. It's more like an impression than a precise reproduction. I want a nice contrast between the pot and the mug. - Now that I placed a lot of shadows I can see that the wood is too light, I definetely want a darker tone. I like to proceed in this progressive way and not to decide everything ahead because I want to listen to the painting. This is a dynamic process. I know that I'm not in control of everything. I want to recalibrate myself with the painting, with how it's looking at each stage. I notice a reflection of the mug on the wood, so I mix some cobalt again. Just a little touch but it makes a nice addition. - - - - - - - - So this is it, alternate those two media until you get a nice contrast and have fun with this. If you like this technique, I think it has a lot of potential and it's relatively quick. You can decide how detailed or lose you want this to look. One thing to be aware of try not to introduce too many shadows, but raider reinforce the ones that are already there.
8. Mixed media project 3 - subject 1: For our last mixed media project, we're going to use ink with watercolor. And you can do this in different ways, like with liquid ink and apply it with the brush. Or you can use pens. They come in different sizes and types. But it's important that they use Indian ink, so they are waterproof. If you use a non waterproof ink, as you can see, there water reactivates it. So if you want a clean line, use Indian ink. This one was a fine liner, but my favorite is the brush pen, which has this brush tip and produces a very beautiful line that can be very fine or wider depending on the pressure. That's what I'm going to use for this demonstration. But first, I make a really simple sketch with my pencil, just to set the general proportions. And I'll make all the details directly with the brushpen. - you can do the same kind of line with a bottle of ink and a fine brush. To create the sense of intricate hidden branches, I use this sort of discontinuous line. Now before erase the pencil marks and take my watercolors, I'm going to dry. So I'm sure that the ink is completely dry, otherwise I'd make a mess. I start from the trunk, so I mix some earthy tones, some more pinkish, other more orangey or grey brown. I'm being free with the first brushstrokes, I try to be spontaneous, just putting the color here and there, not overblendinig, And I fill all the shape like that. I like to have a variety of colors. Instead of making it all brown or monochrome, which would be kind of boring. Then a nice green for the grass and for the leaves and I'm painting them with single brushstrokes. I'm not thinking about the shape of a leaf. I'm just painting all different traits and ovals, and irregular shapes that can create the illusion of a bunch of leaves. Now a darker tone for some shadows, but I don't want to make it too heavy. I want to keep it fresh and simple because in my opinion it fits with this style. I wanted to create some yellow flowers. but it didn't work on that already green background, so I made them orange. Finally I dry it all and I add some line with the brushpen. It's completely up to you how many of those little pen details you want to add. Same for the leaves. I could leave them just like that or create some marks like a partial outline here and there. And here is our little tree.
9. Mixed media project 3 - subject 2: So in this case, I started with the ink line and I moved on with watercolors. But now I want to show you that you can do the opposite too. With this last project will proceed like that. And our subject will be a colorful bouquet of flowers. So I start from the flowers and I want to make them very simple. Just a few brush strokes to indicate the flower. And remember our class number two for this kind of uneven washes. And again, just try to be spontaneous and free and take liberties from the photo references. Now that it is all dry, take your brushpen or your ink, and experiment on how many lines you want. We can use it to make some parts more readable And of course add details and even create a new object like the glass vase. What I don’t like to do is outline everything everywhere. If you want, you can add more values. And darken some areas, or just leave it simple and sketchy. Those little studies are great to find out about your artistic taste, what you like and what you don't. Because here the goal is not realism anymore. So it's more about style and your preferences. So finally, your artistic personality. I hope you like experiment with it, and I really hope you had fun.
10. Wrap it up and goodbye! : Well, we finally made it to the end of this eight classes, this journey in watercolor learning. And I really wanted to conclude it with a mixed media class because I want to point out that within art it's always possible to do something new even when it looks like everything was already done and tried out. I hope it gave you the motivation, the curiosity, and a will to experiment and try everything you want. This is just a starting point. If you followed all the classes, I'm sure you have a strong understanding on how water color works so you can really play with it and consolidate your knowledge through practice. And also break the rules. Try different things. Don't be scared, take from these classes only what resonates with your unique sensibility. You don't have to paint like me, you can find a totally different approach to watercolor. one that really fits you. Most importantly, art should be fun. So do what brings you joy. It may be realism studies or loose and expressive paintings. It's an endless journey and this is the beauty of being an artist. Either you are a professional or not. It doesn't matter because painting is a form of enrichment and pleasure. Thank you so much for sticking with me for such a long time and I wish you all the best. I hope I see you soon in another class. And until then, happy painting.
 Shamila Boffo, Teaching drawing and painting techniques