Transcripts
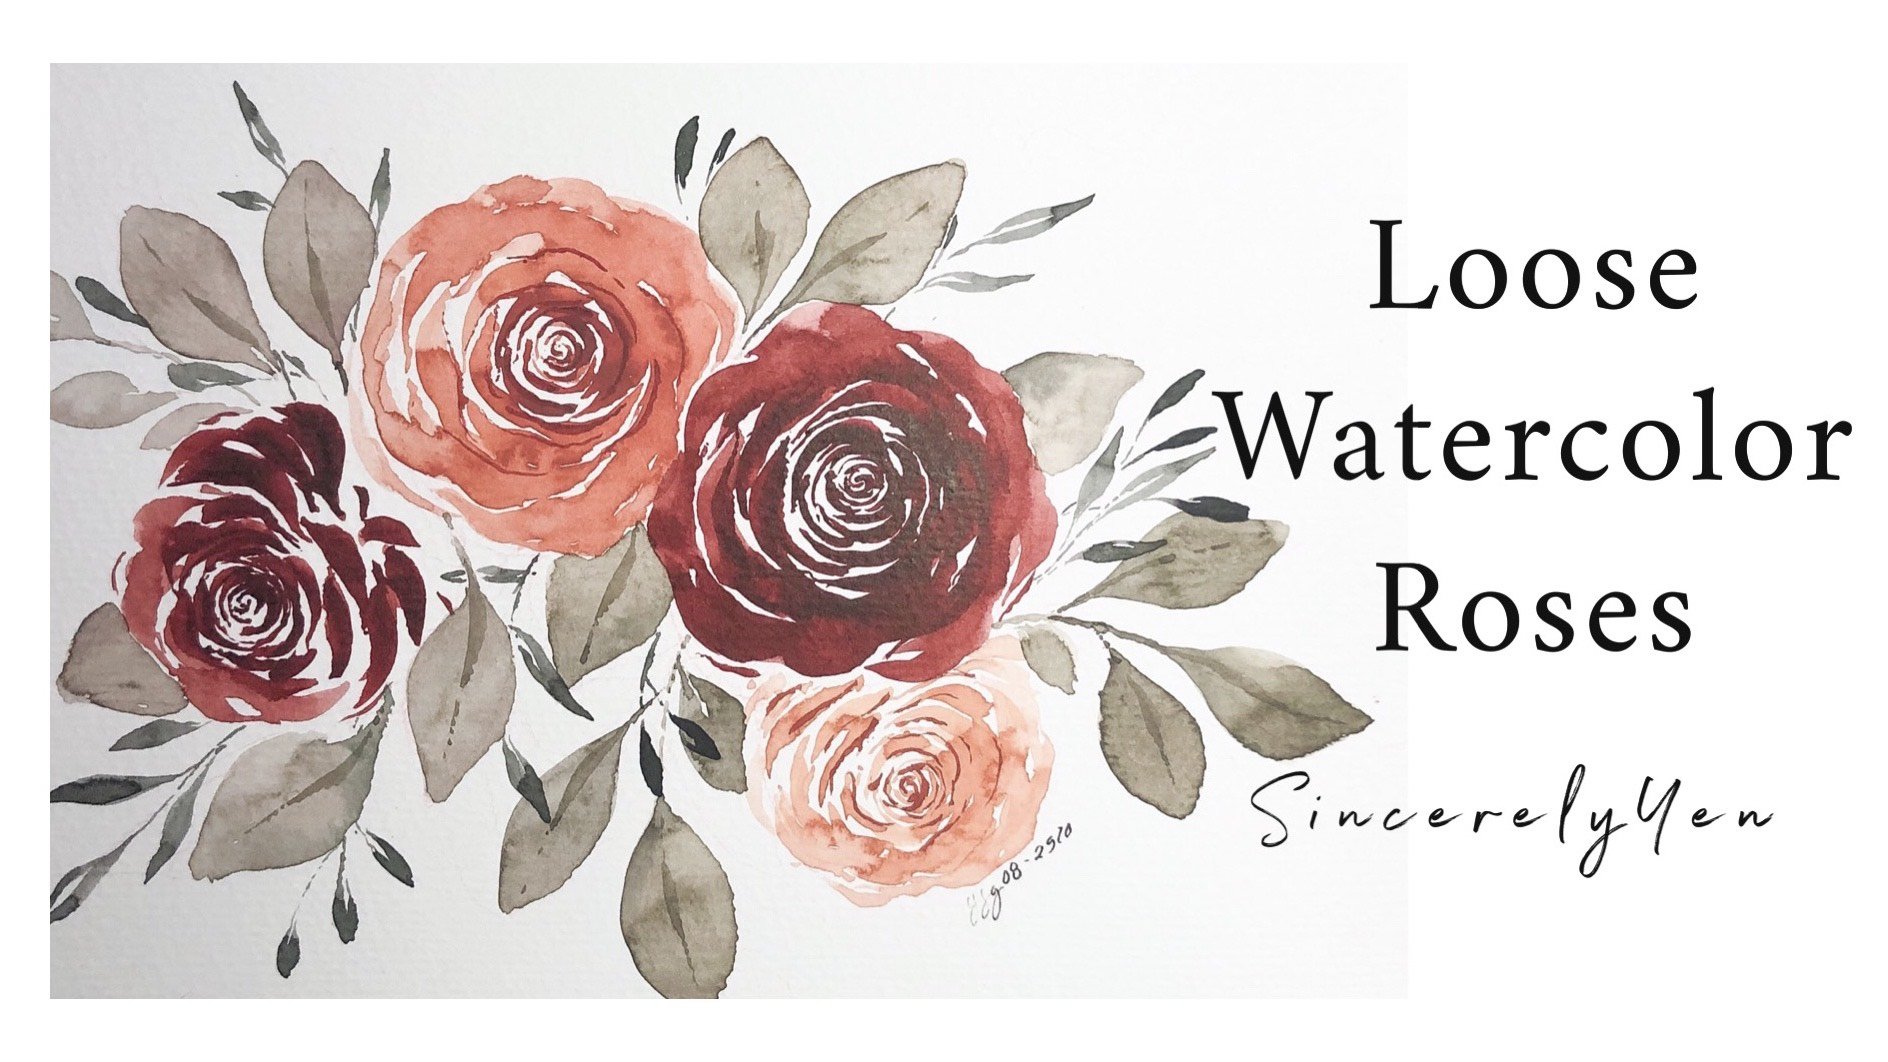
1. INTRODUCTION: I especially like painting floor. He needs flowers, roses. But in this class, we're gonna make something different. We're gonna make our with just weeks and way stop if to discuss in my next skill shop class . So I was browsing and then I saw this art Rick, this one post it has most lives and most insides. Most number of comments. So I thought that my students would be interested in learning how to paint this three. So we are eating a lot about the leafy. So So you may be thinking it looks complicated. I can't do it. But the good news is this class is side for beginners, So absolutely anyone can enjoy their snow prior experience required. I will guide you from the very first leave up to the very last leave and I will teach you the basics jokes which we used to come up with. A beautiful thanks class. I will be teaching the basic watercolor techniques, the weapon wear and the wet on dry techniques. Then I will share the tricks and tips on mixing and blending colors to achieve a monochromatic look. We will also practice the basic brush strokes you need to master. Then I'll teach you how to paint the leaves and how to add details. Lastly, there will be a step by step process of how to put everything together to create early. So by the end of the class, the students will learn how to create their very own monochromatic, leafy, really. So there. Let's start.
2. MATERIALS: for this class. We're going to use the following, but there Yes, for the pain, I will be using ground water color. This has 16 colors. I chose this because it has all the primary and secondary calories, which I will use in blending later on. Also, make sure you have a parent because we will be doing a lot off mixing for the brush. I will be using the pointed, drowned type of brush here. This our sizes far, and it any size will do as long as he have one big and one small brush offensive, which we will use for sketching the shape off the reef. A white Children which we were used for, adding the details on the leaves, what she babes for the healing time and watercolor paper. This is for Briana Cold pressed 200. She is in there. You can use any paper as long as it's at least 200 GSM. That is already enough to absorb the pain in the water. Of course. Clean water and last me. He should paper clean your brush, so no need for expensive materials. You can use whatever brand you have at home. Just make sure you have a plane, watercolor paper and brushes
3. BASIC WATERCOLOR TECHNIQUES (Wet-on-Wet and Wet-on-Dry): in creating a monochromatic leave theories we will use to watercolor techniques, the wet onward and the wet on dry techniques. Let's start to the wet on dry. So it means, as the term implies, applying with paint on to dry paper. So now I'm painting a leaf on dry paper, and then I will paint another one here this time a stem with more needs. So I'm doing this on dry paper and you will see that I have full control. Do wherever the paint goes. It just follows my brush drugs. They're so the paint is still wet. Since it's a little shiny. We're just going to wait for this to dry because aside from painting on Dr Paper, this technique is also used to paint on dry then. So I used this in adding details and layers, so I'm gonna use my smaller brush size for two added details. So watch as you make a very thin stroke. So as you see, we're able to make this dense so we have control to wherever the pain goes again, more thins jobs, they're so I will just show you a comparison. What if we paint the details while the leave is the Web, so we're going to paint a I mean a leaf here and will not wait for it to dry. We were already at the deep eels. No watch and compare, so the pain just flows to the wet bar, and it's very difficult to make thin strokes. So we ended up messing the first layer up because the behaviour of water color paint is that it moves around on that surface. Now, on her second example, we're going toe paint darker colored leaves on top off this light colored leaves to create laters. Again, we make sure it's dry, so there our first leave. So we are, ah, kind off, creating an illusion here that this leaves that the darker color. These are in front off the light colored leaves, so with wet on dry, you can just add layers without worrying about messing. The first layer up. The second technique is the wet on wet technique. So again, as the term implies, it means that Web pain is applied to wet paper or added to a wash off fresh Web pain. So to show you we are going to pay the leave, you seeing the color green there. And while it's wet, we're going to drop darker shades of green here and yeah, so over here. So you see, the colors are mixing and blending on the need because it's moving freely to the Web, all right. Another style is we're going toe wet, the paper first with just water. But on this example, I added a very light shade of green so you can see it on the screen. So now, while it's what we're going to drop green there, watch how the pain just flows. Find a wet fart, then drops of yellow. It's just flowing, and the colors are just blending and mixing beautifully on the leaf. So it's important that you do this before the paint dries up so that the colors will blend and you will not create hard edges there. So it's just mixing now to give you a closer look Here, there it's. It kind of creates texture, and there's a nice blend off the colors. So if you know this, when using the wet on wet technique, were actually sacrificing control of the off the pain for dynamics, the colors are moving freely on the Web Sarah phase. So those air to do basic techniques
4. COLOR MIXING (Creating a palette for a Monochromatic Look): straight color mixes I will be creating a color were for this. I will only use red, yellow and blue our primary colors. So I regard here is to understand the relationship off the colors in the color wheel. Let's start with our primary colors, the color blue there. Then skip three sections and then the color. Yeah, now let's keep another three sections and then the color red. Now, if mixed two primary colors, it's been a result to our secondary colors, so blue plus yellow. So we're pleasing that between blue and yellow. Next, yellow plus red equals our age. So again we're going to place that mean yellow and for change, then red plus blue violet There. Now, if we makes one primary color and one secondary color, we get our 33 colors. It's a blue plus green equals, so we're going to place that between blue and green. Yellow plus green crossed yellow, green, blue violet equals in the cold, violent, less. Read it waas, red violet and our age less red equals. Read our range. Lastly, our range plus yellow equals yellow orange. So now that we understand this, we can easily identify the base scholars or the huge family off the secondary and tertiary colors. This is very important because I'll share you my secret in painting monochromatic Greece. I don't actually use just one color. I use different colors derived from mixing the base colors in different ratios. So to give you examples, let's try different monochromatic themes. First, blood violence. So if you remember, the base colors are red and violet, so I refreshed mix is red, less value, but we're gonna add more that story that there our second mix is thread plus violent, but this time with more valuable. So we just playing with the ratios off Arby's colors. Let's try that. That's our second color. Third, is that less value? Then we will add white to get a tailor. That's add way again. You can play with a month off white in this week's to get more Carter's so there. That's a dealer. Then fourth ISS read, less violent. Then we'll add a little black. I want to show you just a little back there to give it a darker shade. They're so that's our fourth corner and lastly, lead less violent plus great. So just to give you a tip. Gray is blue, plus the color brown, so we're creating the color gray here first, then add dreads and violence. So this gives a recall, er a different. That's that. So this will be the five colors that we will use for our monochromatic red violet pretty now that stay yellow orange. So if you remember, the base colors are yellow and our range. So our first mixed this orange yellow, but with more yellow. Try that there. Our second mix is yellow plus a range, but this time with more orange. Our third mixed this yellow Pless orange, unless why give it the failure is thin fans. Fourth is yellow. Less are change less and little black for a darker shade. They're just as the scholar is too strong. We don't want over our over mix over there. Lastly, yellow plus orrange plus three. So again, we're creating the color green years over mixing blue and brown. They're so this are the five colors that we will use to achieve a monochromatic yellow are range may be Now what if we're going to use a primary colored? So, for example, in this case, you don't have beast colors. So this is what they do for a scholar is the plane color? Second is give it a failure dinner. So we add white third caller. We give it a darker shade, so we add a little there. So if you think he added too much, plus you can add more blue and the chief of less dark. She unless is loop less green again, mixing brown and due to achieve three and six for a different tone. They're so this or the colors we will use for a monochromatic blue reef. You can also play with the racial meaning at more wide at less. Wife on, more gray at more laugh. Then you have different things bones and shades, so there.
5. BASIC BRUSH STROKES: way for begin paint leaves. We need to practice some brushstroke deals. This helps us control the pressure we apply on our brush, so we start with loading the brush with paint. I am using aquamarine blue for this. Then I will also use my size eight by instead round brush. Make sure that it is slow that from the them up Do the hell. So our first drill the thin, thick, thin strokes. It starts with a very thin line, then gradually adding pressure, sure and then back to stand. So again, that's san they thin. So I will do that again. This time, watch closely how the bristles move there. So at first it's just the depth and then press and then thin so we can practice doing this in different sizes and legs. So here's a smaller virtually. They're so you can try a longer one and stand there. One. Justice love. As you practice making thin and thick strokes look, so do this 15 to 20 times, or until you're satisfied with your practice. This is also your warm off before you start Spain thing. Now we are ready for the second do so I'm still using aquamarine blue and I'm going to load my brush Rid pain. This is the same. Brush us the brush I used a vile ago. Make sure that the brush again is loaded from the step up to the Here. This is the loop stroke. The stroke starts with a thin line and then no and back Distin again. That's thin, then press curve and thins. So I'm going to exaggerate this. Watch the movement. No, back to thin So that just put it out live then, Luke and back. It's like painting bad bulls. I'm not gonna do that again. So watch how the brush curves, impressing the brush and in craving it and then back to thin. Okay, so you can practice doing this again for 15 to 20 times, or until you master making the look again. So for for the last time, just watch closely how the brush our moves. You have to make sure that the you start with the thin stroke there, So that's thin exaggerating it and they blue there, So we're all set way
6. PAINTING LEAVES (Using Thin-Thick-Thin Strokes): sense of relief will be full of leaves. We need to learn how to paint different types of leads. So I don't have specific names for this leaves, but we're just going to play with our strokes to come up it very shorts. So the first set of leaves is made of our thin, thick strokes that I will be using blue green for this slightly mixed with Aqua Marine and my pointed round brush size eight. Make sure that the brushes loaded from the trip up to the hell now here's our river is me. So that's then six and then six. We're just gonna do that again, They're and we're going to apply the wet on wet technique for this one. So I'm dropping a different shade off blue green, strapping the color while the leaves still with. So again, this leave ISS made off too thin, thick, thin strokes that they're facing each other. And to just add texture. We are using the wet on wet technique, just dropping colors. Then I'm going to pay a smaller leave here, so I would advise that if you paint leaves, you point them in different sizes Now for our second beef. You can use your smaller brush for this one, but I'm using the same brush. So that's start with this them and then press a little. And then sense true there. So it's made off the very short, thin, sixth in strokes that they're facing each other. So it's like thin breasts and thin and thin breast thin. So we're just doing this again. I just didn't press and thin that there. So if you notice the leaves are parallel to each other now for our third leave, I will be using my smaller brush size for here. So this'll time. This leave is only made off one thin, just dropping colors. Again. Again. This is the weapon, so that's thin and then longer, thick and thin. This is the opposite. The 1st 2nd leave, because this time the fix drug is longer, so that's thin, thick. Try to make your leaves look like they are the same lengths and sizes they're so I tried to make it look like it's a little Ben again. That's a little been there, just kind of giving it the flick to make it look like it's moving naturally now for our last leaf for this set. I'm so using my smaller bush. So that's a stem. And then six. And they're so this leave is kind of like a thicker version off our second leave. So instead of just making a thick stroke, yours likely curving it for him. Uh, somewhat over. Appointed over. They're so it's OK if you have white spaces there, just leave it. It looks like it's the center off believe. Have you noticed how the brush moves? Just gives the the, uh It's like curve. So again, that's Gruban thin and group there. So what? That is over very set off leads.
7. PAINTING LEAVES (Using Loop Strokes): wait. A second set of leaves is made off loops, trolls and others. I'm still using green and aqua marine blue for this, and I find it wrong. Bar size for my smaller brush can make sure it's loaded from the tip of the heel. So we start with this. Them very thin stroke. And then So So our first leaf is made off the basic loop stroke again. That's thin. And then, though there, So it sort of AIDS and off long shape the okay, this. So if you notice you have this white space at the center off leave. It's okay if you have that, it sort of looks like the vein off the knee. Now for our second leave. Still using my small brush. It this made off. The basic groups stroke you can. But this time it looks like a friend kind of looks like a friend, so the leaves are slightly. They are gonna facing upward This So if you have already mastered your loop strove our reels and lesson number five painting. This is already a piece of cake for you. Okay, so just do demonstrate again to show you how we did those loops, strokes from that. It starts with a thin stroke and then do and back to this thing a stroke can move. They're so if you're having a hard time doing the loop, you can do this watch. So those jokes, they're meeting at the center now for our third leave Miss part with painting this them spurs. But this time we're going to leave it to dry. We're just gonna leave that there and we'll proceed to our next leave our Fort Lee. So for this leave, I will be using my bigger brush size. Begin load your brush with pain, make sure it's low debt from the tip to the here. Then we're gonna me a very big loop there, and then we'll add strokes on the sides to make it look like it's around me again. That's loops stroke, and then more strokes on side there. So we'll do another one here to have that white space at the century just gonna filled up with pain again. I'm using the wet on wet technique for this leaves while it's well they're still with. So I love using this technique on bigger leaves because you will appreciate the texture more so there. So I think our third Leavis I mean, the stamps are already dry. So using my smaller brush, I'm gonna tell you the paint with water to create life color. So if you notice it's not even visible on the brush, the color, that's basic Luke and then basic Luke. So I call this leaf that they're inspired leaves. There's me that basic, Loops wrote, but it's inspiring now. Every last leave, it's no longer made off loop strokes. I would be using my small brush for this one. This leave is made off butts. So we start with this, then there and then small dots, small thoughts that were slightly becoming bigger and thicker. So they're pressing the brush. I'm gonna do it. This with a light. I mean a Baylor color. So I'm going to add wife there, and then we'll continue painting. That's bigger. Thoughts toe smaller thoughts on the other end. There again, that's small dots do bigger, loading it with another color and the small cuts again. If you remember in my first class, this is one of the fillings, so that's our second set off leaves
8. ADDING DETAILS TO YOUR LEAVES: way, ready to add details to a release. For this, I will use my pointed round brush this one size four. It should have a finding dip and then my wife. Then you can also use white paid for this, but I prefer using both friends so again for adding details. We use the weapon driving me because you have to have full control off the pain. So close a brush. Make sure it's not too bad. Here. You can see that the tip is very pointed. It's difficult to pay thin strokes if it's do it so thin lying. So when adding details were using a very light pressure. It's a very thin lines for the veins now on the other side, it doesn't have to be part of an do the veins on the right from there. So when adding details, you don't have to load the brush up to the hell. It's OK to load the brush just up to the tip off because you're not going to add especially another style off. Adding details is to just paint one thin stroke at the center off the leaf. Uh, usually use this style when adding details to small leaves because we don't need too much detail on those things. Another style. I'll show this from the next leaf is the pain like me thin, thick fins toe. So that's thin. Think thin. Make sure that it's still very thin. There's We're not pressing the brush too hard. Just a nip of pressure. Added that this in the middle of a stroke. Now for the last leave, we're going to use every wife Ben, so we're just adding details. Similar door first leave. I usually used my wife, Ben or white paint if you prefer using paint on the colored leaves because dark colors won't be visible on our dark leaves. So there. Now let's add details. Your second set off leaves. I'm still using my small brush, and we're still using the wet on dry technique. So I paint that here for the seriously. If I mean that the other half off the leave with a darker she. So we're gonna do that again. Divide the leaf in two and then being the other half there, so it's very important that we do this on dry paint. Do not miss up the first near they're now for over a friend like beef. I will be using my wife, Ben, and we're just gonna draw thin lines. They're so this leave doesn't have to have too much detail now for the inspired leaves. We don't need details for that anymore or our big leave over here. You're using a darker color. We're just adding the veins. Still using very life pressure. Great finish strokes. So if I used a darker color for this leave, then I will be using white thing for my wife then. But since it's like we're going to use darker color there, no, for they thought that leaves. You can choose to add details. You can choose to just leave it best iss but we'll try to add our very thoughts here. Now you're needs are complete and are ready to be painted on.
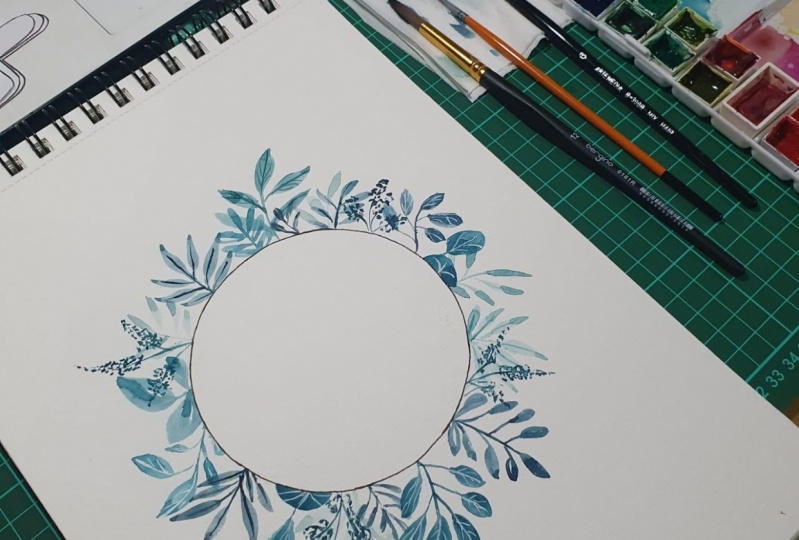
9. CLASS PROJECT: Creating your Monochromatic Leafy Wreath (PART 2): this will be our class project. For the next lesson, I will guide you how to put everything together to create this monochromatic. The fever. First things first. Prepare the following materials. Watercolor pain, clean water, pointed round brushes I'm using sizes for and eight you can use any size as long as there's one small and one big brush offensive. Why should they? Watercolor paper at least wondered Jason and tissue paper. So using your pencil likely draw a circle on your papers. You can use other shapes. If you want. You can draw a square diamond hexagon. Now, using your washing date, follow the circles the inner part. We're going to use this to ensure that we will not be painting inside the circle. So there was just tracing the circle later on. We're going to have feeling time. We're almost done. They're so pressed firmly on the Washington like that. Now, using your bigger brush, prepare the colors that we will use. Our theme, for this reason, is a monochromatic blue green wreath. So for the first mix, it's green plus blue. But it is more blue there. Clean your brush now for our second mix. It's gonna be green plus blue, but with more green. So we're going to try this on paper just to check if we are okay with the colors. So there's a server. First mix Lucas screen with more boo. Now our second makes it kind of looks this same with the first mix of We're going to add Green. So there that's better. Now our, with our third mix will be green plus blue, and we're going to make it the Baylor then. So we're going to add White. It's drive this on. It's stuff needs to be balers, or we're going to add more white everything. It's OK, so there. So we have already approved three colors. Our fourth mix is blue plus green, less flat, so we're going to add back there. Okay, I think I've added too much black, so we're going to add more blue and green, so that's a darker shade. And our fifth mix is gray plus group that's green again. Gray iss, blue plus brown. So that's great. Then we're gonna add do and green, and we're gonna try that. So that's it. So we will be using the's colors. This five colors for our now using your bigger brush. Let's paid light colored leaves. So to make light colors, we're going to the youth. This makes with the water Okay, so we'll start with the basics leaves. So that's thin. I think again. Then we're just going to apply the deals and our earlier lessons there and then your pain. Another one here. So just feel free to move your paper. It allows your hand to move freely, and it also makes you more comfortable with. So we haven't really planned very to put for toe paint relieves. We're just trying to paint the light colored leaves everywhere. Yes, you have to make sure that you leave spaces between this light colored leaves because this is just the first major they're now for in the last then. So we just tried to paint light colored leaves on the top bottom left, and right now, once the first layer is day, let's paint the second layer. So I'm still using my big brush and our first mix. That's Lupus green with more blue in memory. The phrase the second layer has to be darker than the first year they're being thing our big surrounded leads, then using a rebel on the technique. I'm just dropping Barker's shades while belief is still wet. Then I'm just gonna be another allowed that thief here. So we're applying the loop stroke again at the darker shades here, the blend beautifully. While the paint is still wet, they're now using our blue green mixed with degree. That's being a different type of just trying to make it more Saturday that so that it would be darker. So that's very remaking a very long stem here because we do not want their lives to be on the same side of this. If you remember, this is our then think thin is likely. Group needs there again, dropping others. I'm gonna be the smaller leave here again. I advised that you paint your lives in different sizes, so it in the morning match 50 notice the direction of this stems and the leaves. It kind of looks like they're sticking out off the circle, so any access being just pushing them, Orestis them, give for this one. Please avoid touching around it. Leave because it's still you. Do not want to mess that layer there I can just dropping its Okay, so now that we're done with, we're going to do the same at the bottom off the no. So we're just gonna do this to ensure that the reef is violence, So we will also paint a big leave at the bottom. Of course, it's a different type off. Leave there again. Using the weapon with technique were just dropping colors. Just make the strokes. Don't be afraid to touch the washing tape. So if you remember, this is our basically who was then six, then strokes that they're facing each other. Then we'll paint another. Leave another type of leave besides this. So I used the Baylor mix that this blue green bus white again I being did this with long stem to be balanced with the fourth off the reef so you can actually play with the colors you can choose. Different colors mean the mix that we made. Just make sure that the colors of the leaves differ from the leaves that are next to them - again , Believes erupted off different sizes. So there we are, done with the top, the bottom and the light colored leaves. Let's continue feeling histories up leaves on the way
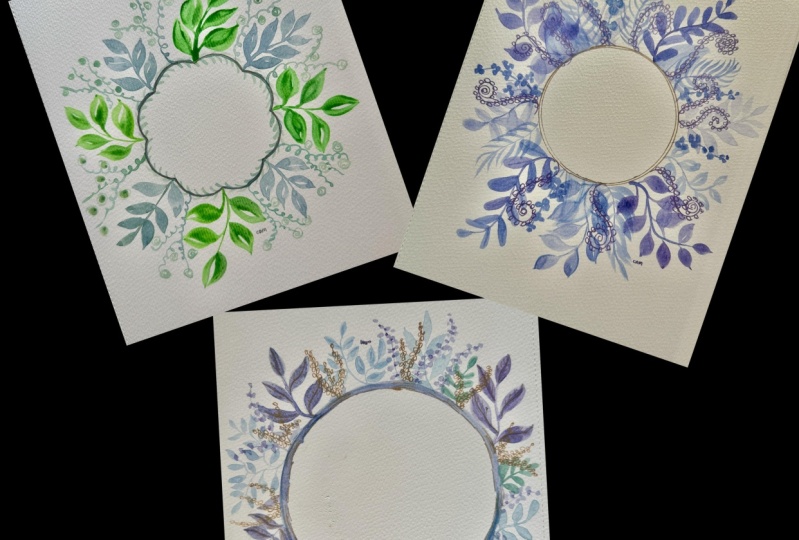
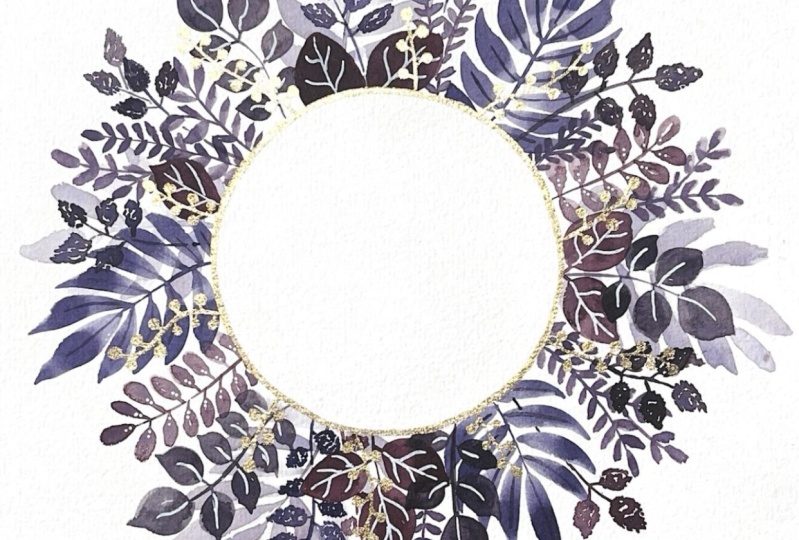
10. CLASS PROJECT: Creating your Monochromatic Leafy Wreath (PART 2): way have completed the top and bottom and established the violence were ready to fill up the streets with other types of leaves. So the next is we're going to paint the long leaves. Remember, this type of leave is made of just one thin think thin stroke. They're so I'm trying to paint the leaves in different lengths and sizes like this. So what I'm gonna do next is I'm gonna pay the same type of leave using a different color at the bottom part off the wreath again. When choosing colors, you should always remember that the color should be different from the color of the leaves beside it. So with for this one, I'm using a darker shade because it's beside the leaves with a Baylor thin trying to fill up this basis. So I were next leave. Hmm. Let's see. So in this said we have already painted the three leaves except for this one. So I'm gonna paint the small leads next, and I will be using a smaller brush to do this, Gonna bathe this one here. So the reason why I paint being leaves first before the small leaves is because it's easier to squeeze in small leaves later on just to fill up this space is so there. So if you know what this I'm just trying to being this stems as if they're pointing doors, different directions. We just want to make this look like they're sticking out and they're moving freely and naturally. So again, I'm going to pay the same type off leave using a different shade on the opposite side of the reef. So for the first, I used the darker shade. But for this one, I used the trailer because of this believes kind of look different from each other. They're not the same guy were maintaining the violence in our. So we're done with the first set of leaves, that stripe painting the loops. So I'm going to paint off the friend like leave in this part and again. I used the Baylor did because and painting this beside leaves with darker colors that I'm gonna pave the basic loops over here. Please excuse my hair again. We're just painting the leaves in different sizes. I'm anything big loops and small loops there. Then I'll be in the same type of leaf on this side. Please. excuse my hair. So nexus. Let's check a relief. Ask where else get add leaves the first basis. So there's a space here and here, here also in here, and they think we can add more leaves on this part. They're so we're going to paint our fillers. So the lives that I usually add last are the transparent leaves and dotted leaves there, like my filler leaves because they're the easiest to squeeze in. So I'm painting stems first, and we leave this to dry before repaint the transparent loops. And then I'm gonna play. That leaves in this part. So what we're doing is we're just looking for spaces where we can add the feelers. So there, rich deciding more. That leaves between the big leaves. I think this times or die so we can add the transparent loops again. They use the paint with the water to create lighter color ruse there. So I think we need to add more needs here. The long leaves that's just add to make the reef violence. So we want a relief to be full but not extra food. So I think this is enough already. Now we're ready to add the details again. Use your smaller brush for the details. So I'm using darker colors or lighter colored leaves and then use white later on for the dark colored leaves. So again very light fresh. We apply very light pressure when adding the dales there. I think we can I d deals here and we're painting this leave. Applying the wet on writing needs were painting 1/2 off this need with darker shade. - Now we're going to use our white then to add details on dark colored. Please again. Excuse me, hair adding the veins on this leaves. You see the texture that we ate when we use the wet on wet technique can add more details here There's I think you need to add more here is to fill up the reef. Okay, Now we are ready for giving time. Remove the Washington and appreciate the perfect circle you have there. Now you can place the border using your gold pin If you have one, just make sure that the paint is dry before you do this so that you will not miss of the same under leaves. Then don't forget your signature. There are very own monochromatic blue green leafy so you can create your own. Choose your own color experiment and play with other shades. Here are red, violet and blue, monochromatic, leafy.
11. RECAP/ FINAL THOUGHTS: now I'm excited to see your class projects. Please do upload your projects here in the project gallery are if you're going to post it on Instagram. How about me? This is that I will be enough to see it works. I'm excited to see your best project. Tips for you first in color mixing identify the hue Family are the base you to come up with different colors for your monochromatic look. Also remember to add white for a paler 10 black for a darker shade and great for a different story. Second, the wet on wet technique issues to add extra thier lives while the wet on dry technique issues the ad deals and mayors. Three. Master your thin fix them and your loop strokes. The secret is on the pressure You apply on the brush fourth with the big leaves first because smaller leaves are easier to squeeze in the feel your leave. Lastly, and most importantly, do not over think it. Just enjoy the process off anything again. Thank you so much for joining the class. Please follow here on skill share so that you will be notified if we have new classes. Were planning more videos and shit arias for you in the coming plus. Also, I would appreciate your comments are abuse or if you questions your messages on the discussions portion off this last seen by the free Always remember that your skills your issue in just our gods gives you. But what you do with those gifts, it's your so keep a big
 SincerelyYen, Watercolor Artist